How to Paint Over Cigarette Smoke Walls Properly
You can cover cigarette-stained walls by cleaning, sealing, and painting in a few focused steps. Ventilate, wear a mask, and wash walls with detergent or TSP to remove soot and nicotine; rinse and fully dry. Patch and sand damaged spots, then apply a high-quality stain-blocking primer (shellac for heavy stains). Roll two topcoats of durable, low-sheen paint. Allow proper drying and ventilate to reduce odor — keep going to learn full prep, tools, and tips.
Quick Action: Fix Smoke-Stained Walls in 5 Steps
If you’ve just cleared out a room after someone smoked, act fast: tackling smoke stains within 24–48 hours makes cleanup far easier and prevents lingering odors. You’ll prep by ventilating, removing loose residue, and protecting floors.
Next, wash walls with trisodium phosphate or a degreaser, scrubbing until nicotine haze lifts. Rinse, dry, and apply a stain-blocking primer designed for smoke.
Paint with low-VOC enamel or acrylic for durability. Consider how historical context and cultural significance shape material choices and expectations.
Finish by ventilating until cured; inspect for bleed-through and recoat where necessary.
Who Needs This Guide (Renters, Renovators, Landlords)
Now that you’ve got the cleanup steps down, think about who benefits most from this guide. You, the renter, can restore walls without risking your deposit by sealing stains and choosing neutral paint that works with your furniture arrangement and window treatments.
Renovators will save time prepping rooms, avoid redoing work, and coordinate colors with existing décor.
Landlords can standardize fix-up procedures between tenants, maintain property value, and minimize costly turnovers.
In every case, you’ll need practical steps, low-odor products, and simple staging tips so painted rooms look fresh, neutral, and ready for occupancy or resale.
Understand How Cigarette Smoke Damages Paint and Drywall
Because smoke leaves behind acidic tar and nicotine, it doesn’t just stain paint — it chemically alters it and the underlying drywall, causing discoloration, lingering odor, and reduced adhesion. You’ll notice paint chalking, peeling, and uneven gloss where residues break the bond.
Drywall paper can yellow and weaken, and seams may separate as adhesives degrade. Over time, rooms accumulate both visible damage and embedded contaminants that resist ordinary cleaning.
Consider the historical impact of long-term smoking on building materials and the cultural significance of spaces where smoking was common; that context explains why remediation often needs sealing primers and material replacement.
Inspect Stains and Grade Odor: Mild, Moderate, Severe
Start by evaluating stain severity across walls and ceilings so you know where to focus cleaning and sealing. Use a simple smell-intensity scale—mild, moderate, severe—to rate odor and decide if odor-blocking primers or deeper remediation are needed.
Check surface porosity, since more porous drywall or wood will hold stains and smells longer and change your treatment plan.
Assess Stain Severity
How bad are the stains and odor once you inspect each wall? You’ll categorize staining as mild, moderate, or severe based on discoloration, greasy residue, and nicotine buildup.
Mild spots wipe away; moderate needs deglossing and spot priming; severe may require sanding or a heavy stain-blocking primer.
Note how stains interact with decorating trends and paint color choices—dark or textured finishes hide more, light hues show more.
Photograph problem areas, mark grades on a plan, and estimate materials and time. That lets you pick the correct prep approach and avoid repaint failures or lingering discoloration.
Smell Intensity Scale
When you assess smoke damage, don’t just look at the walls—sniff them and rate the odor as mild, moderate, or severe so you can choose the right cleaning and sealing methods.
For mild cases, light smoke exposure leaves faint smells; you’ll use routine cleaning and a basic primer.
Moderate means noticeable odor absorption into paint and fixtures; you’ll need stronger cleaners, odor-neutralizing solutions, and an odor-blocking primer.
Severe indicates heavy, long-term smoke exposure with deep odor absorption; you’ll strip or thoroughly degloss surfaces, apply specialized sealants, and consider multiple odor-blocking coats before repainting to ensure lasting results.
Surface Porosity Check
After you’ve rated odor intensity, move on to checking surface porosity by inspecting stains and feeling the texture. Porous materials like unsealed wood, drywall, and textured paint trap tar and odor much more than glossy or sealed surfaces.
You’ll perform a porosity assessment by rubbing a damp cloth over stained areas; heavy uptake signals deep penetration and likely severe odor.
Grade each area: mild (surface residue, easy wipe), moderate (staining into texture, faint persistent smell), severe (dark stains, strong odor after cleaning).
Use targeted cleaning and primer, then consider surface sealing on porous zones before repainting to block remaining contaminants.
Safety First: Ventilate, Mask Up, and Check for Lead
Because cigarette smoke leaves tar and possible lead residues, you should ventilate the room, wear a proper respirator, and test surfaces before you sand or paint.
Follow safety protocols: open windows, run fans to push contaminants outside, and seal off doorways to limit spread.
Use NIOSH-approved respirators rated for particulates and organic vapors; gloves and eye protection help too.
Get a certified lead test kit or hire a pro if paint predates 1978.
If lead’s present, don’t dry-sand—use wet methods or abatement services.
Document findings and stop work if contamination seems extensive; safety comes first.
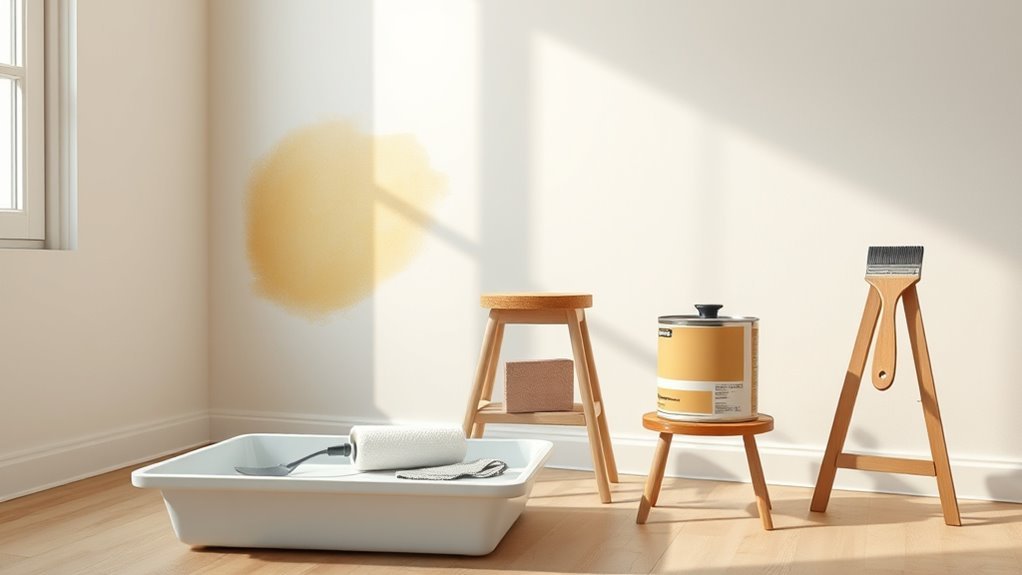
Tools & Supplies Checklist for Smoke-Stained Walls
Before you start, gather the essential tools like scrapers, sponges, drop cloths, and a good vacuum to remove loose residue.
You’ll also want recommended paint supplies—stain-blocking primer, quality latex paint, rollers, and brushes suited for textured surfaces.
Having the right gear up front will save time and guarantee a cleaner, longer-lasting finish.
Essential Tools List
When you’re tackling smoke-stained walls, having the right tools makes the job faster and prevents mistakes, so gather a checklist that covers cleaning, sealing, and repainting.
Start with protective gear: gloves, goggles, and respirator rated for organic vapors.
Add heavy-duty sponges, microfiber cloths, trisodium phosphate or a commercial degreaser for effective cleaning techniques, plus a putty knife and sanding block for surface prep.
For sealing and painting, include stain-blocking primer, rollers with appropriate nap, angled brushes for edges, drop cloths, painter’s tape, and a quality paint tray.
Keep a small sample of your *desired* paint color nearby.
Recommended Paint Supplies
Although smoke damage can seem overwhelming, having the right paint supplies lets you seal stains and restore walls efficiently. You’ll want stain-blocking primer, high-quality latex paint, and brushes and rollers suited to texture. Consider how painting techniques affect finish and how color selection hides residual yellowing.
Buy drop cloths, good sandpaper, a respirator, and tack cloths for prep. Prepare to apply primer first, sand lightly, then paint in even strokes. The checklist below helps you picture each item before you begin.
- Stain-blocking primer and sealer
- 2–3″ angled brush and medium-nap roller
- Quality latex paint (sheen per room)
- Respirator, sandpaper, drop cloth
Remove Surface Grime and Nicotine Residue
Since nicotine and soot cling to paint and sealants, you’ll need to remove surface grime thoroughly so new paint can adhere and look right. Start with dry dusting, then wash walls using a mild detergent solution or a trisodium phosphate alternative to cut nicotine residue.
Work top to bottom, rinsing with clean water and letting surfaces dry completely. Use soft scrub pads to avoid damaging drywall or primer. This surface preparation step prevents sealers and paint from failing.
Wear gloves and ventilate the room. Dispose of used cloths safely, and inspect for stubborn staining that needs deeper treatment before priming.
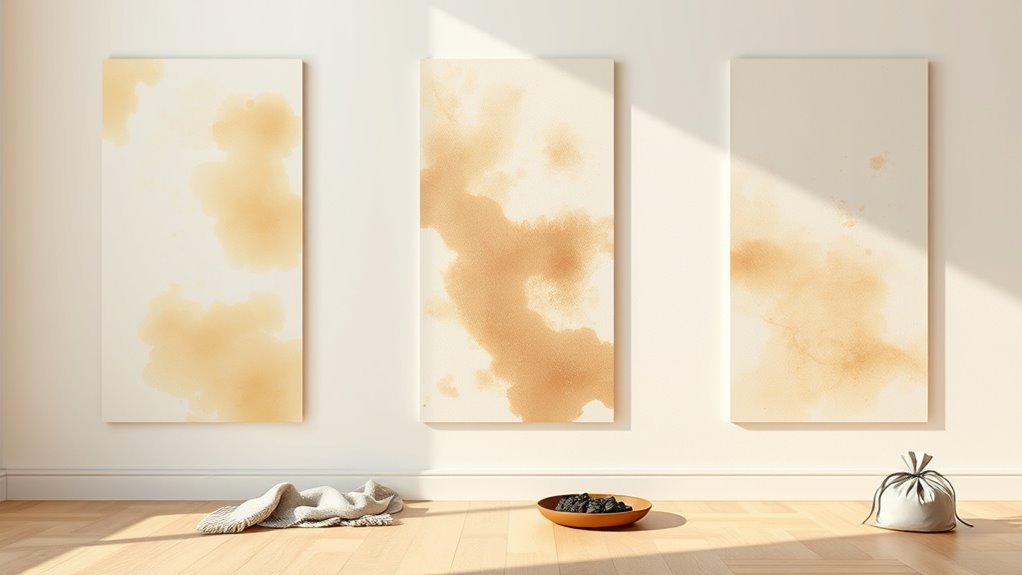
Deep Cleaning for Tar, Soot, and Stubborn Stains

Because tar and soot can penetrate primer and stubborn stains often resist simple washing, you’ll need a targeted deep-clean approach before priming. Start by ventilating the room, wearing gloves and a respirator, and testing a small wall area.
Use trisodium phosphate or a commercial degreaser for Tar removal; agitate gently with a sponge. For Soot cleaning, dry-cleaning sponges lift particles without smearing.
Rinse thoroughly and let walls dry.
- Scrubbed glove moving in circular strokes
- Dark streaks lifting onto a sponge
- Fine soot dust puffing into the air
- Clean, pale test patch revealing success
Finish by inspecting for remaining stains.
Dry and Prep Walls So Primer Will Stick
Before you prime, make sure all smoke residue is removed and the wall is completely dry so the primer can bond.
Patch any cracks or dents and sand rough spots until the surface feels smooth.
Finally, degrease the walls with a suitable cleaner and rinse thoroughly so no film remains to block adhesion.
Remove Smoke Residue
When you’ve cleared the room, tackle the sticky, yellowed film left by cigarette smoke so primer can bond properly. Start by dry-cleaning the walls to remove loose soot, then follow with a degreasing solution to lift residue that would block adhesion.
You’ll address visible cigarette damage now, not repairs. Work top to bottom, using soft brushes and a dry sponge first, then a trisodium phosphate or citrus-based cleaner to dissolve oily smoke residue. Rinse, dry, and inspect for lingering stains before priming.
Picture the process:
- Brushing away flaky soot like dust from a lampshade
- Wiping streaks until they lighten
- Rinsing suds into buckets
- Letting walls dry fully
Repair Surface Imperfections
Now that you’ve removed smoke residue, inspect the walls for holes, cracks, and peeling paint so primer can grip a smooth surface.
Patch holes with spackling or joint compound, let it dry, then sand flush to blend edges and restore uniform surface texture.
Tight hairline cracks get a thin filler; wider gaps need tape and compound.
Scrape loose paint, feather the perimeter, and sand until smooth transition are seamless.
Wipe dust away with a dry cloth.
Check repaired areas under different light to match surrounding paint sheen; re-sand or reapply compound until repairs disappear into the wall before priming.
Degrease And Rinse
Since smoke residue often leaves oily films that repel primer, you’ll need to degrease and thoroughly rinse the walls so coatings will bond. Mix recommended cleaning agents (trisodium phosphate or a milder commercial degreaser) with warm water, wear gloves and eye protection, and ventilate the room.
Work top to bottom, using a sponge or scrub brush, then rinse with clean water. Follow safety precautions on product labels and dispose of rinse water responsibly. Allow walls to dry fully before priming.
- sudsy streaks running down near the ceiling
- a damp sponge dragging grime away
- clear rinse water pooling on drop cloths
- gloves and goggles resting on a counter
When to Repair or Replace Damaged Drywall
If the drywall has only surface stains and minor peeling, you can usually repair it; but if there’s deep staining, crumbling paper, rotten studs, or a persistent odor, replacement is the safer choice. You’ll assess damage, probe for softness, and smell for lingering smoke. Choose surface repair for isolated blemishes—clean, sand, patch, prime. Opt for drywall replacement when structural integrity or odor’s compromised. Hire a pro if studs are rotten.
| Condition | Action | Reason |
|---|---|---|
| Stains only | Surface repair | Saves time/cost |
| Peeling paint | Surface repair | Simple prep |
| Soft drywall | Replace | Structural failure |
| Odor present | Replace | Contamination risk |
Best Primers for Smoke-Stained Walls (Blocks Nicotine & Odor)
When you’re tackling smoke-stained walls, choosing the right primer is critical to block nicotine and odor.
Shellac-based primers are the go-to for sealing heavy stains and locking in smell quickly.
For a lower-odor option that still stops stains, stain-blocking latex primers work well on less severe damage.
Shellac-Based Primers
Why choose a shellac-based primer for smoke-stained walls? You’ll pick a shellac primer because it bonds quickly, blocks persistent nicotine, and provides superior odor sealing compared to many alternatives.
Apply it in a well-ventilated area, using a brush for corners and a roller for flats. It dries fast, letting you repaint sooner, but you’ll want a mask and gloves due to strong fumes.
After it cures, stains and smoke smell stay trapped beneath, giving you a clean surface for topcoat paint.
- A sealed wall, free of yellow bleed-through
- Fresh-smelling room after curing
- Tight, hard film that resists stains
- Smooth repaint-ready surface
Stain-Blocking Latex Primers
Although shellac primers excel at sealing heavy smoke, stain-blocking latex primers give you a more user-friendly alternative for walls with moderate nicotine staining or lingering odor. You’ll find latex variants easier to clean, lower in odor, and forgiving on drywall; they handle light cigarette residue and reduce staining bleed-through when primer compatibility with your topcoat is confirmed. Apply two coats for best results, sanding lightly between coats. Test a small area for adhesion and odor control before tackling the entire room.
| Brand | Coverage | Odor Control |
|---|---|---|
| Brand A | 250 sq ft/gal | Good |
| Brand B | 300 sq ft/gal | Moderate |
| Brand C | 275 sq ft/gal | Excellent |
How to Apply Stain-Blocking Primer Correctly
Before you prime, make sure the room’s well-ventilated and the stained surfaces are clean and dry so the stain-blocking primer can adhere and seal effectively. You’ll tape trim, sand glossy spots, and stir the primer thoroughly.
For primer application, load a roller and work top to bottom, feathering edges to avoid lap marks. Use a brush for corners and trim, maintaining a wet edge.
Allow the recommended dry time, then inspect for bleed-through and reapply only where stains persist. Proper stain sealing prevents odors and tannin migration.
- Roller smoothing across a nicotine-stained wall
- Brushing into tight corners
- Taped edges crisp and neat
- Even, matte sealed finish
How Many Primer & Paint Coats You Need
Once you’ve sealed nicotine stains with a proper stain-blocking primer, decide on coats by evaluating coverage and the paint’s hide—most moderately stained walls need one coat of high-quality oil- or shellac-based primer and two coats of topcoat.
However, very heavy staining may call for a second primer coat before painting. You’ll inspect after primer dries; if yellowing shows through or texture is uneven, apply another primer layer.
Use targeted priming techniques on seams and trim. When choosing topcoat color, test small patches for color matching under room light.
Let each coat dry fully before sanding and recoating.
Paint Choices: Finishes and Formulas That Resist Stains
When you’re tackling cigarette-stained walls, start by choosing a stain-blocking primer to stop nicotine from bleeding through.
Pair that with a low-sheen, durable paint finish for easier cleaning and less highlight of imperfections.
Decide between oil-based primers/paints for tougher stains and water-based options for easier cleanup and lower odor.
Choosing Stain-Blocking Primers
Although cigarette smoke leaves stubborn tannin stains and lingering odors, the right stain-blocking primer lets you seal those problems before you apply finish paint. You’ll pick a solvent- or oil-based primer for heavy tannins, or a high-quality shellac-based option for extreme stains and odor control.
Use proper priming techniques: clean, sand, and apply even coats to lock in discoloration and aid stain prevention. Let each coat dry fully.
Visualize the result:
- A sealed wall, uniform and matte
- Yellowed streaks disappearing under one coat
- No ghosting through topcoat
- A fresh-smelling room ready for paint
Low-Sheen Durable Paints
After sealing stains with a proper primer, pick a low-sheen, durable paint to resist future yellowing and make cleanup easier. You’ll want a finish like satin or eggshell that hides imperfections yet wipes clean without streaks.
Look for formulas labeled stain-resistant and scrub-grade to handle nicotine residue over time. Check VOC emissions ratings and choose low-VOC or no-VOC products for safer indoor air; many eco-friendly options now match traditional performance.
Test a small area for adhesion and stain blocking. Apply two thin coats, allow full cure, and maintain ventilation while painting and during the cure period.
Oil-Based Versus Water-Based
Because cigarette stains and nicotine have different chemistries, choosing between oil-based and water-based paints affects stain resistance, adhesion, and cleanup.
You’ll prefer oil based paints when stubborn yellowing needs sealing; they block stains and adhere to glossy surfaces but require solvents and longer dry times.
Water based paints clean up with soap, dry fast, and emit fewer fumes, yet may need a primer to stop bleed-through.
Pick based on ventilation, surface type, and odor tolerance.
Visualize the result:
- A sealed, satin wall free of yellow halos
- A quick-dry, low-odor repaint in a bedroom
- Scrubbed baseboards with solvent shine
- Fresh, even ceiling finish
Fixing Problem Areas: Patched Drywall, Textures, and Trim
When you tackle patched drywall, textured surfaces, and trim, prep is everything: sand smooth the repairs, feather the edges, and match the texture before priming so paint lays down evenly and the finish looks seamless.
For drywall patching, remove loose paper, apply joint compound in thin layers, and sand between coats until flush. Use texture matching tools—spray gun, stomp brush, or sponge—to replicate existing patterns before they dry.
On trim, sand and degloss, fill gaps with caulk, then prime bare wood or repaired spots. Finish with light sanding after primer so your topcoat hides repairs cleanly and uniformly.
Remove Lingering Smoke Smell After Painting
If smoke odor still lingers after your paint has dried, you can remove it without redoing the whole job. Start with odor neutralization: wash surfaces with mild detergent, then apply a stain-blocking primer if residues persist.
Use air purification to speed removal—run HEPA fans and an activated-carbon filter. Keep windows open when possible.
- A bowl of white vinegar absorbing smells on a side table
- Charcoal bags tucked in closets and corners
- A portable HEPA purifier humming in the room
- Freshly laundered curtains hanging back up
Repeat treatments until the smell fades; replace filters regularly.
Typical Cost & Time: A 12×12 Room Example
A DIY repaint usually takes a full weekend — about 6–10 hours of active work stretched over two days — while hiring pros often means a single day of 4–8 hours plus travel and setup.
For a 12×12 room, expect DIY material costs of $60–$150 (primer, stain-blocking sealer, paint, rollers) and pro quotes of $200–$500 depending on local rates and severity of cigarette residue.
Allow extra for heavy nicotine staining and odor neutralization treatments ($30–$150).
Prep and drying add downtime; plan 1–2 days total DIY or one service day plus curing before returning furniture.
Common Mistakes to Avoid and Maintenance Tips
Now that you know typical time and cost for repainting a smoke-stained room, you’ll want to avoid common mistakes that can waste that investment and cause the staining or odor to return. Don’t skip proper cleaning techniques or primer; failing to degloss surfaces or seal nicotine leads to bleed-through.
Use ventilation strategies while cleaning and painting to disperse fumes and speed drying. Maintain finishes by spot-cleaning and airing rooms regularly. Replace HVAC filters and consider an air purifier if smoking continues.
- Yellowed trim with sticky residue
- Paint peeling at ceiling edges
- Lingering stale odor after painting
- Stained switch plates and vents
Frequently Asked Questions
Can Smoking Residues Affect Electrical Outlets or Wiring Behind Walls?
Yes — smoking residues can cause electrical damage and residue effects by leaving conductive, corrosive films on outlets and wiring, so you should inspect, clean, and possibly replace affected components to avoid shorts or fire hazards.
Will Wallpapered, Smoke-Stained Walls Need Different Treatment?
Yes — you’ll remove wallpaper, assess stains, and prioritize thorough wall preparation; you’ll clean, repair, and choose a stain-blocking oil or shellac primer. Primer selection matters to seal odor and prevent smoke bleed-through before painting.
Can I Use an Air Purifier Instead of Chemical Cleaners?
You can use an air purifier for Air purifier effectiveness, but it won’t replace surface cleaning; it’s a Chemical cleaner alternatives supplement. Use purifiers to reduce odor and particles, then clean stains with proper cleaners before painting.
How Long Before Reoccupying a Room After Painting?
You can reoccupy a room after 24–72 hours for low-VOC paints, but wait 7 days for full cure; make certain thorough wall preparation and choose proper paint selection to minimize fumes and speed safe reentry.
Will Painting Over Smoke Void My Home Insurance or Sale Disclosures?
No — painting over smoke normally won’t void insurance or sale disclosures, but you shouldn’t hide issues. You’ll need proper cigarette stain removal and smoke odor elimination; disclose past smoking to avoid legal or claim complications.
Conclusion
You’ve got this—start with safety, tackle stains, prime well, and finish with odor control—and the room will feel renewed like a deep breath after a storm. Remember: prep beats patchwork; skimp on primer and the smoke will return to haunt you. Take your time on sanding, sealing, and smelling tests, and you’ll save money and stress. Follow the steps, stay patient, and enjoy a fresh, smoke-free space.