How to Paint Over Colored Walls the Right Way
You can transform bold or dark walls into a fresh, even finish by prepping, priming, and painting methodically. Start by cleaning, repairing holes, and sanding glossy areas; protect floors and trim. Use a stain‑blocking or high‑hide tinted primer for deep colors, then apply thin, even topcoats with the right sheen and roller nap. Control temperature and humidity for proper drying. Follow these steps and you’ll get smooth coverage—keep going for tips on tools, troubleshooting, and timing.
Quick Workflow: Prep → Prime → Paint
Before you open any paint cans, set up a simple sequence: prep, prime, then paint.
Start every refresh with this order: prep thoroughly, prime properly, then paint for a flawless finish.
You’ll clear furniture, mend holes, and sand rough spots so wall texture won’t telegraph through new color. Tape edges and protect floors to keep lines sharp.
Choose a primer that blocks the old hue and suits the surface — stain-blocking for stubborn tones, bonding for slick finishes.
Consider color psychology when picking your final shade; primer evens the base so your chosen mood reads true.
Apply primer evenly, let it cure, then finish with two coats of paint for consistent coverage.
When You Can Paint Over Colored Walls vs. When to Strip
If the existing finish is sound, clean, and not unusually dark or glossy, you can usually paint right over it after priming. However, if the old paint is peeling, stained, contains lead, or has heavy texture that will show through, you should strip or remove the problem areas first.
You’ll decide based on color mixing needs and wall textures: light-to-light is easy, dark-to-light needs more primer or a blocker. Strip when contaminants, bubbling, or thick texture will telegraph through new coats.
Ask yourself:
- Do you want a flawless, fresh canvas?
- Will hidden stains bleed through?
- Is structural integrity compromised?
Check Existing Paint: Sheen, Adhesion, and Damage
Before you paint, check the current sheen so you know how well the new paint will adhere. Do a quick adhesion test—press and lift a piece of tape or scrape gently—to see if the old paint flakes.
Inspect the walls for cracks, bubbles, or water damage and repair anything that could ruin your finish.
Check Paint Sheen
While you’re prepping to paint over colored walls, check the existing paint’s sheen first because it affects adhesion and the final look. Glossy surfaces reflect more light, altering color psychology and making rooms feel sharper; matte absorbs light, creating coziness. Sheen also influences paint durability and how many coats you’ll need.
Assess and decide whether to scuff or sand to dull high-sheen finishes.
Then consider these emotional effects:
- High gloss — energizing, confident, but demanding prep.
- Satin — balanced, practical, forgiving.
- Matte — calming, intimate, hides flaws.
Match sheen to mood and longevity goals before you paint.
Test Paint Adhesion
Since paint adhesion determines whether your new coat will stick or peel, you’ll want to test the existing finish on every wall. Pick an inconspicuous spot, press painter’s tape firmly, then pull it off sharply; loose paint means poor adhesion.
Try a small scrape with a putty knife to check bonding and note how the wall texture affects results. If paint flakes or crumbles, you’ll need to sand or strip before priming.
Consider color psychology when choosing primer and topcoat—warm undertones can show through thin coverage—so prioritize adhesion tests to confirm long-lasting, true-to-intent color results.
Inspect Wall Damage
Now that you’ve confirmed adhesion, move on to a close inspection for damage and finish. Check sheen variations, peeling, and soft spots. Run your hand for irregular wall texture and tap for hollow-sounding sections. Note stains or mold—those need treatment before repainting. Take photos and measure repair area so you don’t underestimate supplies. Consider color matching where patching will occur to avoid ghosting under new paint.
Then prioritize fixes:
- Patch holes and sand smooth.
- Treat stains, prime repaired spots.
- Re-skim textured areas or match texture before final coat.
You’ll avoid surprises and get professional results.
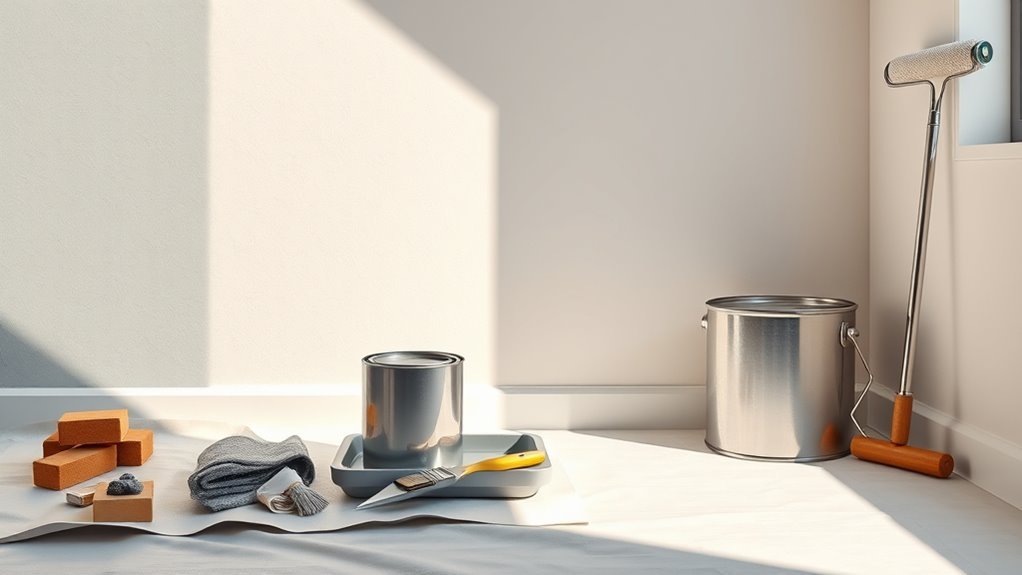
Tools and Materials for Covering Colored Walls
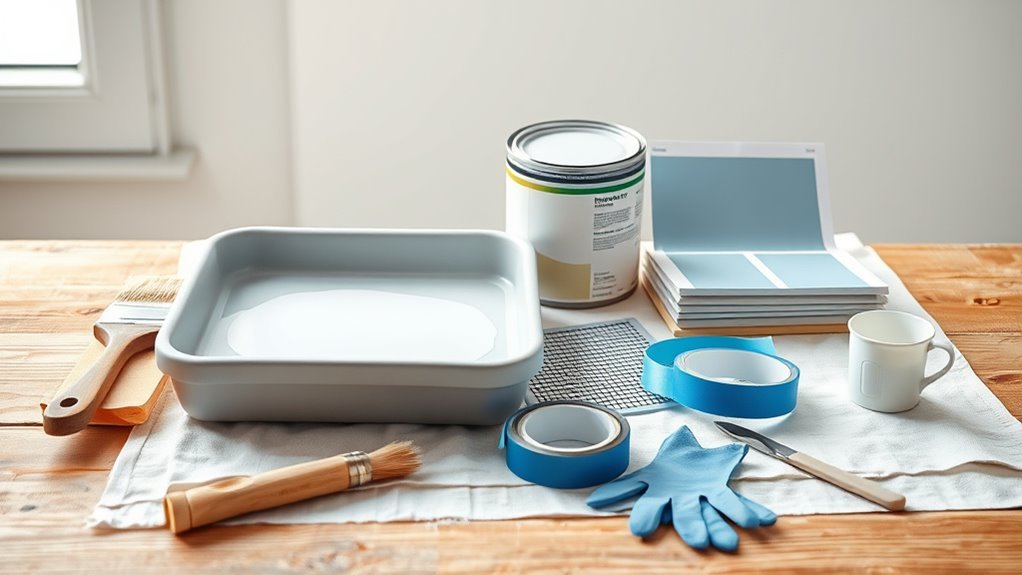
Before you start rolling, gather the right tools and materials so the job goes quickly and the finish looks professional. You’ll need quality brushes, rollers with the correct nap, trays, extension poles, and painter’s tape.
Choose a high-coverage primer—stain-blocking or tinted toward your new shade—plus topcoat paint in the proper sheen. Have sandpaper, spackling paste, a putty knife, and a damp cloth for prep.
Consider color psychology when selecting finishes and account for historical wall colors that might need multiple primer coats. Keep drop cloths and a ladder handy, and test a small patch before committing.
Protect Floors, Fixtures, and Trim Fast
You’ve prepped your tools and picked the right primer; next, protect floors, fixtures, and trim fast so those investments don’t get ruined by drips or splatters. Lay drop cloths and tape trim tightly; covering vents and lights preserves paint durability and lets color psychology choices shine without accidental marks.
Move furniture or wrap legs; secure plastic with painter’s tape so air flows but dust won’t settle.
- Cover floors thoroughly.
- Shield fixtures and outlets.
- Tape and seal trim edges.
Work methodically and check edges often; careful protection saves time, keeps finishes crisp, and prevents regret.
Clean Grease, Smoke, and Marker Stains First
If grease, smoke residue, or marker stains stay on the wall, they’ll bleed through new paint, so tackle them first with the right cleaners and technique. Start by testing a small area: mix trisodium phosphate or a degreasing cleaner with water, scrub gently with a sponge, then rinse.
For smoke or ink, use a diluted bleach solution or an alcohol-based cleaner, ventilating the room. Remove residue entirely before priming; stains that remain can alter final hues and undermine color psychology choices or disrupt meant wall patterns.
Let surfaces dry fully so primers and paint adhere evenly.
Fill Cracks, Holes, and Texture Problems
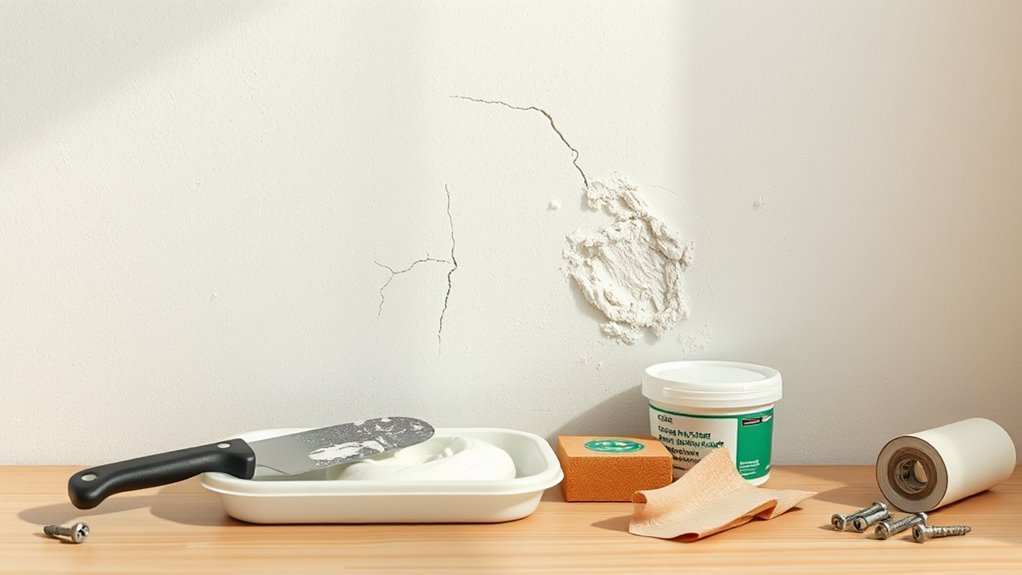
Before you paint, you’ll want to prep the surface by removing loose material and sanding rough spots so filler will bond.
Fill cracks and holes with a suitable spackling or patching compound, then sand smooth once it’s dry.
If the wall has texture, match or skim-coat the area so the finish looks uniform under the new paint.
Prep Surface Properly
While small blemishes might seem minor, filling cracks, holes, and texture issues is essential for a smooth, long-lasting paint job. You’ll want to clean, sand, and remove loose material so fillers bond. Use a high-quality spackle or joint compound, matching finish and drying times to your paint technology.
After curing, sand flush and wipe dust; primer seals repairs and aids coverage while honoring color psychology by preventing undertone bleed-through. Take time — it shows.
Follow this quick emotional checklist:
- Relief: visible flaws vanish.
- Confidence: surfaces feel solid.
- Pride: your finished room looks intentional and calm.
Fix Texture Issues
Because surface texture can ruin even the neatest paint job, you’ll want to address cracks, holes, and uneven texture before you prime. Inspect walls, mark defects, then clean dust.
For small holes and hairline cracks, apply lightweight spackle with a putty knife, let dry, and sand flush.
For larger gouges use patching compound and mesh tape. Feather edges to blend with surrounding surface for texture smoothing. Prime repairs to seal differences.
When painting, use thin coats and work wet edges to ensure paint blending; textured rollers can match existing finish. Finish with light sanding between coats if needed.
When and How to Sand for Better Adhesion
If your existing paint is glossy, peeling, or has visible brush marks, sand it to give the new coat something to grip; you’ll protect wall texture and let color psychology show true tones. Use 120–150 grit for dulling gloss, coarser only for stubborn flakes, then finish with 220 grit for smoothness.
Sand by hand near edges and with a pole sander on flats. Clean dust before painting. Don’t over-sand thin spots. Wear a mask and goggles. Follow this simple rhythm:
- Assess and calm nerves.
- Sand methodically, feel progress.
- Clean, prime, and revel in the result.
Which Primer Stops Color Bleed‑Through
Now that your surface is sanded and cleaned, pick a primer that actually blocks the old color instead of letting it ghost through. Use a high-hide, stain-blocking primer—water‑based acrylic or solvent‑based shellac primers work best against strong pigments.
For bright or saturated hues, apply one coat of high‑hide primer; for deep reds or blues, two coats may be needed. Consider how underlying tones affect final feel—color psychology matters when neutralizing dramatic historical colors.
Test a small patch, let it dry, then sight from different angles. If bleed persists, spot‑prime again before finishing with your topcoat.
Choosing a Primer for Stains or Bonding
When you’re dealing with surface stains or hard-to-bond materials, pick a primer formulated specifically for stain blocking or adhesion promotion. You’ll want an oil‑based or shellac spot primer for tannin, smoke, or water stains, and a high‑adhesion acrylic for slick surfaces.
Consider how primer affects final hue—mixes interact with color psychology and paint color trends, so test a swatch.
- Relief: see stains disappear and breathe easier.
- Confidence: know your topcoat will stick and look true.
- Joy: enjoy a refreshed room aligned with current paint color trends.
Always follow manufacturer instructions and dry times.
Tinted Primer vs. Color‑Blocking Systems
Although both tinted primers and color‑blocking systems aim to simplify covering strong or contrasting colors, they work differently and suit different jobs. You’ll choose tinted primer when you want to neutralize hue quickly; it’s paint with extra pigment that reduces required topcoats and helps preserve color psychology decisions by keeping undertones predictable.
Color‑blocking systems use a high‑opacity base plus a coordinating midcoat to stop bleed‑through from intense pigments or pattern remnants. You’ll pick blocking when stubborn color or drastic shifts demand heavy coverage.
Consider room function, lighting, and color psychology when deciding which method saves time and delivers a true finish.
Pick the Right Paint Sheen and Formula
You’ll want to pick a sheen that fits the room—flat for hiding imperfections, eggshell or satin for living areas, and semi‑gloss for trim and bathrooms.
Choose the right formula too: acrylic latex is durable and easy to clean, while oil‑based or specialty primers and paints can help with staining or adhesion.
Also match the paint to the surface (drywall, wood, or previously painted glossy finishes) to guarantee proper coverage and longevity.
Sheen Choices Explained
Because sheen affects both appearance and durability, picking the right finish matters as much as choosing the color. You’ll weigh sheen durability versus sheen gloss variability to match room use and mood.
Matte hides flaws and soothes; satin balances washability and subtle sheen; semi-gloss resists scuffs and brightens trim. Think about light, traffic, and cleaning needs before you coat.
- Choose matte to calm and conceal.
- Pick satin for livable warmth and easy care.
- Opt for semi-gloss to highlight details and survive scrub tests.
Select confidently—your sheen shapes feel as much as look.
Formula Differences Matter
When you’re moving beyond sheen, formula becomes the next big decision: latex (water-based) dries fast, cleans up with soap and water, and resists yellowing.
Oil-based covers stubborn stains and levels out for a super-smooth finish but takes longer to dry and needs mineral spirits.
You’ll pick latex for bedrooms and living rooms where color psychology matters and quick turnaround helps, and oil for trim or surfaces needing extra paint durability and smoothing.
Consider odor, cure time, and how the chosen formula interacts with existing pigments.
Test a small area to confirm adhesion and final appearance before committing.
Match Surface Requirements
Now that you’ve weighed formula differences, think about how sheen affects both look and performance: flat hides imperfections but won’t stand up to scrubbing. Eggshel balances washability and softness. Satin handles moisture better for kitchens and bathrooms. Semi-gloss or gloss give durable, easy-to-clean surfaces for trim and high-touch areas.
Choose sheen based on wall texture and room use—rough textures mask flaws, smooth walls show more. Also consider color psychology: glossy sheens can feel energetic, flats feel calm. Decide with purpose:
- Practical: durability where needed.
- Emotional: mood via color psychology.
- Textural: match sheen to wall texture.
Calculate Coverage and Estimate Paint Needed
Want to know how much paint you’ll actually need? Measure each wall’s height and width, subtract windows and doors, then total square footage.
Check the paint can for coverage per gallon and factor in two coats if you’re covering a strong color; use primer estimates separately.
Consider how color psychology affects your choice—lighter hues may need fewer coats than deep reds or blues.
Compare paint brand comparison charts for actual hide and coverage; some brands advertise higher opacity, reducing gallons required.
Always add 10–15% extra for waste, texture, and future touch-ups to avoid runs to the store.
Cut In Edges Cleanly on Colored Walls
To cut in cleanly on colored walls, pick a high-quality angled brush that holds paint evenly and gives you control. Use steady-hand techniques—brace your wrist, work in short strokes, and keep a thin, consistent bead of paint.
For ultra-sharp lines, mask edges with painter’s tape or use a tape-and-pull method for crisp results.
Choose High-Quality Brushes
Because crisp edges make the difference between a professional finish and a sloppy one, pick high-quality brushes that hold paint and maintain a sharp tip. You’ll appreciate how a good brush improves cut-ins after color selection decisions, and regular brush maintenance keeps that performance.
Choose angled sash brushes for control, natural or synthetic filaments matched to your paint, and a size that fits the trim.
- Pick a reliable brand that feels balanced.
- Test the tip for spring before buying.
- Clean and store brushes to prolong life.
Investing here saves time and prevents jagged, uneven edges.
Steady Hand Techniques
When you steady your wrist and load the brush correctly, you’ll cut a clean line between trim and colored walls without messy overlap.
Practice a consistent grip, anchoring your pinky on the frame or trim to stabilize motion. Use a sash brush angled slightly to follow contours, adjusting pressure for different wall texture so paint doesn’t blob in crevices.
Work in short, confident strokes, keeping the brush tip loaded but not dripping. Step back to inspect lines under natural light; color psychology affects perception, so crisp edges make new hues read truer.
Clean, steady technique beats heavy correction.
Masking For Sharp Lines
After you’ve mastered steady-hand cutting, masking helps lock in those crisp edges so your new paint reads clean against the old color. You’ll prep by cleaning and smoothing any wall texture, then apply low-tack tape along a taut guideline. Press tape firmly, especially over bumps, to prevent seepage.
Use a brush to seal the tape edge with a thin layer of the underlying color, then paint your topcoat.
- Protect: keep lines sharp, avoid bleed.
- Mood: respect color psychology, preserve meant contrast.
- Finish: remove tape at a 45° angle for perfect edges.
Roll Large Areas Without Lap Marks
To avoid visible lap marks, work in manageable sections and keep a wet edge as you roll; that means overlapping each pass into the still-wet paint and maintaining a consistent pressure and speed.
Work in manageable sections and keep a wet edge—overlap each pass and maintain steady pressure and speed.
Start near a corner and work toward natural light sources so drying differences don’t show.
Use a high-quality roller with the correct nap for your wall texture and load it evenly—too little or too much causes streaks.
Keep a consistent back-and-forth rhythm and feather edges lightly at the end of each section.
Consider how color psychology and paint color trends influence room flow, choosing finishes that hide imperfections.
Apply Multiple Coats Efficiently for Full Coverage
If you want even, true color over a darker wall, plan your coats so each dries fully before the next and use thin, uniform layers rather than one heavy pass. You’ll save time and avoid streaks by sanding light between coats, keeping edges wet, and checking paint texture for consistent sheen.
Think about color psychology: multiple thin coats let the mood settle gradually, so the room feels balanced. Follow these steps to stay confident and calm:
- Wait recommended dry time; test small area.
- Sand and remove dust; apply thin coat.
- Inspect under different light; repeat if needed.
Cover Bold or Dark Colors With Light Paint
Want a bright, neutral room that actually covers the old color? You’ll need the right primer and technique to tame bold or dark walls. Choose a high-hide primer designed for deep pigments, apply evenly, and sand lightly between coats for smoothness.
Test a sample of your light paint over the primed area to confirm coverage before committing. Consider color psychology—lighter tones change mood and perceived space—so pick neutrals that suit the room’s function.
If walls have historical colors or stains, note them for potential extra priming. Finish with two thin topcoats for durable, even results.
Quick Fixes for Bleed‑Through After Priming
When primer still lets old stains or deep pigments seep through, don’t panic—you can usually fix bleed‑through quickly with targeted spot treatments rather than redoing the whole wall.
Treat spots fast: sand lightly, clean, then apply stain‑blocking primer to affected areas. Choose products that respect color psychology—warm undertones need stronger blockers.
Sand, clean, then spot‑prime—use stronger blockers for warm undertones to stop stains quickly.
For stubborn dye from historical colors, use shellac‑based products. After treating, feather edges so patches sit flat.
- Act quickly to stop spread.
- Use the right blocker for pigment type.
- Reprime only treated spots, not whole surfaces.
Let small fixes restore calm and confidence.
Blend Patched and Untouched Areas Seamlessly
Although the repair may be small, you’ll want the patch to disappear into the surrounding paint, so focus on matching texture, feathering edges, and blending sheen before you repaint.
Start by sanding the patch flush and mirroring the wall’s texture with skim coat or stipple. Use a thin coat of primer over the repair to unify porosity.
For color blending, feather the new paint outward in progressively lighter strokes, working a slightly damp roller to avoid lap marks. Match finish—matte hides more than gloss.
Step back often under different light, and touch up quickly where the patch blending needs more subtlety.
When to Call a Pro for Lead, Severe Stains, or Complex Surfaces
If your home was built before 1978, shows heavy water or smoke stains, or has textured/porous finishes you can’t match, call a professional—these issues can hide lead paint hazards, mold, or adhesion problems that make DIY fixes unsafe or ineffective. You want safe, lasting results and a finish that respects color psychology and any historical colors in your house.
Pros assess risk, test for contaminants, and choose primers or removal methods. Consider calling one when:
- You suspect lead or asbestos contamination.
- Stains penetrate deeply or keep bleeding through.
- Surfaces are ornate, uneven, or historically significant.
Drying Time: Temperature, Humidity, and Timing Tips
Temperature and humidity play a big role in how quickly paint dries, so you’ll want to check conditions before you start.
Higher temperatures and lower humidity speed drying, while cold or damp air can stretch drying times and affect finish.
Plan your coats and cure times around the forecast to avoid tacky paint or uneven results.
Temperature Effects On Drying
When you’re painting over colored walls, the air’s warmth and moisture control how fast coatings dry and how the final finish looks. You want steady warmth: cold slows curing and risks tacky paint, while excessive heat can cause blistering and visible lap marks.
Think about color psychology and paint symbolism—temperature can deepen or mute hues as they set, affecting mood. Manage conditions so pigments settle evenly.
- Raise temp gradually to avoid shock.
- Aim for manufacturer-recommended range for consistent sheen.
- Allow extended cure if temperatures dip overnight.
Monitor, adjust, and be patient for best results.
Humidity And Timing Tips
You’ve already learned how temperature affects drying; now look at humidity and timing, which often determine how long paint actually needs to set.
High humidity slows curing, so you’ll avoid painting on muggy days and use dehumidifiers or HVAC to improve humidity control. Monitor the forecast and room conditions: aim for 40–50% relative humidity when possible.
Allow extra time between coats if you notice tackiness or slow drying—don’t rush to sand. Expect drying delays after rain or poor ventilation; plan weekends accordingly.
Proper timing prevents adhesion problems and streaks, ensuring a smooth, durable finish.
Maintenance: Touch‑Ups and Preserving the Finish
Because scuffs and chips happen faster than you expect, a simple maintenance routine will keep your newly painted walls looking fresh for years. You’ll want to wipe marks gently, keep spare paint for spot repairs, and monitor finish wear where furniture or hands touch.
Remember how color psychology and paint color trends influence perception—bright accents show wear more, muted tones hide it. Store labeled touch-up kits and a small brush nearby.
Follow this quick emotional checklist to protect your investment:
- Clean gently
- Touch up promptly
- Rotate decor to reduce wear
You’ll preserve sheen and pride in your space.
Common Mistakes to Avoid When Covering Color
Don’t skip proper prep—you’ll regret painting over grease, chips, or glossy finishes without cleaning and sanding first.
Don’t ignore primer needs, because the right primer prevents stains and guarantees even coverage over strong or dark colors.
Addressing these two steps up front saves time and gives you a professional result.
Skipping Proper Prep
If you skip prep, that fresh paint won’t hide the old color evenly and problems like peeling or flashing will show through sooner. You’ll regret rushing—color psychology shifts when undertones peek through, and inconsistent wall texture ruins the finish. Do the basics: clean, sand, and repair before you open a can.
- Clean stains: grease and dirt repel paint, making patches show.
- Sand and feather: smooth edges so light doesn’t reveal flaws.
- Fill cracks: gaps create shadows and make new color uneven.
Prep safeguards your work and ensures the new hue behaves predictably.
Ignoring Primer Needs
When you skip or skimp on primer, the old color and stains will bleed through and make the new paint look uneven, no matter how many coats you apply. You’ll fight undertones, ruin color psychology goals, and highlight wall texture instead of smoothing it. Use a stain-blocking or tinted primer to neutralize bold hues and glossy surfaces. Below is a quick visual guide to primer effects:
| Condition | Primer Type | Result |
|---|---|---|
| Dark red | Tinted primer | Even base |
| Water stain | Stain-blocking | No bleed |
| Glossy finish | Bonding primer | Better adhesion |
Prime first; save time.
Frequently Asked Questions
Can I Paint Colored Walls in Cold or Humid Weather?
Yes — you can, but Temperature considerations matter: paint won’t cure well in cold, and Humidity effects slow drying and cause adhesion issues. You’ll need suitable paint, climate controls, and more drying time to get good results.
Will New Furniture or Cabinets Affect Paint Adhesion on Freshly Painted Walls?
Yes — new furniture or cabinets can affect paint adhesion if you place them against freshly painted walls too soon; prioritize proper wall preparation, wait recommended cure times, and use protective pads or spacers to avoid scuffs and trapping moisture.
How Long Should I Wait Before Rehanging Artwork or Mirrors?
Wait at least 24–48 hours before rehanging artwork or mirrors; check paint’s drying time and guarantee wall preparation was done properly. If paint feels dry but curing continues, wait up to 7 days for full adhesion and stability.
Can I Change Wall Color if Wallpaper Was Previously Fully Removed?
Can you picture freshly bare walls ready for a new shade? Yes—you can change wall color after wallpaper removal, but you’ll need to clean, repair seams, prime well, and use proper paint for even coverage and lasting results.
Are VOCS From Primers/Paints Safe for Pets and Children?
Short answer: you shouldn’t assume VOCs from primers/paints are safe for pets and children; choose low-VOC or zero-VOC formulas, use pet friendly paints, ventilate well, keep little ones and animals away during application and drying.
Conclusion
You’ve got this—prep, prime, paint, done. I once covered a bright teal wall in an hour with the right primer; it hid 98% of the color on the first coat, and the room felt brand new by sunset. Think of painting like surgery: clean, steady, and precise matters. If you follow the steps, protect surfaces, and patch trouble spots, your new color will last—and you’ll be proud every time you walk in.