How to Paint Over Green Walls Without Issues
You can reliably cover green walls by cleaning and repairing surfaces, then blocking stains and tinting a primer toward red/pink to neutralize green undertones. Use stain-blocking or high-hide primer, sand and feather edges, then apply two thin topcoats of high-opacity paint with appropriate rollers or brushes. Test small patches under different light, choose warmer or neutral topcoats, and pick low-VOC products for indoor air quality. Keep going to learn detailed tips and troubleshooting.
Quick Plan: Cover Green Walls in 3 Steps
Before you start painting, make a simple three-step plan: prep the surface, prime with a high-hide primer, then apply your finish coat. You’ll clean and repair dents, sand glossy spots, and remove loose paint so the new color sits evenly.
Choose a primer that blocks green undertones and matches your finish type. Think about color psychology—lighter neutrals calm, warm tones energize—to pick a hue that complements the room’s purpose.
If you prefer Eco friendly paints, verify low-VOC labels and coverage ratings. Follow dry times and apply even coats for a seamless, lasting result.
Decide When to Skip a Primer
You can skip a primer if your new paint has strong opacity and you’re switching to a similar or darker shade.
Check the manufacturer’s coverage claims and test a small patch to see if the green hides in one coat. If the color still shows through, use a primer to avoid extra topcoats.
When Primer Isn’t Needed
If the green is light, uniform, and you’re switching to a similar or darker shade, you can often skip a primer and go straight to paint. Modern high-coverage paints handle mild color changes well. You’ll save time when walls are clean, undamaged, and previously well-primed.
Consider color psychology—darker or warmer choices may feel cozier without extra coats. Use eco-friendly paints to minimize fumes if ventilation’s limited. Test a small area first to confirm coverage and adhesion.
If stains, drastic hue shifts, glossy finishes, or repairs exist, don’t skip primer; otherwise, proceed with quality paint and proper tools.
Consider Paint Opacity
Because paint opacity determines how much of the old green shows through, check a paint’s hiding power before skipping primer. You’ll judge whether the new shade’s color psychology will read true or be muddied by remnants.
High-opacity paints often cover in one coat, saving time, but weigh paint durability too—cheaper coatings may hide yet wear faster. Test a swatch, view it in different light, and think about surface texture.
If you skip primer, pick a quality, high-hide formula labeled for stain blocking.
- Small swatch on corner
- Morning sunlight view
- Evening lamp glow
- Finger-swipe texture
- Close-up for bleed-through
Assess Your Wall’s Green Shade and Finish
When preparing to paint over green walls, start by identifying the exact shade and finish so you can choose the right primer and paint technique. Examine the green undertones—yellow, blue, or olive—under natural and artificial light to predict how they’ll show through.
Note the finish sheen: flat, eggshell, satin, semi-gloss, or gloss affects adhesion and hide. Glossy surfaces reflect more and may need deglossing.
Take photos, compare paint swatches, and test a small patch with your chosen primer and topcoat. That lets you confirm coverage needs and whether a tint-reducing primer is required before full painting.
Spot Stains, Tannin Bleed, and Hidden Issues
Before you paint, inspect for spot stains and figure out what’s causing them so you can treat the source. If you see tannin bleed—yellow or brown streaks from wood or nicotine—prime those areas with a stain-blocking primer.
Addressing these hidden issues now prevents stains from reappearing through your new paint.
Identify Spot Sources
Wondering why dark spots keep appearing through fresh paint? You’ll inspect surfaces for spot stains, tannin bleed, and hidden issues before priming. Think about color psychology — darker greens can show imperfections more, so identify source locations and decide whether eco friendly finishes suit the repair.
Check trim junctions, water stains, smoke marks, and old adhesive residues. Note structural leaks or mold that need fixing.
- Brownish rings near windows
- Pale ghosting where artwork hung
- Sticky residue behind tape
- Faint yellowing under gloss trim
- Damp patches at baseboards
Block Tannin Stains
Although tannin stains can seem to seep right through a fresh coat, you can stop them cold by using the right prep and primer. Start by cleaning spots with a trisodium phosphate solution, then sand glossy areas.
Seal any visible tannin staining with a shellac-based or stain-blocking primer—oil primers can fail. Test a small patch to ensure green undertones from the existing paint aren’t bleeding through.
For hidden issues behind trim or baseboards, remove and inspect wood; replace or seal rotten pieces.
Once blocked, apply two coats of quality latex paint for uniform coverage and long-term resistance.
How to Test for Bleed-Through Risks
If you’re dealing with green walls, start by checking for bleed-through so you don’t waste time on multiple coats later. You’ll test a small patch with primer to spot stains, considering color psychology and environmental impact when choosing products.
Let tests dry fully and observe under natural and artificial light; some green pigments reappear only in certain angles. If bleed appears, note how fast it spreads and whether it stains the primer. That tells you if a stain-blocking primer or sealer is necessary.
- small taped square on wall
- primer swatch drying
- light at different angles
- fingertip rub test
- note staining spread
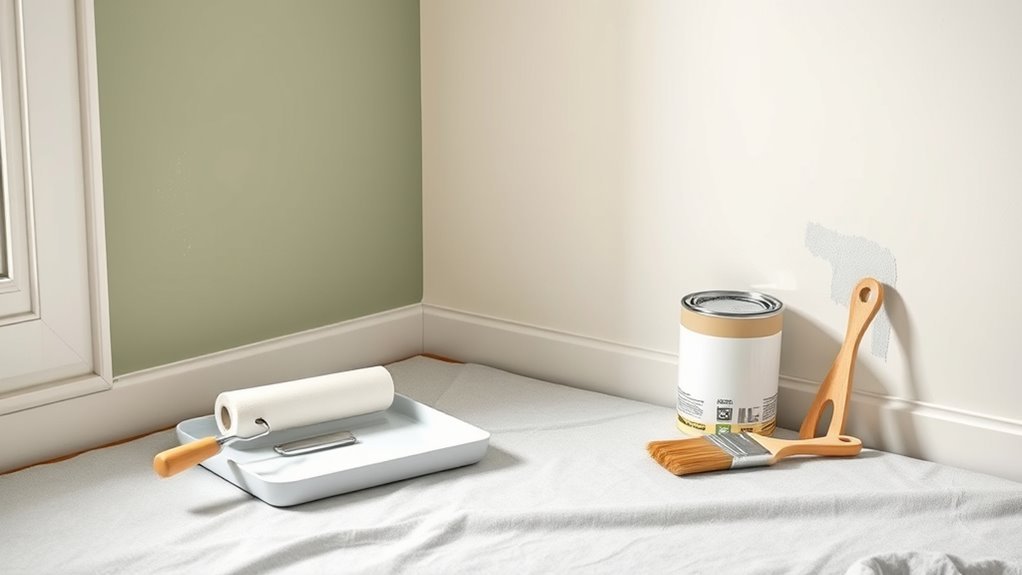
Tools and Supplies You’ll Need
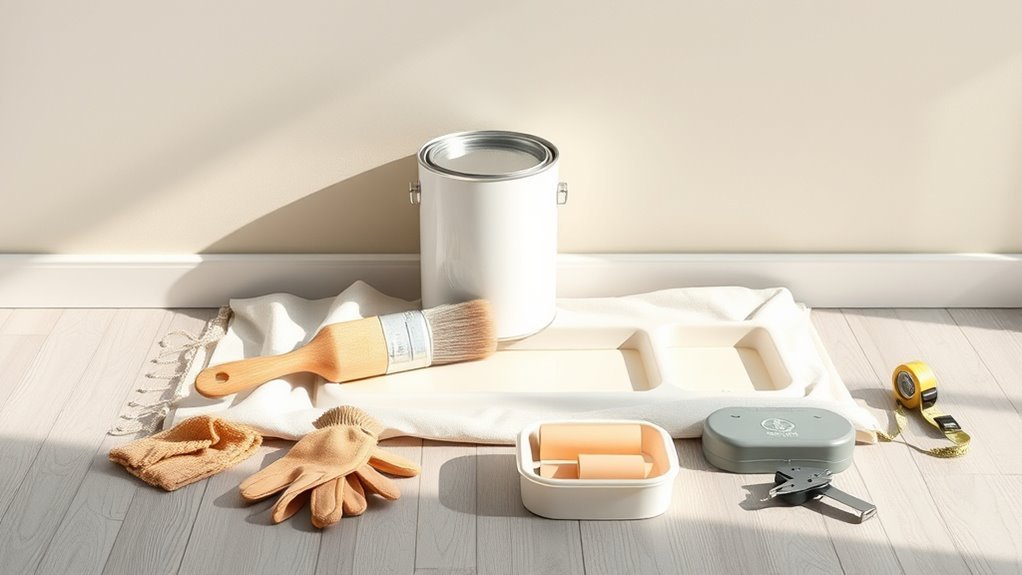
Before you start painting, gather the essential painting tools like rollers, brushes, trays, and a good primer.
You’ll also need surface-prep supplies — sandpaper, spackling compound, tack cloths, and painter’s tape — to fix imperfections and remove dust.
Having the right gear makes covering the green easier and prevents common finish problems.
Essential Painting Tools
Ready the right tools and you’ll save time, avoid mistakes, and get a clean finish when covering green walls. You’ll choose tools that respect color psychology—so your new shade reads true—and consider environmental impact by preferring low-VOC products and reusable gear.
Equip yourself with reliable items that make application smooth without repeating surface prep steps.
- High-quality angled brush for cutting in
- 9″ roller frame with 3/8″ nap cover
- Lightweight extension pole for even reach
- Paint tray with liner and splash guard
- Reusable nylon drop cloths and tool caddy
Grab these and you’ll work smarter, not harder.
Surface Preparation Supplies
Since proper prep makes the paint stick and the color read true, gather a compact kit of surface-prep supplies: a stiff-bristle scrub brush and mild cleaner for washing, a 120–220 grit sanding block for feathering edges and dulling gloss, a tack cloth or microfiber rag for dust pickup, a high-quality stain-blocking primer, spackling compound with a putty knife for repairs, painter’s tape, and a small vacuum or brush to clear debris.
You’ll also want gloves, safety goggles, and drop cloths. Choose low-VOC primer and paint to limit environmental impact.
Proper prep helps your new hue behave predictably and honors color psychology.
Removing Trim, Outlet Covers, and Hardware
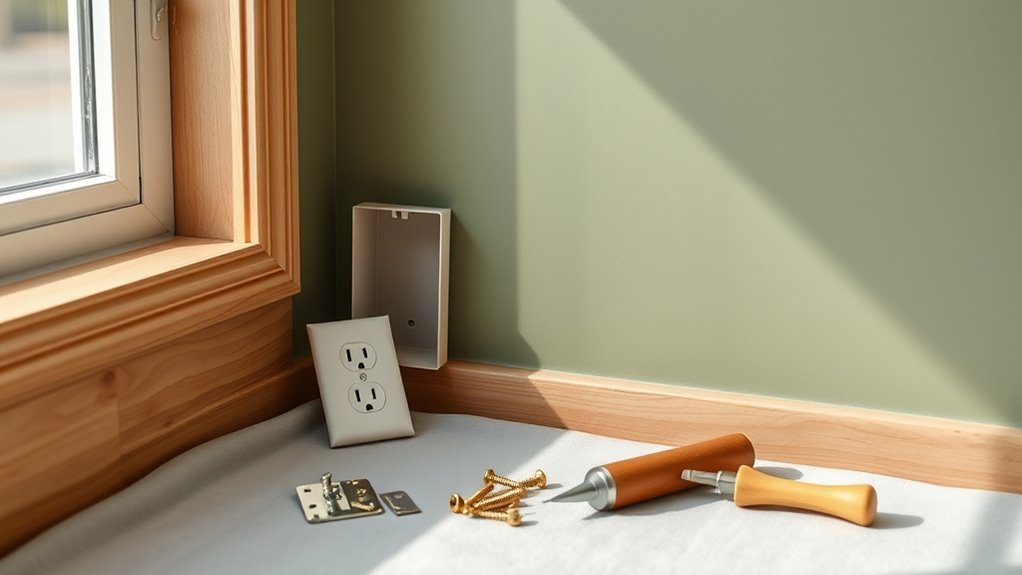
When you’re stripping a room down to paint, start by removing trim, outlet covers, and any hardware so you get clean edges and avoid splattered paint on fixtures. You’ll handle trim removal carefully with a pry bar and putty knife to avoid damaging drywall.
Unscrew outlet covers, label plates, and tuck screws into a bag. Take off door knobs, curtain rods, and light fixtures if needed, storing parts together.
Unscrew outlet covers, label plates, and tuck screws into a bag; remove knobs and fixtures, storing parts together for easy reassembly.
Protect floors with a drop cloth and keep small pieces in clearly marked containers so reassembly is quick.
- pry bar levering baseboard
- neat stacks of labeled plates
- plastic bag of screws
- wrapped knobs and hinges
- folded drop cloth
Clean Walls: Remove Grease, Dust, and Mold
Before you prime or paint, clean the walls thoroughly to remove grease, dust, and any mold so the new paint will adhere and look even. Start by dusting with a microfiber cloth or vacuum brush, then wash greasy areas with mild detergent or trisodium phosphate substitute.
Treat mold with a diluted bleach solution or commercial mold cleaner, wearing gloves and ventilating the room. Rinse residues and let surfaces dry completely.
Cleaning guarantees true color psychology results—your chosen hue reads correctly without grime altering perception. Choose eco-friendly paints afterward to maintain indoor air quality and complement your freshly cleaned walls.
Patch Holes and Smooth Texture Differences
If you want your new paint to look professional, start by filling holes and evening out any texture differences so the surface is smooth and consistent. You’ll spot dents, nail holes, and uneven patches; use lightweight spackle for small repairs and joint compound for larger spots.
Match texture subtly so the repaired area blends before painting. Consider primer alternatives when covering repaired spots, but test first since strong green may need true primer.
Think about color mixing only after repairs to ensure final hue is accurate.
- tiny nail dimples
- larger gouges
- popcorn patch areas
- drywall tape seams
- feathered compound edges
Sanding Tips to Avoid Visible Seams
Start by feathering sanded edges so the old paint fades smoothly into the surrounding wall. Use a light touch and long strokes to blend joint lines without creating gouges.
That way your primer and topcoat won’t highlight seams once the green is covered.
Feathering Sanded Edges
When you sand down old paint or patch compound, feather the edges so the new coat blends smoothly into the surrounding surface; this prevents a ridge or visible seam from telegraphing through the topcoat. You’ll use gentle sanding techniques, working outward from the patch to thin the edge until it’s barely there.
Feathering edges creates a gradual shift so the primer and paint sit evenly. Work with light pressure, consistent strokes, and progressively finer grit.
Clean dust, inspect under raking light, and touch up any high spots before priming.
- soft, sloped edge
- even texture
- fine dust wiped away
- seamless gradation
- subtle feathered profile
Blending Joint Lines
Although joint lines sit low in the surface, you can erase their appearance by sanding with a light, controlled approach that evens the shift between tape, compound, and drywall. You’ll sand feathered edges, check with raking light, and avoid over-sanding which weakens compound and harms paint durability. Use a sanding block, fine grit, and steady strokes so seams disappear under primer. Consider how color psychology affects perception—lighter tones hide flaws differently than dark greens—so test a swatch. Follow this quick checklist:
| Step | Tool/Tip |
|---|---|
| 1 | Sand block, 120–220 grit |
| 2 | Raking light inspection |
| 3 | Feather edges smoothly |
| 4 | Prime before color application |
When to Use High-Hide vs. Stain-Blocking Primers
If you’re covering a bright green wall, choose your primer based on the problem you’re solving. Use high-hide primers when color psychology matters — you want fewer coats and truer color shifts. Pick stain-blocking primers if tannins, water marks, or grease bleed through. Consider eco friendly options for low odor and quicker recoat.
- A living room painted lime transformed by a single high-hide coat
- Brown water streaks sealed by a stain blocker
- A nursery with low-VOC primer for gentle air
- Kitchen grease prevented from seeping through new paint
- Smooth, even base that reduces repainting
Choosing Primer Sheen and Tint for Coverage
Because primer sheen and tint affect how much of the green shows through, pick options that work with your topcoat: flat or matte primers hide better and reduce laps, while a slight eggshell sheen can help smooth application on satin or semi-gloss finishes; tint the primer toward the new paint color (or use a gray universal tint) to cut down on coats and improve true color payoff. You’ll balance coverage with finish: darker tints mask more, lighter tints keep color psychology intact. Consider low-VOC primers for environmental impact. Visualize choices:
| Sheen | Tint |
|---|---|
| Flat | Dark tint |
| Matte | Color-tinted |
| Eggshell | Gray tint |
| Satin | Light tint |
| Semi-gloss | No tint |
When to Use Adhesive-Bonding Primers
If your green walls are glossy, stained, or have adhesion problems, you’ll want to prime before painting to guarantee the new coat sticks.
Learn the differences between standard, stain-blocking, and adhesive-bonding primers so you can pick the right product for tricky surfaces.
I’ll also cover the best application tips—surface prep, drying times, and recommended tools—to get reliable results.
When To Prime
When should you reach for an adhesive-bonding primer? You’ll need it when green undertones fight coverage, when glossy finishes won’t hold, or when stains bleed through; it helps stabilize surface tension so new paint lays flat.
Consider color psychology and historical trends—darker or vintage greens often demand stronger adhesion to avoid patchy results. Prime before sanding, after cleaning, and anytime the surface feels slick or inconsistent.
Visualize the room:
- A glossy mint kitchen still reflecting light
- A smoky emerald wall with water stains
- Peeling trim near windows
- A high-traffic hallway scuffed from years
- A vintage plaster surface with worn paint
Primer Types Explained
One key primer type you’ll want to know is the adhesive-bonding primer, made to stick to slick, glossy, or problematic surfaces so new paint won’t peel or show patchiness. You’ll choose it when green walls have glossy finishes, tiles, or previously sealed stains that repel standard primer.
It creates a reliable base that helps your new hue read true — important for color psychology when moving from intense green to softer tones. Use bonding primer to improve paint durability and reduce the risk of blistering or flaking.
It’s your go-to when adhesion problems threaten a clean, lasting repaint.
Application Best Practices
Because glossy or sealed green walls resist standard primers, you’ll reach for an adhesive-bonding primer whenever the surface is slick, previously coated with high-gloss paint, or shows areas of staining or residue that could repel new paint. You’ll prep by cleaning, scuffing, and testing adhesion in a small patch.
Choose a bonding primer suited to your topcoat and consider how color psychology influences final shade choices over a neutral base. Pay attention to wall texture—smooth surfaces need different application tools than textured ones.
Apply thin, even coats, allow full curing, then sand lightly before the finish.
- a satin sheen reflecting light
- rough stucco catching primer
- glossy trim lines
- patch-tested corner
- even roller strokes
Primer Application: Full Coverage in Two Coats
Although a single coat might seem quicker, you should apply two full coats of primer to guarantee even coverage over green paint. Start with a high-quality, stain-blocking primer designed for pigmentation control.
Apply two full coats of stain-blocking primer over green paint for even coverage and true color.
Let the first coat dry fully, then inspect under natural light for thin spots or bleed-through. Sand lightly between coats if needed for smoothness.
Use a roller for broad coverage and a brush for edges. Choosing primers that align with color psychology helps assure your final hue reads true.
Selecting eco-friendly paints and low-VOC primers minimizes odors and environmental impact while maintaining performance.
Tinting Primer to Neutralize Green
If your green walls keep showing through a single primer coat, tinting the primer toward the opposite hue will neutralize the undertone and cut down on bleed-through; you’ll get better coverage with fewer topcoats.
You’ll choose a primer tint that targets green undertones—usually a red or pink base—so the color cancels before you paint. Tell your supplier the opacity you need, test a small patch, and adjust tint strength.
Visualize the result:
- A muted, even base where green no longer peeks
- Smooth edges between patched and primed areas
- Less streaking under topcoat
- Faster overall project time
- Cleaner color transitions
Picking Topcoat Colors That Hide Green Undertones
When you pick a topcoat, choose hues that visually counteract any remaining green so you won’t need extra coats to mask it. Aim for warm or muted tones—soft terracotta, dusty mauve, or warm taupe—since they neutralize green undertones without clashing.
Test samples on several wall spots after primer tinting; small swatches reveal how light shifts color and whether green peeks through. Avoid cool, lime-adjacent shades that amplify undertones.
If you spot residual green, pick a slightly warmer or deeper topcoat rather than more coats. That approach saves time and achieves consistent, true color.
White, Beige, or Gray: Which Neutral Wins?
Choosing between white, beige, and gray comes down to the room’s light, your furniture, and how much you want green undertones to show through. You’ll pick white for crisp brightness that masks green when light’s ample, beige for warmth that camouflages cool undertones, or gray for modern balance that can either mute or highlight green depending on tone.
Consider color psychology—white feels clean, beige comforts, gray stabilizes. Also factor eco-friendly finishes to keep indoor air healthy. Visualize each neutral against the existing green before committing.
- Sunlit room with crisp white trim
- Cozy beige with wood furniture
- Cool gray and metal accents
- Soft textiles muting green hints
- Plants tying tones together
Using Color Samples and Test Patches
Before you commit to a full paint job, grab several color samples and apply test patches directly over the green—this shows how each neutral actually looks under your room’s light and over the existing hue.
You’ll see how color theory plays out: warm beiges can neutralize cool green, while gray undertones may clash. Paint small squares in different spots at eye level and near windows to check shifts with daylight and artificial light.
Note how wall textures affect coverage—rough surfaces hide undertones differently than smooth ones. Live with patches for a few days before choosing the final neutral.
Calculating Primer and Paint Amounts
If you’re covering green walls, accurately calculating how much primer and paint you’ll need prevents wasted trips to the store and mid-job delays. Measure wall area, account for windows and doors, and factor primer coats needed to block strong green tones.
Consider color psychology when choosing coverage depth—a lighter tint may need extra coats—and factor paint durability for high-traffic spaces.
Estimate gallons using square footage divided by coverage per gallon, then add 10–15% contingency. Gather supplies and map coats before buying.
- Wide living room wall painted over deep green
- Small bedroom with one window
- Hallway with scuffs
- Kitchen near stove
- High-traffic entryway
Rollers, Brushes, and Sprayers: Pick the Right Tool
When you’re covering strong green tones, pick tools that match each surface and paint type to get smooth, even coverage with fewer coats. Use a 3/8″–1/2″ nap roller for smooth to semi-smooth walls; thicker naps hold more paint for textured surfaces.
Choose synthetic brushes for latex, natural bristles for oil, and angled sash brushes for trim.
Consider a HVLP or airless sprayer for large areas or when paint durability and finish uniformity matter most, but practice first to avoid runs.
Match tool quality to primer and topcoat, and test a small area to confirm coverage and sheen.
Cutting In and Feathering on Colored Walls
Although cutting in along edges and corners can feel fiddly, getting a crisp line makes the whole room look professional and prevents green undertones from bleeding into the new color. You’ll tape where needed, use a steady angled brush, and feather the fresh coat into rolled areas so blends vanish. Think about color psychology when choosing edge contrast, and choose eco-friendly paints to minimize odor while you work. Keep a wet edge and short, confident strokes. Clean brushes between passes to avoid dragging green into the new tone.
- A steady hand tracing window trim
- Soft feathered overlap at ceiling
- Sharp corner definition
- Smooth doorframe edge
- Seamless wall-to-wall blend
Applying Topcoat Without Bleed or Streaks
Now that your cut lines are clean and feathered, it’s time to apply the topcoat without introducing bleed or streaks. Work in consistent, overlapping passes with a high-quality roller and appropriate nap for your surface to avoid green streaks. Maintain a wet edge and don’t press too hard; excess pressure causes thin spots and uneven sheen.
Use smooth, even strokes and keep a light, loaded brush for edges. Let each layer dry fully before deciding on another; proper drying preserves paint durability and prevents lifting.
Clean tools and correct technique *guarantee* a uniform, long-lasting finish without flaws.
How Many Coats to Fully Hide Bold Green?
If your green is bold and saturated, plan on at least two full coats of a high-quality primer tinted toward the new color, followed by two finish coats; this sequence hides most pigments and gives an even base for topcoats. You’ll need that primer to counter strong green undertones and improve paint durability, so don’t skimp.
Check coverage after primer; add another primer pass if the green peeks through. Finish coats should be applied evenly and inspected under good light.
Visualize the result:
- A seamless, neutral wall avoiding streaks
- Even color from corner to corner
- Smooth, durable finish
- Consistent sheen
- Clean transition to trim
Drying Times and Ideal Recoat Conditions
When you’re planning recoat timing, remember that drying depends on paint type, humidity, and temperature—latex usually feels dry in 1–2 hours and can be recoated in 4 hours under ideal conditions, while oil-based paints often need 24 hours. You’ll check surface dryness by touch; tackiness means wait. Lower humidity and moderate warmth speed curing. For rooms with green accents, test small patches before full coats. Choose eco friendly paints for quicker low-odor drying. Keep ventilation steady and avoid chilling nights. Use the table to plan timing and conditions.
| Condition | Recommendation |
|---|---|
| Humidity low | Faster recoat |
| Humidity high | Wait longer |
| Warm temp | Ideal recoat |
| Cool temp | Delay |
Fixing Bleed-Through After Painting
If you spot green showing through after your topcoat, first identify what’s bleeding—stains, tannins, or dye from the old paint.
You’ll need to seal those areas with the right primer rated for stain-blocking before you repaint.
Then repaint using proper technique and full coverage to prevent the problem from returning.
Identify Bleed-Through Sources
Wondering why that new coat of paint still shows green patches? You need to find the bleed sources before reworking the surface. Inspect for stains, tannins, or previous pigments causing a faint green tint. Check recent repairs, water damage, wallpaper adhesive, and smoke residue; any can leach color through fresh paint.
Test small areas by wiping with solvent and looking for transfer. Note porous spots that absorb differently. Once you pinpoint origins, you can clean, sand, or isolate those areas. Visualizing the problem helps you decide targeted fixes without needless full repainting.
- water-streaked corner
- nicotine haze
- patched drywall seam
- old green primer edge
- adhesive residue
Seal With Appropriate Primer
Once you’ve identified the spots that bleed, stop them at the source by sealing with the right primer before repainting. You’ll choose a stain-blocking primer suited to the stain type; shellac or oil-based primers often work best. Apply evenly to control color psychology—avoid undertones that betray the green—while matching paint texture to the surrounding wall so finish looks uniform. Let primer cure fully before topcoat. Check adhesion and opacity; recoat primer if needed. Use proper ventilation and gloves.
| Primer Type | Best For | Dry Time |
|---|---|---|
| Shellac | Severe stains | 30–60 min |
| Oil | Tannins, smoke | 6–8 hrs |
| Latex | Mild stains | 1–2 hrs |
Repaint Using Correct Technique
Although you’ve sealed the problem areas, you’ll still need to repaint carefully to stop any remaining green bleed-through from showing. So start by sanding the primed spots lightly to feather the edges and remove dust. Use thin, even coats of a high-opacity paint, letting each dry fully before the next.
Consider Color psychology—choose a shade that masks green undertones without fighting them. Pick eco-friendly options to minimize fumes during multiple coats. Finish with a flat or eggshell sheen to hide imperfections.
Visualize the final surface:
- Smooth, matte expanse absorbing light
- Crisp, clean corners
- Even color depth
- Subtle texture where needed
- Fresh, odor-minimal air
Handling Textured or Faux-Finished Walls
If your walls have texture or a faux finish, you’ll need to adjust your prep and painting approach so the new coat hides the green evenly without accentuating bumps or brush strokes. Inspect texture; clean, repair, and sand where necessary. Use stain-blocking primer and consider tinted primer to cut green bleed-through. For textured finishes, choose a thick-nap roller or sprayer; for faux techniques, test a sample to match sheen and depth. Apply multiple thin coats rather than one heavy one. Finish with appropriate sheen to minimize shadows and blend texture for a uniform, professional-looking result.
| Tool | Purpose |
|---|---|
| Primer | Blocks green |
| Roller nap | Covers texture |
| Sprayer | Even coat |
| Sandpaper | Smooth flaws |
| Sample patch | Verify look |
Quick Fixes for Small Areas
When you’re dealing with small patches of green—like trim, a single wall, or a few scuffs—you can skip heavy-duty prep and still get great results by spot-priming and feathering the new paint into the surrounding area. Pick a primer with good coverage, let it dry fully, then apply thin coats of your chosen finish.
Consider color psychology when selecting a replacement—warm tones close spaces, cool tones expand them—and test swatches under different lighting effects. Use a fine brush for edges and a mini-roller for blends.
Think about color psychology—warm hues cozy up rooms, cool tones open them; always test swatches in varied lighting.
- A narrow trim line being corrected
- A scuff near a light switch
- Corner touch-ups
- Patchy sun-faded spots
- Around outlet covers
Low-VOC and Eco-Friendly Product Options
If you’re sensitive to fumes or want a greener finish, choose from several reputable low-VOC paint brands that still offer good coverage over green.
Pair that with an eco-friendly primer formulated for stain-blocking and adhesion to cut down on coats. I’ll point out top-brand options and when each primer is the best fit.
Low-VOC Paint Brands
Because choosing a low-VOC or eco-friendly paint cuts down on fumes and environmental impact, you’ll want brands that balance performance with safer ingredients. Reputable options include Benjamin Moore Natura, Sherwin-Williams Harmony, ECOS, AFM Safecoat, and Clare.
You’ll find these work well over Green walls when you minimize odor and off-gassing while keeping coverage strong. Pick a finish that hides old pigment without extra coats.
Test a small patch to confirm adhesion and color. Use proper ventilation and allow full cure time.
Visualize the final room: fresh, calm, and healthier thanks to Eco friendly paints.
- soft, muted living room
- bright, airy kitchen
- tranquil bedroom corner
- crisp, modern hallway
- cozy, warm study
Eco-Friendly Primer Options
Want to block stains and neutralize stubborn green pigments without toxic fumes? Choose low-VOC primers labeled for stain-blocking and high hide. You’ll want products from brands emphasizing sustainable sourcing and eco friendly packaging to reduce environmental impact.
Look for water-based formulas with good tinting and adhesion so one coat can cover green undertones. Apply per instructions, let full cure, then inspect for bleed-through; spot-prime if needed.
If odor matters, test a small area first. Recycling instructions and transparency about ingredients signal a responsible choice, helping you paint confidently while minimizing health and ecological risks.
Budget Tips: Save Without Losing Coverage
While you can save money on supplies, cutting corners on primer or paint quality will cost you time and coverage; prioritize a good stain-blocking primer and one or two coats of mid- to high-coverage paint.
You’ll still save by buying sale-brand rollers, trimming efficiently, and prepping well so coverage isn’t wasted.
Think about color psychology when choosing a lighter tone to mask green with fewer coats, and consider environmental impact by selecting low-VOC options.
Stretch materials by painting contiguous rooms together and cleaning tools for reuse.
- A tidy drop cloth soaked in cheap light
- A jam-free roller gliding smooth
- A neat taped edge
- A half-used can saved
- Brushes rinsed clear
When to Hire a Pro for Stubborn Green
If primer won’t cover the green no matter what you try, it’s time to think about calling a pro.
You should also hire help when the walls have extensive damage—cracks, peeling, or mold—that needs repair before painting.
And if you don’t have the time or skill to get a smooth, lasting finish, a professional will save you effort and avoid costly mistakes.
When Primer Won’t Work
When a high-coverage primer still lets green show through or you spot uneven adhesion, it’s time to contemplate calling a pro—especially if the paint is oil-based, stained, textured, or on tricky surfaces like glossy trim. You’ll want an expert who understands color psychology and can recommend eco friendly paints, specialty primers, or bonding agents.
A pro can test adhesion, isolate stains, and suggest color strategies to avoid bleed-through. Consider hiring when you need speed, consistent finish, or warranty-backed work.
- damp basement wall mottled with old green
- glossy trim reflecting light
- patchy primer edges
- oil-streaked closet interior
- textured popcorn ceiling
Extensive Surface Damage
Because severe peeling, deep stains, crumbling drywall, or widespread mold go beyond paint and primer fixes, you’ll want a pro who can assess structural damage and recommend repairs before repainting.
You should call an expert when surface cracks spider across walls, paint peeling exposes bare gypsum, or moisture has softened plaster.
A pro will test for mold, fix underlying leaks, replace damaged drywall, and apply appropriate sealants so new paint adheres and lasts.
Hiring prevents wasted effort, recurring failures, and hidden health risks.
Get a written scope and estimate, so you know repairs, timelines, and when the room’s ready for paint.
Time Or Skill Constraints
Should you lack the time or the confidence to tackle stubborn green walls yourself, hire a pro to avoid costly mistakes and wasted materials. You’ll save hours and guarantee proper priming, coverage, and color correction when green undertones fight your chosen hue.
Pros understand color psychology, so they’ll advise how the new shade reads under your lighting and against furnishings. They’ll fix adhesion issues, match sheen, and seal problem spots efficiently.
- A painter sanding behind a radiator
- Primer wiping stubborn green streaks
- Taped edges ready for crisp lines
- Even roller strokes across a wall
- Final inspection under warm light
Before-and-After Case Studies and Troubleshooting
Before we plunge into specific rooms, you’ll see how practical prep and the right products transform green walls into clean, neutral canvases. Case studies highlight color psychology and environmental impact choices.
You’ll review three short examples: a dark olive living room prepped, primed with stain-blocking primer, and painted warm beige; a mint bedroom where patching and a high-hide primer preserved air quality; a lime kitchen that needed two coats and odor-minimizing paint.
Troubleshooting notes tell you when to sand, re-prime, or switch primers, how to handle bleed-through, and when to call a pro for persistent staining.
Frequently Asked Questions
Can I Paint Cabinets or Furniture That Match the Green Walls Without Priming?
You can sometimes skip primer on cabinets or furniture, but Green wall prep matters and you’ll get better results if you don’t. Cabinet painting tips: sand, clean, use a bonding primer for durability, then apply thin, even coats.
Will Wallpaper Adhere Properly Over Previously Painted Green Walls?
Yes — wallpaper can adhere properly if you do Green wall prep: clean, sand gloss, repair imperfections, and guarantee Primer compatibility with both paint and wallpaper adhesive. Otherwise, it won’t stick reliably and you’ll face bubbling.
Do Baseboards Need Different Primer Than Walls for Color Blocking?
About 70% of DIYers report fewer touch-ups when they prime properly. You’ll need different primer for baseboards for better primer compatibility and color matching, since trim absorbs and reflects paint differently than walls.
Can Humidity or Seasonal Changes Cause Hidden Green to Reappear?
Yes — humidity effects and seasonal reappearance can cause hidden green to resurface if moisture lifts old paint or stains. You’ll need proper primer, moisture control, and full cure times to prevent color bleeding later.
Are There Health Concerns When Sanding Painted Surfaces With Unknown Pigments?
Imagine a renovator sanding an old bedroom—you’re at risk: you’ll encounter paint removal and dust hazards that can release lead or toxic pigments, so wear a respirator, use HEPA vacuums, and get testing beforehand.
Conclusion
You’ve got this—covering green walls comes down to smart prep, the right primer, and testing for bleed-through before you roll. Skip a primer only when the shade and finish allow, and call in a pro for stubborn stains or tannin issues. Go green with low‑VOC options and save by buying quality midpriced products. With a little elbow grease and the right plan, you’ll turn that green into a fresh canvas in no time, easy as pie.