How to Paint Rough Walls Smoothly
If your walls are rough, start by inspecting for cracks, dampness, and loose plaster, then clean and fix any damage. Sand small bumps, or skim-coat widespread texture with joint compound, feathering edges and sanding between coats. Prime patched or porous areas, choose a low-sheen paint to hide imperfections, and apply even coats with proper rollers and lighting. Protect surfaces, ventilate well, and inspect for thin spots. Keep going and you’ll find step-by-step tips for each technique.
Quick Decision: Sand, Skim-Coat, or Spot-Fix?
Not sure whether to sand, skim-coat, or spot-fix? You’ll weigh wall damage, time, and budget: sand for minor bumps, skim-coat for widespread texture, spot-fix for isolated dings.
Inspect in daylight, run your hand over surfaces, and pick the least invasive method that still gives a smooth base.
Consider paint choice early—some eco friendly paints hide imperfections better and work with primers.
Think about your color combinations too; darker hues mask flaws differently than light tones.
Pick tools and materials that match the method, and plan a test patch to confirm the finish before you commit.
Why Smoothing Rough Walls Is Easier Than You Expect
Once you’ve chosen sanding, skim-coating, or spot-fixing, you’ll find smoothing rough walls is more straightforward than it seems. You’ll break the job into clear steps: prep, repair, sand, prime, and paint.
Tools are affordable and techniques intuitive, so learning is quick. You’ll save time by tackling small areas first and avoid overworking the surface.
Smooth walls boost finish quality and let color psychology shine—lighter hues calm, deeper tones add warmth. Choosing eco friendly paints keeps fumes low and cleanup simple.
With basic skills and patience, you’ll get professional-looking results without stress or expensive contractors.
Which Wall Textures Need Smoothing Before Paint
Although some textured finishes add character, you should smooth any surface that’s heavily orange-peeled, popcorn, or knockdown if you want a uniform paint finish or a modern look.
For a clean, modern paint finish, smooth heavy orange-peel, popcorn, or knockdown textures.
You’ll also consider smoothing trowel-applied textures and deep stipple that cast shadows or trap dirt. If wallpaper removal revealed uneven plaster, skim-coating will help.
Smooth walls make paint color selection truer to swatches, since texture affects sheen and tone. Leave subtle textures like light sand or brushed finishes if you prefer depth.
Choose smoothing based on desired style, lighting, and maintenance—don’t over-sand just to eliminate every minor ripple.
Inspecting Walls for Damage, Moisture, and Loose Plaster
Before you start smoothing or painting, carefully inspect each wall for cracks, damp spots, and areas where plaster is loose or crumbling. Walk the room slowly, run your hand over wall texture to feel irregularities, and mark hairline cracks and flaking.
Use a screwdriver to probe suspect plaster; if it gives, remove and note extent. Look for discoloration, peeling paint, or musty smells that indicate moisture; trace any leaks to their source.
Document repairs needed and prioritize addressing active moisture before smoothing. This inspection prevents wasted effort and guarantees your smoothing work adheres to good moisture prevention practices.
Preparing the Room: Protection, Lighting, and Ventilation
Now that you’ve inspected for damage and moisture, get the room ready so your smoothing and painting go efficiently and cleanly. Clear furniture, cover floors and vents with drop cloths, and seal off adjacent rooms. Arrange bright, adjustable lighting so you can spot imperfections and test wall color schemes under true light. Open windows and use a fan for ventilation, especially if you choose eco friendly paints, which still need airflow. Keep pathways clear and wear a mask when sanding. Small preparations save time and keep the space calm, safe, and ready for a smooth finish.
| Calm | Light | Fresh |
|---|---|---|
| Cover | Bright | Airy |
| Clear | Test | Safe |
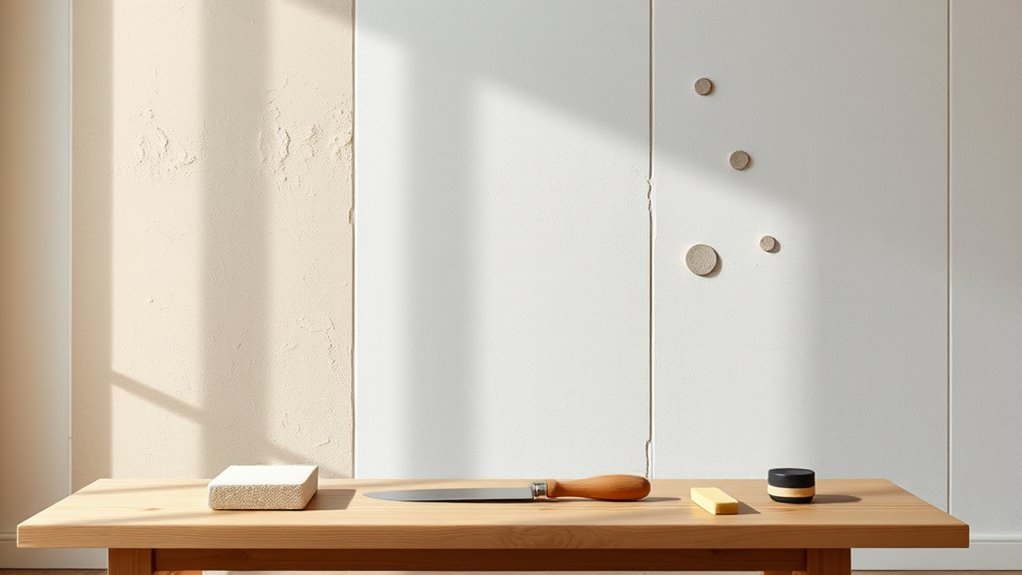
Essential Tools and Materials for Smoothing Walls
When you’re ready to smooth rough walls, gather the right tools and materials so the work goes faster and the finish looks professional. You’ll need sandpaper (coarse and fine), sanding block or pole sander, joint compound, putty knives in multiple sizes, and a hawk or mud pan.
Add a quality primer, paint, and rollers with appropriate nap. Keep tack cloths, drop cloths, painter’s tape, and a good utility knife on hand.
For final touches, plan placement of decorative accents or wall art; have anchors, screws, and a level ready so your smooth surface stays flawless.
Quick Fixes for Cracks, Nail Pops, and Small Holes
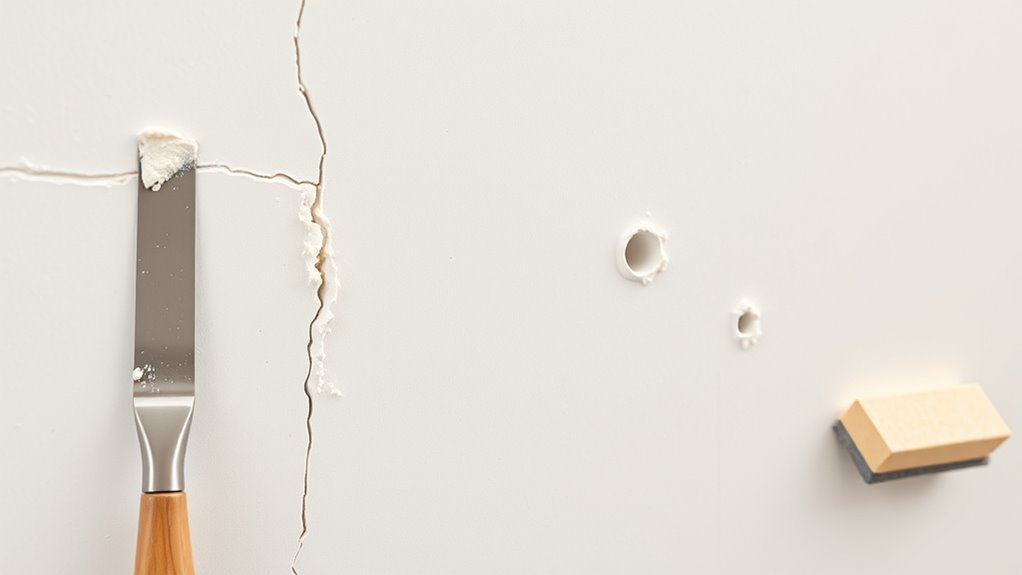
With your tools and materials ready, tackle small imperfections like hairline cracks, nail pops, and tiny holes first so the finish goes on smooth. You’ll clean debris, widen cracks slightly, and press popped nails back or remove them.
Use a lightweight spackle for quick drying, sand flush, and prime bare spots. Consider how repair spots affect color psychology—priming avoids patchy tones—and finish with eco friendly paints to keep surfaces consistent and low-VOC.
- Clean and dust the area
- Apply spackle or caulk sparingly
- Sand smooth after drying
- Prime before painting
Best Fillers and Joint Compounds for Deep Bumps and Holes
When you’re tackling deep bumps and holes, pick a heavy-duty repair mortar for structural gaps and a fast-setting joint compound to build up layers quickly.
Use flexible patch fillers where movement or vibration could reopen the repair.
Start with the mortar for big voids, feather in joint compound for a smooth finish, and finish with a flexible filler around stress points.
Heavy-Duty Repair Mortar
Need something that won’t sag or shrink out of deep gouges? You’ll rely on heavy-duty repair mortar for structural fills before you think about decorating accents or wall color schemes. Choose mortar designed for vertical and overhead repairs; it bonds to masonry, resists shrinkage, and accepts sanding and paint.
Mix to manufacturer specs, apply in layers if needed, and finish flush with surrounding texture.
Tools and tips:
- Use a stiff trowel for firm packing
- Apply in 1/2-inch lifts to avoid collapse
- Cure per instructions to prevent cracking
- Sand only after full cure to match surface
Fast-Setting Joint Compound
Because you’ll often be racing against time on repairs, fast-setting joint compound is the go-to choice for quickly filling deep bumps and holes before sanding and painting. You mix a powdered formula to desired set times, apply in layers, and sand once cured; this speeds project flow so you can move to color matching and finish coats sooner.
Choose a product rated for depth and interior use, wear a mask, and clean edges for a seamless repair. Plan furniture placement to avoid disturbing drying patches, and test a small area to confirm adhesion and texture before full application.
Flexible Patch Fillers
If your walls have deep cracks, bulges, or missing plaster, flexible patch fillers give you a resilient, paint-ready base that won’t crack as the house settles. You’ll choose elastomeric or polymer-modified compounds for movement resistance and long-term adhesion.
Apply in layers, feather edges, and sand lightly between coats. Match filler texture to surrounding surfaces, especially with historical wall textures, so repairs blend before priming. Use primers compatible with eco-friendly paints to guarantee finish adhesion.
Check cure times and compatibility with joint compounds for deep holes.
- Elastomeric fillers for exterior movement
- Polymer-modified for interior stability
- Skim coats for texture matching
- Primer selection tips
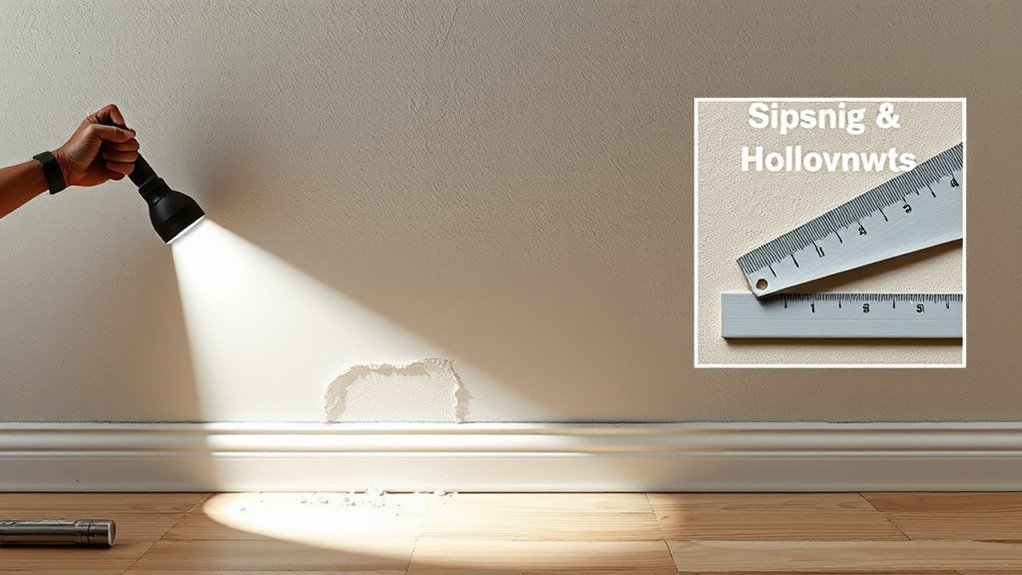
Removing Loose Texture, Flaking Paint, and Debris
Before you start sanding or skim-coating, remove all loose texture, flaking paint, and debris so the new finish can bond properly.
Inspect the wall and tap suspect areas; hollow sounds mean poor adhesion. Use a stiff brush or putty knife to scrape away peeling material, working from intact surfaces toward damaged edges to protect wall texture.
Vacuum dust and brushings with a shop vac, then wipe with a damp cloth to remove residue.
Treat mold or efflorescence per manufacturer instructions.
Prime bare spots with a bonding primer to restore paint adhesion before proceeding to fill or skim-coat for a smooth result.
Safe Sanding for Textured Drywall and Plaster
Wondering how to sand textured drywall or plaster without creating a dust storm? You’ll prepare the room, check for moisture detection (don’t sand damp areas), and protect finishes so wall color isn’t ruined.
Wondering how to sand textured drywall or plaster without a dust storm? Prep, check for damp spots, and protect finishes.
Use a pole sander with fine-grit sandpaper, wear a respirator, and vacuum as you go with a HEPA attachment to control dust.
- Seal vents and doors, cover furniture, and lay plastic.
- Test a small patch to confirm texture removal and substrate soundness.
- Sand lightly; preserve edges to avoid gouging.
- Clean thoroughly before priming and repainting.
Skim-Coating Basics: Tools, Mix, and First Coat
You’ll want a few key tools—wide taping knives, a hawk or mud pan, a quality float, and sanding blocks—to get a smooth skim coat.
Mix joint compound to a creamy, lump-free consistency so it spreads easily without sagging.
For the first coat, apply thin, even layers and knock down high spots so you can feather and sand for a uniform surface.
Essential Skim-Coating Tools
When you’re ready to skim-coat, having the right tools makes the job faster and gives a smoother finish. You’ll need quality basics to apply and refine thin plaster layers, and choosing eco friendly paints later ties into color psychology for the final look. Gather durable, comfortable tools so you work cleanly and avoid rework.
- Stainless steel trowel (12–14″) for smooth application
- Flexible joint knife (4–6″) for tight spots
- Pole sander with fine mesh for feathering
- Mud pan and hawk to hold mixes comfortably
Keep everything clean and inspect edges before you start.
Mixing And First Coat
Because a consistent mix and a confident first pass set the stage for a smooth finish, start by measuring and mixing only what you can use in 20–30 minutes.
You’ll blend joint compound to a lump-free, creamy consistency—thicker than paint but flowing easily. Use a drill mixer at low speed and strain if needed.
Load a broad knife and apply a thin, even first coat, pressing into hollows and feathering edges. Let it firm, sand lightly, then repeat with a finer skim if necessary.
This approach suits decorative finishes and delicate historical restoration where texture and adhesion matter.
Applying a Second Skim Coat for a Truly Flat Surface
After the first skim coat has dried and you’ve inspected for low spots, apply a second, thinner coat to fill hairline imperfections and build an even finish. This coat should be feathered out beyond the first to blend seamlessly into the surrounding wall. You’ll work quickly, keeping the compound smooth and consistent.
Sand lightly between coats, remove dust, and avoid overworking edges. Consider how final paint will affect color coordination and furniture placement so walls read uniform once staged.
- Use a broad stainless trowel for even pressure
- Keep compound slightly wetter than before
- Sand with fine grit between passes
- Wipe surface with a tack cloth
Feathering Edges and Blending Repaired Areas
Now that your second skim coat is smooth and lightly sanded, focus on feathering the edges so repaired areas vanish into the surrounding wall. Use a wide knife, light pressure, and thin passes outward to taper the compound. Match surrounding texture patterns by lightly stippling or brushing before it dries. Once dry, sand gently and test with your chosen paint color; use thin glaze or diluted paint to blend tones. Work small sections and step back often.
| Tool | Action |
|---|---|
| Knife | Feather edges |
| Brush | Match texture |
| Sandpaper | Smooth transition |
| Glaze | Blend color |
| Light | Inspect blending |
Dealing With Stucco and Heavy Textured Finishes
Start by evaluating the stucco or textured surface for cracks, loose material, and how pronounced the texture is so you know whether filling or smoothing is needed.
Pick a primer made for masonry or high-porosity surfaces to ensure proper adhesion and even coverage.
If you need a smoother finish, apply a skim coat with a leveling compound or polymer-based skim and sand it back before priming.
Assess Surface Condition
When you’re evaluating stucco or heavy textured finishes, look for loose material, deep voids, and areas where the texture is inconsistent, because these issues determine whether you can feather in repairs or need to skim-coat the whole surface.
Inspect for cracking, crumbling, and detachment; probe suspicious spots with a screwdriver. Note moisture stains and previous patching that may affect adhesion.
Record transitions where decorative painting techniques or bold wall color combinations will meet repaired areas so you can blend texture and color later.
- Tap walls to find hollow sounds
- Measure depth of texture
- Photograph trouble spots
- Mark areas needing full skim coat
Choose Appropriate Primer
How do you pick a primer that actually bonds to stucco and heavy texture? Choose a high-build, masonry or acrylic bonding primer designed for porous, rough surfaces; these fill tiny crevices and promote adhesion. Test a small area to confirm grip and compatibility with your chosen topcoat.
Consider how primers affect final color—tinting can influence color schemes—so match primer shade to paint for better coverage. Use rollers or brush types recommended by the primer manufacturer to reach deep texture.
Protect nearby floors and furniture placement during priming. Allow full cure time before painting to ensure a durable, even finish.
Apply Skim Coat Methods
After the primer has cured, you’ll move on to skim coating to level heavy stucco and deep texture. This involves applying a thin layer of joint compound or cement-based skim coat to fill peaks and even out the surface so paint can lay flat.
You’ll apply a bonding primer if needed, mix the skim coat to a creamy consistency, and spread it with a broad trowel or drywall knife. Sand lightly between coats and keep edges feathered.
Consider color matching after the final sanding and plan furniture placement to avoid scuffs during curing.
- Use a cement-based skim for exterior stucco
- Work in thin, even passes
- Sand with mesh paper
- Clean tools promptly
Bonding Primers for Slick or Glossy Surfaces
If your wall has a slick or glossy finish, ordinary primers won’t stick well, so you need a bonding primer formulated to adhere to smooth surfaces and provide a grab for topcoats. You’ll prep by cleaning, deglossing, and ensuring any texture removal is complete; primer selection matters — choose a high-adhesion, solvent- or acrylic-based bonding primer. Apply per instructions, thin if needed, and sand lightly between coats for bite. Use this quick comparison:
| Surface | Primer Type | Notes |
|---|---|---|
| Gloss paint | Bonding acrylic | Scuff first |
| Tile | Epoxy primer | For durability |
| Laminate | Solvent primer | Test adhesion first |
Choosing the Right Primer for Repaired or Textured Walls
Want the repaired or textured wall to look seamless under your finish coat? You’ll pick a primer that evens porosity, hides repair edges, and bonds to texture. Consider stain-blocking formulas for patches and high-build primers for heavy texture.
Think about how color psychology affects final hue—choose a tinted primer if you’ll shift tone. For older homes, match approaches used with historical wall finishes to respect depth and sheen.
Consider tinted primers to steer final hues, and honor historical finishes in older homes for authentic depth and sheen.
Test a small area first.
Markdown list to guide choices:
- Stain-blocking primer for patched spots
- High-build primer for uneven texture
- Tinted primer to control color shift
- Oil-based for durability
Spot-Priming Repaired Areas vs. Full-Wall Priming
Decide whether to spot-prime or prime the whole wall based on how many and how large your repairs are. Spot-priming works well for a few small patched areas.
Full-wall priming gives more consistent adhesion and color uniformity, especially on heavily textured or stained surfaces.
Weigh the cost and time tradeoffs—spot-priming saves time and materials, while full priming reduces the risk of visible repairs later.
When To Spot-Prime
When you repair small patches on plaster or drywall, spot-priming those areas usually does the job—saving time and paint—so long as the surrounding finish is intact and you’re matching the same sheen and base (water- vs. oil-based).
You should spot-prime when repairs are isolated, texture matches, and color mixing won’t be obvious. Spot-priming preserves paint durability at seams and prevents flash.
Use a small brush or roller, feather edges, and let primer fully dry before repainting.
- Match base and sheen
- Feather edges into old paint
- Use compatible primer
- Test a small area first
Benefits Of Full Priming
Spot-priming works well for small, localized repairs, but full priming the entire wall offers benefits that spot-priming can’t match. You’ll get uniform absorption, preventing patchy sheen or color when you apply decorative finishes.
Full priming also seals old surfaces, blocking stains and promoting better adhesion so topcoats lay smoothly and last longer. If you plan eco-friendly paints, a consistent primer layer helps them perform as designed, reducing the need for extra coats.
Cost And Time Tradeoffs
Although patching and priming only repaired areas can save time and money up front, you’ll want to weigh those immediate savings against potential rework and uneven finishes later. You’ll decide based on room use, wall texture, and how bold your paint color is.
Spot-priming cuts costs now but can show through on glossy or deep hues. Full-wall priming costs more and takes longer, yet it guarantees consistent adhesion and uniform tone, reducing callbacks.
- Faster initial finish with spot-priming
- Higher risk of visible seams with textured walls
- Full priming prevents color shift
- Long-term savings on repainting
How to Choose Paint Sheen to Hide Remaining Imperfections
Because sheen affects how light plays across your walls, picking the right finish is one of the easiest ways to minimize leftover bumps and texture. You’ll choose matte or flat if you want to hide imperfections—these absorb light and reduce glare.
Because sheen changes how light reads walls, choose flat or matte to absorb glare and hide bumps.
Eggshell gives slight durability with modest concealment; satin reflects more light and highlights faults.
Consider color psychology: lighter, cooler hues with lower sheen can make surfaces feel smoother.
Also weigh eco-friendly options—low-VOC flat paints reduce odors and are kinder indoors.
Test samples on problem areas before committing, viewing them at different times and lighting conditions.
Best Paint Types for Covering Repaired or Rough Walls
When you’re covering patched or rough walls, choose paints that level well and hide texture. High-build acrylic latex fills small voids.
Eggshell or satin finishes mask imperfections without too much sheen. For exterior masonry or severe surface issues, elastomeric masonry paint offers the best coverage and flexibility.
High-Build Acrylic Latex
If you want a fast, reliable way to fill minor surface imperfections before finishing, high-build acrylic latex is a top choice. You’ll spread a thicker, flexible coat that levels small dips and feathered repairs, helping paint sit evenly.
It bonds well, sands smoothly, and accepts primer and topcoats without lifting. Pay attention to color matching when blending repaired areas, and use consistent texture patterns to avoid visible changeovers.
Apply with a roller designed for higher nap or a brush for tight spots. Clean up with water while wet, and sand lightly between coats for best results.
Eggshell Or Satin Finishes
After using high-build acrylic latex to level imperfections, pick an eggshell or satin finish to hide remaining texture while giving walls a subtle sheen. You’ll find eggshell masks minor bumps with low reflectivity; satin adds durability and cleans easier without spotlighting flaws.
Choose based on room use: satin for high-traffic areas, eggshell for living rooms where soft light flatters decorative accents. Use color psychology to influence mood—muted tones calm, warmer hues energize—and test samples on patched areas to check how sheen and color interact with texture.
Apply with quality rollers and thin, even coats for the best, consistent coverage.
Elastomeric Masonry Paint
Want a paint that bridges hairline cracks and seals rough masonry? You’ll find elastomeric masonry paint stretches, hides imperfections, and resists water so repaired or rough walls stay smooth longer. Apply with a thick nap roller or airless sprayer for even coverage on varied wall height surfaces.
Consider color contrast to mask repairs or highlight architectural details; darker shades hide texture, lighter tones reveal it.
Prep thoroughly: clean, prime with a masonry primer, and fill deep voids. Cure times matter—follow manufacturer instructions.
Maintenance is simple: wash gently and repaint when elasticity declines.
- Stretches to bridge hairline cracks
- Water-resistant barrier
- Good for uneven wall height areas
- Use color contrast to disguise repairs
Cutting In and Rolling Techniques for a Smooth Finish
When you’re ready to paint, cutting in cleanly and using the right rolling technique will determine how smooth your finish looks. Tape trim, protect floors and plan color schemes around light and furniture placement so you won’t need touch-ups later.
Use a steady angled brush for edges, feathering paint into the wall with short, controlled strokes.
Use a steady angled brush at edges, feathering paint into the wall with short, controlled strokes.
Load a high-quality roller evenly, roll in a W pattern, then fill without pressing hard. Work in manageable sections, maintaining a wet edge.
Back-roll once lightly to even coverage, checking for missed spots and blending before paint skins over.
How to Avoid Roller Texture and Lap Marks
If you want a truly uniform wall, control your roller pressure, pace, and overlap: load the roller evenly, roll a consistent W or M pattern, and avoid stopping mid-stroke so wet edges blend smoothly. Work small sections, keep a wet edge, and use high-quality rollers matched to your paint. Maintain steady, light pressure to prevent texture buildup. Thin additional coats rather than overworking wet paint. Consider how Color combinations and decorative accents will read under even light; uniform application preserves their desired look.
- Use consistent roller nap and replace when worn
- Blend seams while paint is wet
- Feather edges lightly
- Apply thin, even coats
Working Around Trim, Outlets, and Fixtures Cleanly
Because trim, outlets, and fixtures sit at your paint’s edges, you’ll need steady hands and the right tools to keep lines crisp and surfaces clean. Start by removing outlet covers and masking trim with low-tack painter’s tape; press edges firmly to prevent bleed.
Use an angled sash brush for cutting in around moldings and a small foam brush for tight fixture gaps. Patch and sand rough spots before painting to match decorative accents and maintain your chosen color schemes.
Work in short sections, feathering edges to blend with rolled areas, and clean mistakes immediately with a damp cloth.
Painting Tall Walls and Adjacent Ceilings Safely
You’ve already handled the edges around trim and fixtures; now focus on safe techniques for reaching high walls and the ceiling line. Use a sturdy extension pole, stabilize ladders correctly, and work with a partner to hand tools and watch footing. Consider color coordination when cutting in ceilings to avoid obvious seams and move furniture placement away from walls before you start.
- Check ladder angle and footing
- Use an extension pole with a roller sleeve
- Keep a partner nearby for balance and passing supplies
- Protect floors and relocated furniture with drop cloths
Finish each section methodically, maintaining steady, overlapping strokes.
Fixing Common Problems After the First Coat
When the first coat dries, walk the room with good light and a clean eye to spot runs, thin areas, and texture issues so you can prioritize fixes.
Address runs by sanding lightly, feathering edges, and reloading your roller to blend. For thin or patchy spots, scuff and apply a targeted touch-up, checking color matching under the same light to avoid surprises.
If texture raised or flaked, scrape loose bits, fill low spots with thin joint compound, sand, prime and repaint.
Consider wall insulation gaps causing cold spots that affect finish; seal or insulate before final coats for consistent appearance.
How Many Coats You Really Need and When to Stop
Before you add another coat, check how well you prepped the surface—any missed sanding or patching will show through.
Use a quality primer to seal porous or patched areas, because it can cut down on the number of finish coats you’ll need.
Stop when the color is even, coverage is consistent, and texture looks uniform under normal lighting.
Assess Surface Prep
Although sanding and priming take time, they’ll save you coats of paint down the road, so assess the wall’s texture and repairs first to decide how many coats you really need. You want even adhesion and minimal buildup, so check for cracks, loose texture, stains, and previous decorative finishes that might affect coverage.
Choose eco friendly paints when possible; their opacity varies, so test a small area.
Determine if spot repairs blend or demand skim coats. If tests show uniform coverage after one finish coat, stop. If not, plan a second coat or additional surface prep.
- Check cracks and holes
- Test adhesion
- Spot-test decorative finishes
- Evaluate opacity of eco friendly paints
Primer Coat Importance
Now that you’ve assessed repairs and tested finishes, focus on primer to make your paint behave predictably. You should apply at least one quality primer to seal porous rough walls and improve adhesion, especially where wall insulation causes temperature-driven moisture variance.
Use a bonding primer on chalky or patched areas; a stain-blocking primer where discoloration shows. For smooth coverage under decorative finishes, a second light primer coat often evens texture and lowers topcoat consumption.
Let each coat dry fully and sand lightly between coats. Evaluate coverage in varied light — add another coat only if flaws remain visible; don’t overprime.
When To Stop
When you can see consistent color and texture across the wall in normal and angled light, stop—adding more coats only wastes time and hides subtle flaws. You’ll usually need two coats after primer; add a third only if coverage or finish still looks uneven.
Check for wall moisture before painting or between coats; damp areas won’t hold paint.
Watch for persistent paint odor that suggests incomplete curing or poor ventilation—don’t seal up a room too soon.
Trust your eye and touch, not a coat count.
- Inspect in varied lighting
- Feel for tackiness
- Note lingering paint odor
- Confirm no wall moisture
Long-Term Care to Prevent Cracks and New Texture
Because maintaining a smooth finish takes ongoing attention, you should set up a simple routine to catch minor issues before they become cracks or new texture. Check for humidity changes, inspect seams, and consider wall insulation to reduce thermal movement. Touch up small blemishes with matching paint; good paint color selection helps hide repairs. Clean surfaces gently and avoid harsh detergents that roughen finish.
| Task | Frequency |
|---|---|
| Inspect seams | Monthly |
| Clean walls | Quarterly |
| Touch-up paint | As needed |
| Monitor humidity | Continuous |
Stick to this routine and you’ll limit minor failures without major repairs.
When to Call a Pro: Structural or Large-Area Damage
If you notice large cracks, bowing walls, or doors and windows that stick, those can be signs of structural damage and you shouldn’t overlook them.
For widespread texture issues or areas larger than a few square feet, call a professional because repairs will affect the finish and may need specialized tools or permits.
A pro can assess safety, recommend structural fixes, and make sure the wall’s ready for a smooth paint job.
Structural Damage Indicators
Though small cracks and uneven texture can often be fixed with joint compound and sanding, signs like large, spreading cracks, bowed or sagging walls, doors and windows that suddenly stick, or visible foundation shifts mean you should call a professional—these indicate structural or widespread damage that DIY fixes won’t reliably address.
You’ll want prompt assessment to protect finishes, paint choices, color coordination, and furniture placement. Watch for clear indicators:
- Cracks wider than 1/4 inch or that run diagonally
- Floors or walls that visibly bow or sag
- Doors/windows that jam after seasonal changes
- Gaps at wall-to-foundation junctions
Don’t delay inspection.
When To Hire Pros
Those warning signs mean it’s time to bring in a professional. If cracks, sagging, or widespread damp affect large areas, call a pro—these issues can hide structural problems or compromised wall insulation.
A contractor will assess framing, moisture, and insulation, then recommend repairs before you paint. For extensive surface damage, pros can skim or replaster efficiently, saving time and preventing wasted paint.
They’ll also advise on paint color choices that work with repaired textures and lighting. You’ll avoid recurring issues and costly rework by addressing root causes first; hire experts when damage exceeds your DIY comfort zone.
Budget Methods That Still Look Professional
You don’t need expensive contractors or fancy tools to get a smooth, professional-looking finish; with the right prep, simple materials, and a few careful techniques you can transform rough walls on a budget.
You’ll patch and sand imperfections, apply a quality primer, and use a roller with the right nap. Decorative accents can hide minor flaws, and smart color coordination makes surfaces read smoother.
Focus on technique over cost: controlled strokes, thin skim coats, and proper drying time.
- Patch and sand high spots
- Use bonding primer and flexible filler
- Roll with consistent pressure
- Add accents and trim for polish
Pro Time-Savers for Smoothing Large Rooms
When you’re tackling a large room, prep with power tools—sanders and orbital grinders cut hours off of hand-sanding.
You’ll also want to apply high-coverage skims or a pros’ skim coat mix to level broad areas quickly.
Together, those steps make smoothing big walls far faster and more consistent.
Prep With Power Tools
Although it takes extra setup, prepping rough walls with power tools slashes the time and effort required to get a smooth surface in a large room. You’ll speed through sanding, patching, and edge work using an orbital sander, drywall sander, and a rotary tool for corners.
Plan color coordination and furniture placement before you start so you mask areas efficiently and protect finishes. Wear proper PPE and ventilate the room.
Use drop cloths and tape to contain dust, and work methodically from top to bottom.
- Choose the right sanding grit
- Protect trim and fixtures
- Control dust with a vacuum
- Inspect progress frequently
Use High-Coverage Skims
After the power tools have knocked down texture and dust’s been contained, swapping to high-coverage skims will speed smoothing across large rooms. You’ll work faster with pre-mixed, high-build joint compounds or skim-coat products that level imperfections in fewer passes.
Apply thin, even coats with a wide trowel or roller, feathering edges to avoid ridges. Let each coat dry fully and perform quick moisture testing before sealing to prevent adhesion issues.
Sand only where necessary; less sanding saves time and keeps dust down. For best results, match product choice to your substrate and follow manufacturer drying and recoat guidelines.
Common Mistakes That Make Rough Walls Worse
Ever wonder why your paint job ends up highlighting every bump and groove? You’re likely making avoidable errors that exaggerate texture. Skipping proper prep, using low-quality primer, or applying too-thick coats all backfire.
Ever notice paint emphasizing every bump? Poor prep, cheap primer, and heavy coats make texture scream—fix your process.
Also, misusing decorative accents or ignoring color psychology can draw attention to flaws instead of camouflaging them. Fix habits now.
- Painting over dust and loose plaster
- Relying on glossy finishes in textured areas
- Applying heavy paint instead of skim-coating
- Neglecting sanding and proper priming
Catch these mistakes early, and your smooth-wall goals become realistic instead of repeatedly disappointing.
Quick Troubleshooting: Uneven Sheen or Show-Through
If your new finish looks patchy or has shiny streaks, you’re probably dealing with uneven sheen or show-through—issues that betray problems in prep, product choice, or application. You’ll check for thin spots, glossy roller marks, or underlying stains. Fix by sanding high-sheen areas, applying a stain-blocking primer, and using consistent nap rollers. For texture enhancement, feather joint compound evenly before repainting. Test small patches for color matching and sheen under real light. Empathy helps: frustrating results are solvable.
| Frustration | Action | Relief |
|---|---|---|
| Visible streaks | Sand & prime | Calm |
| Ghosted stains | Stain block | Confidence |
Final Checklist to Inspect and Finish Your Smoothed Walls
You’ve fixed sheen issues and blocked stains, so now give the whole wall one last, systematic inspection before calling the job done. Walk slowly, feel for texture, and use raking light to spot low spots, missed sanding, or residue.
Confirm color matching at different angles and in natural light. Test a small patch for your chosen decorative finishes to ensure adhesion and effect.
Finally, clean trim, reinstall hardware, and document any touch-ups needed.
- Check texture consistency and smooth progression.
- Verify color matching across all sections.
- Test decorative finishes in a discreet area.
- Note and address tiny blemishes immediately.
Frequently Asked Questions
Can I Paint Over Wallpaper Without Removing It First?
You can, but you shouldn’t always; wallpaper removal is usually best. If you proceed, focus on surface preparation: clean, repair seams, prime with an adhesion primer, and use durable paint so the finish stays intact and doesn’t peel.
How Do I Match New Skim-Coat Color to Existing Wall Tint?
You match new skim-coat color by tinting primer or skim mix to the wall’s hue, testing small patches, and using color blending and texture matching techniques so the repaired area visually disappears; adjust tint until it blends seamlessly.
Can I Smooth Walls With a Dehumidifier to Speed Drying?
Yes — using a dehumidifier can help: studies show moisture removal can cut drying time by up to 50%. You’ll monitor wall moisture levels, optimize dehumidifier efficiency, and avoid over-drying or trapping moisture below surfaces.
Will Smoothing Techniques Affect Room Acoustics?
Yes — smoothing alters acoustic impact because flatter surfaces reflect sound more, reducing sound absorption by textured irregularities; you’ll notice livelier reflections and less diffusion, so consider adding soft furnishings or absorptive panels to compensate.
Are There Low-Voc Options for Joint Compounds and Primers?
Imagine a stressed parent choosing a nursery paint; yes, you can find Low VOC options for joint compounds and Eco friendly primers. You’ll spot brands like Benjamin Moore Natura and USG Sheetrock Low VOC compounds that reduce odors.
Conclusion
You’ve got this—think of the work as your own restoration, like a conservator revealing a painting beneath grime. Pick sanding, skim-coating, or spot-fixing based on texture and damage, follow prep steps, and use proper lighting and ventilation. Avoid common mistakes, and troubleshoot sheen or show-through before final coats. Step back, inspect with the checklist, and enjoy the smooth result: your room, renewed and ready, like a familiar story freshly told.