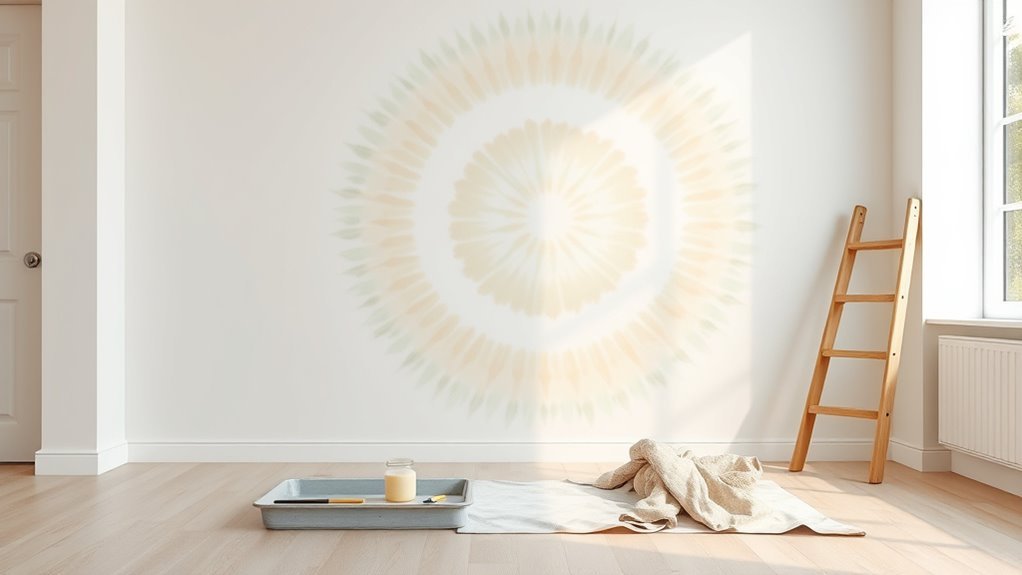
How to Paint Tie Dye on a Wall (Creative Wall Idea)
You can create a bold tie-dye wall by choosing a mood-based palette, prepping the surface, and layering diluted latex paints with sponges, brushes, and spray bottles for soft blends and crisp bursts. Work from light to dark, test mixes on cardboard, and use glaze or clear coat to unify tones and protect the finish. Match technique to wall texture—smooth walls take softer fades, textured ones hold more pattern. Keep going to learn step-by-step tools, timing, and color tips.
What Type of Content Is This and Who Is It For?
What kind of guide is this, and who’ll get the most from it? You’re getting a practical, creative how-to that mixes design basics with hands-on tips for painting a tie-dye wall.
You’ll learn how color psychology influences mood so you can choose hues that fit a room’s purpose. The guide also points out how wall texture affects paint behavior and final appearance, helping you prep surfaces correctly.
It’s aimed at confident DIYers, renters with removable options, and creatives wanting bold accents. You won’t need professional experience—just patience, basic tools, and a willingness to experiment thoughtfully.
Quick Answer: How to Paint a Tie-Dye Wall in Six Steps
If you want a bold, playful wall without overcomplicating the process, follow these six straightforward steps: prep the surface, choose and mix your colors, base-coat the wall, apply the tie-dye pattern with brushes and sponges, blend and soften edges, then seal or safeguard the finished design.
Follow six simple steps—prep, mix, base-coat, brush and sponge the tie-dye, blend edges, then seal.
You’ll consider color psychology when selecting hues and account for wall texture to guarantee even application. Work from light to dark, layering transparent washes. Use sponges for mottled effects and small brushes for defined spirals.
Finally, protect the paint with a clear matte or satin sealer to preserve vibrancy.
- Plan
- Layer
- Seal
Best Rooms for a Tie-Dye Feature Wall
A tie-dye feature wall can bring playful color to a kid’s bedroom, making a cozy reading nook or bedding area pop.
You can also use a bold tie-dye pattern as a living room statement to anchor seating and artwork.
Think about scale and color intensity so the wall fits the room’s function and vibe.
Kid’s Bedroom Accent
When you want to brighten a child’s room without repainting the whole house, a tie-dye accent wall gives you playful color and personality in one splashy move. You can tailor hues to toys and bedding, and use patterns that grow with them.
Consider interior lighting to make colors pop and check wall texture—smooth walls show spirals best, while textured surfaces add depth.
Prep, sample, and protect furniture. Keep designs age-appropriate but adaptable.
Use this quick checklist:
- Choose washable paints.
- Test colors under room lights.
- Seal with a clear, durable finish.
Living Room Statement
Why not let your living room make a bold, artistic statement with a tie-dye feature wall that anchors the space and sparks conversation? You can choose a centered mandala or radial design to preserve pattern symmetry, drawing eyes toward a sofa or media unit.
Pick colors that complement upholstery and art, and test samples under your lighting.
Prep the wall texture—sand and prime glossy surfaces, fill holes—to guarantee paint adheres and colors blend smoothly.
Use painter’s tape for crisp edges, work from center outward, and finish with a clear matte sealer so your living room stays vibrant and wearable.
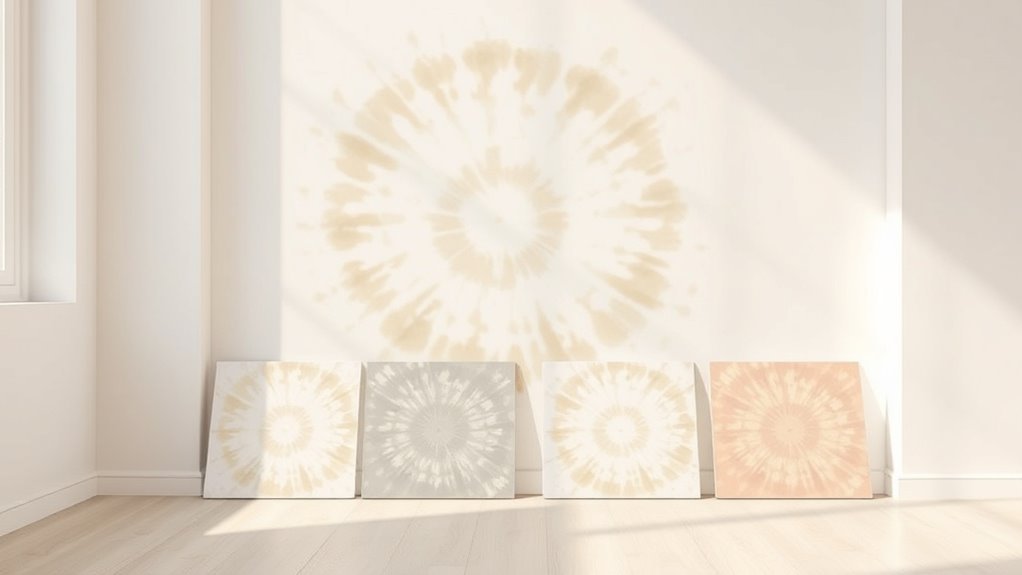
Choose a Color Palette for a Tie-Dye Wall
Start by picking colors that work together—think complementary or analogous schemes to guarantee harmony.
Then add contrast with a bold accent hue or a few darker/lighter tones to keep the pattern lively and balanced.
Trust your eye and tweak until the combination feels vibrant but not chaotic.
Color Harmony Basics
Although a wild mix of hues can look fun, choosing a harmonious palette will make your tie-dye wall feel intentional and balanced. You’ll pick colors that flow, plan Color blending steps, and limit Shade contrast to avoid chaos.
Start with a base hue, add two supporting tones, and test small swatches on paper. Use this simple guide for clarity:
- Pick a dominant color for mood.
- Choose a secondary color that complements.
- Add an accent sparingly for pops.
You’ll work in layers, blend wet edges for seamless progression, and adjust saturation until the wall reads cohesive.
Contrast And Balance
When you pick colors for a tie-dye wall, balance contrast so areas of high energy have nearby calm to rest the eye. Too many bright contrasts will feel chaotic, while too little makes the design flat.
You’ll choose hues that create color contrast without overwhelming the room: pair saturated spots with muted tones, or warm bursts with cool washes. Plan focal zones and use softer rings or neutrals around them to achieve visual balance.
Test small swatches on cardboard, view them in different light, and adjust saturation. This disciplined approach keeps your tie-dye vibrant yet harmonious on a wall.
Pick Paint Types for Vibrant Tie-Dye Effects
Because color and finish determine how vivid your mural reads from across the room, choose paints with high pigment load and a finish that suits the look you want. You’ll prioritize color saturation and plan paint layering to build intensity without muddying hues.
Select quality acrylic or latex wall paints formulated for good coverage and fast drying. Consider using artist-grade pigments for small highlight mixes. Keep colors pure, test blends, and use thin layers to control shifts.
Remember edge control for crisp swirls and wet-on-wet for soft fades.
- Pick high-pigment base colors
- Test blends first
- Layer thin coats
Select Finishes: Matte, Eggshell, Satin, or Gloss
Think about how finish choice affects both durability and how your colors pop.
Matte hides imperfections and gives rich, subdued tones but won’t stand up to scrubbing as well as satin or gloss.
If you want brighter, shinier colors and easier cleaning, choose satin or gloss; eggshell sits comfortably in the middle.
Finish Durability Comparison
If you want your tie-dye wall to stay vibrant and resist wear, choosing the right finish matters—matte hides imperfections but scuffs more easily, eggshell offers modest durability with low sheen, satin balances washability and subtle luster, and gloss gives the toughest, most washable surface while highlighting texture.
You’ll weigh Finish durability against paint longevity: gloss and satin protect colors during cleaning, eggshell suits low-traffic spaces, matte fits textured or artistic effects.
Consider how often you’ll touch or clean the wall, then pick accordingly. Prioritize maintenance needs with this quick checklist:
- High traffic: gloss/satin
- Moderate: eggshell
- Low traffic: matte
Sheen Impact On Colors
When you choose a sheen for your tie-dye wall, remember it changes how colors look more than you might expect. You’ll pick matte for soft, muted tones; eggshell for gentle sheen; satin or gloss to boost vibrancy. Consider sheen variations and how they affect color saturation: higher sheen reflects more light, making dyes pop but revealing imperfections. Lower sheen hides texture and deepens hues subtly. Test small patches under your room’s light before committing. Share the mood you want—subdued, cozy, luminous—and let finish guide your final choice.
| Matte | Eggshell | Satin/Gloss |
|---|---|---|
| Soft | Warm | Bold |
Gather Basic Tools for a Tie-Dye Wall
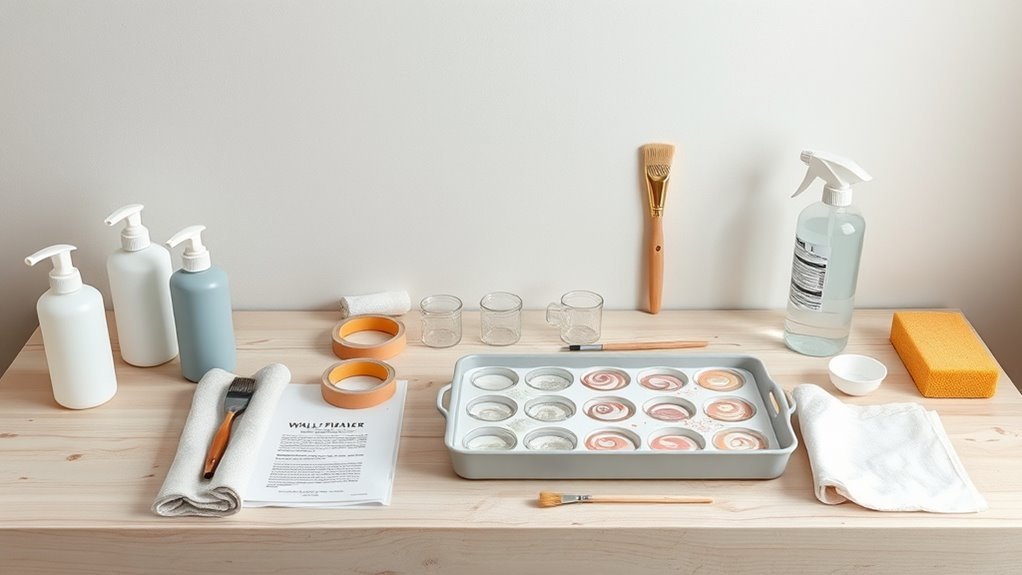
Before you start painting, gather the essential tools so your tie-dye wall goes smoothly: drop cloths, painter’s tape, several sizes of brushes and foam rollers, a palette or trays for mixing, buckets for cleaning, high-quality acrylic or latex paints in chosen colors, extension poles, sponges or rags, and a ladder or step stool if you’ll reach high areas.
Gather essential tools—drop cloths, tape, brushes, rollers, paints, trays, and ladders—to make your tie-dye wall go smoothly.
Keep tools organized and practice basic DIY techniques to get consistent blends. Clean brushes and rollers promptly for proper tool maintenance.
Consider these priorities:
- Prep and protection
- Paint selection and mixing
- Clean-up routine and storage
Optional Tools: Sprayers, Airbrushes, and Texture Sponges
You’ve got the basics covered, but adding optional tools can lift your tie-dye wall from good to gallery-ready. Use a handheld sprayer for soft gradients and quick coverage, controlling dilution to avoid unwanted chemical reactions with finishes.
An airbrush gives precise fades and splatter-free blends; practice on scrap before committing. Texture sponges add organic blooms and tactile depth—dab lightly, layer colors, and consider how color psychology influences mood: cool blends calm, warm bursts energize.
Wear a mask, test compatibility with primers, and clean equipment promptly to keep colors accurate and tools performing for future projects.
Estimate Paint Quantity by Wall Size
A quick way to estimate how much paint you’ll need is to calculate your wall’s square footage and match it to the paint’s coverage rate, so you won’t run out mid-project. Measure width × height, subtract windows and doors, then check the can for coverage per gallon.
Consider Color psychology when choosing hues—lighter colors often need fewer coats than deep pigments.
Paint texture affects spread; thicker texture or heavy glazes use more.
Use this simple checklist:
- Calculate total square footage.
- Check paint coverage (sq ft per gallon) and adjust for coats.
- Add 10–15% for texture and waste.
Prepare Your Wall: Cleaning, Repairing, and Priming
Before you start painting, clean and degrease the wall so the colors will adhere evenly.
Patch any cracks or holes, sand smooth, and remove dust.
Finally, apply a suitable primer to seal repairs and give your tie-dye colors a true base.
Clean And Degrease
Since dust, grease, and residue will keep paint from sticking, start by wiping the wall with a mild degreaser and a clean cloth. Work top to bottom, rinsing and letting the wall dry so you can assess surface texture before any repairs. Remove any waxy buildup, nicotine, or oil stains that repel finish. Also check nearby paint storage—spills can mark primed areas.
- Use a pH-neutral cleaner for painted walls.
- Scrub greasy spots with a degreasing sponge.
- Rinse thoroughly and air-dry.
You’ll end up with a clean, consistent base that helps colors adhere evenly.
Patch And Prime
Now you’ll patch and prime any imperfections so paint lays down smoothly and your tie-dye effect reads true. Inspect for dents, nail holes, and cracks; scrape loose paint and sand edges smooth.
Mix lightweight spackle for small repairs and use joint compound for larger gouges, feathering edges so texture patterns blend. Once dry, sand again to match surrounding wall textures.
Wipe dust with a damp cloth and let dry. Apply a quality primer suited to your substrate and previous finish—stain-blocking if needed—to guarantee color vibrancy and adhesion.
Let primer cure fully before marking out your tie-dye design.
Mask and Protect Floors, Furniture, and Trim
Cover the room thoroughly so paint doesn’t ruin floors, furniture, or trim. You’ll set up floor protection with drop cloths or rosin paper, tape seams, and weight edges. Use furniture covering—plastic sheeting or old sheets—and move small pieces out of the way.
Mask baseboards, window sills, and door trim with painter’s tape to keep clean lines. Keep a damp rag and small brush nearby for quick touch-ups.
Remember to ventilate and work from top to bottom so drips land on protected areas.
Final checklist:
- Secure floor protection
- Cover furniture covering
- Tape trim seams
Create a Sketch: Where to Place Your Spiral Centers
Start by measuring the wall center so your main spiral sits balanced and eye-catching. Mark a few additional focal points across the wall to create movement and avoid a single, static spot.
Also consider where furniture will sit so spirals aren’t hidden or interrupted by sofas, shelves, or lamps.
Measure Wall Center
Before you pick up a paintbrush, measure and mark the wall center so your spiral will sit exactly where you want it; a simple sketch with measured guidelines will save time and prevent awkward off-center designs.
Use a tape measure and level to find horizontal and vertical midpoints, noting any interruptions like outlets.
Consider wall texture when planning—rough surfaces change how lines look.
Also plan ventilation to minimize paint fumes while you work.
Sketch lightly with pencil, then mark the spiral center with painter’s tape.
Follow this quick checklist:
- Measure height and width
- Level center point
- Mark with tape
Mark Multiple Focal Points
If you want a multi-spiral tie-dye wall, sketch where each spiral center will go and mark them with painter’s tape—think about balance, sightlines, and how the design will flow around furniture or fixtures.
Place focal points asymmetrically for movement or evenly for calm, using color psychology to decide warm or cool center tones.
Note wall texture: smoother surfaces give crisper spirals, textured ones diffuse edges.
Measure distances between centers so spirals overlap harmoniously without crowding.
Step back often while marking tape, adjust until the composition reads well from key viewpoints, then trace lightly before painting.
Consider Furniture Placement
Wondering where to place spiral centers so your tie-dye wall complements the room? Sketch the room and note furniture arrangement and wall mounting needs.
Think about sightlines, TV glare, and how a spiral interacts with a sofa or bed headboard. Place spirals so they balance heavy pieces and avoid covering mounting spots.
- Center a spiral above main seating at eye level.
- Offset a secondary spiral near side tables or lamps.
- Keep 12–18″ clearance from TVs or wall mounting brackets.
Adjust placement on your sketch until the design feels balanced with existing furniture arrangement and fixtures.
Tape Guides and Use Chalk for Layout Lines
When you’re ready to map your tie-dye pattern on the wall, use painter’s tape to create crisp guide lines and chalk to sketch the spiral or radial layout—tape keeps edges sharp and chalk wipes away if you need to adjust.
Measure from a central point, mark radiating lines, and run tape along those lines to protect neighboring zones.
Test chalk on a hidden area to see how wall texture affects visibility and wipeability.
Think about color psychology as you plan zones—warm hues toward focal points, cool shades to recede.
Remove tape slowly after paint dries to reveal clean, intentional lines.
Choose and Apply a Base Coat to Boost Color
Start by picking a primer suited to your wall material so colors grab and last.
Then choose a vibrant base shade that will make your tie-dye hues pop.
Apply even, thin coats and let each layer dry fully for consistent, rich color.
Pick The Right Primer
Because a bright, even base makes colors pop and prevents bleed-through, choosing the right primer is one of the most important steps before you paint your tie-dye wall. You’ll pick a primer that enhances priming adhesion and matches your paint viscosity for smooth application.
Look for stain-blocking, high-adhesion formulas on drywall or previously painted surfaces. Apply thin, even coats and sand lightly between coats for a flawless surface.
Consider these quick checks before you start:
- Surface type (drywall, plaster, previously painted)
- Primer finish and drying time
- Compatibility with your chosen paint system
Choose A Vibrant Base
Want your tie-dye hues to sing? Choose a vibrant base that complements your palette and considers color psychology—warm bases amplify energy, cool bases calm. Pick a base shade that enhances contrast without overpowering your planned dyes. Test swatches under room lighting to see how saturation shifts.
Smooth, sanded wall texture reflects evenly; rough texture can mute brilliance, so repair or prime rough spots first. Use a high-quality, pigmented base for true depth and apply it where colors will overlap to prevent muddiness later.
Let the base cure fully; a stable foundation makes your tie-dye pop.
Apply Even, Thin Coats
When you apply your base coat, work in thin, even layers so pigments lay smoothly and won’t drip or pool. You’ll control paint consistency by thinning slightly if it drags; aim for cream-like flow. Use a light brush technique — long, overlapping strokes — to avoid brush marks.
Let each coat dry fully before the next; rush and you’ll trap tacky layers. For reliable coverage, follow this simple checklist:
- Thin paint to desired consistency.
- Use steady, overlapping strokes with your brush.
- Wait full dry time between coats.
This approach yields a vibrant, even foundation for your tie-dye wall.
Mix Custom Colors and Test Swatches
Once you’ve chosen your base hues, mix small batches to find the exact tones you want, keeping notes on ratios so you can recreate them later. Test each mix on poster board or scrap drywall to evaluate color blending under your room’s light. Label swatches with pigment ratios and let them dry fully so you can judge finish and saturation.
Experiment with texture application by brushing, sponging, or stippling swatches to see how techniques alter appearance. Compare swatches side by side to decide progressions and contrast. Keep samples until the full wall palette is finalized so you match colors consistently during painting.
Dilute Paint and Choose Binders for Soft Fades
If you want soft, seamless fades, dilute your paint to a slightly milky consistency so it flows and blends without losing coverage. You’ll control color blending by testing ratios—too thin loses opacity, too thick resists merging.
Pick binders that keep pigments flexible and allow reworking: acrylic medium for fast tack, glazing medium for extended open time, or fabric medium for softer edges.
Use a limited palette and small mixes to maintain harmony. Follow these steps:
- Start with 10–20% water or medium.
- Increase binder for tack or open time as needed.
- Test on cardboard before the wall.
Make a Simple Spray Bottle or Sponge Applicator
Before you start spraying, gather a clean spray bottle and a few kitchen sponges so you can control mist and texture with minimal fuss.
Fill the spray bottle with thinned paint and a little water, shaking gently to mix; test spray on cardboard to gauge droplet size.
Cut sponges into wedges for varied edges, dampen slightly so they don’t soak paint, and press or dab in circular motions to build soft halos.
Use the spray bottle for fine mist blends and the sponge applicator for concentrated bursts and texture.
Clean tools between colors to avoid muddy mixes and keep edges crisp.
Use Brushes and Rollers for Tie-Dye Shapes
Grab a variety of brushes to create crisp lines and soft feathered strokes that form your tie-dye motifs. Use rollers to lay down broad color fields, then lightly back-roll or blend edges with a dry brush for smooth shifts.
Practice pressure and angle control so your strokes and roller passes read as intentional shapes, not smudges.
Brush Stroke Techniques
While you can get bold swirls with a foam roller, using a mix of brushes and rollers gives you finer control over tie-dye shapes and texture. You’ll use brush techniques to paint petals, waves, and feathered edges, adjusting pressure for thin or thick strokes. Focus on color blending at stroke edges so hues meld smoothly without muddying. Clean brushes between shifts to keep tones crisp. Practice wrist motion for consistent arcs.
Try these simple approaches:
- Light fan strokes for soft halos.
- Short dabs for speckled transitions.
- Long curved pulls for radial bursts.
Work deliberately and step back often to assess.
Roller Blending Tips
When you want seamless tie-dye progressions, combine rollers for broad coverage and brushes for precise blending so colors flow without harsh lines.
Start with diluted paints to build soft color gradients, rolling large swaths lightly.
Load a small brush to feather edges where hues meet, using short, overlapping strokes.
Work wet-on-wet to let pigments merge; switch to dry blending for sharper bands.
Use a foam roller for even application and a round brush for circular motifs.
Clean tools between tones to avoid muddiness.
Step back often to assess balance, adjusting with subtle Brush techniques to perfect passages.
Create the Classic Spiral Tie-Dye Pattern on a Wall
Before you start painting, choose the wall section for your spiral and mark the center point with a small dot or piece of painter’s tape; this will be your anchor for all the twisting and color placement.
Stand back, plan your arms for even arcs to maintain Spiral symmetry, and pick 3–4 colors focused on Color blending.
Use a chalk line or light pencil to draw guiding spiral arms from the center outward.
Work in wedges, applying paint in thin layers and feathering edges with a damp brush.
Keep strokes consistent, rotate your body as you paint, and step back often to check balance.
- Plan
- Guide
- Feather
Layer Concentric Rings for Blended Color Transitions
After you finish the spiral arms, start building concentric rings around the center to blend colors smoothly and reinforce the pattern. Work outward in even bands, alternating hues and slightly overlapping edges to achieve seamless color blending.
Use a soft brush or sponge to feather progressions where rings meet so pigments merge without harsh lines. Keep each ring’s width consistent for balance, but vary saturation to add depth.
Step back often to judge symmetry and tweak edges. Let sections dry enough to avoid muddying, then layer additional thin washes for richer tones within the concentric circles framework.
Create Ombré Fades That Radiate From a Center Point
Choose a harmonious palette and plan where each hue will sit around your center so the strongest color anchors the design.
Use soft brushes, sponges, or a damp rag to feather edges and work quickly while paint is wet for smooth ombré fades.
Practice pressure and stroke direction to control how colors blend as they radiate outward.
Color Selection And Placement
When you plan an ombré radiating from a center point, think in color families and value shifts so each ring blends smoothly into the next. You’ll choose hues that follow Color psychology—warm for energy, cool for calm—while considering Wall texture, which can affect saturation and sheen.
Place darker values near the center for depth or at the edge for expansion. Balance complementary accents sparingly to avoid chaos. Prioritize contrast progression so each band reads distinct yet connected.
- Map hues by value.
- Test small swatches.
- Adjust for texture and light.
Keep placement deliberate and simple.
Blending Techniques And Tools
If you want smooth ombré fades that radiate from a center point, focus on controlled layering and the right tools—soft brushes, foam rollers, and damp sponges—to move pigment gradually between rings. Start with thin washes, building saturation outward while you wet edges slightly to help pigments sweep together.
Practice color mixing to anticipate midtones and avoid muddy gradients; test blends on cardboard before you touch the wall. Pay attention to tool ergonomics—choose handles and grips that reduce fatigue so your strokes stay steady.
Finish with light feathering strokes and occasional stippling to unify rings into a seamless, radiating fade.
Make Multiple Overlapping Spirals for a Boho Look
Because overlapping spirals create depth and movement, start by lightly sketching three to five interlaced centers across the wall so you can balance size and spacing before you paint.
You’ll use Color blending to soften intersections and maintain Spiral symmetry where spirals meet. Work outward from each center, alternating hues and feathering edges so overlaps read as intentional layers.
Keep brushes and sponges handy to control edges.
Follow this simple sequence:
- Map centers and rough arcs.
- Paint base spirals, blending at overlaps.
- Refine edges and add highlights for cohesion.
Step back often to confirm the boho composition feels balanced.
Achieve Marbled and Scrunched-Fabric Effects With Rags
While you press and twist rags into crumpled shapes, you’ll create organic marbling and textured scrunch effects that mimic fabric dyeing—perfect for a relaxed, boho wall.
Dip assorted rags into diluted paint, blot gently, then press onto the wall in random patches. Twist or scrunch each rag as you press to vary lines and pools of color.
Lift carefully to reveal marbled blends and subtle textile patterns inspired by actual fabric dyeing. Layer translucent washes for depth, let sections dry between passes, and step back often to balance contrast and rhythm across the surface.
Use Stencils and Masks to Add Crisp Shapes to Tie-Dye
When you want to introduce sharp, repeatable motifs into your tie-dye wall, stencils and masks give you crisp edges and controlled contrast that complement the soft, marbled fields. You’ll cut or buy shapes, secure them, and spray or sponge paint to layer geometric or organic motifs over your base.
Use durable materials so edges don’t bleed and test opacity on scrap. Stencils bridge wall painting and fabric patterns inspiration from Textile art, letting you echo cloth motifs at scale.
Choose durable stencils, test opacity on scraps, and borrow textile motifs to scale cloth-inspired patterns across your wall
Quick tips:
- Press edges flat for crisp lines
- Work light layers for control
- Remove masks while paint’s tacky for clean release
Blend Colors Without Muddying Them
Start with light washes so you can build intensity without overpowering neighboring hues.
Layer colors gradually and blend soft edges with a dry brush to keep tones clean.
Rinse or switch to a clean brush between colors to prevent muddying.
Start Light, Layer Gradually
Because tie-dye relies on translucent washes, begin with thin, pale layers so you can build intensity without turning hues muddy. You’ll control color blending by glazing—dilute paint, apply softly, let dry, then repeat. Paint layering preserves luminosity and prevents brownish mixes. Work from light to dark, stepping back to judge overlap and adjust saturation.
Use soft brushes or sponges and mist water sparingly to encourage flow without loss of vibrancy.
- Start with thinned base washes.
- Add mid-tones after drying.
- Intensify edges last.
Be patient: gradual layers give you clean progressions and bright, true colors.
Use Clean Brushes Between Colors
As you build layers, keep a fresh brush for each major hue so colors stay bright and clear—rinse brushes thoroughly between uses and blot them dry before picking up a new pigment. You’ll avoid muddy progression by practicing strict brush maintenance: use separate containers for rinsing, rotate brushes during paint layering, and wipe ferrules to prevent color carryover. Work from light to dark, cleaning brushes when switching complementary or high-contrast tones. Quick tests on scrap paper help. Enjoy the process—clean tools keep your tie-dye wall crisp and vibrant.
| Tip | Action | Frequency |
|---|---|---|
| Rinse | Use warm water | After each color |
| Dry | Blot on towel | Immediately |
Time Drying Between Layers to Control Blending
If you want crisp edges between colors, let each layer dry fully before adding the next; if you prefer softer shifts, work while the previous layer is still tacky so pigments bleed slightly. You’ll manage drying time and layer control by watching surface tack and humidity. Use thin coats to speed drying, thicker ones to slow it.
For crisp edges, let each coat fully dry; for soft blends, layer while tacky and test first.
- Wait 20–60 minutes for thin coats.
- Allow several hours for thicker applications.
- Use a fan or dehumidifier to adjust speed.
Test on a scrap board first. Keep notes of times and conditions so you repeat effects reliably without overworking the wall.
Correct Mistakes: Lifting, Repainting, and Touch-Ups
If a color lands wrong, gently lift wet paint with a damp cloth or a soft brush before it dries.
For dried mistakes, repaint only the small affected area and let it dry fully before blending.
Finish by feathering the edges so your touch-ups disappear into the surrounding tie-dye.
Lift Paint Carefully
When a color goes wrong or the edges get muddied, act quickly to lift the paint before it dries fully. You’ll protect paint protection layers and preserve wall texture by working fast and gentle.
Blot excess with a damp microfiber, then use a soft brush or sponge to coax pigment away without scrubbing.
- Dab excess outward, don’t smear.
- Rinse tools often to avoid re-depositing color.
- Feather edges with clean water to blend.
Finish by letting the area dry, then evaluate under good light. If staining remains, repeat lifting steps before considering any repainting.
Repaint Small Areas
After you’ve lifted as much stray pigment as possible and the spot’s dry, you’ll often find that a small touch-up will restore the pattern best.
Match your replacement hue using careful color mixing on a palette, testing on scrap cardboard until it reads right under room light.
Use a small brush or sponge to apply paint only to the removed area, considering nearby wall textures so your stroke mimics the original finish.
Feather edges lightly to avoid hard lines, but don’t overwork wet paint.
Let layers dry completely between coats, then step back and evaluate under different lighting before declaring the repair finished.
Blend Seamless Touch-Ups
Because small corrections can stand out against a complex tie-dye wall, you’ll want to blend touch-ups so they vanish into the surrounding pattern; this means matching color, texture, and edge softness precisely.
You’ll first lift any stray paint gently, feathering edges with a damp sponge. Mix pigments by eye, considering color psychology to maintain mood. Match wall texture with stippling or glazing techniques, then apply thin layers, building depth. Sand lightly between coats if needed.
Follow this quick checklist to keep fixes invisible:
- Match hue and value.
- Mimic wall texture.
- Soften edges and layer subtly.
Add Metallics, White Highlights, or Black Outlines
Now bring in metallics, white highlights, or black outlines to make the tie-dye pop and give the mural depth. You’ll use metallic accents sparingly—thin strokes or dots catch light without overpowering colors.
Add white highlights to mimic sheen and lift softer areas; apply with a small brush and blend edges so they read natural. For definition, paint black outlines selectively around swirls or shapes to enhance contrast, then soften with a dry brush if too harsh.
Step back often to judge balance. Let each element support the tie-dye rhythm; keep interventions minimal so the pattern remains vibrant and cohesive.
Seal Your Tie-Dye Wall: When and What Sealer to Use
Those finishing touches will look best and last longer if you seal the wall properly, so pick the right sealer and timing before you call the job done. You’ll choose between matte, satin, or gloss depending on sheen preference; consider compatibility with your paint.
Apply sealer after paint fully cures—usually 24–72 hours. Use proper application techniques: light, even coats, keep a wet edge, and avoid drips.
- Test Sealer options on a scrap area.
- Use a high-quality synthetic roller for even laydown.
- Wait recommended recoat time on the label.
Seal once cured to protect color and texture.
Lighting to Show Off Tie-Dye Wall Colors
Place your tie-dye wall where natural light can hit it at different times of day to let the colors shift and glow.
Use accent lighting—like adjustable spotlights or LED strips—to highlight focal swirls and add depth.
Pick color temperatures carefully (warm for cozy reds and oranges, cool for blues and greens) to keep hues true and vibrant.
Natural Light Placement
Wondering where natural light will best show off your tie-dye wall? Position the mural where natural light hits for most of the day, avoiding harsh midday glare that washes colors. Consider these placement tips:
- East-facing walls for soft morning warmth.
- North-facing walls for steady, cool illumination.
- South- or west-facing walls only if filtered by curtains or trees.
You’ll use light placement to enhance gradients and saturation without extra fixtures. Test during different hours, tape small color swatches, and observe shifts.
Adjust surrounding decor—reflective surfaces and window treatments—to control intensity so your tie-dye stays vibrant and balanced.
Accent Lighting Techniques
If you want your tie-dye wall to pop after sunset, accent lighting will make the colors sing without overpowering them. Position slim LED strips or adjustable spotlights to graze the surface, enhancing texture and creating lighting ambiance that complements your palette.
Use dimmers to balance intensity so hues glow instead of glare. Angle fixtures to produce gentle shadow effects that add depth and highlight swirls without obscuring details.
Layer low-profile uplights with subtle downlights for contrast, and test placements from multiple viewing spots. Keep wiring discreet and choose fixtures with narrow beams to preserve the artwork’s vibrancy.
Color Temperature Choices
Accent lighting sets the stage, but the color temperature you choose will determine how your tie-dye hues read in the room. You’ll want cooler bulbs to sharpen blues and purples, and warmer bulbs to deepen reds, oranges, and yellows.
Consider color psychology and the emotional impact you want: calm, energetic, or cozy. Test bulbs before installing to avoid surprises. Use dimmers to tweak atmosphere throughout the day.
Try combinations for layered effects:
- Warm (2700–3000K) for cozy, rich tones.
- Neutral (3500–4100K) for balanced, true colors.
- Cool (5000–6500K) for vivid, crisp contrasts.
Choose Furniture and Decor That Complement a Tie-Dye Wall
When you pick furniture and decor for a tie-dye wall, aim for pieces that balance its energy rather than compete with it. You’ll focus on Furniture harmony and Decor coordination: choose neutral sofas, simple wood tones, and a few accent cushions that echo one tie-dye hue. Keep large pieces low-key and let smaller items reference pattern colors. Use texture rather than busy prints to ground the room. Consider scale and negative space so the wall remains the focal point.
| Item | Role |
|---|---|
| Neutral sofa | Anchor |
| Wood table | Warmth |
| Accent pillows | Echo color |
| Rug | Texture |
Tie-Dye Tips for Small Walls and Hallways
After choosing furniture that lets your tie-dye wall sing, think about how the same principles change in tight spaces like small walls and hallways. You’ll adapt your tie dye technique to scale and sightlines, keep colors restrained, and use vertical patterns to elongate. Consider lighting and wall texture to avoid muddiness.
Think small, purposeful accents rather than full coverage.
- Use thinner bands to fit proportions.
- Limit palette to two or three colors.
- Position focal point near eye level.
You’ll test on scrap boards, tape edges cleanly, and step back often to keep the effect balanced.
How to Scale a Tie-Dye Mural for Large Walls and Ceilings
Because large walls and ceilings demand different proportions and planning, you’ll think bigger in pattern, color, and execution. Begin by sketching scaled grids and full-size stencils so motifs read from a distance.
Choose a limited palette and amplify contrast; large gradients need more paint and gradual blending. Use texture techniques—sponges, dry brushes, and stippling—to add depth without overworking areas.
Plan for lighting effects: stage natural and artificial light paths to highlight swirls and shadows.
Work in sections, scaffold safely, and step back often.
Seal with a matte or satin varnish to unify sheen and protect your mural.
Kid-Friendly Simplified Tie-Dye Wall Ideas
Keep it kid-safe by choosing washable, non-toxic paints so messes stay manageable and cleanup is quick.
Use simple stencils—circles, stars, and spirals—to give kids an easy way to make tie-dye patterns without complex techniques.
Set up interactive color stations with labeled cups and brushes so each child can mix and apply colors independently.
Safe, Washable Paints
Choosing safe, washable paints makes tie-dye wall art kid-friendly and stress-free, so you can let little ones help without worrying about permanent stains. Pick water-based, low-VOC options labeled kid-safe and eco friendly paints to keep air quality good. Test colors on poster board to check color calibration before you commit.
Prep brushes, sponges, and drop cloths, and set clear rules for little helpers.
- Use washable tempera or acrylics for easy cleanup.
- Keep wipes and soapy water nearby.
- Rinse tools immediately to prevent staining and prolong paint life.
Simple Stencil Designs
Now that you’ve picked washable, low‑VOC paints and prepped supplies, try simple stencils to get tie‑dye vibes without messy technique. Choose large, rounded shapes—spirals, sunbursts, hearts—and layer translucent washes so colors blend softly.
Let kids stamp one color, then a second lighter hue for that graduated look.
Mention tie dye symbolism briefly: spirals suggest growth, circles suggest unity; use shapes that fit your room’s tone. Respect cultural influences by avoiding sacred motifs unless you’ll honor their origins.
Finish with a clear sealer to protect art and keep edges crisp, and clean stencils after each session.
Interactive Color Stations
When you set up interactive color stations, you give kids a hands‑on way to build a simplified tie‑dye wall without the mess of traditional techniques. You’ll arrange small bins of washable paint, sponges, and pre‑outlined shapes so each child contributes safely. Use Interactive displays at kid height and clear labels to guide Color mixing choices.
Rotate stations so everyone tries blending, stamping, and layering. Encourage simple patterns and let pieces dry before combining on the wall. Consider a short demo, then supervise.
Benefits are creativity, teamwork, and low cleanup.
- Blending
- Stamping
- Layering
Use Removable Paints or Temporary Murals for Renters
If you rent and don’t want a permanent commitment, removable paints and temporary mural options let you get the full tie-dye look without risking your deposit. You can apply peel-and-stick murals, wallpaper sheets, or removable vinyl stencils to mimic swirls and color blends.
Check wall texture first—very rough or textured walls may prevent adhesion, so test a small patch. Follow manufacturer ventilation considerations during application and drying; open windows or use a fan to disperse fumes.
When it’s time to move, remove slowly and clean residue with approved solutions, leaving your landlord happy and your design temporary.
Eco-Friendly Paint and Low-VOC Options for Tie-Dye Walls
Because you’ll be working with lots of color and layers, choosing low-VOC or zero-VOC paints keeps your room healthier and reduces lingering odors while still delivering vibrant tie-dye effects. You’ll want paints that use eco friendly pigments and Low VOC formulations to limit toxins and preserve true color.
Pick water-based acrylics or natural milk paints, test swatches, and layer transparently for that blended look. Consider these quick tips:
- Start with a zero-VOC primer for adhesion.
- Use washable, water-based pigments for mixing.
- Seal with a low-VOC matte clear coat to protect finish without fumes.
Budget-Saving Tips and Where to Splurge for Impact
Choosing low‑VOC paints helps keep your project healthy, but you can still save money without sacrificing impact. Prioritize splurging on quality primers and one good brand of paint for vivid color payoff; cheap base coats can make colors muddy.
Choose low‑VOC paints and splurge on primer plus one quality paint brand for truer, more vivid color.
Use affordable tools—rollers, trays, drop cloths—and borrow specialty items like sprayers.
Plan color psychology to pick a focused palette that maximizes perceived depth without extra cans. Test small swatches to see how light and wall texture alter tones.
Reuse painter’s tape and mix custom shades from remnants.
Invest in one standout accent treatment, then finish economically elsewhere.
Step-by-Step Timed Workflow for a Weekend Project
When you’ve allocated a weekend for your tie‑dye wall, map out a timed workflow that breaks the project into clear blocks—prep, priming, base coats, tie‑dye application, drying, and touch‑ups—so you can finish without rushing.
Day 1 morning: prep and prime (2–3 hours).
Day 1 afternoon: lay base coats, plan Color blending and Pattern symmetry (2–3 hours).
Overnight drying.
Day 2 morning: apply tie‑dye layers, refine symmetry (3–4 hours).
Afternoon: final drying and touch‑ups (1–2 hours).
Keep tools organized, label mixes, and allow buffer time for unexpected delays.
- Plan
- Pace
- Inspect
Common Mistakes Beginners Make and How to Avoid Them
If you’re new to painting tie‑dye on a wall, expect a few predictable missteps—uneven blending, overpowering colors, and rushed prep are the usual culprits—and knowing them ahead of time will save time and frustration. You’ll avoid muddy Color blending by testing swatches and working wet‑into‑wet. Don’t overload paint; thin layers prevent drips and eventual paint peeling. Prep properly—clean, prime, and tape—and let layers cure. Stay patient, work systematically, and step back often.
| Mistake | Cause | Fix |
|---|---|---|
| Muddy hues | Too much paint | Test swatches |
| Drips | Overloading | Thin layers |
| Peeling | Bad prep | Prime well |
Troubleshoot Color Bleeding and Streaking Issues
Because wet paint can migrate and blend unpredictably, color bleeding and streaking are the two problems you’ll spot most often on tie‑dye walls—and the good news is they’re usually fixable with adjustments to technique, timing, and materials.
When you see color bleeding or streaking issues, act quickly: blot excess pigment with a dry brush or paper towel, don’t rub. Let layers dry longer between applications and thin paints less; heavier body paint resists running. Seal edges with a light clear coat to lock colors.
Key preventive steps:
- Dry thoroughly between layers
- Use thicker paint or additives
- Blot—don’t drag
Repair Scuffs and Chips Without Redoing the Whole Wall
Although small scuffs and chips might catch your eye, you don’t have to redo the whole mural to fix them; targeted touch-ups can restore the pattern and texture quickly. Clean the area, sand lightly to match wall texture, and apply primer if the substrate shows. Use small brushes or sponges to mimic tie-dye edges, blending colors in thin layers. Ventilate well to avoid lingering paint fumes. Seal with a clear matte coat once dry.
| Step | Action |
|---|---|
| Prep | Clean and sand |
| Prime | Spot-prime exposed areas |
| Paint | Layer and blend carefully |
| Seal | Apply protective coat |
How to Photograph Your Tie-Dye Wall for Social Sharing
When you photograph your tie-dye wall for social sharing, aim for clear, well-lit shots that show color and texture without glare. Position natural light to one side to reveal wall texture and avoid direct flash.
Frame compositions that include a focal spot, furniture accents, or a person to convey scale and color psychology—warm tones feel energetic, cool tones calm.
Use a tripod and low ISO for sharpness. Edit minimally: boost contrast, tame highlights, and preserve saturation.
Follow basic shots:
- Straight-on for pattern symmetry.
- Angled for depth and texture.
- Detail close-up for pigment and finish.
Maintenance Tips to Keep Colors Vivid Over Time
If you want your tie-dye wall to stay bright, set up a simple care routine: keep it out of prolonged direct sunlight, dust it gently every few weeks with a soft brush or microfiber cloth, and avoid harsh cleaners that strip pigment.
When spots appear, spot-clean with a damp cloth and mild pH-neutral soap, testing an inconspicuous area first. Use gentle cleaning techniques—no abrasive pads or solvent-based sprays.
Control room humidity and avoid touching the painted surface. Rotate furniture or art that casts shade to prevent uneven color fading.
Reapply a compatible clear protective topcoat every few years if needed.
When to Call a Pro: Complex Murals and Perfection Jobs
Keeping up your tie-dye wall at home can handle most wear and minor fixes, but some projects are worth calling in a pro. You should hire help when scale, precision, or preservation exceed DIY comfort, especially if the design references historical context or demands attention to cultural significance.
Pros offer technique, scaffolding, color matching, and archival materials. Consider these scenarios:
- Massive wall or multi-story mural.
- Intricate, symmetric patterns needing perfect gradients.
- Restoration or site-sensitive work tied to heritage.
If any apply, get quotes, review portfolios, and communicate the story you want honored before they start.
Creative Variations: Galaxy, Sunburst, and Watercolor Tie-Dye
Although these three variations share the swirled, saturated look of classic tie-dye, you can adapt their techniques to produce distinctly different moods.
For a galaxy wall, layer deep blues, purples, and speckled white for stars; use sponging and splatter to suggest depth, then adjust mood lighting to enhance shimmer.
Sunburst relies on radial gradients—warm yellows to oranges—applied with feathered brushes so the wall texture reads softly.
Watercolor tie-dye washes diluted pigments, letting colors bleed; work wet-on-wet and blot gently to control edges.
Test color intensity and finish so each style complements the room’s ambiance.
Pair a Tie-Dye Wall With Wallpaper, Decals, or Art
When you pair a tie-dye wall with wallpaper, decals, or art, think of the painted surface as an energetic backdrop that should either play a supporting or starring role—don’t let competing patterns fight for attention.
Choose pieces that respect Tie dye symbolism and Cultural influences: let motifs echo colors or contrast with solid shapes. Use scale and spacing to avoid clutter.
Honor tie-dye’s cultural symbolism—echo its hues or counter with solids, minding scale and spacing to prevent visual clutter.
Consider these approaches:
- Subtle wallpaper border to frame without overwhelming.
- Large minimalist art to anchor and calm the swirl.
- Small decals arranged sparingly to add whimsy.
Balance is key—decide whether your wall leads or complements.
Cost Breakdown Example for a Single-Bedroom Feature Wall
If you’re planning a tie-dye feature wall for a single bedroom, here’s a concise cost breakdown to help you budget.
You’ll need primer and three colors of paint ($25–$60), brushes, rollers, and sponges ($15–$35), painter’s tape and drop cloths ($10–$25), and optional stencils or masks ($10–$30).
Allow $20–$50 for test samples and cleaning supplies.
If you hire a pro for a half-day, expect $150–$300 labor.
Factor in time costs to learn historical techniques and to adapt cultural influences responsibly.
Total DIY: roughly $80–$170; with pro help: $230–$470.
Inspirational Design Sources and Color Palette Generators
To find inspiration for a tie-dye feature wall, start by gathering images and color stories from unexpected places—vintage band tees, botanical prints, sunset photos, and textile archives—and let their contrasts guide your palette.
Use color psychology to pick hues that evoke mood, and test small swatches to see how paint texture shifts saturation. Try palette generators online, upload images, or extract dominant tones from photos.
Prioritize harmony, contrast, and repeatable blends. Consider these quick steps:
- Sample three dominant colors.
- Choose one accent and one neutral.
- Adjust for paint texture and room lighting.
Next Projects to Try After Mastering a Tie-Dye Wall
Now that you’ve honed color selection and blending on a tie-dye wall, pick projects that push those same skills into new forms and scales. Try creating ombré ceilings, mural panels, or gradient furniture to apply blending techniques to different surfaces.
Take your tie-dye blending further—ombre ceilings, mural panels, or gradient furniture to expand scale and surface skills.
Experiment with stenciled overlays to introduce crisp patterns against soft swirls, and test paint on textured samples to understand how wall texture changes color perception.
Work in well-ventilated spaces to minimize paint fumes, and use low-VOC paints when possible.
Each project sharpens edge control, layering, and palette restraint, preparing you for larger commissions or mixed-media interiors.
Frequently Asked Questions
Can Tie-Dye Techniques Damage Existing Wallpaper?
Yes — you could damage wallpaper if you tie-dye the wall directly; solvents and scrubbing cause wallpaper damage and poor paint adhesion. You’ll want to remove or seal the wallpaper first so paint adhesion holds and avoids peeling.
How Long Before Hanging Heavy Art on the Finished Wall?
You should wait at least 48–72 hours after paint sealing and final wall preparation so the finish fully cures; if you used heavy sealer or multiple coats, give it a week before hanging heavy art to avoid marks or sagging.
Can Pet Hair Affect Paint Adhesion During Application?
Yes, pet hair weakens paint adhesion, contaminates surfaces, and spreads surface contamination; you’ll remove fur, clean thoroughly, and prime where needed to guarantee paint adhesion and a durable, clean finish.
Will Tie-Dye Paint Off-Gas Strong Odors After Sealing?
No, properly sealed tie-dye paint won’t off-gas strong odors; you’ll still notice mild fumes briefly. For odor concerns, ventilate well, use low-VOC paints, and follow sealing tips like thin clear coats and adequate drying times.
How to Remove Spray-Mist From Adjacent Painted Walls?
You gently wipe off spray-mist from adjacent painted walls using a damp microfiber cloth and mild detergent, then rinse and dry; for stubborn spots, use a magic eraser or gentle solvent, testing first to protect wall cleaning and mist removal.
Conclusion
You’ve got everything you need to turn a plain wall into a swirling tie-dye statement that feels as joyful as a summer kite. Start small, test colors, and work in layers so the hues blend without getting muddy. Don’t be afraid to make mistakes—they often lead to happy accidents. Once you finish, step back, admire the texture and movement, and let your room’s personality shine through like sunlight through stained glass.