How to Paint Wall Tile Without Removing Tiles
You can paint wall tile without removing it by cleaning thoroughly, sanding or using a deglosser, priming with a high‑bond primer, then applying thin, durable topcoats designed for tile. Mask fixtures and grout, repair chips and recaulk joints, and cure fully before use to avoid peeling. Use the right tools—brush for edges, roller or sprayer for flats—and choose low‑VOC products for safer indoor work. Keep going to learn step‑by‑step prep, paint choices, and troubleshooting.
Quick Answer: Can You Paint Wall Tile Without Removing It?
If your tiles are sound and well-adhered, you can paint them without removing them — but success depends on preparation and the right products. You’ll clean, sand, and prime to guarantee adhesion, then pick a paint formulated for tile or enamel.
Consider color psychology: lighter hues open small rooms, while muted tones calm busy spaces. Follow manufacturer instructions and cure times to avoid peeling.
Historical trends show tile repainting has grown as a cost-saving update, so today’s primers and epoxies outperform older methods. You’ll get durable results if you prepare thoroughly and use appropriate coatings.
When to Paint Tile vs. Replace It
You should check the tile’s condition and surface integrity first — hairline cracks, loose tiles, or flaking glaze usually mean replacement is the safer choice.
If the tiles are sound, painting can be a cost-effective short- to mid-term fix compared with the higher upfront cost of retiling.
We’ll compare long-term costs and expected lifespan next so you can decide which option makes more sense for your budget and timeline.
Condition And Surface Integrity
Because the condition of your tile determines whether painting is worthwhile, start by inspecting grout, chips, and loose pieces closely.
If tiles show widespread cracking, deep glaze loss, or detachment, don’t paint — replace.
Small chips, stable grout, and sound adhesion mean you can prep and paint successfully.
Also consider original historical patterns and cultural influences: ornate or period tiles may lose value if painted, so weigh preservation against aesthetics.
Test adhesion with tape and a solvent wipe.
If repairs are simple and surface is solid, painting saves effort; if structural or heritage concerns exist, replacement is wiser.
Long-Term Cost Comparison
When weighing painting versus replacing tile, think beyond the upfront price and factor in lifespan, maintenance, and resale impact. You’ll do a cost analysis comparing paint, primer, labor, and touch-ups against demolition, new tiles, and longer disruption.
Painting suits short-term refreshes and tight budget planning, lowering immediate expense and downtime.
Replace when tiles are damaged, outdated structurally, or you want durable resale value—higher upfront cost but fewer repairs over years.
Include expected maintenance, warranty differences, and how buyers value original tile.
Use realistic timelines and contingency funds so your decision matches both aesthetic goals and financial realities.
Best Rooms and Surfaces for Painted Tile
If you’re choosing rooms to paint tile, pick low-moisture, low-traffic spaces like powder rooms, laundry rooms, or hallway accent walls where the finish will last longer and maintenance stays simple.
You’ll also consider backsplashes in kitchens that don’t get heavy grease, closet niches, or decorative fireplace surrounds.
Match painted tile to current color trends for a modern refresh, or use contrasting grout lines to mimic original tile patterns.
Smooth ceramic and porcelain accept paint best; avoid textured or cracked surfaces.
Test a small patch first, and plan for durable topcoats where occasional splashes or scuffs might occur.
When You Should Not Paint Tile
Although painting tile can refresh a space, you shouldn’t do it in high-moisture or high-traffic areas where adhesion and durability matter most. You’ll risk peeling, mold, and frequent touch-ups that negate any cost comparison advantage versus replacement. If tiles are damaged, porous, or historically significant, don’t paint them. Consider resale impact and warranty loss. DIY challenges like proper prep and long curing times make some projects poor choices for beginners. Use painting for cosmetic updates only on suitable walls, not floors, shower pans, or exterior surfaces where failure creates bigger problems.
| Area | Reason |
|---|---|
| Shower | Moisture, mold |
| Floor | Wear, safety |
| Exterior | Weathering, adhesion |
Tools & Materials for Painting Tile
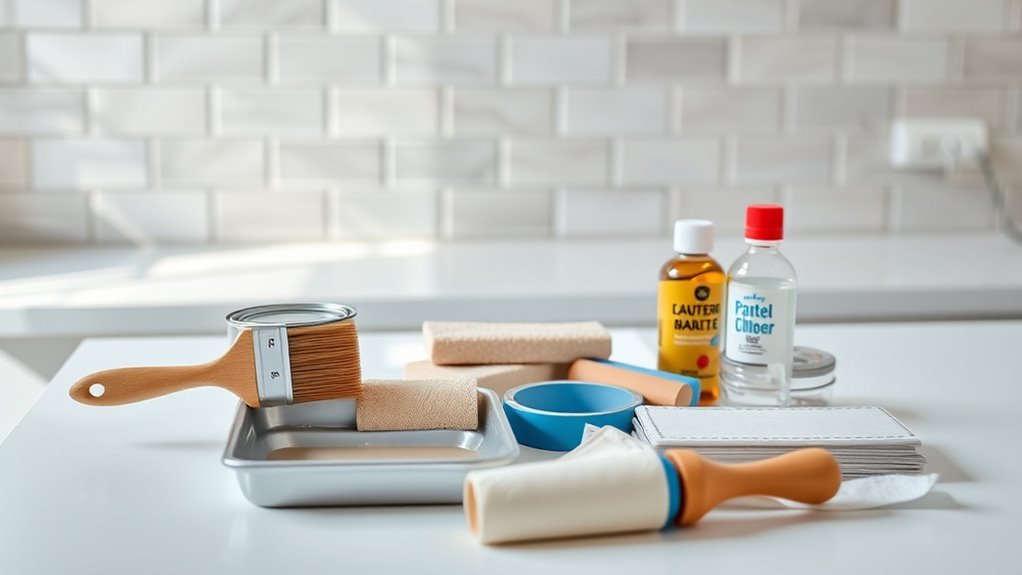
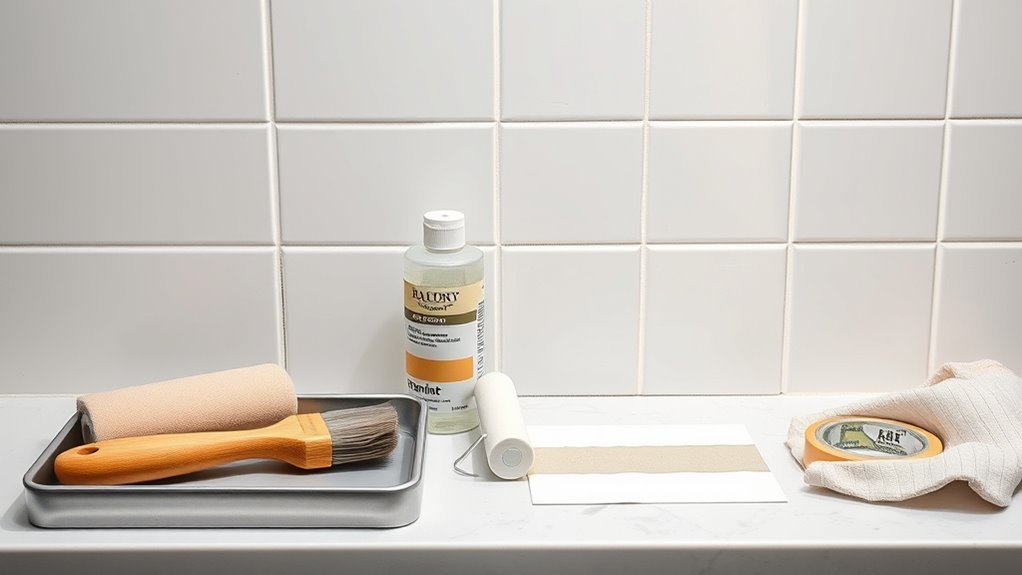
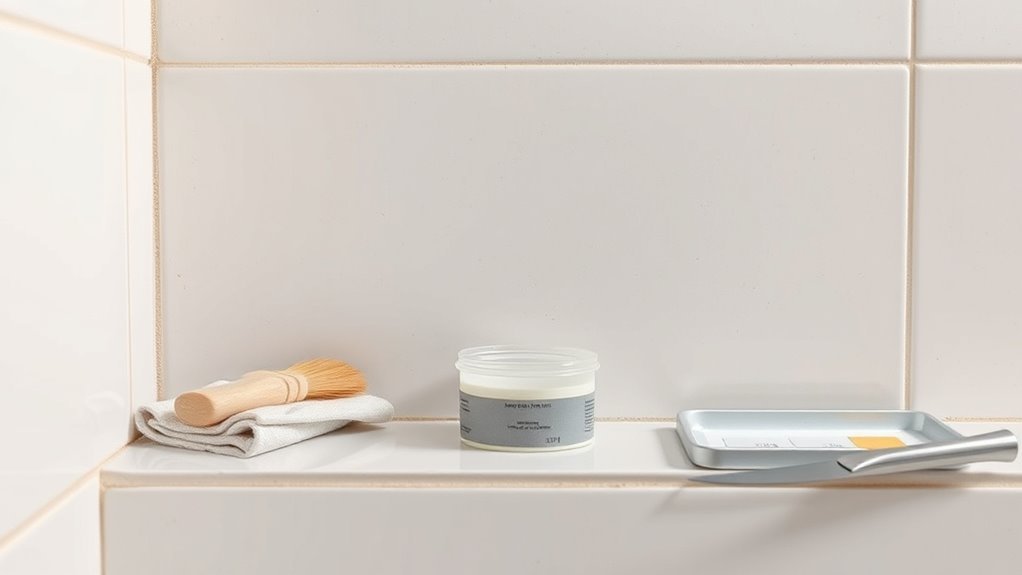
Before you start, gather the right tools and materials so the job goes smoothly and the finish lasts. You’ll need quality degreaser, fine-grit sandpaper, tack cloths, high-bond primer, and a paint formulated for tile.
Grab angled brushes, foam rollers, painter’s tape, nitrile gloves, and a respirator. Keep clean rags and a small bucket of water handy.
Choose paint color with color psychology and cultural symbolism in mind to match mood and context. Buy sample sizes to test. Label tools and keep work area ventilated.
Proper preparation materials and the right tools prevent peeling and guarantee an even, durable finish.
How to Choose the Right Primer for Glossy Tile
When you’re painting glossy tile, pick a high-bond primer specifically formulated for slick surfaces so the paint actually sticks and resists peeling. Choose one labeled for tile, porcelain, or glazed surfaces and verify adhesion properties.
Consider drying time, VOC levels, and whether it sands smoothly between coats. If you’re doing color matching to an existing palette, test primer tints with small swatches to confirm true hue under your chosen topcoat.
Factor primer cost into your budget planning—cheaper options can mean more coats. Always follow manufacturer instructions and prep the tile thoroughly for the best, long-lasting result.
Epoxy vs. Latex vs. Acrylic: Which Paint to Use
If you want a durable, long-lasting finish on tile, pick your paint based on the room’s use. For high-moisture or heavy-traffic areas, epoxy gives the toughest, water-resistant coat but needs careful mixing and ventilation.
Latex is user-friendly, quick-drying, and good for most walls; it follows modern color psychology trends favoring softer, washable palettes.
Acrylic offers a middle ground—better adhesion and flexibility than standard latex, easier than epoxy.
Consider historical trends: kitchens and baths shifted from glossy enamels to milder sheens, influencing finish choices.
Match durability, maintenance, and aesthetic goals when selecting between these three.
What Grout Lines Mean for Prep and Paint Choice
Check the grout for cracks, stains, or crumbling because its condition determines how much prep you need.
If grout’s porous or damaged, you’ll likely choose a more flexible, adhesive paint or an epoxy and plan to seal or regrout first.
Properly sealed and repaired joints help the paint bond and prevent moisture problems later.
Grout Condition Assessment
Wondering what your grout lines are telling you about prep and paint choice? You’ll inspect grout color and tile texture to judge staining, cracking, and adhesion. Pale, clean grout needs light cleaning; dark or stained grout may hide issues but still requires degreasing. Soft or crumbling grout demands repair or replacement before painting. Deep grooves or highly textured tile mean more caulk and careful edging. Match your prep to grout condition to prevent peeling and uneven finish.
| Grout Condition | Recommended Action |
|---|---|
| Clean, intact | Light cleaning, primer |
| Stained | Degrease, cleaner |
| Cracked | Regrout or patch |
| Soft/crumbly | Remove and replace |
| Wide joints | Caulk and sand |
Impact On Paint Selection
Because grout condition affects both adhesion and appearance, you’ll choose primers, paints, and sealers that address the specific issues you found—clean, intact grout lets you use a standard bonding primer and durable acrylic paint.
While stained or greasy grout calls for a stronger degreasing step plus a stain-blocking primer.
Cracked or soft grout means you must repair or replace it first and then use a flexible, mold-resistant coating to prevent future failure.
Consider how grout color interacts with color psychology and paint color trends: contrasting grout emphasizes pattern, matching grout creates seamless color fields.
Pick finishes and tints that hide imperfections and suit the room’s mood.
Sealing And Joint Prep
Now that you’ve assessed grout condition and picked primers and paints accordingly, you need to prepare and seal the joints so your finish performs and looks right.
Clean grout lines thoroughly, remove loose bits, and use a grout sealer to prevent moisture and staining.
Caulk cracked joints with a flexible, paintable silicone for smooth progressions between tile and wall.
Feather caulk edges so paint won’t ridge; consider color blending at edges to hide seams.
If you plan texture techniques, test them on a scrap to guarantee grout absorbs finish similarly.
Proper joint prep ensures durability and a professional appearance.
How to Test Tile Adhesion (Quick Adhesion Check)
How do you know the tile will hold paint? Start with a quick adhesion check: clean a small area, let it dry, then press a 1-inch square of painter’s tape firmly onto the tile and peel it off sharply. If paint or tile coating lifts, adhesion’s poor. If it stays, proceed.
Test multiple tiles across the wall—edges, grout lines, and high-moisture spots—to confirm consistency. Note results for color coordination and lighting enhancement decisions; well-adhered tiles will accept primer and color evenly, helping your chosen hue and finish reflect light as intended.
Record any marginal spots for closer inspection.
If Adhesion Fails: Repair, Prep, or Remove Options
If the tape test shows poor adhesion, don’t paint—address the surface first. You’ll confront adhesion failure, often caused by grease, old coatings, or surface inconsistencies like pits and loose grout.
Start by cleaning with a degreaser, then sand glossy areas to dull the finish. Fill chips and uneven grout with an appropriate filler, cure it, and sand smooth.
If tiles are loose or glazing flakes, consider removing affected tiles and replacing or reglazing them. Only proceed when the substrate is stable and uniform.
Proper repair and prep prevent paint failure and give you a lasting, professional result.
Prep Your Workspace and Protect Nearby Surfaces
Before you start painting, cover nearby fixtures like faucets, light switches, and outlets with plastic or painter’s tape so they don’t get splattered.
Mask the floor and trim with drop cloths and painter’s tape to protect against drips and stray brush strokes.
Taking these quick steps will keep cleanup easy and your finished job looking professional.
Cover Nearby Fixtures
Once you’ve cleared the room, cover nearby fixtures and surfaces to prevent paint splatters and dust from settling where you don’t want them. Use painter’s tape and plastic to mask faucets, light switches, and vents; fixture masking keeps edges clean and speeds paint touch up later. Work top-to-bottom, secure coverings, and label areas you’ll remove last. Check seams so dust won’t slip under. Remove or wrap movable items. Keep a small kit for immediate paint touch up: brush, matching paint, and solvent.
| Item | Purpose | Tip |
|---|---|---|
| Tape | Seal edges | Press firmly |
| Plastic | Protect large areas | Weight edges |
| Brush | Touch up | Fine tip |
Mask Floors And Trim
When you’re ready to paint, protect floors and trim by laying down drop cloths or heavy-duty plastic and securing their edges with painter’s tape so dust and drips can’t sneak underneath.
Next, tape baseboards, door frames, and any moldings with low-tack tape so paint lines stay sharp and finish removal is easy. Cover vents and nearby fixtures, and weigh corners of cloths to prevent shifting while you work.
Think about color psychology when choosing drop cloths or masking materials—lighter covers reveal stray splatters.
Note historical trends in trim finishes to decide whether to preserve or update trim contrast.
Cleaning Grease, Soap Scum, and Mildew
Wondering how to get your tiles truly clean before painting? You’ll follow practical cleaning routines focused on removing grease, soap scum, and mildew so paint will adhere.
Start by ventilating and wearing gloves, then use a degreaser or dish soap and hot water to break oil films.
For soap scum, apply a vinegar-water mix or a commercial scum remover, let sit, then scrub with a non-abrasive pad.
Treat mildew with diluted bleach or a mildew cleaner, rinse thoroughly, and dry.
Finish by wiping with isopropyl alcohol to guarantee stain removal and a residue-free surface ready for priming.
How to Sand Tile for Better Paint Bonding
Before you prime, sand the tile to scuff the glossy finish so paint can grip. You’ll work methodically, removing shine without deep scratches. Use fine-grit sandpaper or a sanding sponge, keep strokes even, and wipe dust frequently to check progress.
Before priming, scuff glossy tile with fine-grit sandpaper, keep strokes even, and wipe dust frequently.
- Start with 220–320 grit for light abrasion and even texture enhancement.
- Sand grout edges gently to avoid chips; vacuum and tack cloth before priming.
- Test a small area to confirm color contrast and adhesion before full coverage.
You’ll avoid over-sanding; aim for a dull, uniform surface that accepts primer and paint reliably.
Etching and Chemical Deglossers: When to Use Them
If light sanding doesn’t dull the glaze enough or you’re working with particularly smooth, nonporous tile, use an etching solution or chemical deglosser to create microscopic tooth for primer to bite into.
Choose a product labeled for ceramic or glazed tile, follow manufacturer dwell times, and rinse thoroughly.
Work in a ventilated area, wear gloves and eye protection, and neutralize acids if required.
Consider environmental impact: prefer biodegradable formulas and avoid drains when rinsing.
Keep leftover liquids for proper disposal or paint recycling programs when relevant.
Test a small area first to confirm adhesion before coating the entire surface.
Masking Edges and Protecting Fixtures Without Damage
Once the tile surface is prepped and any etching residue is rinsed away, you’ll want to protect adjoining surfaces and fixtures so fresh paint only lands where you intend. Use low-tack painter’s tape on grout lines, trim, and around faucets; press edges firmly to prevent bleed. Cover countertops, mirrors, and hardware with drop cloths or plastic sheeting secured with tape.
Once tiles are prepped, tape grout and fixtures carefully, and cover surfaces to prevent paint bleed and damage.
Consider soft foam pads behind fixtures to avoid scratches when removing covers.
- Tape edges precisely for clean lines.
- Mask outlets and switches; remove plates.
- Use gentle removers to avoid damage.
Pick eco-friendly paints and consider color psychology when choosing finish.
Applying Primer: Timing, Coats, and Coverage
When the tile is fully clean and dry, start with a high-bond primer designed for glazed ceramic or porcelain so paint will adhere and resist peeling. Apply one thin, even coat and let it dry per manufacturer instructions—usually an hour or two—then inspect for full coverage.
Add a second coat if the sheen still shows through or in grout lines. Expect two coats on glossy or heavily worn tiles.
Primer choice can subtly affect final color and ties into color psychology decisions you’ve made; consider how tones interact with historical tile styles nearby when planning coverage and timing.
How to Paint Tile: Brushes, Rollers, and Sprayers
Now that your primer’s set, pick tools that match the tile size, surface texture, and your comfort level. Choose a brush for edges and grout, a short-nap roller for flat tiles, or a sprayer for quick, even coverage on textured or large areas.
With primer dry, match tools to tile and texture—brush for edges, short-nap roller for flats, sprayer for textured expanses.
Consider how color psychology will influence room mood when choosing finishes, and respect historical tile styles if restoring a period look.
- Brush: detail work, cut-ins, grout lines.
- Roller: smooth, controlled application on flat tiles.
- Sprayer: fastest, best for texture, needs masking and practice.
Layering Paint: Dry Times, Coat Counts, and Tips
Because tile holds and shows drips differently than drywall, plan your coats and dry times so each layer cures fully before you add the next.
Start with a primer recommended for tile; let it dry per label—often several hours.
Apply two thin topcoats rather than one thick one to avoid runs; wait full curing times between coats.
Lightly sand between coats if texture appears.
Consider color psychology when choosing finish and number of coats—lighter shades need fewer coats but may require touch-ups.
Factor environmental impact: use low-VOC products, dispose of materials responsibly, and ventilate well during drying.
How to Paint Grout Lines Cleanly and Evenly
After your topcoats have dried, give attention to grout lines since they can make or break the finished look. Use a small angled brush or grout pen to apply paint precisely, keeping strokes parallel to the joint. Prioritize Color matching to tile and existing grout for a cohesive result. Finish with Grout sealing to protect the line and prevent staining.
- Clean: scrub grout, rinse, let fully dry.
- Paint: steady hand, thin layers, wipe excess immediately.
- Seal: apply clear grout sealer after cure, follow manufacturer’s dry times.
Work methodically, section by section, for even, clean grout lines.
Getting a Smooth Finish on Textured or Uneven Tile
If your tile has texture or unevenness, you can still get a smooth-looking finish by preparing the surface and choosing the right products and techniques.
Start by cleaning and sanding high spots with a fine-grit block. Then fill deep pits with a flexible tile filler or epoxy skim coat. Sand smooth, wipe away dust, and apply a bonding primer made for glossy surfaces.
Clean and sand high spots, fill deep pits, smooth, dust off, and prime glossy tile for paint-ready surface
Use thin, even coats of high-build epoxy or acrylic paint, sanding lightly between coats.
Consider color psychology when choosing shades to minimize visual bumps, and honor historical tile styles by selecting finishes that complement their era.
Curing Paint for Bathrooms and Wet Areas
When you’re painting tiles in bathrooms or other wet areas, proper curing matters as much as the paint you choose—it’s what turns a fresh coat into a durable, water-resistant surface. You’ll control humidity, temperature, and ventilation to help coatings set correctly and avoid tacky finishes that trap moisture.
Consider how Color psychology affects perceived gloss and warmth in tile design while curing influences final appearance. Follow these steps:
- Keep room warm (65–75°F) and ventilated for 48–72 hours.
- Avoid steam, showers, or splashes until fully cured.
- Wait manufacturer’s recommended cure time before light use.
Best Sealers and Topcoats for Durability
To make your painted tile last, pick a sealer that matches the room’s demands.
For heat-prone areas, use a high-heat polyurethane.
For general durability and clarity, consider an epoxy acrylic topcoat.
Apply each according to manufacturer directions for proper adhesion and long-lasting protection.
High-Heat Polyurethane
Because kitchen tiles face heat and frequent cleaning, you’ll want a topcoat that actually withstands hot pans, steam, and scrubbing—enter high-heat polyurethane. You’ll find it resists yellowing, maintains sheen, and protects painted tile against abrasions.
Consider color psychology and historical trends when choosing sheen: gloss reads modern and clean, satin feels softer, matte hides imperfections. Apply thin coats, sanding lightly between them for bite.
- Prep: degrease, etch, prime.
- Apply: thin, even strokes; wait full cure.
- Maintain: mild cleaners, avoid abrasive pads.
This choice boosts longevity without replacing tiles.
Epoxy Acrylic Topcoat
Although it combines epoxy’s toughness with acrylic’s flexibility, an epoxy acrylic topcoat gives you a durable, low-yellowing barrier that’s ideal for high-traffic or humid areas like kitchens and bathrooms. You’ll get strong adhesion, chemical resistance, and easier maintenance than pure acrylics. Use it to protect painted tile, enhance color blending, and preserve texture contrast from faux finishes. Apply thin, even coats and allow full cure before heavy use. Compare products by gloss, cure time, and VOCs:
| Brand | Gloss Level | Cure Time |
|---|---|---|
| Brand A | Satin | 24–48 hrs |
| Brand B | Semi-Gloss | 48–72 hrs |
| Brand C | Matte | 24 hrs |
| Brand D | Gloss | 72 hrs |
How to Repair Chips and High-Traffic Wear Spots
When you notice chips or worn areas on wall tile, act quickly to stop damage from spreading and to keep the finish looking uniform. You’ll want to clean, sand, and fill chips with a matched filler, then feather edges so texture patterns blend. Match color combinations by tinting filler or paint for seamless repair. Follow these steps:
- Clean and sand area, remove loose material.
- Apply filler, shape to tile profile, let cure; sand smooth.
- Prime touched-up spot, then paint and seal with compatible topcoat for durability.
Check repairs visually; repeat tinting for perfect color match.
Cleaning and Maintenance for Painted Tile
After you finish repairing chips and wear, keep the painted surface looking good with routine cleaning and occasional maintenance. Wipe tiles weekly with a soft cloth and mild, pH-neutral cleaner to avoid dulling the finish. Spot-treat stains promptly and rinse thoroughly to prevent residue buildup.
Inspect grout and edges monthly; recaulk or touch up paint where adhesion fails. When touching up, blend new paint carefully for color matching and feather edges to hide seams.
Be mindful of lighting effects—different bulbs can reveal imperfections—so check repairs under the room’s typical light before declaring the job done.
How Long Painted Tile Lasts and When to Refinish
Paint on wall tile typically lasts several years—often 5 to 10—depending on the quality of prep and paint you used.
You should plan to refinish when you see peeling, chipping, discoloration, or if grout areas start breaking down.
Factors like moisture, surface prep, ventilation, and traffic will shorten or extend the finish life.
Typical Lifespan Expectancy
Although the exact lifespan varies with prep and use, properly primed and top-coated tile usually holds up for 5–10 years in low-traffic areas and 2–5 years in high-moisture or heavy-use spaces. You’ll get the longest life by prepping thoroughly, using quality primer and epoxy or enamel topcoat, and ventilating during drying.
Consider how color psychology and cultural symbolism affect your willingness to tolerate aging finishes.
Typical expectations:
- Bathroom shower walls: 2–4 years with regular use.
- Kitchen backsplash: 3–6 years depending on cooking exposure.
- Accent or guest-room tile: 5–10 years.
Signs You Should Refinish
When you start seeing chipped edges, peeling, or persistent discoloration, it’s time to contemplate refinishing; these visible signs mean the protective coating has failed and won’t just improve on its own.
You should refinish when wear concentrates in high-touch areas, grout darkens despite cleaning, or dents expose the original tile beneath paint.
Consider color psychology—faded or yellowed hues can age a room, so rejuvenating color can revive mood as well as surface integrity.
Historical trends in design may influence timing: if your painted tiles clash with current styles, refinishing can update looks.
Act before damage spreads to save effort.
Factors Affecting Durability
If you keep up with proper prep and use quality products, painted tile can last anywhere from 5 to 15 years before it needs refinishing, but several factors will push that range shorter or longer.
You’ll notice lifespan depends on material, use, and environment. Consider:
- Surface prep and paint quality — poor adhesion ages fast.
- Traffic and moisture — showers and backsplashes wear quicker; humidity matters.
- Style choices — color psychology may influence when you repaint; historical trends affect perceived datedness.
Monitor chips, peeling, and discoloration. Refinish when damage or style fatigue outweighs touch-up; don’t wait for widespread failure.
Cost: DIY Painting vs. Tile Replacement (Bathroom Example)
Because you’ll save on labor and demo costs, painting existing bathroom tile usually runs a fraction of what full tile replacement costs, with DIY projects commonly totaling $100–$400 for primer, paint, and supplies versus $1,200–$5,000 or more for removal, new tile, grout, and installation.
You’ll weigh upfront savings against longevity: painted tile often needs touch-ups sooner than new tile.
Consider resale—buyers sometimes value original tile for historical context or cultural significance, which can affect perceived home value.
Ultimately, you decide based on budget, expected lifespan, and whether preserving or updating the original aesthetic matters.
Project Timeline: Typical Bathroom Painting Plan
Although the exact schedule depends on tile size and room conditions, you can usually finish a small to medium bathroom in 2–3 days. You’ll prep, prime, paint, and cure, planning around ventilation and drying times.
Consider color psychology when choosing shades—lighter tones open space, calming hues suit baths. Also weigh environmental impact: low-VOC primers and paints reduce fumes and disposal concerns.
- Day 1: Clean, sand, tape, and apply primer; ventilate well.
- Day 2: Apply two thin topcoats; inspect for coverage gaps.
- Day 3: Allow full cure, reattach fixtures, and do final touch-ups.
Common Mistakes and How to Avoid Them
Don’t skip proper cleaning and sanding—poor surface prep is the main reason paint peels from tile.
Make sure you use a paint and primer made for glossy surfaces or enamel specifically formulated for tile and bathrooms.
I’ll point out the most common prep mistakes and the right paint choices so your finish lasts.
Surface Preparation Errors
Preparing tiles properly makes the difference between a durable, professional-looking finish and paint that chips or peels within months. You’ll avoid common surface preparation errors by checking for grime, loose grout, and underlying surface damage that leads to paint peeling. Do this:
- Clean thoroughly: use a degreaser and rinse; oils cause adhesion failure.
- Repair: reattach loose tiles, fill cracks, and sand glossy glaze to scuff for better bite.
- Prime: apply a bonding primer to sealed or porous areas to guarantee uniform adhesion.
Skip shortcuts—poor prep is the main cause of failure, not the paint itself.
Using Wrong Paint Type
If you pick the wrong paint, it won’t stick or stand up to moisture and cleaning, and you’ll be repainting sooner than you think. You should choose a tile primer and epoxy or acrylic enamel designed for nonporous surfaces. Check paint durability ratings and test Color matching under room lighting. Avoid latex meant for drywall; it flakes. Apply thin coats and cure fully.
| Mistake | Fix |
|---|---|
| Using wall latex | Use epoxy/acrylic enamel |
| Skipping primer | Use bonding primer |
| Ignoring humidity | Choose moisture-rated paint |
| Poor color match | Test swatches in light |
| Low durability | Check durability specs |
Troubleshooting Adhesion, Bubbling, and Peeling
When paint starts lifting, bubbling, or flaking on your tiled wall, it usually signals an adhesion problem you can fix rather than a complete redo. Check surface prep first: old grease, soap scum, or glossy glaze prevent bonding; sand and degrease, then reassess texture patterns to verify primer grips and paint hides imperfection and aids color matching.
If bubbles form after painting, pop them, let dry, sand smooth, and spot-prime. For widespread peeling, strip back to sound edges, feather sand, and re-prime.
Prevent recurrence by using proper primer, allowing full cure, and maintaining ventilation during application.
Eco-Friendly and Low‑VOC Product Options
If you want a healthier project, start by choosing a low‑VOC primer formulated for slick surfaces so it bonds without strong fumes.
You can pair that with plant‑based paints—like those made from natural oils or waterborne resins—for a durable, lower‑toxicity finish.
I’ll cover specific product recommendations and application tips next so you can pick the right match for your tiles.
Low‑VOC Primer Options
Looking for a primer that’s gentle on indoor air yet tough enough for tile? You’ll want low‑VOC options that bond to glossy surfaces and pair well with eco friendly paints. Consider how color psychology will guide your topcoat choice after priming. Choose primers labeled for tile or multi‑surface adhesion and low odor.
- Shellac‑alternative primer: fast drying, bonds well, low VOC.
- Latex bonding primer: water‑based, easy clean, compatible with eco friendly paints.
- Universal adhesion primer: for glossy ceramic, promotes durability and resists peeling.
Test a small patch, follow manufacturer instructions, and ventilate while you work.
Plant‑Based Paint Choices
Priming helps guarantee your topcoat sticks and stays put, so now consider plant-based paints that pair well with low‑VOC primers. You’ll find plant based coatings made from linseed, soy, or citrus oils that dry hard, resist moisture, and release minimal odors.
Choose products labeled for tile or high-adhesion surfaces, and verify compatibility with eco friendly primers to avoid peeling. Test a small area, use thin coats, and allow full cure before use.
These options cut VOC exposure and support sustainability without sacrificing durability, giving you a safer, long-lasting finish for painted tile surfaces.
When to Hire a Pro (And What to Expect)
When your tile project involves extensive repairs, stubborn stains, or complex surfaces like textured or porous tiles, hire a pro—you’ll save time and avoid costly mistakes. You’ll want someone who recognizes historical trends and cultural influences in restoration, especially with vintage or period tiles. Expect a clear estimate, timeline, and prep plan.
For extensive, historic, or stubborn tile work, hire a pro—expect a clear estimate, timeline, and restoration expertise.
- Assessment: pro inspects adhesion, grout, and substrate.
- Prep & repair: they handle cleaning, etching, and filler work.
- Finish & seal: pros use appropriate primers, paints, and sealers for durability.
Ask for portfolio, warranty, and references so you get reliable results.
Creative Finishes: Patterns, Two-Tone, and Faux Textures
You can turn plain tile into a statement by adding a patterned accent wall that repeats geometric or stencil designs for visual impact.
Try a two-tone layout to frame features or break up a large expanse without removing any tile.
For a more natural look, use glazing and layering techniques to create convincing faux stone finishes that read like real masonry.
Patterned Accent Walls
If you want to make a bold statement without replacing tiles, patterned accent walls are an easy way to add personality and depth—think geometric stencils, two-tone blocks, or faux-marble veining applied directly over properly prepped tile.
You’ll pick a palette guided by color psychology and reference historical styles for inspiration. Plan alignment around grout lines, tape carefully, and use tile-appropriate primers and paints.
Consider these approaches:
- Repeat geometric stencils for modern rhythm.
- Two-tone blocks that highlight architectural lines.
- Hand-painted veining for subtle luxury.
Seal the finished surface with a durable clear coat to protect your work.
Faux Stone Finishes
Although it looks complex, faux stone finishes let you mimic the texture and warmth of natural rock without tearing out tile, so you can achieve a high-end aesthetic on a budget. You’ll prep grout, prime, and layer paints with sponges and stipple brushes to create depth. Use glaze washes and highlights to sell the effect. Faux stone works well as decorative finishes for backsplashes or accent walls, and you can vary tones for realism. Practice on a spare tile first, then seal. Below’s a quick reference:
| Step | Tip |
|---|---|
| Prep | Clean, sand, prime |
| Base | Neutral base coat |
| Texture | Sponging, stippling |
| Detail | Glaze, dry-brush |
| Seal | Clear polyurethane |
Frequently Asked Questions
Can Painted Tile Be Safely Used Behind a Gas Stove or Heat Source?
Yes — you can, but you’ll need heat-resistant finishes and proper prep to preserve tile durability; you’ll also want to test paint color options for heat tolerance, avoid direct high flames, and follow manufacturer temperature limits.
Will Paint Change the Tile’s Slip Resistance in Wet Areas?
Right off the bat, it’s not a done deal: you’ll likely reduce slip safety if you add glossy paint, but textured coatings or anti-slip additives restore grip and improve water resistance, so choose products and prep wisely.
How to Match New Painted Tile to Existing Painted Walls or Cabinetry?
You’ll sample and test paint on spare tile, adjusting pigment until the Color matching’s perfect, then sand and prime to guarantee adhesion; use similar sheen and topcoat so Finish blending makes the painted tile visually seamless with cabinetry.
Can Mold-Resistant Additives Be Mixed Into Tile Paint?
Yes — you can add mold-resistant additives, and by coincidence your bathroom’s humidity will thank you; just check additive compatibility with your tile paint, follow manufacturer ratios, stir thoroughly, and test a small area before full application.
Are There Paint Warranties That Transfer With Home Sales?
Yes — some paint warranties transfer with home sales, but you’ll need proof and proper tile surface preparation records; you’ll also want paint color matching documentation to confirm coverage, so keep receipts, prep photos, and warranty paperwork.
Conclusion
You can totally paint tile without removing it — hooray for lazy renovation — but don’t expect miracles. If your tiles are in good shape, adhesive-friendly, and you prep like a perfectionist, a fresh coat will transform the room faster and cheaper than a demo day. Still, if tiles are cracked, loose, or in heavy-moisture zones, painting’s just a cosmetic bandage. Be honest, do the prep, use the right products, and enjoy the faux-renovation glow.