How to Paint Wood Exterior House (Complete Guide)
You’ll prep, repair, prime, and finish in that order to get a durable exterior: inspect for rot, mold, and loose paint; replace or patch damaged wood; sand and clean; caulk joints; prime bare or repaired areas with a compatible exterior primer; then apply flexible acrylic or oil-based topcoats using brushes, rollers, or spray, allowing proper dry times and weather windows. Follow safety, calculate paint needs, and plan for two good coats — keep going and you’ll find step-by-step techniques and troubleshooting.
Do You Need to Repaint Exterior Wood?
If your siding is peeling, chalking, or the wood looks faded and dry, you need to repaint it—otherwise moisture and UV will damage the substrate.
You’ll inspect for cracks, raised grain, and soft spots; probe suspect areas with a screwdriver. If water beads and the finish feels slick, you can usually delay repainting.
Exposed wood losing its wood texture or showing bare patches needs attention.
When deciding, factor maintenance history, climate, and aesthetic goals.
Choose a repaint time when surfaces are dry and temperatures are moderate.
Consider color matching to preserve curb appeal and avoid frequent repaint cycles.
Oil vs. Acrylic Paint for Exterior Wood
When you choose between oil and acrylic for exterior wood, think about what matters more: oil’s long-lasting toughness or acrylic’s ability to move with the wood.
You’ll see oil paints often resist wear and hold up well over time.
Acrylics, however, flex as temperatures and humidity change, which helps prevent cracking and peeling.
Oil Paint Durability
Although oil paints have long been prized for their hard, glossy finish, you should weigh their durability against modern acrylics when painting exterior wood. You’ll notice oil’s deep paint sheen highlights wood grain, resisting scuffs and holding color well in stable climates. Oils cure slowly, so they toughen into a dense film that blocks stains and resists abrasion, but they can crack if underlying wood moves. Choose oil when you want a lustrous, protective coat and can control moisture and movement.
| Emotion | Feature | Result |
|---|---|---|
| Pride | Gloss | Enduring beauty |
| Caution | Rigidity | Cracking risk |
| Confidence | Toughness | Long wear |
Acrylic Paint Flexibility
Because acrylics remain flexible as they cure, they’re better at following seasonal wood movement without cracking, so you can expect fewer hairline splits and longer-looking finishes on siding and trim.
You’ll appreciate acrylic flexibility when boards expand and contract; the paint stretches instead of fracturing. Choose acrylics for clapboard, trim, and fascia where movement is constant.
Match your prep and primer to guarantee adhesion, then pick an exterior paint sheen appropriate for exposure — flatter sheens hide imperfections, glossier ones shed water better.
How to Choose a Primer for Exterior Wood
When choosing a primer for exterior wood, you’ll match the product to your wood type—softwood, hardwood, or treated lumber each need different formulations.
Look for primers with strong adhesion to prevent peeling and guarantee the topcoat bonds well.
Also pick a primer rated for the climate you face, with mildew resistance and UV protection for long-term durability.
Wood Type Compatibility
Different woods need different primers, so start by identifying the species and its condition before you pick one. You’ll match primer type to softwoods, hardwoods, or engineered boards, considering wood grain and how paint sheen will lay over textured surfaces. Oil-based primers suit tannin-heavy woods; acrylic primers work for most boards; shellac helps repair knots. Test a small area for absorption and finish. Visualize choices:
| Wood Type | Primer Choice | Finish Note |
|---|---|---|
| Cedar | Oil-based | Tames tannin |
| Pine | Acrylic | Seals grain |
| Plywood | High-build | Smooths layers |
| Redwood | Latex | Preserves color |
Primer Adhesion Qualities
Since a primer is the bridge between raw wood and your paint, you’ll want one that sticks firmly, resists moisture, and bonds to the specific surface texture and species you’re working with.
Check primer compatibility with cedar, pine, or composite siding and match solvent type to existing finishes. Choose primers formulated for tannin-rich woods or for knot sealer use.
Apply per manufacturer directions—surface prep, temperature, and coat thickness matter. Poor preparation or wrong primer increases risk of adhesion failure, peeling, and stain bleed.
Test a small area, let it cure, then inspect adhesion before committing to full coverage.
Weather Resistance Requirements
Because exterior wood faces sun, rain, freeze-thaw cycles, and UV exposure, pick a primer that blocks moisture, resists chalking, and includes UV inhibitors or a compatible topcoat to prevent premature breakdown. You’ll want primers formulated for weatherproofing techniques and tested for material compatibility with cedar, pine, or engineered siding.
Choose mildew-resistant, breathable primers that let trapped moisture escape while keeping new water out. Apply according to temperature and humidity limits, and sand glossy surfaces for adhesion. Use a high-quality topcoat suited to the primer.
- Mildew-resistant, breathable primers
- Match primer to wood species and topcoat
- Follow environmental application limits
Best Paint Finishes for Siding and Trim
When you pick finishes for siding and trim, think about where each surface needs durability, washability, and appearance.
Siding usually benefits from satin or low-sheen finishes that hide imperfections and shed dirt, while trim calls for semi-gloss or gloss to tolerate frequent cleaning and resist chipping.
Siding fares best in satin to hide flaws and shed dirt; use semi-gloss or gloss on trim for durability and cleanability.
Choose acrylic latex for siding for flexibility and UV resistance.
Use tougher alkyd or high-build enamel on trim if you want a hard, durable edge.
Consider color psychology when selecting gloss levels—lighter sheens read brighter, darker sheens look richer.
Respect historical paint types on period homes to maintain authenticity and finish compatibility.
How Much Paint Will Your House Need?
If you’re ready to estimate paint needs, start by measuring each wall’s height and length and subtracting areas for doors and windows to get the true square footage you’ll cover.
Calculate total square footage, then divide by your paint’s stated coverage per gallon.
Account for two coats, primer needs, and waste.
Color mixing can change coverage slightly if tint is heavy; note that different paint sheen levels may require extra coats—flat hides better, high-gloss needs more.
Use this quick checklist:
- Total wall square footage (minus openings)
- Coverage per gallon × coats needed
- Extra for color mixing losses and touch-ups
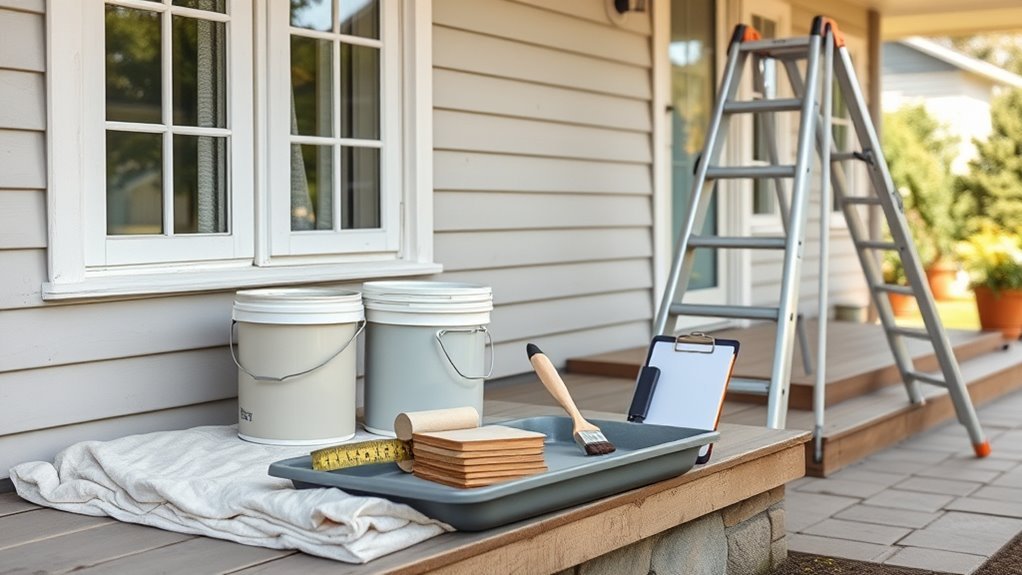
Essential Tools for Painting Exterior Wood
You’ll want a compact set of reliable tools before you start painting exterior wood: a quality angled brush for trim, a 3/4–1″ nap roller for smooth siding, a sturdy extension pole, a paint tray and liners, a ladder or scaffold suited to your home’s height, plus drop cloths and painter’s tape for protection. Pick quality rollers and brushes to lay paint smoothly and respect color psychology when testing swatches. Keep tools organized and clean for historic styles restoration.
| Tool | Purpose |
|---|---|
| Angled brush | Cut-in and detail |
| Roller | Coverage |
| Tray/lin liners | Fast cleanup |
Safety Gear and Ladder Tips for Exterior Painting
Because working on ladders and around wet paint raises real hazards, prioritize protective gear and smart ladder setup before you start, and keep safety nonnegotiable throughout the job. Wear goggles, a respirator if sanding or using solvent-based products, gloves, and non-slip shoes.
Follow basic safety precautions: inspect gear, keep a clear work area, and never overreach.
For ladder positioning, place it on stable ground at a 4:1 angle, secure the top, and tie off if needed. Use a helper when possible and a tool belt to keep hands free.
- Inspect ladder condition and footing
- Use PPE and respirator as needed
- Maintain proper ladder positioning
Best Weather and Timing for Exterior Paint Jobs
When planning exterior painting, pick a stretch of dry, mild days so paint can film and cure properly. You’ll aim for temperatures between roughly 50–85°F (10–30°C) and low humidity; extremes slow drying or trap moisture.
Check forecasts for rain, dew, and wind—strong gusts fling debris and can thin drying.
Check forecasts for rain, dew, and wind—gusts can fling debris and slow paint drying.
Match timing to your climate zones: colder or coastal areas need shorter seasonal windows, while inland regions offer longer ones.
Use paint additives when recommended to extend open time or resist mildew in humid climates.
Schedule prep and multiple coats within the same favorable period to make certain of consistent results.
Inspecting Wood for Rot, Mold, and Pests
Before you start painting, walk the exterior and do a careful visual surface inspection for soft spots, bubbling paint, or dark streaks that signal rot or mold.
Tap or probe suspicious areas with a screwdriver to check firmness and look for frass, bore holes, or live insects that indicate an infestation.
Treat or replace damaged boards and address pests or mold before you prime and paint.
Visual Surface Inspection
Although the surface may look sound at a glance, you should closely inspect all wood for signs of rot, mold, or pest damage before painting. You’ll run your hand over surfaces to detect soft spots, note discoloration, and check for fuzzy mold growth.
Examine joints, trim, and areas where moisture collects; assess surface texture and whether previous paint sheen hides problems. Use a bright light and magnifier if needed. Don’t probe deeply yet—that’s for the next step.
- Look for soft, crumbly wood
- Note powdery or fuzzy growth
- Check bubbling or flaking paint sheen
Checking For Infestation
Since paint won’t last on compromised wood, inspect more thoroughly now for rot, mold, and pests. Probe suspect areas with a screwdriver; soft, crumbling wood needs repair or replacement.
Look for dark staining, fuzzy growth, and musty odors indicating mold — clean and treat before painting.
Check for holes, frass, mud tubes, and galleries; document findings for insect identification and targeted treatment.
Seal gaps, fix leaks, and improve drainage as basic pest prevention.
If infestation is extensive or uncertain, call a professional for assessment and remediation.
Only paint surfaces that are dry, sound, and properly treated.
Safely Removing Loose Paint and Old Coatings
When paint is flaking or bubbling, you’ll want to remove those loose areas so new coatings can adhere properly and look smooth. Use a scraper or putty knife for large chips, taking care not to gouge the wood.
For stubborn spots, employ a heat gun or chemical stripper per safety instructions.
Sand edges feathering the old paint to a firm surface; choose grit to match your texture preference.
Collect and dispose of debris safely to prevent contamination.
Consider how underlying conditions affect your paint color choice before finishing.
- Scrape large flakes
- Use heat or stripper for stubborn areas
- Sand and clean edges
Washing and Degreasing Wood Before Painting
After you’ve removed loose paint and smoothed edges, wash the surface to remove dirt, mildew, oil, and sanding dust so new paint adheres evenly. Use a mild detergent or a dedicated deck cleaner mixed per instructions; scrub with a stiff brush and rinse thoroughly.
For oil or grease, apply a degreaser, let it dwell, then rinse.
Let wood dry fully—usually 24–48 hours—before sanding. Lightly sand using proper sanding techniques to knock down raised grain and blend repairs. Wipe with a tack cloth.
Test paint sheen on a small area to confirm adhesion and final appearance before full application.
How to Strip Stubborn Paint: Heat vs. Chemical
When paint won’t budge you’ll choose between a heat gun method or a chemical stripper.
You’ll use a heat gun to soften layers and scrape them away, watching for scorching or lead dust if it’s old paint.
Or you’ll apply a chemical stripper, follow the label for safe use, then neutralize and rinse before repainting.
Heat Gun Method
Although it takes more time and care than chemicals, using a heat gun gives you precise control for stripping stubborn exterior paint without harsh solvents. You’ll soften layers, scrape away softened paint, and avoid bleaching or runoff.
Hold the heat gun a few inches away, move steadily, and test small areas to prevent scorching. Use a paint scraper and stiff brush, and wear heat-resistant gloves, eye protection, and a respirator.
Work in shaded, well-ventilated areas and dispose of removed paint chips safely.
- Heat gun temperature control for delicate wood
- Gentle paint removal technique
- Safety gear and proper scraping tools
Chemical Stripper Option
If you prefer a faster, less labor-intensive route, chemical paint strippers can dissolve multiple layers at once so you can scrape and wash them away with less elbow grease. You’ll choose a product rated for exterior wood, apply per instructions, keep kids and pets away, and wear a respirator, gloves, and goggles. Test a small area, then work in manageable sections, neutralize residue, and rinse thoroughly before sanding. Chemical stripper speeds paint removal but needs careful disposal and weather consideration. Compare with heat methods for delicate trim or lead paint concerns.
| Benefit | Consideration |
|---|---|
| Fast removal | Hazardous fumes |
| Works on layers | Requires neutralizer |
| Less heat damage | Waste disposal |
| Good for detailed trim | Weather sensitive |
Sand Exterior Wood: Tools, Grits, and Tips
Because proper sanding sets the foundation for a long-lasting finish, you’ll want the right tools, grits, and technique before you touch the paint. You’ll sand to control wood texture and to guarantee consistent paint sheen.
Start with coarser grit to remove old finish, then progress to finer grits for smoothness. Use a palm sander for flat areas and a detail sander for trim and corners.
Keep pressure even, move with the grain, and vacuum between steps to avoid grit embedding.
- Start 80–120 grit for removal
- Follow with 150–220 grit for smoothness
- Use 320 grit only for ultra-smooth surfaces
Repair Small Cracks, Splits, and Nail Holes
Before you paint, inspect each board to assess the extent of cracks, splits, and nail holes so you know what needs repair.
Pick a filler suited for exterior wood and the size of the damage—wood filler for small holes, epoxy or wood filler for deeper splits.
Once cured, sand the patch smooth so the repair blends with the surrounding surface before priming and painting.
Assess Damage Extent
Once you’ve stripped and cleaned the siding, walk the exterior and inspect every board and trim piece for small cracks, splits, and nail holes so you know what needs fixing before priming. Note depth, length, and location of damage; prioritize areas near joints and trim.
Match repairs to the board’s woodgrain patterns to keep texture consistent after finishing, and record paint branding used previously for color and sheen matching.
Use a simple checklist to avoid missed spots:
- Mark shallow surface cracks and isolated nail holes
- Flag splits that may need reinforcing
- Identify rot or decay needing replacement
Choose Appropriate Filler
While you’re still on the inspection phase, pick a filler that matches the size and movement of each defect: use a paintable, exterior-grade acrylic or latex caulk for hairline cracks and nail holes.
A paintable wood filler or epoxy should be used for deeper gouges and splits.
A flexible, elastomeric compound is suitable where boards expand and contract.
Choose filler types based on exposure, substrate, and paint compatibility.
Prepare surfaces by cleaning and removing loose material.
Use proper application techniques: apply in layers for deep voids, tool or backfill to avoid air pockets, wipe excess, and follow cure times.
Test adhesion before priming and painting.
Sand And Smooth Surface
After filling and letting repairs cure, sand the patched areas so they’ll blend seamlessly with the surrounding wood and accept paint. Use medium-grit then fine-grit sandpaper to remove high spots and feather edges; test by touch.
Clean dust with a tack cloth or damp rag so surface preparation is complete before primer. Check for remaining imperfections, re-fill tiny voids, and sand again until smooth. Proper smoothing ensures even paint application and adhesion.
Finish by wiping the area and masking adjacent surfaces.
- Use 120–150 then 220 grit for best results
- Remove dust thoroughly before priming
- Reinspect under good light
Replace Rotten Boards and Trim Correctly
Before you paint, remove and replace any rotten boards and trim so the new finish will adhere and last; you’ll save time and avoid peeling by fixing damaged wood now.
Inspect siding and corners, marking rotten boards for removal. Pry out fasteners, cut back to sound wood, and measure replacement pieces precisely.
Use rot-resistant lumber and fit trim replacement snugly, maintaining proper gaps for expansion. Fasten with corrosion-resistant nails or screws, seal joints with exterior-grade caulk, and apply a primer to bare wood.
Guarantee surfaces are flush and solid before sanding and painting to achieve a durable, professional result.
Stop Wood Rot: Treatment and Prevention
If you want your paint job to last, stop wood rot before it spreads by removing moisture sources, treating affected areas, and protecting exposed wood.
Inspect regularly for soft spots, peeling paint, or fungal growth. Address leaks, poor drainage, and clogged gutters to keep surfaces dry.
Use wood preservation products on bare timber and apply a quality primer before painting.
Treat small decay with epoxy consolidants and replace severely damaged sections.
Control insects near wood and maintain Pest control measures to prevent further compromise.
- Remove moisture and fix leaks
- Apply preservative and primers
- Treat decay; monitor pests
Caulk Joints and Seams for Weatherproofing
Before you paint, pick a high-quality, exterior-grade caulk rated for wood and the local climate.
Prep joints by removing old sealant, cleaning surfaces, and letting everything dry so the caulk will bond.
Apply consistent, smooth beads and tool them flush to shed water and create a neat paint-ready surface.
Choose Proper Caulk
When you’re sealing joints and seams on exterior wood, pick a caulk that stays flexible, adheres well to wood and nearby materials, and is rated for exterior use so it won’t crack or pull away as temperatures change.
Choose silicone, polyurethane, or high-quality acrylic-latex with silicone for paintability. Consider longevity, paint adhesion, and UV resistance.
Think about caulk removal for future repairs and how you’ll handle color matching to trim or primer. Test small areas and read manufacturer specs.
- Silicone: excellent flexibility, poor paint adhesion
- Polyurethane: durable, bonds strongly
- Acrylic-latex+s.: paintable, easy to tool
Prep Joints Thoroughly
Although caulking might seem like a small step, you’ll want to prep joints thoroughly to guarantee a watertight, long-lasting seal.
Clean gaps of old caulk, dirt, and loose paint with a scraper and brush so joint sealing bonds to sound substrate. Remove mildew with a mild bleach solution, rinse, and let dry completely.
Check for rotted wood and replace or repair before sealing. Light surface sanding around seams creates a keyed surface for better adhesion.
Use backer rod in wide gaps and mask edges for neat lines. Proper prep prevents leaks and extends paint life.
Apply Smooth Beads
Now that joints are clean and prepped, apply smooth, continuous beads of quality exterior caulk to seal seams against moisture and air. You’ll hold the gun steady, maintain even pressure, and move at a consistent speed so bead application is uniform.
Tool the bead within a few minutes, smoothing with a wet finger or tool for tight contact and proper bead consistency. Wipe excess immediately and let cure per manufacturer instructions.
Check corners and lap joints for voids, and reapply where needed. Proper beads prevent rot and drafts, so take your time and inspect the work carefully.
- Steady pressure
- Tool promptly
- Inspect seams
Prime Bare and Repaired Exterior Wood
If your exterior wood is bare or you’ve just completed repairs, prime it before painting to guarantee proper adhesion and long-term protection. You’ll clean, sand along the wood grain, and remove dust; use a high-quality exterior primer compatible with your chosen paint sheen. Spot-prime repairs, nail pops, and bare knots to prevent bleed-through. Allow full dry time and inspect for missed areas before topcoating. Primer evens porosity, improving coverage and durability.
| Surface | Primer benefit |
|---|---|
| Bare wood | Seals and evens porosity |
| Repaired areas | Hides joints, prevents tannin bleed |
| Knots | Blocks stains |
| Overall | Improves paint sheen consistency |
Brush Technique for Smooth Exterior Coverage
When you load your brush, dip only the lower third of the bristles and tap off excess on the can’s rim so paint doesn’t drip or puddle. Hold the brush with a relaxed brush grip near the ferrule for control; use long, even strokes following the grain.
Mind color mixing on-site to match patches and avoid streaks; keep small test blends handy. Work wet edges and feather out overlaps to hide lines. Clean edges with light tipping strokes.
- Maintain steady, gentle pressure
- Stroke with the wood grain for uniform finish
- Re-load frequently to prevent dragging
Roll Siding Like a Pro: Pattern and Nap Guide
Because siding panels can show texture and pattern differently than flat boards, you’ll want to pick the right roller nap and technique to get even coverage and a uniform look.
Choose a 3/8″ to 1/2″ nap for smooth to lightly textured siding; go up to 3/4″ for deep grooves.
Use a 3/8″–1/2″ nap for smooth to light texture; choose 3/4″ for deep grooves.
Roll along the panel grain, maintain a wet edge, and use a light “lay-off” stroke to minimize lap marks.
Test color combinations on a scrap to see how paint texture reads in sunlight.
Keep pressure consistent, reload often, and blend seams as you work to avoid pattern mismatches.
Spray Exterior Wood Like a Pro
Rolling gives you control on textured panels, but spraying lets you cover large flat or intricate surfaces faster and with a thinner, more even film.
You’ll prep by masking, cleaning, and using a primer suited to wood. Adjust nozzle and pressure for desired paint texture; test on scrap to dial in atomization and fan width.
Maintain consistent distance and overlap to avoid runs and uneven sheen. Consider color matching when touching up or blending with existing siding; spray allows subtle gradations if you match gloss and pigment precisely.
- Mask windows and trim carefully
- Test spray on scrap board
- Keep steady, overlapping passes
How to Blend Brush, Roller, and Spray Work
Although each tool has strengths, you’ll get the best finish by planning how brush, roller, and sprayer will meet at edges and shifts.
Begin by spraying broad flat areas, keeping a wet edge. Follow immediately with roller techniques to even sheen and push paint into grain. Use a brush to cut in and refine joints, feathering outward to blend.
For brush blending, work from wet sprayed or rolled paint toward dry edges so strokes dissolve. Match paint load and speed: light spray, medium roller pressure, steady brush strokes.
Inspect for lap marks and rework quickly while paint’s wet.
Painting Trim vs. Siding: Strokes and Speed
After you’ve coordinated spraying, rolling, and brushing across broad surfaces, focus on how strokes and speed change when you move from siding to trim. You’ll slow your painting speed for trim, use shorter brush strokes for control, and keep siding runs longer and steady.
Trim demands careful edge work; siding tolerates rhythm and overlap. Match tool to task: a sash brush for corners, a mini-roller for narrow boards, a larger roller for flat planes. Maintain wet edges and consistent sheen by adjusting pace.
Practice on a scrap board to set stroke length and painting speed before tackling visible sections.
- Short, deliberate brush strokes for trim
- Steady, long strokes for siding
- Match tool size to surface
Cut-In Windows and Doors Without Mess
When you cut in around windows and doors, work methodically to keep paint off glass and hardware: mask edges with low-tack painter’s tape, butt the tape to the frame, and wrap any exposed locks or hinges with plastic.
Use a sharp angled sash brush and steady strokes, feathering at the tape to avoid ridges. Remove tape while paint is tacky to prevent peeling.
For decorative accents, switch to a smaller brush and steady your hand on the frame. Match brush type to paint textures—smooth for glossy trim, stippled or thicker if your finish has texture—to get crisp, clean lines.
How Many Paint Coats Does Exterior Wood Need?
Deciding how many coats exterior wood needs comes down to the condition of the surface, the type of paint, and the exposure it’ll face. You’ll usually apply two coats: a quality primer (if bare or patched) and two topcoats for longevity in harsh climates.
Choose finishes and hues with color psychology in mind—lighter shades reflect heat; darker ones emphasize architectural details. You can reference historical paint techniques for authentic layering on period homes, but modern acrylics often outperform traditional oils.
- One coat: light refresh on well-sealed surfaces
- Two coats: standard, durable protection
- Three coats: high-wear or extreme exposure
Drying Times: How Temperature Affects Curing
Although temperature isn’t the only factor, it has a major impact on how fast paint cures and how well it bonds to exterior wood, so you should plan your project around the forecast. You’ll see Temperature effects in drying times: warm, dry conditions speed the curing process; cold or humid weather slows it and risks tacky finishes. Aim for manufacturer-recommended temps, allow extra cure time near dew or overnight lows, and avoid painting in direct midday heat that can cause blistering. Monitor surface temp, not just air temp, and postpone if conditions risk incomplete curing.
| Temp range | Expected cure | Notes |
|---|---|---|
| <40°F | Very slow | Risky |
| 40–50°F | Slow | Use slow-dry formulas |
| 50–70°F | Normal | Ideal |
| 70–85°F | Fast | Watch for flash drying |
| >85°F | Very fast | May cause defects |
Spot Repairs vs. Full Repaint: When to Do Each
If you’re dealing with isolated peeling, small areas of rot, or a few faded boards, opt for spot repairs; they save time and money by targeting only the damaged areas. You should choose spot fixes when damage is limited, matching existing finish and using eco-friendly paints to minimize VOCs.
Go for a full repaint when more than 20–30% of surfaces show failure, or when patchwork would look uneven. Consider color psychology if changing hues to affect curb appeal or mood.
Assess substrate soundness, long-term maintenance plans, and budget before deciding.
- Patch and blend small areas
- Repaint when widespread failure
- Prioritize low-VOC, durable coatings
Pick Exterior Colors That Last and Hide Flaws
Pick a durable, fade-resistant finish so your paint holds up to sun and weather. Use mid-tones and muted hues to mask minor imperfections without calling attention to them.
Always test samples on different walls in sunlight to see how color and finish read at various times of day.
Choose Durable Paint Finishes
When you want a paint job that stands up to sun, rain, and time, choose finishes formulated for exterior use and high UV resistance; they repel moisture, resist fading, and hide minor surface imperfections so your siding looks good longer.
You’ll pick between acrylic latex for flexibility, alkyd for toughness, and specialty elastomeric for cracked areas.
Consider color psychology when selecting sheen — glossier finishes reflect light and read brighter, while flatter sheens mask texture.
Paint texture and application technique affect durability, so prep thoroughly and apply recommended coats.
- Acrylic latex: flexible, low-maintenance
- Alkyd: hard-wearing, smooth finish
- Elastomeric: fills hairline cracks
Use Colors To Conceal
Along with choosing a durable finish, the colors you select can help mask imperfections and keep your exterior looking fresh longer. You’ll use color psychology to pick tones that reduce visual contrast—medium neutrals and muted hues hide surface blemishes better than stark whites or deep blacks.
Consider siding texture and shadow when doing color matching to trim and accents so flaws don’t stand out. Warmer mid-tones conceal dirt; cooler mid-tones minimize uneven fading.
Stay practical: choose low-gloss sheens and coordinated palettes that age gracefully. That way, your house appears well-maintained without constant touch-ups.
Test Samples In Sunlight
Because sunlight changes how paint reads, test several full-size samples on different walls and observe them at multiple times of day; you’ll see how tones shift and whether they reveal or hide imperfections. Do a Sunlight test to check gloss, texture, and color fading over weeks. Note which shades mask trim lines, grain, and repairs, and which amplify blemishes. Keep records and photos under morning, midday, and evening light. Use durable exterior formulas to minimize color fading and match samples to siding, trim, and landscaping so the final look endures and conceals flaws.
- Morning: soft, cool tones
- Midday: true color
- Evening: warm shifts
Painting Over Stained Exterior Wood
If your exterior wood is stained and you want a fresh painted look, start by evaluating the type of stain and the wood’s condition so you know how much prep you’ll need. Test adhesion with a small primer patch; oil or penetrating stains often need stain removal or sanding to accept paint.
Clean thoroughly, repair damaged areas, and let the wood dry.
Prime with a stain-blocking primer to prevent bleed-through and guarantee adhesion. For best results, pick a paint color after considering existing tones—use color matching samples on the primed surface and view them in daylight before committing.
Paint or Stain: Decks and Porches Decision Guide
When you’re choosing between paint and stain for decks and porches, weigh the pros like color options and surface protection against the cons such as slipperiness and hiding wood grain.
Consider maintenance and longevity: paint hides flaws but needs more frequent scraping and repainting, while stain soaks in, shows grain, and usually requires simpler yearly upkeep.
Think about your tolerance for maintenance and the look you want to decide what’s best for your outdoor wood.
Paint Versus Stain Pros
Deciding between paint and stain for your deck or porch comes down to how much maintenance you want, the look you’re after, and how well you want the wood protected; each option has clear trade-offs in durability, appearance, and upkeep.
You’ll pick paint when you want bold color psychology effects, crisp coverage, and the ability to follow historical trends on period homes.
Stain appeals if you prefer visible grain, easier spot repairs, and a more natural look.
Consider use, exposure, and design goals before choosing.
- Paint: strong color, opaque protection
- Stain: natural grain, subtle tones
- Hybrid: primed paint for trim, stain for floor
Maintenance And Longevity
Because upkeep dictates long-term value, you’ll want to weigh how paint and stain perform over years of sun, rain, and foot traffic. You’ll check durability, touch-up frequency, and how slipping, mold, or wear affect safety.
Paint hides grain and needs full recoats every 5–10 years; stain shows wood, so you can spot-treat and reseal more often.
Consider color psychology for decks used for entertaining—brighter hues feel lively, muted tones calm.
For historic homes, factor in historical restoration standards that may restrict coatings.
Choose based on maintenance willingness, desired appearance, and budget for periodic refinishing.
Prevent Drips, Runs, and Brush Marks
If you want a smooth, professional-looking finish, control your paint load and brush strokes to prevent drips, runs, and brush marks. Wipe excess paint on the can rim, work thin layers, and watch edges where paint pools.
Practice steady, even strokes and long pulls to blend each section while it’s wet. For drip prevention, keep vertical surfaces vertical and inspect from below. Use high-quality brushes and maintain a light, consistent pressure.
- Load less paint on the brush
- Use long, continuous strokes
- Feather edges to blend wet paint
Apply Brush techniques deliberately to avoid texture and imperfections.
Clean and Store Paint Tools Properly
When you’re finished painting, clean your brushes, rollers, and trays right away so dried paint doesn’t ruin them. Flush water-based paint with warm water; use mineral spirits for oil-based. Label containers with paint color and sheen before sealing. Dry tools flat or hang to keep bristles straight. Store rollers in plastic wrap for short breaks; use airtight lids and stir sticks for leftover paint.
| Tool | Cleaning Tip | Storage |
|---|---|---|
| Brush | Comb bristles | Hang |
| Roller | Rinse until clear | Wrap |
| Tray | Scrape then wash | Stack |
| Lid | Wipe rim | Seal |
| Can | Label | Cool place |
Fix Peeling, Blistering, and Chalk Problems
Start by evaluating the damaged areas to see where paint is peeling, blistering, or chalking.
Scrape and sand away all loose material until the surface is sound.
Then clean, repair any bare wood, and apply a suitable primer before repainting.
Assess Damage Areas
Before you paint, inspect the siding closely and mark any peeling, blistering, or heavy chalking so you know exactly what needs repair. Walk the perimeter, note areas where old paint loss exposes bare wood, and assess whether previous paint color or a change in paint sheen contributed to weathering.
Prioritize spots near rooflines, windows, and trim. Estimate material and time for each patch, and decide if underlying rot or moisture issues need pros. Record measurements and photos to track progress and match repair paint color and sheen later.
- Peeling clusters by trim
- Blisters under siding joints
- Chalky sun-exposed panels
Remove Loose Material
If you find peeling paint, blistering, or chalky residue, scrape and sand loose material back to a sound surface so new paint will adhere properly. Use a medium scraper, sanding block, and wire brush; remove all flaky bits until edges are tight. Wear a mask and guarantee paint ventilation when sanding; contain dust and old paint chips. Check exposed wood for rot and dry thoroughly before proceeding. Keep color mixing notes if you’ll touch up small areas so repaired spots match.
| Tool | Action | Tip |
|---|---|---|
| Scraper | Remove flakes | Hold flat |
| Sandpaper | Smooth edges | Use 80–120 grit |
| Brush | Clean dust | Work outward |
| Mask | Protect lungs | Guarantee ventilation |
Prep And Prime Surfaces
Once you’ve removed loose paint and repaired any soft or rotted wood, clean the surface thoroughly, let it dry, and apply a high-quality primer formulated for exterior wood. This stops chalking, seals bare spots, and promotes adhesion.
Scrape blisters, sand feathered edges, and wash chalky residue with a trisodium phosphate substitute.
Choose primer compatible with your topcoat to simplify color mixing and maintain desired paint sheen.
Spot-prime repairs, then prime full areas if substrate varies.
Use quality brushes or a sprayer for even coverage.
- Scrape, sand, and clean
- Spot-prime, then full prime if needed
- Match primer to topcoat
Year-Round Maintenance for Painted Wood
Though the work’s done after a good paint job, you’ll need simple, regular checks to keep wood siding looking great and prevent costly repairs. Inspect for chips, blistering, and moisture at least twice yearly, paying attention to wood grain direction where water collects.
Clean mildew with a mild detergent solution and rinse; avoid power washing that can erode fibers and alter paint sheen.
Touch up minor damage promptly with proper primer and matching topcoat.
Trim vegetation and keep gutters clear to reduce splashback.
Recaulk joints as needed and document changes so you can plan full repainting before extensive decay occurs.
Cost to Paint Exterior Wood: DIY vs. Pro
You can save on labor by doing the job yourself, but you’ll need to budget for paint, primer, brushes, rollers, tape, and any scaffolding or ladder rentals.
A pro will quote higher upfront costs but brings speed, experience, and often a warranty that can protect your investment.
We’ll compare a typical DIY cost breakdown with common professional painting prices so you can choose what makes sense for your home and budget.
DIY Cost Breakdown
Deciding whether to tackle your exterior wood painting yourself or hire a pro comes down to time, skill, and money. You’ll save on labor but pay for tools, primer, quality paint, and safety gear.
Factor in color psychology when choosing hues and test paint texture for durability and finish; bad choices waste cash.
Estimate costs per square foot, add contingency for prep (sanding, repairs), and amortize reusable tools over projects.
- Basic materials: brushes, rollers, primer, paint
- Prep and safety: sandpaper, fillers, harnesses
- Contingency: extra gallons, unexpected repairs
Professional Painting Prices
One common question homeowners ask is how much more it costs to hire a pro versus doing the exterior wood paint job yourself. You’ll pay for labor, prep, and quality materials—pros factor in color mixing, premium primers, and expert brush selection.
Expect national averages per 1,500–2,000 sq ft: DIY roughly $1,000–$2,500; pro $3,000–$8,000 depending on complexity.
Pros save time, guarantee consistent coverage, and handle repairs and permits. If you value warranty, efficiency, and flawless finish, hiring a pro is worth the premium.
If budget’s tight and you have skills, DIY can cut costs substantially.
Workflow Hacks for Multi-Day Paint Projects
Because weather and drying times rarely cooperate with your schedule, planning a clear, staged workflow is the difference between a messy, drawn-out job and a smooth multi-day paint project. You’ll break work into bite-sized zones, schedule coats around forecasts, and keep consistent Color schemes to avoid mid-project changes.
When weather won’t cooperate, stage work into zones, schedule coats around forecasts, and keep color choices consistent.
Prioritize Tool maintenance nightly so brushes, rollers, and sprayers stay ready. Prep, paint, and inspect each section before moving on; that prevents rework and maintains finish consistency.
Use staged cleanup and staging areas to protect wet surfaces and materials.
- Plan zones by exposure and drying time
- Maintain tools after each shift
- Nightly inspection checklist
Eco-Friendly Paints and Disposal Rules
When you plan zones and protect wet surfaces, it’s a good time to think about the products you’ll use and how you’ll dispose of leftovers. Choose low-VOC or zero-VOC paints with certified eco-friendly pigments to reduce fumes and environmental impact. Read labels for durability so you buy less.
Store sealed cans in a cool, dry spot to extend their life; donate unopened paint to community programs. For leftovers and rags, follow local disposal regulations—never pour paint down drains or into soil.
Harden small amounts with kitty litter and label containers before trashing, and take hazardous waste to official drop-offs.
When to Call a Contractor for Lead or Structural Issues
If you suspect lead paint, extensive rot, or structural movement, call a licensed contractor right away—these issues can be hazardous and require professional assessment and remediation. You shouldn’t try major abatement or load-bearing repairs yourself.
A contractor will test for lead concerns, contain contamination, and follow local abatement rules. They’ll evaluate structural integrity, recommend shoring, replacement, or engineered repairs, and give you compliant estimates.
Get referrals, verify licenses and insurance, and ask for written scopes and timelines. Prioritize safety and code compliance to protect occupants and value.
Hire a pro when risk, complexity, or legal requirements exceed DIY.
- Lead testing and abatement
- Framing and foundation repairs
- Licensed scope, permit checks
Seasonal Repaint Checklist: What to Inspect Each Year
As seasons change, make a quick annual walkaround to spot problems early so small repairs don’t turn into big jobs. Check siding for peeling, cracking, or blistering paint; probe soft wood near eaves, windows, and trim.
Inspect caulking and flashing for gaps, and clear gutters to prevent water damage. Note faded areas to reconsider color palettes that suit sun exposure and curb appeal. Test a small patch for adhesion before repainting.
Examine trim joints, shutters, and doors for rot. Clean surfaces, sand as needed, and choose appropriate brush techniques for smooth, lasting coverage on your next repaint.
Quick Troubleshooting: Bad Finishes and Fixes
Because paint problems rarely fix themselves, you’ll want to identify the symptom quickly and match it to the right remedy. Inspect for peeling, blistering, uneven color blending, or inconsistent paint sheen.
Because paint issues won’t self-correct, spot the symptom early and choose the proper fix—inspect carefully.
Scrape loose areas, sand feathered edges, and prime bare wood. For lap marks or streaks, thin your coat and maintain a wet edge.
Mildew needs a detergent wash and fungicide before repainting. Test small patches to confirm adhesion and color match.
- Peeling/blistering: remove, sand, prime, repaint
- Mildew: wash, treat, dry, repaint
- Sheen mismatch: scuff, prime spot, recoat
Frequently Asked Questions
Can I Paint Exterior Wood Over Fresh Caulk Immediately?
No, you shouldn’t paint over fresh caulk immediately. For proper painting preparation, wait for caulk application to cure per manufacturer instructions—usually 24–48 hours—so the paint adheres well and prevents cracking or peeling later.
How Do Hummingbirds or Insects Affect Paint Longevity?
Hummingbird interference and insect damage prevention matter: you’ll see droppings, sap, or insects stick to wet paint, accelerating wear and causing chips; you’ll prevent problems by timing coats, using repellents, and keeping surfaces clean.
Will Exterior Paint Trap Moisture in Reclaimed Lumber?
Yes — painted surfaces can trap moisture in reclaimed lumber; studies show improperly sealed wood raises rot risk by up to 60%. You should dry, prime, and use breathable coatings so trapped moisture can escape over time.
Are There Warranty Tips for DIY Exterior Paint Jobs?
Yes — you can protect warranty coverage by documenting paint preparation, following manufacturer instructions, saving receipts, registering the product, and keeping photos of prep and conditions. If issues arise, you’ll promptly contact the manufacturer for claim guidance.
How to Choose Paint for Historic Woodwork Authenticity?
Pick paints like a museum snob: you’ll favor low-gloss, historically accurate formulas and breathable, oil- or acrylic-alkyd blends for an authentic finish. You’ll test samples, match period pigments, and document choices for preservation records.
Conclusion
Ready to tackle your exterior wood paint project? You’ll save time and money by repainting every 7–10 years—studies show proper maintenance can cut long-term repair costs by up to 40%. Choose the right primer, finish, and season, dispose of materials responsibly, and call a pro for lead or structural risks. With regular yearly checks and prompt fixes, your home will look great and stay protected for years.