How to Patch Plaster Walls Before Painting
Before painting, inspect for loose plaster, cracks, and delamination, then remove any loose material and clean the surface. Fill small holes with spackle or lightweight compound; tape and skim hairline cracks with fiberglass tape and joint compound. For larger damage, back with mesh or a patch board and apply thin, multiple coats, sanding lightly between them. Prime sealed patches with a plaster-compatible primer, let dry, then paint—keep going to learn tools, materials, and troubleshooting tips.
Quick Plaster Repair Checklist
Before you grab paint, run through this quick plaster repair checklist so you won’t miss any steps that affect finish and durability. You’ll assess wall stability, locate moisture sources, and mark areas needing patching.
Prioritize repairs that preserve historical restoration details, matching profiles and textures. Remove loose plaster, clean surfaces, and choose appropriate patching compounds.
Consider eco-friendly materials like lime-based mortars or low-VOC finishes to protect occupants and historic fabric. Sand and feather edges, allow proper drying times, and apply primer suited to plaster.
Finish by rechecking adhesion and texture before painting for a durable, authentic result.
Quick 3‑Step Plaster Inspection: Loose, Cracks, Delamination
Now that you’ve checked stability, moisture, and surface prep, it’s time to inspect the plaster itself for three common problems: loose sections, cracks, and delamination.
First, tap areas lightly; hollow sounds or movement mean loose plaster—mark and prioritize those for secure reattachment to preserve plaster durability.
Tap surfaces gently—hollow sounds or movement signal loose plaster; mark and prioritize reattachment to preserve durability.
Second, follow cracks; hairline versus spreading gaps indicate different fixes and risk to structural finish.
Third, probe edges and behind trim for delamination by inserting a thin tool; lifted layers need consolidation.
Throughout, balance practical repairs with historical preservation awareness—document original details so fixes respect the wall’s character.
Decide: Repair or Replace Plaster?
If the damage’s limited and the lath is sound, you can usually repair plaster. If you find extensive cracking, wide sections of delamination, or rotten lath, replacement is often the safer long-term choice.
You’ll weigh scope, cost, and time: small hollows, hairline cracks, and isolated delamination favor plaster restoration, preserving original surfaces and details. Large areas, structural movement, or moisture damage usually mean full replacement gives a more reliable result.
Also consider historical preservation: if the wall has architectural detail or heritage value, prioritize restoration or consult a specialist.
Decide based on durability, budget, and the wall’s historical significance.
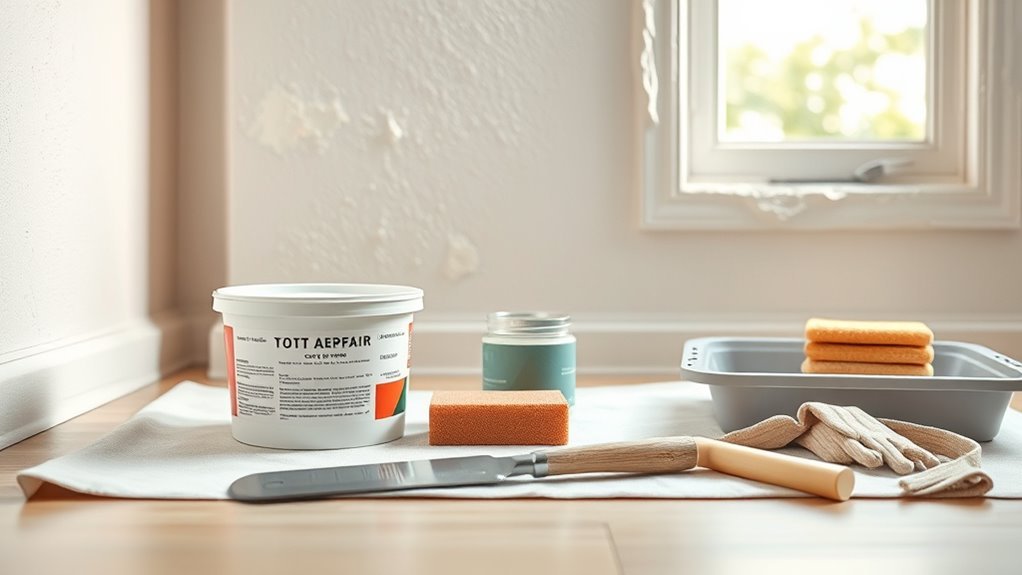
Tools You’ll Need for Plaster Repair
Before you start patching, gather the essential hand tools like a putty knife, plastering trowel, sanding block, and a good utility knife.
You’ll also need mixing supplies and materials—a hawk or bucket, bonding agent, premixed or powdered plaster, and clean water.
Don’t forget safety gear and cleanup items: gloves, goggles, a dust mask, drop cloths, and a shop vacuum or broom.
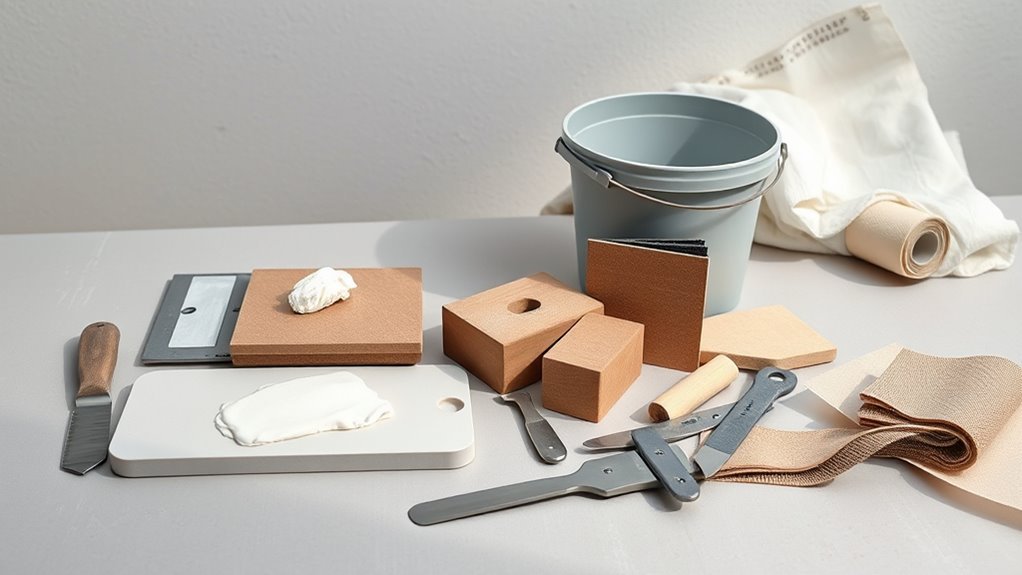
Essential Hand Tools
When you’re ready to tackle plaster repairs, a few dependable hand tools will make the job faster and cleaner. You’ll need scrapers, putty knives, sanding blocks, hawks, and taping knives to remove loose plaster, apply patches, and finish smooth surfaces. For decorative finishes or historical restoration, include small detailing tools and gentle scrapers to protect moldings. Keep a good utility knife and wire brush for prep and a set of assorted blades. Work deliberately, clean tools between passes, and choose sizes that fit the patch.
| Tool | Use |
|---|---|
| Scraper | Remove loose plaster |
| Putty knife | Apply patch |
| Hawk | Hold compound |
| Sanding block | Smooth finish |
| Utility knife | Trim edges |
Mixing And Materials
Although the right materials make the job easier, your technique matters just as much. Gather plaster mix or premixed joint compound, a bonding agent for older lath, and mesh or paper patches. Use a hawk, mixing bucket, margin trowel, and 6–10″ plastering trowel.
For historical restoration, choose lime-based plasters to match original layers; ask suppliers for compatible recipes. If you prefer eco-friendly materials, look for low-VOC compounds and recycled-fiber reinforcement.
Measure water precisely, mix to a creamy, lump-free consistency, and work in small batches so the material stays workable as you apply and smooth repairs.
Safety And Cleanup
Want to keep yourself and your home safe while you repair plaster? Follow basic safety precautions and tidy as you go. Wear gloves, eye protection, and a dust mask; ventilate the room.
Contain dust with drop cloths and painter’s tape, and use a vacuum with a HEPA filter for cleanup tips that actually work. After repairs, wipe surfaces with a damp cloth and dispose of debris responsibly.
- Nitrile gloves and safety goggles
- N95 or P100 respirator
- Drop cloths and painter’s tape
- HEPA vacuum and damp rags
These steps protect you and speed final cleanup.
Choosing the Right Plaster Patching Compound
Picking the right plaster patching compound matters because it determines how well repairs blend, how long they last, and how easy the job will be. You’ll choose a product that matches plaster color and texture, and consider historical accuracy for older homes.
Look for compatibility with existing finish, required cure time, and sandability. If you need textured match, pick a compound designed for finishing coats. Check moisture resistance for damp areas and shelf life for leftover material.
Buy a small test amount to confirm color and workability before committing to a full repair. Follow manufacturer mixing and application instructions.
Joint Compound vs. Spackle vs. Plaster: Which to Use?
You’ll want to know the basic material differences—joint compound is gypsum-based and trowel-friendly. Spackle is thicker and dries faster. Traditional plaster is harder and more durable.
Pick spackle for small holes and quick repairs. Use joint compound for wider skim coats or taping. Choose plaster for historic or large-area restorations.
Also consider drying times: spackle sets quickest, joint compound varies by formulation, and plaster often needs the longest cure time.
Material Composition Differences
Curious which filler will give you the smoothest, most durable finish? You’ll want to understand material differences and composition variations so you pick correctly.
Joint compound mixes gypsum and binders for sanding-friendly, larger repairs.
Spackle uses lightweight polymers for quick, small fixes that shrink less.
Traditional plaster contains lime, gypsum, or cement and sets harder for structural patches.
Consider drying time, sanding ease, and bond strength when choosing.
- Joint compound: gypsum-based, easy sanding
- Spackle: polymer-rich, low shrinkage
- Plaster: lime/cement/gypsum, durable
- Hybrids: blended formulas for specific needs
Best Uses Per Repair
When should you reach for joint compound, spackle, or plaster? You’ll choose joint compound for larger interior gaps, taped seams, and feathered repairs before painting.
Use spackle for small holes, nail pops, and quick touch-ups where minimal sanding’s needed.
Opt for traditional plaster when matching profiles, repairing lath-and-plaster, or during historical restoration—plaster gives the density and texture older walls require.
For decorative finishes, select the material that accepts sculpting or layering without cracking: plaster or specialized joint compounds work best.
Match substrate, profile, and finish to guarantee a seamless repair that holds up under paint.
Drying Time Comparison
Now that you’ve matched materials to the repair type and finish, consider how drying times affect your schedule and technique. You’ll choose joint compound for larger gaps, spackle for small dents, and traditional plaster for deep or historic fixes.
Drying times vary with coat thickness and humidity levels, so plan multiple thin layers rather than one thick application. Temperatures and ventilation speed things up; high humidity slows them.
- Joint compound: slow, multiple coats, sanding between.
- Spackle: fast spot repairs, minimal sanding.
- Plaster: longest cure, structural strength.
Tip: control humidity levels for predictability.
Prep the Wall So Patches Stick
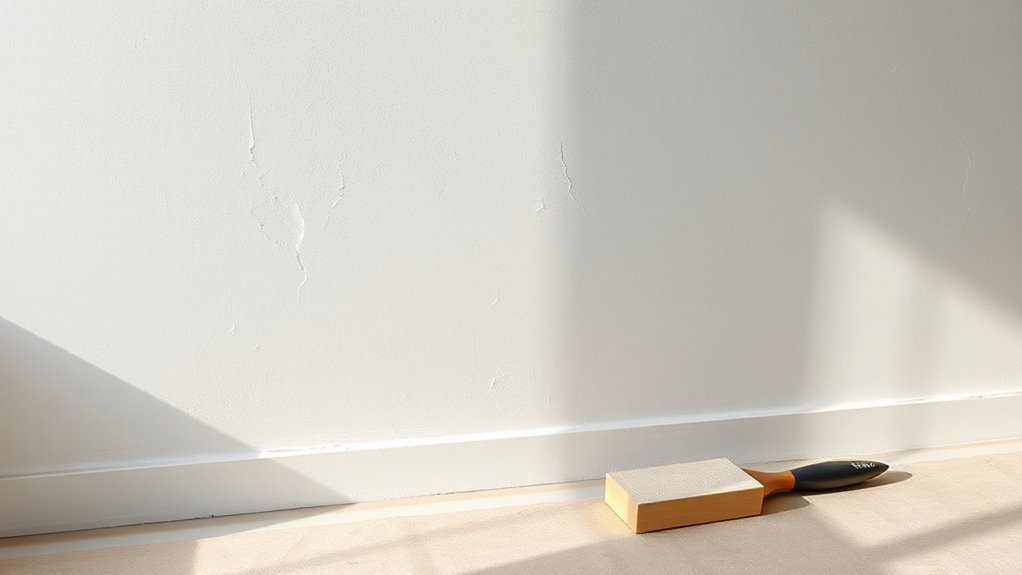
How do you make sure your patching compound grips the wall? You’ll clean loose dust, scrape flaking plaster, and sand glossy spots so the compound bonds. Match repairs to surrounding wall texture and plan for color matching later. Dampen very dry plaster slightly so it won’t suck moisture from the filler. Use a bonding primer on crumbly areas and a small undercoat where suction differs.
| Step | Action | Why |
|---|---|---|
| Clean | Remove dust/debris | Better adhesion |
| Sand | Scuff glossy paint | Prevents slipping |
| Prime | Apply bonding primer | Seals porous plaster |
Fix Small Nail Holes and Pinholes
If you’ve got small nail holes or pinholes, you’ll want to fill them before priming so the finish goes on smooth and even. Use lightweight spackling for quick Nail holes and Pinhole fixes—it sands easily and dries fast. Work with a small putty knife or fingertip for neat results. After drying, sand flush and wipe dust away.
Fill small nail holes with lightweight spackle, smooth, sand flush, wipe clean, and spot-prime for an invisible finish.
- Apply spackle sparingly, overfilling slightly
- Smooth with a damp finger or small knife
- Sand with fine-grit paper once set
- Wipe clean and spot-prime before painting
This keeps repairs invisible and guarantees an even topcoat.
Stop Hairline Cracks in Plaster
Before you patch, figure out what’s causing the hairline cracks—settling, moisture, or vibration each need different fixes.
Once you know the cause, clean the crack and apply a strip of fiberglass tape to bridge and reinforce the joint.
Finish with a thin skim coat of plaster or joint compound so the repair stays flat and strong.
Identify Crack Causes
Wondering why those hairline cracks keep returning? You need to identify root causes before patching, especially in older homes where historical preservation matters and you may prefer eco friendly materials.
Inspect patterns, test moisture, and note structural shifts. Consider these checks:
- Check for plumbing leaks or rising damp that weaken plaster
- Look for seasonal movement from timber framing or temperature swings
- Inspect paint layers and bonding failures from incompatible coatings
- Note roof or foundation issues that transfer stress to walls
Once you’ve pinpointed causes, choose compatible patching methods and sustainable materials to prevent recurrence and protect the building’s character.
Reinforce With Fiberglass
When you’ve tracked down the cause of recurring hairline cracks, reinforce vulnerable areas with self-adhesive fiberglass mesh to stop them coming back. Cut the mesh slightly larger than the crack area, press it flat, and overlap seams by about an inch.
Mix a thin layer of joint compound, embed the mesh, then smooth another coat over it; let dry fully. Sand lightly, prime, and finish with paint.
Fiberglass reinforcement adds tensile strength and prevents movement from re-opening cracks. Use targeted patching techniques for stubborn areas and avoid excessive layers—minimal, proper reinforcement gives the cleanest, longest-lasting results.
Patch Medium Gouges and Dents
If you’ve got medium-sized gouges or dents—about the size of a quarter to a half-dollar—you’ll need a slightly different approach than for hairline cracks: prep the area, fill it with a durable patching compound, and feather the edges so the repair blends with the surrounding plaster.
Clean loose debris, control moisture, and let the substrate dry. Use a setting or vinyl compound, apply in thin layers, and sand between coats.
Match surrounding texture before final sanding, then prime.
- Clean and dry the dent
- Apply compound thinly
- Sand and reapply as needed
- Texture matching, then prime
Repair Large Holes and Delaminated Plaster
Because large holes and delaminated plaster compromise both structure and finish, you’ll take a more robust approach than you did for small dents: clear loose material, assess the backing, and choose either a patch with mesh and setting compound or replace the damaged lath before re-plastering.
Start by removing loose plaster to sound edges and inspect for rot or rusted nails; document any historical context if the wall’s original fabric matters. Brace the area if needed, use appropriate PPE, and follow DIY safety: respirator, gloves, and eye protection.
After repair, feather and sand to match surrounding profiles before priming.
Use Mesh and Backing for Big Plaster Repairs
Although large openings need solid support, you can save time and materials by reinforcing them with metal or fiberglass mesh and a backing before applying setting compound. You’ll secure a backing—plywood, cement board, or new lath installation—so the mesh has something to grip.
Cut mesh to overlap edges, fasten it, and contour it to any plaster mold details you’re preserving. This prevents sagging and offers a key for the compound.
- Choose backing material matching wall depth
- Fasten mesh with corrosion-resistant screws
- Recreate plaster mold transitions before topping
- Facilitate mesh is tight and wrinkle-free
Apply Thin, Even Compound Layers
Start by spreading the compound in thin, even coats so it bonds without sagging. Feather each edge outward with a trowel or knife so the repair blends smoothly into the surrounding plaster.
Let each thin layer dry fully before applying the next to build a strong, invisible finish.
Feathering The Edges
When you apply joint compound, feather the edges by working outward from the repair with thin, even layers so each coat blends smoothly into the surrounding plaster; this reduces visible ridges and makes sanding easier. You’ll focus on gradual progressions to aid texture matching and color blending later.
Use a wide knife, keep strokes light, and check from different angles. Let each thin layer dry fully before light sanding.
- Hold the knife at a shallow angle
- Wipe excess compound off the blade
- Feather beyond the damaged area slightly
- Inspect under raking light for high spots
Multiple Thin Coats
Because thin layers dry more evenly and sand smoother, apply several light coats of joint compound instead of one thick one. You’ll protect plaster texture and respect historical preservation by building up thin, even layers that match surrounding profiles. Let each coat fully dry, sand lightly with fine grit, and remove dust before the next coat. Work outward from the repair to feather edges, checking alignment and texture frequently. Patience yields invisible repairs and less cracking. Use a flexible knife, consistent pressure, and minimal compound per pass to control depth and finish.
| Calm | Care | Respect |
|---|---|---|
| Dry | Sand | Match |
| Wait | Blend | Preserve |
| Check | Smooth | Finish |
| Pride | Save | Beauty |
How to Tell When Compound Is Dry Between Coats
If you press lightly with your fingertip and feel coolness or tackiness, the joint compound isn’t ready for the next coat yet. Dry compound should be hard to the touch and lose that damp, flexible feel. Use simple drying indicators and a moisture test to confirm readiness.
If your fingertip feels cool or tacky, wait—dry compound should be hard, matte, and not flexible.
Check surface color uniformity and edges for lifting. Wait longer in humid rooms.
- Tap: a solid sound means dry.
- Touch: no tackiness or coolness.
- Visual: consistent matte finish.
- Time: manufacturer’s recommended cure plus extra for humidity.
If all four match, you can apply another thin coat confidently.
Sand Plaster Patches for a Feathered Finish
Now that the compound feels dry and shows a uniform matte finish, you can begin sanding the patch to feather its edges into the surrounding plaster.
Use fine-grit sandpaper (120–220) on a sanding block, working lightly from the center outward to blend the patch with existing plaster texture.
Check frequently for low spots and maintain wall stabilization by avoiding aggressive pressure that could loosen nearby plaster.
For subtle texture differences, lightly stipple with a damp sponge or very light sandpaper touch to mimic plaster texture.
Clean dust with a vacuum and tack cloth so the surface’s finish reads seamless before priming.
Prime Patched Plaster Areas Before Painting
Before you paint, seal the patched areas to prevent uneven sheen and absorption. You’ll want a primer designed for plaster or a multi-surface primer that bonds well and blocks stains.
Apply the primer thinly and evenly, then let it dry fully before topcoating.
Seal Patch Areas
While the patch looks smooth, you still need to seal it so paint adheres evenly and color reads uniform. Prime the patched areas with a quality primer that’s compatible with both plaster and your finish coat.
After priming, focus on sealing patch edges and any remaining micro-cracks to prevent seal gaps and address moisture issues that can cause peeling. Use a thin bead of appropriate caulk where joint movement occurs, and allow full cure.
Sand lightly if needed, then wipe dust. Finish by inspecting under good light to ensure seamless transitions before painting.
- Seal edges and joints
- Check for damp spots
- Caulk movement gaps
- Re-prime if needed
Choose Appropriate Primer
Which primer should you pick for patched plaster? Choose a high-quality primer designed for plaster repairs to seal joints and guarantee adhesion.
Use a stain-blocking, fast-drying formula if patches differ in porosity. Apply a thin, even coat over patched areas, feathering into surrounding wall to aid texture blending.
If you plan a dramatic color change, pick a tinted primer for better color matching and fewer topcoats.
For repaired spots that absorb differently, consider a shellac- or acrylic-based primer depending on odor tolerance and drying time.
Let primer fully cure before sanding lightly and painting for a seamless finish.
Prevent Future Cracks and Plaster Movement
Because plaster moves over time, you’ll need to address the causes of that movement to stop new cracks from forming. Inspect structural issues, moisture sources, and previous repairs—especially in historical restoration—so you fix root causes, not cosmetic symptoms. Control humidity and leaks for mold prevention and long-term stability. Reinforce and isolate where needed, then use flexible fillers.
- Stabilize framing and lath connections
- Repair roof, plumbing, or window leaks promptly
- Use breathable paints and appropriate primers
- Add mesh or paper tape over joints for flexibility
Follow these steps so repaired plaster stays intact and paint looks good longer.
Troubleshoot Common Plaster Repair Problems
If you run into trouble after patching plaster, don’t panic—you can usually fix it with the right diagnosis and a few targeted steps.
First, identify the issue: hairline cracks suggest movement or shrinkage; crumbling edges mean poor adhesion or damp. Reclean, key the surface, and use appropriate bonding agents.
For visible texture mismatches, feather additional compound and sand lightly; match any decorative finishes by mixing texture or consulting samples.
If paint lifts, check for residual dust or old oil-based coatings.
In historical restoration, test materials on concealed spots and document any reversible treatments to protect authenticity.
Typical Cost and Time for Plaster Repairs
Costs and time for plaster repairs vary a lot depending on the job: small hairline crack repairs might take an hour or two and cost $50–$150 in materials and labor.
Plaster repair costs and times vary widely; small hairline fixes often take 1–2 hours and cost $50–$150.
Larger patching, re-skim coating, or work on historic moldings can run several hundred to a few thousand dollars and take a day to several days. You’ll pay more when matching plaster texture or doing historical restoration that needs careful materials and curing.
Plan for drying and sanding times between coats. Typical ranges depend on size, access, and finish goals:
- Small crack: 1–2 hours, $50–$150
- Medium patch: half–full day, $150–$500
- Re-skim: 1–3 days, $300–$1,200
- Historic restoration: several days–weeks, $500+
When to Call a Pro for Plaster Wall Work
When repairs go beyond a quick skim or the damage looks structural, call a pro—you’re likely dealing with issues that need experienced assessment and tools.
You should hire a specialist if cracks span several feet, plaster detaches from lath, mold or moisture repeats, or electrical/plumbing lies behind walls.
Choose someone experienced with historical preservation for period homes to protect original details and materials.
Ask about using eco friendly materials if sustainability matters.
Pros will diagnose structural causes, match textures, and guarantee safe, code-compliant fixes.
Hiring prevents wasted time, recurring problems, and costly mistakes you mightn’t spot.
Frequently Asked Questions
Can I Paint Plaster With High-Gloss Paint Without Extra Prep?
No, you shouldn’t—high-gloss needs solid paint adhesion, so you’ll prep the surface, make sure plaster drying is complete, sand and prime; otherwise the finish may peel or show imperfections and won’t last.
Will Plaster Repairs Show Under Textured Paint Finishes?
Like a scar under fabric, repaired plaster can peek through textured paint finishes. You’ll minimize visibility by matching plaster texture and ensuring paint compatibility; prime repairs, blend textures, and use compatible paint for the most seamless result.
Can Wallpaper Be Applied Over Newly Patched Plaster?
Yes — you can apply wallpaper over newly patched plaster if you follow plaster patching techniques, let repairs fully cure, sand smooth, prime for wallpaper adhesion, and use appropriate adhesive; otherwise seams or bubbles can form.
Are There Health Risks From Sanding Old Plaster With Lead Paint?
Like walking through a fog of danger, yes — sanding old plaster with lead paint creates lead dust that’s hazardous. You’ll wear an N95 or P100 respirator, use containment, wet-sanding, and follow health precautions to protect yourself.
How Long Before Furniture Can Touch a Freshly Painted Repaired Wall?
You can place furniture after full drying time; wait at least 24–48 hours for touch-dry paint, but allow 7 days for cured finish before heavy furniture placement. Furniture placement depends on drying time and paint type.
Conclusion
Now you’ve got the map to tame those tired walls, and with a little elbow grease you’ll turn cracks and chips into smooth canvas. Patch, sand, prime and paint like a sculptor finishing a statue—each careful pass brings the room back to life. Take your time, follow the checklist, and don’t be afraid to call in a pro if the damage runs deep. Your walls will sing again, ready for their new coat.