How to Patch Up Paint on Wall (Quick Fix Guide)
You can fix scuffs, nail holes, and small chips fast: clean the area, scrape loose paint, fill holes with spackle or lightweight joint compound, let dry, sand smooth, prime bare spots, then feather on matching paint with a small brush or mini roller to blend edges. For textured walls use mesh tape or texture spray before priming. Tackle stains with a stain-blocking primer and address leaks or mold first—keep going for fuller tips and pro tricks.
What This Guide Fixes Fast
When you’re short on time, this guide shows how to fix the common, quick paint problems that make a wall look tired—scuffs, small chips, nail holes, and uneven touch-ups—so you can restore a clean appearance in one session.
You’ll learn quick patching, gentle sanding, and feathering techniques that blend repairs without full repainting. Keep spare cans labeled for easy color matching and follow basic color theory to decide whether to blend, lighten, or touch shadows.
You’ll also get tips on proper paint storage to preserve touch-up quality and when a small repair will do versus more work.
When You Need a Full Repaint Instead
If the wall has large cracks, peeling, or other extensive surface damage, patching won’t hold and you’ll need a full repaint.
You’ll also want to repaint when the repaired spot won’t match the surrounding color or texture, since mismatches draw the eye.
When those issues appear, plan for a complete redo rather than trying to blend fixes.
Extensive Surface Damage
Although small chips and scuffs are easy fixes, extensive surface damage—large cracks, widespread peeling, water stains, or uneven previous coatings—means you’ll need a full repaint rather than spot repairs.
You should assess wall texture and structural issues first: run your hand over surfaces to find delamination, soft spots, or flaking. Remove loose paint, repair cracks with appropriate filler, sand smooth, and address moisture sources.
Apply surface priming to bare or repaired areas to guarantee adhesion and uniform absorption. A full repaint restores durability and appearance; don’t waste time patching when the underlying surface is compromised.
Color Or Texture Mismatch
Because subtle differences in hue or finish stand out across a room, you’ll often need a full repaint rather than spot-touching to fix color or texture mismatches. If you try a small patch, you’ll notice a color mismatch where light hits differently, or a texture mismatch if the patching method contrasts with the original finish.
Match sheen, primer, and application technique, but accept when blending’s impossible. Repainting the entire wall guarantees uniformity.
Prep by cleaning, repairing, and priming, then apply consistent coats with the same tools and lighting. That way, your wall looks cohesive and professional.
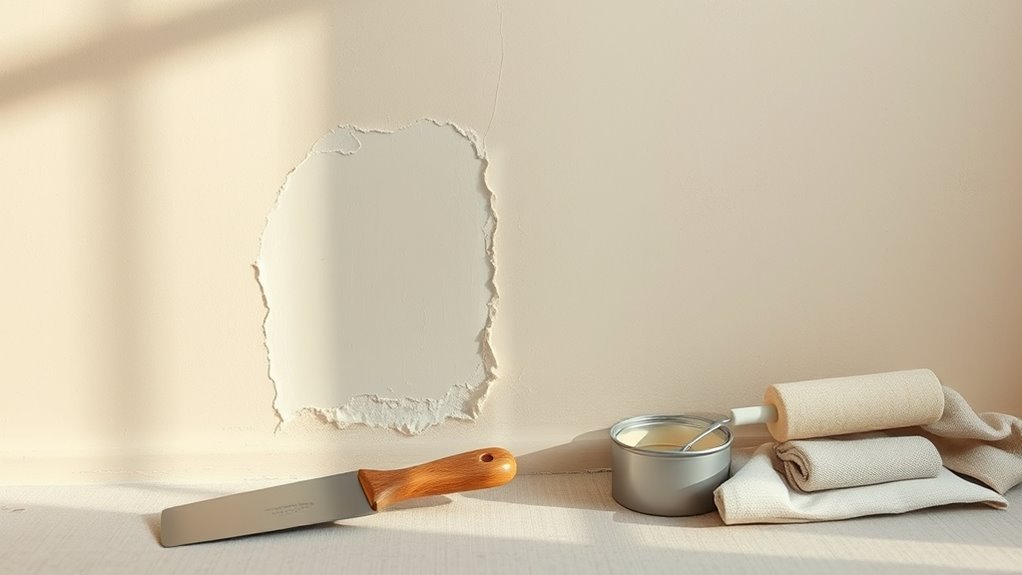
Gather Tools for Quick Paint Repairs
Before you start patching, gather the right tools so the job goes smoothly: a putty knife, spackle or lightweight joint compound, sandpaper (120–220 grit), a small paintbrush or mini-roller, matching paint and primer, a damp cloth, and drop cloth or painter’s tape to protect floors and trim.
Before patching, gather tools—putty knife, spackle, sandpaper, paint, primer, drop cloth—so repairs go smoothly.
You’ll also want a sanding block, a utility knife, and a small mixing tray. Keep tools clean and accessible.
Choose materials mindful of color contrast to avoid obvious touch-ups and consider paint durability for high-traffic areas.
Organize everything nearby so you can work efficiently and finish neat, professional-looking repairs.
Stock Essential Paints and Fillers
Now that your tools are ready, you’ll want to stock a few paint types—matching latex for walls and a small can of touch-up gloss for trim.
Keep spackling compounds, wood filler, and a good primer on hand so repairs stick and blend smoothly.
Don’t forget sandpaper, putty knives, brushes, and a mini roller to get the job done neatly.
Essential Paint Types
When you’re ready to repair a wall, knowing which paints and fillers to have on hand saves time and prevents mismatched finishes. You’ll want latex (water-based) for most interior touch-ups—easy cleanup, quick drying, flexible with temperature changes.
Use oil-based for high-traffic trim or stubborn stains needing stain-blocking. Keep satin or eggshell for walls; flat hides imperfections but’s harder to clean.
Understand paint chemistry to match sheen and adhesion, and use color psychology to pick repair paint that blends or subtly adjusts room mood.
Buy small sample pots of your chosen sheens so you can test before committing.
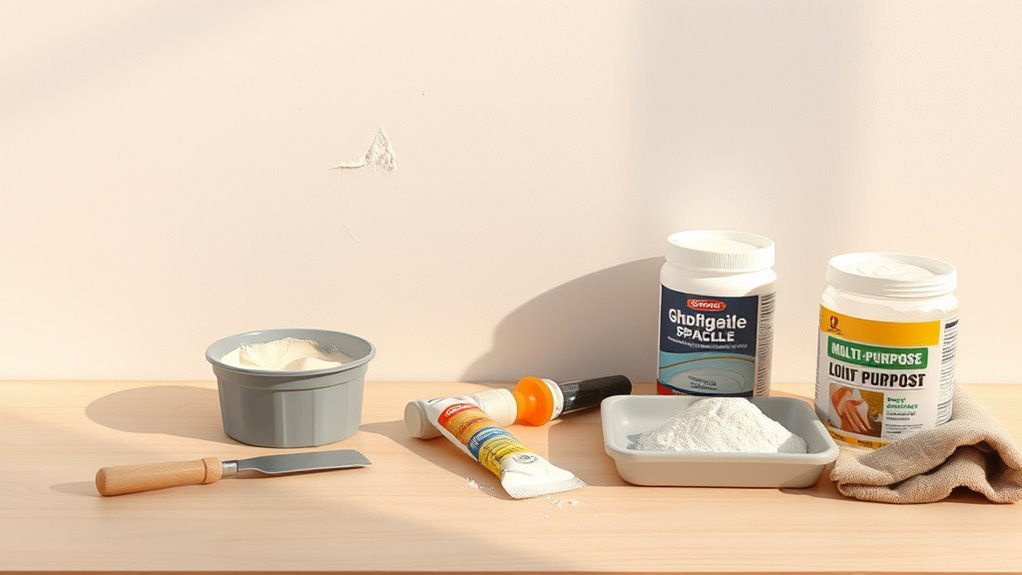
Fillers And Primers
After you’ve picked the right paint and sheen, you’ll need the fillers and primers that make repairs look factory-new. Choose a filler matched to the substrate—spackle for small holes, lightweight joint compound for drywall, and exterior-grade filler for outdoor repairs.
Apply and sand smooth so the patched area blends with surrounding texture. Use primer applications to seal the repair, improve adhesion, and prevent flashing or absorption differences that harm paint durability.
Spot-prime bare filler or exposed substrate, feathering into surrounding paint. Let primer dry fully before topcoating, and pick a primer compatible with your chosen paint type for best results.
Tools And Accessories
Because having the right tools keeps repairs quick and durable, stock your kit with essentials that match the fillers and primers you’ve chosen. You’ll need a selection of putty knives (various widths), a sanding block with medium and fine grit, a refillable caulking gun, and trays for small paint mixes.
Keep sample tins of essential paints and compatible primers, plus a brush set for cutting in and a mini roller for matching wall textures. Add disposable cloths, masking tape, and a small vacuum or brush for dust.
Stay current with decorating trends by keeping neutral samples and texture-matching tools on hand.
Pick the Right Filler for Your Wall Type
Although surface repairs can look similar, you’ll need different fillers depending on whether your wall’s drywall, plaster, or masonry.
For small drywall dents, use lightweight spackle; it sands smooth and matches typical wall texture.
For deeper drywall holes, choose setting-type joint compound or a mesh patch for strength.
For plaster cracks, pick a flexible, cement-based or acrylic filler that bonds to rigid layers without shrinking.
For masonry or brick, use a mortar repair compound or a polymer-modified patch to resist moisture.
Consider your room’s color palette and final texture when selecting filler so repairs take paint and finish consistently.
Choose Matching Paint Color and Sheen
How do you guarantee a repaired spot disappears once painted? Start by identifying existing paint finish and approximate hue so color matching and sheen consistency blend seamlessly. Pick the same brand or a close formula; differing bases show even if color seems right.
For quick reference, consider:
- Check paint can label for batch and sheen.
- Hold a small swatch in the same light to spot obvious differences.
- Use small quantities of the same finish to avoid texture mismatch.
Work fast but carefully: apply thin coats, let each dry fully, and assess in varied light before declaring the repair done.
Test Paint Match Before You Commit
Want to make sure that touch-up won’t stand out? Test a small, inconspicuous swatch before committing. Apply the paint in thin, feathered strokes over a cleaned area and let it fully dry; sheen and paint durability reveal themselves only after curing.
Observe the swatch at different times of day and under artificial light to catch shifts caused by color psychology—warm or cool tones can alter perceived brightness and mood.
If possible, test on a removable sample board so you can compare nearby walls. Repeat with adjusted formulas until the sample blends seamlessly, then proceed with confidence.
Inspect Damage and Choose the Repair Method
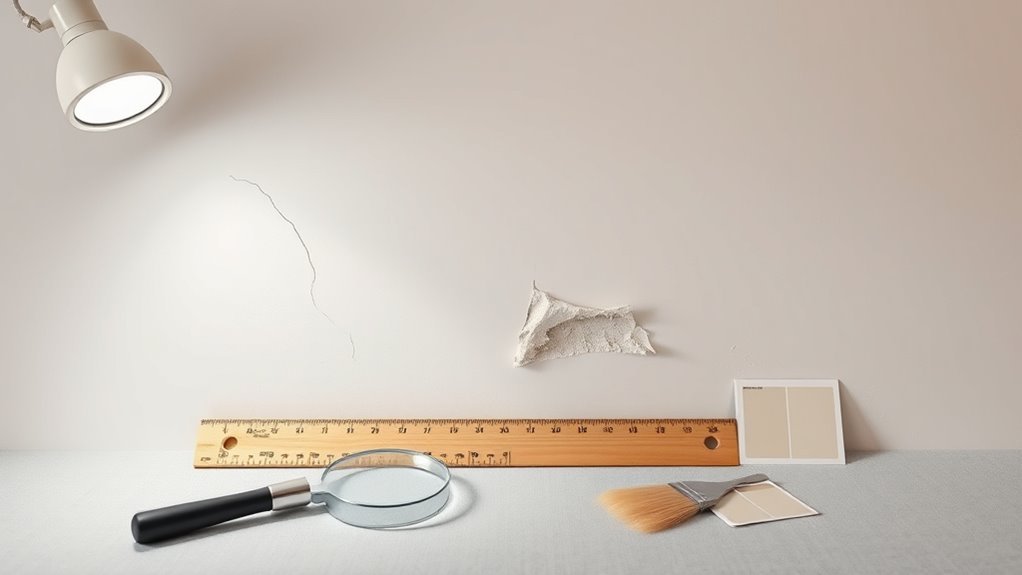
First, check the damage to see if it’s a scuff, chip, crack, or hole. That tells you whether you’ll need simple cleaning and touch-up, spackling and sanding, or a patch and primer.
Choose the repair that matches the problem so your finish looks seamless.
Assess Type Of Damage
Before you grab a brush, walk the wall and examine the damage closely so you can pick the right repair method. You’ll note size, depth, and cause—scuffs from furniture placement, nail holes from wall decor, or peeling paint from moisture.
Match observations to a repair category: surface, hole, or structural.
- Surface blemishes: small scuffs, light stains
- Small holes: nails, anchors, chips
- Larger damage: cracks, gouges, moisture issues
Measure hole diameter and depth, test flaking by scraping gently, and sniff for mildew. Document locations so you won’t miss spots when you prep.
Select Appropriate Repair
How will you fix the problem? Inspect the spot closely: is it a surface scuff, small chip, nail hole, or damp-related damage?
For minor scuffs or shallow chips, clean, sand lightly, and apply primer plus touch-up paint.
For deeper gouges, fill with spackle or joint compound, sand smooth, then prime.
For water or mold damage, address the moisture source first, replace compromised drywall if needed, then repair.
Always plan for color matching and texture matching — test paint swatches and recreate the wall finish (smooth, orange peel, knockdown) before final touch-up to blend repairs seamlessly.
Clean Grease, Dirt, and Stains Before Repairs
Since grease, dirt, and stains can stop fillers and paint from adhering properly, clean the affected area thoroughly before you start any repairs. You’ll want the right cleaning tools and a grease removal method that suits the stain.
Begin by testing a mild detergent; escalate to trisodium phosphate or a commercial degreaser for kitchen grime. Rinse and dry fully before filler or primer.
Start with a mild detergent; for tough kitchen grease, step up to TSP or a commercial degreaser, then rinse and dry.
- Use a soft sponge or microfiber cloth for gentle scrubbing.
- Apply degreaser sparingly, following manufacturer instructions.
- Rinse with clean water and let the wall dry completely.
This prep guarantees long-lasting adhesion and a smooth finish.
Remove Loose or Peeling Paint Safely
When paint starts to flake or peel, you need to remove the loose sections so new coatings will bond properly. You’ll wear gloves and a dust mask, score edges with a utility knife, then scrape gently with a putty knife or sanding block. Match scraping to wall texture to avoid gouging; feather edges to blend paint sheen gradations. Clean dust before priming. If lots of paint comes off, test for lead (older homes). Dispose of debris safely.
| Tool | Purpose | Tip |
|---|---|---|
| Utility knife | Score edges | Light pressure |
| Putty knife | Remove flakes | Angle 30° |
| Sandpaper | Smooth edges | Use fine grit |
| Mask | Safety | Use N95 |
| Trash bag | Dispose | Seal tightly |
Widen and Clean Nail Holes for Repair
Before you fill nail holes, widen and clean them so the patching material adheres properly. You’ll enlarge the hole slightly with a nail file or small drill bit, removing loose paint and splinters. Use a vacuum or brush to clear dust, then wipe the area for thorough surface cleaning.
- Widen just enough for filler to key in.
- Remove all debris with a soft brush or compressed air.
- Wipe with a damp cloth and let dry before filling.
This prep prevents sinking or poor adhesion, ensuring a smooth, long-lasting repair when you apply putty or spackle.
Patch Tiny Nail Holes (Under 1/8)
Now that the hole’s been widened and cleaned, you can move on to filling tiny nail holes under 1/8 inch.
Use a small dab of lightweight spackling or wall patch compound on a fingertip or putty knife, pressing it into the nail hole until flush with the surface. Smooth excess away and feather edges to blend with surrounding paint.
Let it dry fully, then lightly sand with fine-grit paper for a seamless finish. Wipe away dust, prime if needed, and touch up with matching paint.
This quick method keeps repair minimal and nearly invisible on most walls.
Fill Medium Holes and Dents With Spackle
If the hole or dent is bigger than a pinhead but smaller than about 3 inches, reach for lightweight spackle to get a smooth, durable repair. Clean loose debris, apply spackle with a putty knife, and feather edges so it blends.
Let dry, sand lightly, and check texture matching before priming. Match paint sheen for a seamless finish.
- Use a thin layer, let it cure fully.
- Sand gently with fine grit.
- Prime patched area if porous.
Touch up with matching paint, checking under the same light. Small, careful steps avoid rework and keep the surface uniform.
Repair Holes Over 1 With Patch Kits
For holes larger than an inch, pick a patch kit that matches the wall type and hole size so you get a sturdy repair.
Follow the kit instructions to secure the patch, apply the compound smoothly, and let it cure.
Once dry, sand the area flush before priming and painting for a seamless finish.
Choose The Right Kit
Because holes larger than about 1 inch need more than spackle, you’ll want a proper patch kit that matches the size and wall type—metal or plastic mesh patches for medium holes and self-adhesive or drywall-repair plates for bigger ones.
Pick a kit that supports paint durability and helps minimize color contrast after finishing.
Consider substrate (drywall vs. plaster), kit size, and whether you need fast-setting compounds.
Choose kits with clear instructions so you won’t overwork the repair.
- Metal mesh for strength and rigid support
- Self-adhesive plates for quick alignment
- Complete kits with compound and finishing tape
Apply And Sand Patch
When you’ve secured the patch plate or mesh over the hole, mix the patch compound to the recommended consistency and spread it smoothly over the repair, pressing firmly to fill voids and feathering the edges so it blends with the surrounding wall.
Let it dry fully, then sand with a fine-grit block until flush and smooth. Check for low spots and apply a thin second coat if needed, drying and sanding again.
Prime the patched area before painting. Match paint for color matching and use appropriate tools to replicate texture blending so the repair disappears into the existing finish.
Use Mesh Tape for Large Compound Repairs
If a hole or gouge is larger than about 1/2 inch, you’ll want to reinforce the patch with self-adhesive fiberglass mesh tape before applying joint compound. You’ll stick the mesh tape over the damaged area to prevent cracking and provide a stable base for large repairs.
Press firmly and smooth any wrinkles so it lays flat. Choose tape that’s slightly larger than the damaged area and trim excess. Keep edges overlapped when joining strips.
Press the mesh firmly, smooth wrinkles flat, trim excess, and overlap edges when joining strips for a seamless repair
Replace loose drywall paper around edges first. Check that mesh is flush and dry-clean the surface before compound.
Benefits include strength, crack resistance, and faster repair prep.
- Strong support
- Crack prevention
- Easy to apply
Apply Joint Compound Like a Pro
Once the mesh tape or patch is secure, spread a thin, even layer of joint compound over the area with a 6–8 inch taping knife, feathering the edges so it blends with the wall surface. Work smoothly, keeping the knife at a low angle to avoid ridges.
Let each thin pass settle, then apply one or two additional thin coats to build profile without excess sanding.
Match texture by mimicking surrounding patterns on textured surfaces—use a sponge, brush, or stipple tool while compound is tacky.
Be mindful of color mismatch later when priming and painting; prep ensures a seamless finish.
How Long Fillers Need to Dry
After your final coat of joint compound is smooth and texture-matched, you’ll need to let fillers dry thoroughly before sanding or priming. Drying time varies by compound, layer thickness, humidity, and temperature.
Thin coats can dry in 1–2 hours, while thicker applications may take 24–48 hours. Letting fillers cure fully guarantees paint durability and improves filler longevity.
Check firmness at edges and avoid forcing it.
- Thin coats: quick tack-dry, test after 1–2 hours
- Thick repairs: allow 24–48 hours, longer in damp conditions
- Fast-dry products: follow manufacturer times closely and ventilate the room
Sand Patched Areas for a Seamless Finish
Before you sand, make sure the filler is fully dry and the work area is well-lit so you can see low spots and feathered edges.
Use a medium-grit sanding block to level high ridges, then switch to fine grit for a smooth surface that matches surrounding wall texture.
Sand lightly across the patch’s perimeter to blend edges; avoid gouging.
Wipe dust with a damp cloth and let dry.
Check under angled light to confirm uniformity.
Your goal is a seamless surface so primer and paint adhere evenly and the final paint sheen won’t highlight imperfections.
Proceed when the patch looks consistent.
Feather Primer Into Surrounding Paint
When you feather primer into the surrounding paint, use a thin, overlapping stroke to taper the edge so it won’t show through once painted.
Keep the primer slightly wet at the border and work outward to blend the wet edges with the existing finish. This technique prevents hard lines and gives you a seamless base for color.
Feathering Technique Basics
If you want your repaired spot to disappear into the rest of the wall, feathering the primer into the surrounding paint is crucial. You’ll work outward from the patch, using light, diminishing strokes so the primer thins toward existing paint. Focus on color matching and subtle texture blending to avoid hard edges.
Use these quick tips:
- Use a damp brush or roller to soften the primer edge.
- Lightly sand between coats to match surrounding texture.
- Apply less product as you move outward for a seamless gradient.
Check lighting and let primer dry fully before final paint to guarantee a smooth result.
Blending Wet Edges
Want the patch to vanish? Work while the primer’s wet: roll a thin coat over the patched area, then immediately feather outward with light, overlapping strokes. Use a damp brush or a dry roller with minimal pressure to blur the primer into surrounding paint so color contrast fades. Match nap and stroke direction to avoid texture inconsistency.
If edges still show after drying, lightly sand the blending and apply a second skim coat, feathering again. Let each layer flash off slightly before final paint. Check under different light angles; proper blending makes touch-ups disappear.
When to Use Primer vs Spot-Sealer
Because spot-sealers and full primers serve different jobs, you’ll choose one based on the surface condition and the scope of repairs.
Know the Primer purpose: full primers block stains, improve adhesion, and uniform porous surfaces.
Learn Sealer differences: spot-sealers target small stains, tannins, or isolated repairs without priming the whole wall.
Use a spot-sealer when damage is small, localized, and paint adhesion is good.
Use primer when stains bleed, you’re switching sheen or color dramatically, or large repairs need consistent absorbency.
- Small nick or isolated stain: spot-sealer
- Tannin, marker, smoke: spot-sealer or primer depending on spread
- Large patching or bare drywall: full primer
Blend New Paint Into the Old Finish
Now that you’ve decided whether to spot-seal or prime, it’s time to blend the repaired area so the new paint looks like the old. Match sheen and base color to minimize color contrast; test a small swatch and let it dry before committing.
Feather the new paint outward with a light rolling or stippling motion to gradually merge edges and reduce texture variation. Work in thin layers, allowing full drying between coats, and step back often to check from different angles and light.
If needed, lightly sand between coats to harmonize texture, then apply a final thin coat for a seamless finish.
Touch Up With a Brush Without Brush Marks
When you’re ready to touch up with a brush, choose a high-quality, angled synthetic brush and load it sparingly so you’re working with thin, controlled strokes; this helps you lay paint smoothly without heavy ridges. You’ll focus on Color consistency and Texture matching while minimizing visible marks.
Feather edges, work from the center outward, and let each thin layer dry fully before evaluating coverage. Use these quick tactics:
- Light pressure and short strokes to avoid buildup
- Dab excess paint on a rag to control flow
- Match sheen and thin coats to blend with surrounding finish
Finish by gently misting the area if needed.
Use a Mini Roller for Invisible Touch-Ups
If brushwork still shows faint strokes or you need a smoother finish over a larger area, grab a small foam or microfiber mini roller to blend your touch-up into the surrounding wall.
Load the roller lightly with matching paint, remove excess on a tray, and roll in short, overlapping strokes. Work from the repaired spot outward, feathering the edges to avoid ridges.
Match sheen and use thin coats, letting each dry fully before evaluating. For best invisible touch ups, keep pressure even and avoid reworking wet paint.
Clean the mini roller after use to preserve nap and performance.
Match Texture on Textured Walls
Because textured walls hide flaws differently than smooth ones, you’ll need to recreate the specific pattern before painting so the repair blends in. Inspect the surrounding area and match the texture type—note similarities to a textured ceiling or nearby wall paneling. Feather the repair edges so gradations aren’t sharp. Use compound or premixed patch and apply with the right tool.
Recreate the wall’s texture before painting—match the pattern, feather edges, and use the right tool for a seamless repair.
- Match tool to texture (brush, sponge, knife)
- Practice on scrap cardboard first
- Blend edges and let dry fully
Finish by priming the patch, then paint with the same sheen for an invisible result.
Fix Orange Peel and Knockdown Textures
Start by evaluating the texture damage so you know whether a small spot or a larger area needs work.
Match the original orange peel or knockdown pattern using the right spray, brush, or knockdown knife.
Feather and blend the patch into the surrounding wall so the repair’s edges disappear once it’s painted.
Assess Texture Damage
When you’re checking texture damage, focus on matching the existing finish—orange peel and knockdown show different patterns and depths that call for different repairs. You’ll want a careful texture assessment and a focused damage evaluation before touching tools.
Inspect from different angles and light; note depth, spread, and whether paint peeled or substrate failed. Clean loose material and measure repair size to decide patch method.
Consider these quick checks:
- Surface firmness: probe for softness or crumbling.
- Pattern edge: note abrupt vs. gradual shifts.
- Paint adhesion: test with tape for flaking.
Document findings to guide the repair approach.
Match Texture Pattern
If the wall’s orange peel or knockdown texture doesn’t match the surrounding finish, you’ll need to recreate the pattern before repainting so the patch blends invisibly. Start by cleaning and priming the repaired area, then use a small spray hopper or texture brush for texture matching.
Practice pattern replication on cardboard to dial in spray pressure, distance, and compound thickness. For knockdown, apply joint compound, let it set slightly, then gently “knock down” peaks with a wide drywall knife at a shallow angle.
Work in small sections, compare frequently to the existing surface, and adjust technique until the textures align.
Feather And Blend
Once you’ve matched the texture pattern, feather the repair into the surrounding wall so the shift disappears. You’ll smooth edges lightly, work outward in thin layers, and use a damp sponge or brush to merge peaks. Aim for feather blending that erases ridges and creates a seamless gradual change to the existing finish.
Let each skim coat dry, then sand very fine between passes. When paint goes on, use slightly thinned primer first for adhesion, then your finish coat with a light roller or stipple brush. Repeat only as needed until texture and color read uniform.
- Blend outer edges gently
- Sand between coats
- Use light rolling
Repair Wood Trim and Moulding Paint Chips
Although trim and moulding might seem minor, repairing their paint chips makes a big visual difference and prevents moisture damage. You’ll finish the job faster if you work methodically.
Start by cleaning the trim, sand damaged edges to smooth chips and expose fresh wood grain for better paint adhesion. Pry off loose paint, fill gouges with wood filler, and sand once dry.
Prime bare spots to seal and promote adhesion, then match the trim sheen and paint with thin coats, sanding lightly between. Work along profiles to keep crisp lines, and wipe dust before final touch-ups.
Handle Water Stains Before Painting
Before you paint, you’ll need to find and stop the moisture source so the stain doesn’t come back.
Once the area’s dry and repaired, clean the stain and apply a stain-blocking primer.
After the primer dries, you can proceed with your regular paint for a lasting finish.
Identify Moisture Source
If you see water stains on a wall, don’t just paint over them—you need to find where the moisture’s coming from first. Check visible Moisture sources: leaky pipes, roof damage, or poor exterior sealing. Use simple steps to pinpoint the problem quickly.
- Inspect ceiling and adjacent rooms for active drips or soft spots.
- Smell for mustiness and measure Wall humidity with a hygrometer.
- Look outside for clogged gutters, cracked flashing, or siding gaps.
Once you identify the source, stop the leak or improve ventilation before any cosmetic repair; otherwise stains will return.
Treat And Prime Stain
Once you’ve stopped the leak, tackle the stain so paint will stick and the discoloration won’t bleed through. First, clean the area with mild detergent and rinse; let it dry completely.
For stubborn discoloration, apply a stain treatment—use a commercial stain blocker or a diluted bleach solution for mildew, then wipe and dry.
Sand glossy spots lightly to key the surface.
Next, perform a targeted primer application: choose a stain-blocking or oil-based primer, feather it beyond the stained zone, and let it cure per instructions.
After priming, inspect; repeat primer application if any stain shows through before repainting.
Treat Mold or Mildew Spots Safely
While mold and mildew can seem like minor stains, you need to treat them properly to prevent health risks and paint failure. Wear gloves and a mask, ventilate the room, and test a small area first.
Use a gentle cleaner or diluted bleach solution for Mildew cleaning; rinse and dry thoroughly to stop regrowth.
- Scrape loose material, then clean surface
- Apply a mildew inhibitor or primer for Mold prevention
- Let area dry completely before repainting
Address underlying moisture—fix leaks or improve ventilation—so your patch lasts and the mold doesn’t return.
Match Sheen on Glossy, Satin, and Flat Finishes
When you patch a spot, matching the paint sheen is as important as matching the color. Use the same gloss level—glossy, satin, or flat—and feather the edges so the repair blends with the surrounding finish.
If the sheen still stands out, lightly scuff and recoat the area to make it disappear.
Match Paint Sheen
Because sheen affects how light reflects off a repaired area, you’ll need to match the original finish—glossy, satin, or flat—to make patches disappear. You’ll check sheen consistency and keep color harmony by comparing test swatches under the same lighting. Use the same product line or mix with manufacturer additives to replicate sheen. Lightly sand between coats for uniform texture.
- Test small areas first
- Use manufacturer’s sheen labels
- Keep lighting consistent
If unsure, buy small cans to match, note the existing finish, and avoid high-gloss on flat surfaces to prevent obvious differences.
Blend Finish Seamlessly
Matching sheen is only half the job; now you’ll make the repaired area disappear by blending the finish so light reads the same across the wall.
Start by feathering paint outward with thin coats, working wet edges into surrounding areas to hide any texture variation. Use the same applicator type—brush, roller, or pad—as the original to preserve surface characteristics.
If color contrast remains, tint the touch-up slightly to match aging and lighting.
For glossy or satin spots, lightly scuff surrounding sheen with fine abrasive before recoating.
Let each coat cure fully, then reassess under natural light for a seamless result.
How Temperature and Humidity Affect Repairs
If you’re working in a cold, damp room, expect paint to take longer to dry and finishes to look uneven. High heat or low humidity can speed drying but may cause blistering or brush marks. You should monitor temperature effects and humidity influence before patching.
Aim for manufacturer-recommended ranges, and delay work if conditions are extreme. Use slow-drying formulas in hot, dry conditions and quick-dry products in cool, damp ones. Ventilate to control moisture and temperature.
Check cure times before sanding or recoating.
- Ideal temps: 50–85°F (10–29°C)
- Relative humidity: 40–60%
- Use fans or dehumidifiers as needed
Touch Up High or Hard-to-Reach Areas Safely
When you’re working up high, set your ladder on solid, level ground and secure it before you climb.
Use extension poles, angled brushes, or a paint edger so you can reach spots without overreaching.
If a task feels unsafe, stop and switch to a taller ladder, scaffolding, or get help.
Safe Ladder Setup
Need to reach a high spot? Set your ladder on firm, level ground, lock its spreaders, and face the ladder when climbing. Prioritize ladder safety and keep tools handy without overloading.
- Check angle: base one quarter of ladder height from wall.
- Secure top: tie or have a partner steady the ladder.
- Tool organization: use a tool belt or bucket hook to free your hands.
Climb with three points of contact, don’t overreach—move the ladder instead.
Inspect for damage before use, wear nonslip shoes, and avoid ladders in high winds or near power lines to prevent accidents.
Reach Tools Selection
Although you can climb to most spots, using the right reach tools lets you touch up high or awkward areas safely and with better control. Choose extension poles, angled brushes, or roller attachments that prioritize tool ergonomics so you won’t fatigue. Use small, sealed paint cups or roller trays mounted on poles for neat paint storage. Practice steady strokes and keep a rag and small scraper handy. Inspect attachments before use and lock extensions securely. Replace or clean tips after each job to maintain performance and avoid drips.
| Tool | Best Use | Tip |
|---|---|---|
| Extension pole | High walls | Lock securely |
| Angled brush | Corners | Check ergonomics |
| Roller attachment | Broad areas | Use sealed cup |
Hide Scuffs and Rub Marks Quickly
Scuffs and rub marks are easy to fix yourself with a few simple supplies and the right technique. You’ll first assess the wall texture and paint sheen to match touch-up methods. Lightly clean the area, then test a small patch to guarantee color and finish blend.
Scuffs and rub marks are simple to fix — clean, match texture and sheen, then test a small patch first
- Use a melamine sponge for shallow marks.
- Apply matching paint with a small brush for deeper scuffs.
- Feather edges with a damp sponge to blend sheen.
Work in thin layers, letting each dry. Keep strokes consistent with surrounding texture so touch-ups stay invisible and durable.
Fix Paint Drips and Runs From Past Jobs
If you noticed drips or runs while hiding scuffs, don’t worry—you can fix them cleanly with a few simple steps.
Start by sanding the drip smooth with fine-grit sandpaper until the surface is even. Wipe dust away, then apply a thin skim coat of joint compound or spackling to eliminate any low spots.
Once dry, sand again and prime bare areas. Match paint carefully—color matching prevents obvious patches, and texture matching keeps light from revealing repairs.
Feather the new paint into surrounding areas with a small roller or brush. Let dry and inspect; touch up if needed.
Quick Fixes for Scratched Painted Doors
When your painted door gets scratched, you can often restore it without stripping or repainting the whole panel. Assess depth: light surface scratches buff with a microfiber cloth and mild abrasive cleaner.
Deeper gouges need filler and touch-up paint. Match sheen and color; modern paint innovations in small bottles help you blend perfectly. Think like Famous painters who layered carefully for texture and finish.
- Clean and sand lightly
- Use wood filler or caulk for deeper scratches
- Apply matched touch-up paint in thin, even coats
Let each coat dry fully and finish with light buffing for a seamless look.
Repair Paint Near Outlets and Switches Safely
Because electrical fixtures pose shock and fire risks, you should always cut power and confirm outlets or switches are dead before you touch paint nearby. After turning off the breaker, remove outlet covers, but keep outlet covers handy for reinstallation.
Use a non-contact voltage tester to verify no live current.
Gently sand and clean around the box, masking the edge with painter’s tape to protect contacts. Use a small brush or sponge to feather paint, avoiding contact with terminals.
Once paint’s dry, reinstall outlet covers and restore power.
Prioritize electrical safety throughout; when unsure, call a licensed electrician.
Protect Furniture and Floors During Repairs
After you finish work around outlets and switches, shift focus to shielding your furniture and floors so dust, drips, and accidental scuffs don’t create new problems. Move small items out, cover larger pieces with drop cloths or plastic sheeting, and tape edges to avoid paint seepage. Use low-tack painter’s tape on baseboards for added Floor safeguarding and to keep cloths in place.
Protect high-use furniture with old sheets for Furniture protection that you can wash later. Keep a small trash bin and damp cloth nearby to catch debris and wipe drips before they set.
- Use canvas drop cloths
- Tape seams securely
- Keep walkways clear
Estimate Time and Cost for a Spot Repair
A quick spot repair usually takes between 30 minutes and a few hours depending on the damage, and you’ll want to budget both hands-on time and drying/curing time when planning.
Start by evaluating the damage: small nail holes need filler and a quick sand; gouges or peeling require more prep.
For cost estimation, list materials (spackling, sandpaper, primer, paint, brushes) and factor in replacement vs. leftover paint.
Use time planning to sequence steps—prep, fill, dry, sand, prime, paint—so you don’t rush drying.
Expect basic jobs under $20; larger fixes cost more.
When a Spot Repair Isn’t Enough
If the damage spreads beyond isolated nail holes or the paint looks uneven across a large area, a spot repair won’t give you a seamless result. You’ll need broader fixes when patterns, sheen, or surface texture don’t match. Consider options that address substrate and finish rather than patching alone.
- Repaint the entire wall section to blend color and sheen.
- Repair or replicate ceiling textures if damage involves crown seams or nearby ceiling textures.
- Remove damaged wallpaper first; wallpaper removal often changes prep needs and may reveal larger issues.
Choose a repair scope that guarantees uniform appearance and long-term durability.
Make Small Repairs Last Longer
When you take a little extra time on preparation and choose the right materials, small paint repairs hold up much longer. You’ll clean the area, remove loose paint, and sand feathered edges so the patch bonds smoothly.
Use a quality primer to seal stains and improve paint adhesion; that step boosts paint durability and prevents patch outlines. Match paint sheen and tint, apply thin even coats, and allow proper drying between layers.
Finish by blending edges with light sanding and a final coat. These steps increase repair longevity and keep touch-ups discreet and resilient.
Maintain Walls to Prevent Future Damage
Keeping up with simple maintenance prevents small issues from becoming big, costly repairs. You should inspect walls monthly for chips, moisture, and scuffs, matching wall texture and paint sheen when touching up.
Regular wall checks stop small chips and moisture from turning into costly repairs—match texture and sheen when touching up.
Clean surfaces gently to avoid wear and catch issues early. Seal grout and caulk gaps near trim to stop water intrusion. Repaint high-traffic areas before finish degrades.
- Wipe marks with mild cleaner, then spot-prime.
- Address leaks immediately; dry and treat mold-prone spots.
- Keep furniture off walls; use bumpers and felt pads.
Regular attention saves time and keeps patches seamless.
Handle Multiple Patches Across a Room
As you tackle multiple patches across a room, plan the work so you can match texture, primer, and paint in batches to guarantee uniform color and finish. Start by grouping repairs by wall orientation and light exposure to maintain color consistency. Label each patch area and record which primer and paint lot you use.
Apply joint compound and perform texture matching before priming; let textures fully cure so sanding won’t alter the pattern. Prime all patched areas together, then paint in continuous passes, feathering edges.
Work from least to most visible spots so touch-ups blend and the room looks cohesive.
Pro Tools and Tricks for Invisible Touch-Ups
You’ll want a small kit of essential touch-up tools—brushes, a mini roller, putty knife, and fine-grit sandpaper—to make precise repairs.
Learn matching paint techniques like feathering, using the original sheen, and testing swatches on scrap cardboard before you touch the wall.
Finish with seamless blending tricks such as thin layers, cross-hatching, and blending the edges while the paint’s still wet.
Essential Touch-Up Tools
When you want truly invisible touch-ups, having the right tools matters as much as the paint itself. You’ll work smarter with precision tools that respect color psychology and existing wall art placement, so repairs blend rather than stand out.
Gather small, quality items for neat results:
- Angled artist brushes for feathering edges and tight corners
- Micro sponges and a stippling pad to replicate texture subtly
- Painter’s pencil, mixing tray, and a fine sanding block for tiny corrections
Use steady strokes, thin layers, and test on scrap—these tools keep touch-ups discreet and long-lasting.
Matching Paint Techniques
Although color chips and photos help, getting an invisible repair depends on matching sheen, pigment, and texture exactly. So start by testing small swatches in the room’s light, adjust pigment with tiny amounts of tint, and use tools like micro-sponges and angled brushes to blend wet edges into the surrounding finish.
You’ll diagnose undertones using basic color theory to avoid obvious mismatches. Match finish level—flat, eggshell, satin—to preserve paint durability. Feather in new paint minimally, curing between layers.
For old or sun-faded surfaces, mix small batches from the original can or bring chips to the store for a precise match.
Seamless Blending Tricks
If you want an invisible touch-up, rely on the right tools and a few precise tricks: a micro-sponge or artist’s brush for controlled application, a tapered foam roller to reproduce texture, and a light misting spray to settle edges.
You’ll prep the area, feather the patch, and focus on seamless blending with careful color matching. Work thin layers, let each dry, then assess under consistent light.
Use these pro tips:
- Test on scrap to confirm color matching before touching wall.
- Roll texture outward from the patch for continuity.
- Mist edges lightly to erase brush marks and blend.
Common Mistakes That Make Touch-Ups Obvious
Because touch-ups sit next to the original finish, even small errors jump out—using the wrong sheen, mismatching color, over-brushing, or failing to feather the edges makes patches obvious. You should check decor color and paint texture before you start. Match sheen, stir paint thoroughly, and test a tiny area. Don’t load the brush; apply thin layers and feather outward. Avoid drastic lighting differences and glossy spots. Keep tools clean and use the same roller nap if possible.
| Mistake | Effect | Fix |
|---|---|---|
| Wrong sheen | Spotty glare | Use same finish |
| Heavy brush strokes | Texture mismatch | Feather, thin coats |
Document Color and Paint Info for Later
Before you roll a single patch, write down the paint details so future touch-ups match exactly. You’ll thank yourself later when a scuff appears. Record brand, finish, batch/tint code, and date mixed. Note surface prep and layer count. Store a small sample of mixed paint in a labeled container.
- Brand, sheen, and tint code
- Mix date and room location
- Storage instructions and disposal notes
Keep a photo of the wall and a swatch for color documentation. Seal cans tightly and follow paint storage guidelines—cool, dry, away from sunlight—to preserve usability for future touch-ups.
Approach Repairs in Rental Properties
When you’re patching paint in a rental, start by checking your lease and local laws so you know who’s responsible and what approvals you need. Get landlord consent for repairs that alter walls—especially if wallpaper removal is involved. Take photos, note paint codes, and agree on timelines. Use safe products, follow ventilation tips, and avoid structural changes. If landlord handles repainting, offer help or reimbursements in writing. Keep receipts and before/after images to prevent disputes.
| Task | Who pays | Notes |
|---|---|---|
| Small patches | You | Document color |
| Wallpaper removal | Landlord/You | Get approval |
Touch Up Ceilings and Crown Molding
Start by prepping the ceiling and crown molding—clean, sand, and mask off nearby surfaces so you get a smooth work area.
Make sure you match the paint color and sheen exactly to avoid obvious patches.
Use light, consistent strokes and feather the edges so the touch-up blends seamlessly with the surrounding finish.
Prep Ceiling And Molding
Although ceilings and crown molding sit above eye level, you’ll still want to prep them carefully to get seamless touch-ups.
Start with ceiling cleaning: dust and grease hide flaws and stop paint from sticking. Inspect molding for loose joints from prior molding installation and secure with finish nails or adhesive. Lightly sand glossy areas and vacuum dust.
Use painter’s tape along edges and drop cloths to protect floors and furniture. Prime any bare spots. Check for hairline cracks and fill with flexible caulk.
Let everything dry fully before touching up so your repair blends and lasts.
Match Paint And Finish
Because slight differences in color or sheen show up easily on ceilings and crown molding, you’ll want to match both paint and finish before you touch up. Check leftover cans for sheen and batch numbers; take a small sample to the store if you don’t have any. Compare against color charts under natural and artificial light to confirm hue.
Use the same finish—flat, eggshell, satin—so touch-ups don’t reflect differently. Ventilate well to avoid strong paint fumes; wear a mask if needed. Buy a small test can, apply to an inconspicuous spot, and only proceed once the match is verified.
Blend Strokes Seamlessly
Now that you’ve confirmed the right paint and sheen, focus on blending each stroke so repairs disappear into the surrounding ceiling or crown molding. You’ll work carefully to maintain color consistency and avoid obvious edges. Feather brush strokes outward, keep pressure light, and overlap fresh paint with old in thin layers.
For textured surfaces, practice texture matching before committing. Sand lightly if needed, then apply coats sparingly until it looks seamless.
- Feather edges with a soft brush
- Match texture and apply thin layers
- Check in varied light to confirm consistency
Take your time; small, controlled strokes beat heavy daubs.
Safety Checklist for DIY Paint Repairs
Before you open a can of paint, take a quick safety inventory so you don’t create avoidable hazards. Check ventilation, wear a mask rated for paint fumes, and use gloves and eye protection.
Before opening paint, do a safety check: ventilate, wear a fumes-rated mask, gloves, and eye protection.
Identify environmental hazards like lead, mold, or flammable solvents and isolate the area. Keep a fire extinguisher handy and store rags in a sealed metal container.
Verify local painting regulations about disposal and VOC limits to avoid fines. Move furniture and cover floors.
Keep kids and pets out, label stored materials, and have a plan for spills. Proceed only when controls are in place.
When to Call a Pro for Wall Paint Repairs
If the damage exceeds a small chip or scuff, call a pro—you’ll save time and avoid costly mistakes on issues like extensive cracking, water stains, mold, or uneven texture that indicate underlying problems.
You should also hire a pro when structural issues, persistent damp, or failed previous repairs appear. Pros diagnose causes, match Color psychology goals for room mood, and recommend Eco friendly paints or specialty primers.
Consider calling a pro if you see:
- Large moisture stains, peeling, or soft drywall
- Widespread cracking, blistering, or paint failure
- Mold growth or uncertain odor source
They’ll prevent recurrence and ensure a clean finish.
Frequently Asked Questions
Can I Paint Over Wallpaper Without Removing It?
Yes — you can paint over wallpaper sometimes, but you’ll want to weigh wallpaper removal first; you’ll check paint compatibility, repair loose seams, prime with a proper bonding primer, and avoid hidden issues that peel later.
How Do I Repair Lead-Based Paint Hazards Safely?
Like handling a sleeping dragon, you should hire certified pros for lead hazard assessment and safe removal, seal and contain work areas, avoid DIY sanding, use HEPA cleanup, and keep kids and pregnant people well away.
What’s the Best Way to Remove Old Paintbrush Marks?
You’ll sand lightly, feathering edges to erase paint texture, then smooth with a damp sponge; adjust your brush technique—use thinner coats, proper bristle type, and long wet strokes—recoat when dry for a flawless finish.
Can I Blend Two Different Paint Brands Successfully?
Yes — you can, but you’ll check paint compatibility first and test a small area. You’ll need precise color matching, use a primer or same sheen, and blend carefully to avoid visible edges or adhesion problems.
How Do I Fix Bubbling Paint Beneath the Surface?
Like a blister, bubbling paint needs prompt care: you’ll scrape loose paint, sand and clean for proper surface preparation, choose compatible paint selection, prime exposed areas, then repaint—preventing moisture or poor adhesion from returning.
Conclusion
You’ve got the basics to fix small dings fast, but know when a full repaint or pro’s help’s better. For example, a renter I know patched a 6-inch hole with spackling, sanded, matched the paint, and guests never noticed—no lease issues, no repainting fee. Follow safety steps, keep matching paint and filler on hand, and tackle ceilings or crown molding carefully. Call a pro if damage’s widespread or structural.