How to Prep Cinder Block Wall for Paint Correctly
You can prep a cinder block wall correctly by quickly inspecting for cracks, efflorescence, and damp spots, then fixing leaks, repointing mortar, and sealing hollow cores. Clean with a stiff brush and mild detergent, rinse and let dry, sand high spots, and apply a masonry primer that penetrates pores. Use breathable masonry or acrylic paint suited to your climate, and follow cure times. Keep going to learn step‑by‑step techniques and troubleshooting.
Quick 5‑Step Prep Checklist for Cinder Block Walls
Want to get your cinder block walls ready fast? You’ll follow five clear steps: clear debris and dust, repair cracks and mortar, wash mildew or efflorescence, etch or sand glossy surfaces, and prime with masonry primer.
Consider historical context if the wall’s age affects repair methods or if preservation rules apply. Test a small area for adhesion before full priming.
Choose primer and paint with color matching in mind so final coats hide repairs and blend with surroundings. You’ll let each layer dry fully, inspect for missed spots, and proceed to paint only when the surface is uniformly prepared.
Assess the Wall Quickly (5‑Minute Check)
Before you grab tools, spend five focused minutes evaluating the wall so you know exactly what prep it needs. Walk the length, noting cracks, loose mortar, stains, and previous coatings.
Before you start, take five focused minutes to inspect the wall—note cracks, loose mortar, stains, and past coatings
Tap blocks to find hollow-sounding spots that need repair. Check for moisture by feeling cool or damp areas and look for salt deposits without diagnosing them here.
Consider how color theory will affect primer and paint choices given texture and lighting. Note any architectural details or signs of historical significance that might guide your finish.
Jot quick photos and a short list of repairs, cleaning, and primer needs before starting.
Identify Efflorescence and Why It Matters
How do you spot efflorescence, and why should you care? You’ll see white, powdery deposits or salt streaks on the cinder block surface, often near joints or low areas.
Efflorescence detection matters because those salts reveal water movement through the block. If you overlook them, paint adhesion suffers and coatings can flake or blister.
Scrape a bit—if it brushes away, it’s likely efflorescence, not mold. Note patterns: widespread crystals suggest ongoing moisture issues.
Address the source before painting; otherwise patching and repainting won’t last. Recognizing moisture impact early saves time and ensures a durable finish.
Test for Moisture: Simple Ways to Check Dampness
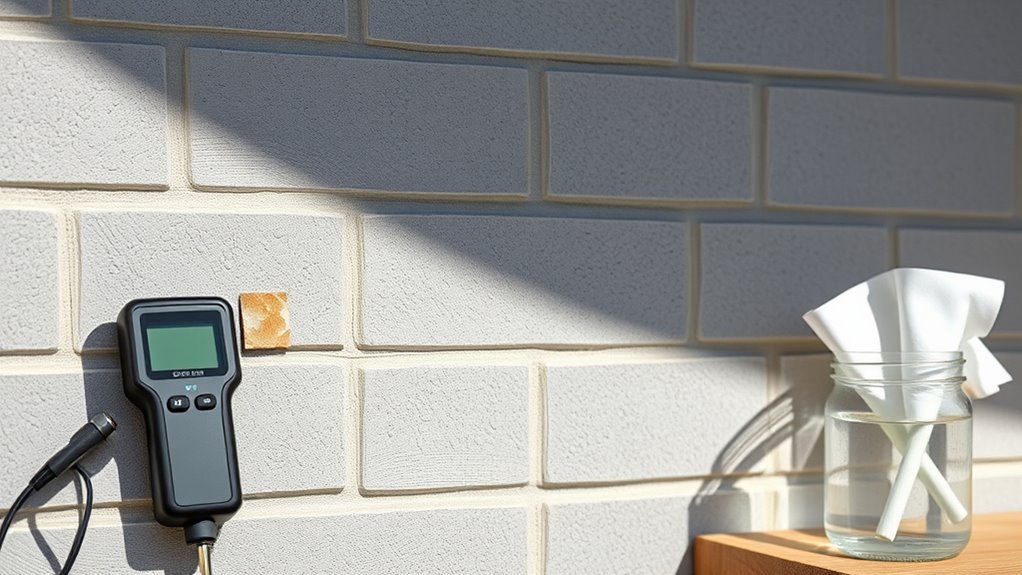
Before you paint, check for damp spots with a quick visual inspection so you can spot discoloration, efflorescence, or flaky mortar.
Use a moisture meter to get an objective reading in different areas, and try the simple plastic sheet test overnight to see if condensation forms.
If any test shows moisture, don’t paint until you fix the source and the wall is fully dry.
Visual Surface Inspection
Notice any dark patches, efflorescence, or peeling paint on your cinder block wall—these are quick visual clues that moisture may be present. You’ll scan for staining patterns, white powdery deposits, mold spots, and soft or crumbling mortar joints.
Check inside corners and near ground level where water pools. Compare affected areas against *desired* color coordination to decide if touch-ups will match once repaired, and consider historical preservation if the wall’s texture or patina matters.
Document locations with photos and notes, mark damp zones, and avoid painting until surfaces are dry and visible damage is repaired.
Moisture Meter Test
When you suspect dampness after the visual inspection, use a moisture meter to get quick, objective readings from your cinder block and mortar joints. Tap the meter to multiple spots—base, mid-height, and near suspected leaks—to map moisture patterns. Record readings and compare against manufacturer’s dry thresholds; repeat after drying attempts.
High or fluctuating values mean fix the source before painting to protect structural integrity and guarantee successful adhesion. This testing supports historical preservation by preventing moisture-driven damage in older masonry and informs aesthetic enhancements by confirming surfaces are ready for primer and topcoat, avoiding wasted effort and materials.
Simple Plastic Sheet Test
If you suspect hidden dampness but don’t have a meter, tape a clear plastic sheet over a 12–18 inch square of cinder block to run a simple vapor test. Wait 24–48 hours, then check for condensation or darkening behind the film.
If moisture appears, don’t paint—address leaks, improve drainage, or use a vapor barrier. Treat dry areas normally, thinking about color coordination and artist techniques when choosing finishes.
Quick steps:
- Clean surface, tape plastic edges tightly.
- Mark date/time, inspect after 24–48 hours.
- If wet, dry and repair; if dry, prime and paint as planned.
Fix Moisture Sources Before Painting (Waterproofing Tips)
Because paint only lasts on dry, stable masonry, you should first track down and stop any water that’s reaching the cinder block before you prime or paint. Inspect for leaks, rising damp, cracked mortar, and failing downspouts; fix flashing, re-point mortar, and extend gutters to divert runoff.
Apply breathable waterproofing sealers to exterior faces, not non-breathable membranes that trap moisture. For interior damp, install a vapor barrier or improve ventilation and grading around the foundation.
Once dry, consider how color coordination and mural design will react to sunlight and remaining humidity before you choose paint and finishes.
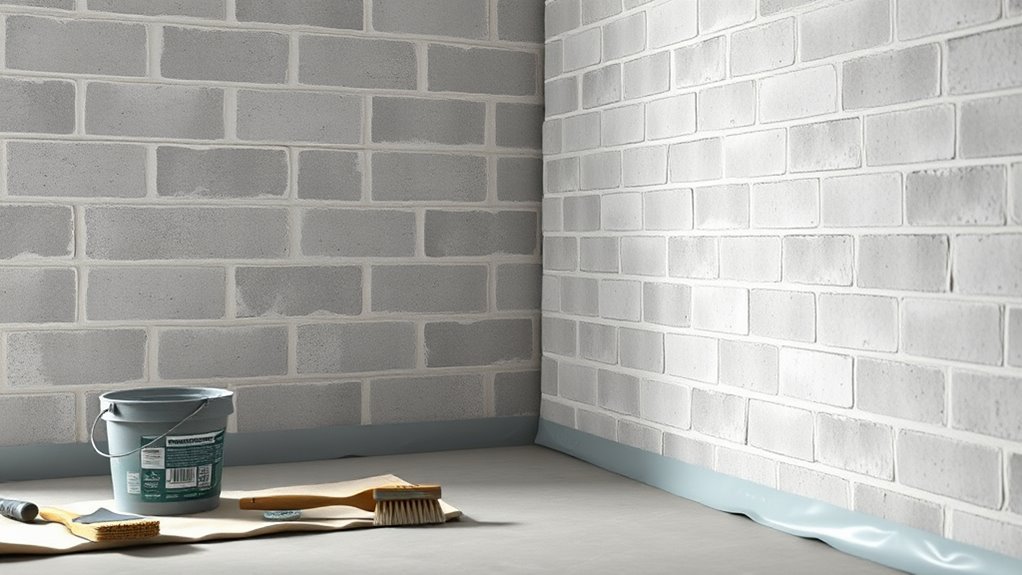
Remove Loose Debris: Sweeping, Vacuuming, and Blowing
After you’ve stopped moisture and let the wall dry, clear away loose dirt, dust, and crumbling mortar so primer and paint can bond properly. You’ll remove debris with three focused steps to reveal true block texture for better color coordination and texture enhancement.
- Sweep firmly with a stiff-bristle brush, dislodging flaky mortar and surface dust.
- Vacuum with a shop vac using a brush attachment to pull dust from pores and joints.
- Blow remaining particles out with compressed air or a leaf blower, working top to bottom.
Finish by inspecting for hidden loose spots before priming and painting.
Remove Dirt, Grease, and Mildew Safely
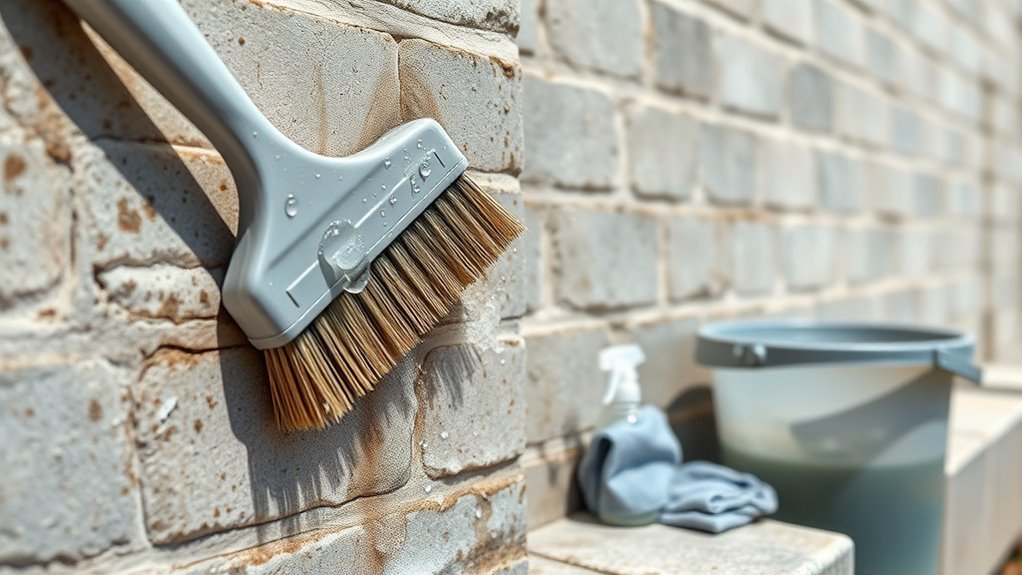
When you’re ready to clean, tackle dirt, grease, and mildew with the right cleaners and protective gear so the primer will stick and stains won’t bleed through.
Start by testing a small area and wear gloves, eye protection, and a mask. Then use a degreaser for oil or cooking residues and a bleach solution or mildew cleaner for moldy spots.
Rinse thoroughly and let the wall dry completely before moving on. Scrub gently with a stiff brush, avoiding damage to block faces. Dispose of runoff responsibly to protect garden landscaping.
Once dry, the surface will support primer and paint, improving interior decor and longevity.
Detergent Wash vs. Pressure Wash: Which to Choose?
Wondering whether to scrub with detergent or blast with a pressure washer? You’ll pick based on surface condition, paint goals, and nearby landscaping.
Detergent wash uses gentler agitation and chemical cleaning; it’s ideal if you want to preserve mortar or explore color trends without aggressive damage.
Pressure washing removes stubborn grime fast but can etch soft blocks and spread debris.
Consider these scenarios:
- Light dirt, intact mortar — detergent wash and soft brush.
- Heavy grease or peeling paint — low-pressure wash, controlled passes.
- Preparing for new historical styles or bold modern palettes — balance cleaning with surface integrity.
Treat and Remove Efflorescence Effectively
If white, powdery stains (efflorescence) blot your cinder block, tackle them promptly to prevent long-term salt damage and paint failure. Start by dry-brushing loose salts, then rinse with water.
For persistent deposits, use a diluted vinegar or masonry cleaner and a stiff brush, rinsing thoroughly. Let the wall fully dry; moisture drives efflorescence causes, so identify leaks or rising damp and fix them before painting.
Apply a breathable masonry sealer to reduce salt migration while allowing vapor escape. For ongoing issues, consult a pro; effective efflorescence prevention combines moisture control, proper drainage, and suitable breathable coatings.
Repair Cracks in Mortar and Block Cores
Although small hairline cracks might seem harmless, you should repair cracks in mortar joints and block cores before painting to guarantee structural integrity and a lasting finish.
Repair hairline cracks in mortar and block cores before painting to ensure structural integrity and a lasting finish
Inspect the wall, tap for hollow sounds, and mark cracks.
For mortar repair, rake out loose material, clean with a brush, then tuckpoint with matching mortar; keep joints compacted and tool smooth.
For core sealing, blow debris from hollow cores, inject an approved sealant or grout, and allow full cure.
Finally, recheck for movement and wipe dust away.
Proper mortar repair and core sealing prevent moisture paths and assure paint adhesion.
Fill Holes and Surface Pits for a Smooth Finish
Before you prime or paint, fill any holes and surface pits so the finish goes on smooth and lasts longer. You’ll scrub dust, apply a masonry patch or spackling, press it into voids, and level with a trowel. Let cures fully, sand lightly for texture enhancement, and wipe clean. That prep keeps paint even and reduces callbacks. If color consultation matters, test a small patch after priming to confirm hue on repaired areas. Trust the process: careful filling prevents shadowing and flaking.
| Concern | Feeling |
|---|---|
| Pits | Relief |
| Holes | Confidence |
| Unevenness | Calm |
| Repairs | Pride |
| Finish | Satisfaction |
Repoint Mortar Joints Step by Step
When mortar joints have deteriorated, you’ll need to repoint them to restore strength and keep moisture out. Remove loose mortar with a chisel or grinder to a consistent depth, brush clean, then dampen joints.
Mix mortar to match existing color and texture so your color schemes or decorative finishes aren’t compromised. Pack joints tightly, tooling for a smooth profile, and allow proper curing time.
Follow this simple sequence:
- Remove and clean joints to proper depth.
- Mix and color-match mortar, then pack and tool.
- Cure and clean excess mortar to preserve appearance and adhesion.
Seal Hollow Cores and Voids Before Painting
If you find hollow cores or voids in your cinder block walls, seal them now so paint adhesion stays reliable and moisture can’t get trapped. Inspect blocks, probe cores with a flashlight and flexible rod, and mark gaps needing attention.
Seal hollow cinder block cores now—inspect, probe, and mark voids to prevent trapped moisture and paint failure
For larger voids, insert backing material or foam before applying a compatible sealant. For small openings, use low-expansion spray foam or masonry-grade filler.
Work from the inside out, keeping surfaces clean and dry. After curing, scrape excess, sand as needed, and wipe down.
This core treatment prevents hidden moisture, reduces paint failure risk, and helps guarantee a smooth finish.
Choose Patching Products: Mortar, Patch Compound, and Caulk
Next you’ll pick the right patching products for the job: use mortar for structural gaps and a patch compound for shallow surface repairs.
Choose caulk for thin cracks and joints where flexibility matters.
I’ll cover mixing ratios and application tips so you get durable, paint-ready repairs.
Mortar Vs. Patch
Although cinder block repairs can look similar at a glance, you’ll choose very different products depending on the damage—mortar for rebuilding joints and large voids, cement-based patch compounds for surface chips and scaled faces, and caulk for hairline cracks and gaps at trim or joints.
You’ll pick mortar when structural fill and bond matter, and use patch compound to match color matching and surface texturing for cosmetic fixes. Consider these scenarios:
- Mortar — deep joints, missing cores, structural rebuilds.
- Patch compound — shallow chips, feathering, texture matching.
- Caulk — tiny gaps, non-structural seals before painting.
Best Caulk Uses
When you need a flexible, paintable seal for hairline cracks, gaps at trim, or joints between dissimilar materials, caulk is your go-to product because it accommodates movement and prevents moisture intrusion without adding bulk.
Use acrylic latex caulk for interior block walls—it’s paintable, easy to tool, and resists shrinking. Reserve silicone for wet areas where paint won’t stick.
Choose mildew-resistant formulas near basements or utility sinks.
Apply caulk around window trim or shelving where kitchen decor meets masonry.
After curing, it blends with paint and helps protect any nearby plant care items from moisture damage.
Mixing And Application
Before you start filling holes, decide which material fits the job—mortar for structural repairs, a polymer-modified patch compound for shallow surface voids, or caulk for flexible joints—and follow the manufacturer’s mix ratios and pot-life limits so the product performs as designed.
Mix small batches, keep water consistent for Color mixing accuracy, and use a drill paddle for lump-free texture. Apply with proper brush techniques or a pointing trowel, then tool joints before skin forms. Cure as directed. Clean tools promptly.
Use:
- Mortar for deep gaps.
- Patch compound for shallow chips.
- Caulk for seams and movement.
Sand or Grind Uneven Surfaces When Necessary
If your cinder block wall has high spots, mortar ridges, or rough patches, you’ll need to sand or grind them down so paint will lay smooth and stick evenly. Wear eye, lung, and ear protection; use a masonry grinder or coarse sanding block to level protrusions, working systematically from top to bottom.
Clean dust frequently with a shop vac and stiff brush. Test a small area to confirm smoothness before you continue.
Smoothing helps achieve consistent color coordination and supports textured or decorative finishes. Take your time—uneven substrates will telegraph through even the best paint jobs.
Prime Cinder Block Walls: Why Primer Changes Everything
Although porous cinder block soaks up paint and causes uneven coverage, a quality masonry primer evens absorption, improves adhesion, and seals the surface so your topcoat looks consistent and lasts longer. You’ll notice color contrast becomes truer and texture enhancement appears intentional rather than accidental.
Apply primer evenly with a roller, brush, or sprayer, letting it penetrate. It creates a uniform base that reduces coats and prevents blotchy patches. Your finished wall will hold paint better and resist moisture.
Visualize the benefits:
- Even base for accurate color
- Reduced paint usage
- Smoother texture and durability
Which Primer Type to Use on Cinder Block (Masonry vs. Acrylic)
When you’re choosing a primer for cinder block, pick the type that matches your wall’s condition and the finish you want.
If your block is porous, weathered, or previously unpainted, masonry primer soaks in and stabilizes surface salts, improving adhesion and offering better texture enhancement for a uniform look.
Use acrylic primer on smoother, already-painted blocks where flexibility and quicker drying matter; it helps with color matching if you’re shifting hues slightly.
You’ll often combine primers: masonry to seal, acrylic to refine finish.
Match primer choice to substrate and final paint type for durable, predictable results.
Apply Primer for Full Penetration and Adhesion
Because proper priming determines how long your paint will stick and look good, you should apply primer so it fully penetrates the block instead of just sitting on the surface. You’ll work methodically: saturate mortar joints, brush into pores, and avoid puddles. Use a low-pressure sprayer then back-roll, or a masonry brush for tight spots.
Consider how color psychology and historical styles influence your final choices; a neutral base improves tint accuracy.
Practical steps:
- Pre-wet slightly, then apply primer evenly.
- Back-roll to force primer into pores.
- Inspect for missed areas and recoat immediately.
Choose Paint for Cinder Block: Masonry, Elastomeric, or Acrylic
Now you’ll pick the right paint for cinder block, starting with masonry paint for its breathability and resistance to efflorescence. Consider elastomeric if you need flexible, crack-bridging protection.
While acrylics give a durable, easier-to-apply finish. We’ll compare the trade-offs so you can match performance to your wall’s condition and budget.
Masonry Paint Benefits
If you want durable, weather-resistant coverage for cinder block, choosing the right masonry paint makes a big difference. You’ll benefit from formulations made for porous masonry: they resist moisture, breathe to prevent trapped vapor, and offer long-lasting color.
Consider the historical context of masonry coatings to appreciate modern improvements. Always use proper safety equipment when applying—gloves, goggles, and respirator.
Masonry paint benefits include:
- Improved moisture resistance that reduces efflorescence and spalling.
- Enhanced adhesion to rough block, lowering peel and flake risk.
- Fade-resistant pigments and mildew inhibitors for low maintenance and durability.
Elastomeric Vs Acrylic
Having chosen a masonry paint for its moisture resistance and adhesion, you’ll want to decide between elastomeric and acrylic formulations for cinder block surfaces.
Elastomeric delivers superior crack-bridging and waterproofing—choose it if the wall sees movement or heavy exposure. Acrylic breathes better, dries faster, and resists fading, so it’s ideal for milder conditions.
Both accept varied color options, but elastomeric often limits sheen choices.
Consider texture techniques: thicker elastomeric hides imperfections; acrylic pairs well with primers and faux textures.
Match product specs to climate, substrate condition, and desired finish, and test a small area before committing.
Calculate Paint and Primer Quantities Accurately
Because cinder block walls are porous and textured, you’ll need to measure surface area and account for extra coverage when calculating paint and primer quantities. Measure height and width of each section, then add 10–25% for porosity and rough texture.
Factor in primer for sealed adhesion before color matching and use test swatches to verify hue under real light. Consider texture simulation if you plan a thick finish requiring more material.
Use this checklist:
- Total square footage plus 10–25% extra.
- Primer coverage (usually 1 coat; more if very porous).
- Paint coats required after testing.
Best Tools and Techniques for Painting Cinder Block
Now you’ll cover the essential tools you’ll need, from masonry brushes and rollers to masonry-grade primers and sealants.
You’ll also learn surface preparation techniques like cleaning, patching cracks, and etching for better adhesion.
Finally, you’ll get clear paint application methods—brush, roller, and spray tips—to guarantee even coverage and long-lasting results.
Essential Painting Tools
When you’re tackling cinder block walls, the right tools make the job faster and give a more durable finish. You’ll need quality rollers, brushes, and sprayers to apply paint evenly and highlight your color schemes and desired paint sheen.
Pick a thick-nap roller for textured blocks, nylon brushes for edges, and an airless sprayer for large areas. Also grab drop cloths, painter’s tape, extension poles, and a sturdy ladder.
- Thick-nap roller — covers pores efficiently.
- Nylon brush — crisply cuts edges and mortar joints.
- Airless sprayer — speeds large-surface work and ensures uniform sheen.
Surface Preparation Techniques
If you want a paint job that lasts, start by cleaning and repairing the block so paint can bond properly. Scrub with a stiff brush and trisodium phosphate or a mild detergent, rinse, and let dry.
Patch cracks and voids with masonry filler, then sand rough spots.
Etch glossy surfaces or use a masonry primer to improve adhesion.
Mask edges and protect floors.
Test a small area to confirm porosity and color outcome.
Plan Color combinations ahead so primers and topcoats coordinate.
If you’ll add Decorative finishes, practice techniques on scrap block to refine texture and coverage.
Paint Application Methods
Although cinder block’s rough, porous surface demands different handling than drywall, you can get even, durable coverage by choosing the right tools and technique for each area.
Start with a masonry primer, then pick tools: a thick-nap roller for broad faces, a brush for mortar joints, and an airless sprayer for speed.
Consider color theory when selecting tones to minimize contrast with shadows in the cells, and choose paint sheen to match function—flat hides imperfections, satin wipes clean.
Apply two thin coats, back-rolling after spraying for penetration, and keep consistent overlap to avoid lap marks.
- Roller
- Brush
- Sprayer
Ideal Weather and Curing Conditions Before and After Painting
Because paint needs the right temperature and moisture to bond, you should plan your cinder block painting for dry days with moderate temperatures—ideally between 50°F and 85°F—and low humidity.
Plan cinder block painting for dry, moderate days—ideally 50–85°F with low humidity for proper bonding
You’ll prep surfaces, then let primers cure fully before applying topcoats; follow product cure-time guidance.
After painting, keep conditions stable for 24–72 hours to avoid tackiness or bloom. Avoid spraying or washing the wall until paint hardens.
If you’re coordinating exterior looks, consider color coordination and decorative accents only after full cure so touch-ups won’t mar the finish.
Monitor forecasts and postpone painting if rain or frost is expected.
Common Mistakes That Cause Peeling and How to Avoid Them
Before you start painting, know that most peeling comes from poor surface prep, choosing the wrong paint, or ignoring moisture problems.
If you skip cleaning and patching, use a non-breathable or incompatible coating, or paint over damp blocks, the finish won’t stick.
We’ll cover how to prevent each of these so your paint job lasts.
Poor Surface Preparation
Want your paint to stick instead of flaking off? You must fix poor surface preparation first. Surface contamination—dust, efflorescence, grease—prevents adhesion and worsens over time, especially with environmental impact like humidity causing salts to leach. Clean, repair, and prime methodically.
- Remove loose mortar, dirt, and efflorescence with a brush and mild detergent.
- Patch cracks and spalls with mortar or concrete patch; sand smooth once cured.
- Apply a masonry primer that locks out salts and improves bond.
Skip shortcuts: thorough prep saves paint, prevents peeling, and extends your finish’s lifespan.
Wrong Paint Selection
If you pick the wrong paint—one not formulated for masonry or high-moisture conditions—the finish will fail no matter how well you prep the wall. Choose a breathable exterior masonry or concrete paint with proper adhesion and mildew resistance; latex-based masonry paints usually work best.
Don’t use interior wall primers or glossy house paints that trap moisture.
Match finish and pigment to function: darker colors absorb heat, lighter ones hide imperfections and aid color coordination with trim and decorative accents.
Test a small patch, follow manufacturer guidelines, and buy quality products sized for block texture to avoid flaking and premature repainting.
Ignoring Moisture Issues
Picking the right paint won’t save you if the wall is wet; moisture undercuts adhesion and makes even masonry-grade coatings peel. You need to find the source before painting: rising damp, leaks, or poor exterior grading.
Install moisture barriers where needed and improve drainage solutions to stop water intrusion.
Prep includes cleaning, drying, and using a breathable masonry primer if residual dampness remains.
- Trace leaks to source.
- Add moisture barriers and gutter/drainage solutions.
- Allow full drying time before coating.
If you skip this, paint will fail. Address moisture first so your work lasts.
Maintenance Tips to Keep Painted Cinder Block Looking Good
Once the paint’s dry, you’ll extend its life with a few simple maintenance habits. Inspect quarterly for peeling, efflorescence, or stains, and address small chips with touch-up paint to prevent larger problems.
Clean gently with a soft brush and mild detergent; avoid pressure washing that can erode mortar or paint.
Control nearby vegetation and runoff to limit moisture exposure.
If your wall features artistic murals or has historical preservation value, document condition changes and use compatible materials when repairing to protect integrity.
Keep a record of paint type and dates so future upkeep stays consistent and effective.
When to Call a Pro: Signs This Job Is Beyond DIY
When you spot widespread cracking, heavy efflorescence, structural movement, or moisture seeping through the blocks, call a pro—these issues go beyond simple cleaning or touch-ups and can signal underlying problems like failed waterproofing, compromised mortar, or foundation shifts.
You’ll want expert assessment before painting, especially if the wall affects your garden design or interior decor plans. A pro will diagnose causes, recommend repairs, and ensure proper sealing.
Signs to trigger professional help:
- Bowing walls, large cracks, or gaps at joints.
- Persistent dampness, mold, or salt deposits.
- Uneven settling, visible foundation movement or recurring repairs.
Frequently Asked Questions
Can I Paint Cinder Block Walls in a Basement With a Dehumidifier Running?
Yes — you can paint cinder block walls while a dehumidifier’s running, but you’ll need consistent basement humidity below recommended levels; monitor moisture and confirm dehumidifier effectiveness so paint adheres and cures without trapping dampness.
Will Exterior Block Paint Change the Block’s Fire Resistance Rating?
Like a raincoat on stone, exterior block paint won’t materially change the block’s fire resistance; you’re adding a paint coating that’s cosmetic and weatherproofing, not a fireproofing layer, so ratings remain fundamentally unchanged.
How Long After New Concrete Block Installation Should I Wait to Paint?
Wait at least 28 days before painting new concrete block; you’ll guarantee proper curing. For surface preparation, clean and repair blocks, then use appropriate priming techniques—alkali-resistant masonry primer—so paint adheres and lasts.
Can I Use Colored Stain Instead of Paint for a Natural Block Look?
Yes — you can use colored stain for a natural finish; picture porous block soaking up muted pigment. You’ll weigh stain versus paint: stain penetrates for subtle texture, while paint covers more uniformly and hides imperfections.
Are There Safe Eco-Friendly Primers and Paints for Children’s Playrooms?
Yes — you can use low-VOC, zero-VOC eco friendly primers and child safe paints formulated for indoor playrooms; they minimize fumes, meet safety standards, resist stains, and you’ll want proper ventilation and cure time before kids use the space.
Conclusion
You’ve prepped like a pro, and this wall’s about to look so good neighbors will think you painted the whole block overnight. Don’t skip the moisture checks, kill efflorescence, and patch cracks—these small steps stop future peeling and drama. Let everything dry fully, pick the right masonry primer and paint, and keep up simple maintenance. If damp keeps returning, call a pro before your “quick fix” turns into a tragicomedy.