How to Prep Exterior of House for Painting Like a Pro
Prep like a pro by starting with a thorough top‑to‑bottom clean: pressure‑rinse gently, treat mold, and let everything dry. Scrape loose paint, sand feathered edges, and probe for rot or soft spots, repairing or replacing trim, siding, and flashing as needed. Remove old caulk, recaulk joints, then prime appropriate surfaces—masonry, metal, or bare wood—using the right primer. Protect plants, mask windows, set ladders safely, and plan coats for proper drying; follow the checklist ahead to learn more.
What You’ll Complete Before Exterior Painting: Quick Checklist
Before you pick up a brush, make a quick, prioritized checklist of prep tasks so nothing slows the job. You’ll clear gutters, trim plants, and remove loose hardware; pressure-wash siding, scrape peeling paint, and sand rough spots; repair rot, caulking, and damaged trim; mask windows, doors, and fixtures.
Confirm permits, order quality primer and paint, and stage ladders and drop cloths. Consider color psychology when sampling swatches and balance curb appeal with neighborhood context as you test exterior color schemes.
Schedule paint days with favorable weather forecasts and assign roles so you work efficiently and safely.
When to Repaint Siding: Signs and Timing
If your siding is chalking, cracking, or peeling, you shouldn’t wait—those are clear signs it’s time to repaint.
Check for faded color, uneven sheen, and areas where dirt or algae cling; these indicate weathering and reduced paint durability.
Look for faded color, patchy sheen, or spots where dirt and algae cling—signs of paint weathering.
Consider timing: repaint in mild, dry months so new coats cure properly.
Think about color psychology when choosing a refresh—lighter shades can make spaces feel larger and cooler, while bold tones add curb appeal.
If your current paint still adheres and looks even, you can delay, but plan repainting within a 5–10 year window for maximum protection.
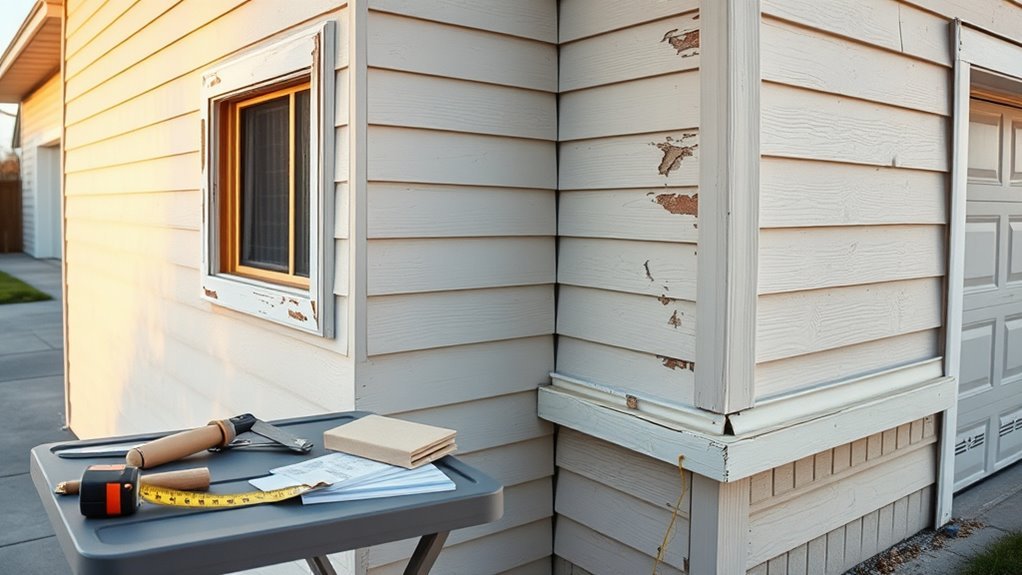
How to Inspect Siding for Rot, Mildew, and Damage
Start by doing a careful visual surface check, scanning for peeling paint, cracks, or discoloration.
Then probe suspect areas with a screwdriver or awl to feel for softness or crumbling that indicates rot.
Finally, look for mold and mildew—dark, fuzzy patches or musty odors—and mark them for cleaning or replacement.
Visual Surface Check
How do you tell whether siding needs repair or just a good cleaning? Walk the perimeter in daylight, scanning for discoloration, chalky residue, and streaks that signal mildew rather than structural failure.
Note areas where old paint flakes or peels—those spots affect color coordination and can undermine paint durability if ignored. Inspect seams, trim, and around windows for gaps and warped boards. Use binoculars for high sections.
Photograph issues and mark them for targeted cleaning or repair. If stains rub off with a damp cloth, it’s likely surface mildew; permanent stains or missing material mean you’ll need repairs before painting.
Probe For Softness
After you’ve noted visible stains and peeling, feel the siding for softness—soft spots mean moisture has compromised the material and won’t hold paint. Use a small screwdriver or awl as a softness probe, pressing gently along seams, trim, and behind flashing.
Tap and listen for hollow sounds, then probe any yielding areas to gauge depth of rot. Mark compromised boards for repair or replacement.
Combine visual cues with moisture detection by testing with a handheld moisture meter where available; readings above recommended levels mean delay and drying or replacement.
Prioritize structural integrity before painting to guarantee a lasting finish.
Look For Mold/Mildew
Because mold and mildew feed on damp, shaded areas, you’ll want to scan siding, trim, and eaves for dark streaks, fuzzy growth, or discolored patches—especially where water runs off or pools.
If you spot colonies, test small areas with a stiff brush and soapy water; stubborn patches need a bleach-based cleaner for effective mildew removal.
Scrape loose paint and dry thoroughly before treating to avoid trapping moisture.
Replace rotten boards and seal gaps to improve drainage.
Regular cleaning, trimmed vegetation, and repaired gutters support mold prevention so your new paint will adhere and last.
Inspect Trim, Fascia, and Soffits for Needed Repairs
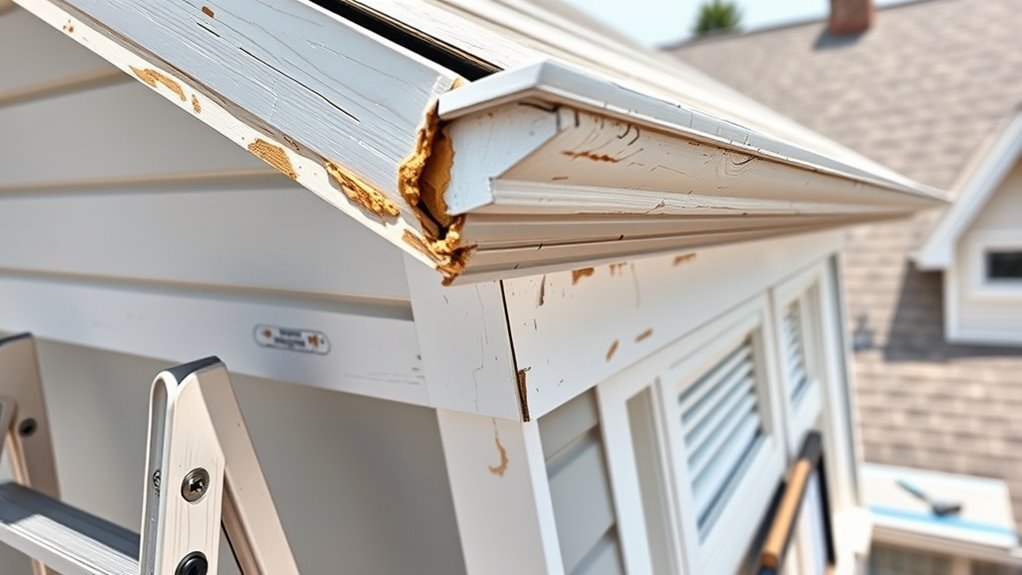
While you prep the exterior, give special attention to the trim, fascia, and soffits—these elements protect your home and show paint flaws first.
Walk the perimeter, noting rot, cracks, loose trim, and peeling paint. Prioritize trim repairs where joints separate or wood softens; replace or sister boards as needed.
Perform a fascia inspection for gaps, insect damage, and loose flashing that let water reach sheathing.
Check soffits for venting blockages, sagging, or mildew. Remove damaged material, secure fasteners, and apply wood filler only on sound substrates.
Proper repairs guarantee a smooth, lasting paint job.
Inspect Windows and Doors for Paint Prep
If you want a durable, professional-looking finish, start by closely inspecting every window and door—frames, sills, casings, and glazing compound—for rot, gaps, peeling paint, and failing seals.
You’ll remove loose paint, sand smooth, and probe wood for soft spots. Replace or repair rotten sections, tighten loose hardware, and clean glazing channels.
Recaulk joints with quality window caulking to seal drafts and prevent moisture intrusion.
Mask glass and trim before door painting, and prime bare wood or rusted metal.
Finish with proper exterior paint, checking operation so windows and doors open and close smoothly after drying.
Inspect Porch, Deck, and Railings for Repainting
Before you pick up a brush, walk the entire porch, deck, and railing system to spot rot, loose fasteners, peeling finish, and drainage problems.
Before painting, walk the porch and deck to find rot, loose fasteners, peeling finish, and drainage issues.
Check every board and joint during your Deck inspection, probing suspicious areas with a screwdriver to reveal soft wood.
Test handrails and porch railing posts for wobble; tighten or shim connections so repairs are minimal.
Note areas where paint is blistering or mildew needs cleaning.
Clear leaves and debris that trap moisture, and verify water drains away from structures.
Photograph issues and mark priorities so prep and sanding targets are clear before you begin painting.
Decide: Spot Repairs vs Full Replacement
Walk your porch, deck, and railings with a condition assessment checklist to note rot, loose boards, or surface damage.
Weigh the upfront cost versus longevity—spot repairs save money now, but replacement can cut future maintenance.
Make sure any new pieces match the material and finish so paint adhesion and appearance stay consistent.
Condition Assessment Checklist
How damaged is each surface, and can targeted fixes hold until your next paint job? Walk every wall, trim, soffit, and fascia. Note rot, cracking, blistering, peeling, and loose caulk. Tap siding to detect hollow spots, probe suspect wood, and measure moisture where staining appears.
Prioritize safety hazards and structural decay over cosmetic flaws. Mark areas for spot repairs versus full replacement, and record dimensions.
Consider how new color choices will interact—use color psychology when planning accents—and choose eco-friendly paints where possible.
Create a checklist with photos, severity ratings, and recommended actions before ordering materials.
Cost Versus Longevity
While a few patched spots can keep your house looking good in the short term, you’ll need to weigh immediate savings against how long those fixes will last and what they’ll cost over time. You’ll compare spot repairs versus full replacement by estimating lifespan, disruption, and future repaint cycles. Consider how your color psychology choices and paint branding affect resale value and maintenance frequency. Use this simple comparison to decide.
| Option | When to choose |
|---|---|
| Spot repairs | Minor damage, tight budget |
| Full replacement | Widespread rot, long-term value |
Match Material And Finish
When you decide between spot repairs and full replacement, match the new material and finish to the existing siding so repairs blend visually and perform the same over time. You’ll evaluate extent of rot, color shifts, and texture to choose spot fixes when matches exist, or replace whole sections if mismatched.
Prioritize color coordination and material durability: a small patch with different sheen or weaker substrate will stand out and fail sooner. Consider these steps before cutting or caulking:
- Inspect for hidden damage and moisture.
- Test sample paints and finishes.
- Source identical siding or compatible alternatives.
- Plan for long-term maintenance.
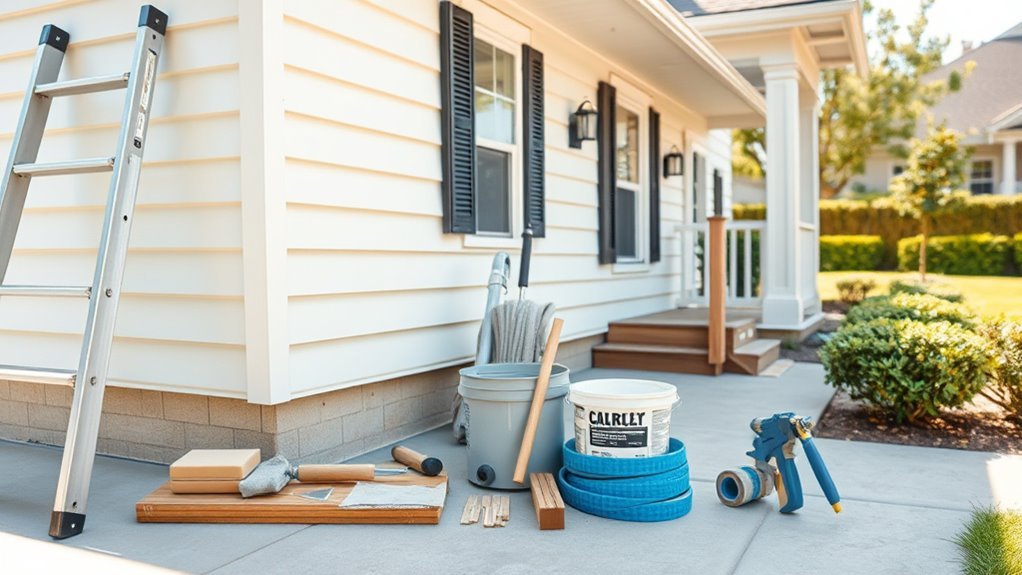
Tools and Safety Gear for Exterior Paint Prep
Because exterior prep can be the most hazardous and detail-oriented stage, you’ll want the right tools and safety gear before you start. Gather goggles, a respirator rated for particulates and fumes, cut-resistant gloves, and sturdy knee pads.
Use pry bars, scrapers, sanding blocks, a pressure washer with appropriate nozzle, and wire brushes for rust. Keep paint storage organized with labeled containers and proper seals; practice color coordination so touch-ups match.
Have tarps, drop cloths, and painter’s tape to protect surfaces. Keep a first-aid kit, fire extinguisher, and a charged phone nearby. Inspect gear before use.
Set Up Ladders and Scaffolding Safely
Before you climb, inspect and position your ladder or scaffold on firm, level ground and lock every joint and brace so nothing shifts under load.
You’ll verify ladder stability by checking feet, angle, and condition; tie off the top if possible.
For scaffolding assembly, follow manufacturer steps, use base plates, and secure guardrails.
Don’t overload platforms; know weight limits.
Work with a partner when raising or moving equipment, and wear a harness where required.
Keep tools tethered and maintain three points of contact on ladders.
Review anchors and plumb lines before painting to prevent slips or collapses.
- Check feet and angle
- Lock joints/braces
- Secure guardrails
- Tether tools
Protect Landscaping and Hardscapes From Paint
Before you start painting, cover plants and shrubs with breathable cloths or plastic to keep paint off foliage.
Lay down heavy-duty drop cloths or rosin paper to protect walkways and patios, taping edges so they won’t shift.
Block driveways and decks to stop foot traffic and splatter until the paint’s fully dry.
Cover Plants and Shrubs
Want to keep your landscaping looking fresh while you paint? You’ll need plant protection and shrub shielding before you start. Cover shrubs with breathable drop cloths or burlap so leaves can breathe and won’t trap moisture.
Secure covers with stakes or soft ties to prevent paint blow-ins. For delicate flowers, use temporary plastic tents with air gaps to avoid heat buildup. Rinse any accidental splatters immediately with water.
Keep pruning shears and tarps on hand for quick fixes. Follow this simple checklist:
- Use breathable cloth covers
- Stake and tie covers securely
- Tent delicate plants with ventilation
- Rinse splatters promptly
Protect Walkways And Patios
Once the plants are protected, turn your attention to walkways and patios so paint splatters or drips don’t stain hardscape surfaces. Lay heavy-duty paper or rosin paper for walkway protection, taping seams and edges to prevent wind lift.
Use contractor-grade drop cloths or plastic sheeting for patio covering, weighting corners with sandbags or bricks so they stay put. Keep a secondary layer near work zones where overspray is likely.
Fold and tape cloths at door thresholds to maintain a clean transition. Remove coverings daily to sweep grit away, preventing scratches and ensuring paint only touches intended surfaces.
Block Driveways And Decks
How will you keep paint off driveways and decks while you work? You’ll block off areas, cover surfaces, and protect fixtures. Move outdoor furniture and shield garden lighting before you start.
Lay heavy-duty drop cloths or rosin paper on decks and driveways, taping edges to prevent wind lift. Use low-profile ramps or plywood to create walkways over wet paint.
Keep a dedicated tray and brush for small touch-ups so you don’t track paint. Clean spills immediately with appropriate solvent.
Follow this checklist:
- Remove furniture and fragile items
- Cover lighting and fixtures
- Secure drop cloths
- Create protected walk paths
Cover Windows, Vents, and Fixtures Correctly
Before you start painting, seal off windows, vents, and exterior fixtures so paint won’t get where it shouldn’t. You’ll use window coverings and tape to protect glass, vents, and trim; install fixture protection over lights and hardware. Work methodically: mask edges, cover screens, and secure plastic with painter’s tape so wind won’t peel it. Check vents still allow airflow if needed. Remove coverings carefully after paint dries.
| Item | Covering | Notes |
|---|---|---|
| Window | Plastic & tape | Smooth edges |
| Vent | Mesh guard | Maintain airflow |
| Light | Bag & tape | Avoid heat sources |
| Trim | Paper | Prevent bleed |
| Hardware | Foam | Secure tightly |
Remove Loose and Peeling Paint the Right Way
If paint is cracking or flaking, scrape and sand those areas down to a firm edge so new paint will adhere properly; don’t just paint over loose material. You’ll remove all loose flakes, feather edges smooth, and clean dust before priming.
If paint is cracking, scrape and sand to a firm, feathered edge—remove loose flakes, clean, then prime.
This boosts paint durability and guarantees your chosen hue reflects desired color psychology without patchy texture. Use hand scrapers, sanding blocks, and a wire brush for tough spots. Wear protection and collect debris properly.
- Scrape to solid paint
- Sand to a smooth feathered edge
- Clean and prime exposed areas
- Inspect for recurring failure points
When: and How: to Use a Pressure Washer Safely
When you decide to use a pressure washer, pick a calm, dry day and check local regulations and safety guidelines so you don’t damage siding, landscaping, or nearby people and pets.
Use pressure washing only after loose paint is removed and avoid high PSI on soft materials.
Wear eye protection, gloves, and non-slip shoes.
Keep nozzle at a 45-degree angle and maintain distance—start 3 feet away, move closer cautiously.
Protect windows, vents, and plants with coverings.
Never point the wand at people or animals.
Follow manufacturer instructions and test a small area first to confirm settings and safety precautions.
Clean Siding for Exterior Paint Adhesion
Before you paint, remove loose dirt and debris from the siding with a brush or blower so the surface’s ready for cleaning.
Wash the siding with a mild detergent and rinse thoroughly to strip away oils and grime that block adhesion.
If you spot mold or mildew, treat it with a proper cleaner and let the area dry completely before priming or painting.
Remove Dirt And Debris
Though it might seem like a simple step, removing dirt and debris is essential for paint to stick and last, so start by knocking loose cobwebs and sweeping away leaves, dust, and surface grime.
You’ll inspect siding, trim, and eaves, removing loose mulch, seed pods, and bird nests that trap moisture. Keep gardening tips in mind—trim plants back so foliage and soil don’t rub wet paint.
Check around outdoor lighting and fixtures, clearing grit that causes uneven finish. Use a broom, soft brush, leaf blower, and scraper to prepare surfaces thoroughly.
- Sweep surfaces
- Brush crevices
- Blow away dust
- Scrape loose material
Wash With Mild Detergent
Because paint won’t bond to grime, wash your siding with a mild detergent solution to remove chalk, mildew, oil, and pollen before you prime or paint. You’ll work systematically from top to bottom, rinsing with a garden hose or low-pressure washer to avoid damaging surfaces.
Use a soft brush for textured areas and a bucket-to-brush method for controlled cleaning. Let surfaces dry completely; moisture traps ruin adhesion and affect how color psychology reads—damp surfaces look darker.
Once dry, inspect for remaining stains and note areas where you’re changing paint sheen so primer and paint selection match your desired finish.
Treat Mold And Mildew
When you spot mold or mildew on siding, act quickly to remove it so paint will stick and last. Mold can eat into finishes and cause unsightly staining if you let it spread.
You’ll scrub affected areas with a bleach-based cleaner or a commercial Mold removal solution, rinse thoroughly, and let the surface dry.
For Mildew prevention, improve drainage, trim plants, and increase sunlight.
Wear gloves, goggles, and a mask when cleaning.
Follow up with a mildew-resistant primer before painting.
Remember, proper preparation reduces peeling and staining and helps your new paint job last.
- Identify growth early
- Use appropriate cleaner
- Rinse and dry completely
- Apply mildew-resistant primer
Treat Mildew and Mold Before Painting
If you spot any mildew or mold on siding, trim, or eaves, clean it off before you even think about priming or painting—mold will lift paint and cause stains to bleed through.
You’ll use a mildew prevention mindset: remove organic matter, scrub with a diluted bleach solution or a commercial cleaner, rinse thoroughly, and let surfaces dry completely.
For extensive growth, call a professional for mold remediation to guarantee spores aren’t spread indoors or to unaffected areas.
After treatment, inspect for moisture sources—repair leaks, improve ventilation, trim vegetation—and only then proceed to prime and paint for long-lasting results.
Strip Old Paint: Chemical, Heat, or Sanding
When old paint won’t come off with soap and water, you’ll need to choose between chemical strippers, a heat gun, or sanding.
I’ll cover safe chemical stripper options and application tips, effective heat gun techniques for blistered paint, and sanding best practices to protect the wood and your lungs.
Pick the method that matches the paint type, surface condition, and your comfort with safety precautions.
Chemical Stripper Options
Although stripping paint can seem straightforward, choosing between chemical removers, heat, or sanding depends on the surface, paint type, and safety constraints. You’ll often pick a chemical stripper for detailed trim, leaded layers, or delicate wood because it targets bonds and eases paint removal without excessive abrasion.
Wear PPE, test a small area, and follow dwell times. Neutralize and rinse as directed. Dispose of waste responsibly. Consider ventilation and tarp protection.
- Pick the right product for substrate and paint age.
- Always use gloves, goggles, and respirator.
- Test small area first.
- Neutralize and clean thoroughly afterward.
Heat Gun Techniques
Because heat loosens paint by breaking its bond with the substrate, you can strip large flat areas faster than with scraping alone. Use a heat gun at moderate distance and move continuously to avoid scorching wood. Watch for bubbling; stop as paint softens, then lift with a wide scraper.
Prioritize heat gun safety: wear gloves, eye protection, and a respirator if fumes appear; keep a fire extinguisher nearby and never leave the gun unattended. Test a small area first to gauge temperature and timing.
After stripping, cool the surface, remove residue, and inspect for remaining soft spots before priming.
Sanding Best Practices
After you’ve removed loosened paint with heat, sanding lets you smooth remaining edges and prep the surface for primer. You’ll work with coarse, then fine grit to create uniform tooth for adhesion, improving paint durability and finish. Wear a respirator, use a dust mask, and protect plants. Keep pressure even; don’t gouge wood. Clean dust before priming so color psychology choices aren’t skewed by dirt.
For efficient, safe sanding follow these steps:
- Start with 80–100 grit on rough areas.
- Move to 150–220 grit for smoothness.
- Vacuum and tack cloth thoroughly.
- Inspect for gouges, fill, then re-sand.
Sand Exterior Surfaces for a Smooth Finish
Why start by sanding? You’ll smooth old layers, remove loose paint, and create a keyed surface so your chosen exterior paint color and paint finish options cover evenly.
Work with 80–120 grit for peeling areas, then 150–220 grit for feathering and smoothing.
Use a sanding block on flat boards and a palm or detail sander for trim, keeping movements consistent with the grain.
Vacuum and wipe with a tack cloth between grits to inspect progress.
Wear a respirator, goggles, and dust control.
Proper sanding prevents visible flaws and guarantees topcoats adhere and show true color and sheen.
Repair Wood Siding, Trim, and Gap Filling
Once your sanding shows a smooth, keyed surface, inspect the siding and trim for rot, cracks, and loose boards so you can repair them before priming.
You’ll remove rotten sections, secure loose trim, and replace damaged boards where needed. Use epoxy or wood filler for small defects, and follow with proper sanding.
For larger replacements, caulk seams and verify flashing is intact. Focus on durable wood repair and careful gap filling to prevent moisture entry.
- Remove and replace rotted wood
- Use epoxy or carpenter’s wood filler
- Caulk and seal all gaps
- Fasten loose trim securely
Fix Vinyl and Aluminum Siding Dents and Seams
Start by walking the exterior to assess damaged panels, dents, and loose or gapped seams so you know exactly what needs attention.
For dents, push out small creases from the back when possible and replace panels that are cracked or badly warped.
For seams, clean them, realign the siding, and use a compatible sealant or trim fasteners to restore a tight, weatherproof joint.
Assess Damage Areas
Noticing dents, loose seams, or warped panels now will save you bigger headaches later; walk the perimeter with a close eye and mark any damaged vinyl or aluminum siding so you can address each spot before painting.
Check around gutters, eaves, and near shrub beds—garden maintenance can expose hidden damage.
Note areas affected by freeze-thaw, wind, or sun exposure; weather considerations influence repair urgency.
Record locations, severity, and whether fasteners are loose or panels are distorted. Use this checklist to prioritize work:
- Location (north/south/elevation)
- Dent size and depth
- Fastener condition
- Proximity to vegetation or water
Repair Seams Properly
After you’ve mapped damage, tackle seams and dents to create a smooth, paint-ready surface. Start by cleaning seams with a brush and mild detergent, then inspect for gaps or lifted edges.
For vinyl and aluminum siding, use seam sealing to prevent moisture intrusion and movement.
Push dents out gently from behind or use a specialized tool, then smooth imperfections with fine-grit sanding.
Apply joint caulking rated for exterior use, tooling it flush and wiping excess before it skins.
Let sealant cure per instructions, then primer any repaired areas.
Proper seam sealing and caulking assure a durable, professional finish.
Patch Stucco and Masonry Before Painting
If your stucco or masonry has cracks, chips, or loose sections, patching them now prevents moisture problems and gives paint a smooth, long-lasting surface to adhere to. You’ll remove loose material, brush away dust, and dampen substrates before applying compatible patching compound.
Match stucco texture when troweling so repairs blend; feather edges into surrounding areas. For masonry, prioritize masonry sealing after patches cure to lock out moisture and improve paint adhesion.
Finish by sanding high spots and cleaning residue. Follow product cure times before priming.
- Remove loose material
- Match stucco texture
- Use proper patch compound
- Apply masonry sealing
Choose the Right Exterior Caulk and Where to Use It
When you’re sealing gaps around windows, doors, trim, and where different materials meet, choose an exterior caulk that’s durable, flexible, and matched to the substrate so the seal lasts through temperature swings and rain. Pick silicone for wet areas, polyurethane for siding, and paintable acrylic-latex for interior trim and painted surfaces. For window caulking, use low-modulus products to avoid glass stress. Use color-matched caulk on visible joints to keep finishes flawless. Here’s a simple emotional guide:
| Feeling | Surface | Caulk |
|---|---|---|
| Relief | Window frames | Silicone |
| Confidence | Trim | Acrylic-latex |
| Pride | Siding | Polyurethane |
Apply Caulk for Weatherproof Seams
Now you’ll apply the right caulk to seal gaps and keep moisture out.
Make sure you prep joints by cleaning, drying, and removing old caulk so the new sealant adheres.
Work methodically along seams for a smooth, weatherproof finish.
Choose Proper Caulk
Want your paint job to last? Choose proper caulk that’ll flex with temperature changes, bond to your trim, and accept paint. Think about choosing color—pick a paintable caulk that matches primaries or can be tinted for fine edges near exterior lighting fixtures.
Seal gaps around windows, doors, and trim with the right type: acrylic latex for painted wood, silicone for nonpaintable metal, polyurethane for high-movement joints, and hybrid for mixed materials.
- Acrylic latex — paintable, easy tool
- Silicone — durable, nonpaintable
- Polyurethane — flexible, long-lasting
- Hybrid — versatile, strong
Prep Joints Thoroughly
Because gaps and seams are the weakest points against water and drafts, prep joints thoroughly before painting by cleaning, sizing, and backing them so caulk can bond and flex properly. You’ll remove old sealant, dirt, and loose paint, then dry the area completely.
Choose a caulk compatible with your siding and primer, considering color coordination so seams disappear under the topcoat. Tool joints to a smooth finish and guarantee proper bead size for movement.
Match paint texture by feathering edges when you prime and paint over cured caulk. Inspect after curing to confirm weatherproof seals and uniform appearance.
Select the Right Primer for Each Surface
When you choose a primer, match it to the surface—wood, metal, masonry, or existing paint—to guarantee adhesion and durability. You’ll pick primers that block stains, prevent rust, and seal porous masonry while considering color psychology and paint branding so your topcoat looks and performs as designed.
Match primer to surface—wood, metal, masonry, or old paint—to ensure adhesion, block stains, prevent rust, and seal porous substrates.
Prep surfaces: clean, sand, and remove loose material before priming. Apply evenly and follow manufacturer dry times.
- Wood: use an acrylic or oil-based primer for sealing grain.
- Metal: use a rust-inhibiting primer.
- Masonry: use a high-alkali primer.
- Previously painted: use a bonding primer.
When to Use Stain‑Blocking or Oil‑Based Primers
If stains, tannins, rust, or water damage are present, reach for a stain‑blocking or oil‑based primer before you topcoat. These primers seal troublesome discoloration, prevent bleed‑through, and stick well to oily or previously stained surfaces.
Use stain‑blocking primers when tannin bleed or smoke stains threaten finish color. Choose oil‑based primers for greasy spots, rusted metal trim, or areas with heavy water staining where adhesion and sealing matter most.
Apply according to label, allow full cure, and spot‑check the stain after drying. Don’t skimp: the right primer saves repainting and keeps your exterior looking professional longer.
Prime Wood, Metal, Stucco, and Vinyl Correctly
Before you topcoat, prep each material with a primer designed for its needs: select a high-quality latex or oil primer for wood to seal grain and tannins. A rust-inhibiting oil or epoxy primer is suitable for bare metal. For stucco, use a masonry or acrylic-latex primer to fill pores and promote adhesion. For slick siding, choose a vinyl-specific bonding primer.
Before topcoating, prime each surface appropriately—latex or oil for wood, rust-inhibiting for metal, masonry for stucco, vinyl bonding for slick siding.
You’ll need to clean, sand, and remove loose coatings first. Match the primer to the substrate and follow the recommended drying times.
Use targeted wood treatment on knots or rot spots, and focus on metal priming where corrosion started. Apply even coats and inspect for full coverage.
- Clean and sand surfaces
- Spot-treat problem areas
- Apply correct primer per material
- Verify cure before topcoat
Choose Exterior Paint Type and Finish
Because the right paint protects and defines your home, choose a durable exterior formulation and a finish that suits the surface and exposure.
Start with high-quality acrylic latex for most siding; it offers superior paint durability, breathability, and easy cleanup.
Use oil-based or specialty coatings for metal or heavily weathered trim.
Match sheen to function: flat hides imperfections on rough stucco, satin resists mildew on siding, semi-gloss handles frequent wiping on trim and doors.
Consider how exterior choices will interact with your interior color shifts at entryways, but save specific color selection for the next step.
Pick Exterior Paint Color Like a Pro
When you pick exterior paint colors, think of the whole house as a composition: start with the largest surface and work outward to trim, accents, and the front door so tones coordinate instead of compete.
Use color psychology to set mood—warm neutrals feel inviting, cool grays feel modern. Test samples on different walls and watch them at morning and evening light.
Consider current paint trends but prioritize timelessness.
Follow a simple hierarchy to finalize choices:
- Main siding: base tone
- Trim: contrast level
- Accents: shutters, eaves
- Front door: focal pop
Trust daylight and neighborhood context.
Estimate Paint Quantity and Build Your Materials List
Measure each wall and subtract windows and doors so you can calculate the total surface area you’ll paint.
Multiply by the number of coats and check the paint’s coverage to estimate gallons needed.
Then make a concise materials list—brushes, rollers, drop cloths, primer, caulk, and ladders—so you won’t run short.
Calculate Surface Area
How much paint will you need and what supplies should you buy? Measure wall width and height, subtract windows/doors, and total square footage. Use that figure to compare paint coverage on cans and shortlist paint brands. Consider color psychology when choosing finishes and sample sizes. Create a materials list from the area: brushes, rollers, drop cloths, primer, caulk, and ladder. Verify quantities against manufacturer coverage.
- Calculate exterior wall square footage.
- Subtract non-painted openings.
- Convert to gallons using can coverage.
- Add 10% for waste and touch-ups.
Account For Coats
Because most exterior jobs need at least two coats for proper coverage and durability, you should multiply your base square footage by the number of coats you plan to apply (including primer) and then convert that total into gallons using the paint’s stated coverage.
Next, add 10–15% for waste and touchups. Check paint manufacturers’ coverage charts—they vary with finish and pigmentation.
If you’re switching to a darker or brighter hue, factor in additional primer or coats; color psychology choices can affect coat count because bold colors often need more layers.
Round up gallons to avoid mid-project runs and note required ancillary materials separately.
List Tools And Supplies
Now that you’ve calculated total square footage and coats, list the tools and supplies you’ll need and estimate paint quantities by matching that total to the manufacturer’s coverage rates.
You’ll gather brushes, rollers, primer, caulk, sandpaper, drop cloths, ladders, and safety gear. Factor extra for absorption, trim work, and touch-ups. Consider historical preservation requirements and use paints that meet archival standards.
Think through color psychology when choosing hues for curb appeal. Create a simple materials checklist and buy 10–15% extra paint.
Here’s a prioritized list to guide purchases:
- Primer and topcoat
- Brushes, rollers, trays
- Preparation supplies (caulk, sandpaper)
- Safety and coverings
Plan an Efficient Painting and Prep Sequence
When you map out a logical prep-and-paint sequence before you start, you’ll save time, reduce rework, and keep the job cleaner.
First, walk the property and note surfaces, trim, and problem areas; relate color choices to interior decor so exterior progression feels intentional.
Schedule tasks by height and exposure: top-down for cleaning, repairs, and priming, then lower sections and trim last.
Coordinate drying times and weather windows, and sequence scaffolding and ladder moves to minimize repositioning.
Protect landscaping using simple gardening tips like covering beds and trimming bushes.
List materials per stage and set realistic daily goals.
Mask and Tape Trim for Crisp Lines
You’ll want to pick a masking tape made for exterior paint so it sticks well but removes cleanly. Take time to cover and secure adjacent surfaces—windows, siding, and hardware—so you don’t get stray paint where it doesn’t belong.
Proper taping and protective sheeting are the quickest way to get crisp, professional-looking trim lines.
Choose Proper Masking Tape
Because clean, sharp paint lines start with the right tape, pick a product designed for exterior use that sticks well but removes cleanly—typically a high-quality, UV-resistant painter’s tape with a medium-strength adhesive.
You’ll avoid common masking mistakes by matching tape strength to surface texture and paint type. Tape selection matters for drying times and sun exposure; test a small strip first.
Apply tape firmly along edges, press down the edge, and remove at a 45° angle while paint is slightly tacky or fully cured per label.
- Test adhesion
- Match surface type
- Check UV rating
- Remove per timing instructions
Protect Adjacent Surfaces
If you want crisp paint lines, mask off windows, doors, siding seams, and hardware before you load the brush or sprayer.
Cover nearby plants with breathable drop cloths for plant protection and anchor edges with low-tack tape so you don’t damage foliage.
Apply painter’s tape along trim, flashing, and gutters, pressing firmly for a tight seal.
Use plastic sheeting for large areas, securing with tape that won’t lift paint.
Check weather considerations: avoid taping in extreme heat, cold, or rain, and remove tape within the paint’s recommended window to prevent tearing or adhesive residue.
Protect and Prep Hardware, Gutters, and Fixtures
Before you start painting, remove or shield all hardware, gutters, and exterior fixtures so they don’t get damaged or splattered. You’ll handle hardware protection by removing loose items, labeling screws, and covering immovable pieces with tape and plastic.
Clean fixtures first—fixture cleaning removes grime so paint adheres only where *meant*. Secure gutters with straps if you can’t remove them, and cover downspouts to prevent clogging.
- Remove and label removable hardware.
- Clean fixtures with mild detergent.
- Mask immovable items with painter’s tape and film.
- Protect gutters and downspouts from paint and debris.
Manage Paint Safety, Ventilation, and Disposal
Wear gloves, eye protection, and a respirator when you’re sanding, scraping, or working with solvent-based paints.
Keep fans or open windows flowing to avoid fumes building up while you work.
When you’re done, follow local guidelines to dispose of leftover paint and contaminated rags—don’t pour solvents down drains.
Wear Proper Protective Gear
Because paint fumes, dust, and chemicals can harm you quickly, put on proper protective gear before you start sanding or spraying. You’ll want safety equipment that blocks inhalation, skin contact, and eye irritation.
Choose a respirator rated for vapors and particulates, chemical-resistant gloves, goggles that seal, and disposable coveralls. Check fit, replace filters, and keep gear clean.
Stay aware of heat and ventilation limits when wearing respiratory protection, and take breaks outdoors. Inspect for damage before each use and store items away from solvents so they remain effective.
- Respirator (N95/organic vapor)
- Chemical-resistant gloves
- Sealed goggles
- Disposable coveralls
Dispose Paint Responsibly
How will you handle leftover paint and the fumes it can give off? Store cans tightly sealed, label contents and date, and keep them in a cool, ventilated area away from children and pets.
For small amounts, let water-based paint dry out, then dispose of the solid in regular trash per local rules.
For oil-based or larger quantities, call your municipal hazardous waste program—never pour paint down drains or onto soil. Seek eco-friendly disposal options like community recycling days or paint-exchange programs.
Ventilate work areas while painting and during cleanup to minimize fumes, and wear a respirator if ventilation’s limited.
Best Weather Conditions for Exterior Painting
When choosing a day to paint your house exterior, pick a stretch of mild, dry weather—temperatures between about 50°F and 85°F and relative humidity under 70% give paint the best chance to adhere and cure evenly.
You’ll avoid rain delays and lessen risks from temperature extremes by watching forecasts for several days. Work during daylight when surfaces warm but aren’t hot. Aim for consistent conditions so coats dry uniformly.
- Check 5–7 day forecast.
- Avoid painting just before rain.
- Skip very hot or freezing days.
- Paint in steady, moderate humidity and wind.
Common Prep Mistakes That Shorten Paint Life
If you skip thorough surface prep, paint won’t last no matter how good the product is. You’ll reduce paint durability by ignoring cleaning, sanding, and primer. Leaving mildew, chalk, or loose flakes means new coatings won’t bond.
Skipping caulking and flashing lets moisture undermine your work. Painting over incompatible previous finishes or using wrong primer wastes effort and confuses color psychology choices—bold hues can highlight flaws if surfaces aren’t uniform.
Rushing in wet or dusty conditions traps contaminants. Don’t thin paint improperly or apply too thin a coat.
Take the time to prep right so finish and hue perform as designed.
Spotting Poor Adhesion and Next Steps
As you inspect the exterior, watch for peeling or flaking paint that comes away with light pressure.
Check for poor surface bonding where paint lifts from the substrate and for blistering or bubbling that signals trapped moisture or heat.
If you spot any of these issues, you’ll need to remove loose material, address the underlying cause, and properly prep before repainting.
Peeling And Flaking Paint
How do you tell whether paint is merely weathered or actually failing? Look for raised edges, loose chips, and areas where paint drying stopped properly; color fading alone doesn’t always mean failure. Test with a fingernail: adhesion should resist scraping. If flakes come away in sheets, you’ve got peeling.
- Inspect for lifting at seams and corners.
- Scrape loose material until you reach solid paint or bare substrate.
- Sand feathered edges, remove dust, and clean surfaces.
- Prime exposed bare areas, then spot-paint or repaint full sections for uniform protection.
Poor Surface Bonding
Peeling often leads you to check adhesion more closely, since areas that seemed weathered can hide spots where paint never bonded properly. You’ll inspect for thin, powdery patches or edges that lift with a fingernail—signs of poor surface bonding.
Test suspect areas by firmly scraping a small section; if paint flakes easily or substrate powders, surface adhesion has failed. Remove loose material, clean mildew and dirt, then sand glossy surfaces to promote paint bonding.
Prime bare wood or patched areas with a compatible primer. Reinspect after priming; good adhesion now predicts a longer-lasting finish.
Blistering And Bubbling
If you spot raised bubbles or translucent blisters beneath the paint film, they’re a clear sign that adhesion failed in those spots and moisture, heat, or trapped solvents were at work. You’ll need to identify blistering causes, then act: probe edges, check substrate moisture, and confirm ventilation or solvent issues.
Remove failed paint back to sound edges, dry and treat the substrate, and prime with a compatible sealer.
For bubbling prevention, control moisture, avoid painting in direct sun, and use proper primers.
- Diagnose moisture source
- Strip to solid paint
- Dry and repair substrate
- Prime with compatible sealer
Maintain Tools and Clean Up Each Day
Because you’ll use your brushes, rollers, and sprayers again tomorrow, take a few minutes at day’s end to clean and store them properly. You’ll follow simple tool maintenance steps: flush sprayers, rinse rollers and brushes until water runs clear (or use the correct solvent), comb bristles, and reshape brush heads.
Label and seal remaining paint. Adopt cleanup procedures: remove drop cloths, sweep grit from work areas, and safely dispose of used rags and solvent per local rules.
Store equipment dry in a cool, sheltered spot. Doing this prevents damage, speeds morning setup, and guarantees consistent paint results without wasted time.
Schedule a Multi‑Day Exterior Prep and Paint Plan
When you map out a multi‑day exterior prep and paint plan, block tasks by area and by daily weather windows so you know exactly what to tackle each morning and can finish each day’s work before conditions change. You’ll sequence scraping, repairs, priming, and painting to allow drying times and avoid redo.
Coordinate with family routines, protect interior decor from dust, and shift garden items using gardening tips to keep coatings clean. Track materials, note contingency days for rain, and assign realistic daily goals so progress is steady.
- Zone tasks by façade section
- Schedule dries between coats
- Protect interiors and plants
- Log supplies and contingencies
When to Hire a Pro Instead of DIY
Although you can handle many exterior painting tasks yourself, hire a pro when the job exceeds your skills, time, or safety limits—think major lead-paint concerns, extensive rot or structural repairs, multi‑story work requiring scaffolding, or tight timelines you can’t meet.
You’ll want expert certification for lead, structural fixes, and insurance for high‑risk work. If you’re juggling interior decorating projects or following gardening tips while prepping, a pro frees your time and prevents DIY mistakes that compound costs.
Choose a licensed crew when permanence, code compliance, or complex color matching matters—especially on historic or high‑visibility façades.
What to Ask and Inspect When Hiring an Exterior Painter
If you decide to hire a pro instead of tackling the exterior yourself, the next step is to know exactly what to ask and inspect so you hire a reliable painter. Ask for license, insurance, and local references; check recent work in person.
Discuss color trends and request mockups or samples. Confirm specific paint brands, warranties, surface prep, and drying conditions.
Inspect their prep methods: power washing, scraping, priming, and caulking.
Verify written estimates and cleanup plans.
Compare DIY vs Pro: Cost, Time, and Scope
Because you can save money but trade off time and expertise, deciding between DIY and a pro comes down to what you value most: upfront cost, project timeline, and the scope of work.
If you DIY, you’ll cut labor costs and learn color psychology to pick tones, but you’ll spend weekends, risk mistakes, and wrestle with prep and ladders.
Hiring a pro speeds completion, ensures consistent coverage, and handles complex repairs and trim details, though it costs more.
Whether you DIY or hire, pick quality brushes, consider eco friendly paints for durability and low VOCs, and match scope to your skills.
Document Prep and Paint for Warranty and Resale
Whether you painted the house yourself or hired pros, documenting the prep and paint work protects your investment and helps future resale. You should record product labels, batch numbers, and application dates, noting any historical preservation requirements and approvals. Photograph prep stages and final coats, and keep receipts for warranties and eco friendly paints used. Store files digitally and in a hard copy folder for buyers or inspectors.
- Note surface prep methods and contractors.
- Log paint brands, colors, and batch codes.
- Save warranties, permits, and preservation correspondence.
- Include dated photos of each phase and finish.
Seasonal Touch‑Ups to Extend Exterior Paint Life
As seasons change, you’ll want a short, regular routine to catch small chips, peeling, and dirt before they turn into bigger problems; these quick touch-ups preserve the paint’s protection and keep your home looking sharp.
Inspect quarterly after storms and during seasonal maintenance: probe edges, touch blistered spots, and rinse grime. Match paint sheens and spot-prime bare wood or metal to prevent rust and rot.
Consider weather considerations when planning work—avoid high humidity, freezing temps, or direct sun.
Keep a small kit: mixed-matching paint, caulk, sandpaper, and brushes. Log touch-ups so you only repaint when truly needed.
Final Checklist: Step‑By‑Step Exterior Prep Tasks
Before you start painting, run through a concise, prioritized checklist so nothing important gets missed—clean surfaces, repair damage, protect trim and landscaping, and stage ladders and tools for safe access. You’ll follow a tight sequence to ensure color harmony, maximize paint durability, and cut rework.
Before painting, run a concise, prioritized checklist—clean, repair, protect, and stage tools for safe, durable results
Start with cleaning, then patching and sanding, prime where needed, and mask edges. Verify materials, weather window, and safety gear.
- Pressure-wash and let dry completely.
- Fix rot, caulk gaps, sand smooth.
- Prime bare wood/metal and check adhesion.
- Protect plants, cover fixtures, arrange stable ladders.
Frequently Asked Questions
Can Painting Over Lead-Based Exterior Paint Be Done Safely by Homeowners?
You can only do limited lead paint removal safely if you follow strict safety precautions; otherwise, you should hire certified professionals. Use containment, HEPA cleanup, PPE, and wet methods to minimize dust and exposure.
How Long Should Newly Repaired Wood Cure Before Painting?
Expect wood repair to feel like it’s aging into a fine whiskey: you’ll want curing time of at least 24–72 hours for small repairs, and up to 7 days for larger fills before you prime and paint.
Will Painting Reduce Exterior Noise or Improve Insulation?
No — painting alone won’t provide meaningful exterior soundproofing or insulation enhancement; you’ll need thicker materials like specialized siding, insulation, or soundproof panels to noticeably reduce noise and improve thermal performance around your home.
Can Exterior Paint Be Applied in Light Rain or High Humidity?
You shouldn’t paint in light rain or very high humidity; you’ll face Rain precautions and Humidity effects like poor adhesion, longer drying, and blistering. Wait for dry conditions, use moisture-tolerant primers, and follow manufacturer guidelines.
How Do I Document Prep Work for a Future Home Inspection?
You’ll create a document inspection checklist and start recording prep progress with dated photos, before/after notes, receipts, contractor sign-offs, and a timeline; you’ll organize files digitally and print a summary for the future home inspector.
Conclusion
You’ve already done most of the heavy lifting—prep is where paint longevity is won or lost. Did you know properly prepping surfaces can double exterior paint lifespan, often extending it from 5–7 years to 10–14? Use the checklists above to inspect siding, trim, windows and doors, fix rot or mildew, and document repairs for warranty and resale. Follow the seasonal touch‑ups and you’ll keep your home looking pro‑finished for years.