How to Prep Exterior Wood for Painting Properly
You’ll extend paint life and prevent rot by evaluating, repairing, cleaning, sanding, priming, and masking before you paint. Probe for soft spots, remove loose paint, replace or epoxy rotten wood, and fill cracks and nail pops. Wash mildew with a bleach solution or pressure-rinse gently and let wood dry. Sand progressively, spot-prime repairs, then apply the right primer and paint for the wood and climate. Keep going to learn detailed steps and tips.
Who This Guide Helps and What It Covers
Whether you’re a DIY homeowner tackling siding and trim or a pro preparing multiple jobs, this guide helps you get exterior wood ready for a lasting paint job. You’ll find practical steps for cleaning, repairing, sanding, and priming various wood types, plus tool choices and safety tips.
It’s written for homeowners, contractors, and caretakers of older structures, addressing historical preservation needs and the cultural significance of maintaining original materials. You’ll learn when to consult preservation specialists, how to match finishes sensitively, and how to document conditions before work.
Follow these concise procedures to protect wood and respect heritage.
Why Proper Prep Matters for Exterior Wood Painting
If you prep exterior wood correctly, your finish will last longer and look better through changing weather. Proper prep also helps stop moisture entry that leads to rot and decay.
That extra work up front saves you money over time by avoiding frequent repairs and repainting.
Longevity Of Finish
Because exterior wood faces constant sun, rain, and temperature swings, proper preparation determines how long your paint job will last. You’ll get better paint adhesion by cleaning, sanding to follow the wood grain, and using primer that bonds.
Prep reduces peeling, blistering, and premature fade so your finish endures. Take time to remove loose paint, smooth rough spots, and make certain surfaces are dry before coating; those steps cut maintenance and repaint frequency.
- Clean surfaces to remove dirt and mildew
- Sand with the grain for consistent adhesion
- Apply a compatible primer and inspect for defects
Preventing Rot And Decay
Good prep doesn’t just make paint last—it helps keep the wood underneath healthy. You’ll remove failing coatings, dry trapped moisture, and address soft spots so rot can’t take hold.
Sanding and cleaning along the wood grain exposes damage and guarantees primers and exterior finishes penetrate properly. You’ll replace or repair any decayed sections, seal end grain, and improve drainage and ventilation to prevent future dampness.
Use fungicidal treatments where needed and choose breathable coats that shed water but allow residual moisture to escape. By prepping thoroughly, you stop decay early and create a stable substrate for lasting protection.
Cost Savings Over Time
When you invest time in proper exterior wood prep, you’ll spend less on repairs and recoats over the years because the paint adheres better, covers evenly, and protects the substrate from moisture and rot.
You save money by extending intervals between jobs, reducing material waste, and avoiding structural fixes. Thoughtful budget planning upfront helps you compare DIY vs. professional costs and pick the smartest approach.
Proper sanding, priming, and sealing cut long-term expenses and preserve curb appeal, so you won’t be chasing failures.
- Fewer recoats and touch-ups
- Lower long-term repair bills
- Clear DIY vs. professional trade-offs
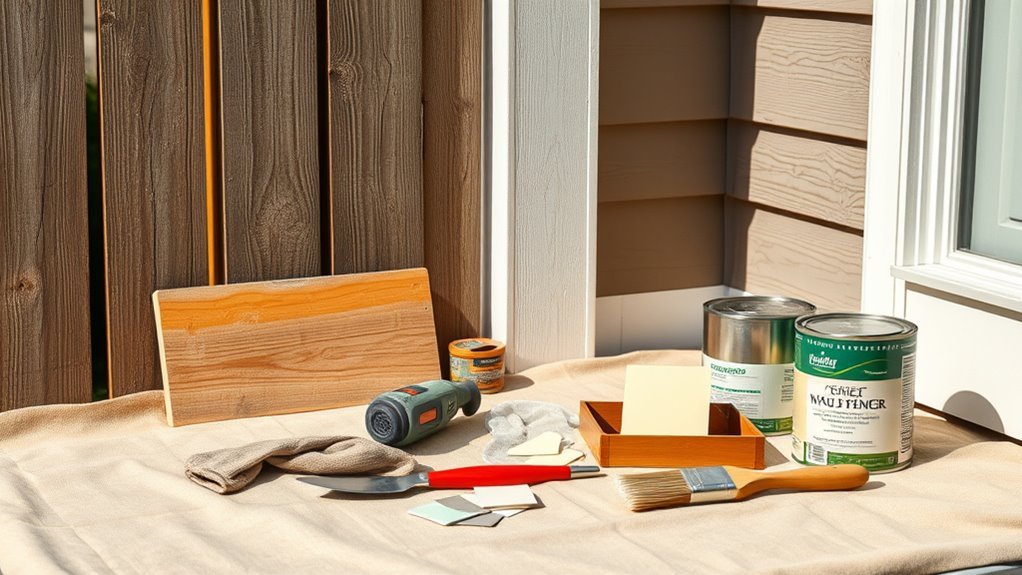
Quick Checklist: Tools, Materials, and PPE
Before you start, gather the right tools and equipment—scrapers, sanding blocks, power sanders, brushes, and a good caulk gun.
Don’t forget personal protective equipment like gloves, eye protection, dust masks or respirators, and hearing protection for power tools.
Having these materials on hand keeps the job safe, efficient, and professional.
Tools And Equipment
Although you can tackle small touch-ups with basic tools, preparing exterior wood properly calls for a focused set of equipment, materials, and personal protective gear that’ll keep the job efficient, safe, and long-lasting.
You’ll clear nearby outdoor furniture and note landscaping considerations before starting.
Gather key tools: a pressure washer or garden hose, variable-speed sander with sanding discs, scraper and wire brush.
Collect materials: exterior primer, paint, wood filler, and caulk.
Have containment supplies like drop cloths and painter’s tape.
Organize a ladder, extension poles, and a durable paint tray to streamline work and reduce rework.
PPE And Safety Materials
Because you’ll be working with dust, chemical primers, and high-pressure water, get the right PPE and safety materials before you begin so you stay protected and compliant. Wear a NIOSH-rated respirator for sanding and primer fumes, chemical-resistant gloves for solvents, and safety goggles for splash protection.
Use disposable coveralls and knee pads to keep outdoor furniture and nearby surfaces clean. Put down drop cloths and seal vents and interior walls to prevent dust migration.
Keep a first-aid kit, fire extinguisher, and spill kit nearby. Inspect gear, replace damaged items, and follow label safety instructions throughout the project.
Assessing Exterior Wood Condition
When you inspect exterior wood, look for rot, loose or raised grain, peeling paint, and soft spots that indicate moisture damage. You’ll assess boards, trim, and window sills, factoring in outdoor decor placement and seasonal considerations that affect exposure.
Probe suspicious areas with a screwdriver and tap for hollow sounds. Note repairs, replacements, or deep sanding needs before priming.
- Mark sections needing replacement
- Record areas requiring filler or consolidation
- Note proximity to vegetation or fixtures
Prioritize safety and weather forecasts so repairs dry properly. Make a concise plan: repair, sand, clean, then prime.
Identifying Paint Failure: Peeling, Blistering, and Checking
If paint is failing, you’ll usually see one of three clear signs: peeling where large sheets lift away, blistering where bubbles form under the film, or checking where fine cracks spider across the surface.
You should inspect affected areas to determine whether failure follows moisture, poor adhesion, or sun exposure.
Peeling often means adhesion loss; blistering signals trapped moisture or heat; checking shows surface fatigue from cycles of expansion and contraction.
When planning repairs, consider historical preservation guidelines and choose colors with color psychology in mind to maintain context and appeal.
Document patterns so your prep and primer address root causes.
Diagnosing Wood Rot vs. Surface Decay
Start by scanning the wood for visual signs like discoloration, soft spots, or fungal growth to distinguish decay from surface weathering.
Then probe suspicious areas with a screwdriver or awl to see if the wood crumbles (rot) or simply roughs up (surface decay).
Finally, check nearby structural members and load-bearing points so you can judge whether repair or replacement is needed.
Visual Inspection Signs
How can you tell whether soft or discolored wood is simply surface decay or active rot that needs repair? You’ll rely on visual cues: texture, pattern, and spread. Note whether discoloration follows paint failures or appears in streaks, and consider nearby moisture sources. Color psychology and historical styles won’t affect decay, but they’ll guide your expectations for finishes and where hidden damage might hide on older trim. Look for consistent signs of deterioration rather than isolated blemishes.
- Crumbling, spongy areas versus flaky paint only
- Irregular, spreading dark patches along grain
- Fungal growth, mushrooms, or visible mycelium
Probing With Tools
When you need to confirm whether soft spots are shallow decay or active rot, probe the wood with simple tools to get a clear feel for the damage. Use a screwdriver, awl, or ice pick to press into suspect areas; firm wood resists, while rotten wood crumbles or yields easily.
Work edges and joints where moisture collects. Remove loose paint and surface decay until solid wood appears. Mark repairs and plan replacements if probing reveals deep decomposition.
While diagnosing, keep paint mixing and color theory in mind so repaired sections match texture and hue during final finishing.
Assessing Structural Integrity
Before you replace or paint, you need to determine whether the wood’s problem is superficial decay or true structural rot, because the repair approach and safety requirements differ. You inspect by probing soft spots, checking for crumbly fibers, and looking for fungal discoloration.
Surface decay sands away; structural rot needs removal and possible replacement. Consider nearby moisture sources and fix them first so new work lasts. Match replacement wood for grain and color matching to blend seamlessly, then prime to preserve paint durability.
Use a moisture meter for confidence, and document repairs before repainting.
- Probe suspicious areas
- Measure moisture content
- Replace compromised sections
Repaint or Strip to Bare Wood: How to Decide
Deciding whether to repaint or strip to bare wood comes down to evaluating the existing finish, the wood’s condition, and how long you want the next job to last.
Check adhesion: if paint peels broadly or bubbles, stripping is safer. Spotty wear, solid adhesion, and acceptable paint durability mean you can repaint after proper cleaning and sanding.
Also consider color matching—moving from dark to light or vice versa may need more coats or stripping to avoid bleed-through.
Factor in rot, mildew, and previous primer quality.
Choose stripping for long-term performance; repainting saves time when the substrate is sound.
Safe Removal of Loose and Flaking Paint
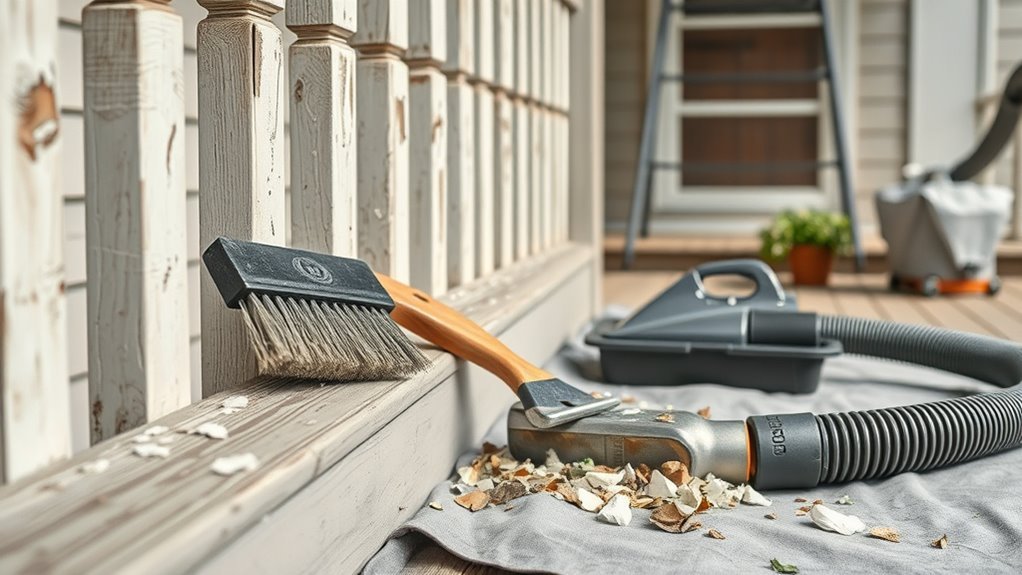
Before you start scraping, make sure you’ve got the right tools and safety gear—gloves, eye protection, a dust mask or respirator, and drop cloths.
Use appropriate paint-removal techniques for the paint condition and age, from hand-scraping and sanding for small areas to heat or chemical strippers for tougher spots.
Work methodically to avoid damaging the wood and to contain dust and debris as you go.
Tools And Safety Gear
How will you get the old, loose paint off without creating a hazard? You’ll need the right tools and safety gear to contain dust, protect yourself, and preserve paintable surfaces.
Combine respirators, goggles, and disposable coveralls to prevent inhalation and skin contact. Use drop cloths and plastic sheeting to capture debris.
Keep a grounding fan handy for ventilation and a HEPA vacuum for cleanup.
Remember color theory when planning touch-ups so your primer and final coats match, and practice brush maintenance after cleanup to extend tool life.
- Respirator, goggles, coveralls
- Drop cloths, plastic sheeting, HEPA vacuum
- Gloves, grounding fan, spare brushes
Paint Removal Techniques
When paint is loose or flaking, strip it down to a firm edge using hand tools and controlled methods so you don’t spread dust or damage the substrate. Use a stiff putty knife, scraper, and sanding block to remove failing paint, working outward from edges.
Wet-sanding or a chemical remover can help stubborn areas—always follow label directions and contain runoff. Wear a respirator and capture debris with drop cloths.
After removal, clean surfaces and prime bare wood. When planning finish coats, consider color mixing for accurate matches and use a high-quality paint roller for even application on broad sections.
Pressure-Washing Exterior Wood Safely
Although a pressure washer speeds up cleaning, you’ll need to use it carefully to avoid damaging wood fibers or forcing water into joints. You’ll pick a low-pressure nozzle, test a hidden area, and aim parallel to grain.
Protect decorative accents and areas important for historical preservation by backing them off or hand-cleaning. Drying time matters before priming.
- Use 500–800 psi and a 40° nozzle for siding.
- Hold the wand 12–18 inches away, keep it moving.
- Cover vents, electrical, and open seams to prevent water intrusion.
Rinse gently and let wood dry thoroughly before any paint prep.
Cleaning Mildew, Mold, and Algae on Wood
If mildew, mold, or algae have taken hold on your exterior wood, you’ll want to remove them before sanding or priming to prevent staining and paint failure.
Start by wetting the area, then apply a commercial mildew removal solution or mix one cup of bleach with a gallon of water and a tablespoon of detergent. Scrub gently with a stiff brush, rinse thoroughly, and let the wood dry completely.
Wet the wood, apply a mildew cleaner or bleach solution, scrub with a stiff brush, rinse, and fully dry.
For persistent growth, repeat treatment or use a stronger product labeled for wood.
After cleaning, consider algae prevention by improving drainage, trimming vegetation, and ensuring sunlight reaches the surface.
Sanding Approaches for Different Exterior Surfaces
Because each exterior surface wears and accepts finish differently, you’ll need tailored sanding approaches to get a durable, even paint job. Match technique to substrate: smooth boards, rough-sawn planks, and trim all demand different grit progressions so your paint texture stays consistent and your chosen color psychology reads true.
Focus on removing loose finish, feathering edges, and creating enough profile for primer.
- Smooth clapboard: finer grits to avoid glazing, maintain grain for uniform paint texture.
- Rough-sawn wood: open pores with coarser grit, clean debris before finishing.
- Trim and details: careful sanding to preserve shape and adhesion.
Hand Sanding vs. Power Sanding: Pros and Cons
When you sand by hand you get finer control and can feel the surface, which helps preserve details and avoid over-sanding.
Power sanding can speed the job but risks gouging, creating swirl marks, and generating more dust you’ll have to manage.
We’ll weigh those hand-sanding benefits against the common power-sanding drawbacks so you can choose the right method.
Hand Sanding Benefits
Though power sanders speed the job, hand sanding gives you control and finish quality that machines often can’t match. You’ll feel the wood grain and judge pressure to preserve detail while smoothing imperfections.
When you hand-sand, you control the finish sheen and avoid overworking edges. It’s slower, but it’s precise.
- You can follow contours and joints without creating dips.
- You’ll reduce tear-out on soft grain and protect molding profiles.
- You’ll better sense when primer or old paint is thin enough to stop.
Choose hand sanding when accuracy and surface feel matter most before painting.
Power Sanding Drawbacks
Hand sanding gives you the tactile control and finesse machines can’t match, but power sanding still has its place—just be aware of its drawbacks.
When you use a sander, you remove material fast, risk gouges, and can create uneven profiles on trim or corners. Power sanding drawbacks include heat buildup that burns finishes and rapid removal that hides defects until too late.
You’ll also generate vast airborne dust, so Dust control is essential: wear a respirator, connect vacuums, and seal nearby areas.
For best results, combine power sanding for large flat areas with hand sanding for edges and touch-ups.
Sandpaper Grits and Sequences for Exterior Wood
Because the grit you choose determines both how quickly you remove flaws and how well new paint will bond, start each sanding step with a clear plan. You’ll follow coarse-to-fine progressions, matching grit to condition: remove old finish with 80–100 grit, refine surfaces with 120–150, and finish with 180–220 for smooth paint adhesion.
Choose grits deliberately: progress coarse-to-fine—80–100 to remove, 120–150 to refine, 180–220 for a smooth paint-ready finish.
Sand along the wood grain to avoid scratches that show through paint. Keep pressure even and check progress often; don’t oversand thin trim. Choose sanding tools that suit the surface profile and weathered condition before priming and painting.
- 80–100 grit: heavy removal
- 120–150 grit: smoothing
- 180–220 grit: final finish
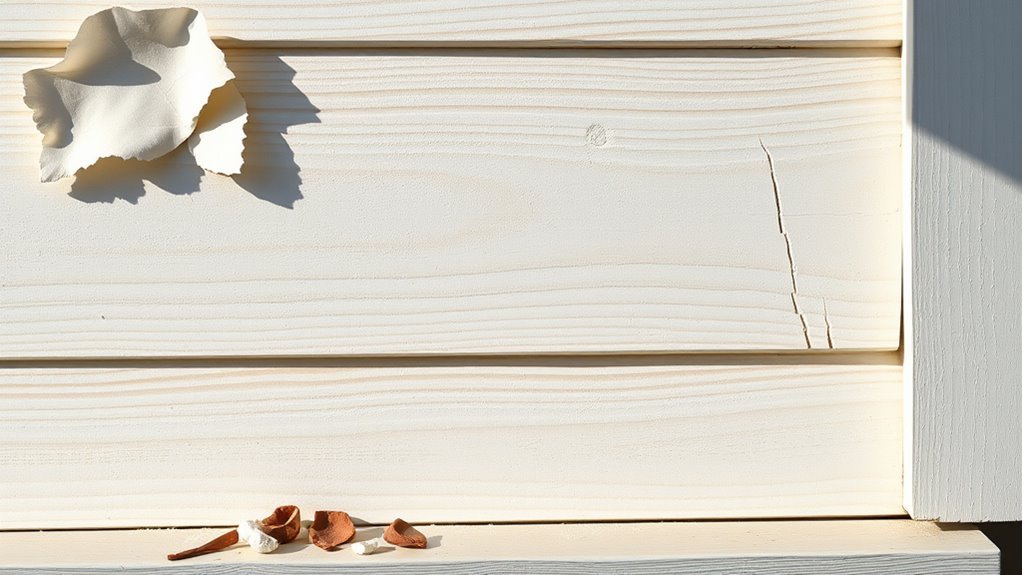
Repairing Small Cracks, Holes, and Nail Pops
Start by evaluating the damage carefully so you know whether a crack, hole, or nail pop needs a simple fill or a bit more work.
Choose an appropriate filler — exterior-grade wood filler or caulk for small gaps, and a patching compound for larger voids.
Once filled and cured, sand flush and smooth the edges so the repair blends seamlessly with the surrounding wood.
Assess Damage Carefully
When you’re ready to prep the surface, inspect every board and joint for small cracks, holes, and nail pops so you don’t trap defects under paint. These flaws can let moisture in and cause peeling later. You’ll mark damage, note areas needing fasteners, and consider seasonal planning for repairs—moisture and temperature affect adhesion—and how your chosen paint color may highlight imperfections.
Triage what’s cosmetic versus structural, prioritize active water paths, and plan touch-ups accordingly. Use this checklist to organize work and materials:
- Identify and mark all nail pops and surface holes
- Flag joints with recurring gaps or movement
- Note boards with hairline cracks
Choose Appropriate Filler
Now that you’ve marked nail pops, holes, and hairline cracks, pick a filler that matches the defect size and the wood’s movement characteristics. You’ll choose between flexible acrylic-latex for small, moving cracks; exterior-grade epoxy for rotted or large voids; and wood filler for cosmetic repairs on stable areas.
Consider filler types and cure time, paintability, and whether stain or paint will follow. Match pigment or plan for color matching under primer to avoid show-through.
Apply in layers for deep fills, tool smooth to the profile, and let each layer fully cure before proceeding to the next step.
Sand And Smooth Edges
If the filler’s cured, grab a sanding block or sandpaper and smooth each repair until it blends with the surrounding wood profile—you want edges feathered so paint won’t catch on a ridge. Sand gently across small cracks, holes, and nail pops, keeping the surface even.
Check decorative accents carefully so you don’t round crisp profiles. Wipe dust away and inspect under good light; repeat light sanding if needed.
Match primer and topcoat for proper color matching over repairs. Finally, spot-prime patched areas before full priming to ensure uniform absorption and adhesion.
- Sand with progressive grits
- Clean and inspect
- Spot-prime repairs
Replacing or Patching Rotten Wood Correctly
Because rot weakens structure and invites moisture back under your paint, you should remove and replace or properly patch any compromised wood before priming.
Inspect thoroughly, mark soft areas, and cut back to solid wood. For small spots, use a properly sized wood patch or dutchman repair; fit and glue a replacement piece, screw and fill seams.
Larger sections require full board replacement and matching profiles. Seal cut edges with primer, then sand smooth for paint adhesion.
While prepping, consider gardening tips and interior decorating lessons about moisture control and aesthetic continuity to prevent future decay.
Using Consolidants and Epoxy for Structural Rot
First, you’ll assess the extent of the rot to determine whether the wood can be saved or needs replacing.
Then pick a consolidant designed for exterior use that matches the wood species and exposure conditions.
Finally, apply a compatible epoxy repair to restore structural strength and shape before priming and painting.
Assess Rot Extent
When you encounter soft or crumbling wood, don’t assume the damage stops where you can see it; probe around the affected area with a screwdriver or awl to map how far decay has spread and whether the remaining structure is sound enough for consolidation. You’ll judge if farmhouse charm or rustic appeal can be preserved without full replacement.
Check joins, load-bearing sections, and hidden cavities; measure depth and width of rot. If consolidation looks viable, document extent and plan epoxy or filler work.
Use probes and tapping to detect hollows, then decide repair vs. replace based on remaining solid timber.
- Probe joints and edges
- Tap for hollowness
- Measure rot depth
Choose Appropriate Consolidant
If the rot is shallow enough that solid fibers remain, you’ll want a consolidant that penetrates deeply, bonds to degraded wood, and cures hard without shrinking. You’ll test small areas, following manufacturer directions, to confirm absorption and tack-free time.
Select solvent- or water-based formulations compatible with later adhesives and paints; consider how choosing finishes will interact with cured consolidant and primer.
Match product viscosity to exterior textures—open-grain siding needs thinner penetrants; raised details benefit from higher-viscosity systems.
Work in dry conditions, remove dust and loose rot, and allow full cure before sanding or moving to repairs so subsequent coatings adhere properly.
Apply Epoxy Repair
Although you’ve stabilized the fibers with a consolidant, you’ll now use epoxy to rebuild lost section and restore structural integrity. You’ll remove loose rot, follow manufacturer mix ratios, and apply epoxy to recreate the original profile. Match repaired contours to surrounding wood grain so the finish looks seamless, and sand to a feathered edge before priming.
Check that the patch accepts primer evenly to guarantee consistent paint sheen.
- Mix epoxy to the right work time and viscosity.
- Shape with a putty knife or carving tools once partially cured.
- Sand progressively to blend repair into existing surface.
Preparing Trim and Corner Joints Before Painting
Ready to tackle the trim and corner joints? You’ll inspect seams for gaps, rot, and loose caulk, then sand and clean surfaces.
Ready to tackle trim and corners: inspect seams for gaps, rot, and loose caulk, then sand and clean.
Choose color coordination early so primer and paint match adjoining siding and accents.
Use appropriate caulk for exterior gaps, tooling joints smooth, and allow full cure before priming.
Pick brush selection to suit trim profiles—angled sash brushes for detail, wider flats for straight runs—to get crisp lines.
Mask adjacent surfaces where needed.
Check for nail pops and set them below the surface, then fill and sand.
Work methodically so joints stay weatherproof and paint bonds well.
Treating Bare Wood vs. Previously Painted Wood
Now that your trim and joints are sound, you’ll handle bare wood and previously painted surfaces differently to guarantee a lasting finish.
For bare wood, remove mill glaze, sand to smooth raised grain, and treat with a stabilizer to resist moisture.
For painted wood, strip loose paint, feather edges, and clean chalky surfaces so new coatings adhere.
Consider color trends for guidance, but prioritize substrate condition and local weather patterns when deciding preparation intensity.
- Bare wood: clean, sand, stabilize
- Previously painted: strip, sand, clean
- Inspect for rot and fix before coating
Choosing the Right Primer for Exterior Wood
When you pick a primer for exterior wood, match it to the wood condition, the topcoat type, and the climate so the system bonds, blocks stains, and withstands moisture cycles. You’ll choose oil-based for tannin-rich or bare wood, latex for flexible adhesion on previously painted surfaces, or specialty primers for mold and salt exposure. Consider exterior decor goals and weather durability so colors and textures last. Prep by cleaning, sanding, and spot-priming. Use the table below to compare quick options and pick what suits your substrate and environment.
| Primer Type | Best For | Key Benefit |
|---|---|---|
| Oil-based | Bare/tannin wood | Stain blocking |
| Latex | Repaint | Flexibility |
Selecting Exterior Paint: Types and Performance
After you’ve primed and prepped the wood, pick a topcoat that matches the primer’s properties and the exposure the surface will face. Choose acrylic latex for durability and breathability, or 100% acrylic for sunshine and humidity resistance. Consider oil-base for trim where toughness matters, but note cleanup and VOCs.
After priming, select a topcoat that matches primer and exposure—acrylic latex for durability, 100% acrylic for weather resistance.
Think about color psychology when selecting hues—lighter tones reflect heat; darker tones hide imperfections. If sustainability matters, look for eco friendly paints with low VOC and strong adhesion. Match paint flexibility to wood movement and local climate to reduce cracking and peeling.
- Acrylic latex: versatile exterior work
- 100% acrylic: weather resistance
- Low-VOC oil alternatives: durable, greener
Matching Sheen and Color for Longevity
Because sheen affects both appearance and durability, pick a finish that balances aesthetics with the surface’s wear and exposure. You’ll want sheen consistency across trim and siding so light reflects evenly and maintenance needs stay predictable.
When replacing boards or touching up, use color matching tools and test patches in daylight to confirm hue under real conditions. Match gloss levels too—flat over semi-gloss will show differences even if color aligns.
Keep records of brand, formula, and sheen for future touch-ups. Proper matching reduces repainting frequency and helps coatings perform as *designed*, extending the life of your exterior wood.
Masking and Protecting Non-Wood Surfaces
Before you start painting, protect everything that isn’t wood so plants, windows, and fixtures stay clean and undamaged. Use drop cloths or plastic sheeting to cover adjacent vegetation.
Tape and masking film for glass and window frames, and remove or wrap hardware and light fixtures.
Proper masking saves time on cleanup and prevents costly damage.
Covering Adjacent Vegetation
When you’re prepping exterior wood for painting, protecting nearby plants and non-wood surfaces is just as important as sanding and priming the wood itself. You’ll do vegetation trimming to create a clear work area; cut branches and mow beneath eaves so tarps and drop cloths fit without crushing plants.
Lay breathable fabric or plastic sheeting over shrubs, securing edges with rocks or stakes. Keep paint, thinner, and brushes off soil to prevent contamination and support insect prevention by avoiding trapped moisture under covers.
- Use lightweight breathable fabric
- Secure edges to prevent gaps
- Remove fallen debris promptly
Protecting Windows And Glass
How will you keep paint off glass and window frames while you work? Start by cleaning glass and surrounding trim so tape adheres. Use fine-line painter’s tape on glass edges and wider tape on frames, pressing firmly to seal.
Cover panes with kraft paper or plastic sheeting, taping edges to avoid sagging. Remove tape while paint’s tacky, not fully dry, to prevent peeling.
Protect sills and interior décor by taping from outside and adding temporary interior guards if wind or overspray’s a risk. Consider nearby landscaping design when laying drop cloths so plants stay covered and pathways clear.
Shielding Hardware And Fixtures
While you work, shield all hardware and fixtures to keep paint off hinges, doorknobs, light fittings, and vents; remove what you can, and mask the rest with tape and snug-fitting covers so paint won’t seep into crevices or moving parts.
You’ll practice proper hardware shielding and fixture protection by evaluating each item, choosing appropriate materials, and securing edges. Use plastic caps for knobs, painter’s tape for seams, and paper or drop cloths for larger pieces.
Inspect after masking to confirm mobility. After painting, remove coverings carefully to avoid smudges, reattach removed parts, and test moving mechanisms.
- Plastic caps
- Painter’s tape
- Drop cloths
Best Weather and Timing for Prepping and Painting
Because paint and prep products respond to temperature and moisture, you should choose days with steady, moderate conditions—ideally 50–85°F (10–30°C) and low humidity—so coatings cure properly and surfaces stay manageable.
Plan sanding, washing, and priming when no rain is forecast for at least 24–48 hours and morning dew has evaporated.
Work during mild wind to avoid dust and debris; strong sun can cause blistering on hot siding.
Time projects in spring or fall for predictable temps. That also helps you test Creative color schemes and confirm Eco friendly finishes perform as expected before committing fully.
Safety Gear and Environmental Precautions
When you prep exterior wood for painting, wear the right safety gear and take simple environmental precautions to protect yourself and nearby plants, pets, and water sources. Follow clear safety protocols: goggles, respirator, gloves, and sturdy shoes.
When prepping exterior wood, use proper PPE—goggles, NIOSH respirator, gloves, and sturdy shoes—and protect surroundings.
Contain debris and runoff to minimize environmental impact by using tarps and closed containers. Work upwind and limit spraying near storm drains.
- Wear NIOSH-rated respirator, eye protection, and durable gloves.
- Cover soil and plants with plastic sheeting; secure edges.
- Collect scrapings and paint chips; dispose per local regulations to prevent contamination.
Preventing and Managing Lead-Paint Hazards
If your home was built before 1978, assume old paint may contain lead and take steps to prevent exposure: test suspect surfaces, keep dust and chips contained, and don’t dry-sand, torch, or use open-flame heat on painted surfaces.
You should hire a certified contractor for lead hazards if testing is positive, or follow EPA/RRP rules for containment, warning signs, and cleanup.
For paint removal, use wet methods, HEPA-filter sanders, or chemical strippers labeled safe for lead paints, and collect debris in sealed bags.
Wash work areas, HEPA-vacuum, and keep children and pets away until clearance testing confirms safety.
Applying Sealers and Water Repellents Before Painting
Wondering whether a sealer or water repellent is worth the extra step? You’ll protect exterior wood by reducing moisture penetration and stabilizing the wood grain so paint adheres evenly and the paint sheen stays consistent.
Apply to clean, dry surfaces; follow manufacturer drying times before priming. Choose products compatible with your primer and finish.
Apply only to clean, dry wood; respect manufacturer dry times and ensure compatibility with primer and topcoat.
- Use a penetrating sealer on bare, weathered wood to lock fibers.
- Pick a breathable water repellent where moisture must escape.
- Test a small area to confirm finish and sheen after topcoat.
Proper application prevents peeling and preserves the substrate for longer.
Proper Caulking Techniques Around Windows and Trim
Because gaps around windows and trim let water and drafts in, you’ll want to caulk carefully to protect both the paint job and the structure beneath. Inspect joints, remove old failing caulk, and clean surfaces so new caulk adheres.
Choose a high-quality exterior caulk compatible with trim material and paint. Cut the nozzle for a consistent bead, apply steady pressure, and smooth with a wet finger or tool for full contact.
Seal gaps between window frame and siding, inside trim miters, and nail heads. Allow proper cure time before painting.
These caulking techniques ensure effective window sealing and longer-lasting finishes.
Final Surface Checks Before Priming or Painting
Now that the joints are sealed and caulk has cured, do a final surface check before you prime or paint. Walk the exterior, feel for rough spots, and remove dust or debris so primer bonds well. Verify all repairs are smooth and solvent-cleaned.
Confirm your color selection against samples in daylight and on different walls. Check for moisture with a meter; don’t paint damp wood. Consider finish durability needs—high-traffic areas may need tougher topcoats.
Make notes, then mask and tack off dust right before priming.
- Smoothness and cleanliness
- Moisture and repair integrity
- Color selection and finish durability
Scaling Prep: Small Projects vs. Full Exterior
When you’re prepping for a paint job, scale matters: a small trim replacement or a single door lets you move quickly with a hand sander, spot priming, and a single-day workflow.
While a full exterior requires staged planning, larger tools, and realistic time blocks for drying and inspections. You’ll choose tools and methods based on project size: hand tools and targeted cleaners for small repairs, power sanders, scaffolding, and temp coverings for whole-house jobs.
Inspect surface textures to decide grit and primer; keep consistent color matching across batches and substrates. Plan timelines, staffing, and cleanup to match scope.
Common Prep Mistakes and How to Avoid Them
If you skip thorough prep, you’ll undo hours of painting with peeling, uneven coverage, or visible repairs — common mistakes that turn a good finish into a problem job. You should remove loose paint, clean mildew, and sand rough spots; skipping any invites failure. Don’t paint over wet wood or ignore caulking gaps. Consider exterior decor elements and remove or protect them. Mind seasonal timing so paint cures properly.
- Skipping cleaning: traps dirt under new paint.
- Poor sanding: prevents adhesion and shows imperfections.
- Ignoring gaps: lets moisture in, causing future peeling.
Maintenance Tips to Extend a New Paint Job
Although a great prep job gives you a head start, regular maintenance keeps that fresh finish looking new and prevents small issues from becoming big repairs.
Inspect painted surfaces seasonally, focusing on trim, eaves, and areas near downspouts. Clean gently with a soft brush and mild detergent to remove dirt, pollen, and mildew.
Touch up chips and cracks promptly with compatible primer and paint to stop moisture infiltration.
Protect painted wood from impact and abrasion—move garden furniture carefully and avoid leaning wet hoses.
For interior wood near entryways, maintain weatherstripping and vents to reduce humidity and temperature stress on finishes.
Cost and Time Estimates for a Thorough Prep
Because prep determines most of your project’s labor and materials, you’ll want realistic cost and time estimates before you start. You’ll factor repair extent, surface area, and whether you choose eco-friendly paints or specialty products for historic preservation.
Expect patching and sanding to take most time; cleaning and primer are quicker. Labor rates vary by region; DIY saves money but costs more time.
- Small porch (100–200 sq ft): 1–2 days, $150–$400.
- Full exterior (1,500–2,500 sq ft): 3–7 days, $1,000–$4,000.
Historic details: add 20–50% for care and materials.
Frequently Asked Questions
Can I Paint Exterior Wood in Winter With Heaters and Tents?
Yes, you can paint exterior wood in winter using heating tents, but you’ll need strict controls. Winter painting with heating tents works if you maintain proper temperature, humidity, ventilation, and dry times to guarantee adhesion and cure.
How Do I Prep Wood on the North Side That Never Fully Dries?
Think like a shipwright: you’ll remove moisture first, using moisture removal strategies and drying techniques—improve drainage, add ventilation, use dehumidifiers or heat, scrape and sand only when dry, then prime with a breathable sealant.
Will Silicone-Based Caulk Interfere With Paint Adhesion?
Yes — silicone interference can prevent paint from sticking. You’ll check caulk compatibility before painting; use paintable acrylic-latex or special paintable silicone, clean and prime surfaces, and test a small area to confirm adhesion.
Can I Paint Over Wood Treated With Copper-Based Preservatives?
Yes—you can paint over wood treated with copper-based preservatives, but you’ll need to test paint compatibility, use compatible primers, and confirm the wood preservation chemicals won’t bleed through; proper prep ensures lasting adhesion and finish.
How Long Should New Pressure-Treated Wood Weather Before Painting?
Wait at least 6–12 months before painting new pressure-treated wood so wood moisture drops; you’ll check with a moisture meter below 15–18%. Before priming, do thorough surface cleaning to remove dirt, mill glaze, and residues.
Conclusion
You’ve done the heavy lifting—now enjoy the glow. With proper prep, your exterior wood will shrug off weather and look refreshed for seasons, not months. Tackle repairs, clean thoroughly, and prime where needed; those small courtesies pay off big. Follow the checklist, avoid common slip-ups, and you’ll keep upkeep neat and predictable. Treat the job with gentle respect now, and your paint will return the favor with lasting charm.