How to Prepare a Painted Wall for Tiling Properly
You’ll get a durable tile job by fully evaluating the painted wall, removing loose or flaking paint, and sanding glossy areas to a dull, keyable finish. Clean, dry the surface and repair holes or soft spots, then prime with a high‑bonding or waterproof primer. Use the proper underlayment where needed and choose the correct thinset for your substrate; back‑butter large tiles and press firmly. Follow cure times and keep going for detailed tips and troubleshooting.
Who This Guide Is For : And The Result You’ll Get
If you’re about to tile over a painted wall, this guide is for you — whether you’re a confident DIYer tackling a bathroom update or a first-timer fixing a backsplash. You’ll get clear steps that respect historical trends in finish practices, so your work won’t clash with a period look if that matters.
You’ll learn how surface prep affects adhesion and how Color psychology informs tile choices to match mood and light. By the end, you’ll know whether to strip, sand, or prime, and you’ll achieve a durable, attractive tiled surface that looks intentional and lasts.
Quick Checklist: Do You Need to Prep a Painted Wall for Tile?
Now that you know what outcome to aim for and how finish choices affect the result, use this quick checklist to decide whether your painted wall needs prep before tiling.
Check paint adhesion: press a piece of tape, peel—if paint lifts, strip and sand.
Inspect for glossy finishes; dulling or etching may be required.
Assess wall textures: heavy texture often needs smoothing or skim coat.
Look for cracks, holes, or mold—repair and treat.
Consider color schemes only for potential bleed-through with thin tiles or translucent grout; prime if unsure.
Finally, verify the surface is clean, dry, and free of contaminants before tiling.
Why You Can’t Just Stick Tile Over Paint
You can’t just stick tile over paint because the paint layer can prevent a strong bond, causing tiles to loosen or pop off.
Paint can also hide contaminants like grease, dirt, or previous coatings that weaken adhesion.
Before tiling, you’ll need to remove or properly profile the paint and inspect for hidden issues so the adhesive can grab solidly.
Paint Surface Adhesion
Why will paint keep your tiles from sticking properly? You’ll find paint can create a slick, nonporous layer that blocks mortar bond. Color mixing or glossy finishes hide adhesion issues; texture matching matters because a smooth paint won’t grip like a rough substrate. You should test adhesion, sand or strip compromised areas, and choose primers designed for tiling.
| Issue | Action |
|---|---|
| Smooth gloss | Sand to dull finish |
| Flaking paint | Remove to solid substrate |
| Old latex | Use bonding primer |
| Color mixing layers | Guarantee uniform surface |
Do prep; don’t rely on paint to hold tiles.
Hidden Contaminants
Although a painted wall might look clean, it can hide contaminants—like grease, wax, soap scum, nicotine residue, or previous adhesive—that stop mortar from bonding properly. You’ll need to test and remove these so tiles won’t lift later.
Degreasers, trisodium phosphate, or solvent cleaners strip oils; adhesive removers tackle old glue. Scrubbing reveals whether wall texture and paint porosity trap residue; rough or glossy finishes may require sanding or a primer.
Don’t ignore how color psychology led to heavy coatings in living spaces—dark or glossy paints often mask grime.
Clean, prep, and verify adhesion before tiling.
How to Inspect Paint Adhesion, Moisture, and Substrate Damage
Start by checking paint adhesion with a firm scrape or tape test to see if the paint peels away.
Look for signs of wall moisture like stains, efflorescence, or a musty smell and use a moisture meter if you’re unsure.
Finally, inspect for substrate damage—soft spots, cracks, or crumbling plaster—that’ll need repair before tiling.
Check Paint Adhesion
Curious whether the paint will hold up once tile and thinset go on? You’ll inspect adhesion methodically: try a crosshatch test, score a small grid, apply tape, then pull. If flakes lift, the finish needs removal.
Note any irregularities from color mixing or uneven paint sheen—those can signal improper application that weakens bond. Check for blistering, chalking, or soft spots by pressing and scraping with a putty knife.
Clean grease and dust before retesting. If adhesion’s solid across several spots, you can proceed; if not, strip to a stable substrate or apply proper primers first.
Detect Wall Moisture
Because moisture undermines tile adhesion and promotes mold, you’ll want to identify any damp issues before you tile.
Inspect paint for blistering, peeling, or discoloration.
Press a damp square of clear plastic against the wall for 24 hours to check condensation.
Use a moisture meter on different wall textures and note high readings near plumbing, exterior walls, or below windows.
Smell for mildew and watch for efflorescence on masonry.
Record moisture hotspots and consider ventilation or waterproofing fixes first.
Also note how your chosen color schemes and wall textures might hide or reveal moisture signs during inspection.
Assess Substrate Damage
How well is the paint sticking where you’ll put tile? Check adhesion by scraping small areas with a putty knife; flaky or curling paint needs removal. Probe for soft spots, blistering, or powdery residue indicating moisture damage or compromised substrate.
Use a moisture meter to confirm dampness before proceeding. Repair damaged plaster or drywall, replace rotten sections, and sand glossy finishes to improve bonding.
Once sound, prime for tiles, matching primer choices to color schemes and preserving any decorative accents you want to keep. Document repairs and let surfaces fully dry to guarantee a durable tile installation.
Paint Types That Prevent Tile Adhesion (Latex, Oil, Enamel)
When you’re prepping a wall for tile, recognize that certain paint types—especially latex, oil-based, and glossy enamel—can seriously hinder adhesion. These finishes create smooth, nonporous surfaces that resist thinset bonding.
You’ll want to note where previous color schemes or lighting options led to high-gloss or oil-based choices, since those areas often need more aggressive preparation. Latex and enamel peel or flake under tile stress, while oil-based paints repel moisture and adhesives.
Identify glossy sections visually and by touch. Plan to remove or mechanically abrade these coatings so your tile mortar can adhere to a sound, keyed substrate rather than slick paint.
How to Test Paint Adhesion Before You Start
Before you start tiling, confirm the existing paint will hold up under mortar and grout by doing a simple adhesion test. Pick an inconspicuous spot, note paint texture and any color matching needs, and use 2-inch masking tape pressed firmly for 30 seconds.
Peel sharply at a 180-degree angle; if paint lifts, it won’t hold tile.
For stronger verification, score a small X with a utility knife through paint coating, apply fresh tape over the cut, and peel. If flakes or primer come away, you’ll need to remove or recoat before tiling to guarantee a durable bond.
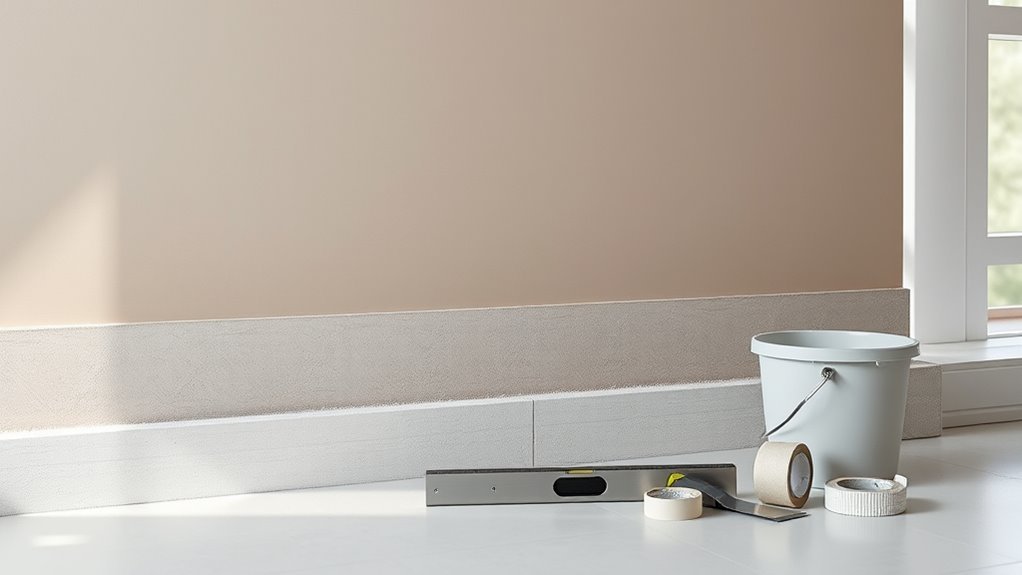
Tools and Materials for Prepping Painted Walls
Once you’ve confirmed the paint will hold, gather the right tools and materials so you can prep the wall quickly and correctly. You’ll need a scraper, sanding block, primer, cleaner, filler, and appropriate adhesive. Consider how color schemes and wall textures affect primer choice and tile layout. Match primer to sheen and texture; smooth walls need different sanding than textured ones.
| Item | Purpose | Tip |
|---|---|---|
| Sandpaper | De-glossing | Use 80–120 grit |
| Primer | Bonding | Select based on sheen |
| Filler | Repair | Feather edges smoothly |
Work methodically and check surfaces before tiling.
Safety Gear and Protecting the Work Area
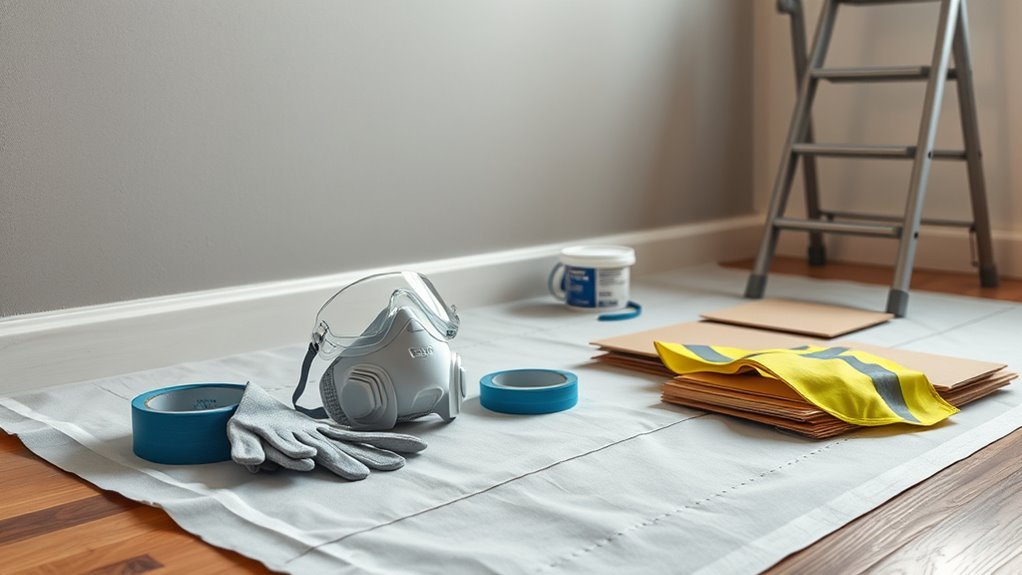
Since you’re dealing with dust, chemicals, and sharp tools, put on safety goggles, a dust mask or respirator, and work gloves before you begin. Lay down drop cloths and tape plastic sheeting over floors, fixtures, and nearby furniture to catch debris and splashes. Keep ventilation on and clear pets and kids. Treat the zone like a purposeful project—like garden landscaping or precise cooking techniques—to stay organized.
- Label and isolate the area: close doors, hang signs.
- Ground coverings: heavy-duty drop cloths plus taped plastic.
- Tool station: blade guards, sealed containers for solvents.
Check PPE regularly and dispose of waste properly.
How to Remove Loose or Flaking Paint Safely
Start by spotting areas where paint is bubbling, cracking, or lifting so you know what’s unsafe to leave in place. Use a scraper and sanding block to remove loose paint carefully, wearing a mask and goggles to protect yourself.
Once the surface’s sound paint is exposed, clean off dust and residue and apply a suitable primer before tiling.
Identify Unsafe Paint Areas
Before you tile, pinpoint any loose or flaking paint and remove it safely to guarantee a solid bond. Walk the wall, looking for paint peeling, bubbled areas, or sections where moisture has stained the substrate. Tap suspect spots—hollow sounds mean weak adhesion. Note edges that lift or curl and mark them for attention. Also check for previous repairs with poor color matching that could hide delamination. Prioritize areas near plumbing, corners, and high-traffic zones.
- Inspect visually under good light.
- Press and tap to find hollow patches.
- Mark all compromised zones for treatment.
Remove Loose Paint Safely
Now that you’ve marked weak spots, remove loose or flaking paint to create a stable surface for tile adhesive. Use a scraper, wire brush, or oscillating tool, working gently to avoid gouging. Wear a mask and goggles, contain dust, and dispose of debris properly. Check edges for feathering so tiles sit flush. Consider how exposed layers affect future color schemes and how lighting design will highlight repaired areas; smooth gradations look cleaner under bright fixtures. Finish when all loose material’s gone and the surface feels solid to the touch.
| Tool | Purpose | Tip |
|---|---|---|
| Scraper | Remove flakes | Hold flat |
| Wire brush | Clean texture | Moderate pressure |
| Oscillating tool | Tough spots | Use blade |
| Sandpaper | Smooth edges | Fine grit |
| Vacuum | Collect dust | HEPA preferred |
Clean And Prime Surface
A clear sweep will make the rest of the job easier: once all loose or flaking paint is removed, wipe the wall with a damp, lint-free cloth or sponge to lift dust and chalking, then let it dry completely.
Next, sand rough edges, vacuum residue, and spot-prime bare areas to guarantee adhesion.
Consider how color schemes and lighting options will affect final tile appearance before choosing primer sheen.
Use a high-adhesion, stain-blocking primer suited to your substrate.
Follow manufacturer drying times, then lightly sand and clean again.
You’ll create a stable, uniform surface that helps tiles bond and finish evenly.
When to Strip Paint Down to Bare Drywall or Plaster
If the existing paint is flaking, glossy, or built up in many layers, you should strip it back to bare drywall or plaster so new tile will bond properly.
Do this when adhesion tests (tape or scrape) show loose paint, when layers hide substrate condition, or when previous coatings include oil-based finishes that repel thinset.
Consider historical context if the wall may have lead paint and test before sanding; follow safety abatement rules.
Also factor color matching only for adjacent surfaces you won’t retile—expose substrate where needed to confirm primer and final paint will achieve desired tones.
Repairing Dents, Holes, and Soft Spots in Painted Walls
Start by evaluating the extent of dents, holes, and any soft spots so you know what needs fixing.
Patch small holes with spackle and use proper backing or mesh for larger gaps to guarantee a solid surface.
For soft areas, remove damaged material and reinforce with new drywall or a patch to prevent future failure under tile.
Assess Damage Extent
How bad are the dents, holes, and soft spots in your painted wall? You’ll inspect size, depth, and firmness before patching, since color schemes and lighting effects can hide defects until tiles go on.
Evaluate surrounding paint adhesion by tapping and pressing; note cracks that run under the finish. Record locations and severity so you don’t miss weak areas during prep.
- Small surface dents: shallow, paint intact — cosmetic risk only.
- Medium holes/cracks: paint compromised, substrate exposed — structural concern.
- Soft spots/large damage: give under pressure — must be stabilized or replaced.
Patch Holes Properly
Now that you’ve mapped damage locations and severity, it’s time to repair each flaw so tiles sit flat and adhesives bond well. Remove loose paint and dust, then widen tiny dents slightly to create a key. Fill holes with patching compound, press firmly, and level with a putty knife.
For deeper voids, apply in layers, letting each cure. Sand smooth; feather edges to match surrounding paint. If the wall has a visible pattern design, mimic texture subtly before finishing.
Consider color mixing only for final touch-ups after tiling to match paint, not to mask structural repairs.
Reinforce Soft Areas
When a painted wall gives under pressure or crumbles around fasteners, you’ll need to reinforce those soft spots before tiling so the surface can support adhesive and tile weight.
Identify dents, holes, and soft areas by tapping and probing; note changes in wall texture and any paint delamination that could affect adhesion.
Use a layered approach:
- Cut back damaged paint and drywall to solid edges.
- Apply patching compound or epoxy filler; embed mesh tape for larger voids.
- Sand smooth, prime with a bonding primer, and consider how color psychology of final tiles interacts with repaired wall texture.
Proceed only when fully cured.
When to Replace Damaged Drywall or Backer Board
If your drywall or cement backer board shows facing damage that compromises its strength, replace it before you tile. You’ll spot swelling, crumbling, deep gouges, mold growth, or loose seams; any of these mean the substrate won’t hold tile.
In kitchen remodeling, prioritize full replacement behind wet zones and behind ranges. Even cosmetic paint flaking over sound board can mask deeper issues; probe with a screwdriver. Don’t patch over mold—remove and replace affected board.
While garden landscaping won’t affect interior walls, nearby outdoor moisture can, so check exterior-facing walls.
Use proper backer board, fasten per manufacturer instructions, and keep seams sealed.
Best Cleaners for Grease and Soap Scum on Painted Walls
Before you install tile, you’ll need to tackle any grease and soap scum so adhesives will bond properly.
For heavy grease build-up, use a commercial degreaser or a strong TSP substitute.
Mild non-abrasive cleaners or white vinegar solutions work well on soap scum.
Always choose cleaners labeled safe for painted walls and spot-test first to avoid stripping or bubbling the paint.
Degreasing Heavy Build-Up
Because grease and soap scum can block tile adhesive and leave stains, you’ll need to strip heavy build-up thoroughly before you start tiling. Choose cleaners that cut through oils without damaging paint.
Assess wall texture and consider color theory only for final touch-ups—cleaners can dull finishes. Work in small sections, test a hidden spot, and use non-abrasive tools.
Effective options:
- Degreasing citrus-based cleaner — strong on oils, gentle on paint when rinsed.
- Trisodium phosphate (TSP) substitute — powerful; follow dilution and ventilation guidelines.
- Gentle household detergent with warm water — for lighter heavy build-up.
Rinse completely and let dry before priming.
Removing Soap Scum
How do you tackle stubborn soap scum without stripping paint? You’ll gently soften deposits with warm water and a soft cloth, testing a hidden patch first so your color schemes and decorative accents stay intact. Work in small areas, rubbing lightly until residue loosens; avoid harsh scrubbing that dulls finish. Rinse thoroughly and dry to prevent streaks. If residue persists, repeat the gentle cycle rather than escalating chemicals. The goal is a clean, stable surface ready for tiling, preserving paint depth and ornamental details while removing buildup carefully and confidently.
| Emotion | Action |
|---|---|
| Relief | Gentle soaking |
| Confidence | Patch testing |
| Satisfaction | Light rubbing |
| Pride | Preserved accents |
Safe Wall-Friendly Cleaners
When you’re prepping painted walls for tiling, choose cleaners that cut grease and soap scum without harming the finish—mild dish soap diluted in warm water, a pH-neutral cleaner, or a vinegar-water mix (for durable paints) are solid options you can trust.
Test any solution on an inconspicuous spot so color theory insights and wall textures stay true. Work top to bottom with a soft sponge, rinse thoroughly, and let dry.
- Mild dish soap solution — safest for most finishes.
- pH-neutral commercial cleaner — effective, paint-friendly.
- Vinegar-water (1:4) — use only on durable paints.
How to Sand Painted Walls for Better Tile Adhesion
If your painted wall feels glossy or slick, you’ll need to sand it to give tile adhesive something to grab onto. You’ll scuff the surface evenly, focus on edges around decorative accents, and avoid harming underlying color schemes you want to keep. Work methodically, wipe dust, and inspect for smooth, dull finish before tiling.
| Area | Action | Result |
|---|---|---|
| Center panels | Light scuffing | Matte surface |
| Corners | Gentle sanding | Adhesive holds |
| Around accents | Careful touch | Preserves details |
| Trim | Feather edges | Smooth transition |
Finish with a clean, dry wipe.
Sanding Grit and Tools: Scuffing Vs. Full Sanding
You’ll decide between light scuffing to remove gloss or full sanding to strip uneven paint. Use 120–150 grit for scuffing and 80–100 grit if you need to remove layers.
Choose a sanding tool such as a sanding block, sanding sponge, or orbital sander for speed and control. I’ll cover which tool fits each job and how aggressive to be so your tile adhesive sticks properly.
Scuffing Versus Full Sanding
Although scuffing and full sanding both roughen paint to help tile adhesive stick, they serve different situations and require different grits and tools. You’ll choose based on paint type, adhesion needs, and visible color contrast or texture variation.
Scuffing is quick; full sanding removes gloss and evens surfaces. Consider these steps:
- Scuff lightly with a sanding pad for glossy finishes and minimal prep.
- Full sand with a sanding block or orbital sander when you need to remove texture or uneven layers.
- Clean thoroughly after either method to remove dust and inspect for spots needing spot-sanding.
Pick the least aggressive approach that guarantees adhesion.
Recommended Sandpaper Grits
Now that you’ve chosen between scuffing and full sanding, pick the right sandpaper grit and tool to match the job.
For light scuffing on glossy paint, use 180–220 grit to remove sheen without harming color options or thin topcoats.
If paint’s peeling or you’re smoothing rough wall texture, start with 80–120 grit, then progress to 150–180 for a uniform surface.
For final feathering before priming, use 220–320 grit to avoid deep scratches.
Change grits systematically and check results by touch and sight.
Match abrasive type to material—aluminum oxide for durability, garnet for softer wood-based layers.
Tools For Efficient Scuffing
When prepping a painted wall, pick tools that match whether you’re scuffing the surface or doing full sanding so you get good adhesion without extra work. You’ll want light abrasion for scuffing and heavier grit for removal.
Choose tools that suit your chosen Creative color schemes and wall texture techniques to avoid damaging finishes.
- Sanding block with 120–220 grit for gentle scuffing.
- Random orbital sander with 80–120 grit for textured or glossy paint.
- Handheld sanding sponge for edges and contours.
Test a small area first, clean dust, then prime before tiling.
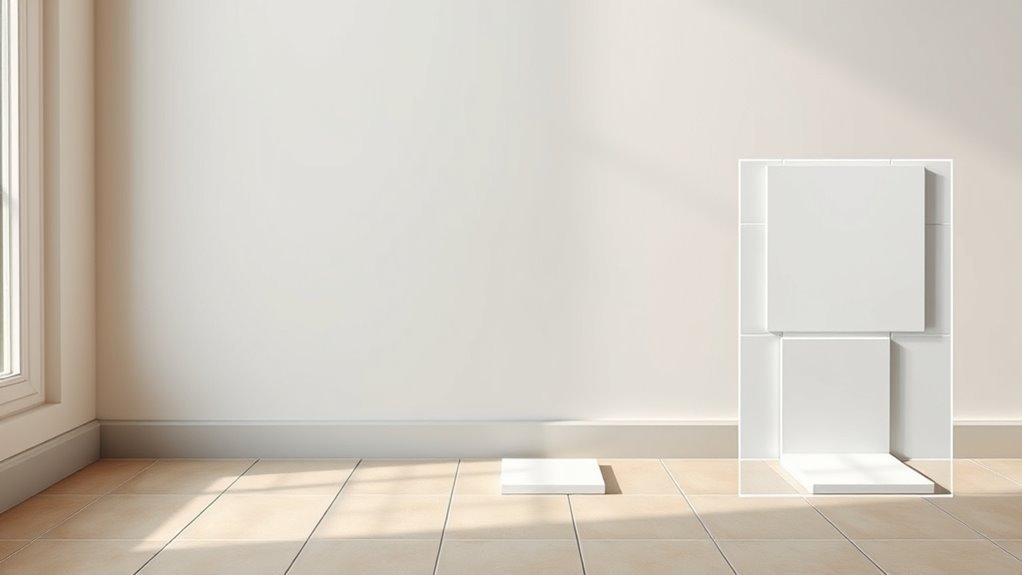
Choosing the Right Underlayment for Wall Tile Over Paint
Because paint can interfere with tile adhesion, you need an underlayment that creates a solid, stable bonding surface and matches the moisture and load conditions of the room. You’ll evaluate substrates, thickness, and vapor resistance so tiles won’t crack or delaminate.
Consider historical trends in materials to understand proven performance, and note color psychology only when finish choices affect perceived space before tiling.
Choose products rated for wall use, compatible with thinset or adhesive, and suitable for humid areas if needed.
Install per manufacturer guidelines, fasten properly, and prepare joints and seams to ensure a long-lasting tile installation.
Cement Backer Board Vs. Waterproof Drywall: When to Use Each
While both cement backer board and waterproof drywall can create a stable surface for tile, they serve different conditions and demands, so you’ll want to match the material to the room’s moisture level, substrate, and expected movement.
Choose cement backer board when you need maximum water resistance and rigidity—ideal for wet areas and heavy tile.
Pick waterproof drywall for light‑duty, low‑moisture walls where ease and paint durability matter.
Consider these factors:
- Moisture exposure: high = backer board; low = waterproof drywall.
- Structural movement: backer board handles flex better.
- Finish needs: waterproof drywall pairs with color theory and painted aesthetics.
How to Fasten, Tape, and Seal Backer Board Seams
Before you start tiling, you’ll want to fasten, tape, and seal backer board seams so joints stay rigid, water-resistant, and ready for thinset. Fasten boards with corrosion-resistant screws every 6–8 inches, countersink slightly. Apply alkali-resistant fiberglass tape over seams, embed with thinset, and smooth. Seal corners with waterproof membrane or sealant for moisture protection. After curing, inspect for flatness; you can plan tile layout and consider color matching or decorative accents without compromising waterproofing.
| Task | Material | Tip |
|---|---|---|
| Fasten | Screws | Countersink |
| Tape | Fiberglass | Embed with thinset |
| Seal | Membrane | Seal corners |
Choose the Right Primer: Bonding Primer Vs. Waterproof Primer
You’ll want to choose between a bonding primer, which helps tiles and thinset stick to slick painted surfaces, and a waterproof primer, which adds moisture protection in wet areas.
Consider the substrate, room use (like a shower or backsplash), and manufacturer recommendations when picking one.
Picking the right primer now prevents adhesion failures and water damage later.
Bonding Primer Purpose
If your painted wall has a smooth, glossy surface or is prone to flaking, a bonding primer creates the grip and adhesion tile mortar needs to stick reliably. You’ll apply it to improve mechanical bond, seal chalky paint, and stabilize loose layers without affecting color theory or decorative finishes beneath.
Follow these quick reasons to use one:
- Promotes adhesion on slick or aged paint.
- Seals porous or powdery surfaces for consistent mortar coverage.
- Bridges minor peeling and reduces future delamination risk.
Use a product labeled “bonding primer,” follow manufacturer instructions, and let it fully cure before tiling.
Waterproof Primer Benefits
While bonding primers focus on adhesion, waterproof primers give you a moisture barrier that protects both the substrate and the tile assembly. You’ll prevent water vapor migration, mold, and staining that can ruin grout and tiles, especially in wet zones.
Applying a waterproof primer also stabilizes porous painted surfaces so tiles set evenly. Think about how it affects Color schemes and Lighting options: a sealed, uniform base keeps colors accurate and reflective qualities consistent under different lights.
Use waterproof primer where moisture and longevity matter, and you’ll reduce repair needs while preserving the finished look of your tiled wall.
Primer Selection Criteria
When choosing between a bonding primer and a waterproof primer, weigh adhesion needs against moisture protection so you pick the product that matches the wall’s condition and the room’s use. You’ll assess substrate, existing paint texture, and exposure to water.
Choose bonding primer for slick surfaces or glossy paint; choose waterproof primer for wet areas. Consider color mixing effects if the primer will influence final tile grout or thin topcoats.
- Surface: clean, sanded, and free of peeling paint.
- Usage: dry living room vs. shower or backsplash.
- Compatibility: primer with your tile adhesive and paint texture.
How and When to Apply Primer Over Painted Surfaces
Because paint type and surface condition determine how well tile adhesive will bond, you should always assess and prime painted walls before tiling. Inspect for glossy finishes, loose paint, and contaminants; sand glossy areas and clean grease or dust.
Choose a primer compatible with both the existing paint and your tile adhesive—use high-adhesion or bonding primers for smooth or challenging surfaces. Apply primer when the wall is dry and the temperature matches product guidelines.
One even coat often suffices, but follow manufacturer cure times before tiling. Think like an art gallery curator or space exploration engineer: be precise, patient, and follow specifications for a reliable bond.
Using a Bonding Agent or Primer Instead of Full Paint Removal
If the existing paint is sound and well-adhered, you can often skip full removal by applying a high-quality bonding agent or primer that creates a proper surface for tile adhesive to grip.
You’ll first clean and sand lightly, then choose a bonding primer compatible with both paint type and adhesive. Consider how color matching or decorative accents beneath tiles might affect primer choice.
Follow these steps:
- Clean, degrease, and sand glossy spots for adhesion.
- Apply bonding primer per manufacturer instructions; allow full cure.
- Spot-test tile adhesive on the primed area before full installation.
Mark Reference Lines and Plan Your Tile Layout on Prepped Walls
Since a good layout prevents wasted cuts and uneven grout lines, start by establishing true reference lines on your prepped wall before you set any tiles. Snap a level horizontal line at eye height and plumb verticals from it to create a grid.
Dry-lay tiles on the floor to test spacing, cut placement, and how pattern interacts with corners, fixtures, and color schemes. Account for variation in wall textures that can shift tile alignment; scribe tiles where walls aren’t square.
Mark tile centerlines and focal lines with pencil or removable tape. Recheck measurements before applying any adhesive to avoid costly mistakes.
Choosing Thinset Mortar for Painted or Primed Walls
Wondering which thinset will bond best to painted or primed walls? You’ll choose based on paint type and wall textures, not aesthetics or color schemes. Consider these options:
- Modified thinset — best for non-porous, previously painted or primed surfaces; use when adhesion is critical.
- Unmodified thinset — acceptable on cementitious primers or when manufacturer specifies; avoid over glossy paints.
- Specialty adhesives — for challenging substrates or heavy tile; check compatibility with primer and surface prep.
Always check manufacturer instructions and conduct a small bond test.
If paint is glossy, scuff or remove it first to guarantee reliable adhesion.
How to Apply Thinset for Consistent Bond on Prepped Walls
Choosing the right thinset is only part of the job; proper application is what actually creates a lasting bond on prepped walls. You’ll spread thinset with a flat trowel, then comb with a notched trowel sized to tile. Work in small sections, check coverage, and back-butter large tiles. Press tiles with a firm twist to collapse ridges and remove voids. Consider wall textures and evenness; deep texture may need extra paste. Color theory doesn’t affect bond but helps layout contrast. Use consistent pressure, clean excess, and cure per manufacturer instructions.
| Step | Tool | Tip |
|---|---|---|
| 1 | Flat trowel | Keying coat |
| 2 | Notched trowel | Match notch size |
| 3 | Margin float | Back-butter if needed |
| 4 | Level | Press, twist tiles |
| 5 | Sponge | Clean joints promptly |
Tackling Corners, Trim, Windows, and Electrical Outlets
When you reach corners, trim, windows, and outlets, plan each shift before you spread thinset so cuts and adjustments go smoothly; identify corner profiles, measure trim depth, and note outlet box locations. You’ll cut tiles to fit tight corners, scribe around trim, and use backerboard where windowsill angles need solid bed support.
Consider color theory when selecting grout and tile edges so decorative accents read clearly at joins.
Steps:
- Remove outlet covers, mark and test power, use proper spacer depth.
- Use corner trim or Schluter pieces for clean progressions.
- Dry-fit pieces, then thinset and grout carefully.
How Long to Wait Between Prep Steps and Before Tiling
Before you tile, let each prep step fully cure so your work has a stable, dry surface—follow manufacturer times for primers, patching compounds, and backerboard fasteners, and allow at least 24 hours for thin patching compounds and 48–72 hours for gypsum-based or deep repairs to dry. Wait after sanding until dust is cleared and primer tack is gone. Test small areas for color matching and texture blending before committing. Use this timing guide:
| Step | Typical wait |
|---|---|
| Sanding/cleanup | 1–2 hours |
| Primer | 2–24 hours |
| Patching cure | 24–72 hours |
Confirm dryness with touch and moisture meter before tiling.
Common Mistakes That Cause Tile Failure : And How to Avoid Them
Letting each prep layer dry properly helps prevent many problems, but tile failures still happen if key mistakes slip in during or after installation. You’ll avoid costly issues by watching for common errors and correcting them before setting tile.
Let each prep layer dry — small installation mistakes still cause tile failures, so catch and fix errors early.
- Skipping proper cleaning — leftover grime or loose paint causes poor bond and eventual paint peeling.
- Using wrong primer or adhesive — incompatible products lead to weak hold and color bleeding from old finishes.
- Ignoring movement joints — stress causes cracks and grout failure.
Check compatibility, clean thoroughly, and follow manufacturer cure times to keep your tile durable and secure.
Troubleshooting Adhesion Problems After Tiling Starts
If you spot loose tiles, hollow sounds, or grout that’s cracking shortly after installation, act quickly—these signs usually point to adhesion problems that can worsen fast.
First, remove a loose tile to inspect mortar coverage and substrate bonding. If mortar shows gaps, reapply appropriate thinset after cleaning; if paint residue or glossy finish remains, strip to a keyed surface.
Check wall textures—uneven or flaky textures reduce contact area. Consider whether incorrect adhesive or rapid-dry conditions caused the issue.
Test surrounding tiles for hollowness and replace failed areas.
Consult manufacturer specs and adjust materials; color theory won’t fix poor bonding.
Quick Maintenance Tips to Protect Your New Tiled Wall
When you finish a tiling project, a few simple, regular habits will keep the wall looking sharp and prevent costly repairs. Wipe grout haze within 24–48 hours, then seal grout to repel stains.
Inspect grout lines monthly and touch small chips before moisture spreads. Match any replacement grout or paint for color matching so repairs stay discreet, and protect decorative accents with gentle cleaners.
Inspect grout monthly; fix small chips before moisture spreads, match replacement colors, and clean accents gently.
Follow this quick checklist:
- Clean spills and soap scum weekly with a non-abrasive cleaner.
- Reseal grout every 1–2 years or as needed.
- Repair cracks immediately and touch up color matching.
Frequently Asked Questions
Can You Tile Over Painted Paneling or Beadboard?
Yes — you can tile over painted paneling or beadboard if you roughen the surface, complete paint preparation, fill gaps, and apply surface priming. You’ll guarantee strong adhesion, use proper thinset, and follow tile layout.
Do Heated Towel Rails or Radiant Heat Affect Tile Adhesion?
“Measure twice, cut once.” You’ll find heated towel rails and radiant heat can slightly stress tile adhesive with thermal cycling, but if you use flexible, heat-rated adhesive and proper substrate prep, tiles will stay bonded reliably.
Will Tile Adhesive Bond to Paint With Heavy Texture or Knockdown?
No—tile adhesive won’t reliably bond to heavy texture or knockdown unless you do paint preparation first. You’ll need to remove or sand textured surfaces, apply a suitable primer or bonding coat, then use the correct adhesive.
How Do I Handle Mold-Prone Areas Behind Tiles on Painted Walls?
Think of mold like an unwanted guest; you’ll evict it by removing contaminated paint, treating with a biocide, installing moisture barriers, ensuring ventilation, and using mold prevention-grade backerboard and grout sealant so it can’t return.
Can I Reuse Old Tiles Removed From Painted Walls for the New Job?
Yes — you can reuse old tiles if they’re intact and clean, but during old tile removal you’ll inspect for damage. You’ll handle surface preparation carefully, repairing substrate and cleaning tiles before resetting them with proper adhesive.
Conclusion
You’ve got the know-how to turn a painted wall into a tile-ready surface, so don’t rush it—patience pays. Check adhesion, strip or sand glossy and oil-based paints, repair damage, and follow drying times; each step builds a bond that’ll hold for years. Think of prep as the quiet work behind the spotlight: invisible now, but what makes your tile sing later. Stick to the checklist, and your wall will thank you.