How to Remove Marks on Painted Walls Fast
You can quickly erase scuffs, fingerprints, crayon, and sticker residue using gentle tools and cleaners: start with a soft microfiber cloth and warm soapy water, blotting or wiping in circular motions; use a damp melamine sponge or baking soda paste for tougher marks, and rubbing alcohol for ink or adhesive—always test first on a hidden spot. Work top to bottom, dry thoroughly, and protect floors. Keep going to learn targeted fixes, finish tips, and safety pointers.
How to Use This Guide: Fast Fixes and Follow-Ups
When you need a quick fix, skim the checklist and try the fastest methods first—eraser sponge, mild soap, or a magic cloth—then move to stronger options only if marks persist.
You’ll assess wall texture and paint color before acting so you pick techniques that won’t dull finishes or highlight imperfections.
Start with the least abrasive choice compatible with your surface, test in a hidden spot, and note results.
Begin with the gentlest option that suits your wall, test out of sight, and record the outcome.
If marks fade, rinse and dry; if not, escalate one step.
Track what worked and any touch-up needs so follow-ups are faster and you avoid repeated damage.
Quick Answer: Remove Marks From Painted Walls
Need a fast fix? Start with quick spot cleaning using a soft cloth and mild soap.
If that won’t cut it, move on to targeted methods for tougher stains like baking soda, magic erasers, or a diluted trisodium phosphate mix.
Test any cleaner in an inconspicuous spot first, and work gently to avoid removing paint.
If stains persist, consider touch-up paint or consult a pro.
Quick Spot Cleaning
If a scuff, crayon streak, or fingerprint appears, you can usually remove it quickly without repainting by targeting just the spot. Test your method in an inconspicuous area, especially if you’ve done wallpaper removal recently or have delicate wall texture. Use gentle tools and work outward from the mark.
- Try a soft eraser or damp microfiber for light smudges.
- Use diluted dish soap on a sponge for oily marks.
- For stubborn crayon, a paste of baking soda and water can help.
- Dry the area and inspect; repeat gently if needed.
Stop before sanding or harsh solvents to avoid damage.
Tough Stain Removal
For marks that won’t respond to quick spot cleaning, you’ll need stronger but still safe techniques to protect your paint. Start by testing a mild cleaner—baking soda paste or diluted dish soap—on an inconspicuous area to check for finish changes. Work gently with a soft cloth in circular motions, then rinse and dry.
For stubborn scuffs, try a melamine sponge carefully; don’t scrub textured surfaces hard or you’ll alter wall texture. If a stain persists, feather-touch touch-up paint after color matching the original finish restores appearance.
Always let cleaners dry and reassess before repeating treatments.
How Paint Finish Affects Cleaning Results
Although the same cleaning method might work on different walls, the paint finish you chose changes how marks respond—flat and matte hides imperfections but soaks up stains. Eggshelf and satin resist dirt better, and semi-gloss or gloss stand up to scrubbing and moisture.
You’ll notice paint texture and wall preparation affect absorption and durability, so tailor your approach. Consider finish when testing solutions:
- Flat/matte: absorbent, avoid heavy scrubbing.
- Eggshell/satin: forgiving, moderate cleaning works.
- Semi-gloss: great for kitchens and bathrooms.
- Gloss: best for repeated scrubbing and moisture-prone areas.
Match technique to finish to protect paint.
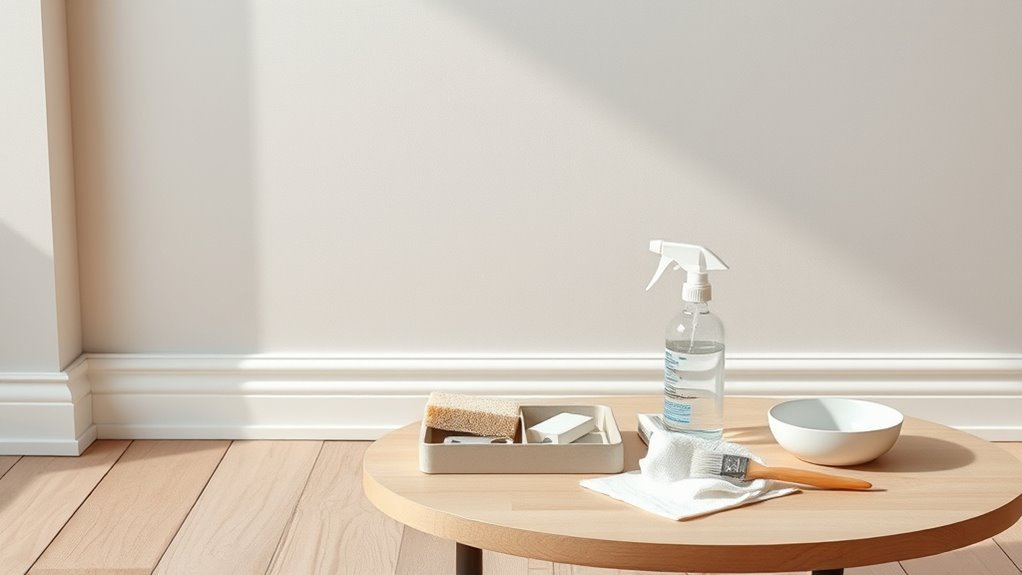
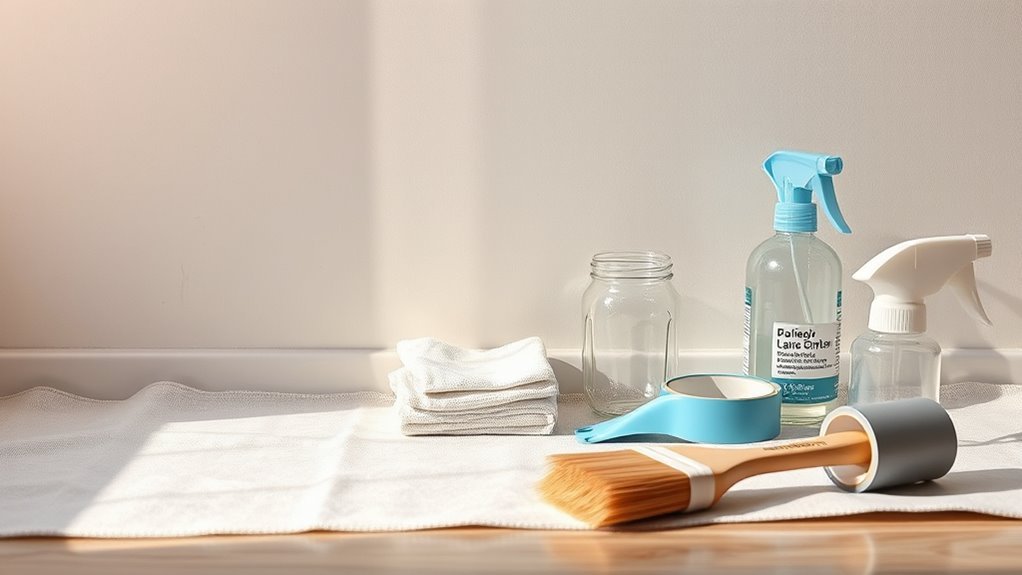
Supplies You Need for Painted-Wall Cleaning
Before you start scrubbing, gather the right supplies so you can clean efficiently without damaging the paint. You’ll need soft microfiber cloths, a non-abrasive sponge, and a bucket for mixing mild dish soap with warm water.
Keep a magic eraser for tougher scuffs, but test it on an inconspicuous spot to protect wall texture and paint sheen.
Have a soft-bristled brush for crevices and a spray bottle for spot treatments.
Keep a microfiber drying towel handy to remove moisture quickly.
Optional: a small putty knife for stuck-on gunk and painter’s tape to mark tested areas.
Safety First: Protect Paint, Yourself, and Floors
Before you start scrubbing, put on protective gloves to keep cleaners and grime off your skin.
Lay drop cloths or old sheets over floors and furniture to catch drips and prevent scuffs.
Taking these simple steps protects your paint, yourself, and your floors from avoidable damage.
Wear Protective Gloves
When you start cleaning marks off painted walls, put on protective gloves to shield your skin from chemicals and to keep fresh paint from picking up oils or dirt from your hands. You’ll want gloves that balance protection with dexterity so you can feel the surface and control cleaning tools.
Prioritize hand safety while you work; change gloves if they tear or get heavily soiled. Consider nitrile for solvent resistance and latex for light-duty tasks.
- Choose the right glove material for cleaners you’ll use.
- Inspect gloves before starting.
- Replace gloves after heavy contamination.
- Wash hands after glove removal.
Use Drop Cloths
If you’re removing marks from painted walls, lay down drop cloths to protect floors, furniture, and baseboards from drips, scrapes, and cleaning residue. You’ll want heavy-duty drop cloths for high-traffic areas and lightweight ones for quick touch-ups.
Secure edges with painter’s tape so they don’t shift while you work. Drape cloths over nearby furniture and tuck along baseboards for complete wall protection.
Replace cloths if they become saturated to avoid transferring cleaners back onto surfaces. After cleaning, fold dirty cloths inward and launder or dispose of them properly.
Proper setup saves time and prevents accidental damage.
How to Test a Cleaner on Hidden Paint

Because cleaning products can strip or dull paint, always try your cleaner on a hidden spot first. Pick a small area like inside a closet, behind furniture, or inside a trim corner. Apply a tiny amount, wait a few minutes, then blot and inspect for color loss, sheen change, or softening.
Always test cleaners on an inconspicuous spot first—apply a tiny amount, wait, blot, and check for damage.
You’ll assess wall texture and paint durability this way. Test multiple cleaners if needed, note results, then proceed.
Quick checklist:
- Choose an inconspicuous test area
- Use diluted cleaner on a cotton swab
- Wait, blot, compare to surrounding paint
- Record results and any surface changes
Stop if you see damage.
Remove Scuffs From Painted Walls With an Eraser
Pick a soft, non-abrasive eraser designed for painted surfaces so you won’t damage the finish. Test it on a hidden spot first, then gently rub the scuff with light, even pressure.
If marks persist, stop and try a different eraser or a milder method to protect the paint.
Choose The Right Eraser
When you spot a scuff, reach for an eraser designed for paint-safe cleaning rather than a random art gum—those can smear or abrade the finish. You’ll want to know eraser types and avoid harsh cleaning abrasives.
Choose one that matches your paint: softer for matte, slightly firmer for semi-gloss. Test in an inconspicuous spot first.
- Mr. Clean Magic Eraser (melamine) — effective but use gently
- Rubber or vinyl erasers — safe for many surfaces
- Kneaded erasers — low abrasion, good for light marks
- Specialty paint-safe erasers — formulated to minimize finish damage
Safe Cleaning Technique
If you’ve tested the eraser on an inconspicuous spot and confirmed it won’t damage the finish, proceed gently: hold the eraser flat, use light, steady strokes, and avoid scrubbing hard. Work from the scuff’s outer edge inward to prevent haloing.
Wipe debris with a dry microfiber to check progress. For delicate or historic surfaces—especially with historical wall treatments—limit pressure and test frequently.
Prefer eco friendly tips: choose a rubber eraser without harsh additives and dispose of crumbs responsibly.
If marks persist, stop and consult a professional conservator to prevent permanent damage.
Use a Melamine (Magic) Sponge Safely on Paint
Curious how a magic sponge works without wrecking your paint? You’ll use melamine magic gently to lift scuffs while prioritizing paint preservation. Test a hidden spot first, then follow these steps:
Curious how a magic sponge cleans scuffs without harming paint? Test first, then gently dampen and rub.
- Dampen the sponge slightly; avoid soaking to prevent drip marks.
- Lightly rub with short strokes; don’t scrub hard or stay in one spot.
- Rinse and wring the sponge often to remove debris that could abrade paint.
- Dry the area with a soft cloth to check results and prevent streaks.
If you notice dulling or color loss, stop immediately and try a less abrasive method.
Wipe Fingerprints and Smudges With Mild Soap
Although fingerprints and smudges seem minor, you can usually remove them quickly with a mild soap solution and a soft cloth. Mix a few drops of mild dish soap in warm water, dampen the cloth, wring it well, and test a hidden spot first.
For fingerprint removal, gently wipe in a circular motion—don’t scrub hard. Rinse the cloth, remove soap residue with a clean damp pass, then dry with a microfiber or soft towel to prevent streaks. Repeat only if needed.
This soap application is safe for most paints, but stop if paint softens or sheen changes.
Lift Crayon Marks With a Baking Soda Paste
Make a thick paste by mixing baking soda with a little water until it’s spreadable but not runny.
Gently rub the paste over the crayon marks with a soft cloth or sponge using circular motions.
Rinse the area with a damp cloth and pat dry to remove residue and check your progress.
Make A Thick Paste
If you’ve got crayon scuffs on painted walls, mix baking soda with just enough water to form a thick paste that holds its shape. You’ll want a consistency similar to toothpaste so it clings without dripping. Consider your wall texture and paint mixing history—some finishes react differently, so test in an inconspicuous spot.
- Use about two parts baking soda to one part water.
- Stir with a clean spoon until smooth and lump-free.
- Adjust dropwise; too thin won’t lift marks, too thick won’t spread evenly.
Keep a damp cloth nearby for quick cleanup after testing.
Gently Rub And Rinse
Once your baking soda paste is ready, dampen a soft cloth or sponge and gently rub the crayon marks in small, circular motions—apply light pressure and let the paste do the work rather than scrubbing hard. You’ll lift most pigment without damaging paint; pause if the surface feels rough.
Rinse the cloth frequently and blot residue away with a clean, damp cloth. Match any remaining faint marks by evaluating color matching before touching up paint.
Consider wall texture—smooth finishes respond best, while textured walls may need careful, repeated gentle passes. Dry the area, inspect, and touch up sparingly if necessary.
Remove Marker and Ink Stains With Rubbing Alcohol
When you spot marker or ink on painted walls, rubbing alcohol lets you lift the stain quickly without scrubbing hard; dab a small amount onto a cotton ball and blot gently to test how the paint reacts before working the whole spot.
For Marker removal and Ink stains, follow a careful approach so you don’t damage paint. Use these steps:
- Blot, don’t rub, to avoid spreading the mark.
- Work from edges toward the center to contain the stain.
- Rinse the area with a damp cloth after treatment to remove residue.
- If paint dulls, stop and consult a pro or test milder options.
Tackle Grease and Food Splatters With Dish Soap
Because grease and food splatters sit on the surface rather than soaking in, you can lift them with a small amount of liquid dish soap and warm water.
Mix a drop of soap into a bowl of warm water, dip a soft cloth, and wring it out so it’s damp, not dripping.
Gently blot and wipe the area in circular motions until the grease buildup and food splatter loosen.
Rinse the cloth and repeat as needed, then dry the spot with a clean towel.
Test a hidden patch first to make sure the paint won’t dull, and avoid abrasive scrubbing.
Clean Pencil Marks Without Harming Paint
If pencil marks are light, you can usually lift them without damaging the paint by using gentle tools and minimal pressure. Test a hidden spot first.
Start with soft methods and avoid scrubbing; think delicate like removing chalk dust from a mural or prepping for wallpaper removal. Try these steps:
- Use a clean white eraser, rubbing lightly in one direction.
- Dab with a microfiber cloth and a few drops of water.
- Use a magic eraser sparingly, pressing gently and briefly.
- Apply a tiny amount of non-gel toothpaste, wipe, then rinse.
Dry the area and repeat only if the finish stays intact.
Remove Nail Polish From Painted Walls Safely
Before you touch the stain, check the paint finish so you know how delicate the surface is.
Test your chosen removal method in an inconspicuous spot to make sure it won’t strip or dull the paint.
If the test goes well, work gently with mild solvents or nail polish remover formulated for painted surfaces.
Assess Paint Finish
When you’re dealing with nail polish on a painted wall, start by identifying the paint finish so you can choose a safe removal method. Knowing paint durability and finish sheen helps prevent damage.
Inspect the wall visually and by touch to determine gloss level and hardness.
- Check for high gloss or semi-gloss: usually tougher, higher paint durability.
- Flat or matte: low sheen, more fragile; avoid harsh solvents.
- Satin/eggshell: moderate sheen and durability; proceed cautiously.
- Older or layered paint: may be brittle; prioritize gentler options.
Use this assessment to guide your removal approach without testing yet.
Test Remove Method
Since you’ve assessed the paint finish, pick a hidden spot to test your chosen nail polish removal method so you can confirm it won’t damage the surface.
Dampen a cotton swab lightly and apply your method briefly, blotting rather than rubbing. Wait a few minutes, then inspect for color change, softening, or sheen loss.
If the sample passes, proceed to the mark with the same gentle motions, working from the edge inward. Keep a clean cloth and water handy to rinse residue.
If any harm appears, stop and try alternative quick fixes or consult the next section for safer solvent guidance.
Use Gentle Solvents
Although nail polish can seem stubborn, you can remove it without harming paint by choosing mild, non-acetone solvents and using them sparingly. You’ll avoid harsh chemical reactions and protect the finish by testing an inconspicuous spot first. Follow these steps and prioritize solvent safety.
- Blot excess polish gently with a soft cloth, don’t scrub.
- Apply a small amount of non-acetone remover or isopropyl alcohol to a cotton swab.
- Dab lightly, working outward from the stain to prevent spreading.
- Rinse the area with a damp cloth and dry immediately to stop further reactions.
Deal With Water Stains and Ring Marks
If you spot a ring or water stain, act quickly to prevent discoloration from setting into the paint—start by blotting any dampness with a clean cloth.
Then assess whether the mark is just surface residue or has caused staining. For light rings, gently clean with a mild soap solution, rinse, and dry.
Check if the mark is surface residue or a true stain; clean light rings gently with mild soap, rinse, and dry.
For stubborn stains, try a diluted hydrogen peroxide spot test in an inconspicuous area first. Match your approach to alternative wall textures—do textured finishes need gentler dabbing?
Favor eco-friendly cleaning products to avoid fumes. If staining persists, prime and repaint the affected area for a lasting fix.
Remove Adhesive Residue and Sticker Glue
Before you reach for a harsh solvent, test it on an unseen patch of wall to make sure it won’t damage the paint.
If the test is fine, loosen the residue with gentle methods like warm soapy water, a soft cloth, or a plastic scraper.
Work slowly and re-test stronger solvents only if the gentler options don’t lift the glue.
Test Solvent First
Wondering which solvent won’t damage your paint? You’ll do quick solvent testing on an inconspicuous spot first. Use Protective techniques—gloves and a soft cloth—to avoid spills and abrasion. Try small dabs, wait a minute, then blot; don’t rub hard.
- Test a hidden area (corner, behind trim).
- Use cotton swab with mild solvent (isopropyl or citrus-based).
- Note any color change, softening, or gloss loss.
- Rinse area with water and dry.
If the paint shows no change, proceed carefully. If it alters, stop and choose a gentler option.
Gentle Removal Techniques
When adhesive residue or sticker glue clings to painted walls, you can remove it gently without harming the finish by softening the adhesive first and lifting it with minimal abrasion.
Dampen a microfiber cloth with warm soapy water, or use a small amount of rubbing alcohol or citrus-based remover on hidden spots to test compatibility with paint sheens and texture patterns. Let the solvent sit briefly, then blot and gently scrape with a plastic card, not metal.
Rinse residue with clean water, pat dry, and examine under good light. If needed, repeat sparingly and always retest to protect the finish.
Remove Tape and Painter’s Tape Residue Cleanly
If residue from painter’s tape won’t lift with a fingernail, gently dissolve it with a safe solvent—like rubbing alcohol or a citrus-based adhesive remover—and wipe it away with a soft cloth, working small sections at a time to avoid damaging the paint.
For tape removal, peel slowly at a 45° angle; heat stubborn adhesive with a hair dryer first.
For residue cleaning, test solvents on an inconspicuous spot. Use gentle pressure and fresh cloths to avoid smearing.
- Peel slowly and steadily.
- Warm adhesive before pulling.
- Dab solvent sparingly.
- Rinse and dry the area promptly.
Treat Soot, Smoke, and Nicotine Stains on Walls
Start by evaluating the damage level so you know whether a light wipe or a deeper treatment is needed.
For stubborn soot or nicotine stains, mix and apply trisodium phosphate (TSP) following the label instructions and test a small area first.
Finish with a degreasing cleaner to remove residue and rinse thoroughly.
Assess Damage Level
Before you grab a sponge, take a close look at the affected area to judge how deep the soot, smoke, or nicotine has penetrated the paint and whether the damage is localized or widespread. You’ll want to note signs that affect cleaning choices and whether professional help’s needed. Check near wall art and behind furniture where residue hides. Look for paint peeling or discoloration that suggests deeper harm.
- Light surface residue that wipes off
- Sticky, tar-like buildup needing stronger cleaners
- Areas with paint peeling or bubbling
- Large, evenly stained surfaces indicating long-term exposure
Use Trisodium Phosphate
When soot, smoke, or nicotine has soaked into paint and simple soap won’t cut it, trisodium phosphate (TSP) gives you a powerful, reliable cleaning option you can use to strip away stubborn residue without sanding.
You’ll mix TSP per label instructions in a well-ventilated area, wear gloves and eye protection, and test a small patch first.
Focus on wall preparation: remove loose dust, mask trim, and cover floors.
Apply with a sponge, working top to bottom, rinse thoroughly, and allow to dry.
TSP is one of the strongest cleaning solutions for embedded stains, but follow safety and disposal guidelines.
Apply Degreasing Cleaner
If TSP didn’t fully remove smoke, soot, or nicotine, reach for a dedicated degreasing cleaner formulated for walls—these products break down oily residues without stripping paint. You’ll prep the area, test a hidden patch, and adjust technique for different wall textures.
Use appropriate cleaning tools and gentle pressure to avoid damage.
- Choose a cleaner labeled for painted surfaces.
- Test on a small, inconspicuous spot first.
- Use soft sponges or microfiber; avoid abrasive pads.
- Rinse thoroughly and dry to prevent streaks.
Work from bottom to top to prevent drips, and repeat if faint stains remain.
Clean Mold Spots Without Stripping Paint
Although mold can look stubborn, you can remove most spots without stripping paint by using gentle cleaners and the right technique.
First, test a hidden area to check how wall texture and paint sheen react. Mix equal parts water and white vinegar or a mild detergent solution, and apply with a soft cloth or sponge—don’t over-saturate porous surfaces.
Gently scrub in circular motions, then rinse with clear water and pat dry to prevent residue.
For persistent spots, use a diluted hydrogen peroxide spot treatment briefly.
Always ventilate the room and wear gloves; repeat only if needed to preserve the finish.
Remove Wax Drips and Candle Marks From Walls
Because wax often hardens into a thin, stubborn layer, you’ll need to soften it before removal to avoid damaging paint. Gently heat candle wax with a hair dryer until it’s pliable, then blot with a paper towel; don’t rub.
For residual wall marks, use mild dish soap and water, or rubbing alcohol on a cotton ball for tougher spots. Test first in an inconspicuous area.
- Heat wax with a hair dryer
- Blot softened wax; avoid scrubbing
- Clean residue with mild soap and water
- Remove stubborn marks with rubbing alcohol (spot-test)
Work carefully to protect paint while removing candle wax and wall marks.
Erase Shoe Scuffs and Dirt Smudges Fast
Wax and soap won’t always handle the everyday scuffs and dirt tracked onto painted walls, so tackle shoe marks with quick, targeted steps that won’t harm the finish.
When wax or soap fail, remove shoe scuffs gently with quick, targeted steps that protect your painted finish.
Start by dry-brushing loose debris, then test a small area with a magic eraser or a damp microfiber cloth.
For stubborn shoe scuffs, gently rub using light pressure; avoid sanding.
Mix mild dish soap and water for persistent dirt smudges, blotting rather than scrubbing to protect paint.
Rinse with clean water and pat dry.
If marks persist, try a diluted baking soda paste applied sparingly, then rinse and dry.
Remove Paint Transfer and Small Splatters
When paint splatters or transfer from a ladder or can end up on your walls, act quickly to prevent it from bonding to the finish; fresh spots come off far easier than dried ones. Test a hidden area first to match paint color and check wall texture tolerance. Gently scrape excess with a plastic putty knife, then try these steps:
- Dab with warm soapy water using a soft cloth.
- Use rubbing alcohol or a dedicated paint remover for stubborn spots.
- Rinse, blot dry, and let fully cure.
- Touch up with matching paint color for seamless repair.
Fix Deep Gouges After Stain Removal
After you’ve removed stains, inspect the area for deep gouges and clear away any loose debris so you can assess the damage accurately.
After removing stains, inspect for deep gouges and clear debris to accurately assess damage.
For deep gouge repair, press out dust, then undercut jagged edges with a utility knife so filler bonds well. Apply a suitable spackling compound or lightweight filler in thin layers, letting each dry fully before sanding smooth.
Once flush with the wall, wipe clean and apply stain sealing to prevent bleed-through from residual pigments. Prime the repaired spot, then touch up with matching paint.
Work patiently; proper prep and stain sealing ensure a seamless, durable finish.
Solvent vs. Water-Based Cleaner: Which to Use?
When choosing a cleaner, you’ll weigh solvent-based options that cut grease and stains fast but can damage paint and emit strong fumes.
Water-based cleaners are gentler and safer for most finishes, but you’ll still test a hidden spot and use gloves if needed.
I’ll outline the pros and cons so you can pick the right product for your wall.
Solvent-Based Pros/Cons
Although solvent-based cleaners cut through greasy, sticky marks faster than water-based solutions, they come with trade-offs you should know before you reach for a bottle. You’ll get fast results because a paint solvent dissolves oils and binders; understanding basic cleaning chemistry helps you pick the right product for glossy or stubborn stains. Use solvents carefully and test a hidden spot first.
- Pros: powerful on grease and scuff marks
- Pros: works quickly, fewer scrubs needed
- Cons: can soften or strip finish
- Cons: stronger fumes and solvent residue
Pick solvents when speed matters, but test first.
Water-Based Safety Tips
Because water-based cleaners are gentler on most paints, you’ll usually want to try them before reaching for solvents. Use a mild soap solution and a soft cloth, testing an inconspicuous spot first.
Limit water contact to avoid streaking or swelling on flat or matte finishes. Practice water safety: don’t let runoff puddle near floors or electrical outlets, and dry the area promptly.
Wear gloves and guarantee ventilation to reduce chemical exposure even from mild cleaners. If marks persist after gentle attempts, switch to a targeted solvent sparingly, following manufacturer instructions and re-testing the paint.
Protect Trim and Flooring While Cleaning Walls
If you’re planning to clean scuffs and stains from painted walls, protect baseboards, trim, and flooring first so you don’t trade one mess for another. Consider wall color and paint texture when choosing protection so cleaners won’t stain or abrade finishes.
Before cleaning scuffs, protect baseboards, trim, and floors—match protection to paint color and texture to avoid damage
Lay down drop cloths, painter’s tape, and low-tack adhesive to guard surfaces near your work area. Follow this quick checklist:
- Use a soft cloth or foam under tools to prevent scratches.
- Tape edges where trim meets wall to stop cleaner seepage.
- Cover flooring with breathable cloths for wet cleaning.
- Remove dust from trim before applying any solution.
Clean High or Hard-to-Reach Marks Safely
When you’re tackling marks up high, use a stable step stool and position it on level ground so you don’t overreach.
Pick gentle, non-abrasive cleaners to avoid stripping paint while removing stains.
Lay down drop cloths or tape off nearby trim and flooring to protect surrounding surfaces.
Use A Stable Step Stool
Although you can reach lower scuffs from the floor, you’ll need a stable step stool to clean high or hard-to-reach marks safely. Choose one with a wide base and non-slip feet, position it on level ground, and test its steadiness before climbing. Use a Stable Step to protect Wall Stability and your balance. Bring tools up with you rather than leaning.
Follow these quick tips:
- Check weight rating and locks before use.
- Face the wall and keep three points of contact.
- Wear flat shoes and avoid overreaching.
- Keep a helper nearby for steadying or passing supplies.
Work deliberately to avoid slips and wall damage.
Choose Non-Abrasive Cleaners
How do you clean high or hard-to-reach marks without damaging the paint? Use non-abrasive cleaners like diluted dish soap, gentle all-purpose cleaners, or melamine foam sparingly. Test in an inconspicuous spot to check color matching and verify the cleaner won’t dull finish or alter sheen.
Consider wall texture—flat paint absorbs more, so blot instead of scrubbing; satin or semi-gloss tolerates light rubbing. Apply cleaner with a soft cloth or sponge on an extendable pole, working top-down. Rinse with plain water and pat dry.
If marks persist, switch to a milder solution before trying stronger options.
Protect Surrounding Surfaces
Want to avoid drips, splatters, and accidental scuffs while cleaning high or hard-to-reach marks? Protect surrounding surfaces before you work: cover floors and furniture, shield trim, and tape edges to preserve paint sheen and avoid damage to wall texture. Use lightweight, removable materials so you can adjust as you go.
- Lay down drop cloths or old sheets
- Apply painter’s tape along trim and baseboards
- Temporarily remove or wrap wall decor and outlets
- Use an extendable tool with a soft pad or microfiber to limit contact
These steps keep adjacent areas safe and help you clean more confidently.
Methods Safe for Flat/Matte Painted Walls
Because flat and matte finishes are softer and hide imperfections differently than glossier paints, you’ll need gentler, non-abrasive methods to remove marks without damaging the surface.
Start with a dry microfiber cloth to lift dust, then try a soft eraser or diluted dish soap and water applied sparingly. Test discreetly; blot, don’t rub.
For stubborn scuffs, use a melamine sponge very lightly. If current marks remain, consider minimal paint touch ups after spot cleaning—ensure color matching before applying.
Finish by feathering edges to blend. Always work gently to preserve texture and avoid sheen changes.
Best Methods for Eggshell and Satin Finishes
While eggshell and satin finishes give you a bit more durability than flat paint, you’ll still want to use gentle, non-abrasive techniques to remove marks without dulling the sheen. Start with a dry microfiber cloth, move to a diluted dish soap solution for light stains, and reserve melamine sponges or stronger cleaners for very stubborn spots, testing each method in an inconspicuous area first.
You’ll protect Eggshell sheen and a Satin finish by working top-to-bottom, blotting rather than scrubbing, and rinsing residue promptly. Try these steps:
- Dry wipe with a microfiber cloth
- Mild dish soap and warm water
- Soft nylon brush for texture
- Spot-test melamine sponge
Clean Semi-Gloss and Gloss Without Streaks
If your walls have a semi-gloss or gloss finish, they’ll resist dirt but reveal streaks and smudges easily, so clean them with techniques that lift grime without leaving residue.
Start by dusting and using a microfiber cloth dampened with warm water and a few drops of mild dish soap; wipe in consistent horizontal strokes and rinse the cloth often.
Dust first, then wipe with a damp microfiber cloth and mild dish soap—use consistent horizontal strokes and rinse often.
For stubborn marks, use a magic eraser gently to avoid texture removal.
Dry immediately with a clean microfiber towel to prevent streaks.
Keep a small stash of matching paint for quick paint touch up after deeper cleaning or minor abrasions.
Quick Spot-Clean Routine for Busy Households
Keep a small kit with a microfiber cloth, mild cleaner, eraser sponge, and a touch-up paint pen so you can act fast.
For each mark, test your cleaner, work from the outside in, and rinse or blot dry to avoid streaks.
Finish with quick preventive tips—like high-traffic touch-up spots and routine wipe-downs—to keep walls looking fresh.
Fast Supplies Checklist
Because quick touch-ups matter, keep a small kit stocked so you can handle smudges before they set—grab a soft microfiber cloth, a gentle all-purpose cleaner or mild dish soap, a magic eraser (use gently on satin/matte), painter’s tape, a small bucket, and a fine-point touch-up brush or matched paint pen. You’ll want tools that prevent damage and limit paint peeling.
Include:
- Microfiber cloths and sponges
- Mild cleaner, bucket, and spray bottle
- Touch-up brush or paint pen for color matching
- Painter’s tape and small sanding block
Store the kit near high-traffic rooms for fast response.
Targeted Cleaning Steps
When you spot a scuff or smudge, act quickly with your kit: blot any fresh grime with a damp microfiber, spray a tiny amount of mild cleaner (or soap solution) onto the cloth—not the wall—and gently rub in a circular motion to test paint tolerance.
For stubborn marks, use a soft eraser or a magic sponge with light pressure, repeating tests in an inconspicuous spot to protect the finish.
Match your approach to wall texture—smooth needs gentler action than eggshell or textured surfaces.
After cleaning, pat dry and inspect; if color matching is required for any remaining blemish, note exact paint details before touch-up.
Preventive Touch-Up Tips
If you want to prevent small scuffs from becoming big jobs, set up a quick spot-clean routine you can do in minutes. Keep a tiny kit with essential cleaning tools and a small container of matching paint for paint touch ups. When you see a mark, act fast to avoid sanding or repainting large areas.
- Microfiber cloth for dusting and wiping
- Gentle cleaner and a soft sponge for stains
- Small artist brush and sample paint for chips
- Magic eraser for scuffs on satin or semi-gloss finishes
Check weekly and tackle spots immediately to save time.
Step-By-Step Checklists for Each Common Stain
Though stains vary, each common mark has a straightforward checklist you can follow to remove it quickly and safely.
For scuffs: dry-erase or melamine sponge, gentle wipe, spot-clean soap, then assess paint durability.
For crayon or marker: test solvent in hidden spot, dab from edges inward, rinse and dry.
For grease: apply dish soap, blot, repeat, then dry.
For nail polish or ink: lift with recommended remover, keep pressure light.
For mud or dirt: let dry, brush, wipe with mild cleaner.
After each cleanup, inspect for color matching needs before final touch-up.
Blend Repaired Areas for an Invisible Fix
Now that you’ve removed the mark and confirmed the paint’s condition, blend the repaired spot so it disappears against the surrounding wall. You want invisible blending that doesn’t draw attention. Work carefully and test as you go.
- Feather edges lightly with fine sandpaper to erase ridges.
- Use a damp sponge to smooth texture differences before paint.
- Apply thin coats from the center outward to aid color matching.
- Step back often under different light to check for visible seams.
Take your time; precise preparation and gradual adjustments deliver a seamless result without obvious touch-up lines.
Touch-Up Paint When Cleaning Fails
When cleaning doesn’t lift a stain, reach for touch-up paint to restore the surface without repainting the whole wall. You’ll want to prep the spot: clean with eco-friendly cleaning methods, dry thoroughly, and lightly sand any rough edges.
Use small amounts and thin layers, letting each coat dry so texture matches surrounding paint. Modern innovative paint formulations often hide blemishes better and resist future scuffs, so choose a compatible product.
Apply with steady strokes, feathering edges for a seamless look. After curing, inspect under natural light and repeat thin coats only if needed to avoid buildup.
Choose Touch-Up Tools and Match Paint Color
After you’ve prepped the spot and applied initial touch-up coats, pick the right tools and confirm a perfect color match to make the repair disappear. You’ll want tools that lay down paint evenly and respect paint durability so the fix lasts.
Focus on color matching under natural light and test small swatches. Use these essentials:
- Small angled brush for edges and thin lines
- Foam roller for textured or larger areas
- Cotton swab for tiny dots and precise blending
- Sanding sponge for feathering gradations
Match gloss level as well as hue; proper tools and accurate color matching create seamless, long-lasting repairs.
Preventive Habits to Keep Painted Walls Clean
Keeping up with a few simple habits will keep your painted walls looking fresh and cut down on repairs. Wipe scuffs promptly with a soft cloth and mild cleaner so marks don’t set. Rotate wall art occasionally to prevent uneven fading and dust frames regularly.
Mind furniture placement—leave a small gap between pieces and walls to avoid scratches and abrasion. Use felt pads on chair and table legs, and avoid leaning objects against painted surfaces.
Inspect high-traffic areas weekly and address stains quickly. These routines take little time but prevent buildup, reduce touch-ups, and keep paint looking new longer.
Kid- and Pet-Proof Strategies to Reduce Marks
Because kids and pets are naturally curious and energetic, you can cut down marks by making your walls part of a damage-resistant routine. You’ll choose finishes and habits that limit scuffs, fingerprints, and bruises without constant fixes.
Pick washable, stain resistant paint and add pet safe barriers where needed. Train routines and use protective accents to redirect activity.
- Install washable chair rails and corner guards to block impact
- Use high-traffic mats and easy-to-clean wall panels near doors
- Create activity zones with washable wall decals and washable paint
- Teach kids gentle play and keep pet-safe toys to reduce wall contact
Eco-Friendly Cleaners for Painted Walls
Those preventive steps cut down on stains, but you’ll still need gentle cleaners that won’t harm paint or the planet. Use eco friendly ingredients like baking soda, white vinegar, and castile soap; they lift marks without stripping finish. Test a hidden spot first, work gently with a soft cloth, and rinse. Natural cleaning methods reduce fumes and waste, and they’re cheap. Here’s a quick comparison:
| Cleaner | Best For | Notes |
|---|---|---|
| Baking soda paste | Scuffs | Mild abrasive |
| Vinegar solution | Grease | Dilute 1:4 |
| Castile soap | General marks | Rinse well |
| Melamine sponge | Tough spots | Use gently |
DIY Cleaning Cost vs. Professional Service
When you weigh DIY cleaning against hiring a pro, you’ll find the choice often comes down to time, skill, and total cost. You can save money doing it yourself, but you’ll spend on cleaning gadgets and possibly materials for paint touch ups. Consider these factors:
- Time: DIY takes hours; pros finish faster.
- Cost: Tools and cleaners vs. service fees.
- Risk: DIY may need later repainting.
- Quality: Pros deliver consistent finish and fewer mistakes.
If you’re handy, DIY is economical. If you value speed and guaranteed results, a professional service is worth the investment.
Troubleshoot Dulling, Streaks, or Finish Loss
If your wall suddenly looks dull, streaked, or like it’s lost its finish, start by identifying what changed—cleaning products, moisture, or scrubbing techniques can strip sheen or leave residue—and then test a small hidden area to confirm the cause before treating the whole surface.
Check for soap film or mineral deposits by wiping with distilled water; if streaks persist, try a mild solvent on a test spot.
Restore paint sheen with a gentle restorer or low-sheen touch-up if needed, keeping color matching in mind.
For widespread loss, repaint using the original sheen and proper prep.
How Often to Deep-Clean Painted Walls by Room
Because traffic, moisture, and cooking residues vary by room, you’ll want a different deep-clean schedule for each space. Tailor cleaning frequency to use: high-traffic and humid areas need more attention, low-traffic rooms less. Regular Wall maintenance prevents buildup and preserves finish.
- Kitchen: deep-clean every 1–2 months to remove grease and cooking residues.
- Bathroom: deep-clean every 1–2 months to combat moisture and mildew risks.
- Hallways and entryways: deep-clean every 3–6 months to address scuffs and fingerprints.
- Bedrooms and formal living areas: deep-clean every 6–12 months unless visibly soiled.
Adjust based on pets, children, and visible dirt.
Quick Checklist to Restore Painted Walls Fast
Now that you know how often each room needs a deep clean, use this quick checklist to get painted walls looking fresh in minutes. Start by dusting top-to-bottom, test a hidden spot for cleaner compatibility, then treat scuffs with a soft eraser or mild detergent. For stubborn marks, spot-clean gently and rinse. Note wall textures before scrubbing and keep a small sample for color matching if touch-up’s needed. Use this simple table to guide actions:
| Task | Tool | Result |
|---|---|---|
| Dusting | Microfiber | Removes grit |
| Spot-test | Cotton swab | Prevents damage |
| Touch-up | Sample paint | Seamless repair |
Frequently Asked Questions
Can Cleaning Remove Paint Texture or Stippling From Walls?
No — cleaning won’t remove paint texture or stippling; you’ll strip finish or loose paint with harsh methods. For true paint removal or altering wall texture, you’ll need sanding, chemical strippers, or skim-coating to change wall texture.
Will Repeated Spot-Cleaning Cause Color Fading Over Time?
Yes — if you repeatedly scrub spots with harsh cleaning agents, you’ll accelerate color fading; gentler cleaners and soft cloths preserve paint durability, so you should test first and limit aggressive spot-cleaning to avoid wear.
How Do Humidity and Temperature Affect Cleaning Effectiveness?
Humidity impact is that higher moisture softens grime, so you’ll clean more easily but risk paint swelling; temperature influence means warm temps boost solvent action and drying, so you’ll adjust methods, timing, and solutions to avoid damage.
Can Wallpaper-Covered Walls Be Treated With These Methods?
Like testing ice on a pond, you’ll check surface risk: you can’t always use those methods on wallpaper—Wallpaper removal steps differ, and you’ll verify Paint compatibility first, avoiding excess moisture to prevent damage.
Are There Compatibility Issues With Voc-Free or Low-Voc Paints?
Yes — you might see compatibility issues with VOC emissions and different paint formulations; you’ll need gentler cleaners on low‑ or VOC‑free paints, test a hidden spot first, and avoid abrasive scrubbing or strong solvents.
Conclusion
So you tackled the mystery smudges like a pro and—shockingly—most of them vanished with nothing more heroic than dish soap and a sponge. Ironically, the real villain isn’t crayon or scuff marks but impatience: rushing equals ruined finish. Keep gentle cleaners, test a hidden spot, and don’t scrub like you’re polishing a trophy. If something goes sideways, call a pro; your wall probably forgives quicker than you will.