How to Remove Paint Off Walls Without Damage
You can strip paint without harming walls by starting gently: wet-clean the area, soften spots with warm water or a mild solvent, and lift paint using plastic scrapers, soft brushes, or nonwoven pads at low angles. Test methods on a hidden patch to identify latex versus oil and check for lead. Use low heat, gel strippers, or poultices only if needed, neutralize residues, patch lightly, and match primers. Keep going for detailed surface-specific steps and safety tips.
This Guide: How to Remove Paint From Walls (Quick Overview)
If you’re tackling paint removal, this quick overview tells you what to expect and which method fits your wall type and finish. You’ll assess surface material—drywall, plaster, or wood—and small-test removals to avoid damage.
Choose chemical, heat, or mechanical approaches based on finish, age, and nearby trim. Protect floors, vents, and hardware, and work in ventilated conditions.
After paint’s gone, address minor gouges and sanding for Texture restoration, then prime appropriately.
Plan for Color matching if you’ll repaint portions, saving samples and notes.
Proceed methodically, stopping to reassess when substrate or finish reacts unexpectedly.
Quick Answer: Safest Method to Remove Paint From Walls
The safest way to remove paint is to start with a wet sponge and gentle scrubbing so you don’t damage the wall surface.
Before working a large area, test a mild solvent on a hidden spot to see if the finish or underlying paint softens.
If the test shows no damage, continue with the sponge method and only increase strength if absolutely necessary.
Wet Sponge Method
Looking for the gentlest way to strip paint from walls without causing harm? Use the wet sponge method: dampen a soft sponge with warm water and a drop of mild detergent, wring it well, and test an inconspicuous spot.
Work in small sections, wiping gently along the wall’s grain to lift loose or peeling paint without abrading the surface. Rinse the sponge frequently and blot dry with a microfiber cloth to prevent water damage.
This preserves underlying color matching and paint sheen for easier touch-ups. For stubborn spots, repeat carefully; avoid harsh scrubbing or saturating drywall to prevent harm.
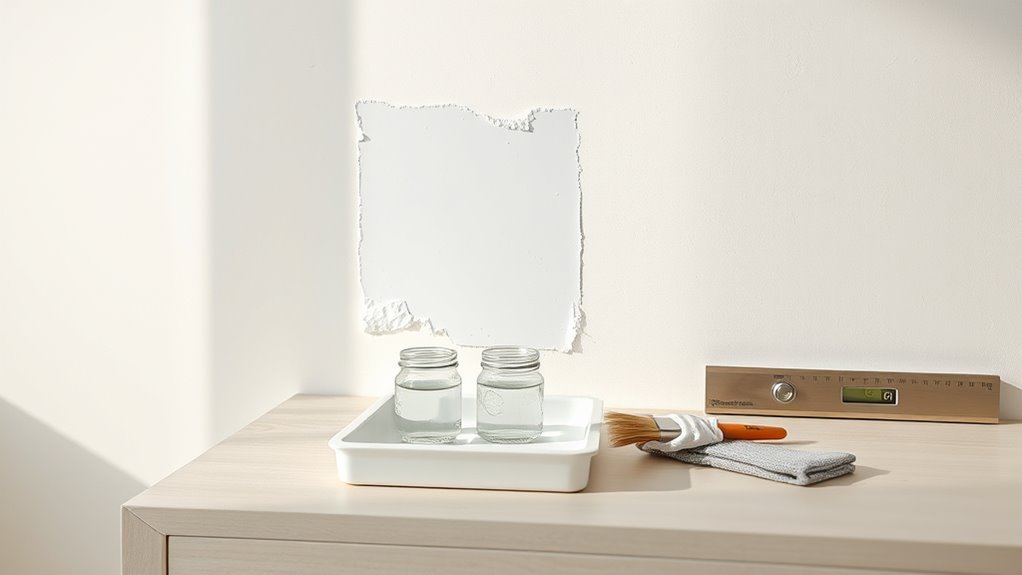
Mild Solvent Test
When you need a step up from plain water without risking your wall’s finish, try a mild solvent test using isopropyl alcohol or a citrus-based cleaner diluted per the label. Dab a hidden area, wait a minute, then rub gently. If paint peeling starts, stop — the solvent’s too aggressive for that finish.
If the test spot lifts grime without removing paint, it’s likely safe. Note solvent compatibility with latex, oil, or specialty coatings before wider use. Work in small sections, rinse with water afterward, and ventilate the room.
Repeat tests when switching products to avoid damage.
Which Wall Surfaces This Guide Covers (Drywall, Plaster, Wood, Brick)
This guide covers the common wall types you’ll encounter: drywall/sheetrock, plaster, wood, and brick.
You’ll get specific tips for each surface so you can remove paint without causing damage.
Follow the right method for the material to protect the wall and speed up the job.
Drywall And Sheetrock
While drywall and sheetrock make up most modern interior walls and are fairly forgiving, you still need to treat them gently to avoid gouges, dents, or paper tears when removing paint. You’ll want to test a small area, avoid aggressive scrapers, and consider chemical strippers designed for drywall. Keep wallpaper removal separate—solvents and steam can damage paper face. Mind ceiling texture when working overhead; protect it from drips. Proceed slowly, sanding lightly only where needed, and patch small nicks with joint compound.
| Task | Tool | Tip |
|---|---|---|
| Test spot | Sponge | Low pressure |
| Strip paint | Plastic scraper | Shallow angle |
| Sand | Fine grit | Light strokes |
Brick, Wood, Plaster
If you’re working beyond drywall, you’ll find brick, wood, and plaster each demand different techniques and tools to remove paint without causing damage. You’ll approach each surface with care:
Bricks need gentle abrasion to preserve brick patterns; use a stiff brush, low-pressure power washing, or chemical stripper for old layers, protecting mortar and patterns.
Wood requires attention to wood grain; sand with the grain, use milder strippers, avoid deep gouging that ruins wood grain.
Plaster benefits from soft scraping and solvent testing; test a small area, scrape softly, then use compatible removers.
How to Assess Paint Type Before Starting (Latex vs Oil)
Before you start scraping or sanding, figure out whether the existing paint is latex (water-based) or oil-based, because that determines the solvents and tools you’ll use and how much prep is required.
Test small: rub a cotton ball soaked in denatured alcohol; if paint softens, it’s latex. If it resists, try mineral spirits — resistance suggests oil.
Note paint sheen and previous color matching efforts, since glossy oil paints resist removal and may hide primer differences.
Wear gloves, ventilate, and document results so you choose the right stripper, sandpaper grit, or primer later without damaging the wall surface.
How to Check Underlying Wall Condition and Adhesion
Once you remove loose paint and dust, inspect the wall for cracks, bubbling, or flaking to judge how well the coating and substrate are adhering.
Check wall texture and surface porosity visually and by touch: rough, chalky, or soft spots mean poor adhesion. Use a fingernail or scraper to perform a light adhesion check across several areas. Note any mold, efflorescence, or exposed drywall paper.
- Tap test: listen for hollow sounds indicating delamination.
- Scrape test: confirm how easily paint lifts.
- Porosity check: sprinkle water; fast absorption shows high surface porosity.
When to Test a Small Area First and How to Document Results
Because walls and coatings can hide unexpected reactions, always test a small, inconspicuous area first to confirm the removal method won’t damage the substrate or finish. You’ll note texture, adhesion, and any discoloration, and record steps for color matching and DIY safety. Photograph before/after, note product, time, and dwell time, and mark location.
| Area Tested | Product Used | Result |
|---|---|---|
| Corner near trim | Citrus stripper | Slight dulling |
| Behind outlet plate | Sanding block | No damage |
| Closet interior | Heat gun low | Paint bubbled |
| Baseboard edge | Solvent wipe | Finish removed |
Use notes to repeat or adjust.
Essential Safety Precautions Before You Remove Paint
Your test notes and photos tell you what methods worked and what didn’t, but they also guide how you’ll protect yourself and the room when you start removal. Before you begin, prioritize Safety gear and set clear ventilation protocols.
Wear goggles, gloves, and an appropriate respirator; cover skin and hair. Open windows and use fans to direct fumes outside; seal doorways to prevent dust spread. Remove or cover furniture and floors with drop cloths. Check for lead paint and follow local disposal rules.
Keep a fire extinguisher nearby if using chemical strippers and work in short, controlled sessions.
- Personal protection
- Airflow control
- Containment
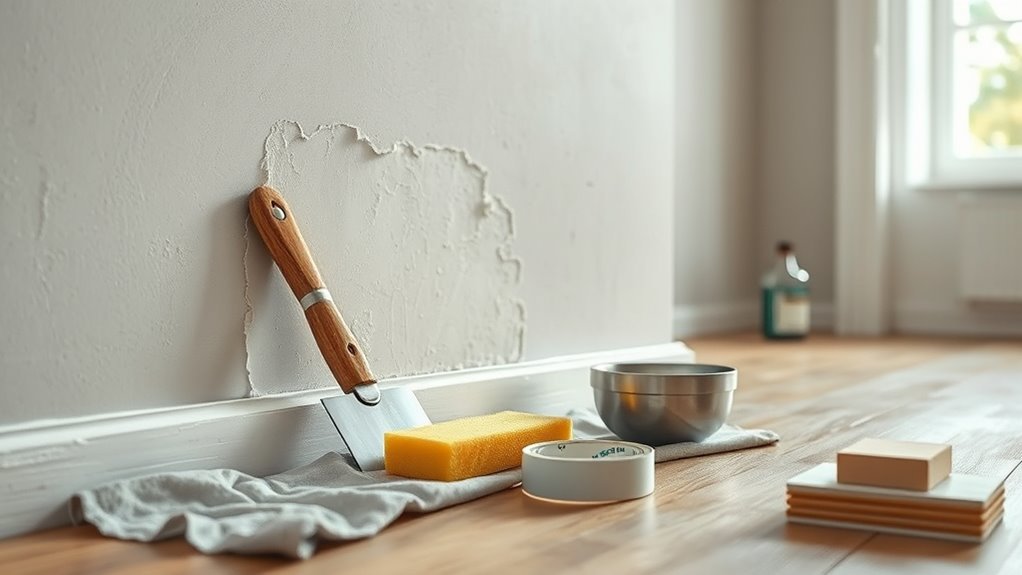
Tools You Need for Gentle Paint Removal
You’ll want soft scrub materials like microfiber cloths and non-abrasive sponges to lift paint without scratching the wall.
Pair those with precision stripping tools—plastic scrapers, fine-tipped putty knives, and small detail brushes—for controlled removal around edges and trim.
Use the gentlest option that works to protect the surface as you go.
Soft Scrub Materials
When you need to lift paint without gouging the wall, soft scrub materials are the go-to tools: they combine gentle abrasion with cleaning power so you can remove flaking or stained paint without damaging drywall or plaster.
You’ll want nonwoven pads, soft-bristled brushes, and mild abrasive creams that remove residue while preserving surface texture. These choices help you assess underlying color matching and won’t undermine paint durability on adjacent areas.
Work lightly, test a small spot, and rinse thoroughly to avoid streaks.
- Nonwoven scrub pads
- Soft-bristled nylon brushes
- Mild abrasive cream
Precision Stripping Tools
Although gentle removal calls for restraint, having the right precision stripping tools makes the job faster and safer. You’ll want a thin metal scraper, plastic putty knives in graduated sizes, a palm sander with fine grit, precision heat gun, and micro-abrasive pads. Use them to target flaking areas, preserve surrounding finish, and test paint adhesion before full removal. Keep color matching in mind for touch-ups and avoid gouging substrate. Below is a visual cue of tools and purpose:
| Tool | Use |
|---|---|
| Thin metal scraper | Lift flakes |
| Plastic knives | Pry gently |
| Palm sander | Smooth edges |
| Heat gun | Soften paint |
| Micro-pad | Final clean |
Household Items That Work as Low-Risk Paint Removers
Because you don’t always want harsh chemicals on your walls, several common household items can safely loosen or lift paint with minimal risk, especially on latex finishes. You can use creative techniques to test small areas and consider paint color choices when deciding whether to remove or touch up. Try gentle methods first, working slowly and checking substrate condition.
Because harsh chemicals aren’t always needed—use gentle household solutions and test small areas before removing paint.
- Warm soapy water and a soft cloth — good for fresh drips and scuffs.
- Vinegar solution (diluted) — softens stubborn latex without stripping drywall paper.
- Rubbing alcohol or hand sanitizer — targets glossy spots; use sparingly.
Best Chemical Strippers for Drywall Without Damage
When choosing a chemical stripper for drywall, you’ll want to compare types like solvent-based, caustic, and biodegradable options and pick one labeled safe for gypsum.
Check ingredient lists for drywall-safe compounds (look for low-odor, non-sodium-hydroxide formulas) to avoid paper damage and bubbling.
Follow the maker’s instructions for application, dwell time, and neutralization so you can remove paint without harming the wall.
Chemical Stripper Types
If you’re tackling paint removal on drywall, choosing the right chemical stripper matters because some formulas are too harsh and can damage paper-faced gypsum. You’ll want options that soften finish without soaking the paper; consider how color mixing residues and paint drying times affect cleanup and recoat scheduling. Match stripper type to paint age and layer count.
- Solvent-based: fast action for oil paints, stronger odor—use minimal dwell.
- Caustic (lye): strips thoroughly but risks swelling paper—test first.
- Bio-based: gentler, lower fumes, slower action—safer for drywall when used carefully.
Drywall-Safe Ingredients
Now that you’ve weighed stripper types against drywall’s vulnerabilities, look for formulations that soften paint without saturating paper-faced gypsum. Choose water-based, low-odor gel strippers with mild solvents like dibasic esters or citrus-derived limonene; they lift layers without over-penetrating the paper.
Avoid methylene chloride and harsh caustics that blister surfaces. Look for products labeled safe for drywall or plaster.
Test small areas to see how the finish and wall texture respond, and to verify color matching after repair. Keep instructions concise, follow safety guidance, and pick a product that balances efficacy with drywall preservation.
Application And Neutralization
Because drywall can absorb cleaners and swell, you’ll want to apply chemical strippers sparingly and neutralize residues promptly to protect the paper face and underlying gypsum. You’ll test a small area, use low-odour, drywall-safe formulas, and limit dwell time to prevent delamination.
After stripping, rinse and neutralize per product instructions, then dry thoroughly before any touch-up.
- Use minimal stripper, work in thin sections.
- Neutralize with manufacturer-recommended solution, then blot dry.
- Sand lightly only if surface is fully dry.
Careful application preserves substrate, aids color matching later, and improves paint longevity.
Choosing Water-Based vs Solvent-Based Strippers
When deciding between water-based and solvent-based strippers, consider the paint type, substrate, indoor ventilation, and how quickly you need results.
You’ll pick water-based for latex or thin layers; it’s gentler, less odorous, and easier to rinse, preserving underlying finishes and aiding future color matching.
Choose solvent-based for stubborn oil-based or multiple coats because it acts faster and boosts paint removal success, though it’s harsher on surfaces and emits stronger fumes.
For tough oil-based or multi-layer paint, use solvent-based strippers—they work faster but are harsher and smell stronger.
Always test a small area to check paint durability and substrate reaction.
Wear appropriate PPE, ventilate well, and follow label instructions to avoid damage.
How to Use a Heat Gun Safely on Painted Walls
Pick a heat gun with adjustable temperature and a narrow nozzle so you can control the heat and avoid scorching.
Protect floors, trim, and nearby furniture with drop cloths and heat-resistant tape before you start.
Work in thin passes and peel softened paint off in layers rather than forcing large sections at once.
Choose The Right Gun
If you’re removing paint with heat, choosing the right heat gun matters for both effectiveness and safety. You’ll want to choose equipment that matches the job: light-duty for thin, flaking paint, mid-range for typical layers, and high-power for thick or multiple coats.
Consider paint consistency to set temperature—low for softening, higher for stubborn buildup. Use steady sweeping motions, keep the nozzle 2–4 inches away, and never linger.
Select variable temperature and a cool-down feature. Check for overload protection and a pistol grip for control.
Practice on a hidden spot before tackling visible areas.
- Light-duty: thin flakes
- Mid-range: typical layers
- High-power: thick coats
Protect Surrounding Surfaces
Because heat guns blast intense, focused heat, you’ll want to safeguard nearby surfaces and belongings before you start—cover floors with flame-retardant drop cloths, tape up trim and adjacent walls with high-temperature masking tape, and move or wrap furniture, curtains, and electronics well out of the work area.
Keep a fire extinguisher handy and work with a helper to hold protective barriers.
Protect outlets and vents with foil, and use a heat-resistant shield to prevent scorching adjacent paint you plan to keep for color matching later.
After stripping, clean and inspect areas for surface priming before repainting to guarantee adhesion.
Remove Paint In Layers
When you work in short, controlled passes, a heat gun strips paint layer by layer without scorching the substrate—hold the gun 6–8 inches away, keep it moving in a slow sweeping motion, and stop as soon as the paint softens and bubbles.
You’ll wear gloves, eye protection, and a mask, and test a small area first to gauge heat and timing.
Work in well-ventilated spaces, scrape softened paint gently, and avoid overheating corners or trim.
Plan for disposal and factor safety into budget planning.
After stripping, prep surfaces for color matching and repainting.
- Test first
- Move steadily
- Cool and clean
When to Avoid Sanding and Why It Can Harm Drywall
Although sanding might seem like the quickest fix, you should skip it on drywall in several common situations because it can weaken paper faces, create gouges, and spread fine dust that ruins finishes. You’ll also challenge paint removal myths and Painting myths tied to color psychology that push unnecessary sanding. Check surfaces and choose gentler methods when seams, thin skim coats, or textured finishes are present.
| Condition | Risk |
|---|---|
| Thin paper face | Tearing |
| Seams | Separation |
| Textured finish | Damage |
| Previously skim-coated | Gouging |
When in doubt, test a small area or use chemical or mechanical alternatives.
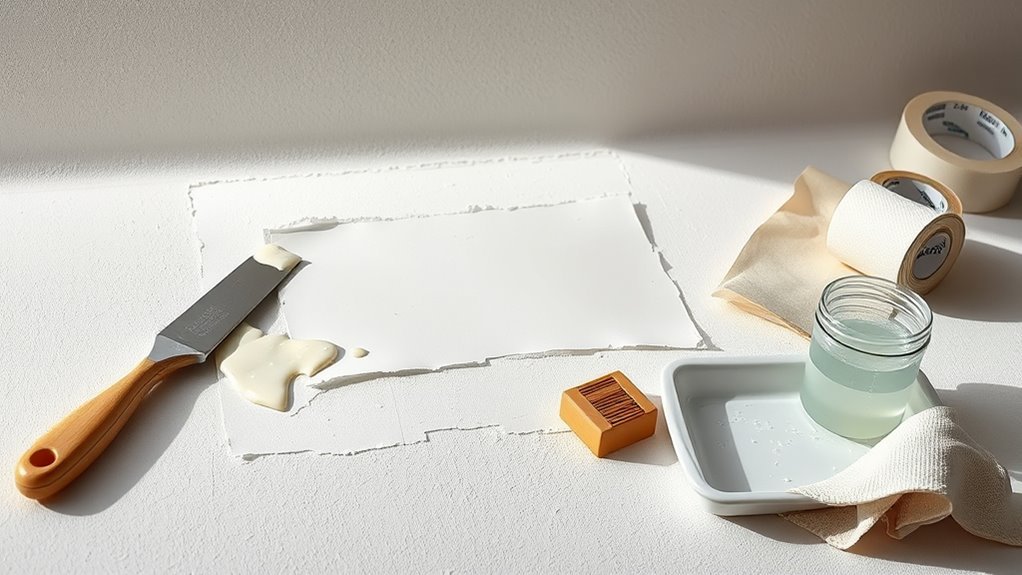
Hand-Scraping to Remove Paint From Walls Without Damage
When you need to remove paint without sanding, pick the right scraper — a flexible putty knife for flat areas and a stiff-edged scraper for trim and stubborn spots.
Hold the tool at a low angle and push gently to lift paint without gouging the wall, working in small sections.
Keep a steady pace and check your progress often so you stop before you damage the drywall or plaster.
Proper Tool Selection
If you want to remove paint by hand without damaging the wall, pick the right scraper and blade for the surface and paint type. You’ll consider wall texture and future color matching while choosing tools so repairs blend later.
Match blade stiffness to paint hardness: flexible for thin layers, stiff for thick. Use handles that give control without fatigue. Protect adjacent trim and finishes with low-profile tools. Choose scrapers that accept multiple blade types so you can adapt as you work.
- Flexible putty knife for delicate textures
- Stiff metal scraper for tough layers
- Multi-blade holder for versatility
Safe Scraping Technique
Now that you’ve chosen the right scraper and blade, focus on a steady, controlled scraping technique to protect the wall. Hold the scraper at a low, consistent angle and use short, overlapping strokes; don’t gouge or pry.
Work with the paint’s grain and test a small area first to check for underlying adhesion issues. If you’ll repaint, keep notes for color matching and avoid aggressive sanding that changes the surface tone.
Preserve existing texture by removing thin layers gradually; stop when you hit solid substrate or original finish.
Clean debris regularly and inspect frequently to prevent accidental damage.
Steam to Soften Paint : Timing and Tips
Although steaming won’t strip every finish, it softens most water-based and latex paints quickly so you can scrape without gouging drywall or wood. You’ll avoid common paint removal myths by testing steam on a hidden patch first. Historical techniques relied on heat but lacked controlled steam timing.
Aim for 10–20 seconds per 6-inch area, watching for bubbling or sheen change. Keep the steamer moving and never oversaturate the surface.
- Hold steamer 2–4 inches away, 10–20 seconds.
- Scrape gently with a flexible putty knife.
- Reheat briefly if paint firms before removal.
Using a Chemical Poultice for Stubborn Paint Patches
When a stubborn paint patch won’t budge, you’ll prepare a chemical poultice by mixing the recommended solvent with an absorbent carrier to a paste-like consistency.
You’ll spread it over the spot, cover it with plastic to keep it moist, and let it sit for the instructed time.
Afterward, you’ll gently remove the poultice and wipe the area clean, repeating only if necessary.
Preparing The Poultice
Before you apply a chemical poultice, gather the right materials and read the product label so you mix and use it safely. You’ll prep a small batch matching the poultice base to the paint sheen to control absorption; note color matching only matters if you plan touch-ups afterward. Wear gloves, eye protection, and guarantee ventilation. Measure carefully and mix to a spreadable, paste-like consistency per instructions. Test a tiny, inconspicuous spot to confirm no surface reaction.
- Protective gear: gloves, goggles, mask
- Tools: nonmetallic bowl, spatula, brushes
- Disposal: plastic bags, neutralizer per label
Applying And Removing
Once you’ve confirmed the poultice mix and tested a hidden spot, apply a 1/8–1/4-inch layer over the stubborn paint, pressing gently so the paste contacts the paint and not just the surrounding wall.
Cover with plastic wrap, tape edges, and label time applied. Check after the manufacturer’s recommended dwell time; you’ll see softened paint pulling away from the substrate.
Scrape carefully with a plastic scraper, working parallel to the wall to avoid gouges.
Rinse residue with a damp sponge and neutralizer if required.
Once dry, inspect for staining and plan touch-up using appropriate paint primers and color matching before repainting.
How to Remove Paint Drips and Splatters Without Sanding
Ever tried scraping at a dried paint drip and only made the mess worse? You can remove drips and splatters without sanding by softening the spot, lifting carefully, and touching up for seamless repair. Consider color matching and paint sheen before finishing so the repair blends.
- Wet softening: dab warm water or mild solvent, let soften, gently lift with a plastic scraper.
- Blotting: absorb loosened paint with a damp cloth; avoid rubbing to prevent spreading.
- Feathered touch-up: apply minimal matched paint to blend edges, keeping sheen consistent for an invisible fix.
Steps to Remove Paint From Textured Drywall Without Flattening
Start by testing your chosen removal method in a hidden spot to make sure the texture and finish stay intact.
Use gentle techniques—like a soft scraper, mild solvent, or a damp microfiber—to lift paint without flattening the peaks.
Move slowly and reassess often so you can stop if the texture starts to soften.
Test in Hidden Area
Before you attack the whole wall, pick a discreet spot—behind a bookshelf, inside a closet, or near a baseboard—and test your chosen removal method to confirm it lifts paint without flattening the texture. Use a hidden spot for a quick paint test so you don’t compromise visible areas.
Observe adhesion, color change, and texture integrity. Note drying effects and any residue.
- Try your solvent or scraper briefly and inspect texture.
- Compare treated and untreated sections under good light.
- Wait 24 hours to check for softening or flaking before proceeding.
Use Gentle Removal
How will you remove paint from textured drywall without flattening the finish? Start with soft methods: use a plastic scraper, gentle bristle brush, or microfiber cloth to lift loose paint.
Apply a mild solvent or water-based stripping gel sparingly, testing and blotting rather than scrubbing. Work along texture contours, using short strokes to avoid compressing peaks.
Rinse residues with a damp sponge and pat dry. Keep pressure light and tools broad to protect texture.
Prioritize paint removal while practicing wall preservation—stop if texture changes, reassess, and switch to even gentler options or consult a pro for delicate patches.
Removing Paint From Plaster Walls Without Cracking
Want to remove paint from plaster walls without causing cracks? You’ll work slowly, use low-abrasion methods, and test small areas first. Focus on Color matching and Texture preservation when repairing any tiny chips.
- Use a plastic scraper and warm water with mild detergent to lift paint gently.
- Apply a chemical stripper labeled safe for plaster in thin coats; rinse and neutralize per instructions.
- Patch with flexible plaster compound, sand lightly, then match color and texture before repainting.
You’ll avoid aggressive sanding or heat, which cause cracking, and preserve the wall’s original finish.
Removing Paint From Wood Trim and Baseboards Gently
When you need to strip paint from wood trim and baseboards gently, work slowly and choose methods that protect the grain and profile. You’ll test a hidden spot, use a gentle chemical stripper or heat gun on low, and scrape with a plastic or wooden tool to avoid gouging. Sand lightly with fine grit, follow the grain, and clean residues before refinishing. Respect antique moulding by working in short sessions and keeping moisture minimal. For stubborn layers, repeat controlled cycles rather than aggressive measures to preserve detail and avoid costly repairs.
| Heart | Care |
|---|---|
| Patience | Respect |
| Precision | Trust |
| Restore | Honor |
How to Strip Paint From Brick and Masonry Without Damage
Because brick and masonry absorb moisture and texture, you’ll need methods that remove paint without eroding mortar or changing the surface. So start by testing a small, inconspicuous area to see how the material reacts.
Use gentle chemical strippers formulated for masonry or low-pressure soda blasting to lift paint while preserving brick and pointing. Protect nearby vegetation and rinse thoroughly.
Consider color matching for any touch-ups and assess paint durability before repainting.
- Soft chemical stripper — apply, wait, brush off.
- Low-pressure soda blast — quick, non-abrasive.
- Poultice for stubborn spots — controlled dwell time.
Best Approach for Multilayer Paint Removal
Start by evaluating how many paint layers you have and whether any contain lead or stubborn coatings.
Then choose controlled strip methods—like gentle chemical strippers, heat guns on low, or careful sanding—matched to the layer count and substrate.
Work in small sections and test your approach to avoid damaging the wall.
Assess Paint Layers
If you’re facing multiple paint layers, first determine how many coats and what types you’re dealing with so you can choose the safest removal method. You’ll inspect edges, test small sections, and note sheen differences to assess color mixing history and paint durability. Identify lead risk before proceeding.
- Scrape a tiny corner to reveal layers and adhesion.
- Use solvent tests (acetone/mineral spirits) to distinguish oil vs. latex.
- Record layer order, thickness, and visible damage.
With that data, you’ll pick removal tactics that protect substrate and minimize accidental gouging or overwork.
Controlled Strip Methods
Now that you’ve mapped the layers and identified paint types and any lead hazards, controlled strip methods give you a repeatable, low-risk way to remove multiple coatings without harming the substrate.
You’ll choose between chemical gels, infrared heaters, or small-scale abrasive techniques based on paint color depth and wall texture sensitivity. Test a 6-inch square to confirm removal rate and substrate reaction, adjusting dwell time or heat.
Work in overlapping passes, scrape gently with the correct blade angle, and neutralize residues when using solvents. Clean, prime, and match primer to original paint color before repainting to guarantee uniform finish.
How to Handle Lead Paint Safely: Testing and Legal Rules
Because old paint can hide serious health risks, you should treat any suspect surface as potentially lead-based until testing proves otherwise. You’ll need to follow rules: get a certified test kit or professional inspection, isolate the area, and avoid dry scraping.
Lead paint and legal regulations vary, so check local requirements before work. If tests confirm lead, hire certified abatement or follow containment, HEPA cleanup, and waste disposal rules. Don’t sand or torch.
Protect occupants and pets, wear PPE, and post warning signs. Keep records of tests, notifications, and contractor credentials to prove compliance.
- Test first
- Contain work
- Document actions
Renter-Friendly Methods That Meet Deposit Standards
When you need to remove paint without risking your deposit, focus on gentle, noninvasive methods that leave the surface ready for the landlord to accept. Start by testing a small area with a damp cloth and mild detergent; that often removes scuffs or minor paint without sanding.
Use a citrus-based remover or heat gun on low only where needed, keeping tools steady to protect wall texture. Clean residue thoroughly, let it dry, and touch up with matched paint—ensure color matching and sheen match the original.
Document the process with photos and receipts to prove careful, renter-friendly work.
How to Avoid Common Mistakes That Cause Gouges and Streaks
Pick the right tool for the job—a plastic scraper or fine-grit sanding block instead of a metal putty knife—to avoid cutting into the drywall.
Always test your method in an inconspicuous spot so you can adjust technique before visible damage occurs.
Work with gentle, even pressure to remove paint without leaving gouges or streaks.
Choose The Right Tool
Which tool you use matters more than how hard you press—choose one that matches your paint type and wall finish to avoid gouges and streaks. You’ll want tools that respect surface profile and finish: soft cloths for eggshell, plastic scrapers for latex, and metal scrapers only on sturdy trim.
Consider Color matching and Paint branding when selecting solvents or removers; some brands pair better with specific formulations.
- Soft microfiber or sponge: gentle on delicate finishes.
- Plastic or flexible scraper: removes flakes without cutting.
- Nylon brush or pad: lifts residue without abrading paint.
Test Inconspicuous Area
Before you start scraping or applying a solvent, always test in an inconspicuous spot so you can catch problems—like gouges, streaks, or finish reaction—before they show on the main surface.
Try your chosen tool and product on a hidden corner or behind furniture, noting how the paint lifts and whether the substrate ghosts through. Check color matching after removal; a patched area can betray you if underlying layers or primer differ, especially with vintage finishes that age or yellow.
Record what worked and what didn’t, so you repeat the safe method across the rest of the wall without surprises.
Use Gentle, Even Pressure
When you work the paint off the wall, use steady, gentle pressure so the scraper or solvent lifts the coating without digging into the drywall or plaster. Hard, uneven force causes gouges, streaks, and feathered edges that show up after priming. You’ll keep edges smooth by angling tools shallowly and letting solvent soften layers instead of forcing them.
Watch areas with varying paint gloss—they resist differently, so adjust pressure. Also remember underlying color mixing can make old layers look mottled; remove carefully to preserve substrate integrity.
- Test angle and pressure.
- Soak stubborn spots; don’t pry.
- Sand lightly after drying.
Prepping the Room to Protect Floors, Fixtures, and Vents
If you want to keep the rest of the room intact while removing paint, start by clearing furniture away from walls and covering floors with drop cloths or plastic sheeting; secure edges with painter’s tape so debris and liquids can’t seep underneath. Use furniture protection like moving blankets and plastic wrap; label and stack pieces. Seal fixtures and switches with tape and protective covers. Follow ventilation tips: open windows, run fans toward open doors, and cover vents temporarily with mesh filters to catch dust.
| Area | Protection | Quick tip |
|---|---|---|
| Floors | Drop cloths | Tape edges |
| Furniture | Blankets | Wrap & label |
| Vents | Mesh cover | Direct airflow |
Step-by-Step: Remove Paint From an Interior Wall
Now that the room’s prepped, tackle the wall in clear stages: work from top to bottom, score and soften stubborn layers, gently scrape or sand loose paint, and finish by cleaning the surface so repairs or repainting will adhere properly. You’ll protect trims, test removers in a hidden spot, and note paint sheen to guide your finish. Check color matching needs before final coats. Use these focused steps:
- Apply heat or remover, wait, then scrape softened paint gently.
- Sand feathered edges, vacuum dust, wipe with a mild solvent.
- Inspect under good light, repeat where needed, then prime.
How to Repair Minor Surface Damage After Paint Removal
Once the paint’s off, you’ll want to clean and prep the surface so dust and residue won’t interfere with repairs.
Fill small holes with spackling or joint compound, let it dry, then sand smooth.
Finally, sand and feather the edges of patched areas so your topcoat blends seamlessly.
Clean And Prep Surface
After you’ve removed the paint, assess the wall for nicks, gouges, and loose plaster so you can prioritize repairs before priming.
Clean the area with a damp sponge and mild detergent, rinse, and let it dry completely.
Lightly sand rough edges to blend repairs with existing wall texture and avoid sharp transitions.
Consider color matching early if patches will be visible after priming so you choose primer and paint that minimize contrast.
- Remove dust and grease thoroughly.
- Sand seams and feather edges for smoothness.
- Inspect for remaining loose material before sealing.
Seal and prime repaired spots before final painting.
Fill Small Holes
When you find small nail holes or tiny gouges after removing paint, patching them quickly prevents moisture and dirt from causing bigger problems and gives you a smooth surface for primer.
Use a ready-mixed spackling compound for holes under 1/2 inch; press it in with a putty knife, overfill slightly, and wipe excess. Let it dry fully, then test firmness.
If color matching matters for touch-ups, use a primer before final paint so the repair doesn’t show through.
Keep paint sheen consistent with surrounding areas when you repaint, and clean the area before applying any finish.
Sand And Feather Edges
Although the surface may look close to smooth, you’ll need to sand and feather the edges where paint was removed to blend repairs into the surrounding wall. You want consistent paint texture and careful edge smoothing so patched areas disappear.
- Use fine-grit sandpaper to level ridges, working outward from the repair.
- Feather with a sanding block at shallow angles to thin the repair into the old finish.
- Check paint texture; apply thin skim coats of joint compound if needed, then sand again.
Wear a mask, clean dust, and prime before repainting so the finish matches evenly.
When to Re-Prime vs When to Skim-Coat After Stripping
If the stripped wall shows only minor surface irregularities and the substrate feels solid, you’ll usually just need to clean and re-prime to restore adhesion and uniformity.
Re-prime when gaps are shallow, patches are tight, and you plan to match color and paint sheen; a quality primer seals porosity and helps topcoat hide differences.
Skim-coat when damage is deep, texture varies, or joints and gouges remain visible after cleaning. Apply thin, even coats, sand between layers, then prime the fresh compound.
Choose skim-coating for structural smoothing; choose priming for sealing and simple cosmetic correction.
How to Blend Stripped Areas So New Paint Looks Even
Because stripped spots catch the eye, you’ll need to feather, texture-match, and prime them so the new paint reads as one surface. Start by sanding edges smooth, apply joint compound sparingly, and recreate the wall’s texture before it dries. Use a primer to unify porosity, then test paint patches.
Feather edges, match texture, prime for uniform porosity—test paint patches so repaired spots blend seamlessly.
- Prep: feather edges, sand, and clean the area.
- Texture blending: replicate stipple or knockdown with matching tools and thin layers.
- Color matching: use swatches or a small patch test; adjust tint before rolling the final coat.
Work small, let each layer cure, and inspect under good light.
Time-Saving Tips for Large Rooms or Whole-House Projects
When you’re tackling large rooms or an entire house, plan your workflow to minimize trips, overlap tasks, and keep progress visible so you can move efficiently from one area to the next. Map zones, sequence stripping from top to bottom, and group similar tasks so you don’t switch tools constantly.
Use multi-room drop cloths, rolling tool carts, and labeled bins to save time. Try eco-friendly solutions like citrus-based strippers in batch containers to reduce rinsing, and use proven DIY hacks—plastic putty knives, adjustable sanding blocks—to speed work without risking wall damage.
Schedule short breaks to maintain a steady pace.
Cost Comparison: DIY vs Pro – Time, Materials, and Typical Prices
Planning and organization will save you time, but you’ll still face a key decision: whether to tackle paint removal yourself or hire a pro. You’ll weigh time, materials, and cost.
DIY saves labor but costs tools, strippers, and possible fixes for wall texture; pros charge labor but offer efficiency and color matching expertise.
- DIY: lower cash outlay, higher time investment; rent tools, buy materials, test patches.
- Hybrid: hire for tricky areas (textured walls), do the rest to balance cost and time.
- Pro: higher upfront cost, faster finish, accurate color matching and fewer mistakes.
When to Call a Professional Paint Removal Contractor
If your walls show lead paint, extensive damage, or complex textures that could be ruined by scraping, call a professional—these jobs need specialized training, containment, and tools to protect your health and the wall surface.
You should also hire a contractor when the scope overwhelms your schedule, when structural issues lurk behind paint, or when you’re dealing with historic finishes requiring historical preservation best practices.
A pro will assess substrate stability, recommend safe removal methods, and coordinate permits.
Ask about credentials, insurance, and whether they offer eco-friendly solutions.
Get multiple bids and written scopes before you commit.
Eco-Friendly Paint Removal Options and Disposal Tips
Because removing paint can create dust, fumes, and contaminated waste, choose methods and disposal routes that minimize harm to people and the planet. You can use eco friendly solvents, heat guns on low settings, or gentle sanding with HEPA vacuums to reduce emissions.
Because paint removal makes dust and fumes, pick low-emission methods — green solvents, low-heat tools, and HEPA sanding.
Follow local Disposal guidelines for leftover solids and contaminated rags; seal and label waste.
Wear PPE and ventilate; keep children and pets away.
Consider donating reusable tools and rinsing brushes into sealed containers for proper drop-off.
Check municipal programs for household hazardous waste days so you handle remnants responsibly and avoid illegal dumping.
- Eco friendly solvents
- Low-heat removal
- Follow Disposal guidelines
How to Dispose of Chemical Strippers and Paint Waste Safely
Wondering how to get rid of leftover chemical strippers and paint without harming people or the environment? You should treat them as hazardous waste: never pour strippers or paint down drains, onto soil, or into regular trash.
Check local chemical disposal programs or household hazardous waste events for drop-off options. Seal containers tightly, label contents, and store them upright in a ventilated area until disposal.
Use absorbent material to solidify small liquid leftovers and include it with the sealed container. Document disposal per local waste management guidelines, and consult your municipality if you’re unsure—proper handling protects health and the environment.
Best Products by Wall Type and Task
Now that you’ve handled disposal responsibly, let’s look at the right products for the job. You’ll pick tools that respect substrate and future Color matching, and that preserve Paint durability for repainting. Choose based on wall type and task:
- For drywall: mild citrus stripper or sanding sponge; finish with primer to aid color matching and protect paint durability.
- For plaster: gel remover and plastic scraper to avoid gouges; touch-up with breathable primer to maintain durability.
- For masonry or brick: pressure washer plus masonry cleaner; use masonry paint compatible with original color matching and high durability.
Troubleshooting: What to Do If Paint Won’t Come Off
If stubborn paint won’t budge, start by identifying why — age, multiple layers, oil-based coatings, or a poor initial bond all change your approach — then pick a targeted method rather than repeating the same attempt.
Test small areas, noting whether solvent, heat, or gentle scraping loosens layers.
For older finishes, consider research into historical paint techniques to avoid damaging underlying surfaces.
If chemicals stall, switch to eco-friendly removal methods like soy or citrus-based strippers, or low-heat infrared tools.
Work methodically, ventilate, and wear protection.
When one tactic fails, reassess adhesion and try a different, gentler strategy before escalating.
Troubleshooting: What to Do If the Wall Surface Gets Damaged
When paint removal damages the wall—scrapes, gouges, or softened drywall—you’ll want to stop and assess the harm before continuing. Check depth and extent, note surrounding paint sheen, and decide if patching, sanding, or replacing drywall is needed. Protect the area and gather tools.
- Clean and dry the damage, sand edges smooth, fill gouges with spackle or joint compound.
- After curing, sand flush, apply appropriate primer for wall priming to seal repairs and control paint sheen differences.
- Feather repair edges, inspect under good light, then repaint only when the surface is stable and sealed.
How to Prevent Paint Adhesion Problems After Repainting
Because proper adhesion starts before you roll the first coat, take steps that guarantee the new paint bonds to the surface. Clean dirt and grease, sand glossy spots to match wall texture, and use a quality primer suited to the substrate. Ventilate to disperse paint fumes and speed drying. Allow recommended cure times between coats; rushing invites peeling. Test a small patch to confirm adhesion before finishing. If old paint is flaking, remove loose material fully. Follow manufacturer instructions for temperature and humidity limits.
| Task | Tip |
|---|---|
| Clean | Use mild detergent |
| Prime | Match primer to surface |
Seasonal and Environmental Factors That Affect Removal Success
Although weather and indoor conditions often go unnoticed, they directly affect how easily paint comes off your walls and how safe removal will be. You should consider temperature, humidity, ventilation, and how solvents or heat may interact with finishes.
Weather and indoor conditions directly influence paint removal—consider temperature, humidity, ventilation, and solvent interactions.
Think about environmental impact when choosing methods and solvents, and plan around Seasonal timing to avoid extremes.
- Temperature: work between 50–80°F to keep strippers effective and adhesives predictable.
- Humidity & ventilation: high moisture slows drying and raises mold risk; ventilate to disperse fumes.
- Outdoor factors: wind, rain, and disposal rules change cleanup and waste handling.
Quick Checklist to Follow Before You Start Removing Paint
Now that you’ve considered how weather, humidity, and ventilation affect paint removal, get a quick checklist in place so the job runs safely and smoothly.
Confirm the paint type and test a small area. Check for lead-safe protocols if the house is old.
Clear furniture and protect floors with drop cloths. Verify ventilation and comfortable temperature to aid paint drying on repaired spots.
Gather tools, PPE, and appropriate solvents or strippers. Mix chemicals only per label—never improvise color mixing or dilution.
Have a waste plan and first-aid kit ready. Pause if unexpected issues appear; reassess before continuing.
Resources and Where to Find Local Regulations
Before you begin, gather reliable resources so you can follow local rules and protect yourself and your home. Check municipal codes for paint disposal and lead rules if your home’s old layers may contain lead; local environmental agencies post guidance online. Contact your waste authority for hazardous-material drop-off schedules.
Ask hardware stores about safe products that suit your interior lighting and won’t harm wall surfaces or wall decoration. Use certified renovator directories for lead-safe practices.
- Municipal code websites
- Local waste authority
- Certified renovator or licensed contractor
Keep records of permits and guidance you consult.
Frequently Asked Questions
Can Paint Removal Reveal Mold or Hidden Water Damage Behind Walls?
Yes — when you remove paint you can reveal mold or hidden water damage behind walls. You’ll notice stains, musty smells, or soft drywall; use mold detection methods and address water damage promptly to prevent bigger problems.
Will Removing Paint Affect Built-In Insulation or Vapor Barriers?
Yes — if you strip paint aggressively, you can damage vapor barriers or insulation; you’ll want gentle methods that preserve wall texture and avoid removing paint primer layers, so proceed cautiously and test small areas first.
How Do I Protect Electrical Outlets and Wiring During Paint Stripping?
You’d think sparks’ll launch fireworks—so you’ll prioritize electrical safety: shut power, label breakers, remove covers, tape outlets with plastic and use outlet protection inserts, keep wires dry and clipped, and use insulated tools cautiously.
Are There Insurance Implications for DIY Paint Removal in My Home?
Yes — you should check insurance coverage because DIY paint removal can trigger liability concerns if damage or injury occurs; you’ll want to notify your insurer and document precautions to avoid denied claims or increased premiums.
Can Pets’ Exposure to Removed Paint Particles Cause Health Issues?
Like storm dust, paint particles can harm pets; you should prioritize pet safety by sealing work areas, using HEPA vacuums, and keeping animals away, since inhalation or ingestion can cause serious health concerns and veterinary visits.
Conclusion
You’ve learned how to identify paint types, how to test adhesion, and how to choose gentle removal methods for drywall, plaster, wood, and brick. You’ll prepare the room, protect surfaces, and work methodically. You’ll use heat or chemicals carefully, scrape or sand with control, and clean and prime for a smooth repaint. You’ll respect seasonal limits, follow local rules, and call a pro when risk is high—so your walls’ll look right and last.