How to Remove Wallpaper and Paint Walls Easily
You can remove wallpaper and paint your walls easily by first evaluating wall type and paper condition, then protecting floors and trim. Score stubborn vinyl, soften adhesive with a steamer or remover, and gently scrape in small sections. Clean, patch gouges, sand smooth, then prime with a stain-blocking or high-build primer before painting. Work methodically, use quality tools, and test a small area first; keep going and you’ll pick up tips for faster, cleaner results.
Can You Paint Over Wallpaper: Or Must You Remove It?
If the wallpaper is firmly stuck and in perfect condition, you can paint over it, but most pros recommend removing it first because paint won’t bond well to loose seams, textured surfaces, or paper that’s already peeling. You’ll check adhesion, seams, and texture before deciding.
Smooth, well-glued wallpaper patterns might accept primer and paint, but embossed or vinyl-coated papers often resist absorption and create paint compatibility issues.
If seams lift or the paper bubbles, remove it. When in doubt, test a small area with bonding primer to confirm paint compatibility so you don’t trap moisture or create peeling later.
How to Use This Guide (What’s Covered, Who It’s For)
Because wallpaper situations vary, this guide breaks down each step so you can quickly find the advice that fits your wall. You’ll get concise sections on removal methods, tools, safety, and prepping for paint, with tips tied to common wallpaper patterns and wall textures.
It’s for DIYers with basic tools and pros wanting a refresher. Skip to the section matching your situation, or follow start-to-finish if you prefer.
Expect troubleshooting, time estimates, and finishing techniques that help you avoid damage and save effort. If you need a simpler checklist, use the quick-reference page near the end.
Assess Your Walls: Wall Type and Wallpaper Condition
Before you start scraping, check what your walls are made of—drywall, plaster, or cement will affect how you work.
Look closely at the wallpaper for seams, multiple layers, or water damage so you know if it’ll peel off or need stripping.
That quick inspection lets you pick the right tools and method.
Identify Wall Material
When you start removing wallpaper, the first step is to identify what your walls are made of and how the paper is attached so you can choose the right tools and method.
Check for wall texture—smooth, orange peel, or heavy plaster grit—and note visible seams, nail heads, or plaster cracks.
Tap walls to hear hollow studs or solid masonry.
For material identification, look behind outlets or baseboards for drywall paper, plaster lath, or brick.
Knowing the substrate prevents damage: drywall soaks, plaster resists moisture, and masonry needs different tools.
Mark wall types before you begin removing paper or applying treatments.
Inspect Wallpaper Condition
As you inspect the wallpaper, look for loose seams, bubbled areas, multiple layers, and water damage—the condition tells you how stubborn the paper will be and whether the wall underneath may be compromised.
Check wallpaper patterns for alignment shifts or seams that lift; patterned paper often hides damage and may indicate pasted strips rather than removable prepasted types.
Peel a corner to test adhesion and note any stubborn adhesive residue left on drywall or plaster.
Tap and listen for hollow sounds that suggest delamination.
Record findings so you can choose the right remover, tools, and repair approach before you start stripping.
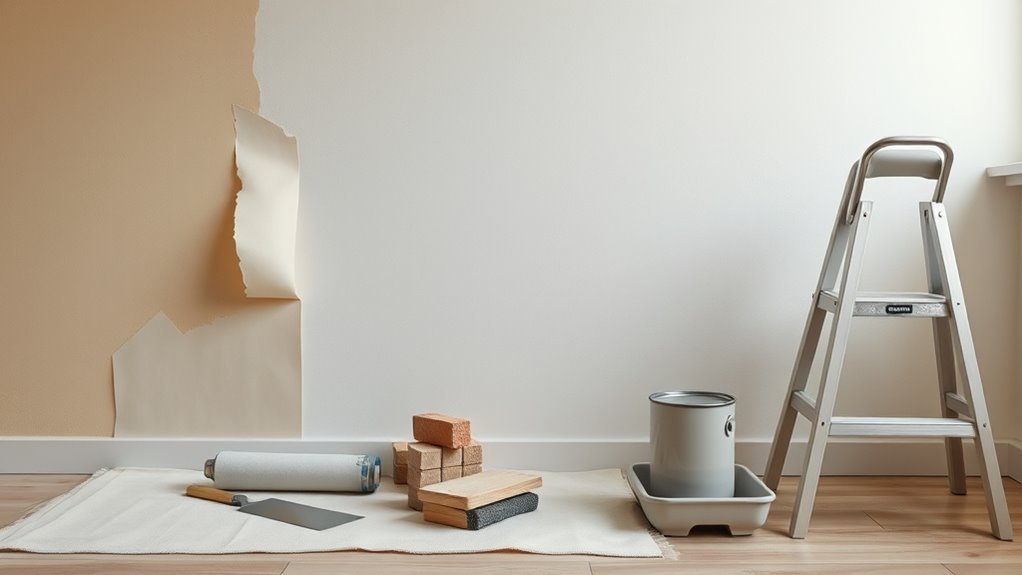
Tools and Supplies You’ll Need for Wallpaper Removal
You’ll need a few essential tools and supplies to strip wallpaper efficiently: a scoring tool, spray bottle or wallpaper steamer, scraper or putty knife, adhesive remover or stripping solution, drop cloths, sponge and bucket, and protective gear like gloves and goggles.
Before you start, match tools to wallpaper patterns and adhesive types so you choose gentle or aggressive methods. Have extra blades, a small utility knife for seams, plastic sheeting for vertical protection, and a stiff brush for residue.
Keep a container for discarded strips and a respirator if using strong solvents. Prep supplies save time and prevent wall damage.
Protect Floors, Furniture, and Trim
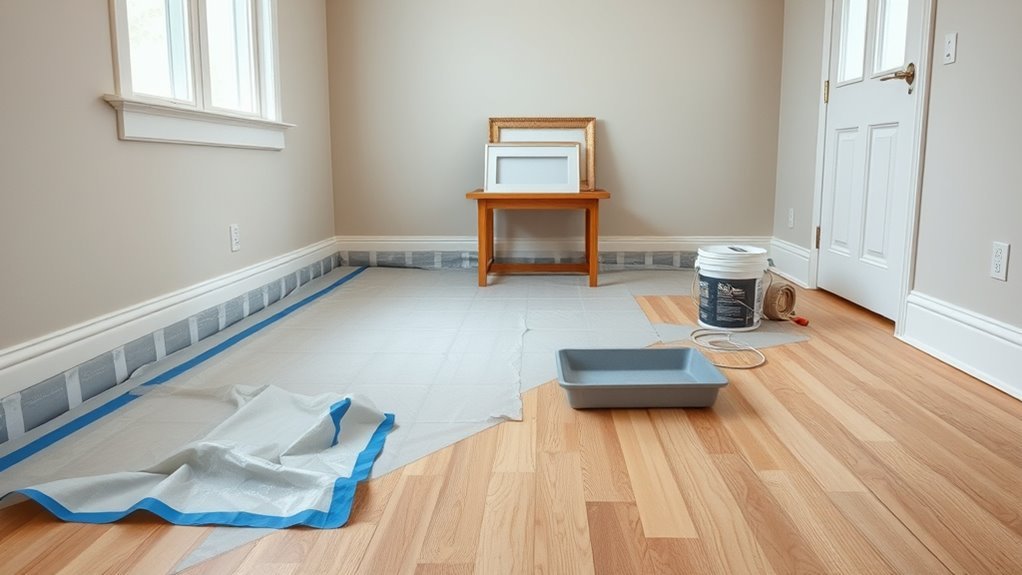
Before you start stripping, cover and secure everything that could get ruined—floors, furniture, and trim—so dust, water, and adhesive don’t create extra work. Lay down floor protection like rosin paper or a contractor’s plastic, and move small pieces or wrap them with furniture covering. Tape edges along baseboards and use corner guards on trim. Keep a trash bin and microfiber cloths handy to catch debris and wipe spills immediately.
- Roll out heavy-duty floor protection
- Drape furniture with breathable covers
- Tape seams and lift points securely
- Protect door thresholds and vents
- Keep tools on a dropped cloth
3 Ways to Loosen Wallpaper: Score, Steam, Strip
Before you steam, score the paper with a handheld scorer so the moisture can penetrate and loosen the adhesive.
If steaming isn’t enough, try a chemical stripper applied per the manufacturer’s instructions to break down stubborn paste.
Always work in small sections and protect surrounding surfaces as you go.
Score Before Steaming
If the paper won’t let water or steam through, score it first so the moisture can penetrate and loosen the adhesive underneath. You’ll avoid tearing and speed the removal timeline by making tiny holes across tough wallpaper patterns. Use a scoring tool gently—don’t gouge the drywall. Work in small sections so steam and water reach layers uniformly. After scoring, steam as directed and peel with a putty knife at a low angle.
- Choose a hand scorer or roller
- Test a hidden corner first
- Keep pressure light and even
- Score vertically and horizontally
- Wear gloves and eye protection
Use Chemical Stripper
When scoring and steaming don’t do the trick, a chemical stripper can break down stubborn paste so you can scrape wallpaper away more easily. You’ll wear gloves, ventilate the room, and apply the solution in sections, waiting the manufacturer’s time. Test a small spot, then scrape gently with a putty knife. Neutralize residue, rinse, and let the wall dry before sanding or priming. Chemical stripping speeds wallpaper removal but needs caution: follow instructions, avoid mixing products, and keep kids and pets out. If you want, repeat for stubborn areas or switch to steaming.
| Tension | Relief | Hope |
|---|---|---|
| Frustration | Progress | Clean wall |
| Overwhelm | Control | Fresh start |
| Sticky paste | Solution | Calm |
| Time sink | Efficiency | Pride |
Step-by-Step: Efficient Wallpaper Stripping Technique
Though the job looks messy, you can strip wallpaper quickly by following a clear, methodical sequence. Start by protecting floors and removing outlet covers.
Score or loosen the top layer, apply warm water or remover, and peel with a wide scraper at a shallow angle. Work in panels, rinse residue, and let the wall dry before priming for new paint color or addressing wallpaper patterns that influenced your prep.
- Clear the room and cover surfaces
- Turn off power and remove fixtures
- Score and wet the paper evenly
- Scrape gently in sections
- Clean, sand, and dry before priming
Handle Stubborn Wallpaper, Vinyl, and Multiple Layers
When wallpaper won’t budge, you’ll want to soften the adhesive with a steamer or scoring and a stripping solution.
Peel away any vinyl top layers carefully, since they often come off in sheets while the backing stays.
Once all layers and residue are removed, sand and prime the surface so it’s ready for paint.
Soften Stubborn Adhesive
If adhesive’s clinging despite your best efforts, you’ll need to soften it before scraping; heat, moisture, and the right chemicals break down stubborn glue so the paper peels without gouging the wall. You want focused adhesive removal and practical softening techniques.
Test a small area first, then proceed methodically: use heat to loosen glue, apply steam or warm water to hydrate layers, try a diluted wallpaper remover for tough spots, and always protect drywall.
Work from seams outward and scrape gently when the adhesive feels tacky rather than dry.
- Heat gun at low setting
- Steam cleaner or steamer
- Warm soapy water
- Commercial remover
- Soft scraper and sponge
Remove Vinyl Layers
Now that you’ve loosened adhesive, tackle vinyl and multi-layer jobs with patience and the right tools—these surfaces resist water and need mechanical and chemical help.
You’ll score vinyl layers with a utility knife to let remover penetrate, then apply a solvent or wallpaper stripper per instructions.
Use a stiff scraper and putty knife at a low angle to lift edges without gouging. For textured surfaces, switch to a softer scraper and test small areas so surface texture stays intact.
Work in sections, reapply remover as needed, and clean residue thoroughly before moving on to the next wall.
Prep For Painting
Because stubborn wallpaper often leaves glue, tears, or bits of vinyl behind, you’ll want to treat the surface like a repair project before you paint. Inspect for remaining vinyl, test Wallpaper durability by probing edges, and sand glossy spots. Remove loose fragments, then neutralize adhesive with a cleaner. Patch gouges and fill seams; let primer seal varied porosity so Paint color selection reads true.
- Scrape loose vinyl gently
- Use adhesive remover where needed
- Sand and clean dust thoroughly
- Apply patching compound and sand smooth
- Prime with a bonding primer suited to surface
You’ll end up with an even, paint-ready wall.
Removing Old Paste and Adhesive Stains
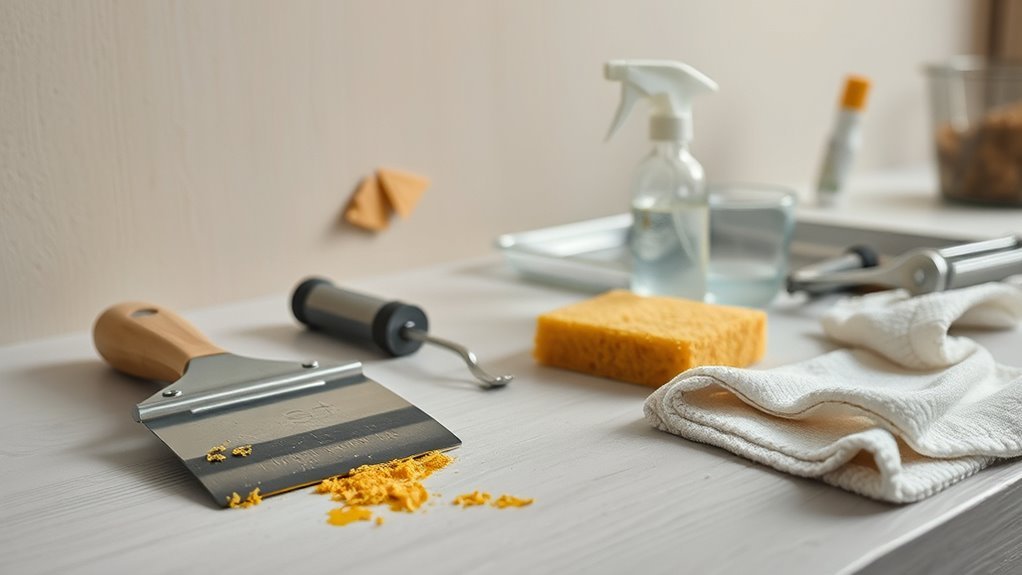
Once you’ve stripped the paper, you’ll still see stubborn paste and adhesive patches clinging to the wall; you’ll tackle these next with the right tools and techniques.
After removing the paper, expect stubborn paste and adhesive patches—tackle them next with the right tools and patience
For wallpaper removal residue, soften paste with warm water and a sponge, working in small sections. Use a mixture of equal parts vinegar and water or a commercial adhesive remover for tougher spots—test first in an inconspicuous area.
Gently scrape with a plastic putty knife to avoid gouging. Rinse thoroughly, repeat as needed, and let the wall dry completely.
Proper cleaning guarantees paint will adhere and prevents future peeling from lingering adhesive stains.
Repair the Wall: Fill, Sand, and Level Seams
Now that the adhesive’s gone, you’ll want to fill any nail holes and gaps with spackling or joint compound. Let the filler dry, then sand seams and filled spots smooth so they blend with the wall.
A flat, even surface makes priming and painting much easier and more professional-looking.
Fill Nail Holes
After stripping wallpaper and smoothing seams, you’ll want to tackle nail holes so your paint goes on evenly and looks professional. You’ll inspect walls, press out loose debris, and choose a ready-mixed wall patch or lightweight spackling for small nail hole repairs.
Use a putty knife to apply, feathering edges flush with the surface. Let dry fully, then check for low spots and reapply tiny amounts if needed. Finish by wiping dust before priming and painting.
- Find every nail hole
- Remove loose paint or dust
- Apply wall patch or spackle
- Feather edges with a putty knife
- Let dry completely before finishing
Sand Seams Smooth
When the filler’s dry, sand each seam until it blends smoothly with the surrounding wall so paint won’t highlight ridges or dips.
Use a sanding block with 120–150 grit for flat areas, switching to finer grit for a final touch. Sand seams evenly, keeping pressure consistent to avoid low spots.
Wipe away dust with a damp cloth and inspect under raking light to catch imperfections.
For uneven joints, reapply thin filler, let dry, then repeat sanding.
Good surface smoothing guarantees primer and paint lay flat and hide repairs, giving you a seamless, professional-looking finish.
Repair, Then Prime: Drywall Primer or Wallpaper Sealer?
Once you’ve removed the wallpaper and fixed dents or seams, choose the right primer. You’ll decide between a drywall primer or a wallpaper sealer based on surface condition and future finish.
Consider lingering adhesive, textured paper impressions, and paint compatibility with your chosen topcoat. Use a sealer for stubborn stains or residual paste; pick a high-build drywall primer to level and bind porous patches.
Factors to weigh:
- Hidden adhesive spots
- Surface porosity after sanding
- Remaining wallpaper patterns
- Stain-blocking needs
- Desired topcoat adhesion
Prime to stabilize, then wait the recommended dry time before painting.
Prep, Prime, and Seal: Step-by-Step Wall Prep Before Painting
Before you paint, prepare the surface carefully: clean any dust or grease, repair imperfections, and mask trims so primer and paint adhere evenly and give a professional finish.
Remove residual adhesive from old wallpaper patterns, sand glossy spots, and patch holes with joint compound. Vacuum and tack cloth to remove dust.
Choose a primer suited for drywall or sealed surfaces and consider paint compatibility with the primer to prevent peeling.
Apply one coat of primer, let it dry, then lightly sand for smoothness.
Seal repaired areas with a thin skim coat where needed. Allow full cure before painting for lasting results.
Choose Paint Finish and Color After Wallpaper Removal
Thinking about finish and color? You’ll want choices that hide any traces left from wallpaper patterns while matching room use and light. Consider durability, sheen, and mood before buying samples. Test patches show real effect; live with them a few days.
- Soft matte to conceal texture and minor flaws
- Satin for easy cleaning in high-traffic areas
- Eggshell for subtle warmth in living spaces
- Semi-gloss for trim and moisture-prone rooms
- Deep, muted tones to minimize pattern remnants
Pick paint sheen based on function, then choose color that complements lighting and existing finishes.
Painting Technique for a Uniform, Durable Finish
Now that you’ve picked the right sheen and color, focus on technique to get an even, long-lasting finish. Prep thoroughly: sand rough spots, fill imperfections, and wipe dust. Tape trim and cover floors. Prime seams where wallpaper patterns once showed through or where stains remain.
Use a good-quality roller and brush; cut edges first with a steady brush, then roll in W-shaped strokes for uniform coverage. Work in manageable sections and maintain a wet edge to avoid lap marks.
Allow proper drying between coats, inspect under good light, and apply a second coat of the chosen paint color for durability.
Time-Saving Wallpaper Removal Hacks (Budget Options)
If you want to speed up wallpaper removal without spending much, focus on a few smart, low-cost hacks that cut labor and mess. You’ll use Budget hacks and DIY shortcuts to work faster and cleaner. Score seams, soften adhesive, and peel in wide strips; repeat wetting for stubborn areas. Protect floors and vents; keep a trash bag handy. Try a fabric steamer rental or a pumice pad for textured paper.
Speed up wallpaper removal with cheap hacks: score seams, soften adhesive, peel wide strips, and protect floors.
- Score seams with a multi-tool
- Use a spray bottle with warm water + vinegar
- Rent a steam cleaner briefly
- Peel from top in wide strips
- Use a plastic scraper and rags
When to Call a Pro: Signs You Need Professional Help
Those budget tricks will get you through most jobs, but some situations call for a pro. If wallpaper peels in large areas, underlying drywall looks crumbled, or repeated attempts fail, seek professional assistance.
Call someone when electrical wiring, plumbing, or structural issues are exposed, or when ceilings and high walls pose fall risks you can’t safely manage. You’ll also want help if you lack proper tools, time, or the project scope grows beyond DIY.
Pros handle permits, disposal, and guarantee work meets code. Prioritize safety considerations—don’t gamble with hazards; hire expertise to protect your home and health.
Troubleshooting Common Problems: Mold, Gouges, and Stains
When you find mold, gouges, or stubborn stains after stripping wallpaper, tackle each problem with the right fix rather than one-size-fits-all methods. You’ll want to address mold quickly with Mold prevention steps, repair gouges, and lift stains before priming and painting.
Start by cleaning, then assess damage and choose materials.
Start by cleaning, assess the damage, and pick the right materials before repairing and refinishing.
- Use a bleach solution or commercial mold cleaner for visible growth.
- Sand and disinfect the area thoroughly.
- Apply patching compound for Gouge repair, then sand smooth.
- Treat oil or ink stains with a stain-blocking primer.
- Make certain proper ventilation and humidity control for long-term Mold prevention.
Frequently Asked Questions
Can Wallpaper Chemicals Harm Pets or Children in the Home?
Yes — you should assume chemical hazards can harm kids and pets; you’ll limit exposure, use pet safety products, ventilate, wear gloves, keep animals and children away during application, and store/remove chemicals safely to prevent poisoning.
How Long Should Freshly Painted Walls Cure Before Rehanging Artwork?
Like a fresh coat dries on a sunny day, you should wait at least two weeks before rehanging artwork. During Painting preparation use proper Wall cleaning techniques; humid conditions might need three to four weeks for full cure.
Can Wallpaper Removal Release Lead or Asbestos Hazards?
Yes, it can: you’re risking disturbing old wallpaper residue that may contain lead or asbestos, and adhesive fumes can complicate exposure. Wear respirators, vent well, test materials first, and hire professionals if you suspect contamination.
Will Removing Wallpaper Affect HVAC or Electrical Outlets in Walls?
About 30% of DIYers report unexpected outlet issues: you’ll minimize problems by removing wallpaper adhesive carefully near electrical wiring; avoid saturating outlets, turn power off, and reseal or replace damaged outlet boxes to protect HVAC and circuits.
How Do I Dispose of Old Wallpaper and Adhesive Responsibly?
You should bag wet scraps after wallpaper steaming, scrape residual adhesive into sealed containers, and check local hazardous-waste rules; you’ll compost biodegradable backing, recycle paper where accepted, and never drain solvents or strong adhesive into sewers.
Conclusion
You’ve got the gist now: like Odysseus steering tricky seas, you’ll decide whether to strip the old map (remove wallpaper) or sail straight on (paint over). Follow the steps, protect surfaces, use the right tools, and patch any battle scars before painting for a smooth, lasting finish. Use the time-saving tricks if you’re on a budget, and call a pro when the walls fight back—then enjoy the new room you’ve earned.