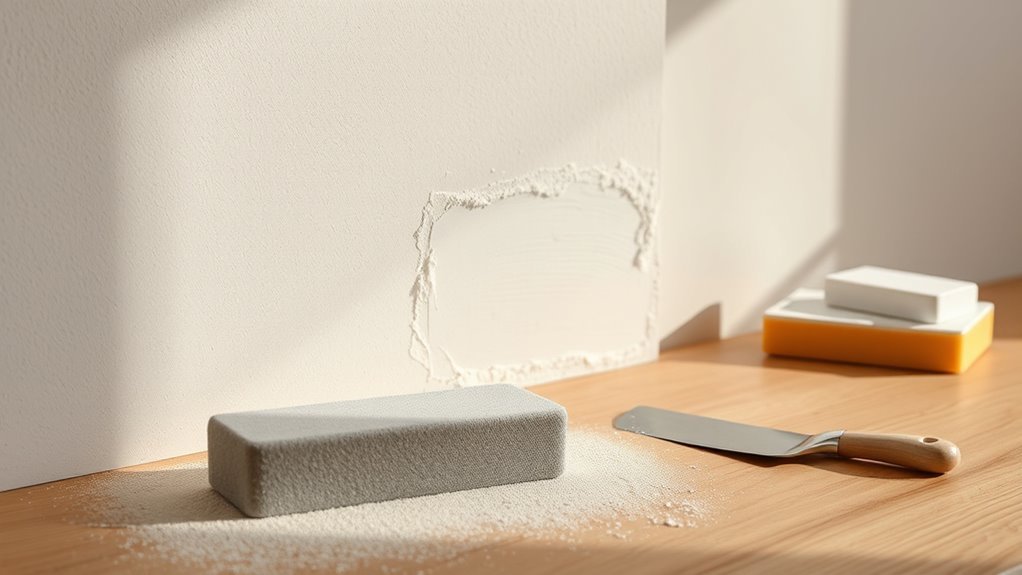
How to Sand Paint Off a Wall Properly
Start by testing for lead and checking adhesion, then clear and seal the work area and put on a NIOSH respirator, gloves, goggles, and coveralls. Clean and dry the wall, then sand with an orbital sander using 80 grit for heavy buildup, 120 for smoothing, and 220 to finish, feathering edges and keeping the sander moving to avoid gouges. Vacuum and tack-cloth the surface, inspect under good light, prime when smooth and dust-free, and keep going for tips on stain, stripper, and primer choices.
Quick Start: Sand Paint Off a Wall (5-Step)
Before you begin, gather the right tools—sandpaper in varying grits, a sanding block or orbital sander, a scraper, tack cloth, and protective gear—so you can work efficiently and safely.
Start by testing a small area to assess paint texture and adhesion.
Begin by testing a small area to check paint texture and adhesion before you proceed.
Step 1: scrape loose paint.
Step 2: sand coarse grit to remove layers, keeping even strokes for consistent color coordination when you later repaint.
Step 3: switch to finer grits to feather edges and smooth roughness.
Step 4: wipe with a tack cloth.
Step 5: inspect under good light, repeat sanding where needed before priming.
When to Sand Vs. Strip or Repaint
You’ll want to sand when the old paint is mostly intact and you just need to remove gloss or rough spots for a smooth finish.
Strip the paint if it’s peeling, layered, or was applied over incompatible coatings that sanding can’t fix.
If the surface is sound but ugly, repainting without aggressive removal is often the quickest option.
When To Sand
If the paint is peeling, crazed, or has rough edges that won’t hide under a fresh coat, sand it. If it’s firmly adhered and only shows minor scuffs, you can often just clean and repaint.
You should sand when adhesion fails, texture is uneven, or glossy finishes prevent new paint from bonding. Use appropriate sanding techniques—hand sanding for small spots, orbital sanders for larger areas—and match grit to the job.
Sand when filling cracks or smoothing progressions before priming. Don’t sand lead-painted surfaces without testing.
Prioritize safe paint removal methods and proper cleanup so new paint adheres and looks uniform.
When To Strip
When the old finish won’t sand smooth, keeps flaking, or was applied in many thick layers, it’s time to strip rather than sand or just repaint. You should strip when paint hides damage, contains lead (common in historical paint), or prevents adhesion.
Test for lead and consult regulations before disturbing hazardous layers. Choose an eco-friendly removal method—mechanical scraping with containment, infrared heat, or biodegradable chemical strippers—to reduce fumes and waste. Wear PPE, ventilate, and protect surrounding surfaces.
After stripping, clean residues, repair substrate, and prime appropriately. Stripping buys a stable base and longer-lasting results than covering problems.
Test Paint: Adhesion and Lead First
Before you start sanding, check the paint’s adhesion and test for lead to protect yourself and avoid extra work later. You’ll evaluate layers, understand paint chemistry, and plan surface preparation before touching tools.
Do a simple scrape test and a swab for lead if the home’s old.
- Scrape a small area to see if paint flakes easily
- Use EPA-approved lead test kits when age suggests risk
- Note different layers and finishes for sanding approach
- Clean the surface to reveal true adhesion
- Record results to decide between sanding, stripping, or encapsulating
Safety Gear: PPE and Lead Precautions
Because sanding can kick up fine dust and flakes that you’ll breathe or track through the house, you need proper PPE and strict lead precautions. Wear a NIOSH-rated respirator (N95 or P100), disposable coveralls, gloves, and eye protection to prevent inhalation and skin contact.
Use HEPA-filtered tools or local exhaust when possible, and seal the work area with plastic sheeting. Assume older paint may contain lead; follow Lead safety protocols: wet-sanding to minimize dust, collect debris in sealed bags, and never dry-sweep.
Wash hands and clothes separately, and dispose of waste per local hazardous-waste rules.
Tools and Sandpaper Grits You Need
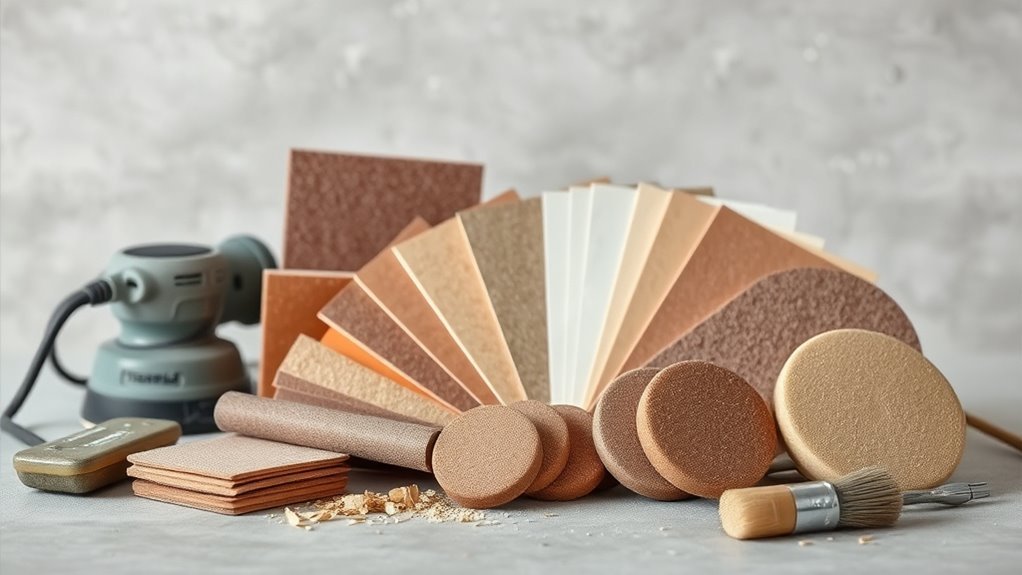
Now that you’ve got protective gear and lead precautions sorted, gather the right tools and sandpaper so the job goes smoothly and safely. You’ll want a mix of hand and power tools to control pressure and preserve drywall or trim.
Consider how painting techniques and color matching affect how much you sand before repainting.
- Orbital sander (variable speed)
- Sanding block (medium firmness)
- Assorted sandpaper: 80, 120, 220 grits
- Detail files/needle files for trim
- Vacuum attachment and tack cloths
Choose coarser grits for old build-up, finer grits for a smooth finish.
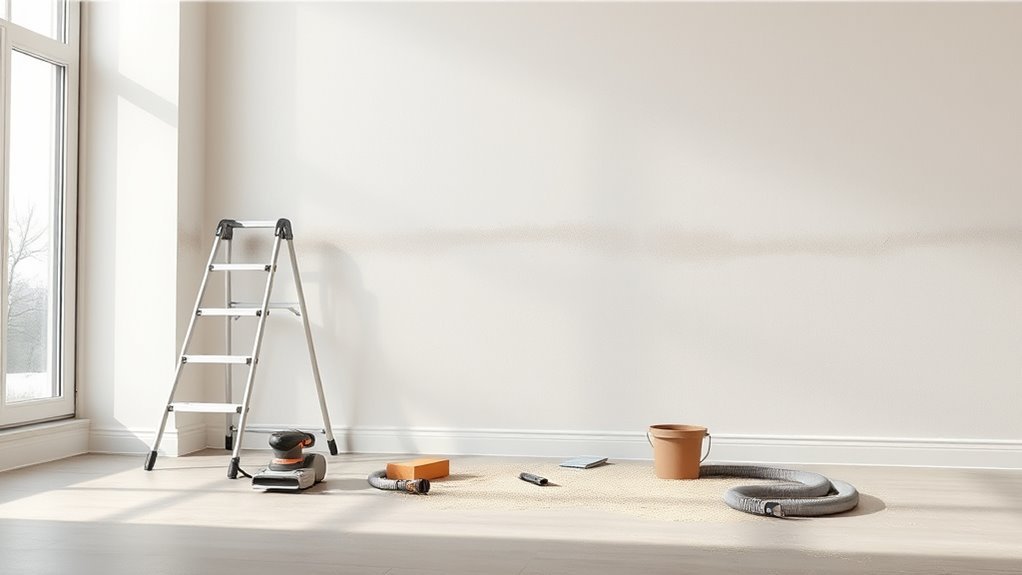
Set Up the Room: Control Dust & Protect Surfaces
Before you sand, seal off doorways with plastic sheeting and tape to keep dust from spreading through the house.
Lay drop cloths or plastic on floors and drape furniture with covers so particles can’t settle.
Doing this once, carefully, saves you a lot of cleanup later.
Seal Off Doorways
How will you keep sanding dust from spreading through the house? Focus on doorway sealing for effective dust containment. Close doors, then create barriers so dust stays where you sand. Use simple, removable methods that seal gaps without glue or damage.
- Hang plastic sheeting over frames
- Tape the edges with painter’s tape
- Install a zipper doorway for access
- Roll a draft stopper under the door
- Use a box fan facing outward near the doorway
Check seals for gaps before sanding. Maintain negative pressure if possible by exhausting air toward windows. Replace taped edges when they loosen.
Cover Floors & Furniture
Once you’ve sealed doorways, cover floors and furniture thoroughly so dust and paint particles can’t settle or scratch surfaces.
Lay a durable floor covering—contractor-grade paper, rosin paper, or drop cloths—taped at seams to prevent trips and gaps.
Drape furniture with breathable cloths or plastic sheeting, securing edges with low-tack tape for furniture protection without damaging finishes.
Elevate small items on sealed trays or pull them into another room.
Keep a vacuum and tack cloth nearby to clean as you go.
Remove coverings carefully to avoid stirring settled dust, disposing or laundering materials according to contamination and paint type.
Hand-Sanding Small Spots and Edges
When you need to remove paint from tight spots, corners, or trim, hand-sanding gives you control that a power sander can’t match; it lets you work slowly and feel the surface so you don’t gouge the substrate.
You’ll avoid common painting myths by using correct sanding techniques: choose fine-grit, fold sandpaper for edges, and sand with the grain. Use light pressure and check progress often. Keep dust down and wear a mask.
- Folded sandpaper for corners
- Sanding block for flat spots
- Detail files for trim
- Vacuum between passes
- Soft cloth wipe after sanding
Electric Sander: Pads, Speeds, Motions
When you switch to an electric sander, pick the right pad—coarse for old paint, medium for smoothing, and fine for finish work.
Match the pad to a speed setting that removes paint without burning the surface—lower speeds for softwoods and detail, higher for stubborn layers on trim.
Use steady, overlapping motions and keep the sander moving to avoid gouges and uneven spots.
Pad Types Explained
As you pick up an electric sander, know that the pad type, speed setting, and your hand motions all determine how quickly and cleanly paint comes off without damaging the wall.
Choose pads by surface and paint formulation: soft foam for fine sanding, interface pads to reduce swirl, firm hook-and-loop for aggressive removal, mesh pads to cut dust, and sanding discs for edge work.
Match pad to sanding techniques: light pressure, steady passes, and overlap strokes.
Use the right pad to avoid gouging fresh drywall or thin primers.
Test on a small area before tackling the whole wall.
Optimal Speed Settings
Although it’s tempting to crank the sander to full power, you’ll get better results by matching speed to pad type, paint hardness, and wall material.
Start low with soft pads on drywall repair to avoid gouging; medium speeds work for latex and most oil-based paints when using firmer pads. Increase rpm for stubborn enamel or multiple coats, but test an inconspicuous spot first to confirm paint compatibility and avoid overheating.
For skim-coated or fragile surfaces, keep speed minimal and use light pressure. Monitor dust, smell, and surface texture; adjust speed incrementally until you achieve smooth, even stripping without damage.
Sanding Motions Guide
Because motion, pad choice, and speed work together, you’ll get the best finish by syncing how you move the sander with the pad type and rpm. Match motions to surface and paint thickness: light circular passes for smoothing, straight strokes with the grain for leveling, and short cross-hatches to remove drips. Consider how finish affects color psychology and note historical paint trends when aiming for authenticity.
- Use soft foam for light scuffing.
- Use medium foam for thin coats.
- Use coarse pads for heavy build.
Slow rpm for control.
Fast rpm for rapid removal.
Adjust pressure; let the pad do the work.
Sanding Large Walls and High Areas
When you’re tackling large walls or areas high above the floor, plan your path and tools before you start so you won’t waste time relocating ladders or redoing sections. You’ll work systematically: top-to-bottom, left-to-right, keeping consistent pressure to respect wall textures and avoid altering paint sheen. Use extension poles with sanding blocks or a pole sander for even coverage. Secure ladders and rotate tasks to reduce fatigue. Clean dust frequently to inspect progress. Choose grit for initial smoothing, then finer grit for finish.
| Tool | Use |
|---|---|
| Pole sander | High areas |
| Vacuum sander | Large surfaces |
Remove Stubborn Layers and Glossy Finishes
After you’ve covered large areas and inspected the surface, tackle stubborn layers and glossy finishes with methods that cut through adhesion rather than just abrade it. You’ll need targeted steps for effective paint removal and finish smoothing without overworking the wall.
After primary sanding, focus on breaking stubborn, glossy layers with targeted removal—not just abrasion—to preserve the wall.
Try these approaches:
- Score glossy coats lightly with a razor to break surface tension before sanding.
- Use a chemical stripper for tough, multiple layers; follow safety instructions.
- Employ a coarse-grit disc on a random-orbit sander for stubborn sections.
- Switch to finer grits to reduce deep scratches while preserving substrate.
- Clean residue with a tack cloth and assess for further removal.
Feather Edges and Smooth Transitions
When you finish stripping stubborn paint, focus on blending the remaining edges so the patched area disappears. Use a feather sanding technique—light pressure and a tapered stroke—to gradually thin the paint toward the surrounding surface.
That smooth shift makes priming and repainting seamless.
Blend Paint Edges
Although the patched area may look fine at first, you’ll need to feather the paint edges to create an invisible shift. You want smooth gradations: match tones, soften hard lines, and use proper brush techniques so repairs vanish. Focus on edge thinning and light strokes, not heavy paint.
- Inspect lighting to check visible seams.
- Use color matching to pick the closest tint.
- Apply thin coats and let each dry fully.
- Work outward from the patch with gradual pressure.
- Blend with soft, overlapping strokes for continuity.
Check from different angles, and touch up sparingly until the wall reads as one surface.
Feather Sanding Technique
If you want the repair to disappear, feather sanding is the step that creates a seamless shift between the patched area and the surrounding paint. You’ll use light pressure and a fine-grit sanding block to taper edges until they vanish into the existing finish.
Work in concentric motions, checking frequently to avoid gouging. Feathering techniques demand patience: sand progressively finer grits and blend outwards past the patch to ensure even sheen and texture.
Finish by wiping with a tack cloth, then prime if needed. Proper surface blending prevents visible lines and gives you a smooth, professional-looking repaint ready base.
Clean the Surface for Primer
Ready to prime? You’ll finish surface preparation by removing dust, grease, and loose particles so primer adhesion works. Tackle the wall methodically and don’t skip steps.
Ready to prime? Finish prep by removing dust, grease, and loose particles so primer can bond properly.
- Vacuum edges and corners with a brush attachment to lift sanding dust.
- Wipe with a tack cloth for remaining fine particles.
- Degrease high-touch areas with a mild detergent solution; rinse and dry.
- Inspect under good light; mark spots needing extra cleaning.
- Allow the wall to fully dry before applying primer to prevent trapping moisture.
Clean, dry surfaces give primer the best chance to bond and create a smooth base.
Fix Gouges, Swirl Marks, and Dust Nibs
When you find gouges, swirl marks, or dust nibs, tackle them before priming so your finish looks professional and smooth. Inspect lighting closely to spot imperfections.
For gouge repair, clean the area, apply a thin layer of lightweight spackling or filler, smooth with a putty knife, and let it dry fully. Sand the repair flush with fine-grit paper, feathering edges into surrounding paint.
To remove swirl marks, sand gently with a fine abrasive in even strokes until surface is uniform.
For dust nibs, pick or sand away raised bits, then wipe the area with a tack cloth before final sanding.
When to Stop Sanding and Prime
After you’ve smoothed out gouges, swirl marks, and dust nibs, it’s time to decide when to stop sanding and prime. You’ll know you’re done when the surface looks uniform, feels smooth, and paint removal is complete in problem areas.
When the surface looks uniform, feels smooth, and problem areas are cleared, stop sanding and prime.
Check edges and glossy spots under light. Finish surface preparation by vacuuming and wiping with a damp cloth, then testing adhesion with a thumb press.
- Inspect under raking light
- Run your hand for smoothness
- Remove loose paint flakes
- Wipe away dust and residue
- Do a quick adhesion thumb test
Then apply primer to seal and bond.
Save Time and Maintain Your Sanding Tools
Because well-kept sanding tools cut work time and improve results, make a routine of cleaning, inspecting, and replacing abrasives regularly. You’ll prolong belts, discs, and pads by removing dust after each session and storing tools dry.
Check pads for wear and frayed edges so you don’t mar primer or alter paint color unintentionally. Rotate grits to match sanding techniques, avoiding clogged coarse papers that slow progress.
Lubricate moving parts and tighten fasteners to prevent wobble. Replace bent backing plates and worn brushes promptly.
With consistent care you’ll save time, get uniform surfaces, and reduce costly rework.
Frequently Asked Questions
Can Sanding Remove Wallpaper Adhesive Residue Effectively?
Yes — you can sand wallpaper removal adhesive residues, but you’ll need coarse then finer grit, patience, and caution to avoid damage; for heavy glue you’ll combine sanding with solvent or scraper so the wall’s smooth and clean.
How Do Temperature and Humidity Affect Sanding Results?
You’ll feel Temperature impact as grit bites or clogs; Humidity influence makes dust cake or float, slowing progress. Adjust sanding speed, use drier conditions for crisp removal, and switch to coarser or finer grit as needed.
Can I Repaint Immediately Over Oil-Based Primer Without Sanding?
You shouldn’t repaint immediately over oil-based primer without sanding; priming preparation requires light abrasion to guarantee adhesion. You’ll choose a sander selection like 220-grit hand sanding or a fine-detail orbital sander, then clean before topcoating.
Will Sanding Affect Sound Insulation or Wall Structural Integrity?
You won’t hear a difference; light sanding has minimal acoustic impact and won’t harm wall stability if you avoid deep gouges. Picture feathering dust like fog—work gently, keep pressure even, and check for damage.
How to Dispose of Lead-Contaminated Sanding Waste Safely?
You should treat lead safety seriously: wet-sweep or HEPA-vacuum dust, bag contaminated debris in heavy-duty, labeled bags, follow local hazardous waste disposal rules, don’t mix with regular trash, and use certified disposal facilities for safe waste disposal.
Conclusion
You’ll end up with a wall that feels smooth under your palm like river-worn stone — but only if you don’t rush. Follow the steps: test for adhesion and lead, wear proper PPE, sand with the right grit, patch imperfections, clean thoroughly, then prime. When sanding looks even and dust-free, stop. Keep your tools sharp and clean, and you’ll save time next round. Step back, admire the even surface, and get ready to paint.