How to Tape Off Exterior House for Painting Fast
You can tape off an exterior house fast by prepping and drying surfaces, choosing low‑tack or weather‑rated tape, and working top‑down in 10–30 minute sections with one person prepping and another applying tape. Use sealing film or heavy drop cloths for plants and masonry, press tape firmly with a putty knife, and seal edges with a base coat for crisp lines. Remove at 45° when paint’s tacky; keep going and you’ll pick up pro tips and troubleshooting.
Fast, Step‑by‑Step Exterior Taping Tutorial (10–30 Min Per Section)
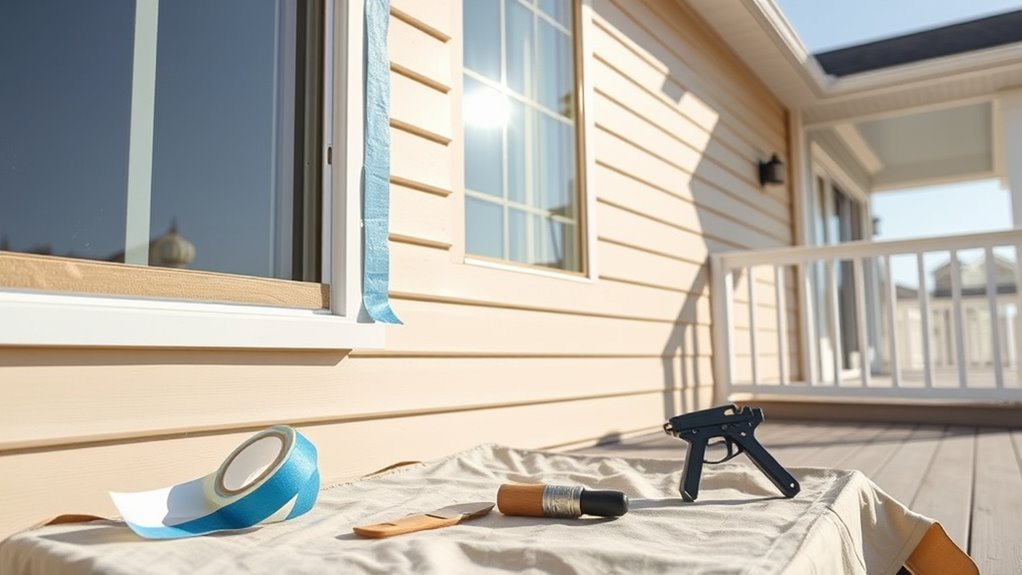
Before you start painting, set up each section so taping takes 10–30 minutes. You’ll gather tape, ladder, utility knife, and drop cloths, then work top-down.
Set up each section first—gather tools, work top-down, and tape carefully for a tidy, efficient paint start.
Mask trim, windows, gutters, and vents with straight, continuous strips; press edges firmly. For decorative elements on historical architecture, follow moldings precisely and use low-tack tape to protect delicate surfaces.
When switching to creative color palettes, label taped areas to avoid mistakes and stagger breaks to maintain speed.
Trim excess tape with a fresh blade, remove dust, and inspect seams. You’ll finish tidy, efficient sections ready for paint without redoing work.
Why Taping Cuts Time and Touch‑Ups
When you tape off edges carefully, you cut both painting time and the hours you’d spend fixing mistakes because clean lines mean one-pass coverage and fewer brush-outs. You’ll work faster since straight edges let you roll and cut confidently without slowing to correct bleeds.
Taping reduces rework: less scraping, sanding, and repainting saves daylight and energy. It also keeps adjacent features—like porch trim or shutters—clean, so your exterior refresh complements interior decor decisions when viewers move between spaces.
Even if you enjoy gardening tips for curb appeal, precise tape work makes the final result look professional and lowers overall project time.
What You Must Tape on an Exterior Paint Job
If you want clean, professional results, tape every surface that could catch stray paint: window glass and frames, door jambs, trim edges, gutters, light fixtures, and any hardware or landscaping elements within reach. You’ll protect details on historical architecture and modern siding alike, and preserve outdoor lighting fixtures and wiring.
Prioritize edges where materials meet and movable parts that you can’t remove.
- Windows — panes, sills, and muntins
- Doors — jambs, thresholds, and locks
- Trim — fascia, soffits, and decorative moldings
- Fixtures — lights, vents, and hardware
Work systematically, removing tape at the right drying stage.
Best Types of Painter’s Tape for Exterior Surfaces
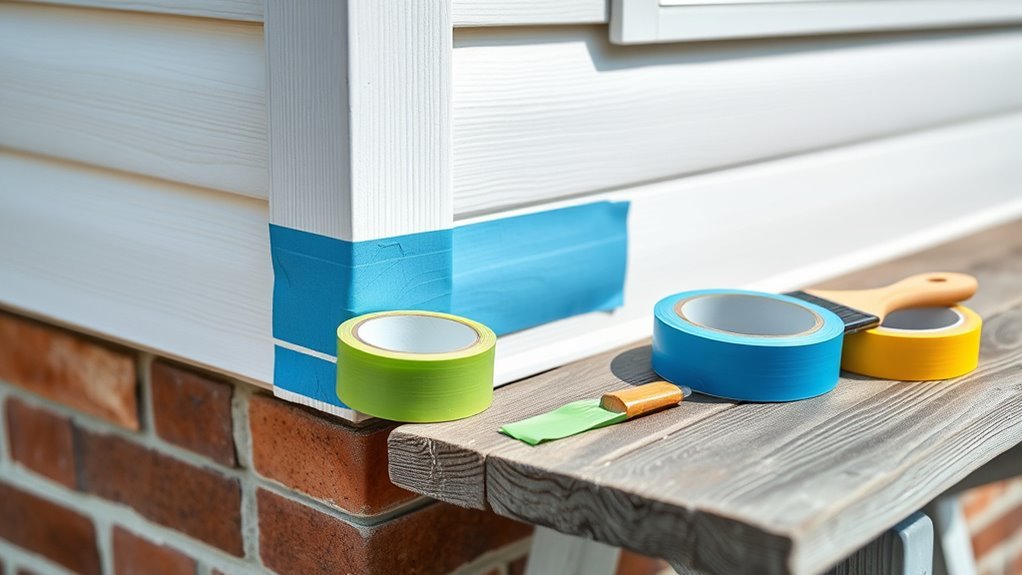
You’ll want tape that matches each exterior surface—vinyl, stucco, wood, and metal all need different backing and stretch.
Compare adhesion strength so you pick tape that sticks in heat, cold, or wind without leaving residue.
Below I’ll outline which tapes work best for each material and their adhesion pros and cons.
Surface Compatibility Guide
Because exterior surfaces vary so much, picking the right painter’s tape matters more than you might think. You’ll choose tape based on surface texture, paint type, and weather.
Do surface preparation first—clean, dry, and, if needed, sand. Match tape to the substrate so you avoid paint bleed or damage during tape removal.
- Smooth siding: delicate, low-tack paper tape.
- Rough wood: high-tack cloth or contractor’s tape.
- Brick or stucco: flexible, medium-tack foam-backed tape.
- Trim and glass: sharp-edge, low-residue tape.
Test a small area before committing to a full run.
Adhesion Strength Comparison
When choosing tape for exterior jobs, focus on adhesion strength first—too weak and paint bleeds or lifts, too strong and you risk surface damage when removing it. You’ll want to compare tapes by Adhesion testing and Tape durability; test on scrap sections, note residue, and how cleanly they peel after 24–72 hours. Choose medium-high adhesion for trim, low-to-medium for delicate siding, and specialty asphalt-safe tape for rough surfaces. Track results to refine choices and reduce rework.
| Tape Type | Best Use |
|---|---|
| Medium Adhesion | Trim |
| Low Adhesion | Delicate siding |
| High Adhesion | Rough surfaces |
When to Use Masking Film, Drop Cloths, or Paper
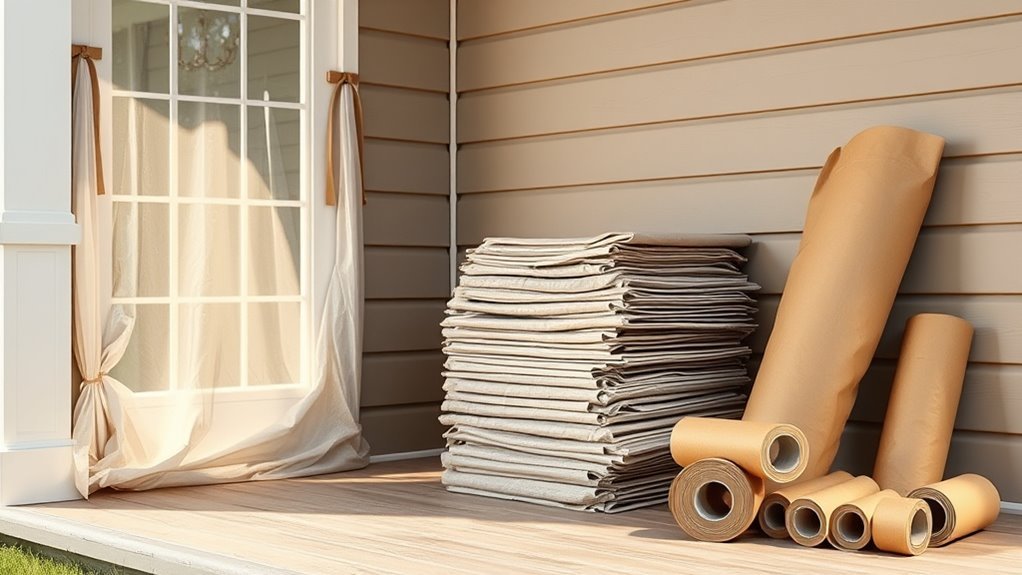
Think about the surface type and texture to pick materials that conform without tearing or leaving residue.
Check weather and wind conditions before you choose masking film or paper, since wind can turn lightweight film into a mess.
Match your choice to the paint type and overspray risk—heavier drop cloths or taped film work better for spray jobs, while paper or light film is fine for brushes and rollers.
Surface Type And Texture
If your siding, trim, or masonry has deep grooves, loose texture, or irregular contours, pick protection that conforms and seals—masking film for tight spots, heavy-duty drop cloths for rough or uneven surfaces, and contractor paper for flat, low-profile areas. Consider surface durability and texture variability when choosing materials.
Match protection to substrate to prevent paint bleed, snags, or trapping moisture.
- Masking film: clingy, seals gaps on grooved or detailed trim.
- Heavy-duty drop cloths: abrasion-resistant for coarse, uneven masonry.
- Contractor paper: economical for smooth, low-traffic siding.
- Combine types where textures change.
Weather And Wind Conditions
Weather and wind change how protective materials perform, so adjust your choices accordingly. Check weather forecasts before you start; strong gusts mean wind delays are smarter than fighting blowing film.
Use heavier drop cloths on windy days and weigh edges with sandbags or clips.
Masking film works well in calm conditions for large windows, but it billows and tears when breezy, so switch to taped paper or secured canvas near doors and trim.
If rain’s possible, pick waterproof film or postpone.
Plan for wind direction to prevent paint drift and protect plants and vehicles accordingly.
Paint Type And Overspray
Because different paints atomize and travel differently, match your protective materials to the paint and application method you’ll use. You’ll pick masking film, drop cloths, or paper based on spray, roller, or brush and whether you’ve done surface priming.
Consider paint overspray range, wind, and substrate sensitivity.
- For sprayers: use heavy masking film; tape edges tightly to stop paint overspray.
- For rollers: lay canvas drop cloths to catch splatter; they resist slipping.
- For brushes: use folded kraft paper for straight edges and trim protection.
- For primed surfaces: avoid abrasive covers that might scuff wet primer.
Tools That Speed Up Exterior Taping Work
When you want to move quickly and keep clean lines, the right tools make all the difference. You’ll want a quality painter’s tape dispenser for long runs, angled trim tape for corners, and a stiff-edged plastic spreader to press tape into grooves.
Use a stabilizing ladder or scaffold with tool caddies so you don’t drop rolls while adjusting outdoor décor or managing landscaping integration around beds. A long-reach masking tool speeds eaves and high trim, while a hand-held heat gun removes stubborn tape without damage.
These tools cut time and improve consistency, so taping becomes fast, neat, and reliable.
How to Inspect Surfaces Before Taping
Before you lay a single strip of tape, walk the entire surface and look for loose paint, dirt, mildew, or gaps that will prevent adhesion. Check siding, trim, windows, and nearby elements like roof shingles and gutter damage that could fling debris onto taped edges.
Clean, scrape, or replace faulty sections before taping. Follow this quick inspection checklist:
- Remove loose paint and flaking caulk.
- Power-wash dirt and mildew; let dry.
- Repair gaps, split trim, or loose flashing.
- Note roof shingles and gutters for debris risk.
A thorough pre-check saves rework and keeps tape sticking.
How Temperature and Humidity Affect Tape Adhesion
You’ll notice tape sticks differently when it’s very hot or cold, because temperature changes the adhesive’s tack.
High humidity can weaken the bond or leave moisture that prevents proper grip.
Very dry conditions can make tape brittle.
Check the forecast and pick tape rated for the expected temperature and moisture so your lines stay clean.
Temperature Impact On Adhesion
Wondering why tape sometimes peels off or leaves gooey residue? You’ll notice Temperature effects create Adhesion challenges you can manage. Cold makes adhesive stiff; heat softens it. Adjust timing and tape choice for best results.
- Use low-temp rated tapes below 50°F to prevent lifting.
- Avoid application above 90°F when adhesive gets gummy.
- Press tape firmly at moderate temperatures for consistent bond.
- Let paint and tape acclimate to the same temperature before masking.
Humidity Alters Tape Grip
If humidity climbs, tape adhesive can absorb moisture or sit on a damp surface, and that changes how well it sticks to siding and trim. You’ll notice in a humid climate the adhesive softens, reducing initial tack and allowing edges to lift.
Work when surfaces are as dry as possible and press tape firmly to squeeze moisture out of contact points.
Watch tape elasticity: too stiff in cold or too limp in humidity means it won’t bridge gaps or form clean edges. Use tapes rated for high humidity and remove them within manufacturer windows to avoid residue or paint bleed.
How to Clean Trim, Siding, and Windows for a Tight Seal
Before you tape, clean trim, siding, and windows thoroughly so sealant and tape stick where they should. You want surfaces free of dirt, mildew, and loose debris so paint color lays true and brush techniques perform as expected. Do this:
- Rinse with a pressure washer on low to remove grime.
- Scrub trims and sills with a mild detergent and nylon brush.
- Use a window cleaner and razor blade for glass and channels.
- Wipe down with a tack cloth and let everything dry fully before sealing or applying tape.
These steps give you a tight seal and professional-looking edges.
How to Remove Loose Paint and Flaking Before Taping
Before you start taping, walk the exterior and inspect for any loose or bubbled paint so you know where to focus.
Use a scraper or putty knife to remove all flaking paint down to a firm surface.
Finish by sanding feathered edges smooth so the new tape and paint will lie flat and hold properly.
Inspect For Loose Areas
When you inspect the siding and trim, look for bubbling, cracking, or curling paint and press gently to find loose flakes. Removing these areas now prevents tape from pulling away dried paint later. Check around windows and eaves where moisture or movement lifts coatings.
Note previous interior color bleeding through or mismatched spots that affect edge prep. Compare wall textures to adjacent surfaces so tape seals evenly.
Use this quick checklist before taping:
- Run fingers over seams for soft spots.
- Tap with a scraper handle to hear hollows.
- Mark loose patches with chalk.
- Clean dust before moving to scraping.
Scrape Flaking Paint
If loose or peeling paint isn’t removed, tape won’t stick and new paint won’t last, so start by scraping all flaking areas down to a solid edge using a sturdy putty knife or paint scraper. Work methodically, remove chips, and clear debris so tape adheres. Check exposed substrate for damage and prime bare spots. Note the original finish for color matching later and keep samples for paint mixing at the store. Clean the surface before taping.
| Tool | Tip | Time |
|---|---|---|
| Putty knife | Angle for leverage | 5–15 min |
| Wire brush | Remove dust | 2–10 min |
| Vacuum | Collect flakes | 3–10 min |
Sand Feathered Edges
After scraping away loose paint and cleaning the area, sand the feathered edges until they blend smoothly with the surrounding surface so tape will seal and paint will lay down evenly. You want a consistent plane for good paint adhesion. Use medium grit to remove high spots, then fine grit to smooth.
Keep the area dust-free before taping.
- Wear a mask and eye protection.
- Sand toward the center of intact paint.
- Check edges by touch; they should feel seamless.
- Wipe with a tack cloth to remove dust for ideal paint adhesion.
How to Prep Gutters, Downspouts, and Soffits Quickly
Before you start taping, clear and secure gutters, downspouts, and soffits so paint jobs stay clean and water flow isn’t blocked. You’ll do quick gutter maintenance: remove debris, flush with a hose, and reattach loose hangers. Wipe soffits with a mild detergent for soffit cleaning, rinse, and let dry. Tape downspouts with painter’s tape and use low-tack tape on gutter edges. Check brackets and caulk gaps so paint won’t trap moisture. Use a ladder stabilizer and work section by section for speed and safety.
| Task | Tool | Time |
|---|---|---|
| Debris removal | Gloves | 10 min |
| Soffit wipe | Sponge | 8 min |
| Secure brackets | Drill | 12 min |
How to Protect Plants, Grass, and Landscaping From Paint and Tape
While you prep the house, protect nearby plants and grass by creating a clear buffer zone: move potted plants out of the work area, cover shrubs and beds with lightweight drop cloths or breathable landscape fabric, and anchor edges with stones or stakes so wind won’t expose foliage. Keep garden furniture covered or relocated, and remove delicate interior accents you might use outdoors.
Follow these steps:
- Lay breathable fabric rather than plastic to avoid trapping moisture.
- Tape drop cloth edges to pavement, not plants.
- Use low-tack painter’s tape on hardscapes only.
- Rinse any paint splatter immediately with water.
How to Tape Windows for Paint Lines Without Glass Residue
If you want crisp paint lines without sticky residue on the glass, choose the right tape and apply it carefully. Use a low-tack painter’s tape designed for exterior glass; press the edge down firmly with a plastic scraper for a tight seal.
Work in cool, dry conditions to avoid window condensation that lifts tape adhesive. Mask frames and trim, leaving a tiny gap for touch-ups and paint color matching checks.
Remove tape within an hour of paint drying to prevent residue. Clean any remaining adhesive with rubbing alcohol, avoiding harsh scrubbing that could damage seals.
How to Mask Sliding Doors and French Doors Efficiently
Masking sliding and French doors follows the same careful tape-and-seal approach you used on windows, but you’ll also account for larger glass areas, tracks, and movable parts. Use these masking techniques to protect glass and hardware while keeping doors operable.
- Clean frames and tracks, then apply painter’s tape along jambs and glass edges.
- Cover large panes with plastic sheeting, secure with tape, and leave overlap for easy removal.
- Protect handles, locks, and rollers with small folded tape tabs or wrap with plastic.
- Test operation, adjust seals, and press tape firmly to prevent paint bleed; remove tape while paint’s tacky.
How to Tape Off Brick, Stucco, and Masonry Edges
Before you tape brick, stucco, or masonry edges, make sure surfaces are clean, dry, and free of loose mortar or dust so the tape will stick.
Pick a high‑bond painter’s tape plus a flexible sealant or caulk for gaps to prevent bleed‑through on textured surfaces.
I’ll show how to prep edges and apply the right tape and sealant for crisp lines.
Preparing Surfaces Properly
When you’re working around brick, stucco, or other masonry, plan your taping so the edges stay sharp without damaging the surface — you’ll use different tapes, backer materials, and techniques for each texture. Clean, dry surfaces make tape stick and paint finish crisp. Remove loose mortar, brush dust, and let repairs cure. Protect adjacent items—think roof maintenance debris and nearby outdoor furniture—before you tape.
- Use a stiff brush to remove dust and efflorescence.
- Patch cracks with compatible mortar or caulk; let cure.
- Dry surfaces fully; avoid taping after rain.
- Apply backer strips where gaps would tear tape.
Choosing Tape And Sealant
Because masonry varies so much in texture and porosity, pick tapes and sealants that match the surface. You’ll choose low-adhesion paper tape for smooth brick, mesh-backed for rough stucco, and stretchable foam for irregular mortar joints.
Test a small area to verify clean removal without damaging decorative patterns or flaky surfaces.
Use silicone or elastomeric sealant where gaps are deep; use acrylic for paintable joints when historical preservation requires reversible materials.
Apply tape firmly, press sealant into gaps, and tool it smooth for a crisp paint line.
Remove tape at a 45° angle while sealant is still tacky for best results.
How to Protect Metal Railings and Light Fixtures Fast
If you want to keep metal railings and light fixtures spotless while painting, start by removing any detachable parts and cleaning surfaces so tape and covers stick well.
For metal protection and to shield each light fixture, work methodically:
- Cover bulbs and sockets with plastic and painter’s tape.
- Wrap railings with rosin paper or plastic sheeting, securing ends with tape.
- Use microfiber to wipe metal before taping to remove oils.
- Reattach fixtures only after paint fully cures; touch up screws and brackets.
You’ll prevent drips, avoid corrosion, and finish faster with minimal cleanup.
How to Tape Around Trim, Corner Boards, and Fascia Cleanly
Now that metal railings and fixtures are protected, move on to trim, corner boards, and fascia—areas that show imperfections quickly if tape isn’t applied right.
Work with a steady hand: press short lengths of painter’s tape along edges, smooth with a plastic card, and overlap at corners. Remove old caulk or loose paint first so tape seals.
For decorative accents, use narrow tape or cut custom shapes with a sharp blade.
When painting, choose tape that won’t lift your color matching work; test a small patch.
Pull tape back at a 45° angle while paint is still tacky for clean lines.
How to Tape Soffits and Eaves While on Ladders Safely
Before you start taping soffits and eaves, make sure your ladder is on firm, level ground and properly angled so you can reach without overreaching.
Keep three points of contact and position the ladder to let you work along short sections at a time.
Use a steady tape application technique—press firmly along the seam and smooth with a small plastic scraper—to reduce gaps and prevent tape sagging while you move.
Secure Ladder Positioning
When you’re taping soffits and eaves from a ladder, secure positioning matters more than speed because a slip can turn a quick job into a serious accident. You’ll focus on Ladder stability and Secure footing before lifting tape or reaching overhead. Follow these concise steps:
- Set the ladder on level ground, use a ground pad or board under feet to prevent sinking.
- Angle the ladder properly (1:4 rule), lock spreaders and inspect for defects.
- Have a helper hold the base and hand tools, keeping your hands free for balance.
- Don’t overreach; move the ladder instead of leaning.
Tape Application Technique
With the ladder secure and a helper steadying the base, you can focus on applying tape cleanly along soffits and eaves without compromising balance. Work in short reaches, keeping three points of contact when repositioning; hand the tape to your helper for long runs.
Press tape firmly against trim and gaps where interior finishes meet exterior, smoothing toward exposed edges to prevent bleed. Avoid laying tape over loose roofing materials; instead, brace yourself and lift shingles minimally to tuck tape under if necessary.
Check seams twice, remove wrinkles, and peel slowly at a 45-degree angle after paint dries for crisp, professional lines.
Quick Techniques for Masking Gutters and Downspouts
Although gutters and downspouts look fiddly, masking them quickly prevents drips and saves time on cleanup later. Before taping, do basic Gutter cleaning and inspect for Downspout repair needs so you’re not sealing problems.
Then:
- Dry and remove debris, use short ladders for safe access.
- Wrap joints with painter’s tape, smoothing to follow curves.
- Cover long runs with plastic sheeting, secure edges with tape.
- For brackets, cut tape strips to tuck under hardware without loosening fasteners.
Work from top down, test adhesion, and remove tape while paint’s tacky for crisp edges and fast cleanup.
How to Tape Complex Architectural Details Without Slowdowns
Match your tape to the surface so it sticks where needed without leaving residue, using painter’s tape for smooth areas and specialty tapes for textured or delicate materials.
Use thin-profile tools like flexible scrapers and micro-rollers to press tape into tight creases and maintain clean lines.
Work in manageable sections so you can move quickly without losing accuracy.
Match Tape To Surface
When you pick tape that fits each surface—smooth siding, textured stucco, or delicate trim—you cut down prep time and avoid redo work. You’ll save time by choosing tape with matching tape properties and proven surface compatibility.
- Smooth vinyl: medium-adhesion tape that peels clean.
- Stucco/rough: high-adhesion, stretchable tape that grips crevices.
- Painted trim: low-adhesion, delicate-paper tape to protect finish.
- Metal flashings: weatherproof, UV-resistant tape for long shifts.
Test a short strip before committing. Apply with light pressure, remove at proper angle and temperature, and adjust choices per results to prevent failures.
Use Thin-Profile Tools
Picking the right tape is only part of the job — you also need tools that fit tight corners and ornate profiles so you can lay that tape quickly and cleanly. Choose thin-profile applicators, angled putty knives, and micro-tip scrapers to press tape into decorative accents without folding or stretching it.
A small roller or bone folder helps seat adhesive along curved trim and spindle work. For interior detailing that mimics exterior ornamentation, practice with thinner blades to avoid nicking surfaces.
Keep tool edges clean and use light, consistent pressure so you move fast and maintain crisp paint lines.
Work In Manageable Sections
Because tackling an entire façade at once slows you down, break the job into clear, manageable sections you can finish in one session. You’ll stay focused on complex trims, cornices, and brackets—especially on historical house styles—while testing creative color schemes without re-taping.
- Map sections by elevation and detail to set priorities.
- Tape one section’s edges, paint, then remove before paint fully cures.
- Use shorter rolls and small tools for tight profiles and ornamentation.
- Label sections and colors to avoid mix-ups and speed cleanup.
Work sequentially, and you’ll avoid fatigue, mistakes, and wasted tape.
How to Use Caulk or Sealant With Tape for a Perfect Edge
If you want crisp paint lines that last, use caulk with your tape to seal gaps and prevent bleed-through. Press tape firmly, run a thin bead of paintable exterior caulk along the joint, then smooth it with a damp finger or tool into the tape edge. Let the caulk skin before painting. This method helps on trim, siding seams, and around windows — it complements drywall repair skills and clean paint mixing habits when prepping surfaces.
| Step | Action |
|---|---|
| 1 | Clean surface |
| 2 | Apply tape |
| 3 | Run caulk |
| 4 | Smooth bead |
| 5 | Paint after skinning |
How to Avoid Paint Bleed Under Tape on Rough Surfaces
On rough siding you’ll need to press the tape edges down firmly so paint can’t sneak underneath. Run a putty knife or your fingernail along the tape to seal it into grooves and gaps.
For extra protection, brush a thin clear coat or sealant over the tape edge and let it dry before painting.
Prep Tape Edges Carefully
When you’re working with rough siding or textured stucco, tape alone won’t stop paint from seeping under the edges, so you need to prep those seams carefully before you roll or spray. Focus on clean, tight edges and plan for proper tape removal and edge sealing. Follow these steps:
- Clean the surface; remove dirt and loose paint so tape adheres.
- Press tape firmly with a putty knife or caulk tool to force it into texture.
- Apply a thin coat of matching base color along the tape edge to seal gaps.
- Remove tape at a 45° angle while paint is tacky for a crisp line.
Seal With Clear Coat
Because rough siding and stucco can let paint creep under even well-applied tape, seal the tape edge with a clear coat before you start painting to lock down gaps and create a smooth barrier. You’ll follow simple sealing techniques: press tape firmly, then brush a thin clear coat along the exposed edge to soak into pores and adhere tape to texture.
Let it cure fully; test adhesion before painting. Use a water-based clear for easy cleanup or solvent-based for tougher conditions, matching drying times to your paint. Proper clear coat application prevents bleed, saves cleanup time, and yields crisp lines on rough surfaces.
How Long to Leave Tape on Exterior Surfaces Safely
If you’re taping exterior trim and siding for painting, leave the tape on only as long as it protects without damaging the surface—typically no more than 7–14 days depending on temperature, sunlight, and tape type.
You’ll balance protection and risk: longer exposure can pull paint or leave adhesive, especially on delicate trim found in historical architecture or surfaces finished with eco-friendly materials. Check daily and remove when paint’s dry to the touch but not fully cured.
- Hot sun: shorten to 3–7 days.
- Mild weather: 7–10 days.
- Cold/wet: extend up to 14 days.
- Sensitive substrates: inspect frequently.
How to Remove Exterior Tape Without Lifting Fresh Paint
Want to pull off tape without wrecking the new finish? Wait until paint’s dry to the touch but not fully cured — usually a few hours depending on temperature.
Pull at a 45° angle slowly, keeping tension low to prevent lifting from the house exterior. Use a sharp utility knife to score along seams where paint bridges tape, and change direction if you hit resistance.
Warm tape slightly with a hair dryer on low if adhesive’s stubborn. Keep basic taping tools handy: pliers for grip, a knife, and a clean rag for quick edge smoothing as you remove each strip.
How to Fix Mistakes After Removing Tape Quickly
When you spot nicks, drips, or paint pulled away after removing the tape, act quickly to keep the touch-up seamless. Assess the damage, blot wet drips, and sand tiny pulls smooth.
For best results:
- Clean the area, let it dry fully.
- Feather edges with fine sandpaper; remove dust.
- Use precise color matching — test swatches and adjust with paint mixing until it blends.
- Apply thin coats with a fine brush, drying between coats; finish by gently blending the brush strokes into surrounding paint.
Work patiently; small corrections are faster than full repaints and keep lines crisp.
How to Speed Up Taping With a Two‑Person Workflow
Because two people can divide tasks, you’ll cut tape time dramatically by pairing a preparer with a taping specialist. You’ll have one person clean surfaces, remove loose caulk, and mark edges while the other applies eco-friendly tapes smoothly.
Communicate edge priorities and which trims get creative color schemes so the taping specialist knows where to lay precise lines. Move systematically—work a single wall together, then rotate.
Keep tools organized: scissors, a small roller, and replacement tape within reach. Practice a handoff rhythm: one holds guide points while the other presses tape; you’ll finish faster with fewer mistakes.
How to Set Up a Taping Assembly Line for Large Houses
For large houses, you’ll speed things up by assigning specialized taping roles — one person measures and marks, another applies tape, and a third checks edges and removes wrinkles.
Set up a materials workflow so supplies (tape rolls, dispensers, ladders) flow from staging to the crew without backtracking.
With clear roles and an organized supply line, you’ll cut downtime and keep a steady pace.
Assign Specialized Taping Roles
If you’re tackling a large house, set up a taping assembly line so each person focuses on one repeatable task—masking windows, taping trim, covering siding, or finishing edges—so the crew moves smoothly and wastes less time switching tools.
Assign roles clearly and brief each person on tape coordination and quality standards. Keep assignments simple so everyone repeats the same motion.
- Window masker: measures, cuts, and secures film.
- Trim tapper: applies tape along wood and joints.
- Siding coverer: protects broad surfaces with drop cloths.
- Edge finisher: smooths seams and fixes gaps.
Organize Materials Workflow
Once you’ve assigned roles, streamline the materials flow so each person gets what they need without pausing—set up labeled stations for tape, film, drop cloths, knives, and dispensers near the work zones. Restock from a central supply point, and route used items to a disposal bin.
You’ll map stations by elevation and facade, keeping garden landscaping and exterior lighting protected with dedicated covers. Assign a floater to shuttle supplies and clear debris, timing runs between taped sections.
Use color-coded rolls and checklists so teams swap quickly. At shift changes, audit inventory, refill kits, and reposition stations for the next area.
How to Prioritize High‑Visibility Areas for Best Results
Although you’ll tape the whole exterior, start with the spots everyone sees first: entryways, front-facing windows, porch trim, and areas framed by walkways or street views. You’ll set priorities that maximize curb appeal and minimize touch-ups. Consider creative color combinations for trim accents and pick eco-friendly tape options when possible.
Then follow this quick checklist:
- Entryway: protect door jambs, hinges, and step edges.
- Front windows: tape glass edges and sills for crisp lines.
- Porch trim: secure railings and posts before painting.
- Pathway-facing walls: cover corners and light fixtures for a uniform finish.
Work outward from these focal points.
How to Choose Tape Widths for Different Exterior Features
For narrow trim and molding you’ll want a thin tape that lets you get tight lines without covering detail.
For wide siding and panels choose broader tape or overlap narrower rolls to speed coverage.
On irregular surfaces and curves pick a flexible, medium-width tape you can stretch or tear to fit the contour.
Narrow Trim And Molding
When you’re working with narrow trim and delicate molding, pick tape that’s slim enough to cover the edge without overlapping the painted surface. You’ll want low-tack, narrow-width tape to protect decorative accents and interior trim without lifting existing finish. Follow these quick guidelines:
- Choose 1/4″–3/8″ tape for fine molding and ornate details.
- Use crepe paper tape for slightly textured surfaces; it conforms well.
- Try painter’s grade micro-tape for crisp lines on very thin profiles.
- Press edges firmly and remove tape within an hour of paint touch-dry to avoid peeling.
Measure trim width before buying to avoid wasted rolls.
Wide Siding And Panels
Narrow tapes work great on delicate molding, but wide siding and large panels need broader protection to speed the job and keep edges straight. Choose tape at least as wide as the joint lines created during panel installation so you cover seams and fasteners without repositioning.
For horizontal siding color changeovers, use long runs of 3–4 inch tape to maintain straight lines and reduce ladder trips. Press tape firmly along grooves and overlaps, smoothing out bubbles for clean paint edges.
Remove tape within the paint’s tack window to avoid tearing. Match tape type to substrate and adhesive strength for best results.
Irregular Surfaces And Curves
Because curved trim and textured stucco change how tape sticks and bends, you’ll pick widths that follow contours without bunching or lifting. For irregular surfaces and curves, think thin for tight radii, medium for gentle curves, and wide for long runs where edges need protection.
Consider substrate texture and paint bleed risk; test a scrap before committing. Remember to protect garden furniture nearby and tape off any interior accents near openings.
- 1/2″ for tight curves and small moldings
- 3/4″ for moderate curves and trim
- 1″ for broader contours
- 1.5″+ for long, straight protection
How to Use Corner Guards and Trims to Save Taping Time
If you’re working on exterior corners and trim, corner guards and preformed trim pieces can cut taping time dramatically by creating clean, paint-ready edges in seconds.
Use corner guards to shield vulnerable edges while you spray or roll; they stick or screw on, so you won’t fuss with long runs of tape.
Preformed trims offer consistent trim alignment, eliminating measurement guesswork and re-taping. Fit trims tightly, clamp or fasten, then paint up to their edge for a crisp line.
Remove guards promptly after painting to avoid adhesion residue. Choose reusable guards to speed future jobs and maintain straight lines.
How to Safely Reuse Plastic Film, Cloths, and Tape (Tips & Limits)
Corner guards and trims cut down how much masking you need, but you’ll still rely on plastic film, drop cloths, and tape for large surfaces and detail work — and reusing them smartly saves time and money.
You’ll want clear rules: inspect, clean, and retire damaged items. Consider Recycling plastics when possible and track Tape longevity so sticks perform.
- Shake out dust, hose plastic film, air-dry thoroughly.
- Brush and launder cloths; retire stained oils or solvents.
- Test old tape on scrap wood for adhesion before reuse.
- Store items dry, flat, labeled by condition and reuse count.
Follow limits to avoid failures.
Taping Tips: Spraying, Rolling, and Brushing
When you’re prepping for paint, choosing the right taping method—spraying, rolling, or brushing—lets you control overspray, edge sharpness, and speed. Each technique pairs with specific tapes and masking setups, so match your method to the paint type, surface texture, and project scale to get clean lines quickly.
For spraying, use high-quality masking film and wide tape, seal seams to protect outdoor decor and nearby landscaping maintenance areas.
For rolling, use medium-adhesion tape on trim; press edges firmly.
For brushing, use low-bleed painter’s tape and tool-edge masking.
Remove tape while paint is tacky for crisp lines.
How to Plan Taping When Painting Multiple Colors or Accents
Start by sequencing your colors so you paint the lightest or base tones first and save trim or accent shades for last.
Use edge masking techniques—like overlapping tape and fine-line tape—for crisp progressions between hues.
Place temporary barriers (plastic sheets or cardboard) to protect completed sections while you work on adjacent colors.
Color Sequence Planning
Because you’ll be working with multiple hues and edges, plan the taping order to prevent wet paint from contaminating finished areas. Use color coordination and simple Taping shortcuts to sequence work logically. Follow this quick plan:
- Paint base walls first, tape adjacent trim to protect wet surfaces.
- Do large accents next, remove tape after paint skins but before fully cures.
- Tackle trim and small details afterward, using fresh tape to avoid color bleed.
- Finish with touch-ups, replacing any damaged tape and blending edges while paint is still tacky.
Keep stages chronological so wet-to-dry flow prevents smudges and saves time.
Edge Masking Techniques
If you’re working with multiple colors or accents, plan your edge masking so each taped line protects a finished area from the next wet coat. Start by mapping color zones, marking overlaps where decorative techniques or trim meet field colors.
Use low-tack, straight-edge tape on clean, dry surfaces; press firmly to prevent bleed. When painting accents, tape the accent first, paint, and remove tape while slightly tacky to keep crisp edges.
For color blending or gradients, feather edges with reducer or light brushing instead of heavy tape. Label taped sections and sequence work to avoid re-taping finished edges.
Temporary Barrier Placement
When you’re juggling multiple colors or accents, plan temporary barriers so each taped edge shields finished work and gives you clear sequencing for wet coats. You’ll set up zones, protect adjacent areas, and avoid color contamination with temporary barriers and plastic sheeting.
Follow a concise sequence:
- Map zones by color and mark taping start/end points.
- Apply painter’s tape, overlap with plastic sheeting where dust or spray could travel.
- Paint base coats first, remove sheeting between zones once dry.
- Tackle accents last, using fresh tape and new plastic sheeting to prevent bleed and guarantee crisp lines.
Protecting Glass During Power Washing & Taping Order
Before you tape for painting, shield every pane and frame so power-washing won’t leave streaks or let water seep under trim. Use painter’s plastic and low-tack tape on glass, pressing edges tight to prevent water intrusion. Remove screens and cover them separately.
Shield each pane and frame before taping—use low‑tack tape and plastic, press edges tight, and remove screens.
Work top-to-bottom: protect upper windows first, then lower ones, so runoff doesn’t rewet sealed edges. Keep a lint-free cloth handy to wipe spray spots immediately.
Proper protection preserves indoor air quality by preventing contaminants from entering when windows get opened later.
After power washing, inspect seals, then follow a consistent taping order to avoid missed spots and simplify tool maintenance.
How to Tape Around HVAC Units, Meters, and Outdoor Equipment
After you’ve sealed windows and checked for any power-wash leaks, move on to HVAC units, meters, and other outdoor equipment—these need careful masking to protect moving parts, electrical connections, and sensitive sensors. Start by turning off power where safe, then follow these steps:
- Cover vents and fan openings with breathable fabric and secure with painter’s tape for HVAC protection.
- Use thin plastic and foam around meters, avoiding pressure on dials—meter masking prevents damage.
- Wrap conduit and exposed fittings with tape-backed paper to shield paint overspray.
- Label covers and leave access points clear for inspections and quick removal.
How to Budget Time and Materials for a Fast Taping Job
Because a fast, neat taping job depends on planning, start by estimating how much surface area you’ll mask, the types of tape and coverings you’ll need, and the time each task will take so you can buy materials efficiently and schedule work in realistic blocks. Use simple Budget planning: break tasks into prep, taping, and cleanup, assign hours, and add contingency. For Material selection, list tape widths, drop cloths, and dispensers. Track quantities per area to avoid mid-job runs.
| Task | Typical time |
|---|---|
| Prep | 1–2 hrs |
| Taping | 2–6 hrs |
| Cleanup | 0.5–1 hr |
How to Shop for Professional‑Grade Tapes and Accessories
Now that you’ve estimated time and quantities, pick tapes and tools that match the surfaces and paint you’ll be using. Choose painter’s tape rated for exterior use, a sharp knife, a wheel dispenser, and a quality rope caulk for edging around outdoor lighting and garden landscaping features. Consider UV resistance, adhesive strength, and residue-free guarantees.
Buy masks for vents and breathable drop cloths. Compare brands by specs and reviews, not price alone. Carry spare rolls and a small tool kit in case conditions change.
- Tape type
- Widths
- Dispensers
- Accessories
How to Test Tape Adhesion in 3 Minutes Before Full Application
If you want to avoid costly peeling or residue, test a short strip of your exterior tape before you commit to long runs. Clean and dry the area, press a 2–3″ strip, wait 2 minutes, then peel at a 45° angle. Check for clean Tape removal and any lifting; repeat in shaded and sunny spots. If paint surface peels or residue appears, consider Surface priming or a different tape. Use this quick protocol across materials.
| Location | Result |
|---|---|
| Shaded siding | Pass/Fail |
| Sunny siding | Pass/Fail |
| Trim | Pass/Fail |
| Corner joint | Pass/Fail |
How to Tape in Windy Conditions Without Rework
When wind kicks up, you’ve got to work smarter to keep tape from lifting and paint from bleeding; start by anchoring long runs with short, staggered tabs so gusts can’t catch an entire edge. You’ll focus on wind resistance and tape durability while minimizing rework. Use these steps:
- Choose high-quality exterior tape rated for UV and moisture for better tape durability.
- Apply short overlapping tabs every 12–18 inches, pressing edges firmly to the substrate.
- Face your work from the leeward side, keeping a shielded zone with a tarp when possible.
- Remove tape at a 45° angle after paint skins over.
How to Keep Edges Crisp on Textured Siding and Clapboard
Because textured siding and clapboard throw irregular gaps between tape and surface, you’ve got to adapt your taping and cutting techniques to the profile to keep paint lines sharp. Work small, press tape into grooves with a flexible putty knife, and use a sharp blade to cut along overlaps. For decorative patterns or historical preservation, test paints and tape on scrap first so you preserve detail. Seal edges with a thin coat of the base color if needed before topcoating. Move deliberately, remove tape while paint’s tacky, and touch up tiny beads with a fine brush.
| Fear | Relief |
|---|---|
| Missed line | Crisp edge |
| Smear | Pride |
How to Document Your Taping Plan for Large or Multi‑Day Jobs
Although you’re focused on fast taping, document a clear plan so teams pick up where you left off each day: mark taped zones, note product and tape types, record edge-sealing steps, and timestamp stages for each wall or elevation. You’ll create a simple job sheet that stays on-site or in a shared folder.
Include:
- Elevation diagrams with tape color codes.
- Materials list (brand, width, Eco friendly materials noted).
- Stepwise edge-seal instructions and drying windows.
- Daily status, photos, and decorating trends notes affecting finishes.
Keep entries short, dated, and signed so handoffs are unambiguous.
How to Train Helpers to Tape Quickly and Consistently
If you want helpers to tape quickly and consistently, start with a short, hands-on demo that shows the exact tape type, edge pressure, and peel angle you expect; then have each person mirror the move immediately on the same trim while you correct technique.
Next, assign clear zones and pair faster tappers with learners so pacing stays steady.
Divide the job into clear zones and pair speedy tappers with learners to maintain steady pacing.
Teach common edge mistakes and a standard stop/start routine for corners.
Emphasize protecting outdoor decor and coordinating with landscaping integration so tapes don’t snag plants or fixtures.
Finish with timed practice runs, brief feedback, and a photo checklist to lock in standards.
How to Combine Masking and Protective Film for Windows Fast
When you’re prepping windows for exterior painting, pair thin painter’s tape along the frame with a low‑tack protective film over the glass so you get crisp edges and dust-free panes without wasting time re-taping. Use a quick, repeatable sequence:
- Clean frames, remove loose caulk, and note decorative accents to protect.
- Apply thin painter’s tape tightly against trim, folding corners neatly.
- Stretch protective film over panes, anchoring to taped trim; smooth out wrinkles.
- For interior masking, cover inside edges where paint could seep and label removable sheets.
Work methodically so you protect glass and trim efficiently.
How to Troubleshoot Common Taping Problems On‑Site
Because site conditions change fast, you’ll run into a few tape headaches that slow you down — lifting edges, adhesive residue, and tape tearing or stretching are the usual suspects.
When edges lift, clean surface dust, press firmly, or switch to a stronger Taping materials grade—low-temp painters’ tape fails on hot or dirty surfaces.
For adhesive residue, apply heat with a hair dryer or use a citrus-based remover; test first.
If tape tears or stretches, replace brittle rolls and avoid over-stretching; cut with a sharp blade.
Keep a small repair kit for quick On site troubleshooting and move on.
How to Inspect Final Tape Removal and Prep for Painting
Before you start painting, take a systematic walk-around to remove tape and inspect the reveal; pull tape back slowly at a 45-degree angle to avoid jagged edges and watch for missed gaps or paint bleed. You’ll check adhesion, surface moisture, and substrate condition, and confirm paint compatibility before priming.
Before painting, do a careful walk‑around: remove tape at 45°, check for gaps, adhesion, moisture, and compatibility.
- Remove remaining tape, noting any torn edges or seal failures.
- Wipe surfaces with a damp cloth; test for moisture and allow drying.
- Sand rough spots, feather edges, and clean dust thoroughly.
- Spot-prime areas where tape lifted coating or exposed bare substrate.
Proceed only when surfaces are dry and compatible.
Frequently Asked Questions
Can Exterior Painter’s Tape Harm Certain Siding Finishes Over Time?
Yes — you can damage siding finishes over time. You’ll need careful tape removal to avoid siding damage; choose low‑adhesion painter’s tape, test a small area, remove slowly in cool temperatures to minimize harm.
Should I Prime Surfaces Before Removing Tape for Best Adhesion?
Yes—you should usually prime before removing tape to guarantee paint adhesion; priming reduces adhesive residue risk and creates a uniform surface, so you’ll get cleaner lines, better bonding, and less cleanup after peeling the tape.
How Do I Protect Outdoor Electrical Outlets Safely While Taping?
Like a knight’s gauntlet, you’ll cover outlets with weatherproof box covers or taped plastic, ensuring electrical safety; use painter’s tape seals, folding edges for removal, and test power off first—those taping techniques keep things safe.
What’s the Best Way to Store Leftover Tape Between Multi‑Day Jobs?
Keep tape clean and ready: remove loose debris before storing, roll used lengths back onto cores, seal in airtight bags, label by type. Those storage methods speed tape removal later and prevent adhesive degradation between days.
Can I Use Painter’s Tape on Newly Replaced Exterior Materials (Vinyl/Trim)?
Yes, you can use painter’s tape on newly installed vinyl siding and trim materials, but don’t leave it too long; test a small area first, choose low‑tack tape, and remove within manufacturer‑recommended time to avoid damage.
Conclusion
You’ve got the quick tape process down, so you’ll save time and avoid touch‑ups when you prep each section—right? Keep the right tape, film, and tools on hand, teach helpers a simple routine, and use consistent seams so removal’s clean. When problems pop up, fix seams, replace damaged tape, and recheck adhesion. Strip tape at the right time, inspect edges, and you’ll be ready to paint without surprises.