How to Thin Valspar Exterior Paint Correctly
You should only thin Valspar exterior paint when you need better sprayability or slower drying in extreme conditions, and you’ll do it in small, tested batches. Use water for latex (start 5–10% by volume) and mineral spirits for alkyds (2–8%), mix gradually, strain, and test on scrap panels for flow, coverage, and sheen. Stop if coverage or adhesion suffers; follow can instructions and safety guidelines, and keep notes so you can learn more about proper adjustments.
Who This Guide Is For and What It Covers
Who’s this guide for and what’ll you learn? You’re a DIY homeowner, contractor, or hobbyist tackling Valspar exterior paint and wanting safe, precise thinning techniques.
You’ll learn when thinning’s necessary, correct ratios, tools, and steps to maintain finish quality without compromising durability.
You’ll also get tips to minimize environmental impact—like capturing waste, using approved solvents sparingly, and following local paint recycling rules.
This guide won’t assume expertise, but it will assume you follow label safety.
You’ll be able to decide confidently whether to thin, how to test viscosity, and how to dispose of leftovers responsibly.
Quick Answer: When to Thin Valspar Exterior Paint
If you’re using Valspar exterior paint, thin it only when necessary—typically to improve sprayability or to correct a viscosity issue after temperature or application changes. You’ll thin for spray setups, extreme cold, or when additives from color mixing slightly thicken the batch. Don’t thin for normal brush technique or to stretch coverage; that harms finish and adhesion. Test small batches, note ratios, and follow can instructions.
| When | Reason | Action |
|---|---|---|
| Spraying | Too thick for gun | Thin per sprayer guide |
| Cold weather | Viscosity rises | Warm and thin slightly |
| Tinted | Color mixing added pigment | Adjust carefully |
| Brushing | Normal use | Don’t thin |
Latex vs. Alkyd Valspar: How Paint Type Changes Thinning
When you move from deciding whether to thin at all to choosing how much to thin, the type of Valspar paint matters: latex (water-based) and alkyd (oil-based) behave differently and need different thinners and amounts.
You’ll thin latex with water — start with 5–10% by volume for spraying, less for rolling, and use a water-resistant brush if needed; color matching stays stable.
Alkyd needs mineral spirits or paint thinner, and you’ll usually add 2–8% for flow and leveling.
Brush selection matters: natural-bristle brushes suit alkyd, synthetic works best for latex.
Always mix gradually and test on scrap.
Signs Your Valspar Paint Is Too Thick
Noticing problems early saves time and keeps your finish looking professional. If your Valspar paint drags, leaves heavy brush or roller marks, or doesn’t level out, it’s likely too thick.
Noticing problems early saves time — if Valspar drags or leaves heavy marks, it’s likely too thick.
You’ll see visible ridges, uneven sheen, and clumping at edges. Thick paint can hide fine detail but harms color trends you meant, causing uneven coverage of accent hues.
It can also reduce paint durability by trapping solvent and preventing proper film formation, leading to premature failure.
You should test small areas, stir thoroughly, and thin per label recommendations before recoating to restore smooth application and longevity.
Signs Your Valspar Paint Is Too Thin or Watery
If your Valspar paint looks patchy with an uneven sheen, it’s a sign it may be too thin. You’ll also notice run marks or drips that don’t level out.
The color will need more coats because coverage is weak. Those symptoms mean you should check the mix and adjust the thinning.
Uneven Sheen Or Gloss
Though your paint may look wet and even at first glance, an uneven sheen or inconsistent gloss is a clear sign the Valspar paint is too thin or watery. You’ll notice sheen inconsistency across panels, and gloss variation where some areas reflect light while others stay dull. Don’t ignore it — thin paint won’t protect or look uniform.
- Check coverage under different light angles to spot gloss variation.
- Feel the surface for texture differences that match sheen inconsistency.
- Let a test patch dry fully to confirm persistent uneven gloss.
- Reassess thinning ratio; add less thinner and stir thoroughly.
Run Marks And Drips
When paint’s been thinned too much, it’ll run and form visible drip lines on vertical surfaces, and you’ll quickly spot tracks where gravity pulled the watery film downward. You’ll see beads and streaks that ruin Color matching and hide Texture enhancement details. Stop and assess before continuing: let runs dry, sand lightly, and apply a correctly reduced coat.
| Symptom | What it means |
|---|---|
| Beading | Too thin; solvent heavy |
| Vertical streaks | Gravity pulled film down |
| Surface gloss variation | Inconsistent pigment laydown |
Adjust thinning incrementally, test on scrap, and maintain recommended ratios to prevent drips.
Poor Coverage Or Hiding
After you fix runs and drips, look for poor coverage as the next clear sign your Valspar paint is too thin or watery. You’ll notice underlying patches, uneven sheen, or streaks that won’t hide primer or old color.
Check your color mixing ratios and confirm you didn’t over-dilute. Reassess surface preparation—clean, sand, and prime where needed. If hiding fails, thicken slightly per manufacturer guidelines or use a higher-build coat.
- Inspect panels for visible substrate and streaks.
- Verify color mixing and tint additions.
- Confirm surface preparation quality.
- Adjust viscosity; test before full application.
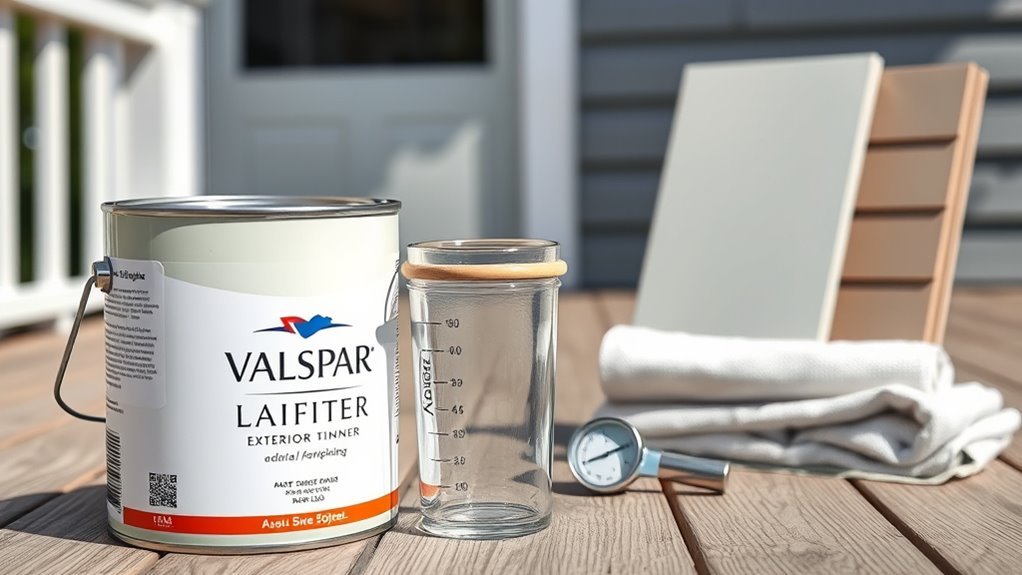
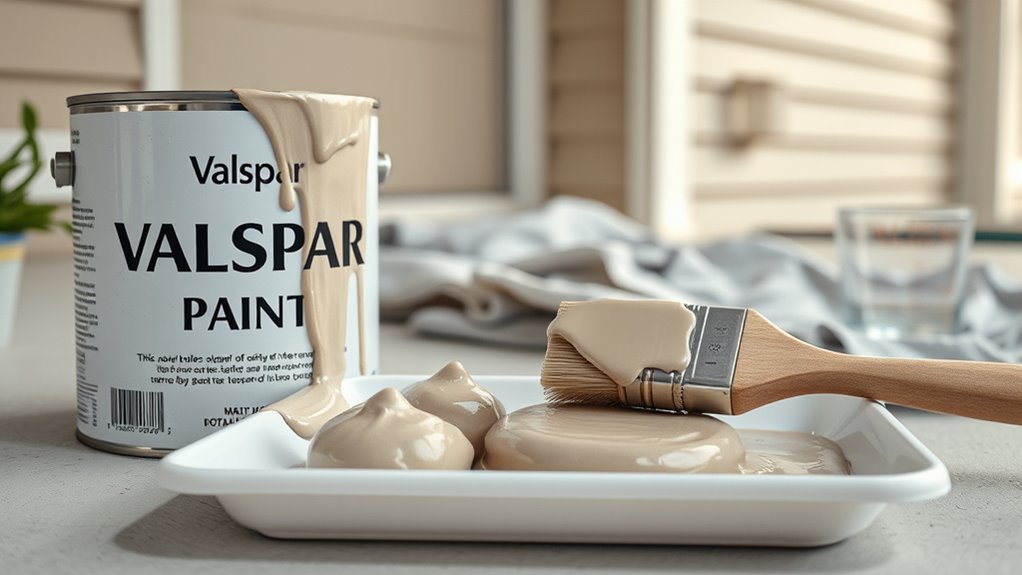
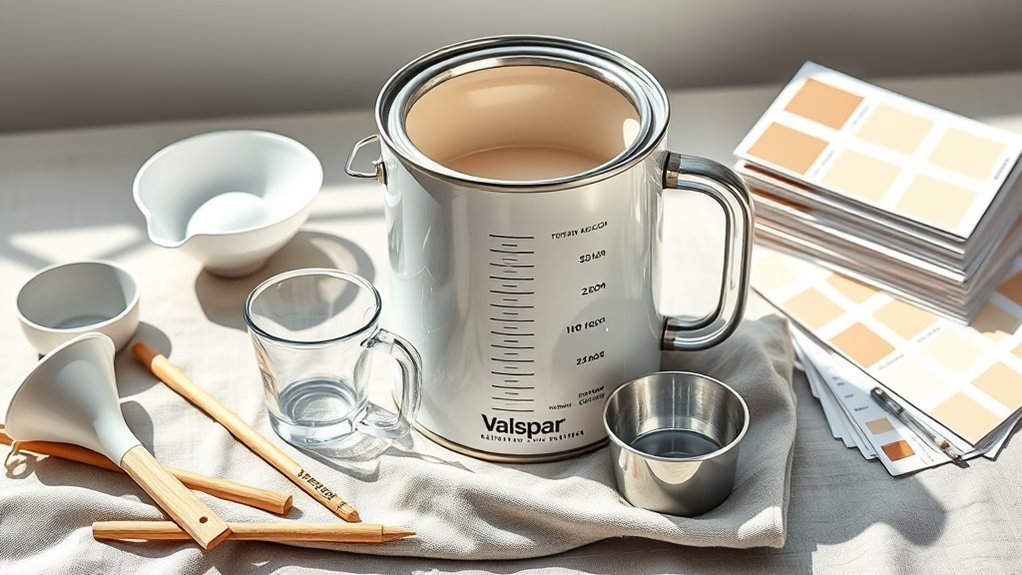
Tools and Supplies for Thinning and Testing Paint
Before you start thinning, gather the right tools and supplies so you can work efficiently and avoid costly mistakes. You’ll need measuring cups, calibrated syringes, and a clean stir stick to add solvent precisely.
Keep a small mixing container, color blending cards, and labeled sample jars for test batches. Have a quality brush and roller, plus replacement bristles to practice brush techniques on scrap wood.
Include a respirator, nitrile gloves, rags, and a funnel to prevent spills. Finish with a moisture meter and surface cleaner to confirm proper conditions before testing thinned paint.
Starter Mixes: Thinning Ratios to Try First
Start with simple ratios like 10:1 and 8:1 base paint to solvent so you can compare flow and coverage.
Mix small test batches in disposable cups and note how each blend behaves as it levels and sprays.
Be ready to tweak those ratios up or down based on temperature, humidity, and the sprayer you’re using.
Base Paint To Solvent
When you’re mixing Valspar exterior paint with a solvent, begin with conservative starter ratios so you can gauge flow and drying without over-thinning. You’ll want to note base paint viscosity, solvent type, and environmental conditions before adjusting.
Keep Color mixing principles in mind to preserve hue and opacity. Match thinning to your Brush techniques: more fluid for rollers and sprayers, slightly thicker for sash brushes. Try these starter mixes, then tweak minimally.
- 95% paint : 5% solvent — light adjustment for mild flow
- 90% : 10% — common balance for exterior use
- 85% : 15% — for hot, dry conditions
- 80% : 20% — only for sprayers
Small Test Batches
If you’re unsure how a thinning ratio will behave on your surface, mix small test batches to evaluate flow, coverage, and drying time without wasting paint. Start with 1-quart samples: straight from the can, 5% thinner, and 10% thinner. Label each jar and record ratios.
Apply each sample to a scrap panel using the brush you’ll use on the job; note how color mixing affects tone and how easy brush cleaning will be afterward.
Let samples cure fully before judging sheen and adhesion. These quick trials save time and materials, and they give you confidence before committing to larger batches.
Adjusting For Conditions
Because weather and application tools change how Valspar behaves, you’ll want a few starter mixes ready so you can match thinning to the job. Begin by noting temperature, humidity, and your sprayer or brush. Keep color matching in mind—thinning can alter sheen—so test on scrap after proper surface preparation. Prepare small, labeled jars: record ratios and results.
- 10% thinner for cool, humid days
- 5% thinner for moderate conditions
- 15% thinner for hot, dry air or fine-tip sprayers
- Unt thinned for touch-ups and heavy coverage
Adjust gradually and retest until satisfied.
How to Thin Valspar Latex Paint for Brushing
Want smoother brush strokes and fewer lap marks? Thin Valspar latex for brushing by adding small amounts of water—start with 1 ounce per quart and test. Stir thoroughly, check viscosity on a mixing stick, and brush a sample panel.
Maintain color matching by testing thinned paint against the target area under natural light; thin only slightly to avoid shifting sheen. Confirm primer compatibility: confirm the primer is fully cured and designed for latex; thin paint can behave differently over oil-based or specialty primers.
If flow improves without sagging or transparency, proceed. Clean brushes and adjust only in small increments.
How to Thin Valspar Latex Paint for Rolling
Before you start rolling, make sure you prepare the Valspar latex paint by stirring it thoroughly and straining out lumps.
Add water in small, measured amounts—use a syringe or measuring cup so you don’t over-thin.
Test the paint on a scrap board or inconspicuous wall and adjust until it spreads smoothly without sagging.
Prepare Paint Properly
When you’re rolling Valspar latex exterior paint, thinning it slightly can improve flow, reduce roller lines, and help the paint level evenly on rough surfaces.
Prepare paint properly by stirring thoroughly to reincorporate pigments for consistent color coordination and by checking sheen for paint durability.
Open cans in a clean, dry area and strain into a clean container to remove skin or lumps. Avoid contamination from old brushes or dirty buckets.
- Stir thoroughly and scrape sides.
- Strain paint through a mesh filter.
- Use a clean pour container.
- Keep lids on between uses to preserve quality.
Measure Water Carefully
If you’re thinning Valspar latex for rolling, measure the water precisely so you don’t dilute the binder and weaken adhesion. Use a clean graduated container and add water in small increments, noting volume per can. Stick to manufacturer recommendations—usually no more than 10% by volume—and record any change for color matching notes.
Stir thoroughly between additions to check pigment consistency and avoid streaks. Don’t guess; a teaspoon difference scales up across gallons. Label thinned buckets with ratios and date. Precise measurement preserves film strength, coverage, and predictable finish without compromising adhesion or altering the designed hue.
Test Roll Consistency
Though you’ve measured water precisely, you still need to test the roll to guarantee the thinned Valspar latex lays down smoothly; you’ll confirm coverage, Color matching, and Texture smoothing before committing to the whole wall.
Pour a small batch into a tray, load the roller, and apply to a scrap or hidden corner. Evaluate for streaks, puddling, or color shifts. Adjust with tiny water additions or more paint as needed, mixing thoroughly between tweaks. Repeat until the finish matches your sample.
- Apply test strip
- Check for streaks
- Assess color match
- Fine-tune viscosity
How to Thin Valspar Latex Paint for Airless Spraying
Because airless sprayers need a slightly thinner consistency than brush or roller application, you’ll want to thin Valspar latex paint just enough to flow without clogging the tip or reducing coverage.
Start by checking color matching and primer compatibility—ensure any tint or primer added won’t alter hue or adhesion. Stir thoroughly, then add water in 1% to 2% increments, mixing and straining before testing.
Aim for a viscosity that sprays smoothly at recommended pressure and passes a 60-mesh filter. Avoid over-thinning; too much water causes runs, poor hide, and weaker film formation.
Test spray and adjust minimally.
How to Thin Alkyd (Oil-Based) Valspar Paint Safely
Before you start thinning alkyd Valspar, make sure you’re working in a well-ventilated area. Wear chemical-resistant gloves and a respirator rated for organic vapors.
Choose the proper thinner—mineral spirits or the manufacturer-recommended solvent—to avoid ruining the paint’s finish.
Add the thinner slowly, mixing and testing spray or brushability as you go.
Safety Precautions First
When thinning alkyd (oil-based) Valspar paint, prioritize your safety by working in a well-ventilated area, wearing chemical-resistant gloves and eye protection, and keeping ignition sources far away—alkyd thinners release flammable, toxic fumes that can harm you quickly.
You should also protect skin, avoid breathing vapors, and keep children and pets out. Store solvents in approved containers and follow paint storage guidelines to prevent spills or degradation; proper labeling helps with color matching later.
Before you begin, read the paint and solvent labels and have a fire extinguisher nearby.
- Ventilation and PPE
- No open flames
- Secure storage
- Read labels
Proper Thinner Selection
Which thinner should you reach for? You’ll pick mineral spirits (odorless if preferred) for alkyd Valspar paint; it keeps color mixing predictable and won’t harm surface preparation. Use clean, high-quality solvents and follow label ratios—start small. Avoid lacquer thinner unless instructed. Test a small batch, note drying and sheen, and adjust. Wear gloves and ventilate.
| Thinner | Use Case | Note |
|---|---|---|
| Mineral Spirits | General thinning | Stable color mixing |
| Odorless Spirits | Indoor jobs | Less smell |
| Turpentine | Traditional | Strong odor |
| Lacquer Thinner | Rare | Can alter finish |
Recommended Thinners and Solvents for Valspar Paint
Wondering which thinners and solvents work best with Valspar exterior paints? You’ll usually use water for latex and mineral spirits for alkyds.
Keep color mixing separate from thinning to avoid unexpected shifts, and match solvent choice to your brush selection and application method.
- Water — for Valspar acrylic/latex; adds small amounts to improve flow.
- Mineral spirits — for oil/alkyd formulas; cleans brushes and adjusts viscosity.
- Slow-evaporation solvent — for hot, dry conditions; maintains open time.
- Manufacturer’s reducer — safest for specialty coatings; follow label ratios precisely.
Don’t Mix Random Solvents : Why It’s Risky
Don’t mix random solvents into Valspar because incompatible chemicals can trigger unexpected reactions that ruin the paint’s consistency or create hazardous fumes.
Doing so can also void your warranty and degrade performance, leading to peeling, poor adhesion, or color shifts.
Stick to the manufacturer’s recommended thinners or water-based options to keep the finish reliable and safe.
Chemical Reaction Risks
If you mix solvents without knowing their chemistry, you can trigger dangerous reactions—like exothermic heat release, toxic gas formation, or polymerization—that ruin the paint and put you at risk.
You should respect chemical stability and watch solvent interaction closely. Don’t assume compatibility; read labels and MSDS, test small batches, and keep ventilation and PPE ready.
Avoid open flames and sparks when mixing.
- Incompatible solvents can create heat and pressure.
- Reactive byproducts may emit toxic fumes.
- Polymerization can clog equipment and spoil finish.
- Small tests reveal instability before full-scale thinning.
Warranty And Performance Issues
Beyond the safety and chemical stability concerns, mixing solvents can void your paint warranty and wreck the finish’s performance. You’ll lose manufacturer protections if you use unapproved blends, and unpredictable solvent interactions can ruin Color matching and durability. You should document any additives and avoid random cans. Using Eco friendly solvents still requires approval; don’t assume compatibility. Below is a quick reference.
| Risk | Effect | Action |
|---|---|---|
| Warranty void | No manufacturer support | Check label |
| Color shift | Mismatched finish | Test small area |
| Adhesion loss | Peeling | Inspect adhesion |
| Durability drop | Faster wear | Avoid mixing |
Proper Thinning Alternatives
While you might be tempted to grab whatever solvent’s on hand, mixing random thinners can create chemical reactions that undermine adhesion, color, and warranty coverage. You should stick to Valspar-approved reducers or water for latex.
Solvent mixing can shift color matching, cause fisheyes, and ruin long-term paint storage. Follow label directions, test small batches, and note mix ratios.
- Use manufacturer-recommended thinner only.
- Thin in small test jars to check color matching.
- Label and seal leftover mixes for proper paint storage.
- Dispose of incompatible solvents—don’t blend unknown chemicals.
Perform a Wet-Edge and Flow Test Before You Paint
Before you commit to a full coat, perform a wet-edge and flow test to make sure the thinned Valspar paint levels properly and won’t lap or leave brush marks.
Pick a small, inconspicuous area and apply thinned paint in overlapping passes, watching how it blends at the wet edge. Check flow over trim and textured surfaces to confirm consistent coverage and color matching with adjacent panels.
Also evaluate primer adhesion where you’ve primed bare spots, ensuring the thinner hasn’t reduced bonding. Adjust thinning incrementally if you see dragging, sagging, or poor leveling, then retest until satisfied.
How to Test Coverage and Drying After Thinning
After thinning, paint a swatch on the same surface you’ll be working on to check coverage and adjust if areas look thin or streaky.
Mark the time and note when the swatch becomes tack-free so you can compare to the paint’s typical dry time.
If coverage or drying is off, tweak the thinner amount and retest on another swatch.
Test Coverage With Swatch
Want to make sure your thinned Valspar paint still covers and dries properly? Swatch a small board using your desired color mixing and note how primer selection affects adhesion.
Apply a thin coat, then a thinned coat matching your planned ratio, and label each area.
- Use a primed and an unprimed swatch to compare coverage.
- Mark the thinner ratio and stir method beside each sample.
- Photograph wet and cured swatches for reference over 24–48 hours.
- Inspect for uniformity, adhesion, and color shift; record results before scaling up.
Adjust thinning if coverage or finish looks compromised.
Check Dry Time
Now that you’ve compared coverage on swatches, check how thinning changes dry time so you don’t get tacky or uneven layers on the real job. Apply the thinned mix to a small, representative panel and note open time, tack-free time, and full cure under the conditions you’ll work in.
Measure with a stopwatch and record temperature, humidity, and coat thickness. Compare dried swatches for color consistency and surface feel versus unthinned paint.
If drying is too slow or finish uneven, reduce thinner slightly or increase flash time between coats. Proper testing preserves finish durability and prevents costly rework.
Adjusting Thinning for High Heat and Low Humidity
Because heat and dry air speed up drying, you’ll need to thin Valspar exterior paint a bit more than usual to keep brush marks and lap lines from forming. You’ll add small increments of manufacturer-recommended solvent, test spray or brush, and watch open time.
Maintain color matching by testing on a hidden panel; excessive thinning can alter sheen and apparent hue. Thinning carefully also preserves paint durability by ensuring proper film thickness.
- Add 5–10% solvent, mix thoroughly.
- Test a small section for flow and color.
- Adjust in 2% increments if needed.
- Avoid over-thinning; maintain film thickness.
Adjusting Thinning for Cold or Humid Conditions
When temperatures drop or humidity climbs, you’ll usually need to thin Valspar exterior paint less—or not at all—to preserve drying time and film build. You should test small batches: apply a thin ribbon on scrap and time tack-free set.
In cold or damp air, solvents evaporate slowly, so over-thinning causes sagging and poor adhesion. Keep thinner amounts minimal, stir thoroughly, and maintain consistent color matching by noting any tint variations when adding solvent.
Also protect tools—warm water for brush cleaning may be less effective, so use manufacturer-recommended cleaner and clean promptly to avoid curing on bristles.
How Thinning Changes Coverage, Sheen, and Dry Time
Although thinning can make paint easier to apply, it also changes how much surface a gallon will cover, how glossy the finish looks, and how quickly the paint dries. You’ll reduce pigment concentration, so coverage per gallon drops and you may need extra coats. Thinner paint levels better for improved color blending but can dull sheen. Faster solvents evaporate more quickly, shortening open time and affecting lap marks. Balance thinning to protect finish durability while getting workable flow.
Thinning eases application but reduces coverage, dulls sheen, speeds drying, and improves blending—balance for durability and flow.
- Coverage: expect reduced spread; plan coats.
- Sheen: may lessen gloss.
- Dry time: often faster.
- Color blending: improved with controlled thinning.
Maintaining Adhesion and Avoiding Peeling After Thinning
Thinning affects more than coverage and sheen; it can also weaken the bond between paint and surface if you’re not careful. You’ll preserve adhesion by thinning only within manufacturer limits and stirring thoroughly so color mixing stays consistent.
Clean, dry, and degloss the substrate before you paint; remove loose paint, dirt, and mildew so thinned coats grab properly. Use primer when switching between surfaces or covering stains.
Apply thin, even coats and let each layer cure fully before the next.
Choose the right tools—Brush selection matters: use quality synthetic bristles for thinned latex to lay down a uniform film and avoid peeling.
Common Mistakes That Cause Runs, Sags, and Blisters
If you overload your brush or roller or apply paint too thickly, you’ll invite runs and sags because the wet film can’t support its own weight. You’ll also cause blisters by trapping solvents under a fast skin.
Poor surface preparation leaves contaminants that prevent adhesion and promote peeling beneath blisters.
Incorrect color mixing ratios or adding too much thinner alters drying and film strength, increasing defects.
Control application, use appropriate viscosity, and allow proper flash time between coats.
- Overloading tools or heavy passes
- Skipping surface preparation steps
- Wrong color mixing or thinning amounts
- Painting in unsuitable temperature/humidity
Troubleshooting: Paint Still Sprays Poorly?
Those application mistakes you just read about often explain poor coverage, but when paint still sprays poorly despite proper technique, look next at the equipment and material handling.
Check nozzle size, strainers, and pressure — clogged tips or wrong orifices create spitting and orange peel. Verify thinned viscosity with a gun cup or viscosity cup; adjust slowly.
Inspect mixed cans for separation or improper color matching that forces overworking and inconsistent layers. Clean filters and replace worn seals.
If you switch between spray and handwork, guarantee brush selection matches finish to avoid texture mismatch. Test on scrap before committing to the surface.
How to Clean and Store Thinned Valspar Paint Properly
When you’re done spraying, don’t leave thinned Valspar sitting in the gun or open can—cleaning and storing it properly prevents clogs and spoilage. Rinse equipment immediately with the solvent recommended on the label, then flush spray lines.
Strain leftover paint into a clean container through a fine mesh to remove debris. Label containers with color, tint formula for future color matching, and date. Store sealed cans upright in a cool, dry place away from sunlight.
For brushes, use proper brush techniques when cleaning—work solvent through bristles, reshape, and hang to dry to preserve performance.
- Rinse and flush equipment
- Strain and relabel leftovers
- Seal and store upright
- Clean, reshape, hang brushes
When to Stop Thinning and Switch Products
Before you keep adding thinner, watch for signs that further reduction won’t help: the paint’s coverage drops, the film feels weak or tacky after drying, or spray performance stays uneven despite proper thinning.
Stop thinning when adhesion, opacity, and flow degrade. If you’re chasing color matching but dilution shifts hue or sheens, switch to a differently formulated Valspar base or consult tinting options.
For brush techniques, don’t overwork thin paint; it’ll leave streaks and poor build. Move to a product designed for spraying or brushing rather than forcing thin exterior paint beyond its meant limits.
Printable Checklist: Thin Valspar Exterior Paint Correctly
If you’ve reached the point where further thinning hurts coverage or adhesion, use this printable checklist to thin Valspar exterior paint correctly and avoid common mistakes. Keep a clean container, stirrer, and measured thinner. Note product lot for color matching and confirm paint branding before altering.
Test small batch, apply sample, and let dry fully. Verify sheen and adhesion.
- Confirm paint branding and lot number for color matching.
- Measure thinner precisely; follow label ratios.
- Test on a scrap panel; inspect after full cure.
- Record adjustments and date for future touch-ups.
Frequently Asked Questions
Can I Thin Valspar Paint for Use on Metal or Masonry Surfaces?
Yes, you can thin Valspar for metal surfaces or masonry application, but you’ll follow product instructions: use recommended thinner, add small amounts, test adhesion, and consider primers and rust/masonry-specific formulations for best durability and coverage.
Will Thinning Affect the Paint’s Warranty or VOC Compliance?
Yes — thinning can void the warranty and alter VOC compliance; you’ll reduce paint durability and may increase environmental impact. Check manufacturer specs before altering; follow recommended reducers and document choices to protect coverage and compliance.
How Long Should Thinned Valspar Paint Be Usable Before It Spoils?
You’ll generally get 1–2 years of usable shelf life for thinned Valspar paint if you practice proper paint storage, seal containers tightly, keep them cool, and avoid contamination; shorter if solvents or water weren’t pure.
Can I Tint Thinned Valspar Paint or Add Colorant Afterward?
Yes — you can tint thinned Valspar paint, but test first to guarantee color matching and tint consistency; you’ll add compatible colorant slowly, stir thoroughly, and retest samples to confirm final hue and performance before full application.
Is It Safe to Thin and Use Valspar Paint Indoors With Ventilation?
Yes — you can thin and use Valspar paint indoors if you follow Indoor safety and Ventilation considerations: you’ll open windows, run fans, wear a respirator, limit thinning to manufacturer’s guidelines, and avoid prolonged exposure for occupants.
Conclusion
You’ve got this—thin Valspar exterior paint only when it’s too viscous to spray or brush smoothly, and match thinner type to latex or alkyd. Go slow, add small amounts, and test as you go; a little extra goes a long way. If problems persist, stop thinning and try a different product or consult the label. Keep tools clean and sealed, and you’ll be back in the saddle with a pro-looking finish.