How to Wall Paint Like a Professional Painter
To paint walls like a pro, start by thoroughly inspecting, cleaning, and repairing surfaces, then prime patched or stained areas; protect floors and trim with drop cloths and tape. Choose low‑VOC, room‑appropriate paint and a sheen that suits traffic and texture. Use quality brushes and rollers, cut in carefully, roll in overlapping W’s, maintain a wet edge, and do neat touch‑ups. Follow good ventilation and cleanup practices, and keep going to learn pro tips for flawless finishes.
Quickly Learn Pro Wall-Painting Steps
When you’re ready to paint like a pro, start by prepping thoroughly: clean surfaces, patch holes, sand rough spots, and tape edges so paint goes only where you want it.
You’ll gather quality brushes, rollers, drop cloths, and primer, then plan your workflow: cut edges first, roll large areas, and maintain a wet edge to avoid lap marks.
Test swatches to assess Color psychology—how hues affect mood—and follow current paint color trends to pick a lasting palette.
Work in sections, keep consistent pressure, and lightly feather strokes.
Finish with inspection and touch-ups for a polished, professional result.
Why Learning Pro Wall-Painting Skills Saves Time and Money
Because you learn proper prep, tools, and techniques, you’ll cut project time and avoid costly mistakes—so painting becomes faster and cheaper overall.
You’ll plan color psychology choices to avoid redoing rooms and pick finishes that hide flaws, reducing coats.
Efficient prepping—patching, sanding, taping—means fewer interruptions and less wasted paint.
You’ll buy the right amount, store leftovers correctly, and use smart paint storage to extend life for touch-ups.
Learning rapid, repeatable techniques lowers labor time and improves results, so you won’t hire pros for fixes.
That saves money long-term and gives you confidence to tackle future projects yourself.
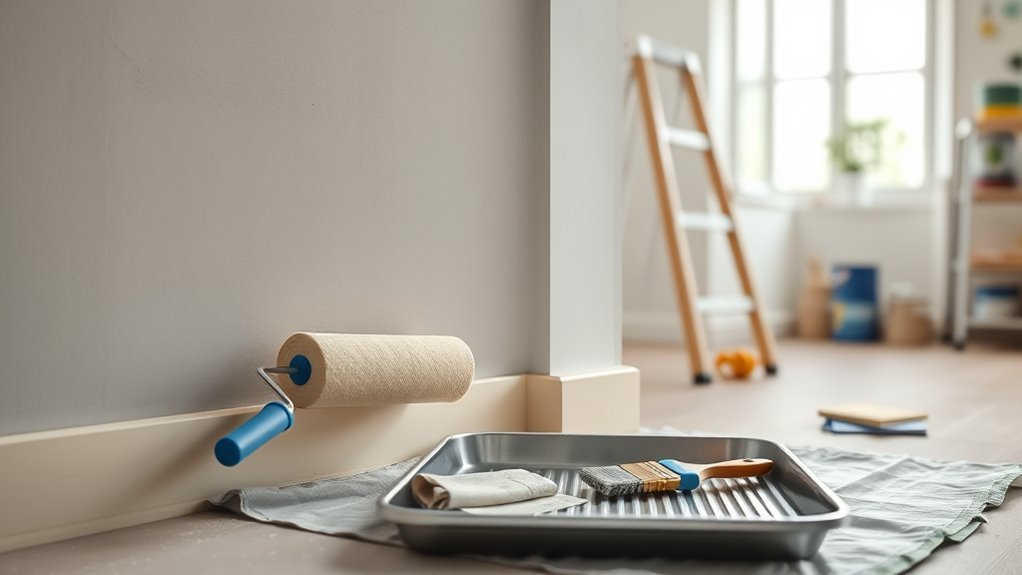
Painting Tools Pros Always Keep On Hand
You’ll want a handful of brushes — angled sash, trim, and a good quality wall brush — to handle edges and detail.
Pick rollers and frames suited to your paint and surface, from smooth short-nap rollers to thicker naps for textured walls.
Don’t forget prep and finishing tools like tape, drop cloths, putty knives, and a reliable edger to make the job clean and fast.
Essential Brush Types
Although brushes might seem simple, the right few types will make your paint job faster, cleaner, and more professional. You’ll want an angled sash brush for cutting in crisp lines around trim and ceilings, a 2½-inch flat for smooth wall sections, and a small round brush for corners and tight spots.
Pick synthetic bristles for water-based and eco-friendly paints, natural-bristle for oil paints. Keep a chip brush for quick touch-ups and a detail brush for touch-ins.
Maintain them by cleaning thoroughly and storing upright. Choosing quality brushes helps your finish reflect thoughtful choices like color psychology and room purpose.
Roller And Frame Options
After you’ve picked the right brushes, the roller and frame you grab will determine how fast and even the paint goes on. Choose roller naps by surface: 1/4″–3/8″ for smooth walls, 3/4″ for textured surfaces. Match frame length to roller—extendable frames save time on high walls.
Use a threaded frame for secure fit and a molded one for light jobs. Microfiber or woven covers reduce splatter and show true paint color. Keep a small trim roller for tight spots; it complements brush styles for corners.
Replace covers between sheen changes to avoid contamination and uneven finish.
Prep And Finishing Tools
Stocking the right prep and finishing tools makes the job faster and gives you a crisp, professional result. You’ll want high-quality putty knives, sanding blocks, and a multi-grit sanding sponge to smooth imperfections. Keep painter’s tape, corner tools, and a reliable caulk gun for clean edges. Use tack cloths to remove dust before cutting in.
For finishing, a trim brush, angled sash brush, and a small foam roller handle details efficiently. Carry a ladder, drop cloths, and a leveling guide. Choose brushes compatible with eco-friendly paints and consider color psychology when selecting finishes to influence mood.
Choosing the Right Paint Type for Each Room
When you pick paint, think about how each room is used and how much wear it gets. You’ll choose durable, washable formulas for high-traffic areas like hallways and kids’ rooms.
For bedrooms, opt for softer, low-VOC options. Kitchens and baths need mildew-resistant, easy-clean paints that handle humidity.
Use color psychology to influence mood—calming blues for bedrooms, energizing yellows for kitchens.
Consider eco-friendly finishes and paints with low odor to protect indoor air quality.
Match product features to function—stain resistance, scrubbability, and VOC level—so each room performs well and feels right without overbuying.
How to Pick the Perfect Paint Finish
Think about sheen levels first, since they affect durability and how much light your walls reflect. Match the finish to the room’s function—use tougher, washable sheens in high-traffic or moisture-prone areas.
Also pick a flatter finish to hide surface imperfections and a glossier one where you want easy cleaning.
Sheen Levels Explained
Because the finish you choose affects durability, light reflection, and how flaws show, picking the right sheen is as important as picking the color. You’ll learn sheen levels—from flat to high-gloss—and how they change a room’s look.
Flat hides imperfections but isn’t as washable. Eggshel gives slight sheen with modest durability. Satin balances sheen and cleanability for trim and moderate-traffic areas. Semi-gloss boosts durability and highlights details. High-gloss maximizes paint gloss, is easiest to clean, and emphasizes imperfections.
Match sheen to surface condition and desired maintenance. Test samples under your lighting before committing.
Room Function Considerations
If a room gets heavy use or frequent moisture, pick a finish that stands up to scrubbing and stains; otherwise choose a softer sheen that flatters walls and hides flaws. You should match finish to function: kitchens and bathrooms need durable, washable sheens; living rooms and bedrooms benefit from matte or eggshell under varied room lighting. Consider maintenance, traffic, and paint odor when choosing low-VOC options for tight spaces. Picture choices:
| Finish | Best For | Durability |
|---|---|---|
| Gloss | Trim, high-moisture | Very high |
| Semi-gloss | Kitchens, baths | High |
| Eggshell/Matte | Living, bedrooms | Moderate |
Surface Imperfections Hiding
Now that you’ve matched finish to room use, consider how sheen affects flaws: flatter finishes hide bumps and patched areas, while shinier sheens highlight texture and imperfections. When choosing, think about wall texture and how visible you want it.
Use flat or matte finishes where walls are imperfect; satin or eggshell for moderate durability with modest reflection. Before painting, prioritize surface preparation—fill holes, sand rough spots, and prime patched areas so paint lays evenly.
Test a small swatch in natural and artificial light to see how the sheen reads. Pick the finish that conceals defects while meeting cleaning and aesthetic needs.
Calculate How Much Paint You Actually Need
Before you open a can, measure and calculate so you don’t buy too much or run out mid-job. You’ll measure wall area, subtract doors/windows, and factor coats. Think about color psychology when choosing finishes—bold hues often need extra coats. Note paint storage for leftovers; label cans with room and date. Multiply square footage by coats, divide by a gallon’s coverage to get required gallons. Keep a small reserve for touch-ups.
| Emotion | Detail |
|---|---|
| Calm | Accurate math |
| Relief | Right amount |
| Pride | Neat storage |
| Confidence | Ready reserve |
How to Read Paint Labels and Coverage Specs
Next, you’ll learn to read the fine print so you know what a can actually covers per coat. Pay attention to coverage rates listed in square feet per gallon and the label symbols that indicate finish, stain-blocking, and recommended coats.
That way you’ll pick the right product and avoid surprises on paint day.
Understanding Coverage Rates
When you pick up a can and scan the label, the coverage rate tells you how much surface a gallon will actually cover — but it’s not a guarantee; it’s an estimate based on ideal conditions. You’ll use it to plan coats, buy enough paint, and avoid rush trips.
Consider color psychology when choosing sheens and how paint texture affects spread. Account for porosity, previous color, and tools.
Typical tips:
- Measure walls precisely
- Increase for textured surfaces
- Add 10–20% for absorption
- Plan extra for trims
- Test a small area first
Adjust estimates after your test patch.
Decoding Label Symbols
Because paint labels pack a lot into small print, you’ll want to learn the common symbols and terms so you can quickly compare coverage, finish, and application details. Read label symbols to find coverage (sq ft/gal), sheen (matte, eggshell, satin), VOC level, and recommended tools. Look for spread rate and hide icons to estimate coats. Check drying time and recoat window. Use the table as a quick visual guide.
| Symbol | Meaning |
|---|---|
| Coverage icon | Sq ft per gallon |
| Sheen droplet | Finish type |
| Brush/roller | Recommended tools |
| Clock | Dry/recoat time |
Preparing Walls: Repair or Replace?
If a wall shows cracks, holes, or water damage, decide now whether to repair or replace before you paint. Small flaws you can patch, but widespread structural or mold problems call for replacement. You’ll assess Wall texture, load-bearing integrity, and lingering dampness.
Consider paint storage conditions if materials sat in a humid garage—they affect adhesion.
Checklist to guide your call:
- Surface area affected (small vs. extensive)
- Evidence of mold or rot
- Structural concerns or shifting foundations
- Cost and time to repair versus replace
- Long-term finish quality and maintenance needs
Make the practical choice so your new paint lasts.
Fill Holes and Smooth Dents Like a Pro
Start by walking the wall and marking every hole and dent so you know what needs attention.
Pick a filler that matches the damage—spackle for small nicks, lightweight compound for larger gouges—and apply it smoothly.
Once it’s dry, sand level and prime the patch so paint will lay down evenly.
Identify Damaged Areas
When you’re prepping a wall for paint, walk the surface slowly and mark every ding, hole, and dent so nothing gets missed; small flaws will telegraph through new paint if you don’t address them. You’ll want to assess size, depth, and surrounding texture to plan repairs that maintain color harmony and match texture techniques later.
Use good light, feel with your hand, and note hairline cracks. Prioritize structural issues first.
- Inspect under raking light
- Run a flat tool over the surface
- Measure hole depths
- Photograph damage for reference
- Mark repair zones clearly
Choose The Right Filler
After you’ve mapped every ding and crack, pick a filler that matches the damage type and wall material so repairs won’t settle, crack, or show through the finish. Choose lightweight spackle for hairline cracks, vinyl for deeper gouges, or joint compound for plaster. Match drying times to your schedule, and pick products compatible with Eco friendly paints if sustainability matters. Think about Color psychology when planning touch-ups—seamless repairs keep tones true. Use this quick reference to guide emotional confidence:
| Repair Type | Confidence | Result |
|---|---|---|
| Hairline | Calm | Invisible |
| Gouge | Bold | Solid |
| Plaster | Reassured | Smooth |
| Quick fix | Ready | Honest |
Sand And Prime Smoothly
Because a smooth base makes paint look its best, sand repairs and prime surfaces carefully so your finish lays down evenly and hides imperfections. You’ll sand filler flush, wipe dust, and spot-prime patched areas to prevent sheen differences. Use fine-grit sandpaper, clean microfiber, and a quality primer suited to your wall.
Remember that Color psychology can influence primer and topcoat choices, and proper paint storage preserves primer performance.
Follow this quick checklist:
- Sand until seams disappear
- Clean dust before priming
- Use stain-blocking primer on damaged spots
- Allow full dry time between coats
- Store leftover paint sealed, upright
Remove Loose Paint and Sand for Adhesion
If old paint’s flaking or bubbling, scrape it off and sand the surface to give the new coat something to grip. You should remove loose chips, feather edges, and sand until the shift is smooth. Test paint color and paint texture compatibility; roughness improves adhesion but won’t hide poor quality. Use medium-grit for chips, fine-grit for finish, and vacuum dust before recoating. Follow with tack cloths to pick up residual particles.
| Tool | Grit/Type | Purpose |
|---|---|---|
| Scraper | Metal | Remove flakes |
| Sandpaper | 80–220 | Shape edges |
| Block | Fine | Smooth surface |
| Vacuum | HEPA | Remove dust |
Clean Walls to Ensure a Long-Lasting Finish
Once you’ve removed loose paint and smoothed edges, clean the walls so new paint will adhere and last. You’ll remove dust, grease, and residues from wallpaper removal or minor mold issues before painting. Tackle stains and mildew with appropriate cleaners, and call professionals for serious mold remediation. Rinse and let walls fully dry.
- Vacuum corners and baseboards
- Wash with TSP substitute or mild detergent
- Spot-treat mildew with diluted bleach solution
- Scrape adhesive left from wallpaper removal
- Dry thoroughly before continuing
Clean walls give a durable, professional finish and prevent adhesion failures.
Priming: When You Need It and Which Primer to Use
You’ll want to prime when walls are stained, patched, porous, or when you’re making a big color change.
Pick a primer formulated for the surface—stain-blocking for water or smoke damage, latex for drywall, or oil/adhesive primers for glossy or problem surfaces.
The right primer improves adhesion, evens out absorption, and saves you coats of paint.
When To Prime
Wondering whether to prime? You should prime when surfaces are stained, porous, patched, or drastically changing color. Priming improves adhesion and covers flaws so your finish looks professional.
Keep in mind proper color mixing after priming to predict final hue, and avoid contaminating fresh primer with leftover paint—observe paint storage best practices.
- New drywall or bare plaster
- Water stains or smoke damage
- Dark-to-light color changes
- Glossy or previously painted surfaces
- Patch repairs and joint compound
Prime selectively when needed; you’ll save time and materials while ensuring even coverage and true color payoff.
Choosing The Right Primer
Now that you know when to prime, the next step is picking the right primer for the job. You’ll match primer type to surface: drywall, glossy surfaces, or stain-blocking needs. Consider color theory when tinting primers to improve final coverage and reduce coats. Acrylic primers add adhesion; oil-based block stains and boost paint durability. Use shellac for water damage. Choose low-VOC for interiors. Below is a quick visual guide:
| Surface | Primer type |
|---|---|
| New drywall | Acrylic latex |
| Stains/odor | Shellac/oil |
Select based on surface and desired finish to save time and guarantee longevity.
Pick Colors to Avoid Repainting Regret
Because paint is one of the most permanent changes you’ll make in a room, think beyond trends and pick hues that match how you actually live in the space. Consider lighting, furniture, and the room’s purpose so you don’t end up repainting in a year.
Use color psychology to match mood and function, and do a paint brand comparison for durability and finish. Choose neutrals for flexibility, accent walls sparingly, and coordinate with existing textiles. Keep undertones consistent.
Balance bold choices with timeless elements.
- Match mood to function
- Consider natural and artificial light
- Coordinate with furniture
- Note undertones
- Prioritize longevity
Test Paint Samples to Avoid Surprises
When you’re choosing a color, test several paint samples on different walls and view them at various times of day so you see how light and surrounding furnishings change the shade. You’ll notice subtle shifts that affect mood; use color psychology to match energy to purpose. Apply eggshell or matte swatches and try Eco friendly finishes to confirm sheen and scent. Live with samples for a week, observing evenings and mornings. Trust your reactions, not a chip. Below is a simple, emotional prompt to guide choices:
| Feeling | Sample |
|---|---|
| Calm | Pale blue |
| Warmth | Terracotta |
| Focus | Soft gray |
| Joy | Sunny yellow |
Create a Color Plan for Connected Rooms
After you’ve lived with samples and settled on moods for individual spaces, create a color plan that helps adjacent rooms feel intentionally linked rather than jarring. You want consistent color harmony and clear room flow so progressions feel natural.
Choose a dominant palette, then vary tone, saturation, or finish to distinguish spaces without clashing. Use accents and repetition to guide the eye. Consider sightlines and lighting when assigning hues.
- Pick a unifying undertone
- Vary lightness, keep undertone consistent
- Use accent walls sparingly
- Repeat one accent color across rooms
- Test gradations in real light
Protect Floors, Trim, and Furniture Efficiently
If you want clean edges and no surprise stains, start by clearing the room and covering floors, trim, and furniture with purpose-built protection.
Roll out drop cloths or taped paper for floor protection, smoothing seams to prevent paint seepage.
Wrap chairs and lamps in lightweight plastic or canvas for reliable furniture coverage, securing edges with low-tack tape.
Remove or bag outlet covers and switch plates, and slide protective cardboard under radiator feet.
Keep a small tool kit and paper towels nearby for quick blots.
Work from top to bottom so drips fall onto protected surfaces, not your belongings.
How to Mask Trim and Windows for Crisp Lines
Because crisp paint lines start with careful masking, grab quality painter’s tape and a straightedge before you touch the brush. You’ll prep trim masking and practice precise window sealing to stop bleed and save touch-ups. Work methodically: clean surfaces, align tape, press edges, and remove tape at the right moment.
Because crisp paint lines start with careful masking, prep surfaces, align tape, press edges, and remove while tacky.
- Clean and dry trim and frames first
- Use a straightedge for long runs
- Overlap tape at corners, trim excess
- Seal tape edge with a thin paint coat or caulk
- Remove tape while paint’s tacky, not fully dry
Follow these steps and your lines will look professional.
Set Up a Productive Painting Workspace
When you set up your painting workspace, organize tools, drop cloths, and lighting so everything’s within reach and you won’t need to stop mid-coat. Clear a zone, protect floors, and position lamps to eliminate shadows. Arrange brushes, trays, and cans by task; label samples for creative color schemes and choose eco friendly paints where possible. Keep a trash bin and damp cloth handy for quick cleanup. Take short breaks and hydrate to maintain focus.
| Calm | Excited |
|---|---|
| Cozy | Inspired |
| Steady | Bold |
Best Rollers and Covers for Smooth, Even Coats
You’ll pick the right nap length for your surface—short naps for smooth drywall, medium for lightly textured walls, and long naps for rough or stucco finishes.
Choose cover materials that match the paint type and desired finish: microfiber or woven covers for latex and smooth results, and natural fibers for oil-based paints.
With the right nap and material, you’ll get smooth, even coats and fewer touch-ups.
Nap Length Guide
Although the right roller nap might seem minor, it controls how much paint your roller holds and how smoothly it lays down—so choose carefully. You’ll match nap length to wall texture: short naps for smooth drywall, medium for lightly textured, long for rough surfaces. Consider how nap affects finish and coverage, and remember color psychology when planning sheen and tone.
Proper paint storage preserves nap performance between coats.
Quick tips:
- 1/4″ nap: ultra-smooth surfaces
- 3/8″ nap: smooth to semi-smooth
- 1/2″ nap: light texture
- 3/4″ nap: medium texture
- 1″ or more: heavy texture
Cover Material Choice
Picking the right nap was a good start; now focus on cover material, because it has as much impact on finish and paint pickup as nap length does.
Choose synthetic covers for water-based paints and natural covers for oil-based ones.
Look for dense knit for smooth walls and blended piles for slight texture.
Prioritize material durability to avoid shedding and maintain consistent laydown.
Match roller width to room size for efficiency.
Keep a fresh roller for trim to prevent contamination, and practice color coordination so fake starts don’t show—use dedicated covers per hue or clean thoroughly between colors to keep edges crisp and true.
Choose Brushes That Give Pro-Quality Edges
When you want crisp, professional-looking edges, start with the right brushes: a narrow angled sash brush for cutting in, a high-quality synthetic for water-based paints, and a natural-bristle option for oils or latex blends. You’ll control lines better, reduce drag, and save touchups.
- Choose widths matching trim and corner size.
- Pick angled edges for visibility and access.
- Match filament type to paint for smooth finish.
- Inspect ferrules and handles for balance and comfort.
- Clean and rotate brushes; proper paint storage preserves shape.
You’ll get sharper edges faster when you select and maintain tools thoughtfully.
Master Cutting-In Along Ceilings and Trim
Now that you’ve chosen and prepped the right brushes, it’s time to get clean lines where walls meet ceilings and trim. Start by loading the brush lightly, tapping off excess. Hold the brush at a slight angle and use steady, controlled strokes, working a few inches from the edge.
Use a sash tool or painter’s tape sparingly along ceiling edges if needed, but practice freehand cut-in techniques for speed and consistency. Feather the paint toward the wall, then backfill with smooth short strokes.
Keep a wet edge, clean drips immediately, and pause to reload before the line breaks.
Rolling Technique for an Invisible Texture
If you want the paint to disappear into the wall, start by choosing a roller cover with the right nap for your surface—3/8″ to 1/2″ for smooth to lightly textured walls—and load it evenly without over-saturating.
Work in consistent W or M patterns, then finish with light, unidirectional strokes to blend. Keep a wet edge and avoid pressing hard.
Roll in W or M motions, then finish with light, unidirectional strokes—keep a wet edge and avoid heavy pressure.
Consider how Color psychology affects sheen choices and pick eco-friendly paints for low odor.
- Use a firm, even wrist motion
- Maintain consistent pressure
- Reload before bald spots appear
- Feather edges lightly
- Inspect under different lighting
Apply Multiple Coats Without Lap Marks
Because each coat changes the surface’s sheen and absorption, plan your timing and technique so new passes blend into still-tackier paint. You’ll work in consistent sections, matching pressure and overlap, and adjust for color theory and paint mixing differences between batches. Keep edges feathered; sand lightly between coats only when cured. Test a small strip to confirm match before full application. Track drying times and room conditions so you don’t recoat too late.
| Step | Action |
|---|---|
| 1 | Section and pressure |
| 2 | Match mix and shade |
| 3 | Light sand, recoat |
Maintain a Wet Edge and Avoid Streaks
When you keep a wet edge, you prevent visible lap marks and streaks by blending each new pass into the still-tacky paint. You’ll work methodically from one section to the next, matching roller pressure and direction so color psychology stays true and sheen remains even across varied wall texture. Slow, consistent strokes matter more than speed.
Use these habits:
- Load the roller evenly, avoid excess drips
- Overlap each stroke by about 50%
- Maintain uniform pressure and direction
- Feather out edges before paint skins over
- Keep a wet edge line no wider than one roller length
Check lighting to catch streaks early.
How to Use Paint Additives and Extenders
While additives and extenders can improve flow, drying time, and durability, you should add them sparingly and follow manufacturer guidelines so the paint’s adhesion and color aren’t compromised.
You’ll choose paint additives for specific issues—open time, leveling, or mildew resistance—matching product instructions to base type. Measure precisely, mix thoroughly, and test a small patch so you confirm finish and cure.
Know extenders benefits: longer workability and smoother application without thinning pigment. Don’t overuse or combine unknown products; excessive extenders weaken film strength.
Clean tools and record ratios for consistent results next time you paint.
Efficient Painting Order for One Room at a Time
Start by getting all your prep work done—cleaning, patching, and taping—so you won’t interrupt your flow once the paint’s going.
Plan your paint sequence next: ceilings first, then walls, and trim last to keep edges crisp.
Stick to one room at a time to maintain rhythm and finish faster.
Prep Work First
Because a clean, organized workspace saves time and prevents mistakes, begin every room by prepping the area before you pick up a brush. You’ll clear furniture, protect floors, and assess surfaces so paint adheres properly.
Consider color psychology when choosing accents and test swatches in different light. Label cans and plan paint storage to keep mixes consistent. Review tools and repair needs so you won’t interrupt the flow.
- Move and cover furniture
- Tape trim and outlets
- Patch holes and sand smooth
- Arrange labeled paint and supplies
- Check lighting and ventilation
Prep lets you work efficiently and avoid rework.
Paint Sequence Plan
With the room prepped, map out a painting sequence that keeps you moving and minimizes touch-ups. Start with ceilings, then cut-in trim, finally roll walls. Use color coordination to sequence adjacent walls and avoid awkward progressions. Label cans and note paint mixing ratios so touch-ups match. Work clockwise so wet edges meet, and let each coat dry fully before the next. Keep tools staged: ladder, brushes, rollers together. Clean as you go to prevent drips. Review for missed spots under consistent light.
| Step | Task |
|---|---|
| 1 | Ceiling |
| 2 | Trim and edges |
| 3 | Walls and touch-ups |
Speed Tips Pros Use on Large Walls and Ceilings
When you’re facing big walls or high ceilings, the right sequence and a few pro tricks can cut hours off the job without sacrificing quality. You’ll prep efficiently, choose rollers and extension poles, and pick eco friendly paints that dry predictably. Think about color psychology for room flow so you avoid rework.
Use these speed tips:
- Work top-down: ceiling to trim to walls.
- Use a 9″ roller and a long nap for coverage.
- Employ extension poles and a roller grid.
- Tackle one wall lengthwise, then cross-roll for even finish.
- Keep a wet edge; reload often.
Paint Tricky Areas: Corners, Vents, and Outlets
Although the broad strokes cover most of the room, corners, vents, and outlets demand a different approach, so you’ll want to slow down and use the right tools — a quality angled brush, a slim trim brush, and painter’s tape — to get clean lines and avoid drips.
Work from top to bottom: cut in corners sharply, paint around vents with a small brush, and remove outlet covers before painting.
Use thin, controlled strokes and feather edges to prevent ridges.
Consider eco-friendly primers for better adhesion and odor control.
Remember color psychology when choosing accent corners to influence mood.
Blend Patch Repairs Into Surrounding Paint
After you finish cutting in corners and working around outlets, you’ll often spot small dents, nail holes, or scraped spots that need patching before the final coat. You’ll want seamless repairs, so focus on color blending and texture matching to hide them. Prep, feather, and finish deliberately:
- Sand edges smooth and remove dust.
- Use lightweight spackle, press into holes.
- Feather edges thinly with a putty knife.
- Match texture with roller nap or stipple brush.
- Test paint on a scrap area, blend wet into surrounding paint.
Work quickly while paint is wet to avoid visible seams.
Quick Fixes for Drips, Runs, and Sags
If a drip, run, or sag appears while the paint’s still wet, catch it fast—don’t wait for it to dry—by smoothing the excess with a dry, soft-bristled brush or a clean 2–3″ artist’s brush, dragging paint back into the surrounding area and then lightening the stroke with a roller to blend the texture.
If it’s tacky, feather outward from the high spot, remove excess with the brush, then roll gently.
For small dry drips, sand lightly, wipe, spot-prime, and repaint.
Match sheen and color; consider color psychology when fixing focal walls and use eco-friendly paints to keep corrections low-odor and safe.
How Humidity and Temperature Affect Drying and Finish
When you paint in a humid or chilly room, the water in latex and acrylic paints takes longer to evaporate, slowing curing and increasing the risk of drips, sagging, and a dull, uneven sheen. You’ll need to monitor humidity impact and temperature effects to get consistent results.
Painting in damp or cold rooms slows drying, risking drips, sagging, and an uneven, dull finish—monitor humidity and temperature.
Control conditions, choose timing, and adjust technique:
- Use a dehumidifier or heater to speed drying.
- Avoid painting at high humidity or near freezing.
- Thin coats dry more reliably than thick ones.
- Improve airflow with fans, but avoid direct blasts.
- Read paint labels for recommended temperature and RH ranges.
When and How to Sand Between Coats
You should sand between coats once the paint feels dry to the touch but before it fully cures, usually after a few hours for latex and longer for oil-based paints.
Use a fine-grit sandpaper (220–320) and a light, even touch to knock down brush marks and dust nibs without cutting through the finish.
Wipe with a tack cloth before applying the next coat to guarantee a smooth, even bond.
When To Sand
Because proper sanding makes the finish smooth and helps each coat stick, you’ll want to sand between most coats—especially on glossy paints, repaired areas, or any spots with visible brush or roller texture.
Wait until the previous coat is fully dry per the label and your paint storage conditions; humidity and temperature affect cure time.
Sand lightly to level high spots and blend edges, paying attention to wall texture and patched areas. Don’t skip a quick dust wipe before recoating.
Key reminders:
- Sand glossy surfaces gently
- Smooth repaired patches thoroughly
- Check manufacturer dry times
- Remove sanding dust completely
- Use proper ventilation
How To Sand
Although sanding between coats sounds simple, doing it at the right time with the right technique makes a dramatic difference in the final finish. You’ll wait until the coat is fully dry—follow the paint can’s recoat time—and then test a small area.
Use fine-grit (220–320) sandpaper or a sanding sponge, lightly scuffing to remove drips, dust nibs, and brush marks without cutting through the film. Wipe with a tack cloth, vacuum, then apply the next coat.
Proper sanding helps color psychology by ensuring smooth color depth, and it’s especially important when working with eco-friendly paints that can show imperfections.
Remove Painter’s Tape the Right Way
When the paint’s dry to the touch, peel the tape back slowly at a 45-degree angle to keep crisp edges and avoid tearing fresh paint. You’ll guarantee clean lines and avoid lifting cured paint by removing tape while paint’s still slightly tacky.
For stubborn edges, score with a sharp blade. Painter’s tape removal timing also helps when you evaluate paint color matching between coats. Follow these quick tips:
- Pull tape toward the painted surface, not away
- Go slow and steady to prevent jagged edges
- Use a utility knife for sealed edges
- Remove in short sections
- Check lighting for color accuracy
Clean Brushes, Rollers, and Equipment Properly
If you want your tools to last and your next job to go smoothly, clean brushes, rollers, and equipment right after you finish painting.
Rinse water-based paint until water runs clear; use solvent recommended for oil-based paint, then wash with soap and warm water.
Comb bristles to remove trapped pigment and reshape tips—that’s essential brush maintenance.
Spin or squeeze rollers to remove excess moisture, then let them air dry standing on ends to keep fibers straight.
Wipe metal trays, stir sticks, and caulking guns clean.
Once dry, organize for equipment storage in a dry, dust-free area so tools stay ready.
Store Leftover Paint and Label for Later Use
Because you’ll want to touch up chips or match a color later, store leftover paint properly and label every can clearly. Seal cans tightly, remove excess airspace, and keep them upright in a cool, dry spot away from direct sunlight.
Store leftover paint tightly sealed, labeled with color and date, upright in a cool, dry spot away from sunlight.
Note paint color, sheen, and any custom mixes on the label, plus date and room. Write paint texture (e.g., eggshell, flat) and brand to avoid mismatches. When reopening, stir gently to reincorporate pigment and binder.
- Use original can if possible
- Transfer to smaller airtight container
- Label with date and room
- Note paint color and code
- Store off concrete
Essential Ventilation and PPE for Safe Painting
Before you start painting, make sure the room has good airflow by opening windows and using fans to push fumes out.
Choose the right respiratory protection for the product—dust masks for sanding, N95 or respirators for strong fumes.
Wear coveralls or old clothes plus chemical-resistant gloves to keep paint off your skin.
Proper Room Ventilation
How will you keep fumes and dust from building up while you paint? You’ll control airflow, protect surfaces, and maintain safe room lighting and furniture arrangement so work stays efficient.
Open windows and doors to create cross-ventilation, use box fans to blow air out, and seal off vents to avoid spreading dust. Follow this quick checklist:
- Open opposing windows for cross-breeze
- Position fans to push air outward
- Cover and move furniture or shield with drop cloths
- Use low-dust sanding methods and vacuum often
- Keep lights positioned to avoid glare and reveal imperfections
Stay alert to odor levels and pause if ventilation’s inadequate.
Respiratory Protection Choices
Good ventilation cuts down fumes, but you’ll still need proper respiratory protection when sanding or using solvent-based paints.
Choose mask options based on task: N95s for dust, half-mask respirators with P100 cartridges for heavy particulates, and respirators with organic vapor cartridges for solvents.
Confirm a snug fit and replace filters per manufacturer guidance.
Consider portable air filtration to reduce airborne particles; position units to draw contaminants away from you.
Test breathing comfort before long sessions and keep windows open when safe.
Inspect seals, straps, and cartridges regularly.
Proper selection and maintenance protect your lungs and keep your work safe and efficient.
Protective Clothing And Gloves
While you work, wear clothing and gloves that keep paint, solvents, and dust off your skin and out of your clothes; they’ll reduce exposure and make cleanup easier. You should choose protective gear that fits, breathes, and resists splashes. Follow safety protocols: remove contaminated clothing promptly, launder separately, and inspect gloves for tears.
Disposable coveralls suit quick jobs. Reusable cotton or poly blends work for longer projects.
Nitrile gloves resist solvents. Thicker work gloves protect against abrasion.
Keep a dedicated change area to avoid tracking contaminants.
- Disposable coveralls for quick jobs
- Reusable work clothes for extended tasks
- Nitrile gloves for solvent resistance
- Heavy gloves for rough work
- Dedicated change and wash area
Lead Paint: Detection and Safe Interim Measures
If your home was built before 1978, assume there could be lead-based paint and test to know for sure. You’ll use certified lead detection kits or hire a pro; don’t sand or scrape until you confirm. Contain the area, ventilate, and keep kids and pregnant people away. Follow safe measures: wet-clean surfaces, use HEPA vacuums, and bag debris securely. If lead is present, consider encapsulation or professional abatement rather than DIY removal.
| Action | Quick Tip |
|---|---|
| Test | Use certified kits or lab tests |
| Contain | Seal work area |
| Clean | Wet-wipe, HEPA vacuum |
| Dispose | Double-bag debris |
Eco-Friendly Paint Options and Low-VOC Choices
After handling lead concerns and securing the work area, you’ll want to choose paints that minimize indoor pollution and long-term exposure. You’ll look for Eco friendly finishes and Low VOC options to protect occupants and preserve finish quality. Consider these choices and practices:
After addressing lead risks, choose low- and zero-VOC, eco-friendly paints and ventilate for healthier, durable finishes
- Choose certified low-VOC and zero-VOC brands.
- Prefer water-based acrylics over oil-based solvents.
- Check for third-party eco labels (GREENGUARD, EPA Safer Choice).
- Use natural primers when appropriate to reduce emissions.
- Ventilate during and after application to disperse residual odors.
These steps help you achieve durable, healthier results without sacrificing professional appearance.
Cost-Saving Hacks Professional Painters Use
You’ll save more by buying quality brushes, rollers, and paint that give better coverage and last longer.
Plan your cuts and measure carefully so you mix only what you need and prevent paint waste. Those two habits cut costs upfront and keep touch-ups minimal.
Buy Quality Materials
While it might seem cheaper to grab the cheapest brushes and paint, buying quality materials saves you time, frustration, and money in the long run. You’ll get better coverage, fewer touch-ups, and truer Color psychology results when hues read as meant.
Invest in good brushes, rollers, primers, and durable paint. Store leftovers properly for later—proper paint storage prevents spoilage and keeps tints consistent.
- High-quality brushes for crisp edges
- Dense rollers for even coverage
- Premium primer to seal and save coats
- Durable paint that resists scuffs
- Proper containers and labels for paint storage
Prevent Paint Waste
Buying quality paint and tools gives you better results, but smart handling keeps more paint in the can and less on the floor. You’ll minimize waste by stirring only as needed, pouring small amounts into a tray, and using a grid to remove excess.
Match paint color to sample lighting to avoid redoing sections. For varied wall texture, thin coats apply more evenly than heavy globs that drip.
Seal cans tightly and store upside down for short gaps; label date and room. Reuse leftover paint for touch-ups, priming small patches, or mixing similar shades to stretch supply.
When to Hire a Pro vs. DIY: Decision Criteria
Deciding whether to tackle a paint job yourself or hire a pro comes down to three things: scope, skill, and schedule. You’ll weigh complexity, desired finish, and safety.
Deciding to DIY or hire a pro hinges on scope, skill, and schedule—balance complexity, finish, and safety.
Consider color psychology when picking hues and ask about eco friendly solvents if indoor air matters.
Choose a pro for large rooms, tricky trims, high walls, or strict timelines. Go DIY for small rooms, simple colors, and budget constraints.
- Safety risks (heights, lead)
- Precision needed (cutting-in, stripes)
- Time you can commit
- Cost vs. quality trade-off
- Warranty and cleanup included
Estimate Time and Labor for Your DIY Paint Job
Because a realistic timeline keeps the project on track, start by breaking the job into tasks—prep, priming, cutting-in, rolling, touch-ups, and cleanup—and estimate how long each will take based on room size, your experience, and whether you’re working alone or with help.
Add buffer time for drying between coats and unexpected delays. Allocate more time for textured walls or intricate trim.
Factor in rest and tool maintenance. If you’re testing Color psychology choices or sampling eco-friendly paints, include sampling and evaluation time.
Sum individual estimates to set daily goals so you finish without rushing and maintain paint quality.
Troubleshoot Common Problems After Painting
When paint doesn’t look or perform the way you expected, start by identifying the symptom—peeling, bubbling, streaks, or uneven sheen—and work backward to its cause. You’ll check adhesion, humidity, and surface prep first.
When paint disappoints, identify the symptom—peeling, bubbling, streaks, or sheen—and trace it back to the cause.
Consider whether color psychology influenced your expectation; light or dark tones reveal flaws differently. If contamination or wrong primer caused issues, sand and spot-prime.
For minor runs, feather and recoat; for widespread failure, strip and redo. Dispose of waste responsibly—follow local Paint disposal rules.
- Peeling: poor adhesion
- Bubbling: moisture or heat
- Streaks: technique or thinning
- Sheen variance: uneven application
- Stains: sealing needed
Maintenance Tips to Keep Painted Walls Looking New
After fixing any flaws, keep your walls looking fresh with regular, simple care that prevents small issues from becoming big ones.
Dust walls weekly with a microfiber cloth or vacuum brush to remove grit that can abrade paint. Clean stains promptly using mild soap and water, testing a hidden spot first.
Rotate wall art occasionally to avoid uneven fading and check hanging hardware to prevent scratches. Use felt pads on furniture matching walls’ baseboards to avoid scuffs.
Control humidity to prevent mold, and avoid harsh cleaners. Schedule gentle inspections each season so small problems don’t escalate.
Touch Up Paint So Patches Are Invisible
If you want touch-ups to disappear, match paint finish and color, prep the area, and use the right tools so the patch blends seamlessly with the surrounding wall. You’ll test color harmony by painting a small swatch and observing it under different lighting effects.
Sand, clean, and prime tiny repairs; feather edges so strokes vanish. Use a small brush for dents and a mini roller for texture, blending outward. Work damp edges quickly, then let cure before evaluating.
- Match finish level
- Test swatch in room light
- Feather and blend edges
- Use appropriate roller nap
- Recoat only when dry
Professional Finishing Touches That Elevate the Result
Because the last brushstroke shows as much as the first, you’ll want a few pro-level finishing touches that make your paint job read as intentional and polished. Check edges with a small angled brush, feathering your lines so trim and wall meet seamlessly.
Inspect under different light angles to catch lap marks and uneven paint texture, then lightly sand and recoat where needed. Consider color psychology when selecting accent walls or trim contrasts to influence mood and perceived space.
Finish with a consistent sheen—matte hides flaws, eggshell adds depth—and clean tools immediately to preserve crisp results.
Frequently Asked Questions
How Do Professionals Handle Moldy or Damp Walls Before Painting?
You clean mold thoroughly, use mold removal solutions, and dry the area; you’ll repair damage, apply a damp wall treatment or sealer, prime with a mildew-resistant primer, then repaint using proper ventilation and moisture control to prevent recurrence.
Can I Paint Over Wallpaper Without Removing It?
Yes — you can paint over wallpaper, but it’s like dressing a wall in thin armor: Wallpaper removal is often safer; thorough surface preparation (cleaning, repairing seams, priming) guarantees the paint adheres and prevents bubbling or peeling later.
What Are Best Practices for Painting Exterior Stucco or Brick?
You should clean and repair surfaces, use masonry primer, and apply breathable exterior paint; employ texture techniques and color blending with rollers, brushes, or sprayers, and seal joints, monitor drying, and reuse samples to guarantee consistent coverage.
How Do Pros Achieve Matched Color When Paint Line Fades Over Years?
You use color matching techniques like spectrophotometers and custom tinting, sample-test in sunlight, blend edges with feathering, and maintain paint color consistency through documented formulas, batch-mixing, and periodic touch-up schedules to match faded lines.
Is Spraying Paint Indoors Worth It Versus Rollers and Brushes?
Absolutely — you’ll feel like a paint-blasting superhero indoors, but spraying’s worth it only for large, smooth areas; use brush techniques for edges and careful paint preparation to avoid drips, overspray, and uneven coverage.
Conclusion
You’ve got the steps to paint like a pro, and using them saves time and money—professional prep cuts redo risk by about 60%. Stick to the right tools, finishes, and touch-up tricks to keep walls flawless longer, and you’ll avoid costly surprises. With careful prep and those finishing touches, your results will look polished and last. Keep practicing; each room you paint makes you noticeably faster and more confident.