How to Wash a Wall Before Painting Correctly
Before painting, you should wash walls to remove dust, grease, mildew, and loose residue so primer and paint stick evenly. Clear or cover furniture, wear gloves and eye protection, then dust and vacuum. Scrub top to bottom with a mild soap or diluted TSP alternative using a soft sponge, rinse well, and let walls dry fully; sand and prime patched or bare spots. Follow these steps and you’ll get a smoother, longer‑lasting finish—keep going for tips on stains, primers, and tools.
Why Wash Walls Before You Paint
Because dirt, grease, and mildew prevent paint from sticking properly, you should always wash walls before you paint. You’ll remove residues that cause bubbling, peeling, and uneven wall color, so the finish stays true. Cleaning gives you a uniform surface, helping the primer and topcoat bond and revealing repairs you might’ve missed.
It also influences how paint sheen reads—dull grime can make a semi-gloss look flat, while clean surfaces show intended luster. Spend time on high-traffic spots, kitchens, and bathrooms.
Clean walls guarantee fewer touch-ups, longer-lasting results, and a final look that matches your expectations.
Quick Pre‑Paint Checklist
Before you pick up a brush, run through a short checklist to make sure the job goes smoothly: clear the room or cover furniture, repair holes and sand rough spots, wash and dry the walls, tape trim and remove outlet covers, and lay down drop cloths.
Next, confirm lighting and ventilation so colors read true and fumes dissipate.
Choose your paint finish for the room’s use—matte hides flaws, satin wipes clean.
Test swatches to assess color psychology effects at different times of day.
Gather brushes, rollers, caulk, sandpaper, tack cloths, and a step ladder so you’re fully prepared.
How to Tell If a Wall Needs Cleaning Before Painting
You’ve prepped the room and gathered supplies, so now check whether the walls actually need cleaning before you paint. Look for visible dirt, grease splatters, stains, cobwebs, or nicotine discoloration; these all interfere with adhesion and final color coordination.
Run your hand gently to find sticky spots or rough patches. Shine a flashlight across the surface to reveal subtle grime and previous paint drips.
If wallpaper removal left residue or seam paste, you must clean those areas. Test a small area with a damp cloth—if dirt smears or won’t lift, plan a thorough wash before priming and painting.
Safety Gear for Wall Cleaning
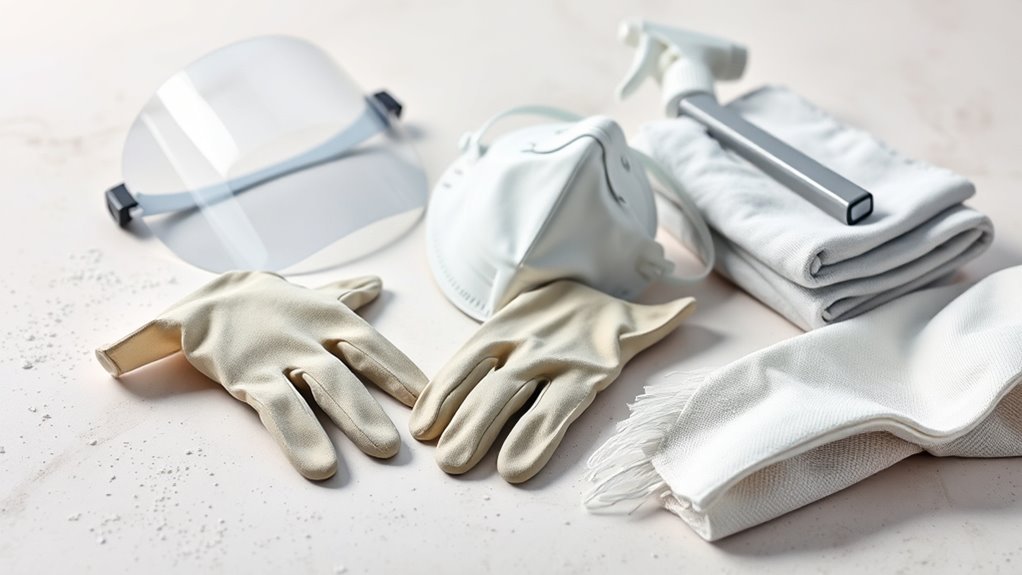
When cleaning walls, wear the right safety gear to protect your eyes, skin, and lungs from cleaners, dust, and debris. Put on safety goggles, nitrile gloves, and a respirator or mask rated for chemical vapors if you’re using strong solutions. A dust mask works for light dust.
Wear long sleeves and closed shoes to avoid splashes. Tie back hair and remove jewelry that can trap grime. Keep a towel and a small first-aid kit nearby for spills or irritation.
Follow product labels to prevent wall paint damage and use cleaning equipment correctly to minimize exposure and accidents.
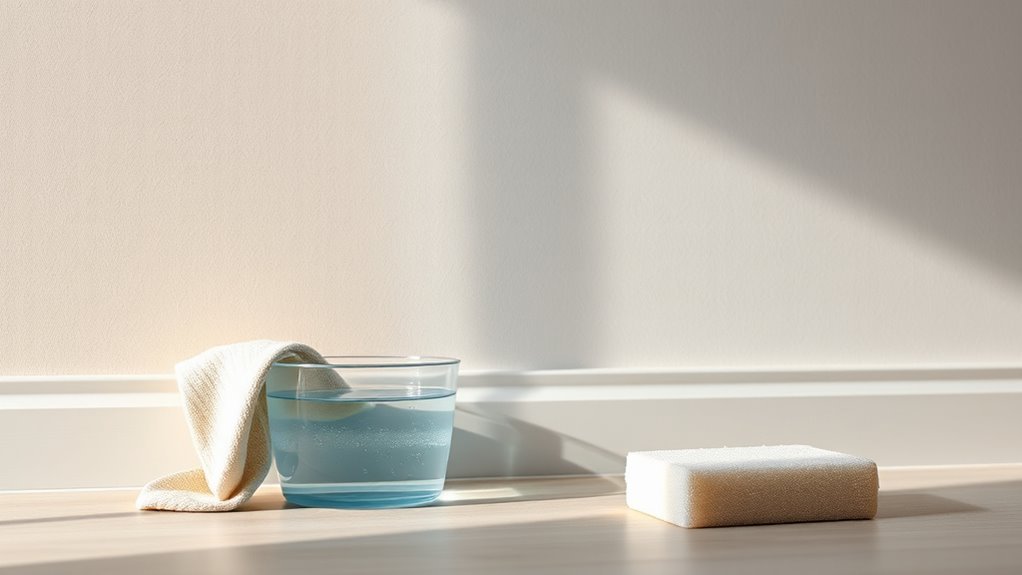
Tools You Need to Wash Walls
Now that you’re properly geared up, gather the right tools so cleaning goes quickly and won’t damage the wall or paint. You’ll want items that reach high spots, protect surfaces, and remove grime without stripping finish—this preserves subtle color combinations and won’t disturb wall insulation or underlying drywall.
Now properly geared, gather tools that reach high, protect finishes, and remove grime without harming paint or drywall.
- Extendable pole with soft microfiber pad for gentle scrubbing and even pressure.
- Bucket, wringer, and lint-free rags to control moisture and avoid drips that could seep into wall insulation seams.
- Soft-bristled brush and a small putty knife for corners, trim, and lifting stuck debris without gouging paint.
Best Household Cleansers for Painted Walls
Because painted surfaces vary in sheen and sensitivity, pick cleaners that lift dirt without stripping finish or leaving residue. Use mild dish soap mixed with warm water for general grime; test a small area to confirm the paint sheen stays consistent.
For greasy spots, try diluted vinegar or a gentle all-purpose cleaner, rinsing thoroughly to avoid affecting color matching later.
A microfiber cloth or soft sponge reduces abrasion. Avoid abrasive pads or harsh solvents that can dull finish or complicate repainting.
Always spot-test, rinse, and let walls dry fully before evaluating stains or proceeding to primer and paint.
TSP and Safer Alternatives
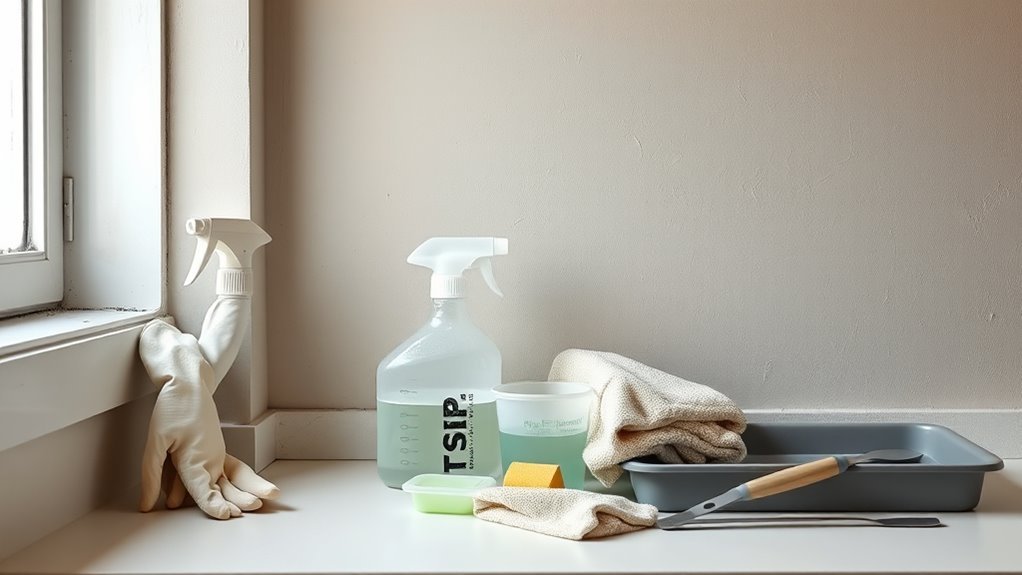
Although trisodium phosphate (TSP) is a powerful degreaser many painters swear by, it’s harsh, corrosive, and can harm finishes, plants, and septic systems if misused. You should weigh TSP safety before using it: wear gloves, goggles, and rinse thoroughly.
Although TSP is an effective degreaser, it’s harsh and corrosive—use caution, protective gear, and rinse thoroughly.
If you prefer gentler options, try eco friendly alternatives that still cut grease without toxic runoff. Choose based on soil type and surface.
- Warm water with mild dish soap — low risk, good for light grime.
- Vinegar solution — cuts grease, biodegradable.
- Baking soda paste — mild abrasion for stubborn spots.
Test Cleaners Safely on Your Wall
Before you wipe an entire wall, try your cleaner on a small, hidden spot to check for color loss, finish damage, or staining. You’ll test how the solution affects wall texture and paint sheen before committing. Use a clean cloth, wait five minutes, then blot dry and inspect under good light. If change appears, dilute or choose a gentler cleaner. Record results in a quick table:
| Spot | Cleaner | Result |
|---|---|---|
| Baseboard corner | Mild detergent | No change |
| Behind outlet cover | TSP substitute | Slight dulling |
| Closet interior | Water only | Safe |
Repeat tests as needed.
Protect Floors, Furniture, and Trim First
Start by clearing the room and moving furniture out or to the center, then cover floors, furnishings, and trim with drop cloths or plastic sheeting to catch drips and dust. You’ll protect floors and baseboards, and prevent cleaning residues from harming upholstery or wood finishes.
Clear the room, move furniture, and cover floors, furnishings, and trim to catch drips, dust, and cleaning residue.
Take care around trim so paint sheen samples or cleaning marks don’t alter edges. Check wall texture as you work; heavier textures trap dust and need thicker protection beneath. Use taped edges to keep coverings secure.
- Use canvas drop cloths for floors.
- Wrap furniture in plastic.
- Tape trim edges with painter’s tape.
Mix a Safe Wall‑Cleaning Solution
Use non‑toxic cleaners like mild dish soap, vinegar, or a commercial low‑VOC wall cleaner so you’re safe and won’t harm paint.
Measure and mix according to the label or a common ratio (about 1 tablespoon soap per quart of warm water) to get the right dilution.
Test the solution on a hidden patch to make sure it won’t discolor or damage the wall before you clean the whole surface.
Choose Non‑Toxic Ingredients
When you’re prepping walls for paint, pick mild, non-toxic cleaners that remove dirt and grease without leaving residues or harsh fumes. Simple ingredients like distilled white vinegar, baking soda, and a gentle liquid dish soap make an effective, safe solution you can mix at home.
Use eco-friendly alternatives and non-toxic ingredients to protect indoor air and sensitive skin. Combine items thoughtfully, avoid fragrances and ammonia, and test a small patch first.
Keep tools separate for painted and unpainted surfaces.
- Vinegar + water for general cleaning
- Baking soda paste for stains
- Dish soap drops for grease
Measure Proper Dilution
Because too-strong cleaners can damage paint and too-weak mixes won’t clean effectively, you should measure dilution precisely before you wet a wall. Use a clear recipe—cups per gallon or tablespoons per quart—and follow manufacturer ratios for stronger agents.
Invest in a measuring cup and label containers so measurement accuracy isn’t left to guesswork.
Match concentration to soil level: light dust needs milder mixes; greasy spots need slightly stronger solutions.
Keep a record of cleaning frequency for each room to avoid overcleaning.
Rinse thoroughly after cleaning and discard leftover mix daily to maintain safety and consistent results.
Test On Hidden Area
Before you apply the cleaner broadly, mix a small batch and test it on a hidden corner or inside a closet to confirm it won’t harm the paint or finish. You’ll learn quickly whether the cleaner causes discoloration, softening, or film removal.
Also check for moisture detection—press a paper towel after 10 minutes to see if dampness persists.
- Use the same cloth and motion you’ll use on visible walls to mirror real conditions.
- Note paint reaction and timing; photograph the spot for reference.
- If staining or excessive wetness appears, adjust dilution or choose a milder cleaner.
Wash a Wall: Step‑by‑Step
If you want a smooth paint finish, start by removing dust, grease, and stains so the new paint can adhere properly. Gather mild detergent, TSP alternative, a soft sponge, bucket, ladder, and drop cloths.
Work top to bottom in small sections, wetting the wall, scrubbing gently, and targeting grease near switches and kitchens. For stubborn spots, spot-treat with a stronger cleaner, then retest the surface.
Rinse tools frequently and change cleaning solution when soiled. Let the wall dry fully before sanding or priming.
Note paint types and color matching needs when planning cleanup and repairs.
Rinse Walls Properly After Cleaning
After scrubbing, rinse the wall with plenty of clean water so no soap or residue is left behind.
Use a sponge, hose, or bucket rinse and work from top to bottom to prevent streaks.
Let the surface dry completely before you start painting.
Use Clean Water
When you’ve scrubbed away dirt and grease, rinse the wall with clean water to remove residue that could keep paint from adhering properly. You should use fresh water in a hose or bucket, changing it if it gets cloudy, so you won’t transfer grime back onto the surface.
Clean water preserves the true wall texture and helps paint colors show as designed—remember color psychology: the final hue depends on a spotless base.
Rinse systematically from top to bottom, using gentle pressure to avoid damage.
- Start with clear water.
- Replace when murky.
- Rinse top-to-bottom.
Dry Walls Thoroughly
Because moisture trapped in pores or behind trim can ruin a fresh coat, dry the wall completely before you paint. You’ll towel, fluff with fans, and wait—moisture alters adhesion, affects wall texture perception, and can shift color psychology outcomes. Feel the surface; press trim joints. Use a moisture meter for accuracy. Don’t rush; paint only when readings match room humidity. Quick checklist:
| Step | Tool | Outcome |
|---|---|---|
| Towel dry | Microfiber | Remove surface water |
| Air dry | Fans | Evaporate trapped damp |
| Heat | Low heater | Speed dry safely |
| Meter check | Moisture meter | Confirm dryness |
| Final wipe | Dry cloth | Prep for priming |
Drying Times and How to Speed Drying
Though drying times vary with temperature, humidity, and the cleaning method you used, you can expect most washed walls to be touch-dry within 30 minutes to a few hours and fully dry in 24 hours under normal conditions.
Drying speed depends on wall texture and paint sheen; rough surfaces hold moisture longer and glossy sheens show spots.
To speed drying, control airflow, temperature, and moisture removal.
- Use fans and open windows to increase airflow and evapotranspiration.
- Raise room temperature modestly (avoid heat sources too close to the wall).
- Use a dehumidifier to pull moisture from the air quickly.
When to Sand or Prime After Washing
After the wall is fully dry, you’ll sand any rough spots, peeling paint, or glossy areas to help new paint adhere.
Prime whenever you’ve exposed bare drywall, repaired patches, or need a uniform base for strong color coverage.
If the surface is intact and uniformly clean, you can skip sanding and prime only if the paint needs better adhesion or stain blocking.
When To Sand
When the cleaned wall looks smooth but still has paint drips, rough patches, or glossy spots, you should sand those areas before priming so the new finish will adhere evenly.
You’ll sand whenever there’s uneven texture, visible repairs, or gloss that resists touch-up. Light sanding blends surfaces; heavier sanding removes stubborn buildup. Remember that sanding choices can influence color psychology and reveal historical wall textures you might want to preserve or smooth.
- Sand glossy or drippy areas with fine grit.
- Sand patched repairs until flush.
- Feather edges between old and new textures for a seamless finish.
When To Prime
Wondering whether to sand a spot again or just prime it? You should prime if stains, bare patches, or uneven sheen remain after washing. Prime to seal cleaner residue, improve adhesion, and aid color matching when switching paint finishes. Sand glossy spots lightly first; deep imperfections need filler, sand, then prime. Use a stain-blocking primer for tannin or smoke. Test a small area: prime, let dry, then apply finish sample to confirm match. Refer to this quick visual:
| Condition | Action |
|---|---|
| Bare plaster | Prime |
| Glossy sheen | Sand then prime |
| Stain present | Stain-blocking primer |
| Even surface | Prime optional |
Spot‑Prime vs Full‑Prime After Cleaning
Decide whether to spot-prime or prime the whole wall based on the stains, repairs, and existing finish you’ve uncovered during cleaning. You’ll choose priming techniques that restore uniform porosity and improve paint adhesion.
Spot‑prime where small stains or isolated repairs exist; full‑prime when large stains, new drywall, or glossy finishes remain.
- Spot‑prime: quick, conserves primer, fixes isolated stains.
- Full‑prime: evens sheen and color, best for heavy staining or inconsistent substrates.
- Hybrid: spot‑prime problem areas, then assess; expand to full if visible differences persist.
Match primer type to surface and follow manufacturer dry times.
Repair Cracks, Dents & Flaking Paint After Washing
After you’ve cleaned and determined your priming approach, deal with any physical damage before you prime or paint. Patch cracks with flexible filler, sand dents smooth, and remove loose flakes. Match wall texture by stippling or skim-coating; feather edges so repair blends. Check surrounding paint sheen to guarantee the finish won’t highlight patches; sand gloss areas first. Prime repaired spots to seal and equalize absorption. Use fine sandpaper between coats and wipe dust before painting. Follow manufacturer cure times for best adhesion.
| Task | Material | Tip |
|---|---|---|
| Crack | Flexible filler | Underfill slightly |
| Dent | Lightweight spackle | Sand flush |
| Flake | Scrape & prime | Remove all loose |
| Texture | Skim coat | Match pattern |
Washing Fresh Drywall (Gentle Methods)
On fresh drywall, you’ll start by removing light dust with a microfiber cloth or soft brush so you don’t abrade the surface.
Use a very mild cleaning solution—like a few drops of dish soap in water—applied sparingly to a damp sponge.
Keep moisture to a minimum and blot rather than scrub to protect the paper facing.
Light Dust Removal
When you’re prepping fresh drywall for painting, start by removing loose dust with a soft-bristled brush or a dry microfiber cloth so the surface won’t trap paint and cause uneven coverage. You’ll want to work top to bottom, using light strokes to protect delicate paper faces and preserve subtle wall texture that affects finish.
Consider how color psychology and surface clarity influence perception; a smooth, dust-free base helps colors read true.
- Brush ceiling lines gently to prevent streaks.
- Wipe broad areas with overlapping passes.
- Vacuum edges with a soft brush attachment.
Mild Cleaning Solution
Because fresh drywall can hold fine dust and surface residues that interfere with primer adhesion, you’ll gently wash it with a mild, pH-neutral cleaning solution—warm water mixed with a few drops of dish soap or a commercial cleaner labeled safe for drywall—to remove oils and grime without softening the paper face. Use a soft sponge, rinse frequently, and let the wall air-dry before priming. Keep in mind how cleaning affects later choices like color schemes and paint finishes.
| Step | Tool | Tip |
|---|---|---|
| Mix | Bowl | Lukewarm water |
| Wash | Sponge | Light pressure |
| Rinse | Cloth | Change water |
Minimal Moisture Technique
If you want to clean fresh drywall without over-wetting it, use just enough moisture to remove dust and light residues while keeping the paper face intact. You’ll protect the surface and help paint adhesion, which supports paint durability and lets color psychology perform as meant.
Work gently with a barely damp microfiber and a soft brush for edges.
- Light wipe: damp microfiber, go with the grain to lift dust.
- Spot clean: tiny damp sponge on stubborn smudges, dab don’t rub.
- Drying: air or gentle fan, guarantee wall is fully dry before priming.
Cleaning Textured Plaster Without Damaging Texture
How do you clean textured plaster without flattening or chipping the finish? You’ll treat textured finishes gently: dust with a soft-bristle brush or vacuum using a brush attachment to lift loose grit from wall textures.
Mix mild detergent with warm water — no abrasive cleaners. Test a small, hidden area first.
Mix a mild detergent with warm water and test a hidden spot first—avoid abrasive cleaners.
Use a sponge or microfiber cloth, dabbing instead of scrubbing, and rinse with plain water to avoid residue.
For stubborn spots, apply a poultice of baking soda paste lightly, then rinse.
Let the wall air-dry fully before painting.
Avoid pressure washers, metal scrapers, or harsh chemicals that can damage texture.
Wash Glossy and Semi‑Gloss Surfaces Before Repainting
Before you start, inspect glossy or semi‑gloss walls for scuffs, peeling, or uneven sheen so you know what needs attention.
Use a mild degreaser and a soft cloth to remove fingerprints, grease, and buildup without harming the finish.
Rinse with clean water and dry thoroughly so new paint will adhere evenly.
Surface Inspection First
When you’re prepping to repaint, start with a close surface inspection so you can spot glossy or semi‑gloss areas that need washing first. You’ll check sheen differences, flaking, and residue so your paint selection and color psychology goals aren’t compromised by hidden grime. Focus on transitions and trim where gloss traps oils.
- Run your hand to feel tackiness or smooth glossy spots.
- Shine a light to reveal streaks, fingerprints, or buildup.
- Mark problem areas for targeted cleaning or sanding before priming.
This prevents adhesion failures and keeps your final finish true to planned tones.
Use Mild Degreaser
After you’ve marked glossy or semi‑gloss areas, you’ll need to remove oils and residue so new paint can stick. Mix a mild degreaser per label instructions — a gentle dish soap solution works for most surfaces. Wear gloves, spot‑test a hidden area, and scrub with a soft sponge using circular motions to lift grime without dulling sheen.
For stubborn grease, choose an eco friendly solution like citrus‑based cleaners labeled safe for paint, or dilute white vinegar for budget friendly tips. Work methodically, avoiding over‑scrubbing that can damage sheen.
Treat trim edges carefully to keep clean lines ready for repainting.
Rinse And Dry Thoroughly
Since lingering cleaner or soap can prevent new paint from adhering, rinse glossy and semi‑gloss surfaces with clean water until no suds remain. You’ll want to remove residue that could interfere with color coordination or hide decorative accents. Use a sponge and fresh buckets, change rinse water often, and work top to bottom.
- Rinse: Flood small sections, wipe with a clean sponge so no streaks stay.
- Repeat: Inspect under different light to ensure all soap’s gone.
- Dry: Blot and air‑dry fully, or use fans to speed curing before priming or repainting.
Removing Grease and Kitchen Splatter
Because kitchen grease bonds to paint and attracts grime, you’ll need to tackle splatters with a degreasing cleaner before priming or repainting. Wear gloves and ventilate, test cleaner on a hidden spot, then scrub with a nonabrasive pad.
For heavy buildup, use a trisodium phosphate alternative or commercial kitchen degreaser, rinse thoroughly, and dry.
Remove splatter around outlets carefully; turn power off first. If you plan wallpaper removal nearby, protect edges to avoid moisture damage and support mold prevention by drying completely.
Inspect for stubborn stains and repeat cleaning rather than sanding into the paint layer.
Degrease Baseboards and Trim
When you clean baseboards and trim, focus on removing greasy buildup that paint and caulk will fail to hide. Wear gloves, open windows, and lay down drop cloths to protect floors.
Use a degreaser diluted per label, scrub seams and corners with a soft brush, and rinse with clean water so new paint sheen adheres evenly.
Pay attention to wall texture where trim meets the wall to avoid trapped residue. Let everything dry fully before priming.
- Test cleaner on a small trim section.
- Use cotton swabs for crevices.
- Replace heavy-grease cloths often.
Tackling Nicotine and Heavy Smoke Stains
Ever wondered how to get nicotine and heavy smoke stains off walls without ghosting or trapped odors? You’ll start by testing a hidden spot, then gently scrub with a trisodium phosphate (TSP) solution or a heavy-duty degreaser, working top to bottom. Rinse thoroughly and let dry completely; sealing with a stain-blocking primer stops bleed-through.
If wallpaper removal’s needed, strip first to avoid sealing stains under paper. Wear gloves and ventilate to prevent inhaling residues. Clean vents and replace filters to remove lingering smoke.
Keep moisture low and monitor humidity as part of mold prevention after cleaning and before painting.
How to Remove Mold and Mildew Safely
Smoke and nicotine stains can hide moisture issues that let mold and mildew take hold, so check for damp spots before you paint. You’ll wear gloves, goggles, and a mask, ventilate the room, and scrub affected areas with a diluted bleach solution or a commercial remover. Rinse, dry thoroughly, and fix the source of moisture to prevent return.
Check for damp spots behind nicotine stains; scrub with diluted bleach, dry thoroughly, and fix moisture sources before painting.
- Isolate the area and test a small patch first.
- Use gentle scrubbing, then rinse and speed-dry with fans.
- Seal and ventilate to support Mold prevention and Mildew prevention before painting.
Dealing With Water Stains and Tannin Bleed‑Through
If water stains or tannin bleed-through show up on your walls, tackle them before priming so stains don’t reappear under fresh paint. Start by cleaning the area with mild detergent and water, then let it dry completely.
For persistent water stains, apply a stain-blocking primer specifically labeled for water stains.
For tannin bleed through from knots or wood trim, use a shellac-based or high-quality oil-based primer to seal those tannins.
After priming, inspect for any remaining discoloration; repeat sealing if needed.
Only paint once the primer has cured to guarantee a uniform finish and prevent stain migration.
Remove Tape Residue, Stickers, and Glue Marks
When tape residue, sticker bits, or glue marks remain on the wall, remove them before priming so the finish goes on smooth and adheres properly. You’ll do quick sticker removal and residue cleaning with simple supplies: a plastic scraper, a cloth, and a gentle solvent. Test solvents in an inconspicuous spot first.
- Soften residue with warm soapy water or a hairdryer, then lift with a plastic scraper.
- Use rubbing alcohol or a dedicated adhesive remover on stubborn spots; blot, don’t rub, to avoid damage.
- Wipe the area clean, let dry, and sand lightly before priming.
Remove Crayon, Marker, and Pen Marks
First, identify whether the marks are waxy crayon, water-based marker, or permanent pen so you can pick the right cleaner.
For crayon, gently scrape then use a mild degreaser or baking soda paste.
For water-based marker, a damp microfiber and gentle detergent usually works.
For permanent pen, try rubbing alcohol or a commercial stain remover, testing a hidden spot first.
Identify Mark Type
Before you grab any cleaner, figure out what made the mark—crayon, marker, or pen—because each needs a different approach and solvent. You’ll inspect texture, sheen, and residue: waxy smears hint crayon, ink bleeding suggests marker, and thin lines point to pen.
Consider color theory briefly—contrasting marks stand out more on certain hues—and note paint finish; flat hides flaws better than gloss. Then confirm with a light touch test in an inconspicuous spot to avoid spreading.
- Rub gently to see if wax moves.
- Blot ink to check transfer.
- Scrape lightly to test penetration.
Effective Removal Methods
If you’ve identified the mark type, tackle crayon, marker, and pen with targeted cleaners so you don’t damage the paint.
For crayon, gently scrape with a plastic scraper, then wipe with a damp cloth and mild dish soap. Test a hidden spot first because wall texture affects how deeply wax settles.
For washable marker, use isopropyl alcohol on a microfiber cloth, blotting rather than rubbing.
Permanent marker may need a magic eraser or rubbing alcohol; test paint finish.
For ink pen, try baking soda paste or hydrogen peroxide sparingly.
Consider color psychology when matching touch-ups to avoid noticeable repairs.
Choosing Between Sponge, Cloth, and Scrub Brush
Wondering which tool will give you the cleanest surface with the least hassle? You’ll pick based on wall color, texture patterns, and the grime level. Match tool to surface: gentle for fresh paint, firmer for textured areas.
- Sponge — Use a soft, damp sponge for flat, light-colored walls; it removes dust and light marks without dulling matte finishes.
- Cloth — Microfiber cloths work on satin or eggshell finishes and follow texture patterns to lift dirt without streaks.
- Scrub brush — Reserve for durable, heavily soiled surfaces; test first in an inconspicuous spot to avoid damage.
How to Use a Scrub Brush Without Harming Paint
When you reach for a scrub brush on textured or very dirty walls, you’ll want to protect the existing paint while removing grime. Test a small hidden area to check how wall texture reacts and whether paint peeling starts.
Use a soft-bristle brush and gentle, consistent strokes, wetting the surface first to loosen dirt. Avoid aggressive scrubbing at seams or flaking spots; instead, lift loose paint with a putty knife.
Rinse frequently and change water so you’re not rubbing grit back onto the wall. Dry the area and inspect for damage before proceeding with priming or repainting.
Eco‑Friendly Cleaning Options for Sensitive Homes
If you’re prepping a home with sensitivities, choose gentle plant-based cleaners that cut grease without harsh chemicals.
Pick low‑VOC solutions and test a small patch to keep fumes and odors down.
You can also use allergy‑friendly methods like damp microfiber cloths and HEPA‑filtered vacuums for dust removal.
Gentle Plant-Based Cleaners
Because harsh chemicals can irritate sensitive skin and harm indoor air quality, plant-based cleaners give you a safer way to prep walls before painting. You’ll want products with plant based ingredients and clear labels so you avoid hidden irritants. Mix mild solutions, test a small area, and rinse thoroughly to prevent residue that affects paint adhesion.
- Castile soap diluted with warm water — gentle, effective, eco friendly alternatives for general dirt.
- Vinegar and water (light mix) — cuts grease; spot-test first.
- Baking soda paste — for scuffs; scrub gently and wipe clean.
Low-VOC Cleaning Solutions
Plant-based cleaners are a great start, but you’ll also want to choose low‑VOC cleaning solutions to keep indoor air safe as you prep walls for paint.
Focus on eco friendly options labeled low‑odor or zero‑VOC, and check ingredient lists for ammonia, phthalates, or harsh solvents.
Dilute concentrates per directions to avoid residues that hinder adhesion during surface preparation.
Use microfiber cloths and a gentle scrub sponge to remove grime without over‑saturating drywall.
Ventilate briefly while cleaning, then allow walls to dry fully before sanding or priming.
These steps protect sensitive homes while ensuring a clean, paint-ready surface.
Allergy-Friendly Prep Methods
When you’re prepping walls in a home with allergies, choose cleaning options that cut allergens without adding irritants: look for fragrance‑free, hypoallergenic cleaners labeled low‑VOC or green‑certified, and dilute concentrates exactly as directed.
You’ll want methods that respect wall texture and won’t affect paint sheen.
- Use a microfiber cloth with a mild, diluted green cleaner to trap dust and avoid abrasives.
- Vacuum with a HEPA attachment first, then wipe; this reduces airborne triggers.
- For greasy spots, try a gentle castile soap solution, rinsing thoroughly and drying to prevent residue.
Exterior Walls: Prepping and Washing Before Painting
If you want a durable, attractive finish, properly prepping and washing exterior walls is essential before you ever open a paint can. You’ll remove dirt, mildew, and loose paint, protect surrounding plants, and choose cleaners suited to siding type. Consider how exterior color and texture will relate to interior décor and how wall textures affect adhesion. Use pressure washing carefully, spot-treat stains, and sand or scrape failing areas. Rinse thoroughly and let surfaces dry fully before priming.
| Surface | Cleaner | Notes |
|---|---|---|
| Vinyl | Mild detergent | Low pressure |
| Stucco | Bleach mix | Gentle scrubbing |
| Wood | TSP substitute | Repair rot first |
Cost and Time Estimates for Washing a Room
Because preparation affects both budget and schedule, you’ll want a clear estimate before you start washing a room. Costs and time vary with room size, wall texture, and how glossy the paint sheen is. You’ll budget cleaners, tools, and possible rental of a ladder or steamer.
Because prep shapes both cost and timing, get a clear estimate before washing—size, texture, and sheen matter.
Estimate labor: a single person can wash a small room in 30–90 minutes; textured or high-sheen surfaces take longer.
- Small room: $5–$20 supplies, 0.5–1.5 hours.
- Medium room: $10–$40 supplies, 1–2.5 hours.
- Large or heavily textured: $20–$80, 2–4+ hours.
Common Mistakes When Washing Walls (And How to Avoid Them)
Don’t use cleaners that’re too harsh or you’ll damage paint and drywall.
Avoid oversoaking the surface, which can lead to warping and mold.
And don’t skip patch repairs—fix holes and cracks before you wash so grime doesn’t hide defects.
Using Too Harsh Cleaners
While trying to remove stubborn stains you might grab the strongest cleaner on the shelf, but using overly harsh chemicals can damage paint, drywall, and trim. You should avoid Harsh chemicals and aggressive tools; they strip finishes and leave surfaces vulnerable.
Instead, test milder solutions and use a gentle sponge rather than an abrasive scrub. Follow these practical tips:
- Start with warm water and mild detergent; rinse and assess.
- Spot-test any stronger cleaner in an inconspicuous area for compatibility.
- Use soft cloths or non-scratch sponges, increasing strength only if necessary.
Protect trim and ventilate the room while cleaning.
Oversoaking The Surface
If you soak the wall, the water can seep into drywall and paint layers, causing bubbling, staining, or mold growth—so work with just enough moisture to clean the surface. You shouldn’t drench areas; surface oversoaking weakens drywall paper and causes joint compounds to swell.
Use a damp sponge or microfiber mop, wringing often, and clean small sections so they dry quickly. Excess water also undermines paint adhesion on the next coat, leading to peeling later.
After washing, ventilate the room and let walls fully dry before priming or painting. Control moisture and you’ll avoid costly repairs and finish problems.
Skipping Patch Repairs
Ever noticed loose paint flakes, nail holes, or dents and kept cleaning without fixing them first? You’re setting yourself up for trouble by Skipping patch repairs.
Proper Wall surface preparation means repairing defects before washing so cleaners don’t force debris into gaps or ruin edges.
- Fill holes and sand smooth so washing removes grime, not loose bits.
- Scrape flaking paint, prime bare spots, then wash to avoid lift-off.
- Seal deep gouges, let patch cure fully, then clean to guarantee adhesion.
Do patch repairs first; washing becomes effective and painting lasts longer.
Troubleshooting Stubborn Stains After Cleaning
Even after a thorough wash, some stains can cling stubbornly to the wall; you’ll need targeted fixes rather than repeating the same cleaning step.
Identify stain type—grease, nicotine, water, mold—and test a small area with appropriate solvent: degreaser for grease, trisodium phosphate substitute for grime, diluted bleach for mold.
Rinse and dry fully.
Sand or prime stubborn tannin or water stains before painting; stain-blocking primers prevent bleed-through and preserve color psychology by ensuring true hues under chosen paint finishes.
If residue persists after spot treatment, consider repainting the entire wall for a uniform appearance rather than endless scrubbing.
When to Hire a Professional Wall‑Cleaning Service
If stains, mold, or damage seem beyond your tools or comfort level, you should consider hiring a pro. Weigh the cost against the time and effort you’d save, especially for large areas or prep needed before painting.
Also factor in safety and insurance needs—professionals can handle heights, hazardous residues, and liability.
Signs You Can’t Handle
When stains, mildew, or deep grease won’t budge with household cleaners, you should call a professional wall‑cleaning service; they’ve got the tools and chemicals to tackle problems that simple washing can’t fix.
You should hire pros when issues risk damaging wall texture or altering paint sheen, or when safety and results matter more than DIY attempts.
Look for these clear signs:
- Large, spreading mold or mildew that returns after cleaning.
- Grease, nicotine, or smoke residues that resist soap and scrub brushes.
- Fragile or uneven surfaces where aggressive cleaning would strip paint or harm drywall.
Cost Versus Time
Because hiring pros costs more upfront, weigh that against the time and hassle you’d spend doing the job yourself. You’ll want clear cost considerations: estimate service fees, materials, and any travel charges, then compare to what you’d pay for supplies.
Factor in how long the cleaning will take based on wall size and soil level.
Use Time management to decide: if the job eats critical hours or delays painting, pro help can be worth it. If you enjoy DIY, have time, and the walls aren’t heavily soiled, doing it yourself saves money.
Choose based on budget, schedule, and expected quality.
Safety Or Insurance Needs
Although you can tackle most wall cleaning yourself, call a pro if the job risks your safety or your homeowner’s insurance might be affected. You should consider professionals when height, mold, or hazardous materials are involved, since they follow safety regulations and can document work for insurance coverage.
Choose a licensed company that proves compliance and carries liability insurance so you’re protected.
- High or unstable areas requiring harnesses or scaffolding.
- Mold, lead paint, or chemical treatments needing specialized handling.
- Jobs where your insurer demands certified remediation to honor a claim.
Final Pre‑Paint Checklist (Quick Scan Before You Paint)
Before you open the paint can, run a quick, focused scan of the wall and surrounding area to catch any missed repairs, dust, or drips that would ruin your finish. Check patching, caulk lines, and sanding—feel for bumps or loose debris that show under light. Confirm wall texture is consistent and dampness is gone.
Remove remaining dust with a tack cloth or vacuum. Make sure tape and drop cloths are secure, furniture moved, and trim wiped. Reconfirm chosen hue—color psychology matters for mood and light.
Verify brushes, rollers, and tray are ready so you can paint confidently.
Frequently Asked Questions
Can I Wash Walls Painted With Lead-Based Paint Safely?
You can’t safely wash walls with lead-based paint without precautions; follow lead paint safety guidelines, avoid dry scraping, wet-clean gently with HEPA-filter vacuuming and containment, and hire certified pros to prevent wall contamination and dust spread.
Will Washing Affect Wall-Mounted Electronics or Smart Thermostats?
Absolutely—washing can absolutely drench and doom devices if you’re reckless. You should cover or remove wall-mounted electronics and smart thermostats, use minimal moisture, and prioritize electronic safety during wall cleaning to prevent damage.
How Soon After Washing Can I Hang Wall Art or Mirrors?
You can hang suitable wall art or mirrors after the wall drying time reaches full dryness, usually 24–48 hours; if it still feels slightly cool or damp, wait longer to avoid trapping moisture and compromising adhesion or finish.
Can I Use a Pressure Washer on Exterior Painted Siding?
Like a sharp wind, yes—you can use a pressure washer on exterior painted siding, but you’ll want low pressure and wide spray to avoid damage. Exterior cleaning via pressure washing works if you’re cautious and test first.
Are There Special Cleaners for Wallpapered Walls?
Yes — you can use special wallpaper cleaners designed for wallpaper removal that’ll loosen adhesive residue; you’ll apply them, let them soak, then gently scrape and rinse, repeating as needed to fully remove paper and sticky buildup.
Conclusion
Before you paint, don’t skip washing: surfaces with just dust or grease can cut paint adhesion by up to 30%. With the right tools and safety gear, a quick clean takes minutes and prevents peeling, blotches, and extra coats. If stains persist or walls are damaged, call a pro. Do a final wipe and tack cloth sweep, let everything dry, then start painting—your prep saves time, money, and a better finish.