How to Whitewash a Wall With Paint (Easy Method)
You can whitewash a wall easily by thinning latex or masonry paint with water (about 1:4 paint to water), then testing the mix on a scrap. Prep the surface—clean, patch, and tape trim—then work in small sections with a brush, wiping immediately with a rag to let texture show. Reapply thin layers until you like the translucency, sand light imperfections, and wait 24–48 hours between coats; keep going for tips on tools, mixes, and fixes.
Who This Guide Is For and What You’ll Achieve
Whether you’re tackling a weekend DIY or prepping a room for a fresh, budget-friendly look, this guide walks you through whitewashing step by step.
You’re likely a homeowner, renter with permission, or maker wanting an aged, breathable finish without harsh chemicals.
You’ll learn techniques that respect historical accuracy where relevant and acknowledge cultural significance of whitewashed surfaces in different regions.
You’ll gain practical skills: choosing paint ratios, prepping surfaces, applying washes, and sealing appropriately.
Decide If Whitewashing Is Right for Your Wall
First, check the wall surface for texture, cracks, or stains to see if whitewashing will adhere and look right.
Think about the finish you want—subtlewashed color, full coverage, or something in between—and whether that matches your style.
Finally, consider how tough the wall needs to be and whether whitewash will meet your durability and maintenance needs.
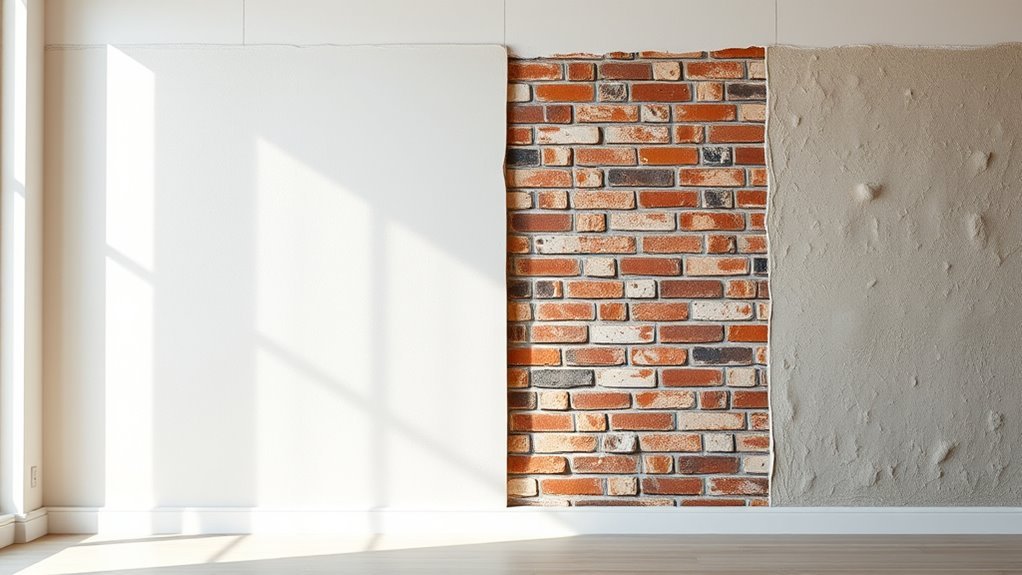
Assess Wall Surface
Before you start mixing paint, take a close look at the wall—its material, texture, and condition will determine if whitewashing will work or if another finish is better. You’ll assess surface texture, check for damage, and plan wall preparation steps. Soft or flaky surfaces need repair; very smooth or glossy ones may not absorb wash. Below is a quick checklist to guide decisions.
| Surface type | Prep needed | Whitewash? |
|---|---|---|
| Brick | Brush, clean | Yes |
| Plaster | Sand, prime | Maybe |
| Drywall | Patch, prime | Yes |
| Tile | Etch, prime | No |
Consider Desired Look
How do you want the finished wall to feel and look — soft and muted, bright and streaky, or barely changed at all? Decide if whitewashing matches your room’s vibe. Think about color coordination with furniture and accents, and how whitewash can provide subtle texture enhancement without hiding character.
Consider how transparent washes let base tones show through versus opaque coats.
- Soft and muted: thin wash keeps underlying color, adds gentle texture enhancement.
- Bright and streaky: visible brush marks, high-contrast color coordination.
- Barely changed: ultra-thin glaze preserves original finish while lightening tone.
Evaluate Durability Needs
Since whitewashing alters surface protection as well as appearance, think about how the wall will be used and how much wear it’ll face. You’ll assess traffic, moisture, and cleaning frequency to decide if whitewashing suits the space. Consider texture options and how they hide scuffs, and weigh color longevity against touch-up needs. If you need heavy-duty protection, a different finish might be better.
| Area | Wear Level | Recommendation |
|---|---|---|
| Hallway | High | Durable finish preferred |
| Nursery | Medium | Soft wash, frequent touch-ups |
| Bathroom | High | Avoid unless sealed |
| Living room | Low | Whitewash okay |
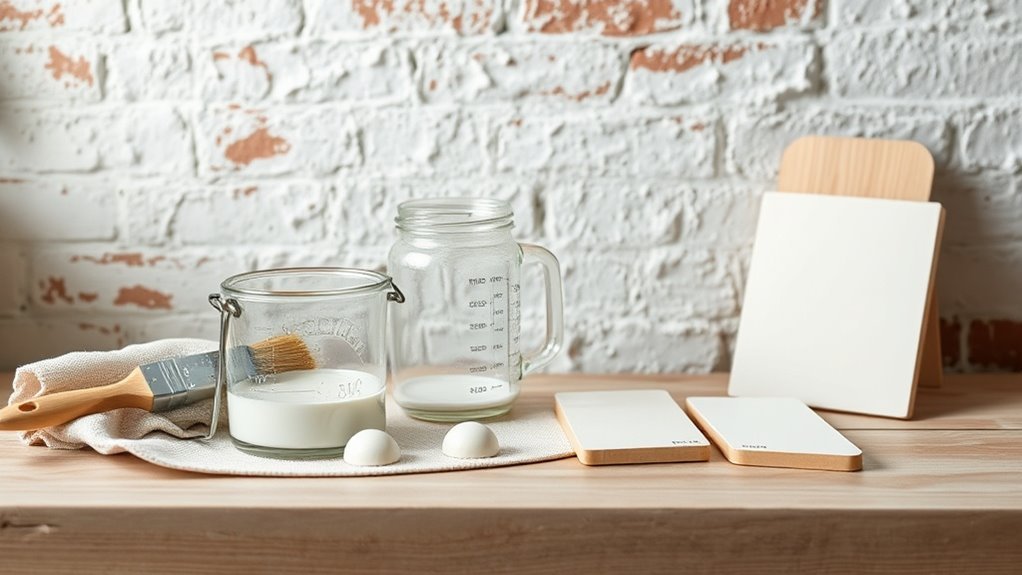
Essential Tools for Whitewashing
When you gather the right tools, whitewashing becomes faster and neater—basic items include a bucket, sturdy brush or roller, a whisk or drill mixer for the lime wash, a garden sprayer or hose for dampening, drop cloths, painter’s tape, gloves, goggles, and a respirator if you’re working in a poorly ventilated area.
You’ll also want sanding blocks, a scrub brush, and a small trowel for repairs. Keep a simple color palette guide nearby to preview effects, and test texture techniques on scrap.
Essential tools help you work cleanly, adjust application, and control finish.
- Brushes and rollers
- Mixing and spraying
- Protection and prep
Choose Paint Color and Mix Whitewash
Start by picking a paint hue that complements the room and the look you want—cool grays for modern spaces, warm creams for cozy ones.
Then mix your whitewash by thinning latex or masonry paint with water until you get a translucent, brushable consistency.
Test the mixture on a hidden section to adjust color and dilution before you begin.
Pick Paint Hue
How do you pick the right hue for a whitewash? Consider light, mood, and longevity: color psychology affects how a room feels, while paint durability matters for maintenance. Test swatches in different light and watch them through the day.
- Choose undertones: warm or cool undertones change mood; pick one that complements furnishings.
- Test small patches: observe hue at morning, noon, and evening to judge true effect and contrast.
- Account for durability: select a paint base and finish that stands up to cleaning, then adjust tint slightly toward desired softness.
Mix Whitewash Solution
Because the right mix balances opacity and texture, pick your paint color first, then dilute it into a whitewash that still shows the wall’s grain.
Choose from color palettes that suit light, airy looks or muted tones; test swatches on scrap wood or a hidden wall section.
For a classic whitewash, mix one part latex paint to four parts water; adjust to two-to-one for more coverage.
Stir thoroughly, strain to remove clumps, and note ratios.
Apply thinly with a brush or rag using texture techniques like cross-hatching or dragging to reveal substrate.
Keep small test patches before committing.
Prepare Walls: Drywall, Plaster, Brick, and Textured Surfaces
Before you apply any whitewash, assess and clean the surface so the coating will adhere evenly; drywall, plaster, brick, and textured walls all need different prep. You’ll check for loose debris, stains, and uneven texture patterns, then plan wall preparation steps accordingly. Use a mild detergent rinse on drywall and plaster, wire-brush brick, and vacuum textured surfaces. Repair cracks and sand glossy areas so the whitewash grips.
Before whitewashing, thoroughly inspect and clean each surface—patch cracks, sand glossy spots, and remove dust for even adhesion.
- Drywall: patch, sand, prime glossy spots.
- Plaster: remove dust, fill hairline cracks, key surface.
- Brick/textured: brush off mortar dust, wet slightly before application.
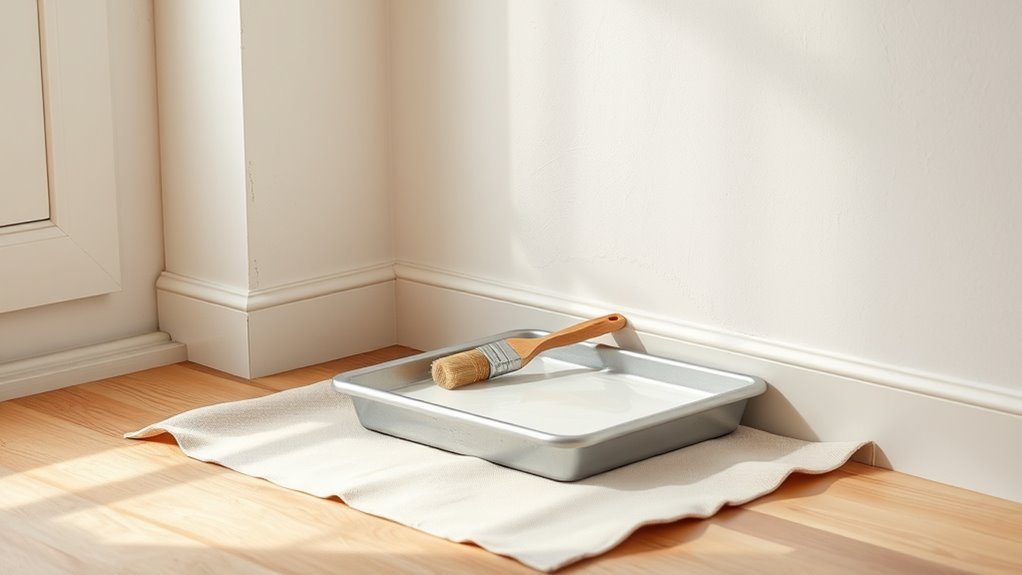
Protect Trim, Floors, and Fixtures
Before you start whitewashing, tape and cover baseboards snugly so paint won’t seep under the edges.
Lay down drop cloths or plastic sheeting to protect floors and secure them with tape to prevent tripping.
Remove or wrap fixtures and hardware so they stay clean and undamaged.
Cover Baseboards Carefully
When you start whitewashing, protect baseboards, trim, and floors so paint won’t stain or seep into crevices—tape edges snugly, lay down drop cloths, and cover fixtures with plastic.
You’ll focus on baseboard cleanup and trim protection to keep lines sharp and avoid extra sanding later. Work methodically, pressing tape into corners and sealing gaps where the wall meets trim. Remove outlet covers and mask hardware.
After whitewashing, pull tape slowly at a 45° angle while paint is tacky for crisp edges.
- Score tape edges for tight adhesion.
- Use thin painter’s tape for delicate trim.
- Keep a damp cloth handy.
Protect Flooring Thoroughly
How will you keep paint off your floors and out of crevices? Begin with a quick surface assessment: note changes, gaps, and material types so you choose appropriate floor protection.
Lay heavy-duty drop cloths or rosin paper, overlapping seams and taping edges to baseboards to prevent slipping. Use painter’s tape along trim and press seams tight where cloth meets wall.
For hardwood, add cardboard or adhesive-backed film to avoid moisture damage. Weight corners with small objects so coverings don’t shift.
Keep a damp rag and a small scraper nearby for immediate cleanup of drips before they dry. Regular checks avoid costly touch-ups.
Shield Fixtures Securely
Since fixtures and trim catch the most stray whitewash, take a systematic approach: cover switches, outlets, light fixtures, and trim with painter’s tape, plastic sheeting, or removable film, pressing tape firmly along edges to seal gaps.
Before taping, do surface cleaning to remove dust and grease so tape adheres.
If possible, perform fixture removal to eliminate obstacles and prevent drips.
When you tape, overlap seams and secure floor edges with kraft paper or drop cloths.
Remove tape within an hour of paint drying to avoid peeling.
Follow these quick steps:
- Clean surfaces thoroughly.
- Remove fixtures where practical.
- Tape and seal edges tightly.
Step-by-Step Whitewash With Brush and Rag
Before you pick up the brush, lay out drop cloths and tape off trim so you don’t chase drips later.
Mix paint with water to a milky wash; test on scrap to confirm color blending before the wall.
Work in small sections: brush on vertical strokes, immediately follow with a rag to wipe and soften.
Vary pressure and wiping direction for subtle texture variation.
If a spot dries too fast, rewet and blend quickly.
Step back often to assess coverage and uniformity.
Let the first pass dry, then add thin additional layers until you’re happy with the translucent look.
Compare Roller, Sprayer, and Sponge Methods
If you prefer a faster, more uniform base than brushing and ragging, consider rollers, sprayers, or sponges—each gives a distinct finish and work rhythm.
- Roller: You’ll cover large areas quickly; rollers create subtle texture patterns and suit thin whitewash mixes for even color blending without streaks.
- Sprayer: You’ll get the most uniform mist and fastest application; sprayers excel at smooth coverage but need masking to control overspray and protect nearby surfaces.
- Sponge: You’ll work slower but gain tactile control; sponges let you stamp deliberate texture patterns and fine-tune local color blending for a handcrafted look.
Adjust Translucency and Texture While You Paint
When you want more depth or a softer wash, tweak the mix and your application as you go: add small amounts of water to thin the whitewash for greater translucency, or stir in extra lime or pigment to make it more opaque.
As you paint, test a small section to practice translucency adjustment, then adjust volume and brush pressure.
Use a dry brush or rag to lift excess for subtle Texture variation, or a stippling motion to build grain.
Tap lightly with a sponge for mottled effects.
Keep notes of ratios and techniques so you can reproduce the look across the wall.
Drying, Re-Coating, and Sealing Tips
Because lime and moisture interact slowly, let each whitewash coat dry fully to touch and feel slightly chalky before you add another. This usually takes 24–48 hours depending on humidity and temperature. You’ll judge readiness by feel, not schedule.
Light sanding between coats refines texture and helps new layers bond. Use thin additional coats for subtle color blending and to build translucency.
Seal only after the final coat cures to avoid trapping moisture.
- Wait 24–48 hours; check chalky feel.
- Lightly sand for texture techniques and adhesion.
- Apply breathable sealer; test on scrap first.
Fix Streaks, Drips, and Uneven Whitewash
Once your coats have cured and you’ve sanded lightly, you’ll spot streaks, drips, and uneven patches more clearly; don’t worry—most are fixable with a few careful moves.
Lightly sand glossy drips until smooth, then feather edges with a damp rag to blend.
Thin a bit more whitewash for a mist coat to even translucency; apply with a soft brush in long, overlapping strokes.
For persistent streaks, scuff sand and reapply targeted micro-coats.
Use creative techniques like cross-hatching or stippling to disguise texture without altering opacity.
Reserve color accents for later styling, not corrective fixes.
Style Whitewashed Walls With Color and Decor
If you want your whitewashed walls to feel intentional instead of unfinished, start by choosing a color palette and decorative approach that play off the wall’s soft translucency. You’ll balance muted neutrals or saturated pops depending on mood; use complementary color schemes to enhance depth without masking texture.
Add simple decorative accents that echo the room’s style—wood frames, woven textiles, metal fixtures. Consider scale and contrast so the wash remains visible.
- Layer textiles and rugs to pick up tones.
- Hang art with thin frames to respect translucency.
- Use plants and metal accents for contrast and warmth.
When to Hire a Pro or Choose Another Finish
When your wall has major flaws, your time is limited, or the finish needs to meet strict durability or fire-code standards, hire a pro instead of attempting a DIY whitewash. You’ll save time, get professional assistance, and avoid costly mistakes. If you want a different look or higher performance, consider alternative finishes like limewash, stucco, or sealed paint.
| Condition | Recommendation |
|---|---|
| Structural damage | Pro repair |
| Tight deadline | Hire pro |
| Commercial code | Pro required |
| High-moisture area | Alternative finishes |
| Decorative desire | Alternative finishes or pro |
Decide based on risk, budget, and desired longevity.
Frequently Asked Questions
Can Whitewashing Be Done Outdoors on Siding or Masonry?
Yes — you can whitewash siding or masonry outdoors. You’ll boost exterior durability by sealing afterward, and you’ll need thorough surface preparation (cleaning, repairs, priming) so the wash adheres and weathers properly.
How Long Does Whitewash Paint Last Before Needing Refresh?
Like an aging fresco, whitewash usually lasts 2–5 years before needing refresh; you’ll preserve historical authenticity by ensuring thorough surface preparation, and you’ll refresh sooner on high-traffic or exterior surfaces exposed to weather.
Is Whitewash Safe for Nurseries and Children’s Rooms?
Yes — whitewash can be safe for nurseries and children’s rooms if you choose low-VOC, child friendly paints and let fresh fumes fully dissipate; ventilate well, use safe primers, and avoid lead or strong solvents for nursery safety.
Can I Whitewash Over Wallpaper or Painted Murals?
“Measure twice, cut once.” You can whitewash over wallpaper or murals if you strip loose paper, sand glossy paint, and guarantee solid adhesion; proper wall preparation and careful paint mixing let you thin the wash so underlying designs subtly show through.
What Are Eco-Friendly or Low-Voc Whitewash Options?
You can use limewash, milk paint, or diluted clay paints; they’re low-VOC, use natural pigments, and pair well with non toxic finishes like beeswax or water-based sealers. You’ll get breathable, eco-friendly whitewash results.
Conclusion
Whitewashing’s an easy, budget-friendly way to refresh walls—over 60% of DIYers try a one-day project at home, so you’re in good company. If you followed the steps here, you’ll know how to pick the right paint mix, prep various surfaces, fix streaks, and seal or recoat for durability. Try a small test area first, and hire a pro if you need perfect coverage on tricky textures or large projects.