Is Exterior Paint Thicker Than Interior Paint?
Yes — exterior paint will usually feel and behave thicker than interior paint because it has higher-solids binders, stronger pigments, and UV/mildew additives that boost viscosity and film build. You’ll often need fewer coats outdoors but must watch for sagging or slow drying. Interior paints prioritize smoothness, low odor, and scuff resistance, so they’re often thinner. Keep application method, substrate, and manufacturer specs in mind if you want to understand the trade-offs further.
Quick Answer: Is Exterior Paint Thicker Than Interior Paint?
Although exterior and interior paints can look similar, exterior paint isn’t automatically thicker than interior paint. You’ll find thickness varies by formulation: binders, pigments, and additives change viscosity to suit surfaces and conditions.
Exterior paint isn’t inherently thicker than interior; formulations—binders, pigments, additives—determine viscosity for each use.
Exterior formulas emphasize weather resistance and UV protection; interior ones focus on scuff resistance, washability, and low odor.
When you compare, check technical data sheets for solids by volume rather than eyeballing cans. Consider color matching carefully—tinting can alter apparent thickness and coverage.
Also weigh environmental impact: low-VOC and waterborne exterior options may match performance without added thickness.
Choose based on specs, not assumptions.
How to Decide Quickly: Use Exterior Paint or Not?
If you need a quick decision, check the surface, exposure, and desired durability: use exterior paint for surfaces exposed to weather, moisture, or strong sunlight, and stick with interior paint for protected, climate-controlled areas.
Decide fast by asking: will it get wet, see sun, or face abrasion? If yes, choose exterior for its mildew resistance and UV stability.
For color mixing, match pigments under the same formula to avoid fading differences.
Keep tool maintenance simple: clean brushes and rollers thoroughly after exterior jobs to prevent contamination.
When in doubt, prioritize durability and compatibility over convenience.
How Paint Thickness Is Measured: Viscosity, Solids, Film Build
When you evaluate paint thickness, you’re really looking at three related but distinct properties: viscosity (how the paint flows), solids content (how much material remains after solvents evaporate), and film build (the actual dry layer thickness on the substrate).
Evaluating paint thickness means assessing viscosity, solids content, and the resulting film build on the substrate.
You measure viscosity with tools like a Zahn cup or viscometer to predict application behavior.
Solids percentage tells you how much coating will remain and affects coverage and color matching accuracy.
Film build is measured with wet and dry gauges to confirm protection and appearance.
You’ll also consider environmental impact—higher solids often reduce VOCs but change application and cleanup.
Wet vs Dry Film Thickness: Exterior vs Interior Paint
Having checked viscosity, solids, and film build, you now need to compare wet film thickness (WFT) and dry film thickness (DFT). Understanding how each matters for exterior versus interior jobs is important.
You’ll measure WFT during application to ensure enough material is placed to reach the specified DFT after curing. Exterior coatings often require higher DFT to withstand weather, while interior jobs prioritize smooth appearance and easier color matching.
Thicker wet films can sag or emit more VOCs, so watch environmental impact and application technique. Use appropriate tools and follow manufacturer WFT/DFT charts to balance durability, finish, and sustainability.
Why Exterior Binders Make Paint Feel Thicker
When you compare exterior to interior formulas, you’ll notice exterior binders form stronger polymer networks that make the paint feel heavier.
They also carry higher solids content, so more material stays on the surface after drying.
Additives for UV and moisture resistance further thicken the film and change the paint’s hand.
Stronger Binder Networks
Because exterior paints must stand up to weather and wear, their binders form tighter, more interconnected networks that make the paint feel thicker to the touch. You’ll notice improved color consistency and smoother finishes because these networks hold pigments firmly, resisting washout and fading. When you apply exterior paint, the stronger binder lets you use different application techniques with less risk of streaking or sagging. That tactile thickness comes from crosslinked polymers creating a dense matrix. Below is a simple comparison to visualize properties and effects.
| Feature | Exterior Binder | Effect |
|---|---|---|
| Network density | High | Durable film |
| Pigment hold | Strong | Color consistency |
| Flexibility | Moderate | Crack resistance |
| Application | Robust | Easier techniques |
Higher Solids Content
Stronger binder networks don’t just improve durability—they also allow manufacturers to boost the paint’s solids load, which is a big reason exterior paint feels heavier.
You’ll notice higher pigment and resin concentrations increase viscosity and film build, so one coat lays down more material than typical interior formulas. That density helps hide imperfections and supports long-term protection.
It also affects how color matching behaves—you might need more tinting precision to hit the exact shade in a thicker base. Even when brands promote eco-friendly formulations, higher solids remain key to exterior performance, balancing coverage, weather resistance, and application feel.
Weather-Resistant Additives
How do weather-resistant additives make exterior binders feel thicker? You’ll notice additives like UV stabilizers, mildewcides, and flexibilizers increase binder viscosity so paint lays on denser and resists runoff.
That thicker film improves durability against sun, rain, and temperature swings, letting coatings bridge hairline cracks and shed dirt. When you’re doing color matching, thicker binders can slightly alter sheen and perceived hue, so test swatches under real conditions.
Paint branding often touts these formula boosts; don’t assume all labeled “exterior” behave identically. Compare data sheets and samples to pick a product that balances workability and long-term protection.
Pigment Volume Concentration (PVC): Impact on Thickness and Hiding Power
When you adjust pigment volume concentration (PVC), you change how much solid pigment sits in the film versus the binder, and that balance directly affects both film thickness and hiding power. You’ll notice higher PVC usually boosts hiding but can make the film more porous and less flexible.
Lower PVC increases binder, improving durability and smoothness. Use color mixing thoughtfully to reach desired opacity without overloading pigment. Apply consistent brush techniques to avoid thin spots that defeat hiding.
Consider three practical impacts:
- Opacity vs. porosity trade-off.
- Film flexibility and crack resistance.
- Coverage per coat and required coats.
How Solvents and Water Content Change Viscosity and Feel
When you adjust the solvent-to-water ratio, you change how thin or thick the paint feels and flows.
Higher solvent content usually lowers viscosity for smoother leveling, while more water raises viscosity and can make texture more pronounced.
Understanding that balance helps you control application, coverage, and final surface feel.
Solvent Vs Water Ratio
Because solvents and water change a paint’s flow and feel in different ways, you need to balance them to get the viscosity and leveling you want. You’ll choose solvent-heavy blends for faster drying and stronger film formation, but that can hurt color consistency and increase environmental impact.
Water-rich formulas feel milder, reduce fumes, and make cleanup easier, yet they may require additives to maintain uniform pigment dispersion. Match ratio to application, substrate, and regulations.
Consider these trade-offs:
- Solvent increases hardness and adhesion.
- Water reduces VOCs and odor.
- Blends optimize performance and compliance.
Viscosity And Texture
Adjusting solvent and water ratios doesn’t just affect drying and VOCs — it directly changes how a paint feels and flows under your brush or sprayer.
You’ll notice higher solvent content lowers viscosity, so paint spreads smoother and levels better, while more water thickens emulsion paints and can create drag or stipple. That change influences texture, hide, and how easily you achieve precise color matching, since thinning can alter pigment distribution.
You should balance flow with substrate needs and remember environmental impact: using too many solvents raises VOCs, while over-thinning with water may require extra coats, wasting materials.
Additives That Change Exterior Paint Body (Coalescents, Fillers, Mildewcides)
If you want paint to lay down smoother, resist mildew, or fill tiny surface voids, additives are the tools that change a coating’s body. You’ll choose coalescents to help bind particles during drying, improving flow for better color matching and uniform sheen. Fillers adjust body so you can hide imperfections without heavy coats. Mildewcides stop fungal growth on damp exteriors, extending life while letting eco friendly formulations remain effective.
Additives—coalescents for smooth film, fillers for body and coverage, mildewcides for long-lasting, mildew-resistant finishes.
- Coalescents: improve film formation, flow, and appearance.
- Fillers: increase body, opacity, and gap-filling.
- Mildewcides: protect film integrity and longevity.
Typical Wet and Dry Film Thickness Ranges by Product Type
You’ll usually see manufacturers specify both wet film thickness (WFT) and expected dry film thickness (DFT) so you can plan coats and coverage.
Typical WFT values range from about 4–10 mils (100–250 µm) while DFTs commonly fall between 1–4 mils (25–100 µm) depending on the product.
Next, we’ll compare common product-specific thickness targets for primers, topcoats, and specialty coatings.
Typical Wet Film Thickness
Wondering how thick paint should be when it’s still wet? You’ll aim for a wet film thickness (WFT) that balances coverage, color consistency, and environmental impact. Different product types have target WFTs to perform correctly and minimize waste.
- Acrylic latex (interior/exterior): typically 4–8 mils WFT for good opacity and even color consistency.
- Alkyd/enamel: usually 3–6 mils WFT to avoid runs while achieving durable build.
- Primers and sealers: often 6–10 mils WFT to ensure substrate sealing without excess VOC release.
Measure WFT with a gauge to apply paint precisely.
Dry Film Thickness Ranges
Because wet film thickness determines how much coating stays after solvents evaporate, you’ll want to know the typical dry film thickness (DFT) ranges for common product types to meet performance and coating specifications.
Exterior latex often dries to 25–50 microns DFT per coat; interior latex typically lands 20–40 microns. Enamels and oil-based finishes can be 30–75 microns. Primers vary widely, 15–60 microns depending on purpose.
When color mixing, pigments can slightly alter DFT; follow manufacturer data.
Apply consistent brush techniques to achieve target wet film thickness and consequently predictable dry film thickness across the substrate.
Product-Specific Thickness Values
While specific values vary by formulation and application method, manufacturers usually publish both wet film thickness (WFT) and dry film thickness (DFT) ranges so you can match product performance to your project needs.
You’ll see clear differences by product type: primers lay down thicker WFT to seal substrates, interior wall paints aim for moderate DFT for coverage and easy touch-ups, and exterior coatings often require higher DFT for durability and weather resistance.
Check product datasheets and paint branding notes for recommended film builds and color matching guidance to achieve desired appearance and protection.
- Primers: WFT 100–200 µm, DFT 25–50 µm
- Interior latex: WFT 80–150 µm, DFT 20–40 µm
- Exterior alkyd/latex: WFT 120–250 µm, DFT 30–75 µm
How Sheen Changes Apparent and Actual Thickness
If you look closely, the paint’s sheen can make a surface look thicker or thinner than it actually is. You’ll notice high gloss reflects light, emphasizing texture and making layers seem thinner, while flat sheens diffuse light, masking brush marks and seeming thicker.
When you do color matching, sheen differences alter perceived hue and depth, so match both gloss level and pigment.
Sheen also affects drying behavior and film buildup subtly, which can change actual microns applied.
Finally, consider environmental impact: selecting low-VOC sheens and proper application minimizes waste and repaint cycles, reducing overall footprint.
Which Sheen to Choose for Durability and Appearance
When you pick a sheen, think about how it affects durability—higher sheens resist abrasion and wash better.
You’ll also want to weigh appearance, since glossier finishes highlight flaws while flats hide them.
Consider how much maintenance you’re willing to do, because tougher, shinier paints make cleaning easier but may require more prep for a smooth look.
Sheen And Durability
Because sheen affects both how paint handles wear and how it looks under light, choosing the right finish is one of the most practical decisions you’ll make for durability and appearance. You want a finish that resists scuffs, sheds moisture, and keeps Color consistency across sun-exposed areas, while considering VOC content for environmental impact.
- High-gloss: toughest, easy to clean, highlights imperfections.
- Semi-gloss: durable, good for trim and high-traffic spots.
- Satin/eggshell: moderate durability, forgiving on surface flaws.
Match sheen to location and maintenance needs to maximize lifespan without sacrificing look.
Appearance And Maintenance
Sheen not only affects durability but also shapes how a space reads, so you’ll want to balance appearance with maintenance needs. Choose higher sheens for trim, kitchens, and bathrooms where scrubbability matters; they highlight color palettes and resist stains.
Flat or matte hides imperfections, so it’s ideal for living rooms and ceilings, but it’s harder to clean. Consider traffic, light exposure, and how often you’ll repaint.
Also weigh environmental impact: low-VOC, durable finishes cut repaint frequency and emissions. Match sheen to function—prioritize easy-clean surfaces in busy areas and softer sheens where comfort and subtlety matter.
When Exterior Paint Is Too Thick: Signs and Fixes
If exterior paint’s too thick, you’ll notice problems quickly: runs, long drying times, and a sticky, uneven finish that traps dirt and hides detail. You’ll also see color psychology effects dulled when texture obscures hue; thick layers worsen environmental impact through wasted product and increased VOC off-gassing. Act promptly to fix it.
- Thin and stir: add manufacturer-recommended thinner to restore flow and uniform color.
- Sand and recoat: scuff heavy drips, remove gloss irregularities, then apply proper-consistency coats.
- Control conditions: paint at correct temperature and humidity to ensure proper drying and longevity.
When Interior Paint Is Too Thin: Problems and Detection
When interior paint’s too thin, you’ll spot uneven coverage, visible brush or roller marks, and patches where the previous color or stains show through — problems that call for correction before they worsen.
You’ll notice poor color blending at edges and corners, making rooms feel patchy.
Thin film reduces durability, so scuffs and stains penetrate more easily.
Texture enhancement designed to smooth surfaces won’t hide substrate flaws when paint lacks body.
Test by applying a wet coat in a small area; if it beads or fails to hide, add a second coat or choose higher-viscosity interior paint to achieve proper opacity and protection.
How Substrate (Wood, Masonry, Metal, Drywall) Affects Desired Film Build
Thin or uneven film on interior walls makes problems obvious, but the substrate you’re coating strongly dictates how much paint you should lay down. You’ll adjust film build: porous drywall soaks in more, smooth metal needs thinner coats for adhesion and flexibility, wood may need sealing to avoid blotchiness, and masonry calls for thicker, breathable films.
Consider color psychology when choosing opacity and sheen—darker hues need fuller coverage. Paint branding matters for recommended mil thickness and primers. Follow manufacturer guidance and test in a small area to match finish, durability, and appearance.
- Drywall: absorbent, needs more coats
- Metal: thin, flexible films
- Masonry/Wood: thicker, breathable or sealed
Why Weather Resistance Needs Higher Film Build on Exteriors
Because exterior surfaces face cycles of sun, rain, freeze and thaw, you want a heavier film build to protect them—thicker paint layers provide a longer-lasting barrier against moisture intrusion, UV breakdown, and mechanical wear.
You’ll rely on higher film build to bridge minor cracks, shed water, and resist abrasion from windborne grit. That extra thickness complements primers and flashings so you’re not depending on a single coat.
It also smooths texture variation across siding and helps color blending appear more uniform under changing light. In short, you’ll get improved durability and more consistent appearance outdoors.
UV Stabilizers, Pigments, and Their Role in Exterior Formulations
Although you won’t see them, UV stabilizers and carefully chosen pigments do the heavy lifting in exterior paint formulations, protecting binders and maintaining color under intense sunlight. You rely on additives that block UV, antioxidants that slow breakdown, and pigments engineered for fade resistance. That combination supports long-term film integrity without overrelying on thickness.
Color blending precision and paint branding choices guide pigment packages and marketing, but performance comes from chemistry.
- UV absorbers: protect polymers and slow chalking.
- Hindered amine light stabilizers: extend binder life.
- Inorganic pigments: resist fading and improve opacity.
Why Brands Feel Different: Formulation and Testing Differences
When you pick up two cans that both say “latex,” you’ll still notice differences because manufacturers choose different binders, pigment loads, additives, and testing targets that change feel, coverage, and durability. You’ll sense viscosity changes, drying rates, and sheen because labs tweak formulations for specific tests. Color matching systems and environmental impact goals also drive choices—low-VOC binders or recycled pigments alter texture. You should evaluate data sheets and try samples, since brand testing focuses on adhesion, scrub resistance, fade, and weathering differently.
| Property | Why it matters |
|---|---|
| Viscosity | Affects thickness feel |
| Binder type | Impacts durability |
| Pigment load | Alters coverage |
| Additives | Change application |
| Test targets | Guide formulation |
When to Use Exterior Paint Indoors: Benefits and Downsides
If you’re tempted to use exterior paint inside because it promises extra durability and moisture resistance, weigh the trade-offs: exterior formulas often contain higher levels of binders, pigments, and additives that resist weathering and mildew. However, they can smell stronger, dry differently, and offer finishes that don’t balance well with indoor lighting or touch.
You might use exterior paint in high-moisture spots or on metal trim, but consider color matching and aesthetic appeal.
Pros and cons in practice:
- Better moisture and mildew resistance for bathrooms or basements.
- Stronger adhesion on problematic substrates.
- Potential off-gassing, uneven sheen, and harder touch-ups.
Risks of Using Interior Paint Outdoors
If you use interior paint outside, you’ll see faster weathering and fading because it isn’t formulated for UV and temperature swings.
It also won’t resist moisture well, which can let water soak in and damage the substrate.
Over time that leads to increased peeling and flaking, so the finish won’t last.
Faster Weathering And Fading
Although interior paints can look fine at first, they’ll fade and break down far quicker outside because they’re not formulated to resist sunlight, moisture, and temperature swings. You’ll notice color fading, chalking, and loss of gloss within months rather than years.
If you use interior paint outdoors, you compromise durability and increase maintenance.
- Choose proper exterior coatings to prevent premature fading and degradation.
- Consider eco friendly options labeled for UV and weather resistance.
- Test a small area and expect quicker repaint cycles if you insist on interior formulas outdoors.
Poor Moisture Resistance
One major problem with using interior paint outdoors is that it won’t keep moisture out, and you’ll see the consequences quickly: peeling, blistering, mildew, and rotting trim. You’ll notice damp spots and mold where interior formulas lack mildew inhibitors and breathable resins.
That trapped moisture speeds substrate decay and forces more frequent repainting, increasing environmental impact through extra materials and waste. Water also undermines adhesion, so color stability suffers as pigments leach or fade unevenly.
To avoid costly repairs and lower environmental footprint, choose exterior-grade coatings designed for wet conditions and UV exposure rather than relying on interior paint outdoors.
Increased Peeling And Flaking
Why will interior paint start to peel and flake when you use it outside? You’ll see adhesion fail because interior formulas aren’t made for temperature swings, UV, or moisture. Poor surface preparation and incompatible primers make bonds weaker, and even good color matching won’t stop physical breakdown.
You’ll notice bubbling, cracking, and loss of pigment as coatings separate from the substrate.
- Poor surface preparation: contaminants or roughness prevent proper adhesion.
- Environmental stress: UV, freeze–thaw, and humidity force flexible breakdown.
- Film inadequacy: interior binders and pigments can’t maintain outdoor durability.
Choose exterior systems to avoid rapid failure.
How to Read Technical Datasheets: Solids and Recommended Film Thickness
When you open a paint technical datasheet, the sections on solids and recommended film thickness tell you how much actual coating will remain on the surface and how thick each applied layer should be to achieve the stated performance. You’ll check solids by volume to compare coverage and buildup; higher solids often mean fewer coats, aiding color matching and reflecting brand reputation. Recommended dry film thickness (DFT) shows the target per coat; exceed it and you risk defects, miss it and you lose protection. Visualize layers:
| Property | Example |
|---|---|
| Solids (vol%) | 40% |
| DFT per coat | 50 μm |
| Max coats | 3 |
| Min DFT total | 150 μm |
Tools to Measure Wet and Dry Film Thickness on Site
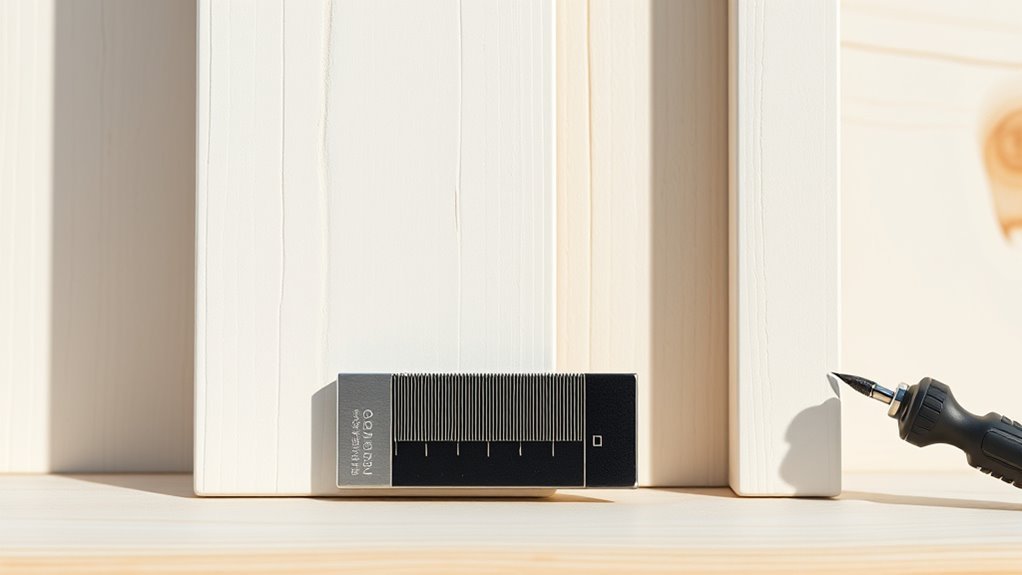
Although you’ll rely on datasheet targets, you’ll need handheld tools on site to verify both wet film thickness (WFT) and dry film thickness (DFT).
You’ll use a wet film comb or gauge immediately after application to confirm WFT and maintain color matching consistency. Measure again after cure with a magnetic or ultrasonic DFT gauge to ensure the protective film meets specs and minimizes environmental impact by avoiding overuse.
- Wet film comb — quick, inexpensive WFT checks to hit target solids.
- Magnetic DFT gauge — dependable on ferrous substrates for cured thickness.
- Ultrasonic gauge — non‑magnetic surfaces and layered systems.
Application Methods That Change Effective Thickness: Brush, Roller, Sprayer
Because the application method alters how much coating actually lands and levels on the surface, you should choose brush, roller, or spray not just for convenience but for how each affects effective dry-film thickness and uniformity.
You’ll find brushes deposit thicker edges and texture, good for spot color matching touch-ups but prone to visible strokes.
Rollers give consistent mid-range build and hide minor substrate variations; nap size and technique control thickness.
Sprayers lay down the thinnest, most uniform films, ideal for smooth finishes and precise color matching but increase overspray and environmental impact.
Match method to substrate and performance needs.
How Primer Choice Affects Final Film Build and Performance
If you pick the wrong primer, you’ll undermine the topcoat’s thickness, adhesion, and durability. The right primer controls absorption, seals porous substrates, and can add an extra microns of protective build.
You should choose a primer that matches substrate and topcoat chemistry so color blending is predictable and you won’t need heavy topcoat hides. Primer solids contribute measurable film build and affect finish sheen uniformity.
Use high-solids or specialist primers for rough surfaces, stain-blocking primers for contaminated substrates, and bonding primers for slick materials to guarantee ideal performance and reduce recoating needs.
- High-solids primer: adds build
- Stain-blocking primer: prevents bleed
- Bonding primer: improves adhesion
Drying, Curing, and How Thickness Drives Drying Time and Defects
When you apply paint, drying and curing start immediately. You’ll notice thicker films trap solvents and slow evaporation, extending tack time and raising the chance of sagging, blistering, or solvent pops.
Thinner coats dry faster and cure more uniformly, preserving color consistency and preventing surface defects that harm aesthetic appeal.
Manage thickness by following recommended wet mils, using proper flash times between coats, and controlling temperature and humidity.
Curing chemistry continues after surface dry, so avoid stress or cleaning too soon.
Cost Trade-Offs: Coverage, Material Needs, and Thicker Formulas
Although thicker formulas can cut the number of coats you need, they also raise per-gallon costs and can demand more careful application to avoid defects. You’ll weigh coverage against material expense: a thicker exterior can cover sooner but costs more upfront, and tougher rollers or sprayers may be required.
Thicker exterior paints can reduce coats but raise per-gallon costs and require tougher tools and careful application.
Consider color matching needs when switching batches—thicker mixes can make matching trickier.
Factor in environmental impact: higher-solids paints may emit fewer VOCs per coat but use more resin.
Balance labor, tools, and waste to decide if a thicker, pricier formula actually saves you money.
- Calculate total gallons and tools.
- Check color matching risk.
- Estimate waste and emissions.
Performance Trade-Offs: Durability, Breathability, Flexibility vs Thickness
Because paint thickness changes how coatings handle stress and moisture, you’ll balance durability, breathability, and flexibility rather than assume thicker is always better.
Thicker exterior coats resist abrasion and weathering, but can trap moisture on porous substrates, reducing breathability and risking blistering.
Thinner, more flexible interior formulations cope with substrate movement and allow color matching across trims without cracking.
You should weigh long-term durability against flexibility needs and environmental impact—heavier films may contain more VOCs or resins.
Test a small area, consider substrate and climate, and choose a film build that meets performance needs without overbuilding.
Quick Checklist: Choose the Right Paint and Target Film Build
If you want reliable results, start by matching paint type to substrate and climate, then set a target film build that balances protection with breathability and flexibility.
You’ll pick exterior or interior formulations based on exposure, but don’t forget interior aesthetics where finish and opacity matter.
Consider recommended DFT (dry film thickness), surface prep, and compatibility.
Plan paint storage to preserve viscosity and performance between coats.
Follow this checklist:
- Select paint chemistry and sheen for substrate, climate, and interior aesthetics.
- Specify DFT and number of coats to meet durability and breathability needs.
- Guarantee proper paint storage, mixing, and application conditions.
Frequently Asked Questions
Can Paint Thickness Affect Indoor Air Quality and VOC Emissions?
Yes — paint thickness can affect indoor air quality and VOC emissions. You’ll trap dust accumulation on thicker coatings, but thicker, more durable surfaces often off-gas longer; choose low-VOC formulas to reduce emissions and improve surface durability.
How Does Temperature During Application Change Final Film Thickness?
Temperature effects directly change drying rate, so you’ll see thinner films if heat speeds solvent loss; colder slows it, thickening wet sag risk. You should adjust application consistency and technique to maintain uniform final film thickness.
Do Colorants/Tints Significantly Alter Paint Viscosity or Film Build?
Yes — colorants can nudge viscosity; don’t expect magic. You’ll find colorant impact usually causes minor viscosity alteration, so you’ll adjust reducers or thinners, ensuring film build stays consistent rather than wildly transformed.
Can Multiple Thin Coats Outperform One Very Thick Coat Long-Term?
Yes—you’ll get better durability with multiple thin coats than one very thick coat. Using proper application techniques lets each layer cure during the paint drying process, reducing runs, improving adhesion, and ensuring steadier long-term film build.
How Does Paint Thickness Influence Adhesion on Glossy Surfaces?
Properly prepared glossy surfaces promote paint adhesion; you’ll prep persistently. You’ll focus on Surface preparation and choose Paint formulation suited for sheen, sand or degloss, apply thin even coats, and let curing create stronger, lasting bond.
Conclusion
In most cases, exterior paint is thicker than interior paint, but “don’t judge a book by its cover”—thickness isn’t the whole story. You’ll choose exterior formulas when you need durability, UV and moisture resistance, and higher solids; pick interior paints for breathability, lower VOCs, and ease of touch-ups. Match sheen, substrate, and manufacturer’s recommended wet/dry film thickness for best results, and test a small area to avoid surprises.