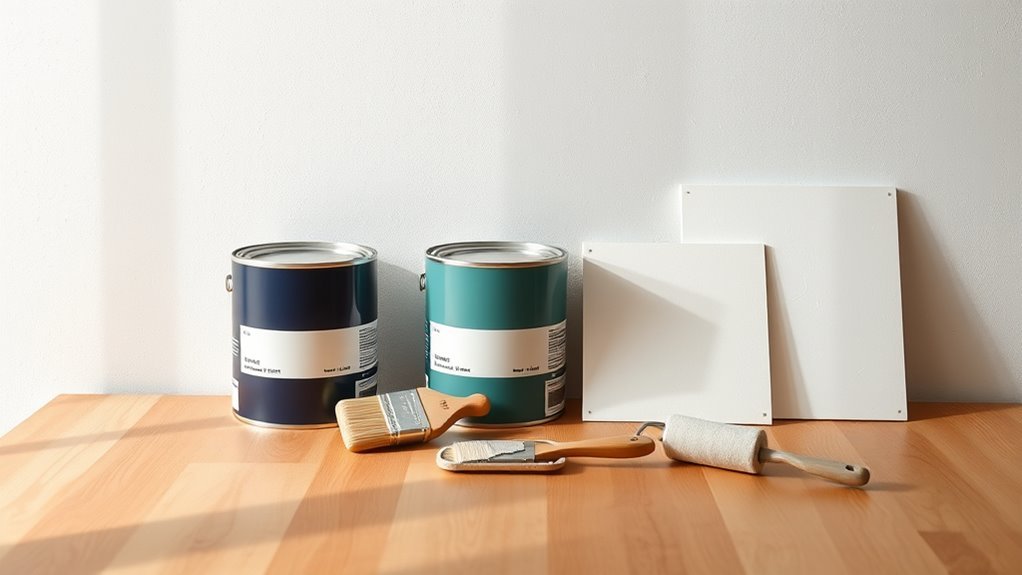
Is Furniture Paint Different From Wall Paint?
Yes — you’ll want different paints. Furniture paint’s formulated to resist knocks, scuffs, frequent cleaning and close inspection, with tougher binders, harder additives and satin-to-high gloss sheens that hold up to handling. Wall paint prioritizes spreadability, coverage, hiding flaws and easy roller application across large vertical surfaces, often with lower VOC options. Using the wrong type risks poor adhesion, chipping or uneven finish, and if you keep going you’ll get guidance on choosing, prepping and troubleshooting.
Quick Answer: Is Furniture Paint Different From Wall Paint?
Yes — furniture paint and wall paint are different. You’ll pick furniture paint for durability, adhesion, and finishes that stand up to touch, protecting surfaces and improving furniture safety.
Yes—furniture paint differs from wall paint: choose it for durability, adhesion, and touch-resistant finishes that protect surfaces.
Wall paint focuses on coverage and appearance across large areas, adapting to wall texture and hiding imperfections.
Formulas differ: furniture paint resists scuffs and cleans easily, while wall paint emphasizes spreadability and matte or eggshell sheens.
You shouldn’t assume one suits both tasks; using the right type preserves finish and longevity.
Choose based on surface, wear, and safety needs rather than convenience or leftover cans.
How This Guide Helps You Choose
This guide helps you compare paint types so you can pick the right formula for furniture or walls.
You’ll learn how durability and finish affect wear and appearance.
It also covers prep and application steps to get a professional result.
Paint Type Comparison
Wondering which paint will work best for your project? You’ll compare wall and furniture paint by checking designed surfaces, application methods, and formulation.
Consider color consistency: wall paint often comes in larger batches keyed to room-wide hues, while furniture paint focuses on small, exact touch-ups for pieces.
Factor budget considerations—wall paint can be cheaper per gallon, but specialized furniture paint may save time and reduce prep costs.
This guide helps you weigh ease of use, tools required, and finish expectations so you can pick the most practical option for your item without guessing or overspending.
Durability And Finish
How long do you want the finish to last and how much wear will it take? You’ll choose furniture paint when durability matters: it resists chips, abrasion, and frequent cleaning better than typical wall paint.
Consider finish sheen and hardness for tables or chairs, and check color consistency across batches so touch-ups match. Also verify primer compatibility with both substrate and topcoat to prevent adhesion failures or uneven gloss.
If you want a softer, matte look with moderate durability, some furniture-formulated wall paints exist. But for high-traffic pieces, pick products specified for furniture to ensure lasting protection.
Prep And Application
When you’re prepping and applying paint, the right surface prep and tools make the difference between a lasting finish and a job you’ll redo. You’ll sand, clean, and prime furniture differently than walls to control adhesion and Finish texture; primers tame knots and glossy surfaces so Color blending stays smooth. Follow these focused steps:
- Sand to dull sheen, vacuum, and wipe tack-free.
- Apply primer suitable for substrate and topcoat.
- Use brushes/rollers matched to paint type for even laydown.
- Thin coats, light sanding between layers for seamless Color blending and durable finish.
Furniture Paint: What Defines It
Because furniture gets handled, moved, and exposed to spills, furniture paint’s formulation focuses on durability, adhesion, and finish—qualities that set it apart from wall paint. You’ll choose paints that resist scuffs, wipe clean easily, and bond to varied surfaces. Consider furniture trends and paint color schemes to match interiors while using primers and sealers made for furniture. Sheen levels affect wear and look, and specialized formulas (chalk, enamel, milk) offer distinct textures and protection. Test adhesion and finish on scraps before committing to a full piece.
| Feature | Why it matters |
|---|---|
| Durability | Resists handling |
| Finish | Affects cleaning and look |
Wall Paint: What Defines It

What makes wall paint different from furniture paint is its focus on coverage, ease of application, and long-term appearance across large surfaces. It’s formulated to spread smoothly, hide imperfections, and resist fading rather than to withstand heavy handling.
You choose wall paint when you want even color, simple roller application, and reliable washability. Consider these practical traits:
- Coverage: hides surface flaws quickly.
- Flow: levels out for uniform finish.
- Durability: resists fading and frequent cleaning.
- Maintenance: aids paint preservation over time.
You can still evoke vintage charm with color and finish, but you’ll prioritize appearance and upkeep for walls.
Side‑by‑Side: Formulation Differences
Although both are called “paint,” furniture and wall formulations use different binders, pigment loads, and additives to meet opposite demands. You’ll notice furniture paints are thicker, carry more pigment for smoother coverage, and include hardening additives for abrasion resistance.
Wall paints prioritize spreadability, opacity, and ease of touch‑up. For projects, pick furniture paint for tabletops, chairs, and vintage restoration where durability and finish control matter.
Choose wall paint for large vertical surfaces and quick recoats. If you want eco friendly finishes, look for low‑VOC options in either category, but verify intended substrate performance before you buy.
Binders Explained: Durability vs. Breathability
You noticed how formulations differ in pigment, thickness, and additives; now look at the binder — the ingredient that actually holds pigment to the surface and largely determines whether a finish resists scuffs or lets wood breathe.
You’ll choose based on use: furniture needs tougher binders; walls can favor breathability or easy washability. Consider:
- Alkyd/acrylic binders: durable, great for furniture, resist scuffs.
- Waterborne latex: balances durability and breathability for walls.
- Natural binders: used in eco friendly finishes, lower VOCs, gentler on wood.
- Specialty binders: for faux painting effects, texture, or satin sheens.
Pigments and Color Saturation Differences
When you pick paint for furniture versus walls, the pigments and how concentrated they are will change how saturated and durable the color looks. You’ll notice Pigment consistency differs: furniture paint uses denser pigments for better Color saturation and coverage on small surfaces. Wall paint spreads thinner, so hues can look lighter and less intense. Choosing the right formulation guarantees the color stays true and resists fading or abrasion on furniture while wall tones remain even from afar.
| Surface Type | Pigment Consistency | Color Saturation |
|---|---|---|
| Furniture | High | Intense |
| Walls | Moderate | Softer |
Sheen and Finish Choices for Furniture vs. Walls
Think about how sheen changes both look and durability: you’ll usually choose low-sheen finishes on furniture for toughness and to hide wear.
Reserve high-gloss for small accents that need dramatic reflection and easy cleaning.
Compare matte and satin to balance glare, touchability, and how imperfections show on walls versus pieces.
Durable Low-Sheen Options
Although glosses can look sleek, low-sheen finishes are often the smarter choice for high-use furniture and lower-traffic walls because they hide imperfections and resist scuffs better. You’ll find low-sheen options match current furniture trends while boosting paint longevity, and they work well on drawers, tables, and bedroom walls.
Consider these practical choices:
- Satin — gentle sheen, easy cleaning, versatile.
- Eggshell — soft look, masks flaws, popular for walls.
- Matte — modern, minimal reflection, forgiving on texture.
- Alkyd semi-gloss (low) — durable, tougher than waterborne, good for edges.
Choose based on touch, wear, and room lighting.
High-Gloss Accent Choices
Because high-gloss finishes catch and reflect light, they’re best used as accents on furniture rather than across large wall surfaces, where they can highlight flaws and create glare.
You’ll choose high-gloss for trim, chair rails, or a statement dresser to draw the eye and use color psychology to emphasize focal points—bold hues pop, neutrals add polish.
On walls, reserve gloss for small architectural details.
Match gloss with eco-friendly finishes when possible; low-VOC high-gloss formulations give durability without excess toxins.
Test swatches under your room’s light to avoid unexpected shine or color shifts before committing.
Matte Versus Satin
When you’re choosing between matte and satin, focus on how much light and wear each surface will face. You’ll pick matte for subtle, low-reflective furniture or walls where imperfections should hide; choose satin where durability and light bounce matter.
Consider Color consistency and Texture variation when matching pieces or rooms.
- Matte: hides flaws, offers soft, even color.
- Satin: resists scuffs, cleans easily, adds gentle sheen.
- Furniture: satin often wins for daily use; matte suits style pieces.
- Walls: matte hides flaws in low-traffic areas; satin fits bathrooms and kitchens.
Additives: Adhesion Promoters, Anti‑Scratch, and Fillers
If you want durable, professional results, additives are where paint really earns its keep: adhesion promoters help coatings grip slick or previously painted surfaces, anti‑scratch agents boost surface resistance to scuffs and abrasion, and fillers smooth out imperfections and build body for sanding or leveling.
You’ll pick additives based on surface texture and the wear the piece will see; fillers help level gouges, adhesion promoters prevent flaking on glossy finishes, and anti‑scratch chemistries keep dining tables looking fresh.
Note that additives can alter paint odor and drying, so test small areas to confirm compatibility and finish.
VOCs and Indoor Air: What to Watch For
Furniture paint and wall paint can have very different VOC levels, so you should check the label and product data before you start.
Know the basic health risks—headaches, irritation, or worse with prolonged exposure—so you can weigh low‑VOC options.
Plan for good ventilation and allow extra curing time indoors to keep air quality safe.
VOC Levels Compared
Although both furniture and wall paints can emit volatile organic compounds (VOCs), their typical formulations and application patterns mean the levels you’ll encounter often differ—and that affects indoor air quality. You’ll notice contrasts when you compare product types, use patterns, and surface area treated. Consider these points as you pick paint:
- Furniture often uses higher-solids or specialty finishes, raising VOC levels per coat.
- Walls get more paint by area but often use lower-VOC interior formulations.
- Application method (spray vs brush) changes immediate emissions you’ll face.
- Curing time and ventilation determine how long indoor air stays affected.
Health Risks Overview
When you bring paint into your home, its VOCs can affect indoor air quickly and sometimes for days after application. You should recognize that both furniture and wall paints can emit chemicals that trigger headaches, irritation, or worsen asthma.
Pay attention to labels and choose low-VOC or zero-VOC options to reduce chemical exposure and support environmental safety.
Sensitive individuals, children, and pets face higher risk, so limit their exposure until odors fade.
Even with safer formulations, small emissions can persist, so monitor symptoms and avoid prolonged presence around freshly painted areas to minimize health impacts.
Ventilation And Timing
Because paint off-gasses most strongly while it’s wet and during the first 24–72 hours, you should plan ventilation and timing before you open a can. You want to protect air quality and limit paint smell for yourself and others. Consider these steps:
- Open windows and run fans to create cross-ventilation immediately.
- Work during dry, low-humidity hours so drying speeds up and VOCs dissipate.
- Keep doors closed to isolate the space and avoid spreading odor through the home.
- Delay reoccupying the room for at least 48–72 hours, longer if smell persists or if anyone is sensitive.
How Surface Porosity Affects Paint Choice
If a surface soaks up moisture or resists it, that porosity decides which paint will stick, look right, and last. You’ll assess surface porosity to predict paint absorption: porous wood drinks thin wall paint, causing blotches; dense laminate repels it, so furniture paint or primer adheres better. Match finish and formula to porosity for durability and appearance. Use sanding and primer when needed, but don’t overdo preparation mentioned later. Feel the surface; test a small area. The table below captures the mood of choice and consequence:
| Hope | Risk | Relief |
|---|---|---|
| Fresh finish | Peeling | Primer help |
| Smooth touch | Stain | Lasting pride |
Prepping Wood, Laminate, and Metal for Furniture Paint
Now that you can read a surface’s porosity, you’ll adjust your prep for each substrate—wood, laminate, or metal—so the paint will bond and last. You’ll choose methods that suit furniture styles and desired paint color outcomes.
Now that you can read porosity, tailor prep for wood, laminate, or metal so paint bonds and endures
- Sand wood to dull gloss, fill holes, and tack clean for even absorption.
- Scuff laminate with fine grit, degloss with a primer made for slick surfaces.
- Remove rust from metal, sand to bright metal, then use a metal etching primer.
- Prime all substrates compatible with your paint color, cure fully, then sand lightly before topcoat.
Prepping Drywall and Plaster for Wall Paint
When you’re prepping drywall or plaster for paint, start by inspecting every wall for cracks, holes, loose paper, and water stains so you know exactly what fixes are needed before you roll anything on.
Patch holes, sand seams, and remove loose texture; tape joints and apply compound smoothly to match surrounding surface texture.
Prime repaired areas and stain spots to guarantee color consistency and adhesion.
Lightly sand primed surfaces, clean dust, and check for imperfections in different light.
Choose the correct primer for plaster or new drywall, then proceed with the paint specified for walls for uniform coverage.
When It’s OK to Use Wall Paint on Furniture
You’ve prepped walls carefully, and some of that same attention can pay off on furniture—especially pieces that won’t see heavy wear. You can use wall paint on small, decorative items when you want consistent room tones or to explore color psychology without extra sheen.
Choose quality primer and sealant, and prefer eco-friendly finishes to limit VOCs.
Pick a good primer and sealant, and opt for low‑VOC finishes to keep air quality and durability high
- Use wall paint on low-traffic pieces like shelves or lamp tables.
- Match room color schemes for cohesion.
- Test adhesion on hidden spots first.
- Topcoat for protection and desired sheen.
This approach saves time while staying intentional.
When It’s OK to Use Furniture Paint on Walls
You can use furniture paint on low-traffic accent walls where durability and cleanability aren’t critical. It’s also handy when you need a specific finish—like ultra-matte or chalky—that wall paints don’t offer.
Just prime properly and test a small area to guarantee adhesion and appearance.
Low-Traffic Accent Walls
Looking for a stylish, budget-friendly way to refresh a small, low-traffic accent wall? You can use furniture paint when the wall won’t face heavy wear and you want bold color blending with existing decor or a room scaled to furniture restoration projects.
Follow simple steps so the finish holds up:
- Clean and sand lightly to guarantee adhesion.
- Prime with a bonding primer suited to both surfaces.
- Apply thin, even coats of furniture paint; allow full cure.
- Seal with a compatible clear coat for extra protection.
This approach saves money and ties pieces and walls together.
Matching Finish Needs
When a piece of furniture and an adjacent wall need the same sheen or texture, furniture paint can be a smart choice—provided the wall’s function and exposure match the paint’s durability. You’ll pick furniture paint for low-traffic zones, small accent areas, or built-ins where matching finish creates cohesion and supports color psychology to guide mood.
Verify adhesion, cleanability, and VOC levels; choose eco-friendly finishes when indoor air matters. Test a swatch, observe in different light, and consider touch frequency.
If the wall will face heavy wear, stick with wall-specific formulas that offer tougher protection and easier maintenance.
Common Failures When You Swap Paints : And Why
Although swapping furniture paint for wall paint (or vice versa) might seem simple, it often leads to adhesion, durability, and finish problems because the formulations serve different purposes. You’ll notice failures tied to chemistry, application, and environment.
Consider these common issues and why they happen:
- Poor adhesion: furniture paints bind to slick surfaces; wall paints may peel on varnished wood.
- Uneven finish: sheens and pigments differ, harming Color consistency when swapped.
- Reduced durability: wall paint may chip on high-contact furniture.
- Shelf problems: Paint storage and age alter viscosity and performance, causing blistering or cracking.
How Primers Bridge Paint Differences
You can use a primer to improve adhesion when switching between furniture and wall paints, so your topcoat sticks and lasts.
It also seals porous surfaces and blocks stains or tannins that would otherwise show through.
Choose a primer formulated for the substrates and paint chemistry to guarantee compatibility and prevent peeling or finish problems.
Primer Adhesion Benefits
Because different paints are formulated for distinct surfaces, primers act as the critical bridge that helps paint stick, hide, and perform the way you expect. You’ll get better adhesion, fewer coats, and a smoother finish when you prime furniture before using wall paint or vice versa.
Primers also help with color consistency and let your brush techniques work efficiently without lifting or streaking.
- Seals porous surfaces for uniform absorption.
- Promotes mechanical grip on slick materials.
- Prevents stains and tannins from bleeding through.
- Reduces the need for repeated sanding between coats.
Sealant And Compatibility
Primers do more than improve adhesion—they act as a sealant that makes different paint systems compatible, so wall paint won’t soak into wood or furniture paint won’t bead on laminate.
You’ll choose primer based on surface porosity and the paint branding guidance; manufacturers often recommend specific primers to bridge chemistry differences.
Apply thin, even coats and sand between layers for smoothness. That seal prevents tannin bleed, reduces flashing, and evens sheen so your finish matches current furniture trends without surprises.
Using the right primer guarantees time, improves durability, and ensures finishes from different product lines behave predictably.
Best Primers for Tricky Surfaces
When you’re tackling glossy, stained, or previously painted furniture, the right primer can mean the difference between a lasting finish and peeling disaster. Choose one formulated for adhesion and stain-blocking to guarantee your topcoat performs.
You’ll want primers that support color blending and texture techniques so your finish looks intentional. Consider:
- Shellac-based primer for tough stain-blocking and quick adhesion.
- Oil-based primer for bare wood and tannin-heavy pieces.
- Bonding primer for slick laminates and glossy surfaces.
- Acrylic latex primer for easy cleanup and good flexibility.
Spot-test and sand lightly; primers prepare, don’t replace, proper surface prep.
Best Topcoats for Furniture Paint
Although choosing the right topcoat might seem like an afterthought, it’s the layer that protects your work and defines the final look and durability of painted furniture.
You’ll pick between water-based polycrylic for a clear, non-yellowing finish, oil-based polyurethane for tougher wear, or a conversion varnish for professional-level resilience.
Consider sheen to match furniture styles—matte for rustic, satin for intermediary, gloss for modern pieces.
Test compatibility with your chosen paint branding to avoid cracking or clouding.
Apply thin, even coats, sanding lightly between layers, and always follow cure times for long-lasting protection and appearance.
Tools and Application Methods by Project Type
When you pick tools for a project, choose brushes and rollers that match the paint type and surface—smooth foam or angled sash brushes for furniture, and nap rollers for walls.
Prep matters: sand, clean, and prime furniture differently than you’d large wall areas to guarantee adhesion and a smooth finish.
I’ll walk you through specific brush/roller options and surface-prep steps for each project type.
Brush And Roller Choices
Because the right brush or roller affects finish, speed, and waste, picking tools that match your project is essential. You’ll choose based on paint type, surface, and desired finish textures; brushes handle detail and color blending while rollers speed broad coverage.
Consider nap length, bristle material, and brush shape to control stroke marks and sheen. Match foam rollers with smooth, water-based furniture paints; use woven rollers for rough walls if needed.
Tools affect cleanup time and longevity, so invest wisely.
- Flat brush — edges, trim
- Angled sash — precision
- Foam roller — smooth panels
- Woven roller — textured areas
Surface Prep Techniques
If you want a durable, professional-looking finish, start by matching your prep tools and methods to the project: furniture, cabinets, or walls each need different cleaning, sanding, and priming approaches.
For furniture, degrease, remove hardware, and sand with fine grit; tack cloth picks up dust and fabric textures on upholstery-adjacent areas.
For cabinets, use deglosser or light sanding, fill holes, and apply shellac or bonding primer for durability.
For walls, patch, sand, and prime high-porosity areas.
Choose primers compatible with antimicrobial coatings when needed.
Use appropriate pads, sanders, and vacuuming to prevent contamination and guarantee adhesion.
Drying vs. Curing: What to Expect
Although both drying and curing happen after you apply paint, they’re not the same process and they affect how soon you can use the piece. The drying process removes solvents so the surface feels dry. Curing time completes chemical bonding for full hardness. Expect different timelines for furniture versus walls and for water- or oil-based formulas. Follow manufacturer guidance and allow longer curing for heavy use.
- Touch dry: hours to a day.
- Recoat: follow label intervals.
- Light use: days to weeks.
- Full cure: weeks to a month, depending on conditions and formulation.
Simple Tests for Adhesion and Wear
Before you commit to full use, run a few quick adhesion and wear checks so you know what to expect from the finish. Test a hidden corner with the paint you plan to use, let it fully cure, then press tape down and pull sharply to check adhesion.
Rub a small area with a damp cloth and mild detergent to simulate cleaning; note any color transfer for Color longevity clues.
Drag a ring or cup to assess scratch and abrasion resistance.
If you prefer Eco friendly formulations, verify their durability too—some low-VOC options need extra coats or topcoats to resist wear.
Cost Comparison: Budget Paint vs. Specialized Formulas
You’ll notice budget paints cost less per can, which makes them tempting for quick or one-off projects.
Specialized formulas usually carry a higher upfront price but can save you money over time with better durability and fewer touch-ups.
We’ll compare those upfront costs against long-term value so you can choose what’s smartest for your piece.
Upfront Cost Differences
When you’re comparing upfront costs, budget wall paints usually win on price per gallon. However, specialized furniture formulas can save you money by cutting down on primer, coats, and long-term touch-ups.
You’ll use cost analysis and consider material sourcing to decide which route fits your project and timeline.
- Price per gallon: budget paints cost less up front.
- Primer needs: furniture formulas often eliminate primer.
- Coats required: specialty paint can reduce number of coats.
- Extras: sanding, brushes, and sealers add to initial spend.
Weigh these factors to choose the most efficient upfront purchase.
Long-Term Value
Having weighed upfront costs like primer needs and coat counts, now look at long-term value: budget wall paints might save you money per gallon, but specialized furniture formulas often lower lifetime costs by resisting chips, reducing touch-ups, and holding finish longer.
You’ll find furniture aesthetics stay truer with coatings designed for contact and abrasion; that means fewer refinishes and less downtime. Wall durability matters too, but walls face different stresses and can tolerate cheaper options.
If you want lasting results on tables, chairs, and cabinets, invest in targeted formulas — you’ll spend less over years despite higher initial price.
Low‑VOC and Eco‑Friendly Paint Options
Because paint off-gasses chemicals that affect indoor air, choosing low-VOC or zero-VOC formulas makes a big difference for your home’s air quality and health. You’ll want eco friendly finishes that still adhere well to furniture and resist wear. Consider brand transparency and certifications for VOC reduction when selecting products.
- Pick zero-VOC or low-VOC furniture paints formulated for durability.
- Use water‑based primers to improve adhesion and reduce solvents.
- Test a small area to confirm finish and scent before full application.
- Ventilate while painting and during initial curing to minimize exposure.
Touch‑Up and Maintenance for Painted Furniture
You’ll want to keep a small kit for quick spot repairs—matching paint, a fine brush, and light sandpaper—to fix nicks before they worsen.
After touching up, seal high‑traffic areas with a compatible clear coat or wax to protect the finish.
For routine cleaning, use a soft cloth and gentle cleaner to avoid stripping the topcoat.
Quick Spot Repairs
When a chip or scuff shows up on painted furniture, quick spot repairs keep the piece looking fresh without a full repaint. You’ll want to act fast to preserve color consistency and extend paint longevity. Follow these steps:
- Clean the area gently with a damp cloth and mild soap, then dry.
- Lightly sand rough edges to feather the chip for a smooth shift.
- Apply matching touch-up paint with a small brush or toothpick, building thin layers.
- Blend edges and let each layer dry fully before evaluating.
Do minor fixes promptly so small flaws don’t worsen.
Sealing And Protection
If you want your painted furniture to hold up to daily use, seal it with the right topcoat and maintain that barrier regularly. Pick a finish—matte, satin, or gloss—based on wear and desired texture enhancement.
Apply thin, even coats of polyurethane, polycrylic, or waterbased varnish, sanding lightly between layers to preserve color blending and smooth progression. For edges and high-contact spots, add an extra coat.
When chips appear, touch up with matching paint, feathering into surrounding areas and resealing once dry. Inspect periodically for wear, reapply topcoat where needed, and store furniture away from harsh sunlight and moisture.
Routine Cleaning Tips
Although regular upkeep seems small, it keeps painted furniture looking fresh and prevents minor damage from becoming major repairs. You should inspect surfaces after furniture assembly or moving, noting chips, grime, or loose hardware.
Clean gently with a soft cloth and mild soap; avoid harsh abrasives that force paint removal. For touch‑ups, match the finish and apply thin layers, sanding lightly between coats. Seal repaired areas when cured.
- Dust weekly to prevent grit buildup.
- Tackle spills immediately with damp cloth.
- Address chips with fine brush and matching paint.
- Recheck joints post‑assembly for stability and finish integrity.
Color Matching When Switching Paint Types
Because furniture paints and wall paints use different binders and sheens, matching a color across them can be trickier than it looks. You’ll want to test swatches on both surfaces because sheen and substrate alter perceived hue; satin on wood reads differently than eggshell on drywall.
Prioritize color consistency by viewing samples in the room’s light at different times.
Check paint compatibility—use a primer or a bonding agent if formulas differ—to ensure proper adhesion and uniform finish.
Adjust tinting cautiously; small additions can shift shade.
Finalize after full cure, since drying can subtly change color and sheen.
Choosing Paint for Vintage or Antique Furniture
When you’re choosing paint for vintage or antique furniture, start by deciding whether you want to preserve original patina or transform the piece—each goal calls for different products and prep.
You’ll assess condition, finish, and value, then pick compatible primers and paints. Consider color psychology for mood and room fit, and weigh environmental impact of low-VOC options.
Follow steps:
- Inspect for damage and test finishes.
- Choose conservation-grade products to preserve patina or sand for full repaint.
- Select color and sheen with historical respect.
- Seal with an appropriate protective topcoat to guarantee longevity.
Swap Case Studies: Wins and Fails
If you’re swapping paints between furniture and walls, pay attention to compatibility and finish—mistakes show up fast in wear, adhesion, and appearance.
You tried wall paint on a vintage dresser; the matte finish soaked stains and peeled at edges, ruining intricate furniture design.
Another time, you used semi-gloss furniture paint on a living room wall and loved the easy wipe-down but hated the sheen highlighting drywall flaws.
A bold experiment with chalk paint on cabinets gave a textured vibe but required sealing to prevent scuffs.
Learn from these wins and fails: match formulation to surface and test paint color and durability first.
Recommended Products for Wood Furniture Projects
Those swap case studies show why picking the right product matters for wood furniture projects. You’ll want durable acrylic latex for cabinets, chalk-style paint for vintage texture, and oil-based enamel for high-traffic finishes.
Think about color psychology when choosing hues that influence mood and room function. Also consider primer type and clear topcoat to protect surfaces and aid cleaning.
For organization and longevity, match finishes to storage solutions like painted dressers or pantry units.
Recommended picks:
- Acrylic latex (semi-gloss) for kitchens
- Chalk paint for shabby chic
- Oil-based enamel for durability
- Waterbased poly for clear protection
When to Call a Pro: High‑Value or Complex Pieces
Because restoring or refinishing high-value or intricate furniture often needs specialized skills and tools, you should call a pro for pieces with antique value, complex joinery, gilding, marquetry, or structural damage beyond basic repairs.
If a piece has original furniture upholstery, delicate inlays, or custom decorative hardware, a pro preserves authenticity and value. They’ll assess finishes, stabilize frames, and match historically accurate paints or stains.
You should also hire someone when repairs require steam bending, veneer replacement, or structural reinforcement. Hiring a specialist reduces risk of irreversible damage and guarantees safe, museum-quality restoration that protects your investment.
Frequently Asked Questions
Can Furniture Paint Be Used Outdoors on Patio Furniture?
Yes — you can use furniture paint outdoors on patio furniture, but you’ll want outdoor durability primers and topcoats because prolonged sun, moisture and temperature swings cause color fading; prep, seal and recoat for lasting protection.
How Long After Painting Can I Safely Place Dishes on Painted Tabletops?
Think of your tabletop as a newborn: you can set lightweight, clean dishes after the paint’s dry to touch, usually 24 hours, but wait the full curing process—often 7 days—for heavy use and food contact to be safe.
Will Furniture Paint Yellow Over Time in Low‑Light Rooms?
Yes — in low‑light rooms you might see furniture aging as varnishes or oil‑based coatings yellow over time, and paint color change can occur; choose water‑based, UV‑stable finishes to minimize yellowing and aging.
Can I Mix Wall and Furniture Paints to Customize Sheen or Durability?
Want to tweak sheen or toughness? You can, but paint compatibility matters: mix only compatible formulations (latex with latex, oil with oil) to safely achieve finish customization, and you’ll test small areas before committing.
Does Painted Upholstery Fabric Need Special Topcoat or Protection?
Yes — you’ll want fabric protection: after painting upholstery, apply a compatible upholstery finishing or fabric sealer to lock paint, improve abrasion resistance, and prevent cracking; test first and follow manufacturer cure and care instructions carefully.
Conclusion
Think of your furniture as an old friend and paint as the clothes you pick for them. You wouldn’t dress a delicate heirloom in a dripping raincoat or paint a mural in a silk scarf; each material needs the right fit to feel alive again. Choose furniture paint when you want durability and refinement, wall paint for broad, forgiving coverage. With the proper pairings, your pieces won’t just survive — they’ll shine.