Is It Better to Spray Paint or Roll Walls?
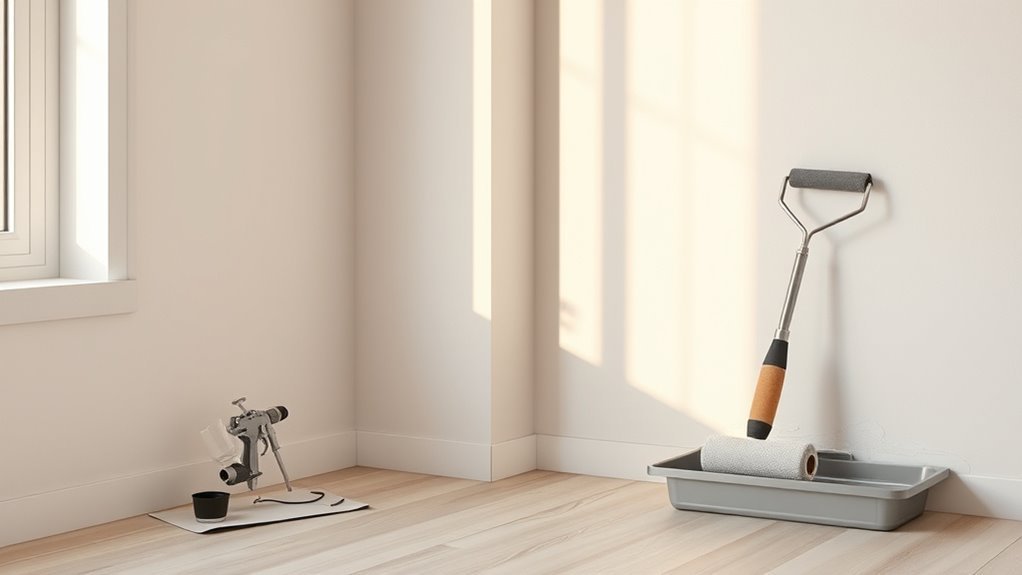
For large, uninterrupted or heavily textured walls you’ll usually spray for speed, smoother coverage, and to reach crevices; for small rooms, trim, or poorly ventilated spaces you’ll roll for control, less overspray, and easier cleanup. Match method to paint type and prep: thin some water-based paints for sprayers and mask thoroughly, or use quality naps and brushes with rollers. Keep ventilation and PPE in mind — read on to pick the right approach for your project.
Quick Answer : When to Spray vs Roll
When you want speed and a smooth, even finish on large, uninterrupted surfaces, spray; when you need control around trim, corners, or textured walls, roll.
You’ll spray for fast coverage and consistent sheen, especially when color matching across cabinets or accent walls matters. You’ll roll to avoid overspray, keep edges crisp, and better handle uneven textures.
Consider paint durability: sprays can form thin, uniform films fast, while rolling lets you build thicker coats in targeted spots.
Choose based on project scale, surrounding surfaces, and how much edge control versus rapid, uniform coverage you need.
Why Choosing Spray vs Roll Matters
Your choice matters because spray often gives a big coverage and speed advantage on large, open walls, while rolling can be slower but more controlled.
You’ll notice spray produces a smoother, more uniform finish and can hide seams, whereas rollers can leave texture that either flatters or exposes imperfections.
Consider the trade-off between time saved and the exact finish you want before you start.
Coverage Speed Advantage
Although both methods cover the same surface, spraying usually gets the job done much faster than rolling, so you’ll finish large walls and high ceilings in a fraction of the time. You still need proper color matching and primer selection before you spray to avoid rework.
Spraying reduces labor and drying-stage turnaround, but setup and masking take time.
- Speed: Sprayers lay down paint uniformly across broad areas.
- Prep: You’ll spend more time protecting trim and furniture.
- Efficiency: Less fatigue means faster multi-room projects.
Balance time savings against prep complexity to decide whether spray or roll fits your project.
Finish And Texture
Because spray and roll produce different surfaces, your choice directly changes the wall’s final look and how light behaves on it. You’ll notice spray gives a smooth, even film that highlights sheen and subtle color shifts, while rolling can leave micro-texture from nap and strokes.
Consider finish options: spray suits ultra-smooth, modern finishes; roll works for traditional matte or slight stipple. For texture enhancement, use thicker rollers or specialty sprays to create controlled effects.
Match technique to the room’s lighting and desired tactile feel, since the method determines both visual depth and perceived quality.
Room Size: Spray vs Roll Decision
When you’re deciding between spraying and rolling, room size should be one of the first factors you weigh.
For small rooms, spraying can be quick but requires masking to protect trim and furniture. Color matching is easier when you test sprays side-by-side.
Large rooms often favor spraying for speed, though you’ll need strong ventilation to manage overspray and fumes.
Consider how paint durability and finish consistency matter across surfaces.
Quick checklist:
- Small (closets, bathrooms): roll if tight masking is burdensome.
- Medium (bedrooms): weigh prep time vs. speed.
- Large (open plans): spray for efficiency, plan containment.
Paint Types and Method Choice (Latex, Acrylic, Oil)
Room size affects your method, but paint chemistry will often dictate whether spraying or rolling makes sense. You’ll choose latex for easy cleanup and flexibility; it sprays well when thinned and works with most sprayers, but you’ll need proper ventilation.
Acrylic behaves like latex but offers tougher finishes; spraying gives smooth results while rolling handles touch-ups.
Oil resists wear and levels beautifully, but it’s slower to dry and best rolled for control unless you’re experienced with solvent cleanup.
Consider color mixing consistency and label paint storage recommendations—store stirred cans upright, sealed, and temperature-stable to preserve performance for future touch-ups.
Wall Texture: How It Affects Spraying or Rolling
If your walls are smooth, you’ll get even coverage quickly with either spraying or rolling.
But textured surfaces change the game. Texture traps paint in nooks, so spraying can reach crevices more easily while rolls may need thicker coats or stippling to penetrate.
Also remember textured walls hide imperfections better, so you can often get away with fewer touch-ups.
Smooth Vs. Textured Surfaces
Although smooth walls let you get crisp, even coverage with a roller, textured surfaces change the game and often make spraying more efficient. You’ll choose based on texture, time, and finish. Consider:
- Spray: faster on heavy texture, better at reaching peaks; good for consistent Color matching.
- Roller: precise on smooth walls, less overspray, simpler cleanup and more Eco friendly options with low-VOC paints.
- Hybrid: roll flat areas, spray recesses for speed and uniformity.
You’ll also weigh setup and skill—spraying needs masking and practice, while rolling is forgiving for DIYers.
Paint Penetration Into Nooks
When wall texture gets deep or irregular, paint penetration into nooks becomes the deciding factor between spraying and rolling—sprayers force paint into crevices fast, while rollers tend to bridge over peaks and leave voids unless you use thicker naps or back-roll. You’ll choose spraying when you need consistent fill; rolling plus targeted brush techniques helps when edges matter. Mind paint mixing to maintain flow and avoid clogging. Use sprayer passes, then touch with a brush. Rhythm:
| Method | Result |
|---|---|
| Spraying | Deep nook fill |
| Rolling+Brush | Controlled edges |
| Mixing | Viscosity balance |
Hiding Imperfections Efficiently
Because surface flaws can make or break a finish, you’ll pick the method that best disguises bumps, dents, and orange peel without adding work. You’ll assess texture, repair needs, and desired sheen. Sprayers flood crevices and smooth orange peel, while rollers hide minor bumps with thicker nap coverage. Consider color matching for repairs and touch-ups, and eco friendly options like low-VOC paints.
- Spraying: great for even coverage, masks fine texture.
- Rolling: fills small dents, needs multiple passes.
- Prep: sand or skim for major flaws, then match color precisely.
Cost Comparison: Sprayer vs Rollers and Supplies
If you’re weighing a paint sprayer against rollers, the decision comes down to upfront and ongoing costs: sprayers often cost more initially and need thinning, cleaning supplies, and occasional replacement parts.
While rollers require cheaper tools, they may need more paint and labor time for full coverage. You’ll also pay for masking, drop cloths, and possible color matching when spraying multiple coats or touched-up areas.
Consider environmental impact: overspray wastes paint and may need air filtration or containment, while rollers produce less airborne waste but more disposable covers.
Tally equipment, material, disposal, and maintenance to choose what fits your budget.
Time Comparison: Faster Spray Scenarios vs Rolling
Although a sprayer can cover large, flat walls in a fraction of the time it takes to roll, you’ll only gain that speed when you factor in setup, masking, and cleanup—so for small rooms or projects with lots of trim, rolling may still be faster overall. You decide based on scale and constraints.
Consider:
- Prep time: extensive masking for spraying can erase speed gains.
- Drying and recoats: sprayers often need thinner coats; timing differs.
- Transport and waste: sprayers can complicate color matching and raise environmental impact concerns.
Balance these factors against your schedule to pick the faster option for your job.
Finish Quality: How Spraying Gives a Smoother Result

Speed matters, but finish quality often seals the decision: spraying produces a consistently smoother surface than rolling because it atomizes paint into a fine mist that levels out without brush or nap marks. You’ll notice fewer stipple patterns and more uniform sheen, which matters with glossy or semi-gloss finishes.
Sprayers also enable subtle color blending across large walls, helping shifts vanish. With eco coatings that often have different rheology, spraying can preserve desired texture and minimize waste.
You’ll still need masking and practice, but if flawless uniformity is your priority, spraying gives a superior, professional-looking finish.
When a Roller Looks Good Enough
If your wall has texture or you don’t need a perfectly smooth finish, a roller can look just fine and save you time.
You’ll trade some speed for more control over drips and coverage, but that control makes touch-ups much easier later.
Consider the room’s use and how often you’ll need to patch before deciding.
When Texture Matters
When you’re aiming for a clean, uniform surface, a roller often delivers the right texture with less fuss than spray paint. You’ll prefer a roller when texture durability and paint absorption matter — it presses paint into pores, smoothing inconsistencies and resisting wear. Consider these points:
- Surface match: rollers suit lightly textured drywall and plaster.
- Finish control: nap size influences uniformity and sheen.
- Repairability: touch-ups blend more naturally with rolled texture.
You’ll get predictable results without overworking edges or creating mist. Use a quality roller and consistent technique to maximize longevity and visual cohesion on most interior walls.
Speed Versus Control
Because rollers let you cover large areas quickly while still giving you control over finish and texture, they’re often the best choice for straightforward wall jobs where flawless precision isn’t required.
You’ll move faster than with a brush and avoid the overspray cleanup of a sprayer, so projects finish sooner.
Rollers give consistent coverage and let you adjust nap and pressure to match existing texture and aid color matching across panels.
They also use less overspray and volatile compounds, reducing environmental impact versus some spray setups.
Choose a roller when you want efficient, controlled results without complex setup.
Touch-Up Convenience
Although a roller won’t match a sprayer for feathering into large, complex surfaces, it gives you fast, precise touch-ups that blend well on most interior walls. You’ll appreciate how a small nap roller and a steady hand correct scuffs without moving furniture or masking large areas.
Use these steps to keep touch-ups discreet and durable:
- Clean and sand lightly, then apply Eco friendly coatings for less odor and quicker return-to-room use.
- Test Color matching techniques on a scrap before committing.
- Roll thin layers, feather edges, and let each coat fully cure for seamless results.
Prep for Spraying: Masking & Containment
Before you pull the trigger on a paint sprayer, plan your masking and containment so overspray never becomes a second project. You’ll tape trim, cover floors with drop cloths, and hang plastic sheeting to isolate furniture and vents.
Seal gaps with painter’s caulk or tape to keep mist from migrating. Consider color matching test sprays on scrap to confirm hue before committing.
If you worry about fumes, choose eco friendly options—low-VOC or water-based sprays—and ventilate thoroughly.
Label covered zones and work from top to bottom so cleanup’s quick and accidental splatter won’t ruin finished surfaces.
Prep for Rolling: Patching, Priming, and Tools
Now that your space is contained and overspray is handled, get the walls ready for rolling by fixing surface flaws, sealing stains, and choosing the right primer and tools.
With space contained and overspray managed, prep walls: fix flaws, seal stains, and choose primer and tools.
Patch holes with spackle or joint compound, sand smooth, and clean dust.
Use stain-blocking primer where needed and consider Color matching samples for trims or repairs.
Pick Eco friendly materials like low-VOC primer and paint.
Choose a 3/8″–1/2″ nap roller for most walls, an angled brush for edges, and a sturdy tray.
Follow drying times, test a small swatch, and keep tools clean for reuse and better results.
Ventilation & Safety for Spraying
Because spray painting creates fine airborne particles and solvent fumes, you’ll need to control airflow and protect yourself and your space before you pull the trigger. Open windows and doors to create cross-ventilation, and use box or inline fans to push fumes outside.
Seal vents, cover floors and furniture, and hang plastic sheeting to limit overspray. Monitor air quality with a simple detector or app, and pause if readings rise.
Keep noise levels in mind: fans and compressors can be loud, so warn neighbors or schedule work accordingly. Plan breaks to air the room and check that containment holds.
Health Risks & PPE for Spray and Roll Jobs
When you choose between spraying and rolling, you’ll need the right respiratory protection—filters or respirators for spray jobs, and at minimum a dust mask for sanding.
Don’t forget gloves and eye protection to keep solvents and splatter off your skin and out of your eyes.
Make sure ventilation and proper airflow are set up so contaminants are exhausted and you’re not breathing concentrated fumes.
Respiratory Protection Needs
Although spray and roll painting both change your exposure to airborne hazards, spray jobs usually create far more respirable particles and vapors that demand stronger protection. You should assess ventilation, consider air filtration, and remember that proper respiratory PPE also helps maintain paint adhesion by preventing contamination.
- Choose respirators rated for organic vapors and particulates (NIOSH-approved cartridges or P100 filters).
- Use local exhaust or HEPA units to reduce airborne load when spraying indoors.
- Fit-test and seal-check masks; replace cartridges/filters per manufacturer guidance or when you detect odors.
Follow manufacturer and site rules to protect your lungs.
Skin And Eye Protection
If you’re working with spray or rolled paint, protect your skin and eyes from splashes, mists, and wet surfaces that can irritate, sensitize, or chemically burn. Wear splash-resistant goggles and a full-face shield for sprays; sealed safety glasses may suffice for rolling.
Use nitrile or neoprene gloves and long sleeves to prevent contact; change contaminated clothing promptly.
Follow established safety protocols: keep a cleanup station with soap, eyewash, and barrier cream, and train helpers on spill response and first aid.
Inspect protective gear before use and replace damaged items.
Treat any exposure immediately and seek medical attention for severe reactions.
Ventilation And Airflow
Because paint solvents and airborne particles can build up quickly, you’ve got to control ventilation and airflow to protect your lungs and everyone on site. Open windows, use exhaust fans, and position box fans to push fumes outside; that helps odor mitigation and reduces inhalation risk.
Seal off HVAC to avoid spreading vapors and manage moisture control to prevent condensation on fresh paint.
Wear NIOSH-rated respirators when spraying; even rollers can kick up particulates.
Follow a simple checklist:
- Set up cross-ventilation with exhausts.
- Use appropriate respirators and eye protection.
- Monitor humidity and air changes per hour.
Best Sprayers for Interior Walls and Ceilings
When you’re tackling interior walls and ceilings, choosing the right sprayer makes the job faster and gives a more consistent finish than brushes or rollers. Pick a handheld HVLP for trim and touch-ups, a turbine HVLP for detailed rooms, or a piston or airless sprayer for large areas—each balances control, overspray, and speed.
Match tip size to paint type and thin per manufacturer guidance.
Consider color psychology when testing samples under real lighting.
Use low-VOC, eco-friendly finishes and a sprayer with good filtration to reduce odors and airborne particles while protecting your HVAC and lungs.
Best Rollers and Nap Choices by Surface
Picking the right roller and nap length is the next practical step after choosing a sprayer—rollers give you control on textured surfaces and cut down on overspray in occupied spaces. You’ll pick based on texture, paint type, and finish; consider color matching needs and Eco friendly paints’ thinner consistency when selecting nap.
Choose:
- Smooth surfaces: 1/4″–3/8″ microfiber for gloss and tight flat finishes.
- Light texture: 3/8″–1/2″ synthetic for eggshells and washable Eco friendly paints.
- Heavy texture: 3/4″–1″ lambswool or thick polyester to hold more paint and reach crevices.
Swap rollers often for consistent coverage.
Which Paints Spray Well (And When to Thin)
You’ll find that thinner, low-VOC latex and water-based enamels usually spray smoothly.
While heavy-bodied primers and high-viscosity glosses often need thinning. Check the manufacturer’s specs and test a small pour to see if the paint atomizes evenly or spits.
If thinning’s required, add the recommended solvent in small increments until you get a consistent spray pattern.
Which Paints Spray
Curious which paints spray well and when you’ll need to thin them? You’ll find latex, acrylic, and water-based enamels usually spray great with HVLP or airless sprayers. Consider these quick points:
- Latex/acrylic — versatile, good for walls; use sprayers rated for thicker milks.
- Water-based enamel — smooth finish, ideal for trims and cabinets; aids color matching.
- Oil-based/alkyd — thin for fine atomization; gives durable, glossy results and accepts eco friendly finishes when reformulated.
You should always test spray on a cardboard panel and check manufacturer guidelines before thinning or priming for best results.
When To Thin
When a paint seems too thick to pass smoothly through your sprayer, you’ll need to thin it to prevent spitting, clogging, or an uneven finish. Check manufacturer recommendations—many water-based paints accept up to 10% water; oil-based types need specific solvents.
Test viscosity with a cup or spray on cardboard. Thin incrementally, stir, then test again. Remember thinning can alter coverage and color coordination, so note ratios to reproduce the shade.
Consider environmental impact: choose low-VOC thinners and avoid over-thinning, which wastes material. If results suffer, switch to a roller or a paint formulated for spraying.
Which Paints Roll Best Without Thinning
- Premium matte latex — self-leveling, minimal splatter.
- Eggshell or satin latex — slightly more durable, still rolls well.
- Acrylic latex for high-humidity rooms — stable viscosity, resists sagging.
Test a small patch to confirm nap compatibility and coverage.
How to Thin Paint and Set Sprayer Controls
When you’re ready to spray, know when paint needs thinning and how much to add so you get a smooth fan without runs. Start with the manufacturer’s recommendation, then thin incrementally and test on cardboard to check viscosity.
Finally, adjust your sprayer’s pressure and tip size to match the thinned paint for even coverage.
When To Thin Paint
If your sprayer sputters, spits, or leaves a heavy, uneven texture, you’ll need to thin the paint before continuing. Check manufacturer recommendations and your paint branding label first; different brands and finishes react differently. Also consider color matching—thinner mixes can slightly alter hue, so test on a scrap.
- Start with small increments: add recommended thinner, mix, test spray.
- Adjust flow and pressure on the sprayer, not just thinner; balance prevents over‑thinning.
- Do a full-panel test to confirm texture, coverage, and color before proceeding to the wall.
How Much To Thin
Knowing how much to thin paint comes down to matching the paint’s viscosity to your sprayer and the finish you want, so start conservatively and work up. You’ll test small mixes: add 5–10% water or manufacturer-recommended reducer, strain, and spray on a scrap panel.
Check atomization, edge definition, and whether color matching holds across coats. Don’t over-thin; it can harm paint film and reduce paint durability.
Keep notes of ratios and conditions (temperature, humidity). If touch-ups or blending are likely, maintain consistent thinning to preserve sheen and color matching throughout the job.
Adjusting Sprayer Controls
Because proper spray results depend on both paint viscosity and machine settings, you’ll adjust your sprayer controls after you’ve thinned and tested your mix. Start with low pressure and increase gradually while checking atomization and edge control. Watch for drips and texture changes, especially with eco friendly formulations that may spray differently.
- Set pressure: low to medium, raise until fine mist without spitting.
- Adjust fan width: narrow for trim, wide for walls; overlap passes.
- Control flow: reduce if runs appear, increase for better coverage.
Also confirm color matching after adjustments; tweak as needed before full coats.
Masking Tips to Prevent Overspray on Trim
When you spray paint a wall, masking your trim carefully saves you hours of cleanup and keeps edges crisp. You’ll tape edges with low‑tack painter’s tape, cover baseboards with kraft paper, and use plastic sheeting for nearby furniture. Think about color psychology when choosing trim contrast, and pick eco friendly finishes to avoid strong fumes while you work. Move slowly, overlap tape seams, and press edges firmly to prevent bleed. If you slip, remove tape within minutes to avoid peeling. Empathy for the space matters — treat trim like the frame of a cherished photo.
| Calm | Protective |
|---|---|
| Pride | Relief |
| Joy | Confidence |
Containment Solutions for Open-Plan Homes
In open-plan homes you’ll need to protect adjacent areas from overspray and dust, so plan clear boundaries before you start. Use temporary partitions like zip walls, plastic sheeting with clamps, or folding screens to isolate work zones.
Also, map and manage ventilation paths to keep fumes out of living spaces and direct airflow safely outdoors.
Protecting Adjacent Areas
How do you keep overspray and dust from turning the rest of your open-plan home into a cleanup nightmare? You’ll plan containment to protect floors, furniture, and finishes while considering color matching needs and environmental impact of materials. Use these steps:
- Seal vents, doorways, and high-traffic openings with plastic sheeting and painter’s tape to stop drift.
- Cover floors and furniture with breathable drop cloths or recyclable kraft paper to avoid chemical buildup and make color checks easier.
- Run air scrubbers or box fans with HEPA filters, and change filters promptly to reduce airborne particles and odors.
Temporary Partition Options
Need a quick barrier that actually works? You can set up temporary partitions to contain overspray and dust in open-plan homes without permanent changes.
Use lightweight frames with attachable panels or clear plastic sheeting hung from tracks to keep sightlines while blocking paint. Choose panels that allow color matching to test paint choices in situ.
Opt for eco-friendly options like reusable fabric curtains or recycled-plastic sheets to limit waste. Secure edges with painter’s tape and clamps; guarantee easy removal and storage for future projects.
These containment solutions let you control the work zone efficiently while keeping the rest of your home clean.
Managing Ventilation Paths
When you’re containing paint or dust in an open-plan home, controlling ventilation paths is essential to stop fumes and particles from migrating to living areas. Seal vents, close transfer grilles, and create negative-pressure zones so airflow moves from clean to work zones instead of the other way around.
You’ll set ventilation barriers at floor and ceiling levels, cover HVAC intakes, and use exhaust fans to pull contaminants out. Focus on odor control with activated-carbon filters and temporary ducting.
Follow this simple checklist:
- Seal vents and transfer grilles tightly.
- Run exhaust fans to create negative pressure.
- Install carbon filters for odor control.
Cleanup After Spraying: Hoses, Tips, Disposal
After you finish spraying, flush your hoses and gun immediately to prevent clogs and make cleanup far easier. Use appropriate cleaning supplies—solvent for oil-based, water for latex—and run them through until clear.
Remove and soak tips, strainers, and filters; inspect for wear and replace damaged parts to keep spray patterns consistent.
Contain waste solvent and used rags in sealed, labeled containers to avoid fire hazards. Follow local disposal methods for solvents, paint, and contaminated materials; never pour them down drains.
Rinse with minimal water, capture runoff, and consult municipal guidelines so you handle hazardous waste responsibly and legally.
Cleanup After Rolling: Brushes, Rollers, Storage
After rolling, you should clean brushes thoroughly to remove all paint and keep the bristles in good shape.
Rinse and comb rollers until water runs clear, then squeeze out excess and let them air dry.
Store brushes flat or hanging and keep rollers covered so they’re ready for the next job.
Cleaning Brushes Properly
If you want your brushes and rollers to last, clean them right away and you’ll save time and money down the line. Rinse water-based paints until clear, using warm water and mild soap; for eco friendly paints follow manufacturer tips.
For oil-based, use mineral spirits in a well-ventilated area and dispose responsibly. Remove excess paint before washing to preserve bristles and avoid contaminating color matching later.
- Work out paint with a brush comb or your fingers.
- Rinse, reshape bristles, spin or blot to remove water.
- Dry flat or hang to keep the ferrule sealed.
Storing Rollers Safely
Once you’ve rinsed and reshaped your roller nap, store it in a way that keeps the fibers clean and dry so mold and odors don’t develop. You’ll follow Safety precautions: squeeze excess water, air-dry upright, and keep rollers ventilated. Use Storage solutions like sealed tubs for clean rollers and labeled hooks for used ones awaiting laundering. Check rollers periodically and replace when shed occurs.
| Item | Action | Timing |
|---|---|---|
| Roller | Rinse and reshape | Immediately |
| Drying | Stand upright | 1–2 hours |
| Storage | Sealed tub or hook | After dry |
| Label | Mark status | Always |
| Replace | When worn | As needed |
Common Spraying Mistakes That Ruin Finishes
When you rush setup, skip test sprays, or hold the gun at inconsistent distances, you’ll get runs, orange peel, and uneven coverage that ruin a finish; pay attention. Check viscosity, pressure, and nozzle size before you spray.
Rush setup or skipped test sprays = runs, orange peel, and uneven coverage. Check viscosity, pressure, and nozzle first.
Poor color blending happens when you change spray speed or overlap inconsistently. Using eco coatings? Thin and test them—low-VOC formulas can atomize differently.
Common mistakes to avoid:
- Spraying too close or too far, causing drips or dry spray.
- Skipping cross-coats, leaving striping and poor adhesion.
- Neglecting tack time between coats, trapping solvents and causing fisheye.
Practice test passes for consistent results.
Common Rolling Mistakes: Streaks, Laps, Shedding
When you roll walls, you’ll want to watch for streaks, visible lap marks, and stray fibers from the roller.
Use the right nap, keep a wet edge, and load the roller evenly to prevent laps and streaking.
Check your roller for shedding and swap it out if fibers start coming off.
Avoiding Roller Streaks
Although rolling sounds simple, avoiding streaks comes down to technique and the right tools. You’ll control streaks by prepping, loading, and finishing correctly while thinking about Color matching and Environmental impact when choosing paints and rollers.
- Use a high-quality, lint-free nap suited to your paint sheen.
- Load the roller evenly — no drips, no dry patches — and roll in a “W” then fill.
- Maintain a wet edge and finish light, overlapping passes to blend.
If you follow these steps and work steadily, you’ll minimize streaks and get a smooth, consistent finish.
Preventing Visible Laps
Because laps stand out more than tiny streaks, you’ve got to plan each pass and keep your wet edge consistent to avoid patchy color and texture. Work in manageable sections, overlap each stroke slightly, and maintain even pressure so Color matching stays seamless. Check lighting and step back often to spot laps before they dry. Clean rollers and trays between breaks—Tool maintenance prevents buildup that causes uneven release. If you must stop, feather edges and restart at a natural break. Use a quality nap and consistent load for uniform coverage; quick corrections beat sanding out dried laps later.
| Tip | Action |
|---|---|
| Plan | Work in sections |
| Overlap | Slightly on each pass |
| Inspect | Step back often |
| Clean | Maintain tools |
Minimizing Roller Shedding
If you want smooth, hair-free walls, prevent roller shedding before it starts by choosing the right cover and prepping it properly: buy a quality roller with the correct nap for your surface, remove loose fibers by washing or giving it a quick lint roll, and preload the nap evenly so fibers don’t pull out during application.
You’ll also control shedding by inspecting and replacing worn covers, using high-quality paints, and avoiding overloading.
Quick tips:
- Roll light, maintain a wet edge to reduce tugging.
- Use appropriate primer selection to seal surfaces.
- Check color matching after drying to catch stray fibers.
Blending Touch-Ups After Spraying
When your sprayed coat needs a small fix, blending the touch-up into the surrounding finish keeps the job looking seamless. You’ll assess spray pattern, feather edges, and match sheen before you start.
Use light, overlapping passes and a fine mist to avoid buildup; practice blending techniques on scrap material first. Keep distance consistent, and work from outside the blemish inward to hide edges.
For touch-up precision, thin paint slightly if recommended and use the same nozzle and pressure as the original pass. Let coats dry fully between passes and inspect under good light to confirm an even finish.
Invisible Touch-Ups After Rolling
Although rolling covers large areas quickly, achieving invisible touch-ups takes patience and the right technique. You’ll want to match texture, nap direction, and paint load precisely.
You can make repairs disappear by feathering edges and working wet into wet. Focus on Seamless blending: match sheen and thin coats, then light passes with the same roller.
- Load less paint, roll off excess to avoid ridges.
- Blend outward from the repair, keeping nap direction consistent.
- Use a light mist of water (latex) or slow-drying additive for reflowing.
Invisible touch ups rely on timing, consistent tools, and careful strokes.
When to Hire a Pro Sprayer
Because a pro sprayer brings speed, consistency, and experience, you should consider hiring one for large jobs, complex surfaces, or projects where a flawless finish matters.
For large, complex, or finish-critical jobs, hire a pro sprayer for speed, consistency, and flawless results.
You’ll save time on high ceilings, textured walls, and rooms that require fast turnaround. Pros control overspray, match sheen and color accurately, and advise on color psychology for mood-driven spaces.
They’ll suggest eco-friendly finishes when indoor air quality or sustainability matters. Hire a pro if you need uniform coverage, fast recoat cycles, or tricky masking.
Budget for expertise when imperfections, timeline, or health concerns raise the stakes.
When Hiring a Pro Roller Makes Sense
If you want tight control over texture, edges, and touch-up work without the risk of overspray, hire a pro roller for medium-sized rooms, trim-heavy spaces, or surfaces where a hand-finished look matters. You’ll get precise color matching, careful paint storage on-site, and minimal mess.
Consider hiring when you:
- Need seamless trim-to-wall transitions in living areas.
- Have moderate square footage where sprayers feel overkill.
- Want meticulous spot repairs and consistent nap direction.
A pro roller lets you preserve delicate finishes, control buildup, and avoid wasted material, so your rooms look uniformly finished with less hassle.
Living Through a Repaint: Noise & Disruption Tips
When painters start, expect steady activity—moving furniture, sanding, and spraying or rolling—that’ll interrupt your normal rhythm for a few days. You’ll want earplugs, a clear workspace, and a staging area for fragile items. Ask for a schedule, confirm work hours, and pick wall colors and paint sheen early to avoid delays. Plan meals, remote work spots, and quiet times for children or pets. Communicate ventilation needs and where drying racks go.
| Tip | Action |
|---|---|
| Noise | Use earplugs |
| Schedule | Confirm hours |
| Airflow | Open windows |
| Belongings | Move to staging area |
Eco-Friendly Paint and Low-Overspray Options
You’ll want to choose low-odor, low-VOC paints to keep your indoor air healthier while you work.
Pair those with techniques like using a controlled spray tip, adjusting pressure, and masking nearby surfaces to minimize overspray.
That combo cuts fumes and cleanup, whether you spray or roll.
Low-Odor, Low-VOC Paints
Choosing low-odor, low-VOC paints lets you finish a room without filling it with harsh fumes, so you can work longer and return sooner without headaches or lingering smells. You’ll prefer eco friendly options that now match conventional finishes for color and paint durability.
Choose water-based formulas for easier cleanup and reduced scent. Consider:
- Certified low-VOC brands for indoor air quality.
- Zero-VOC options when sensitivity matters.
- Hybrid acrylics for tougher surfaces and longevity.
You’ll still prep surfaces properly and ventilate; these paints lower health risks and make interior projects more pleasant without sacrificing performance.
Minimizing Overspray Techniques
Because overspray wastes paint and threatens surrounding plants, finishes, and indoor air, you’ll want strategies that cut mist at the source while keeping projects eco-friendly. Use airless sprayers with low-pressure tips, mask with biodegradable drop cloths, and choose low-VOC, eco friendly solutions. Practice controlled pass speed, keep nozzles close, and test color matching on scraps. Work on calm days or ventilate indoors to limit drift.
| Technique | Benefit |
|---|---|
| Low-pressure tip | Less mist |
| Masking film | Protects plants |
| Biodegradable cloths | Eco friendly cleanup |
| Test panels | Accurate color matching |
| Ventilation | Safer air quality |
Rent vs Buy: Sprayer Budgeting
When you’re weighing whether to rent or buy a paint sprayer, focus on the total project cost, frequency of use, and convenience rather than just the sticker price. Renting cuts upfront expense for one-off jobs, while buying pays off if you’ll spray several times a year or want instant access.
Consider maintenance, storage, and reliability; you’ll also need to budget for color matching and primer selection supplies.
Compare options:
- Rent: low upfront, includes maintenance, ideal for trial runs.
- Buy: higher initial cost, cheaper per use long-term.
- Hybrid: buy accessories, rent premium models for big jobs.
Step-by-Step Plan: Spraying a Single Room
Before you start, clear the room and lay down drop cloths, then mask trim, outlets, and windows so you can work quickly and keep overspray contained. You’ll prep surfaces, repair holes, and sand glossy spots. Mix paint per manufacturer, test color matching on a scrap, and choose eco friendly options if indoor air matters. Practice spray strokes on cardboard, maintain consistent distance, and overlap passes by 50% for even coverage. Allow proper drying between coats, ventilate, and remove masking carefully. Clean the sprayer immediately to preserve equipment and avoid clogged nozzles.
| Step | Focus |
|---|---|
| 1 | Prep |
| 2 | Mix |
| 3 | Test |
| 4 | Spray |
| 5 | Clean |
Step-by-Step Plan: Rolling a Single Room
If you’re rolling a room, start by protecting floors and trim, patching holes, and sanding until surfaces are smooth so your roller lays down an even coat.
Choose color schemes beforehand and test swatches. Use eco friendly paints when possible for lower odor and easier cleanup.
Follow this quick plan:
- Cut in edges with a brush, working top to bottom.
- Roll large areas in a W pattern, overlapping each pass for uniform coverage.
- Apply a second coat after recommended drying time, inspect under different light.
Clean tools, remove tape, and touch up trim for a finished look.
Estimating Paint Quantity for Spray vs Roll
When you estimate paint needs, compare coverage rates for spraying versus rolling since sprayers can lay thinner films but often cover areas faster.
Account for overspray and waste with sprayers—plan an extra 10–20%—while rolling usually needs less backup.
Finally, figure the coat count required for your color and surface, because more coats raise total volume regardless of method.
Coverage Rate Differences
Although spray and roller application both lay down the same paint, they cover surfaces at very different rates, so you’ll need different estimating methods. When you plan, consider color matching and environmental impact: spray can require more touch-ups for perfect match, while rollers give consistent texture with less airborne residue. Estimate by area, coat count, and application efficiency.
- Measure square footage and multiply by coats.
- Adjust for surface texture—rough needs more paint.
- Factor application efficiency: rollers ~80–90% transfer, sprayers ~60–75% transfer.
Use those numbers to calculate gallons and reduce surprises.
Overspray And Waste
You’ve already accounted for surface area, coats, texture, and transfer efficiency, so next you’ll need to factor in overspray and waste, which can considerably change how much paint you actually need.
When you spray, expect 10–30% more paint loss from overspray hazards—airborne droplets drift to floors, trim, and surrounding areas, forcing extra touch-ups or cleanup. Rolling limits airborne loss but can create roller waste and tray residue.
For accurate estimating, add an overspray allowance to spray calculations and a smaller contingency for rolling.
Prioritize Waste reduction: use proper nozzles, overlap technique, and containment to cut excess and save material.
Coat Count Needed
Because spray systems lay down thinner, more uniform films per pass, you’ll usually need more coats by number but not always more paint overall than rolling. You should estimate by surface porosity, sheen, and color change. Spray gives smooth color blending; rolling can hide thin spots with thicker passes.
- Count coats: primer + 2 finish coats is common.
- Measure coverage: sprayers often overspray; factor waste.
- Plan storage: leftover paint needs proper paint storage to match batches.
Calculate square footage, adjust for sprayer transfer efficiency, and buy slightly extra to avoid mismatched batches.
Estimating Labor Time for Each Method
When you estimate labor time for spray-painting versus rolling, break the job into clear tasks—prep, application, touch-ups, and cleanup—so you can compare where each method saves or costs minutes.
Break jobs into prep, application, touch-ups, and cleanup to pinpoint where spraying or rolling saves time.
You’ll prep masking and ventilation longer for spraying, which affects environmental impact precautions, while rolling needs more cutting-in time.
Application with a sprayer goes fast on open walls but demands careful overlaps for color consistency; rollers are slower but predictable.
Touch-ups after rolling are usually quick; sprayer touch-ups can be fiddlier.
Cleanup favors rollers for simple tools, whereas sprayers require thorough flushing and extra disposal steps.
Troubleshooting Uneven Coverage With a Sprayer
After comparing prep and cleanup differences, you’ll find uneven coverage is one of the most common spray issues and usually comes down to technique, equipment settings, or paint consistency. Check these quick fixes to get smooth, even coats:
- Adjust spray pattern and pressure — overlap passes by ~50% and keep a steady distance.
- Thin and strain paint properly; poor color mixing or debris causes blotches.
- Maintain consistent speed; avoid stopping mid-pass and follow recommended paint storage for viscosity stability.
If problems persist, clean or replace the tip and re-test on cardboard. Small tweaks save time and reduce recoat needs.
Troubleshooting Roller Lines, Bubbles, and Shedding
If you notice streaks, tiny bubbles, or lint sticking to fresh paint, you’re likely facing common roller issues that are usually fixable with a few targeted adjustments. You can prevent roller mishaps by checking nap length for your surface, loading the roller evenly, and keeping a wet edge. Bubbles usually mean overworking or painting too fast; wait and back-roll gently. Shedding calls for a better-quality roller and pre-washing new covers. Also be mindful of spray overspray when combining techniques—mask and ventilate.
| Problem | Cause | Fix |
|---|---|---|
| Lines | Uneven load | Re-roll, even load |
| Bubbles | Overworking | Slow, light passes |
| Lint | Low quality nap | Use quality cover |
Painting Ceilings: Roll, Spray, or Hybrid?
Because ceilings demand more overhead work and faster coverage, you’ll want to pick the method that balances speed, control, and finish. You’ll consider ceiling texture, room size, and whether color contrast will reveal imperfections.
Spray gives fastest coverage; rolling gives control and better paint durability on textured surfaces.
- Spray: rapid, even coat—best for smooth, high ceilings.
- Roll: slower, precise—ideal when you need control near fixtures and trim.
- Hybrid: combine techniques for tricky areas without sacrificing finish.
Prep, protection, and proper primer matter most to achieve a uniform, durable ceiling.
Hybrid Strategy: Spray Broad Areas, Roll Detail
While spraying lets you cover large, flat surfaces quickly, you’ll still want a roller for edges, corners, and areas where overspray or texture control matters most. Use the sprayer for broad coverage, then roll to tame texture and achieve consistent sheen.
You’ll switch to a brush for tight spots, blending edges with careful brush strokes so progressions look intentional. Practice color mixing separately to match sprayed areas before touching up.
Work in small sections, feathering the roller into sprayed paint to avoid lap marks. This hybrid approach saves time while giving you control where finish quality matters.
How Trim, Doors, and Windows Affect Your Plan
When you factor in trim, doors, and windows, you’ll need to adjust your spraying and rolling sequence to protect edges, maintain clean lines, and minimize touch-ups. You’ll prep surfaces, mask door hardware, and decide whether to spray trim or roll for texture consistency.
Use this simple plan:
Use this simple plan to protect hardware, keep clean lines, and finish trim professionally.
- Mask and remove hardware to prevent overspray and simplify touch-ups.
- Spray broad wall areas first, then roll near trim for even sheen.
- Paint trim detailing last with a brush or fine spray to preserve crisp lines.
This approach saves time and keeps trim detailing and door hardware looking professional.
Seasonal Effects: Humidity and Temperature Tips
If temperatures drop or humidity rises, your paint’s drying time and finish can change dramatically, so plan your spraying and rolling around the day’s conditions. You’ll check seasonal humidity forecasts and avoid painting when moisture is high; sprayed coats can sag and rolled finishes may take forever to cure.
For temperature considerations, work between the paint maker’s recommended range—usually 50–85°F (10–29°C)—and keep doors or windows open for airflow if safe. Use heaters or dehumidifiers in cold, damp spaces, and delay work during heat spikes that speed skin formation but trap solvents.
Small adjustments prevent runs, bubbles, and long recoat waits.
Prep: Previously Painted Walls vs Raw Drywall
Humidity and temperature affect paint performance, but surface prep determines how that performance shows up—especially on previously painted walls versus raw drywall. You’ll treat each differently to get flawless color schemes and accommodate wall decorations. Follow these steps:
- Sand glossy or peeling paint, clean, and prime spots so new coats bond evenly.
- For raw drywall, apply drywall compound, sand smooth, then use a drywall primer-sealer to prevent blotchy absorption.
- Inspect for stains, smoke, or water damage; use appropriate stain-blocking primer before topcoats.
Prep dictates whether spraying or rolling yields consistent coverage, texture, and longevity for your finished walls.
Long-Term Maintenance: Sprayed vs Rolled Finishes
Although sprayed and rolled finishes both look good fresh, you’ll find their maintenance needs diverge over time. You’ll notice sprayed surfaces often show fewer lap marks and take light cleaning well, while rolled textures hide minor dings and touch-ups better.
Sprayed and rolled finishes start similarly, but sprayed cleans easily while rolled conceals small blemishes and touch-ups better
Cleaning frequency depends on finish sheen and paint formulation; scrubbable, high-quality paints resist staining regardless of application.
When repairing sprayed walls, matching atomized texture can be tricky, so you may need small localized re-sprays.
Consider environmental impact when choosing products and methods—low-VOC formulations cut indoor pollution and make routine upkeep healthier for you and your home.
Small-Space Strategies: Spraying in Apartments
When you’re spraying paint in an apartment, plan for space limits and neighbor concerns up front. You’ll need containment, ventilation, and timing to avoid complaints and overspray. Consider small-area projects like wall murals or focused decorative finishes rather than whole-room sprays.
- Seal doorways and vents with plastic and tape to control overspray.
- Use low-VOC, fine-finish sprayers and run air purifiers for ventilation.
- Schedule work when neighbors are least impacted; notify management first.
Work in stages, test sprays on cardboard, and protect floors and furniture so your results are crisp and neighbor-friendly.
Decision Checklist: Choose Spray or Roll for Your Job
If you want a smooth, efficient outcome, pick the method that matches your surface, timeline, skill level, and budget—spray for speed and uniformity on large, complex surfaces; roll for control, low overspray, and smaller or textured walls.
Check surface type: smooth favors spray; textured needs roll.
Assess room size and access.
Match finish and color palettes to technique—sprays blend seamlessly; rollers show texture.
Consider cleanup, gear cost, and your comfort with masking.
Factor environmental impact: airborne VOCs, overspray waste, and disposal.
Time availability, repair frequency, and desired precision will guide your final choice.
Frequently Asked Questions
Can I Spray or Roll Over Wallpaper Safely?
You can, but you shouldn’t without prep: wallpaper removal is usually best first; if you skip that, use primer-sealer, test adhesion, and follow DIY painting tips so spray or roll won’t cause bubbling, peeling, or poor finish.
How Does Paint Sheen Affect Cleanability Long-Term?
Think of satin like armor and flat like suede: you’ll prefer higher-sheen durability for greasy kitchens, since sheen durability boosts scrub resistance; cleanability comparison shows glossier finishes wipe easier, though they reveal imperfections more.
Will Spraying or Rolling Change VOC Levels in My Home?
Yes — paint application method affects VOC emissions: spraying releases more airborne VOCs and aerosols, so you’ll get higher short-term indoor VOC levels; rolling emits fewer airborne particles, reducing immediate VOC exposure.
Can Pets Stay in the House During Paint Curing?
A neighbor left their dog away for 48 hours; you shouldn’t keep pets inside during the curing process. Pet safety demands ventilation and low-VOC paint, and you’ll want pets out until fumes dissipate for health.
How Do Insurance or Condo Rules Affect Exterior Spraying?
You’ll need to check Insurance restrictions and Condo regulations first; they can prohibit exterior spraying, mandate permits, require containment and notification, and affect liability for overspray or damage, so get written approvals and proper coverage before spraying.
Conclusion
Think of spray and roll like choosing between a broad brushstroke and a fine-tipped pen: spray gives you speed and a seamless, magazine-ready sweep; rolling gives you control and a comforting, hands-on finish. Match method to room size, texture, and upkeep—use spray for big, flat expanses, roll for trim, touch-ups, or textured walls. Trust your space and comfort level, and you’ll end up with a finish that feels as intentional as a well-framed painting.