Is It OK to Paint Concrete Basement Walls?
Yes — you can paint concrete basement walls if you confirm they’re dry, free of active leaks or heavy efflorescence, and properly prepped. Clean, repair cracks, treat salt deposits, and use a breathable masonry primer and paint or an appropriate epoxy for interior use. Control moisture with drainage, dehumidification, and repairs first; otherwise paint will fail. Follow safety and ventilation guidance for low‑VOC products, and keep going to learn specific tests, prep steps, and coating choices.
Is Painting Concrete Basement Walls a Good Idea?
Wondering whether you should paint your concrete basement walls? You’ll weigh practicality and aesthetics: painted walls resist dust, brighten space, and can seal minor pores if you use masonry paint.
Consider historical trends showing basements evolving from storage to living areas—paint often marks that shift. You’ll assess moisture first; painting over active leaks traps damage. Choose breathable primers and finishes when needed.
You can apply artistic techniques like color blocking or faux finishes to make the area inviting without major renovation. If structural or damp issues exist, fix those before painting to avoid wasted effort and expense.
Quick Decision Checklist: Paint or Fix First?
Before you grab a paint roller, check for problems that need fixing first so you don’t seal in moisture or hide structural issues. Inspect cracks, efflorescence, and previous repairs; mark anything wider than hairline or that shows movement.
Before rolling paint, inspect for cracks, dampness, efflorescence, and past repairs—fix issues first.
Test for dampness with a plastic-sheet tape test and note musty odors.
Consider whether walls have historical preservation value or original finishes that need conservation before altering.
Decide if you want a clean painted surface or plan for artistic murals that require smooth, primed walls.
If repairs, waterproofing, or expert assessment are needed, fix those first, then paint.
When to Avoid Painting: Active Leaks and Moisture
If you see water stains or paint that flakes off after rain, don’t paint yet — those are signs of active moisture.
If walls feel damp to the touch or show powdery efflorescence and salt deposits, the moisture source needs fixing first.
Painting over these issues will trap water and make problems worse.
Visible Water Stains
Noticing dark, irregular patches on your basement walls usually signals past or ongoing moisture—don’t paint over them. If stains are dry and purely cosmetic, you can clean and prime, but if they reappear or feel damp, stop.
Investigate sources: cracks, rising damp, or poor exterior drainage. Fixing the problem may mean interior or exterior waterproofing options, sealing cracks, or installing a sump pump.
Once the wall stays dry, you can choose breathable primers before applying decorative finishes. Painting without resolving staining risks trapped moisture, peeling paint, mold, and wasted effort—address the cause first, then finish.
Dampness After Rain
Stains that flare up after a storm are a clear sign you shouldn’t paint yet—wet walls need to dry completely first. If you still feel dampness or see dark patches a day after rain, hold off.
Painting over moisture traps water, causing peeling, mold, and failed decorative finishes. Fix active leaks, improve exterior drainage, and let the wall dry for several dry days before prepping.
When dry, test with a plastic sheet for 24 hours to confirm. Only then consider paint or stain techniques for aesthetics.
Rushing during damp conditions wastes effort and risks damaging your work.
Efflorescence And Salt
When white, powdery deposits or crystalline salts appear on your basement walls after moisture moves through the concrete, that’s efflorescence—and you shouldn’t paint over it. You need to find and fix the moisture source first; painting traps salts and causes blistering, flaking, and failure of decorative finishes.
Clean existing efflorescence with a stiff brush and appropriate cleaner, let walls dry thoroughly, and address drainage, gutters, or interior leaks.
Once dry and stable, test a small area with masonry primer before choosing color palettes or decorative finishes.
If salts recur, avoid permanent coatings until you’ve solved the underlying water problem.
How to Test Concrete Basement Walls for Moisture?
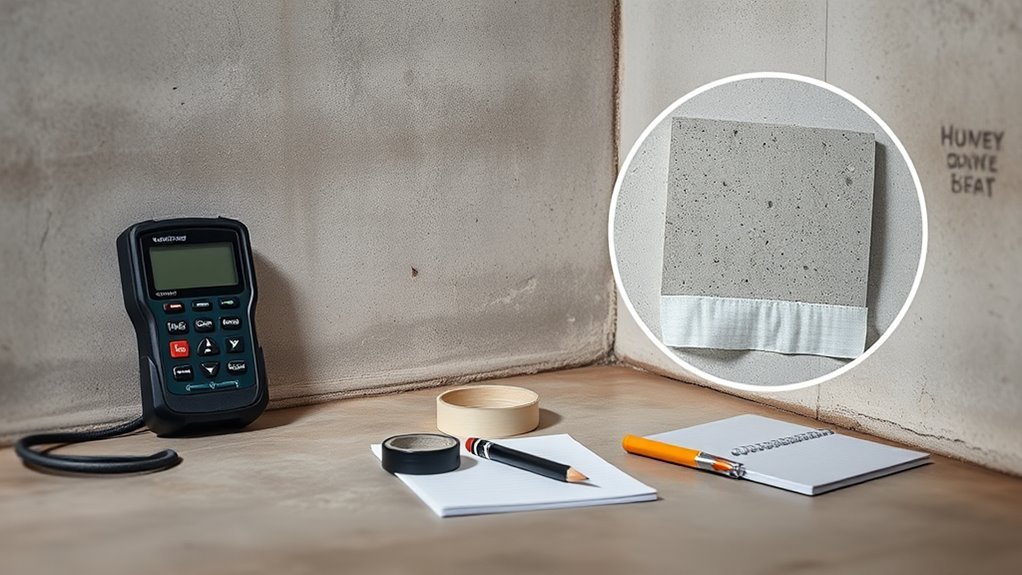
Before you decide to paint, you’ll want to test the walls for moisture so you don’t trap water behind the coating. Start with a simple plastic-sheet test: tape a 2×2 foot plastic square to the wall, seal edges, wait 24–48 hours; condensation or darkening means moisture.
Use a handheld moisture meter for spot checks—follow manufacturer instructions and test multiple areas, especially near grade and seams. Inspect after rain and during different seasons.
If walls stay dry, you can plan color schemes and decorative finishes. If you detect moisture, address source and drying before painting to avoid failure.
What Efflorescence Is and Why It Matters
Wondering what that powdery white residue on your basement walls is? You’re seeing efflorescence: salts left behind when water migrates through concrete and evaporates. It signals moisture movement, which matters because paint adhesion, indoor air quality, and any surface sealing you apply can be compromised.
You’ll want to address the moisture source before painting, since coatings over active salt deposits often fail. For long-term efflorescence prevention, consider improving drainage, repairing cracks, and choosing appropriate vapor-permeable coatings.
- Recognize white, powdery deposits
- Link deposits to moisture movement
- Know paint may peel over salts
- Prioritize fixing water entry
- Consider surface sealing options
How to Remove Efflorescence and Mineral Deposits
If you spot efflorescence on your basement walls, act promptly to remove it so coatings will stick and moisture problems don’t worsen.
Start dry brushing with a stiff nylon brush to lift powder; vacuum residue to prevent spreading.
Begin by dry-brushing with a stiff nylon brush to lift powder, then vacuum residue to avoid spreading.
For stubborn deposits, mix white vinegar and water (1:1) or use a masonry cleaner, test a small area first, rinse thoroughly, and let dry.
Wear gloves, eye protection, and a mask.
After cleaning, neutralize with water, allow full drying before painting, and choose color schemes and decorative finishes that accommodate future inspections and maintenance without trapping moisture.
Inspecting Concrete Basement Walls for Cracks and Spalling
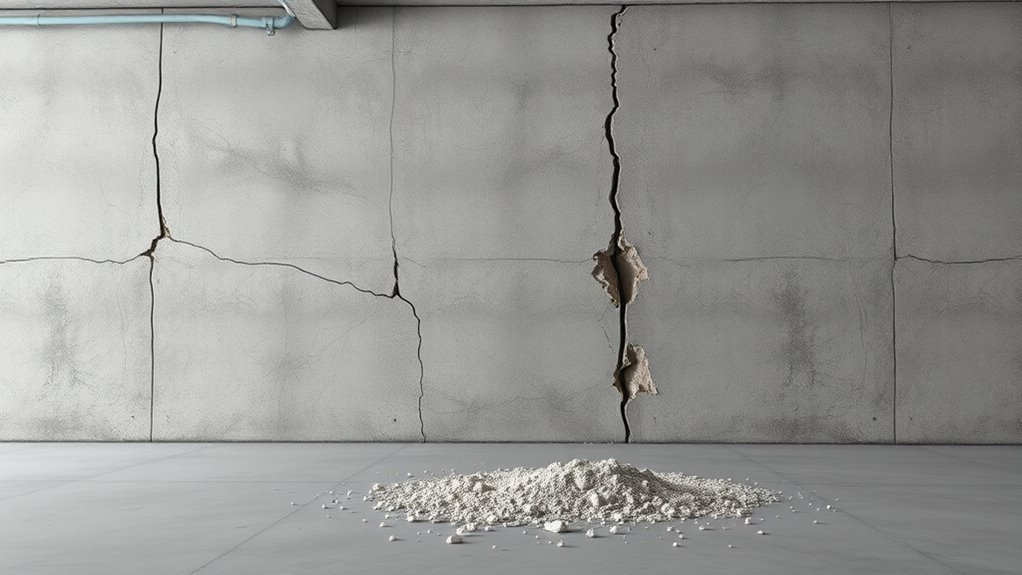
When you inspect concrete basement walls for cracks and spalling, move methodically—start at eye level and work up and down the wall, scanning for hairline cracks, wider fractures, crumbled edges, rust stains, and areas where the surface flakes away.
Note moisture patterns, soft spots, and any signs of plant growth pushing through joints.
Check for gaps where Pest infestation could enter and for mortar loss at seams.
Photograph issues and mark locations for later assessment.
Prioritize patterns that suggest active water movement or structural concern.
- Measure crack width and length
- Look for bulging or delamination
- Record moisture stains
- Note nearby vegetation
- Inspect for insect trails
Repairing Cracks and Holes in Concrete Basement Walls
Before you paint, you’ll need to assess each crack to determine if it’s hairline, structural, or from settling.
Pick a repair material suited to the severity—epoxy or polyurethane for active leaks, mortar or concrete patch for larger gaps.
Then clean, widen if needed, and follow manufacturer instructions to properly prepare and patch the area.
Assessing Crack Severity
Although small hairline cracks are common in basements, you should evaluate each crack’s size, direction, and activity to decide how to repair it.
Look for surface discoloration or dampness that hints at leaks; these affect paint durability and whether sealing alone will work.
Check horizontal cracks (pressure-related), vertical cracks (settling), and stair-step cracks (masonry issues).
Note whether cracks widen over time by marking and measuring.
- Measure width with a caliper or ruler.
- Note crack direction and length.
- Inspect nearby efflorescence or staining.
- Monitor changes over weeks.
- Record any water seepage or damp spots.
Choosing Repair Materials
Since the right repair material determines durability and moisture resistance, pick products matched to the crack type and wall condition.
For hairline cracks, use flexible epoxy or polyurethane sealants.
For wider gaps, choose hydraulic cement or vinyl patching compounds.
Use bonded mortars for spalls and holes, and consider fiber-reinforced mixes where movement’s likely.
Check product specs for damp environments and compatibility with masonry paints.
Think about color matching and texture options if patches will show after painting; you can tint or sand for consistency.
Always select breathable materials when moisture’s present to avoid trapped water and future paint failure.
Preparing And Patching
How do you get concrete basement walls ready so repairs last and paint sticks? You’ll clean, dry, and inspect for loose concrete, efflorescence, or mold. Chip out jagged edges and widen hairline cracks slightly so filler bonds. Use hydraulic cement for active leaks and epoxy or polymer patch for static cracks. Smooth patches flush with a trowel, then sand once cured. Prime patched areas before painting or applying decorative finishes or staining techniques.
- Remove dirt, oil, and salts with a stiff brush and cleaner
- Open and fill cracks properly
- Use compatible patch materials
- Feather edges for a smooth surface
- Allow full cure time
When to Apply Waterproofing Sealers Before Painting
Before you paint, check for moisture and structural issues and decide whether a waterproofing sealer is necessary. If walls show efflorescence, damp spots, or leaking, apply a breathable masonry sealer to stop moisture before color selection and decorative finishes lock in a poor result.
Use sealers rated for below-grade use and follow cure times; some require 24–72 hours before primer. If walls are dry and sound, you can skip heavy waterproofing and proceed to primer and paint.
Don’t conceal active leaks with paint—fix them first. Proper timing prevents peeling, mold, and ruined decorative finishes.
Cleaning: Pressure Wash, Chemicals, and Safer Alternatives
If your basement walls are dirty, chalky with efflorescence, or covered in mold, you’ll need to clean them thoroughly so paint and sealers can stick properly.
Use pressure washing for heavy grime, but avoid saturating foundations; keep pressure moderate.
For algae or mold, use diluted bleach or a commercial masonry cleaner, rinsing well.
Try safer alternatives: hydrogen peroxide, vinegar, or a scrubbing brush with trisodium phosphate substitute.
After cleaning, let walls dry completely before applying decorative finishes or textured coatings.
- Test a small area first
- Protect floors and furnishings
- Wear PPE: gloves, goggles, mask
- Ventilate the space
- Dispose wastewater responsibly
Best Primers for Concrete Basement Walls
When you’re ready to seal and paint concrete basement walls, choose a primer designed for masonry or concrete that bonds well, blocks moisture, and resists alkali and efflorescence. Acrylic-latex masonry primers and specialized penetrating concrete primers are the most reliable options for typical basements.
You’ll want a high-adhesion, breathable primer if walls are damp-prone, and a blocking primer if efflorescence has occurred.
For decorative finishes or historic basements undergoing historical preservation, pick formulations compatible with subsequent coatings and gentle restoration methods.
Always test a small area, follow cure times, and replace compromised mortar before priming to guarantee lasting results.
Best Paint Types: Masonry, Epoxy, or Latex?
With the right primer sorted, your next decision is choosing the paint system that fits the basement’s conditions and how you’ll use the space. You’ll pick masonry paint for porous concrete and longevity, epoxy for high‑moisture, high‑traffic zones, or latex for easy application and repainting.
Choose the paint system to match basement conditions—masonry for porous concrete, epoxy for moisture and traffic, latex for easy repainting.
Consider moisture, durability, and desired look—some homeowners mix historical techniques with modern products to recreate vintage textures or apply decorative finishes for style. Match paint to primer and substrate, and test a small area first.
- Masonry: breathable, durable for block walls
- Epoxy: waterproof, hardwearing
- Latex: flexible, easy touch-ups
- Hybrid: specialty blends
- Finish: sheen choices
Breathable vs. Non‑Breathable Paint : Which to Choose?
You’ll want to know whether to use breathable masonry paint or a non‑breathable sealer based on moisture conditions. Breathable paints let water vapor escape through the wall, reducing trapped moisture and efflorescence.
Non‑breathable sealers block water but can trap vapor, so they’re only safe on dry, properly prepared walls.
Breathable Masonry Paint
Wondering whether breathable masonry paint is worth the extra cost? You’ll appreciate that breathable formulas let moisture escape, reducing blistering and salt stains while supporting historical preservation and offering solid aesthetic enhancement. They’re ideal when you want durable, vapor-permeable protection without trapping dampness.
- Allows vapor transmission through concrete
- Reduces risk of peeling and efflorescence
- Preserves original masonry materials
- Offers matte, natural-looking finishes
- Compatible with lime or mineral substrates
Choose breathable paint when moisture movement matters and you need to respect older structures. It’s a practical, attractive option for many basement walls.
Non‑Breathable Sealers
Although non‑breathable sealers can give concrete a hard, shiny finish and block liquid water, they also trap vapor inside the wall and can cause peeling or efflorescence when moisture tries to escape. You’ll risk reduced paint adhesion and compromised concrete durability if vapor drives behind a sealed surface. Choose non‑breathable only where moisture is controlled. Test moisture and consider breathable alternatives for basements. Use sealers sparingly and follow manufacturer drying times.
| Benefit | Risk | When to Use |
|---|---|---|
| Water block | Vapor trap | Dry basements |
| Gloss finish | Peeling paint | Temporary fixes |
| Easy clean | Efflorescence | Exterior concrete |
Step‑By‑Step: Painting Basement Concrete Walls
Before you pick up a brush, gather the right supplies and prep the space so the paint adheres and lasts. Start by cleaning walls, repairing cracks, and testing for moisture; addressing these protects concrete durability and helps mold prevention.
Patch cracks and smooth joints. Test for moisture.
Prime with a masonry primer, then apply two thin coats of a breathable masonry paint. Allow full drying between coats and run dehumidification during curing.
Inspect for missed spots and touch up.
- Clean and degrease surfaces
- Patch cracks and smooth joints
- Test for moisture
- Apply masonry primer
- Paint two thin coats and ventilate during curing
Tools and Equipment for a DIY Basement Paint Job
When you tackle a basement paint job, having the right tools makes the work faster and the finish much better: gather a quality masonry brush or roller with a 3/8–1/2″ nap, a paint tray, extension pole, angled sash brush for corners, a masonry primer and breathable masonry paint, plus sandpaper, patching compound, and a stiff wire brush for prep.
You’ll also want drop cloths, painter’s tape, a bucket and mixing paddle, and masonry-compatible caulk.
For decorative finishes pick tools suited to texture, like stipple brushes or specialty rollers.
If you’re working on older homes, respect historical preservation by using reversible, breathable products.
Safety: Ventilation, Respirators, and Handling Chemicals
Because basement air is often still and paint fumes can concentrate, you should prioritize ventilation, appropriate respirators, and careful chemical handling to protect your health. Open windows, run fans, and use exhaust to move fumes away.
Choose low-VOC paints if you plan decorative finishes and want safer odor control while maintaining color coordination.
Store solvents in labeled, sealed containers and keep rags in metal cans. Dispose of waste per local rules.
- Wear an NIOSH-rated respirator for solvent or oil-based products
- Use goggles and chemical-resistant gloves
- Read labels and SDS sheets before mixing
- Avoid open flames near solvents
- Work in shifts to limit exposure
How Humidity and Temperature Affect Paint Curing in Basements
Although basement temperatures and humidity often sit outside ideal ranges, they directly determine how paint dries and bonds to concrete, so you’ll want to control both during and after application.
You’ll see humidity effects in slower drying times and reduced adhesion when moisture’s high; mold growth risk also rises if painted surfaces stay damp. Conversely, very low humidity can cause skinning and powdery finishes.
Temperature fluctuations matter because curing slows in cold and can trap solvents, while heat speeds drying too fast, weakening the film.
Aim for stable, moderate conditions during cure time and monitor with a hygrometer and thermometer.
Common Painting Mistakes That Cause Peeling or Blistering
If you skip proper surface prep or rush through drying times, paint will often peel or blister on concrete basement walls. You’ll want to avoid trapped moisture, dirty surfaces, incompatible primers, thick coats, and painting over efflorescence.
Even decorative finishes or mural painting suffer when basics are ignored. Check for water intrusion, clean and etch as needed, use a breathable masonry primer, and apply thin, even coats allowing full cure between layers.
Decorative finishes and murals fail without basics: inspect for leaks, clean and etch, use breathable primer, and apply thin, cured coats.
Test adhesion in a small area before committing. Fixing mistakes later costs time and money, so take the prep steps seriously to prevent peeling and blistering.
- Skipping cleaning
- Painting damp concrete
- Using wrong primer
- Applying heavy coats
- Ignoring efflorescence
How to Prevent Mold and Mildew After Painting
When you finish painting your basement, take steps to keep the space dry and well-ventilated so mold and mildew don’t get a foothold; control moisture sources, maintain airflow, and choose breathable, mold-resistant coatings and finishes.
Inspect and seal cracks, run a dehumidifier, and vent appliances to prevent condensation. Use washable, mildew-resistant paints and avoid trapping moisture with non-breathable sealers.
Position fans or install vents to keep air moving, especially after showers or laundry. Pick color coordination and texture options that hide minor staining yet allow cleaning.
Check humidity regularly and address leaks promptly to stop mold before it starts.
Maintenance: Keep Painted Concrete Walls Looking Good
Keep a simple surface-cleaning routine to remove dust and prevent stains before they set.
When you spot chips or peeling, repair them promptly to stop moisture and further damage.
Plan a repainting schedule so your walls stay protected and look fresh without surprises.
Surface Cleaning Routine
Although painted concrete is durable, it still needs a simple surface-cleaning routine to stay attractive and last longer. You’ll remove dust, grime, and occasional mildew without harming decorative finishes or texture enhancement. Work weekly or after messy projects, using gentle methods that preserve paint and any decorative effects.
- Sweep or vacuum loose dirt and spider webs.
- Wipe with a microfiber mop or soft cloth and mild detergent.
- Spot-clean mildew with diluted bleach (1:10) and rinse thoroughly.
- Use a soft brush for textured areas, avoiding abrasive scrubbing.
- Dry the wall or improve ventilation to prevent moisture buildup.
Repairing Chips Promptly
If a chip appears, don’t let it sit — patching it quickly prevents moisture intrusion and further flaking that’ll demand bigger repairs. You’ll clean loose debris, roughen edges to match concrete texture, apply a compatible patch, and feather edges for good adhesion. For visible areas, do color matching while the patch cures so the repair blends. Keep a small kit with patch, primer, and touch-up paint. Check patched spots monthly and reseal if needed to prevent recurrence.
| Step | Timeframe | Result |
|---|---|---|
| Inspect | Weekly | Early detection |
| Clean | Immediately | Solid bond |
| Patch | Within 24h | Stops moisture |
| Match | During cure | Visual blend |
| Monitor | Monthly | Lasting fix |
Repainting Schedule Planning
When you plan a repainting schedule for basement concrete walls, set realistic intervals based on wear, moisture exposure, and paint type so you won’t be caught off guard. You’ll inspect annually, note peeling or stains, and time touch-ups before problems spread.
Consider decorative finishes and evolving color schemes when choosing refresh timing so updates stay cohesive. Keep records of products used and humidity conditions to predict longevity.
Plan full repaints less often than spot repairs, and prioritize areas with heavy traffic or moisture.
- Inspect every 12 months
- Touch up chips within weeks
- Recoat high-moisture areas every 3–5 years
- Update decorative finishes as desired
- Track products and dates
Cost Breakdown: DIY vs. Pro – Materials and Labor Estimates
Because your budget will drive many decisions, it helps to break costs into materials and labor so you can compare DIY vs. hiring a pro, estimate total spend, and spot where you’ll save or splurge.
For DIY, expect primer, masonry paint, brushes/rollers, patching compound, and caulk — roughly $100–$300 for a typical basement; factor in time.
Pros add labor: $500–$2,000 depending on size and prep needs.
Choose color options wisely; specialty finishes cost more.
Consider environmental impact: low-VOC paints cost more but reduce fumes.
Calculate materials plus hourly labor to decide which route fits your budget.
When to Hire a Pro: Signs You Need Expert Help
Although a DIY job can save money, you should call a pro when the walls show significant structural cracks, persistent damp or mold, extensive efflorescence, or when previous repairs have failed—these issues need diagnosis and specialized repair beyond painting.
If walls show major structural cracks, persistent damp or mold, extensive efflorescence, or failed repairs, call a pro.
You’ll want expert assessment if hidden leaks, uneven wall texture, or failed sealants threaten finishes. Pros can recommend repairs, concrete staining options, and surface prep that preserves integrity.
Consider hiring when safety, warranty, or resale value matters. Signs to watch:
- Large horizontal or stair-step cracks
- Chronic musty odors or visible mold
- Bulging or spalling concrete
- Heavy white efflorescence
- Failed prior patching
Waterproofing Then Paint vs. Paint Alone: Pros and Cons
If you want lasting protection, waterproofing before painting beats paint alone in most basement situations. You’ll stop moisture, salt efflorescence, and mold before adding color or decorative finishes, so paint adheres better and lasts longer.
Waterproofing costs more and takes time, but it prevents peeling and structural damage.
Painting alone is cheaper and quick for dry, low-risk spaces, yet it’s less effective against hidden leaks and offers limited graffiti resistance unless you apply specialty coatings.
Choose waterproofing then paint for durability and value; opt for paint alone only when conditions are confirmed dry and low-risk.
Painting Concrete Block (CMU) vs. Poured Concrete Walls
When you’re comparing CMU block to poured concrete, you’ll need different surface prep because block is porous and often has mortar joints to fill.
You’ll also manage moisture differently—block can wick water more easily, so consider stronger vapor barriers or masonry-grade waterproofing.
Finally, pick paints and primers rated for masonry and high moisture conditions, with elastomeric or breathable masonry coatings for block and concrete-specific primers for poured walls.
Surface Preparation Differences
Because concrete block and poured concrete have different textures and construction joints, you’ll need to prep them differently before painting. You’ll choose color schemes and decorative finishes that suit each surface, but prep determines adhesion and appearance.
Clean, repair, and prime based on block pores or smooth poured surfaces.
- Inspect and chip out loose mortar in CMU joints.
- Fill hairline cracks and tie-rod marks on poured walls.
- Wire-brush block faces to remove efflorescence and dirt.
- Etch or sand very smooth poured concrete for better primer grip.
- Use appropriate masonry primer for porous block and high-adhesion primer for poured walls.
Moisture Management Needs
Although both concrete block (CMU) and poured concrete can look similar once painted, they manage moisture very differently, so you’ll need distinct strategies to keep paint and walls dry.
CMU’s hollow cores and mortar joints wick water; you’ll inspect and seal cracks, prioritize blocking bulk water, and use breathable coatings that respect concrete durability.
Poured walls are denser but can transmit vapor; you’ll check exterior drainage, control interior humidity, and smooth uneven wall texture before painting.
In both cases you’ll address sources—grading, gutters, interior dehumidification—so paint adheres and the substrate maintains long-term concrete durability.
Paint Type Recommendations
If your basement walls are CMU, pick breathable masonry paints or mineral silicate coatings that let trapped moisture escape.
For poured concrete, choose vapor-permeable acrylic masonry paints or high-build elastomeric coatings that handle slight vapor transmission and surface irregularities.
You’ll select products based on substrate, moisture testing, and desired look.
Use masonry primers for adhesion, and consider limewash or mineral paints for authentic decorative finishes.
For high-traffic or urban basements, choose coatings with graffiti resistance.
Follow manufacturer specs for application and cure times to avoid blistering or peeling.
- Test moisture first
- Use appropriate primer
- Choose breathable options
- Consider decorative finishes
- Opt for graffiti resistance
Alternatives to Painting Concrete Basement Walls: Panels & Wallboard
When painting doesn’t suit your budget, timeline, or moisture conditions, you can cover concrete with finished panels or wallboard to get a clean, insulated, and livable space fast.
You’ll choose moisture-resistant gypsum or cement board, add a thermal layer, and frame a furring strip system so surfaces stay dry.
Decorative finishes like faux shiplap or textured panels hide imperfections without painting.
If noise or echo is a concern, install acoustic panels behind fabric or drywall for quieter rooms.
Panels speed installation and allow wiring or plumbing access.
Check for active leaks and remediate before covering to avoid trapped moisture.
Choosing Colors to Brighten and Enlarge a Basement
Because basements tend to be low on natural light and tight on space, pick colors that reflect light and create openness. You’ll want pale neutrals, cool tones, and subtle contrasts to visually expand the room.
Consider how decorative finishes add texture without darkening surfaces, and respect any historical preservation needs if your home has period features.
- Use soft whites or warm creams for largest walls
- Add pale gray-blue accents to recede visually
- Paint trim a slightly brighter shade to define edges
- Introduce satin finishes to bounce light subtly
Test samples under basement lighting before committing.
Choosing Low‑VOC Basement Paints (Environment & Health)
You’ve picked colors that brighten and enlarge the space, so next focus on paint that won’t compromise indoor air quality—especially in a sealed basement. Choose low‑VOC or zero‑VOC masonry paints labeled for concrete; they cut fumes and protect family health.
Look for products with third‑party certifications and check cure times so you ventilate adequately. Low‑VOC options still allow decorative finishes, from matte to satin, without heavy odors.
After painting, add indoor plants to help freshen the air and monitor for lingering smells. If you or household members have sensitivities, prioritize the cleanest formulations and test a small patch first.
How Long Painted Concrete Basement Walls Typically Last
If you maintain the space and address moisture issues promptly, painted concrete basement walls can look good for many years. Lifespan depends on prep, paint quality, humidity control, and traffic. You’ll typically see 5–15 years before touchups, longer with epoxy or masonry primers.
Choosing color schemes and decorative finishes affects perceived longevity; lighter hues hide imperfections, textured finishes mask wear. To maximize life, control water, repair cracks, and use breathable, mildew-resistant paints. Consider recoat schedules and spot repairs rather than full repainting.
- Inspect annually for peeling or efflorescence
- Fix leaks immediately
- Use proper primer
- Choose durable topcoats
- Repaint high-traffic areas sooner
Frequently Asked Questions
Can Painting Concrete Affect Indoor Air Quality Long-Term?
Yes — painting can affect indoor air quality long-term if you don’t manage indoor ventilation and persistent paint fumes; you’ll want low-VOC paints, proper drying, and ongoing airflow to minimize lingering chemical off-gassing and health risks.
Will Paint Hide Past Water Damage or Structural Problems?
A flooded remodeling case showed paint masked stains but not rot; you’ll hide cosmetic marks but won’t fix waterproofing concerns or structural issues, and you shouldn’t rely on paint for mold prevention—address underlying damage first.
Can I Paint Over Existing Coatings or Sealers Safely?
Yes — you can paint over existing coatings if you strip loose material, degrease, and sand for proper surface prep; choose compatible paint types (masonry, epoxy, or elastomeric) and use primer to guarantee adhesion and longevity.
How Soon After Concrete Curing Can I Paint Basement Walls?
Like a slow-blooming flower, you should wait at least 28 days after curing before painting; choose Color options wisely and make certain Surface preparation is thorough, so the paint adheres well and won’t peel or trap moisture.
Does Painted Concrete Impact Home Resale Value?
Yes — painted concrete can boost resale appeal if you choose neutral color choices and highlight paint durability; buyers appreciate clean, bright basements, and durable finishes signal low maintenance and better perceived home condition, improving marketability.
Conclusion
Painting concrete basement walls can be a smart, affordable way to brighten and protect the space—if you deal with moisture first. Fix cracks and active leaks; a simple plastic-sheet moisture test reveals problems before you paint. Notably, basements account for about 25% of home water damage claims, so preventing moisture pays off. Choose low‑VOC masonry paints and light colors to enlarge the room, and expect a good job to last several years with proper prep.