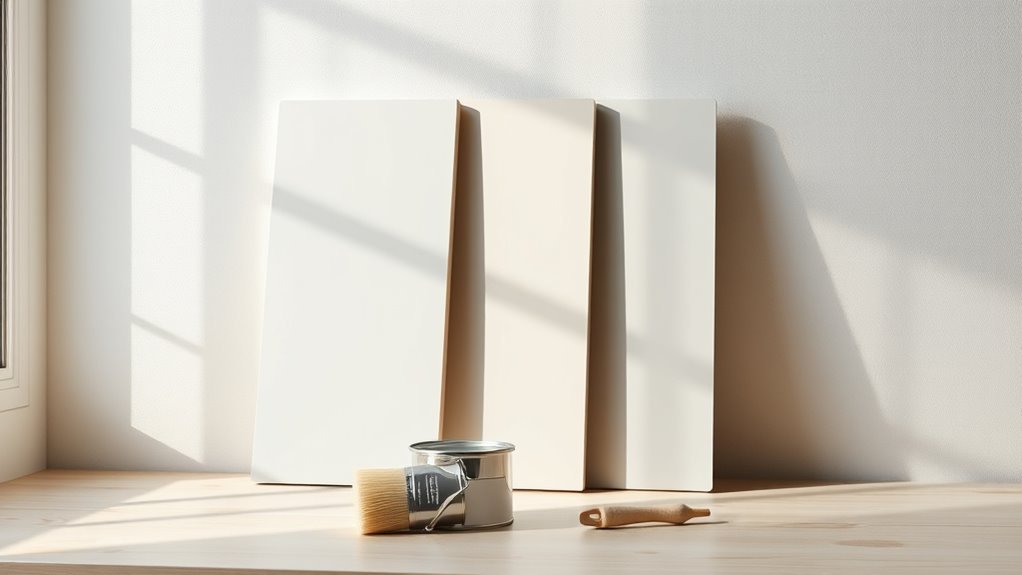
Is Latex Paint Shiny? Finish Types Explained
Yes — latex paint can be shiny, but it depends on the sheen you pick and how you apply it. You’ll find finishes from flat and eggshell (low reflectivity) to satin, semi-gloss, and high-gloss (increasing shine and durability). Surface prep, color, lighting, and tools also change how glossy it looks. Higher sheens are easier to clean but show imperfections; flatter sheens hide flaws but aren’t as durable. Keep going to learn which sheen fits each room.
What Search Intent Does “Is Latex Paint Shiny?” Satisfy?
What’re people really asking when they type “Is latex paint shiny?” They’re usually looking for quick, practical info—whether latex paint dries with a glossy finish, how sheen levels compare, and what to expect for appearance and durability on walls. You’re after intent: basic facts, project planning, or product selection.
Consider historical context and paint formulation to see why sheen varies—binders, pigments, and additives changed over time, shifting common finishes. You want usable guidance, not deep chemistry: comparisons, typical uses for flat to gloss, and how sheen affects cleaning, durability, and perceived texture so you can choose confidently.
Quick Answer: Is Latex Paint Shiny?
Yes — latex paint can be shiny, but how glossy it looks depends on the sheen level you pick (flat, eggshell, satin, semi-gloss, or high-gloss).
Factors like surface texture, lighting, and how many coats you apply also affect the final shine.
Think about the room’s use and desired durability to choose the right finish.
Sheen Levels Explained
Curious whether latex paint looks shiny? You’ll find sheen ranges from flat to high-gloss, letting you choose reflectivity.
Flat and matte hide imperfections and support subtle color blending, while eggshell and satin add soft luster suited to living spaces.
Semi-gloss gives noticeable shine, boosts durability, and resists scuffs—good for trim and kitchens.
High-gloss creates a mirror-like finish that highlights details and cleans easily.
Keep in mind sheen appears as paint drying completes; early stages look different.
Pick a sheen based on desired look, durability, and how much surface reflection you want in the room.
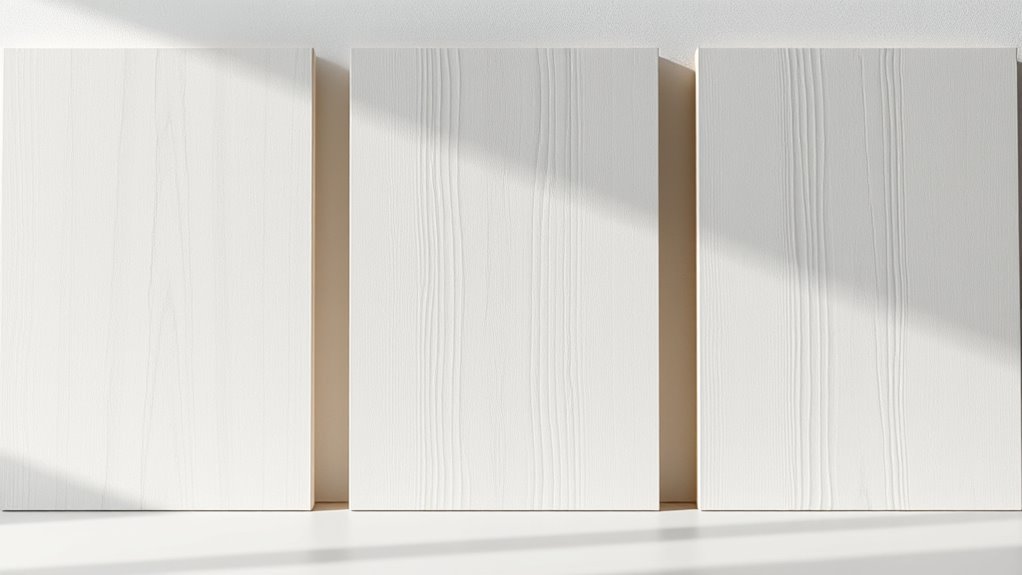
Factors Affecting Shine
Sheen choice matters, but whether latex paint looks shiny also depends on several factors beyond the formula. You’ll notice surface preparation, application technique, and lighting change perceived gloss.
Smooth, well-sanded substrates reflect more light; rough or porous surfaces scatter it, aiding texture enhancement but reducing apparent shine. Tool choice and coats matter: brushes, rollers, or sprayers leave different micro-textures that influence gloss.
Drying conditions and additives alter film clarity, while color blending affects how highlights and shadows read across the wall. Clean surfaces and consistent technique help you predict shininess without relying solely on the paint’s labeled finish.
Choosing The Right Finish
Wondering whether latex paint will give you a shiny finish? You’ll choose based on use, durability, and desired sheen.
For high-traffic rooms or trim pick semi-gloss or gloss — they resist scuffs and highlight detail.
Flat or matte hides imperfections and suits ceilings; eggshell balances subtle sheen with washability.
Consider paint texture and how light reveals flaws: smoother surfaces reflect more shine.
Also factor color matching when touching up or repainting; sheens alter perceived hue, so match both color and finish.
Test samples on your actual wall to confirm appearance before committing.
What “Sheen” Means for Latex Paint
Sheen measures how much light a latex paint surface reflects, from flat to high-gloss.
You’ll notice higher sheens make colors look brighter and highlights flaws, while lower sheens hide imperfections and give a softer look.
Knowing the sheen helps you choose the right finish for both appearance and durability.
What Sheen Measures
When you talk about sheen, you’re really talking about how much light the dried paint reflects—its gloss level—not just how shiny it looks in the can. Sheen measures reflectivity, durability, and how surface texture shows. You’ll pick a sheen for function and mood: color psychology influences perceived brightness, while eco friendly paints can offer similar sheens with lower VOCs. Below is a quick comparison to help you choose.
| Sheen | Reflectivity | Best for |
|---|---|---|
| Matte | Low | Hiding flaws, cozy rooms |
| Eggshell | Low–Medium | Living areas |
| Satin | Medium | Hallways, trim |
| Semi-gloss | High | Kitchens, bathrooms |
How Sheen Affects Appearance
You’ve seen how different sheens compare on paper, but the way a finish interacts with light and texture will change how a room actually looks. You’ll notice glossier sheens highlight imperfections and reflect more light, boosting perceived brightness and emphasizing color contrast between walls and trim.
Matte sheens hide flaws, muting reflections and softening hues. In tight spaces, satin balances durability and subtle reflection, while semi-gloss adds punch for doors and moldings.
When you’re paint mixing, choose sheen to support your color choice—don’t rely on pigment alone. Sheen shapes mood, depth, and how colors read in real life.
How Sheen Is Measured and Labeled
Because gloss is about light reflection, manufacturers measure it with instruments and standardized scales so you can compare finishes reliably. You’ll see numbers like 5, 25, 45, 70 on a gloss scale (degrees of reflected light at set angles). Labels pair industry terms—flat, eggshell, satin, semi-gloss—with those numbers so you know performance. Historical trends shifted toward clearer labeling as consumer demand grew, and Environmental impacts drove standards for low-VOC formulations that still meet sheen specs. Use the table to quickly match terms to typical gloss ranges.
| Finish | Typical Gloss |
|---|---|
| Flat | 0–5 |
| Eggshell | 5–25 |
| Satin | 25–45 |
| Semi-gloss | 45–70 |
How Sheen Changes Perceived Texture and Reflected Light
When you pick a sheen, you change how surface texture reads—flatter sheens hide bumps while glossier ones make texture pop.
You’ll also notice imperfections become more visible as sheen and reflected light increase.
Think about how much light you want bouncing off the wall before choosing a finish.
Surface Texture Emphasis
Although a paint’s sheen might seem like a small choice, it drastically affects how surface texture reads and how light bounces off walls. You’ll notice matte finishes mute surface patterns, softening bumps and creating uniform color.
Satin and eggshell offer subtle texture enhancement, catching light just enough to reveal gentle undulations without shouting imperfections. Semi-gloss and gloss amplify contours, making raised details pop and edges crisp.
When you pick a sheen, think about whether you want textures to disappear or be showcased: lower sheens conceal, higher sheens emphasize, and mid-sheens balance readability and subtlety for varied surfaces.
Highlighting Imperfections Visibility
Ever wondered why a fresh coat can suddenly make drywall ridges and nail pops impossible to ignore? You notice sheen highlights edges and bumps because higher gloss directs light across the wall rather than scattering it. That contrast sharpens texture, so imperfections jump out.
When you choose a finish, think about Color mixing too—darker tints and stronger pigments can deepen shadows around flaws, while lighter hues hide them. Also factor in environmental factors like humidity and surface prep; they change how evenly paint lays and how seams show.
Pick flatter sheens if you want to minimize visible defects without major repairs.
Light Reflection Intensity
How does sheen change the way a wall interacts with light? You’ll notice glossier finishes bounce more concentrated highlights, making textures and brushstrokes pop, while matte diffuses light, softening surfaces. That shift alters perceived depth and can influence your choice of color combinations—high sheen with dark hues reads brighter and sharper; matte tones seem richer and smoother.
When planning, consider how reflected light affects room mood and cleanability. Also remember application details: proper paint ventilation prevents uneven drying that skews sheen and reflection.
Test swatches under actual lighting to judge how sheen, texture, and light interplay before committing.
How Lighting Alters Perceived Sheen
When you stand in a room, the same paint can look dramatically different depending on the light hitting it. You notice lighting effects immediately: direct sunlight brings out glossy highlights, while diffuse overcast light mutes them.
Side lighting emphasizes texture and exaggerates small variations, creating sheen illusions where smooth finishes seem duller or vice versa. Warm bulbs shift perceived contrast, making semi-gloss appear softer; cool LEDs sharpen reflections, boosting apparent gloss.
You can control perceived sheen by changing fixture type, angle, and intensity. Test finishes at different times and with varied lamps before committing to a trim or whole-room choice.
How Color Affects Apparent Gloss
Why do dark and light paints seem to show sheen differently? You’ll notice darker colors reflect highlights more starkly, so glossy finishes look pronounced while matte feels deeper.
Light colors scatter light, softening gloss cues and making low-sheen surfaces appear flatter. Your perception also ties to color psychology: bright hues feel livelier, so subtle shine reads as energetic; muted tones seem subdued, reducing perceived gloss.
Don’t forget context—adjacent colors change contrast and apparent shininess. Practical tip: test samples at different times of day.
Also be aware that strong paint odor can bias your impression, so ventilate before judging finish.
How Surface Texture Changes Perceived Shininess
Surface texture plays a big role in how shiny paint looks because it changes the way light bounces off a surface. You’ll notice rough textures scatter light, softening gloss, while smooth surfaces reflect sharply, increasing perceived shininess.
Texture interacts with paint formulation and even color mixing choices, so pick finishes and additives to suit the effect you want. Consider these practical impacts:
- Smooth, sanded surfaces boost specular reflection
- Textured walls diffuse highlights, appearing less glossy
- Microtextures hide imperfections, reducing glare
- Additives alter surface tension and sheen
- Maintenance affects long-term reflectivity
Adjust texture deliberately to control perceived gloss.
Flat Finish: Appearance and Best Uses
Curious how a flat finish will change a room? You’ll see muted, non-reflective walls that hide imperfections and create a cozy, sophisticated backdrop. Flat works best on ceilings, low-traffic living rooms, and adult bedrooms where you want subtlety over sheen.
You can experiment with color mixing to achieve deeper tones since flat absorbs light differently than glossier paints. Note that flat paint can retain more paint odor during application and drying, so ventilate well.
Touch-ups blend nicely, but avoid high-moisture areas—flat isn’t as washable or durable as satin or semi-gloss finishes.
Eggshell Finish: Look and Common Rooms
Eggshell gives you a subtle low sheen that hides minor wall imperfections while still looking a bit smoother than flat. You’ll find it’s ideal for living rooms, bedrooms, and hallways where you want a balance of style and softness.
It’s easier to clean and more durable than flat, so it stands up well in moderate-traffic areas.
Subtle Low Sheen
When you want a paint that hides imperfections better than flat but still reads soft and understated, a subtle low-sheen (often called eggshell) finish is a great choice. It gives walls a gentle luster without drawing attention, making colors look richer while keeping a low-key feel.
You’ll appreciate its balance: slight reflectivity brightens rooms, while low gloss minimizes glare. It pairs well with decorative techniques and eco-friendly options when selecting products.
Consider these practical points:
- Hides minor surface flaws
- Slightly easier to clean than flat
- Subtle depth to color
- Works with textured walls
- Low maintenance
Best Room Uses
Where does a low-sheen, eggshell finish work best in your home? You’ll find it ideal for living rooms, bedrooms, dining areas, and hallways where you want a soft, refined look without glossy glare. It flatters textured walls, minimizes imperfections, and creates a warm, inviting atmosphere.
In kid or pet areas, choose thoughtful colors since eggshell strikes a balance between style and practicality. Consider environmental concerns when buying—look for low-VOC formulas and proper paint recycling options for leftovers.
Cleaning And Durability
A low-sheen eggshell finish cleans more easily than flat paint but isn’t as tough as satin or semi-gloss, so you’ll want to be gentle when scrubbing stains or scuffs. You can remove marks with mild soap, a soft sponge, and light pressure to avoid dulling the finish. Test any cleaner in an inconspicuous spot.
Eggshell balances subtle sheen and moderate durability, works well with color blending during touch-ups, and pairs nicely with eco-friendly paints for low-VOC projects. Remember to avoid abrasive pads.
Consider these care tips:
- Use mild detergent
- Pat dry after cleaning
- Spot-test cleaners
- Repaint small areas for stains
- Avoid harsh scrubbing
Satin Finish: Durability and Cleaning
Because satin sits between flat and semi-gloss on the sheen scale, you’ll get good durability without the high shine of glossier paints. You can scrub walls more easily, so stains and fingerprints come off with mild detergent and a soft sponge.
Satin hides minor surface flaws better than semi-gloss, especially if you combine careful color mixing and texture techniques during application to mask imperfections. Use satin in high-traffic rooms—hallways, nurseries, and living areas—where cleanability matters but you don’t want a shiny look.
Recoat spots as needed; satin tolerates touch-ups well and resists scuffs.
Semi-Gloss Finish: Shine vs. Practicality
You’ll notice semi-gloss has a much higher sheen than satin, which makes colors pop and highlights surface imperfections. It’s also tougher and easier to wipe clean, so it’s a smart choice for trim, doors, and high-traffic areas.
We’ll weigh that shine against its tendency to show flaws so you can decide where it fits best.
Sheen Level Compared
When you want a balance between noticeable shine and everyday practicality, semi-gloss is the go-to choice; it reflects light enough to highlight trim and doors while still standing up to cleaning and wear.
You’ll compare sheen levels by considering appearance, room use, and subtle effects like color psychology and environmental impact. Semi-gloss sits between satin and gloss, offering moderate reflection without overwhelming glare.
Use this quick checklist to decide if semi-gloss fits your space:
- Highlights architectural details
- Hides minor surface flaws less than matte
- Easier to clean than lower sheens
- Works well in high-traffic areas
- Shows imperfections under strong light
Durability And Maintenance
Semi-gloss’s balance of shine and practicality makes it a strong choice for areas that need both visual definition and regular upkeep; now consider how that gloss level affects durability and maintenance. You’ll find semi-gloss resists scuffs, wipes clean, and highlights trim, influencing color psychology by making hues feel crisp and energetic. Its tougher surface means fewer repaints, but solvent-heavy cleaners can raise environmental impact concerns, so choose low-VOC products. Routine wiping and occasional touch-ups keep it looking sharp. Use the table to compare expectations and plan care.
| Feature | Practical effect |
|---|---|
| Scrubability | Easy cleaning |
| Scuff resistance | Less frequent repainting |
| Finish visibility | Enhances color psychology |
| Maintenance cost | Moderate |
| Environmental impact | Choose low-VOC cleaners |
High-Gloss Finish: Pros and Cons
Because high-gloss latex reflects a lot of light, it makes surfaces look bright and sharp while showing every edge and imperfection. You’ll notice trim and cabinets pop, but flaws stand out. You get excellent washability and durability, and color mixing stays consistent if you plan carefully. Consider paint storage to keep sheen uniform between batches.
High-gloss latex makes trim and cabinets pop with bright, durable finish—but meticulous prep is essential to hide imperfections.
Weigh these pros and cons:
- Easy to clean high-traffic areas
- Highlights architectural details
- Shows surface imperfections clearly
- Requires meticulous prep and sanding
- Can reveal slight color or sheen differences after touch-ups
Use high-gloss where durability outweighs flaw visibility.
Matching Latex Paint Sheen to Room Function
If you’re choosing a sheen for a room, match durability and cleanability to how the space gets used rather than picking solely for appearance. You’ll pick flatter sheens for low-traffic areas like bedrooms and formal living rooms to hide imperfections, while higher sheens suit trim and entryways that need frequent wiping.
Consider Color combinations to maintain cohesive visual flow between adjoining rooms, adjusting sheen subtly to guide focus. Also weigh Environmental factors such as humidity, sunlight and airborne grease when deciding sheen—these affect longevity and maintenance.
Test swatches in real conditions to confirm the balance of look and performance.
Best Sheen for Kitchens and Bathrooms
Kitchens and bathrooms demand a different approach than bedrooms or hallways because they face moisture, grease, and heavy cleaning. You should pick a sheen that balances durability with appearance. Choose semi-gloss or satin for walls and gloss for trim where scrubbability matters.
Kitchens and bathrooms need durable, easy‑to‑clean sheens—use semi‑gloss or satin for walls and gloss for trim.
Consider Color psychology to select tones that promote cleanliness or warmth. Look for eco friendly options with low VOCs to reduce odors and environmental impact. Use a durable primer and proper ventilation.
- Semi-gloss: easy to clean
- Satin: softer glow, durable
- High-gloss: trim, accents
- Low-sheen: limited use
- Eco options: low VOC, durable
Best Sheen for Living Rooms and Bedrooms
Looking for the right sheen for living rooms and bedrooms? You’ll want a finish that balances warmth, durability, and subtlety. EggshelL or satin often works best: they conceal minor wall flaws yet reflect enough light to keep spaces inviting.
Consider color psychology when selecting sheen—glossier surfaces amplify tones, while flatter finishes soften bold hues for relaxation. If you’re repainting frequently or have kids, satin offers easier cleaning without excessive shine.
Choose low-VOC, eco friendly paints to improve indoor air quality and maintain comfort. Test samples at different times of day to ensure the sheen matches your mood and lighting.
Choosing Sheen for Trim, Doors, and Cabinets
When you pick a sheen for trim, aim for a durable, slightly higher gloss to highlight clean lines and resist scuffs.
For doors, cabinets, and other high-touch surfaces, choose semi-gloss or gloss for easy cleaning and strong wear resistance.
I’ll compare the pros and cons of each sheen so you can match finish to function.
Best Sheen For Trim
Curious which sheen makes trim, doors, and cabinets look their best? You’ll usually pick a higher sheen to highlight clean lines and resist scuffs. Consider how color contrast and paint texture affect the result: glossy reflects more light and emphasizes smoothness; satin softens contrast while hiding minor flaws.
- Use semi-gloss for durability and easy cleaning.
- Choose gloss when you want crisp highlights.
- Pick satin to balance sheen and imperfection.
- Eggshell works for low-traffic trim with subtle shine.
- Match sheen to room style and maintenance needs.
Test samples on actual trim before committing.
Choosing Cabinet And Door Sheen
You’ve already considered how sheen affects trim—now apply that thinking specifically to cabinets and doors, where durability and appearance both matter. Choose semi-gloss or satin for high-traffic doors and cabinets; they resist scuffs and clean easily while showing subtle depth.
Use gloss sparingly on decorative accents to highlight details without overpowering surrounding surfaces. Satin works well for interior accents that need warmth without high reflectivity.
For painted furniture or shaker-style cabinets, eggshell can soften look but may lack durability. Always test on a small area, considering lighting and washability, so finish complements design and function.
Choosing Sheen for Walls and Ceilings
Although ceiling and wall paint look similar, the sheen you pick changes how a room feels and performs; you’ll choose based on light, traffic, and maintenance.
For walls, satin or eggshell hides imperfections and cleans well; for ceilings, flat minimizes glare.
Consider decorative techniques and eco-friendly options when matching sheen to function and style.
Think about these factors:
- Room use (kitchen, bedroom, bathroom)
- Light levels and glare
- Surface imperfections and texture
- Cleaning frequency and durability
- Desired ambience and decorative effects
Pick a sheen that balances aesthetics with practical needs for lasting satisfaction.
How Primers Affect Final Latex Paint Sheen
When you pick a primer, its own sheen and whether it’s a sealer or a bonding primer will change how the topcoat reflects light and how even the coverage looks.
A high-build sealer can smooth flaws and raise apparent sheen, while a matte bonding primer can keep a flatter finish and improve adhesion.
Consider both adhesion and coverage needs so your final latex sheen matches what you expect.
Primer Sheen Impact
Primers set the stage for your latex paint’s final sheen by controlling surface absorbency, color depth, and how uniformly the topcoat lays down. You’ll notice primer sheen can subtly alter light reflection, helping or hindering color blending and texture enhancement before the topcoat goes on.
Choose a low-luster primer for flatter results, or a glossier primer when durability and reflectivity matter. Consider these effects:
- Hides minor imperfections
- Reduces patchy gloss
- Boosts adhesion for consistent finish
- Affects perceived color depth
- Moderates surface reflectivity
Match primer sheen to your desired final look, not just substrate needs.
Sealer Type Differences
Because sealer chemistry determines how your topcoat bonds and reflects light, choosing the right sealer changes the final latex sheen more than you might expect. You’ll notice primers with high solids boost gloss; porous sealers mute sheen and create a flatter look. Consider Color psychology when selecting sheen for mood and choose Eco friendly options to reduce VOCs. Match sealer type to desired reflectivity rather than guessing.
| Sealer Type | Effect on Sheen |
|---|---|
| High-solids | Increases gloss |
| Shellac | Promotes sheen |
| Acrylic | Neutral to slight gloss |
| Oil-based | Warms and deepens |
| Water-based | Flattens slightly |
Adhesion And Coverage
How well your primer sticks and spreads will directly shape the final sheen of your latex paint: better adhesion means a smoother, more uniform film that reflects light consistently, while poor bonding leads to patchy coverage and uneven gloss.
You’ll choose primers that promote even color mixing and seal substrates so topcoats lay flat. Use eco friendly options when possible to reduce odor and VOCs without sacrificing hold.
Primer texture, porosity, and curing affect reflectivity. Consider these factors before painting:
- Surface cleanliness
- Primer type (bonding vs. sealing)
- Dry time
- Number of coats
- Topcoat compatibility
Surface Prep to Ensure Even Sheen
Before you open the can, make certain the surface is clean, dry, and smooth—any dirt, grease, or old gloss will show through and create uneven sheen. You’ll remove contaminants with a mild detergent, rinse, and let it fully dry.
Repair holes and dress rough spots so light reflects evenly.
When using Color mixing, blend thoroughly to avoid streaks that mimic sheen variation.
Choose eco friendly options for cleaners and low-VOC paints to reduce residue and promote consistent finish.
Test a small area and view under different lighting before committing to full coats to guarantee uniform sheen.
Priming and Sanding Tips by Surface Type
Pick a primer that matches the surface — stain-blocking for wood, bonding for slick surfaces, and mildew-resistant for bathrooms — so your finish adheres and looks uniform.
Lightly sand between coats with the grit suited to the substrate (coarser for bare wood, finer for painted or finished surfaces) to smooth imperfections and promote adhesion.
Follow manufacturer dry times before sanding or topcoating so you don’t gum up the finish.
Primer Selection By Surface
Wondering which primer suits your surface? You’ll pick based on material, adhesion, and final finish needs, while considering color psychology for base tinting and planning paint disposal of leftovers.
Choose a primer that blocks stains on wood, seals drywall, or bonds to glossy surfaces. For metal use rust-inhibiting formulas; for masonry pick masonry primer; for cabinets select high-bonding, sandable types.
- Wood: oil- or shellac-based for tannin bleed
- Drywall: water-based drywall primer
- Metal: anti-rust primer
- Masonry: breathable masonry primer
- Glossy: bonding primer
Match primer to surface for durable results and easier topcoats.
Sanding Grit Recommendations
When you prep different surfaces, matching the sanding grit to the material and stage of work makes the primer and topcoat stick and look their best.
For bare wood, start with 80–100 grit to remove roughness, follow with 120–150 for smoothing, and finish 180–220 before priming.
For drywall, use 120–150 to level joints, then 180 for final prep.
For previously painted surfaces, scuff with 220–320 to promote adhesion.
Metal needs 180–320 depending on corrosion.
Fine sanding between coats with 320–400 ensures smoothness.
Consider color psychology when choosing sheen levels and minimize environmental impact by recycling dust and using low-dust abrasives.
Rollers and Tools to Minimize Texture
If you want the smoothest finish, start by choosing the right roller and tools: a short-nap roller (3/16″ to 1/4″) and a high-density foam or microfiber cover will lay down thin, even coats with minimal stipple. You’ll also need a quality brush for cutting in, a soft-edged tray, and a microfiber cloth for wiping drips.
Protect ventilation—paint fumes concentrate in closed rooms—and keep color matching samples nearby so you don’t need extra coats.
Use:
- High-density foam roller
- Microfiber cover
- Angled nylon/poly brush
- Soft roller tray liner
- Extension pole for steady pressure
Application Techniques That Affect Sheen
Although sheen is determined by the paint formula, how you apply it—pressure, stroke direction, and timing between coats—directly changes how light reflects off the surface, so you’ll want to control those variables to get the look you want.
Sheen comes from the formula, but pressure, stroke direction, and drying times shape the final reflection.
Vary pressure to smooth or emphasize texture; lighter, even passes reduce highs. Keep strokes aligned for consistent reflection; cross-hatching creates uneven sheen.
Wait proper dry times to avoid clouding or lap marks. Choose eco-friendly options with similar flow and leveling to conventional paints.
If you’re matching historical paint finishes, practice technique on samples to replicate authentic gloss and depth.
How to Test Sheen on Your Wall
Want to know how your chosen sheen will actually look in the room? Cut a 6×6″ sample from a spare board or use painter’s tape on the wall, apply the paint as you will, and let it dry fully.
Test multiple spots: near a window, under artificial light, and on textured versus smooth areas. Keep notes about batches—color mixing affects final tone, and paint storage can change sheen if containers were exposed to temperature swings.
Compare samples at different times of day and from several angles.
- Use the same brush or roller
- Apply same coat count
- Let dry 24 hours
- Photograph for reference
- Label each sample
Reducing Unwanted Shine on Painted Surfaces
Noticing glare where you don’t want it? You can reduce unwanted shine by cleaning the surface, scuff-sanding glossy spots, and applying a flat or low-sheen clear topcoat designed for latex. Test first on a small area to confirm the effect.
Consider modern formulations influenced by historical trends toward matte interiors, which favor diffused light. Use spray or roller techniques to avoid lap marks.
For sustainability, choose eco friendly options like low-VOC flatteners or water‑based matting agents. Maintain ventilation and follow manufacturer directions to guarantee adhesion and long-term appearance without creating new glossy patches.
Ways to Increase Sheen Without Repainting
If you’ve just reduced unwanted shine but now want certain areas to gleam more, there are several quick fixes that boost sheen without a full repaint. You can spot-enhance focal points to use light and finish to influence mood—color psychology matters when deciding where gloss helps highlight features.
Try these simple methods:
- Apply a clear satin or gloss varnish for targeted areas.
- Use high-quality furniture wax on wood trim.
- Blend a gloss-enhancing glazing medium for subtle shine.
- Add reflective decorative accents near the surface.
- Choose eco-friendly paints for touch-ups to keep finishes consistent.
These options save time and resources.
Cleaning and Maintenance by Sheen Level
How should you clean different paint sheens to keep them looking their best? You’ll tailor methods: flat needs gentle dusting, eggshell tolerates mild soap, satin and semi-gloss handle scrubbing with nonabrasive pads. Use eco friendly options like vinegar solutions or biodegradable cleaners to protect finishes and indoor air, noting historical paint trends favored higher gloss for hygiene.
| Sheen | Cleaning Frequency |
|---|---|
| Flat | Monthly dusting |
| Eggshell | Spot clean weekly |
| Satin/Semi-Gloss | Wipe monthly, scrub as needed |
Avoid harsh solvents; test cleaners in an inconspicuous spot first.
Touch-Up and Recoating Tips for Glossy Finishes
When you’re touching up glossy finishes, match sheen and color exactly and prep the area well so the patch blends invisibly. You’ll sand lightly, clean thoroughly, and feather edges so gloss won’t show haloes. Use Color matching swatches and test spots under the same light.
Match sheen and color precisely, prep and feather edges, and test in the same light for invisible glossy touch-ups.
If you need to adjust tint, do paint mixing in small batches and record ratios. Apply thin coats, allow full cure between layers, and polish only after paint fully hardens.
- Sand edges smooth
- Clean with degreaser
- Test sample in place
- Mix small batches
- Let cure completely
When to Repaint to Fix Sheen Problems
Because sheen issues can come from wear, wrong prep, or incompatible products, you’ll want to repaint only after diagnosing the cause and confirming that spot fixes won’t suffice. Inspect affected areas for scuffs, blistering, or cloudiness and test a small patch to see if sanding and a compatible topcoat restores uniformity.
Consider whether fading links to Color theory—light reflections alter perceived hue and gloss. Check paint storage history; expired or frozen cans can separate and change sheen.
Repaint when repairs fail, large areas show mismatch, or substrate damage exists. Use proper prep, primer, and matching sheen for durable results.
Cost Differences by Sheen and Why They Matter
Although sheen might seem like a purely aesthetic choice, it directly affects what you’ll pay. You’ll notice glossier finishes often cost more per gallon because they use higher resin content and require better surface prep. That affects labor, supplies, and long-term value—higher sheen cleans easier, lowering maintenance costs.
Consider resale and matching needs: color matching can be trickier across sheens, and leftover paint needs proper paint storage to stay usable.
- Flat: cheapest per gallon, hides imperfections
- Eggshell: moderate cost, good durability
- Satin: higher cost, easier cleaning
- Semi-gloss: pricier, very washable
- Gloss: most expensive, high shine
Quick Checklist for Picking the Right Latex Paint Sheen
If you want a quick, practical way to choose a sheen, start by listing each room’s traffic, light, and cleaning needs—then match those to sheen properties (flat hides flaws, satin and semi-gloss clean well, gloss shows every imperfection).
Check: high-traffic = satin/semi-gloss; low-traffic ceilings = flat. Note light levels: glossy finishes bounce light, revealing texture.
Consider cleaning frequency and durability before buying. Factor budget and historical trends in popular sheens, but don’t follow fads or celebrity endorsements alone.
Test samples on your wall, view in different light, then pick the sheen that fits function and look.
Frequently Asked Questions
Can Latex Paint Sheen Affect Indoor Air Quality or VOC Levels?
Yes — sheen can influence VOC emissions and indoor air safety: higher-sheen latex often contains more resins and VOCs, so you’ll want low-VOC or zero-VOC products, ventilation, and curing time to protect occupants.
Do Different Sheens Change Paint Drying and Curing Times?
About 60% of paint’s curing completes in 24–48 hours, and you’ll notice sheen durability affects drying pace: higher glosses dry faster on the surface due to lower porosity, increasing surface reflectivity while curing underneath slower.
Will Sheen Choice Impact Paint Color Fading Over Time?
Yes — your sheen choice can affect fading: higher gloss level reflects more UV and resists dirt, so it boosts sheen durability and slows color fade, while flatter sheens absorb light more and tend to show fading sooner.
Can You Mix Sheens in One Room Without It Looking Uneven?
Yes — 78% of homeowners who blend sheens report subtle differences you’ll barely notice if you use the same base color; sheen blending can preserve color consistency when you maintain lighting, application technique, and consistent sheen shifts.
Are Specialty Sheens Available for High-Humidity or Exterior Use?
Yes — you can get specialized finishes designed for high-humidity or exterior use. You’ll find humidity resistance coatings and specialized finishes that repel moisture, resist mold, and withstand weather, so your surfaces stay durable and attractive.
Conclusion
So, should you choose shiny latex? Start by spotting surface specifics: smooth, scrub-ready spaces suit glossy sheens; subtle, shaded spots need satin or eggshell to soften shine. Consider cleaning, touch-ups, and cost—gloss cleans easy but highlights flaws and costs more. For repainting, patch only what’s needed and match sheen exactly. Use this short, simple checklist to select the sheen that best balances style, shine, and sensible savings.