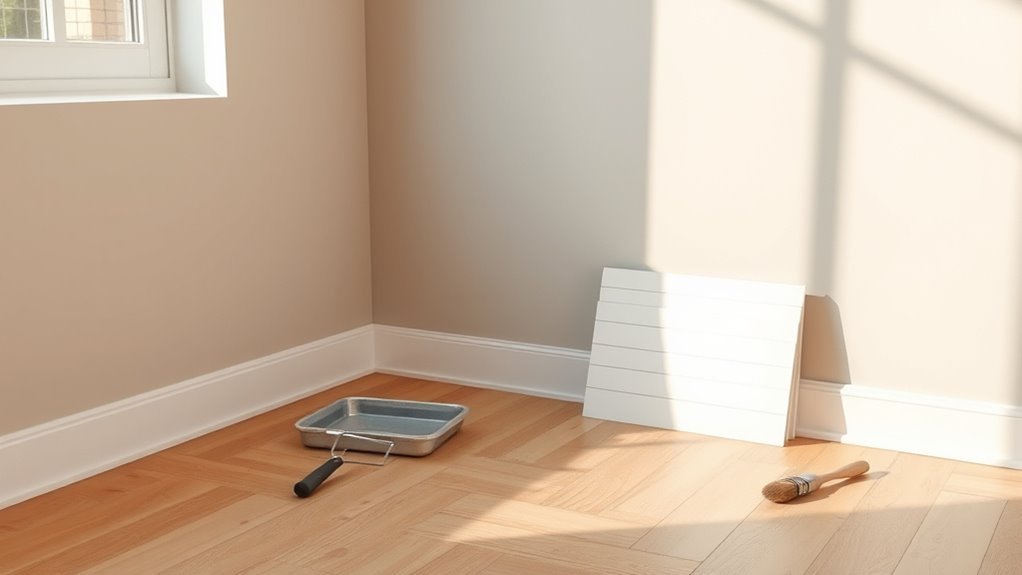
Should I Paint Walls Before Installing Baseboards?
You should usually paint walls before installing baseboards because it gives cleaner coverage, lets you roll right to the floorline, and makes touch-ups far easier without masking trim. Painting first speeds the job when walls are straightforward and helps avoid narrow gaps or paint on the baseboard finish. However, installing trim first can yield crisper edges and protect baseboards during other work. Keep these trade-offs in mind and keep going to learn which choice fits your project.
Quick Answer: Paint Walls First or Install Baseboards First?

Wondering which comes first? You’ll usually paint walls before installing baseboards — it’s cleaner, faster, and helps you master paint techniques without worrying about trim.
Painting first lets you roll smoothly to the floorline, touch up edges, and avoid fighting narrow gaps. After walls dry, you install baseboards and caulk seams for a crisp finish, choosing baseboard styles that suit your room without risking drips or scuffs during trim work.
If you prefer painted trim colors or need exact overlap, you can adjust approach, but as a general rule, paint walls first for efficiency and neater results.
How to Decide: 3 Questions That Determine the Order
Ask yourself three quick questions to decide whether you should paint the walls first: can you comfortably cut in around baseboard height and will you want to caulk after installation?
If you plan to cut in carefully and prefer a seamless edge, painting first usually makes sense.
But if caulking after installation fits your workflow, installing baseboards first can save touch-ups.
Paint Walls First?
How do you know whether to paint walls before installing baseboards? You’ll weigh wall preparation and wall finishes first: if walls need patching or sanding, paint first to avoid damaging trim.
Consider paint techniques — spraying or rolling — and how they interact with baseboard materials and trim styles; delicate millwork may be safer after walls dry.
Use DIY strategies and project planning to sequence tasks, accounting for room layout and access.
Choose tool selection that minimizes splatter around installed trim.
Finally, confirm color coordination so walls and baseboards match your vision; paint first when access and finishes demand it.
Cut-In And Caulking Plans
When you’re deciding whether to cut in paint before or after installing baseboards, focus on three quick questions that determine the best sequence:
will you need tight, paint-to-trim seams;
can you caulk after installation without trapping paint;
and do you prefer the look of paint over or paint under the trim?
Answering guides your cut-in techniques and caulking options.
If you want crisp edges and will accept touch-up trim paint, cut in first.
If you’ll rely on wide bead caulk to hide gaps, install then paint walls.
Consider paint type, trim profile, and your willingness to sand and retouch.
When Paint-First Clearly Wins
If you want the cleanest, fastest finish in rooms with simple trim and few obstacles, paint-first usually wins: you’ll appreciate workflow efficiency and easier paint application when project planning favors wall-first work.
You can protect floors and focus on paint techniques without wrestling with installed trim. Consider finish preferences and color coordination early so choices guide the job. Trim considerations remain minimal when baseboards go on after walls dry.
- Faster coverage, fewer interruptions
- Easier wall protection and cleanup
- Consistent color coordination across surfaces
- Simplified paint techniques for smooth results
When Trim-First Clearly Wins
There are times you’ll want to install baseboards before painting: rooms with intricate trim, tight corners, or lots of wall penetrations are easier to finish when the trim’s already in place.
You avoid tricky cut-ins near complex trim styles, seal gaps with caulk once, and prevent scuffs to freshly painted edges.
If your wall textures vary, baseboards help mask minor inconsistencies where wall meets floor.
Trim-first also suits fast turnovers: you can spray or roller the broad field without taping delicate profiles.
Choose this when precision around trim and practicality beat the pristine edge you get by painting first.
Painting Walls First : Quick Pros
Painting the walls before you install baseboards gives you the cleanest, most consistent finish because you can roll or spray large areas without worrying about masking trim edges.
You’ll simplify wall preparation, fix imperfections, and get even paint application across surfaces. That upfront work saves time and reduces touchups later.
- You can sand, prime, and patch freely without trimming around baseboards.
- Rollers and sprayers deliver uniform coverage faster.
- Fewer seams mean less chance of color mismatch.
- Touchups after baseboard fitting are minimal if you’ve done thorough wall preparation.
This approach favors speed, consistency, and professional-looking results.
Installing Baseboards First : Quick Pros
While it can feel counterintuitive, installing baseboards first lets you achieve crisp trim lines and saves time on touchups later—because the trim’s already in place, you can cut paint edges tight, caulk once, and avoid repeated masking. You’ll protect baseboard aesthetics by preventing drips on finished trim and hiding minor wall imperfections behind trim. Use proper installation techniques: nail, caulk, and seal before painting walls to guarantee smooth shifts. This approach reduces repainting of trim and concentrates wall touchups. It’s efficient for detailed rooms and keeps edges neat, so your finished room looks professionally done.
| Benefit | Impact |
|---|---|
| Crisp edges | Professional look |
| Fewer touchups | Time saved |
| Protected trim | Better aesthetics |
| Single caulking | Cleaner seams |
| Tight paint lines | Neat finish |
Which Option Saves Time on Large Projects
If you’re tackling a large project, the fastest choice usually depends on crew size and workflow: installing baseboards first speeds things up when painters and carpenters can work in parallel—carpenters fit and caulk trim while painters roll walls—whereas painting first can be quicker for small crews that prefer to finish wall coats uninterrupted and then add trim in one sweep.
You should weigh time saving techniques and project organization to decide. Consider:
- Parallel tasks reduce idle time.
- Staging materials limits downtime.
- Assign clear roles to crews.
- Schedule drying and caulking windows.
Choose the flow that minimizes handoffs.
Which Option Reduces Touch-Ups for DIYers
If you want to minimize touch-ups, think through three approaches: paint the walls first, install baseboards and then paint, or paint just the wall edges before installing.
Painting the whole wall first usually means fewer bleed-through fixes around trim, but installing first and painting afterward can be cleaner if you’re careful with caulking and masking.
Painting edges only is a middle ground that saves time but may require more spot corrections later.
Paint First, Then Baseboards
Because you’ll usually get cleaner wall coverage and fewer touch-ups, most DIYers should paint walls before installing baseboards. You’ll benefit from better paint coverage across edges and avoid masking every trim profile.
With smart project planning you’ll manage color coordination and finish durability while protecting adjacent surfaces.
- Prioritize wall protection and tool selection to reduce drips.
- Paint first lets you achieve consistent paint coverage to the floor line.
- Trim alignment is easier when baseboards are fitted to a finished wall.
- Texture matching is simpler; you can feather wall texture into trim seams.
This approach minimizes touch-ups and speeds final cleanup.
Install First, Then Paint
When you install baseboards before painting, you’ll often reduce the number of touch-ups because caulking and gaps get addressed up front and paint can be rolled or brushed straight to the trim line, leaving fewer exposed seams to fix later. You’ll finish with cleaner edges, fewer paint drips on trim, and simplified trim maintenance. During paint application you can focus on wall coverage without masking every baseboard. That said, measure and caulk carefully so you don’t create more sanding. Quick table for comparison:
| Step | Benefit | DIY Tip |
|---|---|---|
| Install first | Fewer seams | Caulk before paint |
| Paint walls | Faster rolls | Use angled brush |
| Touch-ups | Minimal | Keep spare paint |
Paint Edges Only Before
You can blend the two approaches by painting just the wall edges before installing baseboards, which often gives DIYers the best balance of speed and fewer touch-ups.
You’ll cut masking time and protect visible seams while leaving bulk wall painting for after trim. Use careful painting techniques around corners and doorways to avoid overlap.
After baseboards go up, you’ll only need small fills and caulking touch-ups rather than repainting large areas.
- Cut in a crisp line with a steady hand
- Use painter’s tape sparingly for edge protection
- Leave wall centers for rollers later
- Touch up after caulk sets
Practical Touch-Up Techniques for DIYers
A few smart touch-up techniques will save you time and make your baseboards look professionally finished.
When matching paint, focus on color selection by testing small swatches near baseboards and viewing them in different light.
Use angled sash brushes for tight corners and short, controlled brush strokes for smooth coverage. Keep a damp cloth handy to remove wet drips immediately.
For gaps or nicks, apply thin coats, sanding lightly between layers once dry.
Use painter’s tape sparingly to protect flooring, removing it while paint is tacky to avoid peeling.
Inspect under varied light and fix imperfections promptly.
When Professional Painters Prefer Painting First
If pros choose to paint walls before installing baseboards, it’s usually to guarantee a cleaner edge and faster workflow: painting first lets them roll large areas without worrying about trim protection, speed up drying time, and then install baseboards flush to the freshly painted surface for a seamless look.
You’ll notice painter preferences favor this when wall preparation is straightforward and project efficiency matters. They pick paint technique and finish type to suit the room, coordinate color selection with trim styles, and protect floors rather than trim.
Consider pros’ approach when you value speed and a crisp final result.
When speed and a crisp finish matter, follow the pros’ approach for cleaner, faster results.
- project efficiency
- paint technique
- surface protection
- finish type
When Trim Installers Prefer Installing Baseboards First
If you’re working with a trim installer, they’ll often put baseboards up first to protect delicate wall edges during the rest of the job.
That approach can speed up the timeline since installers can measure, cut, and fit without waiting for multiple paint coats to dry.
It also makes touch-ups simpler—painters can focus on clean edges and spot-correct rather than repainting entire sections.
Protecting Wall Edges
When trim installers choose to fit baseboards before painting, you’ll need to protect the exposed wall edges to prevent drips, scuffs, and uneven paint lines during the rest of the job.
You’ll use wall edge protection and trim masking to create crisp boundaries and keep the new trim clean. Apply low-tack painter’s tape tightly along seams, cover the baseboard face with paper or plastic, and shield corners where tools might nick the wall.
Check tape adhesion as work progresses and replace any compromised sections immediately to avoid bleed-through or damage.
- low-tack painter’s tape
- protective paper/plastic
- corner guards
- regular inspections
Jobsite Time Efficiency
Because installers often juggle multiple rooms and trades, fitting baseboards first can cut overall job time by reducing touch-ups and coordination delays.
You’ll streamline jobsite organization by staging materials and scheduling carpentry before painting teams arrive. That sequencing keeps painters from waiting on trim and prevents repeated masking or re-masking.
With clear workflow strategies, crews move predictably: measure, cut, install, then hand off for painting or caulking.
You’ll minimize crew overlap, reduce inspection callbacks, and keep progress inspections efficient.
When time is tight, prioritizing baseboards lets you control sequencing, avoid rework, and finish faster without sacrificing quality.
Paint Touch-Up Ease
Installers often put baseboards in first because it makes paint touch-ups faster and neater: once trim is nailed and caulked, you can spot-prime gaps and feather the final coat directly against a defined edge, avoiding broad repainting of entire walls.
You’ll appreciate faster paint application and improved paint durability when you work from a solid trim line. Consider how wall preparation and baseboard compatibility affect outcomes; trim styles influence finish options and color layering.
Use the defined edge for edge protection and texture blending to hide minor imperfections.
- Easier spot-priming
- Controlled color layering
- Cleaner texture blending
- Better edge protection
How Wall Condition, Gaps, and Dust Affect the Choice
If your walls are uneven, have gaps where the baseboard will sit, or are dusty from sanding and drywall work, you’ll want to address those issues before deciding whether to paint first or after.
Do a surface inspection to spot wall imperfections and perform wall preparation: fill gaps, sand high spots, and prime patched areas.
Good dust management preserves paint adhesion and prevents finish blemishes.
Assess gap assessment to determine if caulking after installation is viable or if painting first yields better finish consistency.
Consider installation challenges—fixing major flaws now saves touch-ups and reduces repainting later.
How Trim Type Changes the Workflow
What kind of trim you choose will change how you prep, paint, and install.
Flat baseboards are quick to caulk and often let you paint walls first, while profiled trim and decorative moldings usually need more touch-ups and may be easier to finish after installation.
Also consider material—paintable MDF sands and accepts primer differently than PVC, which you’ll often install unpainted or use special primers.
Flat Baseboard vs. Profiled
When you’re choosing between flat and profiled baseboards, the decision affects more than looks—it changes how you prep, paint, and fit the trim.
You’ll find flat baseboard benefits include easier cutting, simpler caulking, and faster wall-first painting. Profiled trim advantages show up in masking, touchups, and fitting around corners, often pushing you to install before final wall coats.
Consider these workflow impacts:
- Flat: quicker wall painting, minimal taping, simple joints.
- Profiled: more delicate taping, detailed touchups, careful sanding.
- Flat: forgiving for DIY painters and fast schedules.
- Profiled: suits finished rooms and high-detail installs.
Paintable MDF vs. PVC
Choosing between flat and profiled baseboards naturally leads to another important decision: the material of the trim—paintable MDF or PVC—because it changes how you cut, seal, and finish the job.
You’ll choose paintable MDF when you want crisp edges, smooth priming, and lower cost; paintable MDF benefits include easy tooling and a flawless painted surface, but it swells with water and needs sealed joints.
PVC durability wins for wet areas, outdoor trim, or high-traffic rooms; it resists moisture and dents, requires different blades, and uses plastic-friendly adhesive.
Match material to environment to streamline installation and finishing.
Decorative Moldings Workflow
Different trim profiles change the whole painting and installation flow, so plan your sequence around the molding you pick.
You’ll choose molding varieties and material choices that suit design aesthetics, then decide whether to paint walls first or after install based on trimming options and installation techniques.
Complex decorative styles or layered moldings often need walls painted first with touch-up later; simple profiles let you install then paint.
Consider finishing touches like caulking and color coordination to blend seams and connections.
- Layered profiles need wall-first painting
- Simple trim allows post-install paint
- MDF vs. PVC alters prep
- Caulk and touch-up finalize appearance
How Flooring Choice Influences Sequence
If you’re installing hardwood, engineered wood, or luxury vinyl plank, you’ll likely want to fit baseboards after the flooring so you can cover expansion gaps and achieve a cleaner sightline.
Tile or poured floors, however, often work better with baseboards in place first because grout and leveling can complicate later trim work.
Consider flooring types and installation timing: when floors need movement space, paint walls before baseboards and install trim after flooring.
For rigid, wet-set surfaces, set baseboards early to protect edges and simplify grouting.
Plan sequencing with your installer so paint, trim, and floor trades don’t conflict.
How Paint Sheen Affects Cutting-In and Scuff Risk
When you’re cutting in around baseboards, your choice of sheen matters: matte and eggshell hide brush marks but are less washable, while satin and semi-gloss show sharper edges and clean easier.
You’ll notice satin and semi-gloss resist scuffs and wipe clean, but they also make any cutting mistakes more obvious.
Consider the room’s traffic and your confidence with a steady brush when picking a sheen before installation.
Matte vs. Eggshell
Matte and eggshell finishes behave differently during cutting-in and after baseboards go in, so you’ll want to choose based on how tidy you want edges and how much scuff resistance you need.
A matte finish hides flaws and offers subtle color blending with low light reflection, boosting aesthetic appeal in casual rooms. An eggshell finish has slightly more sheen, improving surface durability and easier cleaning while showing edges more crisply.
For practical decisions consider:
- Matte finish: conceals imperfections, softens transitions
- Eggshell finish: better scuff resistance, cleaner cuts
- Sheen comparison: tradeoff between concealment and durability
- Style choices: match room function and look
Satin And Semi-Gloss
Because satin and semi-gloss reflect more light and clean up better, you’ll notice sharper-cut edges when cutting in and fewer worries about scuffs near baseboards. You should choose satin finish for subtle sheen and semi gloss durability where washability matters. Focus on surface preparation to get crisp lines, and use proper brushes for trim aesthetics and color coordination. Consider wall protection during install and follow maintenance tips for longevity. Below is a quick sheen comparison table to guide choices.
| Sheen | Best Use | Care |
|---|---|---|
| Satin | Living rooms | Gentle wash |
| Semi-gloss | Kitchens/bath | Tougher clean |
Sheen Impact On Scuffing
You’ve already picked a sheen for its look and cleanability, and that choice also shapes how forgiving your walls will be during cutting-in and everyday contact.
When you consider sheen effects, finish types change scuff resistance and paint durability; higher sheens resist marks and simplify maintenance ease, while flatter options hide imperfections but need careful surface preparation.
Match color choices and aesthetic considerations to expected traffic and wall protection needs. Think long term benefits: easier touch-ups versus visible wear.
Quick checklist:
- High sheen: easy cleaning, more visible flaws
- Eggshell/satin: balanced durability, subtle sheen
- Matte: conceals texture, lower scuff resistance
- Prep: essential for lasting results
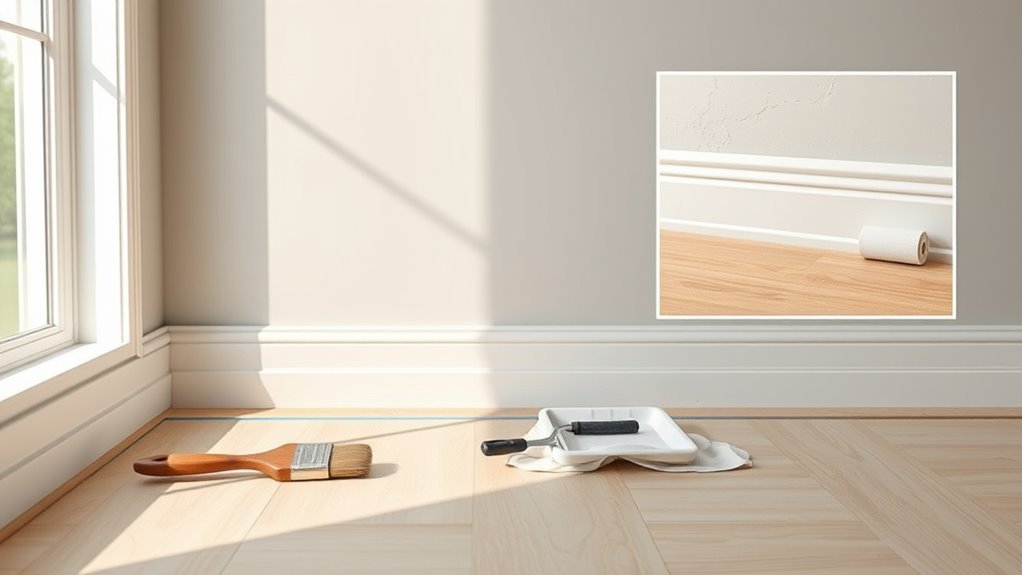
Tools for Painting Walls Before Installing Baseboards
Before you start, gather a compact set of reliable tools that’ll make painting walls easier and keep edges clean when you add baseboards later: a quality roller and angled brushes for precise application techniques, drop cloths and painter’s tape for surface protection, and a sanding block plus patching kit for wall preparation.
Include trim tools like a 2.5-inch sash brush for cut-ins and an edger for straight lines. Choose paint types suited to rooms—washable satin for durability—and keep DIY essentials handy: a sturdy ladder, tray, extension pole, and rags.
Follow workflow tips: prep, cut in, roll, inspect, touch up.
Tools for Installing Baseboards Before Painting Walls
Having the right painting gear makes clean edges easier, but installing baseboards first calls for a different, more carpentry-focused kit.
You’ll want a tools checklist that emphasizes essential equipment and measuring tools for precise trim alignment. Prioritize workspace organization and safety gear, and include items for surface preparation and finishing touches. Keep paint application in mind so you don’t trap dust.
- Miter saw, coping saw, and measuring tools for accurate cuts
- Finish nailer, hammer, and adhesive for secure installation techniques
- Sandpaper, caulk, and filler for surface prep and finishing touches
- Drop cloths, goggles, and masks for safety gear
Step-by-Step: Paint Walls Before Installing Baseboards
Start by prepping your walls—clean, patch, and sand so paint adheres smoothly.
Then cut in precise edges along the floor and corners before rolling the main sections.
After the baseboards are installed, do any touch-up painting to cover gaps or scuffs.
Prep Walls First
Once you’ve cleared the room and protected floors and fixtures, prep the walls by filling holes, sanding rough spots, and wiping away dust so the paint adheres evenly and looks professional.
You’ll focus on wall preparation and surface cleaning to improve adhesion factors and assess wall texture for your paint technique. Consider trim compatibility and baseboard types to plan edge protection and installation clearances.
Good workflow efficiency comes from staged project planning:
- Inspect and patch: hairline cracks, anchor holes
- Sand and smooth: match texture for consistent finish
- Clean thoroughly: remove grease and dust
- Protect edges: tape or shields for future baseboards
Cut-In Paint Edges
Because clean, crisp edges make the whole room look finished, you’ll cut in the paint along ceilings, corners, and where the baseboards will go before rolling the main wall areas.
Use reliable cut in techniques and a steady hand or angled brush to guarantee edge precision.
Focused wall preparation—clean, sand, and prime—helps paint alignment and prevents bleed.
Work in manageable sections, blending brushed edges into rolled areas to preserve trim aesthetics.
Maintain a consistent painting strategy and pace for workflow efficiency.
Keep a damp rag and small bucket nearby for finishing details and immediate cleanup of stray marks.
Paint Touch-Up After
After the walls are painted and the baseboards are set, you’ll inspect and touch up any drips, missed spots, or scuffs to guarantee a seamless finish.
Start with good wall preparation: clean dust, sand rough spots, and spot-prime bare areas. Use small brushes and a steady hand to blend new paint into existing coats.
- Match sheen and color before touching up.
- Feather edges with light strokes to avoid obvious patches.
- Keep a damp cloth handy to remove wet mistakes.
- Let repaired areas dry fully, then reassess for uniformity.
These touch up techniques help the room look professionally finished.
Step-by-Step: Install Baseboards Before Painting Walls
If you’re installing baseboards before painting, follow a clear step-by-step approach to get tight joints, clean edges, and minimal touch-ups later.
First, measure and cut boards precisely, accounting for inside and outside corners. Dry-fit pieces to confirm gaps and miters.
Measure and cut precisely, accounting for inside and outside corners, and dry-fit pieces to check gaps and miters.
Nail or screw baseboards to studs, countersink fasteners, and fill holes with wood filler. Caulk seams between boards and wall for a seamless look.
Sand filled areas smooth. Prime baseboards if needed.
When you paint walls, use steady strokes up to the caulk line, then finish baseboard trim for a professional result.
Masking Baseboards When Painting Walls First
Want crisp wall-to-baseboard lines without touching the trim? You’ll rely on precise masking techniques and paint protection to keep baseboards pristine.
Prep by cleaning and lightly sanding the top edge, then apply low-tack painter’s tape firmly along the trim. Use thin paper or plastic to cover the face if needed.
Work in short passes with a brush or roller, removing tape while paint is tacky to avoid peeling.
- Choose quality low-tack tape
- Press edges with a putty knife
- Replace tape if paint bleeds
- Keep supplies within reach
These steps save touch-ups and time.
Protecting Freshly Painted Walls During Trim Installation
When you’re installing baseboards against freshly painted walls, take simple protective steps to avoid scuffs, drips, and dents that can undo your work.
Start by letting paint cure per manufacturer instructions, then use soft felt or foam pads on tool edges and the back of the baseboard to prevent gouges.
Lay down a low-tack painter’s tape along the wall edge and secure a drop cloth at the floor to catch caulk or paint drips.
Work with a helper to steady long trim pieces, use clamps instead of hammering near the wall, and follow practical wall protection strategies and trim installation tips.
Cutting a Clean Paint Line With Baseboards Installed
You can choose tape or freehand depending on your skill and patience, but tape gives a predictable edge while freehand with a steady brush is faster.
When cutting paint lines against installed baseboards, use a sash brush and steady pressure to keep the line sharp.
If you get paint on the trim, let it dry and carefully touch up with a small brush or use a razor to lift fresh mistakes before repainting.
Tape Or No Tape
Curious whether to tape off baseboards or paint right up to them? You’ll weigh tape techniques against freehand painting based on trim styles, paint types, and adhesion concerns.
Tape gives surface protection and consistent edge finishes; wrong tape risks paint bleed. Freehand suits experienced hands and certain application methods. Consider durability, cleanup, and time.
- Use low-tack tape for delicate surfaces to prevent damage.
- Test adhesion concerns on scrap before long runs.
- Match paint types and drying times to reduce paint bleed.
- Choose method by trim styles and desired edge finishes for best results.
Cutting Paint Lines
Anyone can get a crisp paint line even with baseboards in place by using the right tools and steady technique.
You’ll want a high-quality angled brush, a steady hand, and painter’s tape sparingly for tricky spots. Press tape against the top edge of the baseboard when needed, then cut a straight line with the brush tip, keeping strokes light and consistent.
Use slow, controlled passes and reload the brush rather than forcing paint. For varied baseboard finishes, test on scrap to match sheen and avoid bleed.
These paint line techniques help you achieve a neat junction without repainting.
Touchup Techniques
When baseboards are already installed, touchups demand a steady hand and the right tools to cut a clean paint line without sanding or repainting the trim.
You’ll focus on wall preparation, selecting touch up tools matched to paint finishes, and protecting trim for scuff prevention. Use a slim brush for gaps and a micro-roller for even coverage. Tidy gaps with gap filling caulk where needed, keeping trim styles in mind.
- Use edge protection tape for crisp lines.
- Stage tools for workflow efficiency.
- Keep job site organization simple.
- Apply DIY strategies for consistent results.
Caulking and Gap-Filling After Painting-First Installations
After you’ve painted and installed the baseboards, you’ll need to caulk and fill gaps to create a seamless, finished look; this step fixes any small shrinkage, nail holes, or uneven seams that painting first can reveal.
You’ll prep surfaces—clean dust, scuff paint where needed—for proper wall preparation and paint adhesion.
Use quality caulking techniques: smooth beads, tool before skin, and pick paintable latex caulk.
Apply gap filling strategies for larger voids—backer rod then sealant.
After curing, lightly sand filled spots and touch up paint for trim finishing.
Inspect joints and re-caulk if any shrinkage appears.
Caulking and Finishing When Trim Is Installed First
If you install trim before painting, you’ll focus your caulking and finishing on sealing visible joints and protecting the edges from touch-up mess; you’ll also adapt to different trim styles and wall textures.
You’ll use specific caulking techniques to hide gaps from varied installation methods and match small imperfections to the surrounding surface. For finishing touches, plan careful sanding, primer spots, and selective paint types for durability.
Remember to protect flooring and furniture, and work in stages:
Protect floors and furniture, and tackle trim work in stages for cleaner, safer, and more controlled results
- Choose flexible caulk for movement
- Smooth beads to match trim profiles
- Feather edges into wall texture
- Inspect joints after paint cures
Best Paint Colors and Sheens for Walls and Baseboards
Curious which paint choices will make your walls and baseboards look cohesive and stand up to wear? You’ll pick color combinations that balance trend palettes with timeless neutrals, using accent colors to highlight trim or create focal walls.
Match finish options to function: washable satin on walls where traffic is high, semi-gloss or gloss on baseboard styles for durability and easy cleaning.
Consider wall textures—flat hides imperfections, eggshell adds subtle depth. Choose sheen levels consistently so shifts read intentional.
Think about room moods when pairing tones and trim, testing samples under real light before committing to a final scheme.
Sanding and Touch-Up Workflow After Baseboard Installation
After the baseboards are up, you’ll sand seams and gaps smooth so caulk and filler blend with the wall and trim.
Wipe away dust, then follow a paint touch-up sequence: prime repaired spots, feather wall paint into the edge, and finish with trim paint.
This order keeps repairs invisible and saves you from redoing sections later.
Sanding Seams And Gaps
Start by sanding all seams and gaps to create a smooth, even junction between the baseboard and wall. You’ll use sanding techniques to feather edges and remove excess caulk or dried filler so paint will sit properly.
After sanding, inspect for voids and apply appropriate gap filling—caulk for small seams, wood filler for larger defects. Sand again lightly when dry.
- Use fine-grit sandpaper for final smoothing.
- Keep sanding motion along the seam, not across the wall.
- Wipe dust with a damp cloth before priming.
- Check joints under different light angles for missed spots.
Paint Touch-Up Sequence
When the baseboards are installed and you’ve finished sanding seams, plan a focused sanding-and-touch-up sequence so paint blends seamlessly and edges stay crisp. You’ll work from inspection to sanding, filling, priming, and final coats in short, repeatable steps to minimize rework.
Inspect joints and wall preparation for dust, nail holes, or paint scuffs. Lightly sand high spots, vacuum, and tack cloth before filling gaps with caulk or lightweight spackle.
Prime patched areas to seal and match the surrounding paint finish. Feather new paint into edges with a small brush or roller, allow proper cure, then recheck and spot-correct as needed.
Avoiding Paint Drips and Scuffs During Trim Work
One simple way to prevent paint drips and scuffs while working on trim is to set up clear protection and plan your sequence, so you’re always painting from the wall toward the trim and wiping up errors immediately.
Focus on wall prep and edge sealing before you start; good project planning improves workflow efficiency and finish consistency.
Choose correct tool selection and painting techniques to minimize runs.
Follow these quick steps:
- Apply trim protection tape and drop cloths for scuff prevention.
- Seal edges where wall meets trim.
- Use angled brushes for controlled strokes.
- Clean drips immediately to protect the finish.
Managing Corners, Doorways, and Inside Reveals
When you’re handling corners and inside reveals, it’s usually best to paint the walls first so you get full coverage without fighting trim edges.
For doorways and tight openings you might install the baseboards or jamb trim first to guarantee a clean fit and then touch up paint afterward.
Plan each area so you know where to cut, caulk, and touch up to keep seams invisible.
Paint Before Trimming
If you decide to paint before installing baseboards, you’ll want a clear plan for managing corners, doorways, and inside reveals so paint lines stay crisp and trim fits snugly.
Start with wall preparation and surface protection: patch, sand, and use drop cloths. Time paint drying before installing to avoid smudges.
Focus on color coordination and finish durability so trim complements walls. Choose tool selection for clean edges and workflow efficiency—angled brush, edger, and quality rollers.
Keep trim maintenance in mind; masking allows easy touch-ups later.
- Plan seams at corners
- Mask door reveals
- Protect flooring
- Inspect dry finish
Trim First At Doorways
Although painting walls first can work, trim-first at doorways gives you tighter seams and easier reveal handling: install and caulk the baseboards and door casings before rolling paint so you can butt paint to the trim, control overlap at corners, and rout any uneven reveals without worrying about fresh wall finish.
You’ll manage doorway details precisely, aligning jambs and casing so paint lines stay clean. Work corner trim and inside reveals first to set consistent trim changes, then touch up walls for a crisp edge.
This approach reduces sanding mess, hides minor gaps, and speeds final cleanup.
Dealing With Uneven Walls, Nonplumb Surfaces, and Gaps
Because walls rarely sit perfectly plumb, you’ll need practical strategies to hide unevenness and seal gaps before or after baseboard installation. Assess gaps, plan wall leveling and surface preparation, and balance trim compatibility with aesthetic considerations.
Decide workflow optimization and project planning: whether to skim, scribe, or caulk based on gap size and substrate.
- Measure and document gap assessment for each wall section.
- Choose skim coat or scribing for large deviations; caulk for hairline gaps.
- Manage dust management by containing and cleaning before painting or fitting trim.
- Test fit trim to confirm trim compatibility and final appearance before finishing.
Handling Baseboards When Wallpaper Exists
If you’ve got wallpaper, you’ll need to decide whether to paint the wall before fitting the baseboard or install the trim first to protect the paper.
Consider sealing or trimming the wallpaper edges so they don’t lift when you caulk or paint.
You’ll also want to test how adhesives and caulk interact with the paper to avoid staining or peeling.
Paint Or Baseboard First?
Wondering whether to paint or install baseboards first when you have wallpaper? You’ll usually paint first to guarantee paint protection and cleaner edges, but specifics depend on your situation.
Consider these points to decide:
- Paint first for better workflow efficiency and to avoid shoeing paint under newly installed trim.
- Install first if baseboards must cover damaged wallpaper or you’re matching stained trim.
- When painting first, mask carefully at the floor to protect wallpaper and baseboard recesses.
- If installing first, plan for touch-ups and use caulk to seal seams where paint can’t reach.
Choose based on damage, finish, and time constraints.
Dealing With Wallpaper Edges
When you have wallpaper meeting your baseboards, plan the edge treatment before you install or paint so you get a clean, durable junction; decide whether to trim the paper back, tuck it behind the molding, or butt it against a caulked seam based on the wallpaper’s condition and the baseboard profile. You’ll assess wallpaper removal need, adhesive considerations, and texture matching. Trim if edges are frayed, tuck if seams are tight, or butt and rely on edge sealing for a neat line. Keep design continuity in mind so baseboards complement the paper.
| Option | Best use | Result |
|---|---|---|
| Trim | Damaged edges | Clean line |
| Tuck | Intact seams | Seamless look |
| Butt + Caulk | Thick paper | Sealed joint |
| Remove | Poor adhesion | Fresh start |
Installing Trim Around Built-Ins, Cabinets, and Radiators
Because built-ins, cabinets, and radiators sit close to walls and have irregular edges, you’ll need a different approach to fitting trim than you use on plain drywall.
You’ll plan trim to match built-in installation tolerances and allow access for radiator trim maintenance. Measure and mock up before cutting; paint decisions affect caulking visibility.
Use flexible or quarter-round profiles where gaps vary, and leave removable sections near service panels. Consider painting walls first when tight, so touch-ups are easier than sanding around installed trim.
Choose flexible or quarter-round trim for irregular gaps, and leave removable sections near service panels; paint walls first if access is tight.
- Template and scribe for fit
- Paint before or after per access
- Use flexible molding
- Leave removable panels
Budget Trade-Offs: Materials, Labor, and Rework Risk
After you decide whether to paint walls before or after installing trim, you’ll need to weigh the budget impacts of that choice along with material and labor options.
You’ll compare budget materials—paint quality, primer, caulk—against labor costs for painters versus carpenters.
Consider rework implications: touch-ups after baseboard installation add hidden expense.
Use project timelines to sequence tasks and guide resource allocation, then run a cost benefit analysis to decide if prepping now saves later.
Track efficiency metrics like hours per room and waste rates to inform financial considerations, reducing surprises and keeping the renovation within your planned spend.
Time Comparison: Typical Project Schedules
If you’re trying to schedule a room renovation, compare typical timelines for painting before versus after baseboard installation so you can spot bottlenecks and allocate crews efficiently.
You’ll weigh project duration and the risk of scheduling conflicts. Painting first often shortens total time by letting walls dry while trim is installed, but it needs protection for fresh paint.
Weigh duration versus scheduling risk: paint first to save time but protect fresh walls during trim work.
Painting after prevents touch-up work at trim seams but may extend on-site labor and cause overlap between painters and carpenters.
- Paint-first: faster overall, needs masking
- Trim-first: cleaner edges, longer crew overlap
- Drying times set pace
- Buffer days reduce scheduling conflicts
When to Choose Paint-First for Rental Turnovers
When you’re turning over a rental, faster isn’t always better—prioritize paint-first when you need to minimize tenant downtime, handle multiple units at once, or want walls fully cured before trim work that could scuff fresh paint.
You’ll cut rework by painting walls in bulk, which supports a clear rental strategy and lets crews move systematically between units.
Painting ahead lets caulking and touch-ups cure while installers fit baseboards later, reducing callbacks.
If tenants expect quick move-ins or you’re juggling staggered schedules, paint-first boosts turnover efficiency and preserves finish quality without extending vacancy more than necessary.
When to Choose Trim-First for New Construction
Although painting first works for many projects, you should choose trim-first in new construction when drywall and final traffic are still unpredictable. This is because installing baseboards early protects corners, helps establish consistent reveal lines, and lets painters follow a clean edge without constant taping.
You’ll benefit when construction timelines are fluid and you want durable protection and clear visual guides. Install trim early if you need consistent sightlines, want to lock in trim materials choices, or must protect walls during heavy work.
Consider these practical advantages:
- protects corners from trades
- defines consistent reveal lines
- speeds finishing by guiding painters
- accommodates varied trim materials choices
When to Hire a Pro vs. DIY for Each Sequence
Curious whether you should tackle walls-first or trim-first yourself or call in a pro? Assess your DIY experience honestly: if you’re confident with cutting, caulking, and touch-ups, walls-first can save time and simplify material choices.
Curious whether to paint walls or trim first? Be honest about your skills—DIY for simple rooms, pros for complex jobs.
For complex layouts, ornate baseboards, or high-end finishes, follow pro recommendations—they speed work and reduce errors.
Do a cost analysis: labor vs. potential rework and tool purchases. Consider time considerations—DIY extends timelines; pros finish faster.
Match decisions to project scope: small rooms suit DIY, whole-house jobs or tricky substrates need pros. Plan materials ahead to avoid delays.
Common Mistakes That Force Rework (And How to Avoid Them)
If you skip careful measuring, cutting, or sealing, you’ll almost certainly face frustrating rework that adds time and cost to the job.
You’ll meet installation challenges and rework risks if you ignore material compatibility or rush preparation steps. Good project planning and task prioritization improve workflow efficiency and protect finish quality.
Consider decision factors and budget considerations before changing sequence.
- Measure twice; cut once to avoid gaps and re-cuts.
- Test paint on trim to confirm material compatibility and finish quality.
- Prep surfaces thoroughly to reduce sanding and patching rework.
- Sequence tasks with project planning to boost workflow efficiency.
Start Checklist: What to Do First on Your Paint-and-Trim Job
Before you touch paint or trim, make a concise start checklist so you’re not improvising once tools are out; confirm measurements, inspect walls and trim for damage, gather materials and fasteners, and set up dust and drop protection.
Next, map your workflow: decide whether to paint walls first or after baseboards based on access and finish.
Plan your workflow: choose whether to paint walls before or after baseboards for best access and finish.
Prioritize wall preparation—patch, sand, and prime—to guarantee paint adhesion and smooth seams.
Label trims and hardware locations, test paint color in small areas, and verify caulk compatibility for joints.
Keep tools charged, fasteners organized, and ventilation planned to preserve paint durability and speed.
Frequently Asked Questions
Can I Install Baseboard Heating Covers Before Painting?
Yes — you can install baseboard heating covers before painting, but you’ll risk paint adhesion problems and harder touch-ups; during baseboard installation protect covers, plan cut-ins, and expect to mask or repaint edges for a cleaner finished look.
Should Electrical Outlets Be Changed Before Painting or After Trim?
Think of outlets as anchors; you should change them before painting so outlet accessibility stays clear. You’ll avoid mess, use better painting techniques, and you can reinstall trim afterward, keeping finishes tidy and aligned.
How Do Pets Affect Timing and Protection During Paint/Trim Work?
You should delay work until pets are calm and confined; their behavior can spread hair and track dirt. Use pet safe paints, seal fumes, apply surface protection, follow cleaning tips, and schedule trim installation when pets are away.
Do Humidity or Seasonal Weather Impact Sequence Choice?
Yes — humidity effects and seasonal considerations matter: if air’s damp or winter’s cold slows drying, wait or adjust sequence; if dry and warm, you’ll paint sooner. Plan timing to avoid tacky finishes and gaps.
Will Painting-First Affect Warranty on Prefinished Baseboards?
Generally no — painting first usually won’t void warranty implications on prefinished baseboards, but you should check the manufacturer. If paint adhesion affects edges, they might require installation before touching trim, so confirm specs.
Conclusion
Pick the order that fits your project and budget, then stick to it. I once painted a room before installing baseboards and saved an afternoon—cutting in was faster, and touch-ups were minimal; studies show painters finish 20–30% quicker when walls are prepped without trim in the way. If you’re tight on time or want cleaner trim lines, install first. Either way, prep well, protect surfaces, and plan touch-ups so the final room looks professional.