What Can I Use to Clean Flat Paint Walls? Guide
You can safely clean flat-painted walls with gentle, nonabrasive methods: start by dusting or vacuuming, then spot-test a hidden area. Use a soft microfiber cloth or sponge with warm water and a few drops of dish soap, working top to bottom in small circular motions. For tougher marks try a tested melamine sponge or rubbing alcohol for ink; rinse and blot dry. Avoid strong solvents and excessive scrubbing, and keep going to learn specific stain fixes and tips.
How to Clean Flat-Painted Walls: Quick Plan
Start with a quick plan so you don’t damage the finish: test a small, inconspicuous spot, gather soft cloths, a mild cleaner (dish soap diluted in water) and a bucket, and move from top to bottom to avoid streaks.
You’ll assess spots, grease, and scuffs before choosing tools.
For regular Wall Maintenance, dust or vacuum weekly, spot-clean stains promptly, and avoid abrasive pads.
Set Cleaning Frequency by traffic and room type—high-traffic areas need monthly attention; low-traffic rooms can wait quarterly.
Work gently, rinse with clear water, blot dry, and retest stronger methods only if the paint holds up.
Quick Answer: Safest Ways to Clean Flat Paint Walls
Now that you’ve planned and tested, here’s the quickest safe approach: start with a dry dusting or soft brush to remove loose dirt.
Use a damp microfiber cloth and mild dish soap mixed with warm water for spots, rinsing frequently. Work gently in circular motions from bottom up to avoid streaks.
Dampen a microfiber cloth with mild soapy water, clean spots gently in circular motions, rinsing and working bottom to top.
For tougher marks, try a melamine sponge lightly, testing first. Choose eco-friendly options like plant-based cleaners or diluted vinegar for safe stain lifting.
Keep cleaning frequency low—spot-clean as needed and deep-clean sparingly—to protect flat paint and preserve finish without overworking the surface.
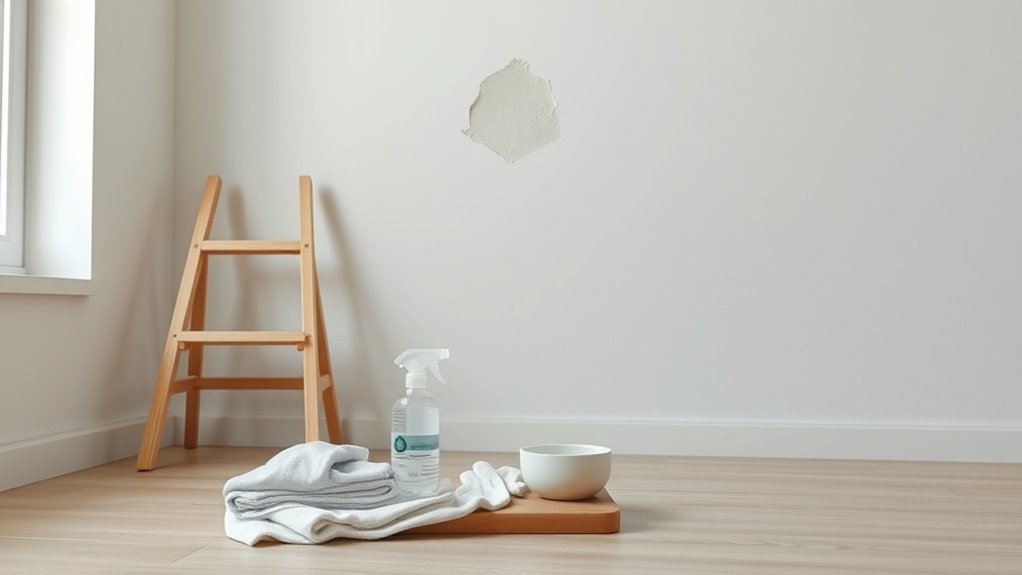
Gather Supplies Before You Start
Before you clean, gather the essential tools like soft sponges, microfiber cloths, a gentle cleaner, and a bucket.
Pick protective gear—gloves and goggles if you’re using any cleaners, and old clothes you don’t mind staining.
Having the right supplies ready will make the job quicker and safer.
Essential Cleaning Tools
Gather the right tools so you can clean flat paint walls efficiently and without damage: a soft microfiber cloth or sponge, a bucket of warm water, a mild dish soap or pH-neutral cleaner, a soft-bristled brush for scuffs, and a dry towel for blotting. You’ll pair these with gentle cleaning techniques and regular wall maintenance to avoid wear. Use the table below to match task, tool, and outcome.
| Task | Tool | Outcome |
|---|---|---|
| Dusting | Microfiber cloth | No abrasion |
| Spot cleaning | Sponge + soap | Stain removal |
| Scuff removal | Soft brush | Restored finish |
Keep tools clean and replace when worn.
Protective Gear Selection
While you prepare your cleaning supplies, pick simple protective gear that shields your skin, eyes, and clothes from dirt and cleaning solutions.
You’ll want durable gloves selection—nitrile or rubber work best—to protect skin from detergents and scrubbing. Wear safety goggles to keep splashes out of your eyes and choose clothing you don’t mind staining or a disposable coverall.
Consider mask importance if you’re using powdered cleaners, bleach, or working in dusty areas; a simple disposable mask or N95 reduces inhalation of particles and fumes.
Keep gear handy so you’ll put it on before you begin cleaning.
How to Test a Cleaning Method on Flat Paint
Start by choosing an inconspicuous patch test area, like behind a door or near a baseboard.
Try a mild cleaner on that spot using a soft cloth, working gently in a small circle.
Let it dry and inspect the finish for color change, sheen loss, or softening before proceeding.
Patch Test Area
Before you apply any cleaner to a visible area, choose an inconspicuous spot—like inside a closet or behind furniture—and test your method there to make sure the flat paint won’t streak, dull, or peel.
Mark the patch test area with a small piece of tape so you can compare it easily. Clean a limited section using your chosen tool and dwell time, then let it dry completely.
Inspect for color fading, sheen changes, or softening. If you see damage, stop and try a gentler approach elsewhere.
If it looks unchanged, proceed carefully, repeating tests for different cleaners or tougher stains.
Mild Cleaner Trial
Now that you’ve confirmed a safe patch test spot, it’s time to try a mild cleaner on a small, inconspicuous area to see how the paint reacts.
Dampen a soft cloth or sponge with the solution, wring out excess, and gently wipe a 2×2 inch section using light pressure and circular motions.
Wait a few minutes, then blot excess moisture.
Repeat with another cleaner concentration only if the first shows no immediate issue.
Record mild cleaner effectiveness and note any changes in flat paint compatibility like sheen shift, color loss, or softness.
Rinse lightly with plain water to remove residue afterward.
Inspect Dry Results
Once the cleaned patch has dried completely, inspect it closely for any changes in sheen, color, or texture that indicate paint damage.
You should perform a careful dry inspection comparing the patch to surrounding wall areas under consistent light. Note any gloss shift, fading, streaks, or raised texture; these signal the method was too harsh.
Also evaluate cleaning effectiveness: did stains, marks, or residues fully disappear without residue?
If results are satisfactory, you can proceed with larger sections, retesting periodically.
If you see damage or incomplete cleaning, stop and try a gentler cleaner or consult manufacturer guidelines before continuing.
Dusting, Microfiber Cloths, and Dry Cleaning Techniques
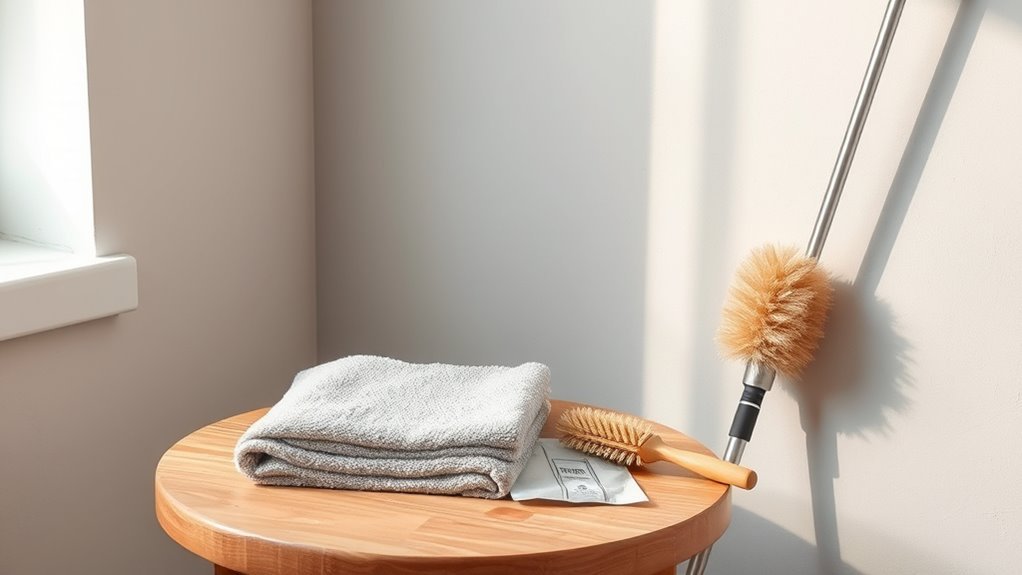
Although flat paint hides imperfections better than glossier finishes, it still collects dust and dirt, so you should dust regularly using soft tools like microfiber cloths and dry-cleaning sponges.
You’ll want simple dusting techniques: work top-to-bottom, use light strokes, and change cloth sections often to avoid smearing.
Microfiber benefits include lifting particles without abrasive pressure, trapping dust, and reducing streaks.
For stubborn marks, a dry-cleaning sponge gently erases surface grime without water.
Test a small area first, keep motions gentle, and replace or wash microfiber frequently so you don’t redeposit dirt onto clean walls.
Vacuuming Walls Without Damaging Paint
Because vacuuming removes dust without rubbing or smearing, it’s a great way to clean flat-painted walls when you use the right tools and technique. You’ll attach soft brush vacuum attachments or a clean microfiber sleeve to prevent abrasion.
Work top to bottom in slow, overlapping strokes, keeping the nozzle barely touching the surface. Use wall vacuums with adjustable suction or lower power settings to avoid pulling paint or causing texture damage.
Check and empty filters often so debris isn’t redeposited. Spot-test any attachment on an inconspicuous area first, and clean regularly to keep walls looking fresh.
Gentle Soap Solution for Everyday Grime
Use a mild dish soap mixed with warm water to tackle everyday grime without stripping flat paint.
Keep the ratio around one teaspoon of soap per quart of water and wring your soft cloth until it’s just damp.
Work in gentle circular motions, rinsing and changing the cloth as it gets dirty.
Mild Dish Soap Mix
When you’re tackling everyday smudges and fingerprints on flat-painted walls, a mild dish soap mix cleans effectively without stripping paint or leaving streaks; you’ll find it gentle, accessible, and safer than harsh cleaners.
Use a soft cloth, work gently, and rinse with plain water to avoid residue. Consider soap alternatives if you need fragrance-free or eco-friendly options.
- Choose a mild dish brand you trust
- Test a hidden spot first
- Use a soft, lint-free cloth
- Rinse thoroughly to remove soap film
- Dry with a microfiber towel to prevent marks
Proper Dilution Ratio
Although you don’t need a complex formula, sticking to a simple 1 teaspoon of mild dish soap per quart (or about 5 mL per liter) of warm water gives you a safe, effective cleaning solution for everyday grime on flat walls.
You’ll want to mix gently, avoiding suds that can leave residue. Test a small, inconspicuous area first to confirm paint tolerance.
For tougher spots, slightly increase soap but never exceed mild concentrations—stronger mixtures risk dulling flat finishes.
Learn basic dilution techniques and keep consistent water ratios to maintain predictable results and protect the paint’s appearance over time.
Soft Cloth Technique
After mixing your gentle soap solution at the recommended ratio, grab a soft, lint-free cloth and wring it out until it’s damp but not dripping.
You’ll use gentle, circular motions to lift grime without saturating paint. Change cloth sections as dirt transfers, and rinse frequently to avoid reapplying residue. Test a hidden spot first.
Use soft cloths and proper cleaning techniques to protect finish and avoid streaks.
- Work top to bottom in small sections
- Apply minimal pressure; let the cloth do the work
- Rinse and wring often
- Dry with a separate soft cloth
- Re-test stubborn spots before repeating
How to Mix and Use a Mild Dish Soap Solution
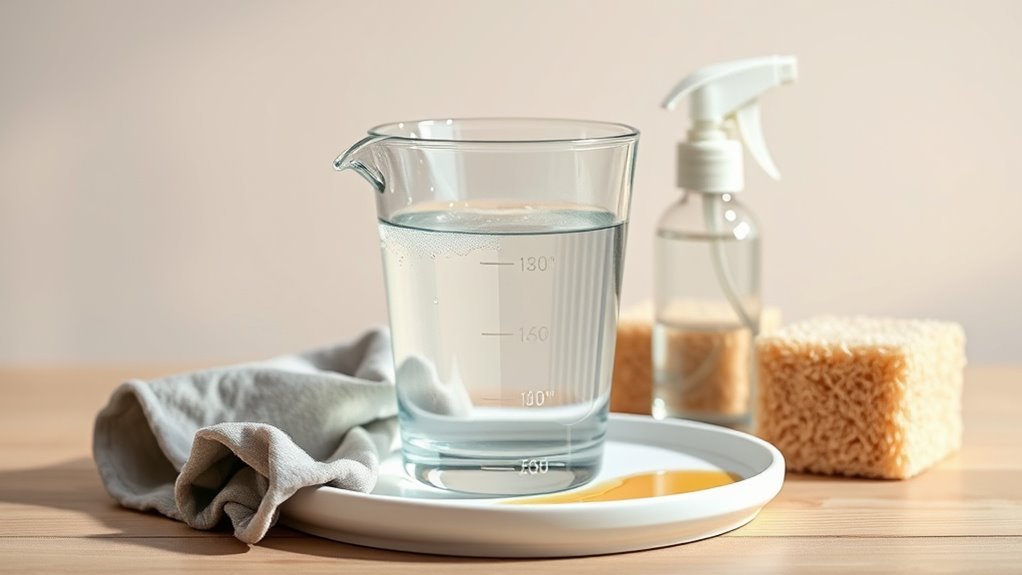
Mix a mild solution by pouring about a teaspoon of dish soap into a quart (roughly 1 liter) of warm water and stirring until it’s lightly sudsy; you’re aiming for gentle cleaning power, not bubbles.
Dip a soft sponge or microfiber cloth, wring it well, and test an inconspicuous spot. Wipe in straight, overlapping strokes, rinsing the cloth often to avoid smearing grime.
Dish soap benefits include cutting grease while being gentle on flat paint when diluted.
For most walls, follow a light cleaning frequency—every few months or spot-clean as needed—to prevent buildup without overworking the finish.
Use Magic Erasers Safely on Flat Paint
Before using a Magic Eraser on flat paint, test it on a hidden spot to make sure it won’t remove finish or color.
Use light pressure and short strokes so you don’t wear through the paint.
Rinse the area with a damp cloth and dry it carefully to remove residue.
Test On Hidden Area
Want to be sure a Magic Eraser won’t dull or remove your flat paint? You should do paint testing in hidden areas before cleaning visible spots.
Pick a small, out-of-sight section—behind furniture, inside a closet, or near a baseboard. Follow these steps and observe results over a day:
- Choose a discreet hidden areas spot for the test.
- Lightly dampen the Magic Eraser; don’t soak it.
- Gently rub a small patch for 5–10 seconds.
- Wipe away residue and let the area dry.
- Inspect for color change, sheen loss, or texture damage.
If it looks unchanged, it’s likely safe to proceed.
Use Light Pressure
Press gently when you use a Magic Eraser on flat paint—apply just enough pressure to lift the mark, not to scrub the finish. You’ll protect the matte surface by using light pressure techniques and small, controlled strokes. Test hidden spots first, move slowly, and stop if paint dulls. These wall cleaning strategies help remove scuffs while preserving texture. Keep your eraser slightly damp and replace worn pieces. Below’s a quick reference to guide pressure and action:
| Spot type | Pressure | Action |
|---|---|---|
| Scuff | Low | Dab |
| Crayon | Low | Light rub |
| Grease | Low | Gentle stroke |
| Smudge | Low | Circular motion |
Rinse And Dry Carefully
Wipe the wall with a clean, damp microfiber cloth after using a Magic Eraser to remove residue, then blot dry with a soft towel so moisture doesn’t soak into the paint.
You should follow specific rinsing techniques to avoid abrasion and keep flat paint intact. Rinse the cloth often, wring firmly, and test a hidden spot first.
Use gentle drying methods to prevent water stains and paint softening.
- Rinse cloth in clear water frequently
- Wring until damp, not dripping
- Blot excess moisture with a soft towel
- Air-dry the area briefly if possible
- Avoid heat drying or aggressive rubbing
Using Baking Soda for Scuffs and Stains
Baking soda’s mild abrasiveness makes it ideal for tackling scuffs and light stains on flat-painted walls without stripping the finish. You can use it as a paste or a dry rub depending on the mark.
Baking soda’s gentle abrasiveness safely lifts scuffs and light stains from flat-painted walls without harming the finish.
For baking soda effectiveness, mix a teaspoon with water to form a soft paste. Apply gently with a microfiber cloth, and rub in small circles.
For stubborn scuff mark removal, try a dry sprinkle on a damp cloth and buff lightly.
Always test a hidden area first, work gently to avoid dulling paint, then wipe with a damp cloth and pat dry.
Vinegar Solutions: What Works and What to Skip
Although vinegar can cut grease and lift some stains, you should pick the right dilution and avoid acidic mixes that can harm flat paint. You’ll usually dilute white distilled vinegar to 1 part vinegar to 4–8 parts water for spot tests.
Use a soft cloth, rinse thoroughly, and dry. Note that undiluted or strong solutions can dull or etch matte finishes.
- Test a hidden area first
- Use mild dilution for general cleaning
- Avoid vinegar on fresh or low-VOC flat paints
- Rinse well to prevent residue
- Consider vinegar alternatives like mild dish soap or commercial pH-neutral cleaners
Vinegar effectiveness varies by stain and finish.
Hydrogen Peroxide for Organic Stains on Flat Paint
1 effective option for removing organic stains—like blood, food, or mildew—from flat-painted walls is hydrogen peroxide, used cautiously and in low concentrations.
You’ll test an inconspicuous spot first to confirm no discoloration. Apply 3% hydrogen peroxide with a soft cloth or cotton swab, blotting gently rather than rubbing to lift organic stains without damaging the paint.
Rinse the area with a damp cloth and pat dry. For persistent marks, repeat once, waiting a few minutes between applications.
Avoid soaking the wall or using stronger solutions, and ventilate the room while you work.
Rubbing Alcohol for Ink and Marker Spots on Flat Paint
Reach for rubbing alcohol when you need to lift ink or marker spots from flat-painted walls, but test a hidden area first to make sure the finish won’t discolor.
You’ll use this solvent sparingly for targeted ink removal techniques and simple marker stain solutions without scrubbing harshly.
- Dab isopropyl alcohol on a microfiber cloth
- Blot gently from edges toward center
- Rinse with a damp cloth afterward
- Repeat only if stain fades, not if paint softens
- Dry with a soft towel
Work patiently, avoiding soaking the paint, and stop if finish dulls or softens.
Best Commercial, Non-Abrasive Cleaners for Flat Paint
When you’re choosing a commercial cleaner for flat-painted walls, pick one labeled non-abrasive and pH-neutral so it lifts dirt without stripping or dulling the finish.
Look for products designed for painted surfaces, marked gentle or formulated for interiors. Test any cleaner in an inconspicuous spot first.
Consider eco-friendly options like plant-based sprays or biodegradable concentrates if sustainability matters.
Use a soft microfiber cloth or sponge, wrung well to avoid excess moisture.
Follow manufacturer instructions and observe recommended cleaning frequency to prevent buildup or overcleaning.
Store cleaners safely and replace damaged paint touch-ups as needed.
Be Careful With Solvents: Why Some Cleaners Damage Flat Paint
Although strong solvents can remove stubborn stains, they can also strip pigment and the binder that keeps flat paint intact, so you should use them only as a last resort.
Strong solvents may lift stubborn stains — but they can also remove pigment and binders, so use them only as a last resort.
You’ll want to understand solvent types and test first, because flat finishes have lower paint durability than glossier ones. Follow safe steps and avoid aggressive chemicals when possible.
- Identify the stain before choosing a solvent.
- Test a hidden spot for discoloration or softening.
- Start with mild cleaners, move up cautiously.
- Use minimal contact time and blot, don’t rub.
- Rinse thoroughly and air-dry to assess damage.
Decide: Spot-Treat or Clean the Whole Wall
Wondering whether to spot-treat or clean the whole wall? Look at overall wall condition first: if marks are isolated and paint looks uniform, choose spot treatment to save time and reduce wear.
Use a gentle cleaner and test an inconspicuous area to confirm no sheen change.
If stains are widespread, discoloration appears, or you’ll notice patchiness after spot cleaning, plan to clean the entire surface for consistency.
For larger jobs, work in sections and rinse well to avoid streaks.
Always let cleaned areas dry fully before judging results or deciding if repainting’s necessary.
How to Remove Fingerprints and Smudges
Start by trying a soft cloth with mild soap and warm water to lift fingerprints without stripping flat paint.
If soap won’t do the job, reach for a gentle melamine alternative or a lightly dampened microfiber eraser and test in an inconspicuous spot first.
Work in small circular motions and dry the area immediately to prevent water marks.
Gentle Soap And Water
When you spot fingerprints or smudges on a flat-painted wall, mix a few drops of mild dish soap into warm water and gently wipe the area with a soft sponge or microfiber cloth, rinsing and drying as you go to avoid streaks.
You’ll use gentle cleaning to protect the finish and remove oils without scrubbing. Test a hidden spot first. If you prefer soap alternatives, try a tiny amount of baby shampoo or a pH-neutral cleaner.
- Blot excess grime before wiping
- Work top to bottom
- Use light pressure only
- Rinse the sponge often
- Pat dry with a clean cloth
Magic Eraser Alternatives
If you’d rather not use a Mr. Magic Eraser, try gentler options to remove fingerprints and smudges.
Dampen a microfiber cloth with mild cleaning sprays or a diluted dish soap solution and wipe in a circular motion. For tougher marks, press a soft scouring pad lightly—test an inconspicuous spot first to avoid dulling paint.
Baking soda mixed with water makes a mild paste that lifts grime without harsh abrasion. Always blot excess moisture and let walls air-dry.
Work from bottom to top to prevent streaks, and repeat sparingly to preserve flat paint’s finish.
How to Lift Grease and Food Splatters
Because grease and food splatters can bond quickly to flat paint, you’ll want to act carefully to avoid smearing or dulling the finish. Blot excess gently, then test a hidden spot.
For grease removal and tackling food stains, mix mild dish soap with warm water and use a soft sponge in light circular motions. Rinse with a damp cloth and pat dry.
- Blot first, don’t rub
- Use diluted dish soap solution
- Work from edges inward
- Rinse residue thoroughly
- Dry to assess
Repeat once if needed; avoid abrasive pads or strong solvents that strip flat paint.
Removing Crayon, Marker, and Ink Stains
Start by identifying whether the mark is waxy crayon, water-based marker, or permanent ink so you can choose the right approach.
Try gentle cleaners and a soft cloth or eraser first to avoid damaging flat paint. If that doesn’t work, move to targeted treatments like rubbing alcohol, baking soda paste, or a commercial stain remover, testing an inconspicuous spot first.
Assess Stain Type
Wondering whether that mark is crayon, marker, or ink will save you time and prevent damage—each needs a different approach.
You’ll use stain identification techniques and follow surface preparation tips before treating anything. Check appearance, texture, and age of the mark, and test a hidden spot.
- Scrape gently to see wax residue for crayon.
- Dab with water on a white cloth to check pigment transfer for marker.
- Press a solvent-safe cloth briefly for ink evidence.
- Note smell and shine as clues.
- Photograph stubborn spots for reference before attempting removal.
Gentle Cleaning Methods
When you’re ready to remove crayon, marker, or ink from flat-painted walls, begin with the mildest options and work up only if needed to avoid damaging the finish. Start with a soft cloth, warm water, and mild dish soap. Test hidden area first. Use gentle circular motions; don’t scrub hard.
| Stain | First step | Next step |
|---|---|---|
| Crayon | Eraser or warm cloth | Mild soap |
| Marker | Rubbing alcohol spot-test | Blot, not rub |
| Ink | Hairspray test | Isopropyl if needed |
Try natural alternatives like baking soda paste cautiously. Ignore cleaning myths promising miracle fixes.
Tough Stain Treatments
If gentle methods don’t lift crayon, marker, or ink, you’ll move to stronger, targeted treatments that remove pigment without harming flat paint—working from least to most aggressive and testing discreet spots first.
Start with a soft eraser or baking soda paste, blotting gently. Try isopropyl alcohol on a microfiber cloth for marker; dab, don’t rub. For ink, use a cotton swab with rubbing alcohol or a commercial ink remover, then rinse.
Persistent crayon may respond to a gentle solvent like WD-40, wiped away and cleaned. Maintain stain removal care and proven cleaning techniques.
- Soft eraser, gentle pressure
- Baking soda paste, blot
- Isopropyl alcohol, dab
- Commercial ink remover, follow directions
- WD-40 for waxy crayon, rinse
Treating Water Stains and Mildew on Flat Paint
Although flat paint hides imperfections, water stains and mildew can still mar its finish and weaken the surface, so you’ll want to tackle them promptly and correctly.
First, identify the water damage source and fix leaks to prevent recurrence. Dry the area fully with fans or dehumidifiers.
For mildew, wear gloves and mix one part bleach to three parts water; test a small spot first. Gently sponge the stain without scrubbing, rinse with clean water, and dry.
Prime stained areas with a stain-blocking primer before repainting with flat, mildew-resistant paint for long-term mildew prevention.
How to Remove Scuffs Without Creating Sheen
Scuff marks on flat-painted walls are common, but you can remove them without polishing the surface or leaving a noticeable sheen. Use gentle scuff removal techniques that lift marks without abrading paint. Test any method on a hidden spot first.
Remove scuffs from flat-painted walls gently—erase, dab with soapy water or a melamine sponge, rinse, and touch up sparingly.
- Try a soft white eraser for light scuffs.
- Use a damp microfiber cloth with mild dish soap for greasy marks.
- Apply a magic-cleaner sponge gently, avoiding scrubbing hard.
- Rinse the area with clean water and pat dry to prevent residue.
- If needed, touch up with matching flat paint sparingly.
These sheen prevention methods keep finish uniform and subtle.
Cleaning High-Traffic Areas Like Hallways and Kids’ Rooms
Because these areas get handled constantly, you’ll need a simple, repeatable routine that removes dirt and protects the flat finish.
Start with dry dusting or a soft microfiber to lift surface grime, then spot-clean with a mild dish soap solution on a damp cloth. Use gentle, circular motions and rinse with plain water to avoid residue.
For persistent marks, try a melamine sponge sparingly. Apply high traffic solutions like routine weekly wipes to prevent buildup.
For kids’ rooms, choose kid friendly methods: fragrance-free, non-toxic cleaners and washable covers on toys and furniture to reduce wall contact.
Cleaning Textured Flat-Painted Walls Safely
Before you start, test a small hidden patch and dust the textured surface to remove loose grit so you don’t grind it in.
Use gentle methods—soft-bristled brush, microfiber cloths, and mild detergent—working from bottom to top to avoid streaks.
For stubborn stains, spot-treat with a paste of baking soda and water or a diluted vinegar solution, rinsing gently and patting dry.
Preparing The Wall
When you’re getting ready to clean textured flat-painted walls, clear the area, cover floors and furniture with drop cloths, and remove any loose dust with a soft-bristled brush or vacuum on a low setting.
Next, assess the wall surface preparation: look for stains, flaking paint, and grease so you can choose appropriate cleaning solutions overview later.
Patch any small chips with compatible filler and sand lightly when dry. Test a discreet spot with your chosen mild cleaner to confirm paint won’t lift.
Keep a ladder stable and wear gloves and eye protection.
- Inspect texture closely
- Remove cobwebs
- Tape off trim
- Protect outlets
- Note stubborn spots
Gentle Cleaning Methods
Start with the mildest approach and work up only if stains persist: wipe textured flat paint using a soft microfiber cloth or sponge dampened with warm water and a few drops of dish soap, rinsing frequently and blotting rather than scrubbing to avoid lifting or dulling the finish. You should test a hidden area first, follow gentle circular motions, and avoid abrasive pads. Keep cleaning myths in mind—harsh scrubbing or strong chemicals can harm flat paint. For regular upkeep, follow simple maintenance tips: dust often, spot-clean gently, and dry areas to prevent streaks.
| Action | Frequency |
|---|---|
| Dust | Weekly |
| Spot clean | As needed |
| Test area | Before cleaning |
| Dry | Immediately |
| Avoid | Abrasives |
Stain Removal Tips
After gentle upkeep, tougher marks will still show up and you’ll need targeted stain-removal methods that protect textured flat paint.
Identify stain types first—grease, crayon, ink, scuffs, or food—and test cleaners on an inconspicuous spot. Use gentle pressure and blotting; avoid scrubbing that removes paint. Adjust cleaning frequency based on household traffic and visible soiling.
- Grease: dish soap solution, dab then rinse.
- Crayon: soft cloth with baking soda paste.
- Ink: isopropyl alcohol sparingly, blot.
- Scuffs: melamine sponge, light strokes.
- Food stains: diluted vinegar, rinse quickly.
Finish by drying and retesting if needed.
Protect Trim and Baseboards During Wall Cleaning
Protecting trim and baseboards keeps your clean walls from getting dingy or damaged during the process. You’ll prep by taping edges, covering with drop cloths, and using small painter’s shields for trim protection and baseboard safeguarding. Work top-to-bottom, using gentle cleaners and a soft sponge to avoid drips onto trim. If paint chips, stop and blot—don’t scrub. After cleaning, remove tape slowly to prevent peeling. Check edges for residue and touch up with a small brush if needed.
| Item | Purpose |
|---|---|
| Painter’s tape | Protect edge |
| Drop cloth | Catch drips |
| Shield | Block splashes |
| Small brush | Touch-ups |
When to Repaint Instead of Cleaning
If stains, scuffs, or odor won’t lift with gentle cleaning, it’s time to contemplate repainting—especially when paint is peeling, chalking, or the finish is uneven across the wall.
You’ll choose repainting when damage is widespread, previous coats hide repairs, or you want a refreshed look.
Consider repainting frequency based on traffic and room use, and plan color selection to hide imperfections or update style.
Check for mold or stains that need priming first.
- Large areas with fading or staining
- Peeling, bubbling, or chalky finish
- Persistent odors or mold
- Frequent touch-up needs
- Desire for new color selection
How to Touch Up Flat Paint for Invisible Repairs
When you want an invisible repair, match the sheen and color, feather the edges, and work quickly while the surrounding paint is still similar in texture and age. You’ll clean the spot, test color matching with small swatches, and use minimal paint applied with a fine brush or sponge. Use thin layers, letting each dry; finish by lightly blending edges. These touch up techniques minimize halos and texture differences.
| Step | Tool |
|---|---|
| Clean | Mild detergent |
| Test | Swatch cards |
| Apply | Fine brush |
| Layer | Thin coats |
| Blend | Dry brush |
Preventive Habits to Keep Flat Walls Cleaner Longer
After you’ve mastered invisible touch-ups, adopt simple daily habits to keep flat-painted walls cleaner and cut down on future repairs.
You’ll save time by building preventive maintenance into routines and using thoughtful wall protection. Be consistent and proactive to avoid stains and scuffs.
- Use felt pads on furniture and hang bumpers behind frames.
- Wipe fingerprints and spills immediately with a soft cloth.
- Rotate art and high-touch items to spread wear.
- Keep humidity steady to prevent grime buildup and paint degradation.
- Establish a quick weekly spot-check to catch marks before they set.
Best Drying Methods to Avoid Streaks and Damage
Even though flat paint hides flaws, you’ll avoid streaks and soft spots by drying cleaned areas gently and evenly. Use a lint-free microfiber or soft cotton cloth to blot excess moisture, then let the surface air-dry or speed things up with a cool, low-flow fan held at a distance to prevent heat damage and uneven drying.
After blotting, work top-to-bottom so gravity helps; avoid circular rubbing that redistributes moisture. For stubborn dampness, pause between light passes to let fibers absorb. Test any towel or fan setting on a small patch.
These drying techniques focus on streak prevention and preserving flat finish integrity.
Tools to Avoid That Will Ruin Flat Finishes
Don’t grab abrasive scrubbers or steel wool, since they’ll scratch and remove the matte surface.
You shouldn’t use strong chemical cleaners or undiluted solvents that can discolor or dissolve flat paint.
Instead, we’ll look at gentler alternatives and safe cleaning solutions.
Abrasive Cleaning Tools
Scrub cautiously: abrasive tools like steel wool, gritty scouring pads, and stiff-bristled brushes will scratch and dull flat paint, leaving visible marks and revealing underlying layers.
You should avoid abrasive materials and rethink harsh cleaning techniques when treating flat finishes. Use softer options and gentle motions to preserve texture and color.
- Don’t use steel wool; it scores paint.
- Skip metal scouring pads; they remove topcoat.
- Avoid stiff brushes; they create streaks.
- Resist abrasive powders; they sand the surface.
- Say no to scrubby erasers; they thin the finish.
Choose microfiber or soft sponges and mild soap for safer results.
Strong Chemical Cleaners
One group of cleaners you should skip are strong chemical products—bleaches, oven cleaners, ammonia-based degreasers, and concentrated solvent sprays—that can strip, discolor, or soften flat paint on contact. You should prioritize chemical safety and test any product first. Even if a cleaner promises high cleaner effectiveness, flat finishes lack protective coatings and will absorb solvents. Use mild detergents, diluted cleaners, or specialized flat-paint formulas. If accidental exposure occurs, rinse immediately and ventilate. Below is a quick reference comparing hazards and outcomes so you can choose safer options.
| Cleaner type | Risk to flat paint |
|---|---|
| Bleach | High discoloration |
| Oven cleaner | Stripping finish |
| Ammonia | Softening |
| Solvent spray | Dissolving paint |
| Mild detergent | Low risk |
Choosing the Right Products for Different Stain Types on Flat Paint
Because flat paint hides imperfections but resists heavy cleaning, you’ll want products matched to each stain’s chemistry—grease needs a degreaser, scuffs respond to a gentle cleaner or melamine sponge, and water stains often require a mild detergent and blotting.
Begin with stain identification and test for product compatibility on an inconspicuous area. Use targeted cleaners and soft tools, work gently, and rinse promptly.
- Grease: degreaser, dab then wipe
- Scuffs: melamine sponge or mild cleaner
- Crayon/marker: rubbing alcohol, test first
- Water/mineral: mild detergent, blot
- Ink: solvent-based spot treatment, careful testing
Eco-Friendly Cleaners: DIY and Store-Bought Options
You can use a gentle vinegar solution—one part white vinegar to three parts water—to safely lift dirt without stripping flat paint.
If you prefer ready-made options, look for plant-based commercial cleaners labeled biodegradable and non-abrasive.
Test any cleaner in an inconspicuous spot first to make sure it won’t affect the finish.
Gentle Vinegar Solution
If you’re looking for an effective, eco-friendly cleaner for flat paint, a gentle vinegar solution is a smart choice: it cuts grease, lifts dirt, and won’t strip paint when used properly.
You’ll mix one part white vinegar with four parts water, test a hidden spot, and work gently with a soft cloth.
Vinegar benefits include natural deodorizing and mild antibacterial action, and it dispels common cleaning myths about damaging flat finishes when diluted.
Use this simple routine:
- Dilute 1:4 vinegar to water
- Spot-test first
- Use soft cloth or sponge
- Rinse with clean water
- Dry immediately
Plant-Based Commercial Cleaners
Many households now prefer plant-based commercial cleaners for flat-painted walls because they combine effective cleaning with gentler ingredients; you’ll find formulas that cut grease and lift dirt without harsh solvents.
You can choose eco friendly options labeled biodegradable and low-VOC, making them safer for indoor use. Test a small, hidden area first, then apply with a soft cloth or sponge, using light pressure to avoid removing paint.
Look for products that list natural ingredients like citrus surfactants or plant-derived enzymes. Rinse lightly if residue stays.
Store away from heat and keep out of reach of children and pets.
Cost and Time Estimates for Typical Wall-Cleaning Jobs
A typical room-sized wall clean will take about 30–90 minutes and cost between $20 and $75 when done by a homeowner or a basic service, depending on stain severity and materials.
Professionals charge $50–$200 per room or by the hour, with textured or high walls adding time and cost.
Professionals typically charge $50–$200 per room; expect higher rates for textured or tall walls.
For practical cost analysis and time efficiency, plan materials and labor upfront so you can compare DIY vs pro options.
- Estimate materials: cleaners, sponges, drop cloths
- Assess stain type and prep time
- Factor ladder or scaffolding needs
- Include travel or disposal fees
- Schedule during off-peak hours
Troubleshooting Common Problems After Cleaning
When you finish cleaning flat-painted walls, check for streaks, paint loss, or lingering residue right away so you can address issues before they set; acting quickly usually makes fixes simpler and prevents bigger repairs. If you spot streaks, re-dampen a microfiber cloth and buff gently. For paint loss, note affected spots and touch up with matching paint. Use stain identification to choose solvents; test in an inconspicuous spot. Adjust cleaning frequency to avoid overworking paint. Quick fixes prevent bigger jobs.
| Problem | Quick Fix |
|---|---|
| Streaks | Buff with damp microfiber |
| Residue | Rinse, dry, repeat |
Safety Precautions for DIY Wall Cleaning
Before you start cleaning, make a quick safety checklist so you don’t get caught off guard:
- wear gloves and goggles to protect against splashes,
- ventilate the room when using cleaning chemicals,
- test any solution on an inconspicuous spot,
- keep children and pets away, and
- use a stable step stool for high areas.
Follow label directions and never mix products.
Use soft cloths or sponges to avoid damaging flat paint during wall maintenance.
If stains resist gentle methods, stop and reassess rather than scrubbing harder.
Your care will preserve the finish and reduce health risks.
When to Call a Professional Wall Cleaner or Painter
If stains, texture damage, or widespread discoloration go beyond what gentle cleaning and spot touch-ups can fix, call a professional—it’s faster, safer, and often cheaper than repeated DIY attempts that make the problem worse. You’ll know to seek professional wall cleaning when mold, persistent odors, large-scale staining, or structural concerns appear. Hiring painters makes sense if repainting, color matching, or surface repair is needed. Expect assessments, quotes, and timelines. Use the table for quick cues:
| Problem | Action |
|---|---|
| Mold | Call pro |
| Large stains | Clean/repair |
| Peeling | Repaint |
| Texture damage | Restore |
| Odor | Inspect |
Quick Checklist: Cleaning Flat-Painted Walls Step-by-Step
1 clear checklist will guide you through quick, safe cleaning of flat-painted walls: gather supplies, test a hidden spot, work top to bottom with gentle cleaners and soft cloths, rinse and dry each section, and touch up any stubborn marks as needed.
Follow this step-by-step list to protect wall maintenance and paint longevity:
- Remove dust with a microfiber duster, top to bottom.
- Spot-test cleaner on an inconspicuous area.
- Use a mild detergent solution and a soft sponge for stains.
- Rinse with clear water and blot dry to prevent streaks.
- Touch up or repaint small areas to restore uniform finish.
Frequently Asked Questions
Can I Use Steam Cleaners on Flat-Painted Walls?
You can, but you shouldn’t overdo it: steam cleaner effectiveness varies and high heat/moisture can reduce flat paint durability. Test a hidden spot, use low-steam settings, keep distance, and dry promptly to avoid damage.
How Does Humidity Affect Post-Cleaning Paint Appearance?
Don’t worry—you’ll still notice changes: humidity effects can cause blotching, delayed drying, or re-softening that alters paint sheen. You’ll reduce issues by drying quickly; otherwise paint durability and finish can degrade over time.
Will Regular Touch-Up Paint Match Older, Faded Flat Paint?
No, regular touch-up paint often won’t match older, faded flat paint exactly; you’ll see color matching issues because paint fading changes hue and sheen, so you’ll need professional matching or repainting larger areas for consistency.
Are Antimicrobial Wall Coatings Compatible With Flat Paint?
Like a breathable shield, yes—you can apply antimicrobial wall coatings over flat paint if you test for surface compatibility first; you’ll gain antimicrobial benefits, but guarantee adhesion with primer or consult manufacturer to avoid peeling or finish changes.
How Long Should a Wall Cure Before Cleaning Newly Applied Flat Paint?
You should wait at least 7–14 days before cleaning, since the curing process continues after initial paint drying; gentle wiping after a week’s light contact is okay, but full cleaning’s best once the paint fully cures.
Conclusion
You’ve got this—cleaning flat-painted walls is simple if you go slow and test first. Start with dusting, move to a gentle soap-and-water mix, and save stronger cleaners for stubborn spots. Treat stains like puzzles: try milder fixes before escalating. Protect floors and wear gloves; if paint peels or stains won’t budge, call a pro. Like tuning a piano, small careful adjustments bring the best results—your walls will look fresh again.