What Happens if Latex Paint Freezes? Explained
If your latex paint freezes, expect changes in consistency, color, and performance—you’ll likely see separation, clumping, or a watery layer that weakens film formation and hiding power. Thawed paint can sometimes be fixed by slow warming, stirring, and straining, but gritty, gelatinous, or foul-smelling paint is usually unusable. Always test a small patch first and use recovered paint on low‑visibility areas; keep cans sealed and stored above freezing to avoid problems, and further guidance explains how to assess and salvage paint.
What Searchers Want When They Type “Latex Paint Freezes
What do people really want to know when they type “latex paint freezes”?
You’re looking for practical guidance: how freezing affects paint consistency, whether it ruins color or bonding, and if you can salvage cans.
How freezing affects latex paint—consistency, color, bonding—and whether you can realistically salvage the can.
You want clear signs of separation, clumping, or odor changes so you can assess paint preservation.
You also expect steps to minimize freezing effects—storage tips, thawing precautions, and when to discard.
You’re after quick criteria to decide if paint’s worth keeping or taking to a hazardous-waste facility, without deep chemistry.
Concise, actionable answers help you protect projects and avoid wasted materials.
Quick Answer: Can Frozen Latex Paint Be Used?
If your latex paint froze, you can sometimes still use it—but only after a careful check.
You’ll assess smell, separation, and texture to decide if salvage techniques might help. If the binder hasn’t permanently clumped and scent isn’t off, you can gently warm and stir for paint restoration.
Don’t expect perfect results; color and performance can degrade. Use restored paint on less critical areas first to confirm adhesion and finish.
If curing seems weak or lumps persist after thorough agitation and straining, don’t risk the job—discard the can and buy fresh paint for reliable results.
Immediate Triage: Three Quick Checks to Do Now
Start by checking whether the paint’s integrity can be restored—look for clumping or a foul smell that means it’s ruined.
Next, assess separation and texture by stirring; thin, uniform consistency can usually be fixed but gritty or chunky paint can’t.
Finally, test a small patch for drying time and coverage to see if it’ll perform on your walls.
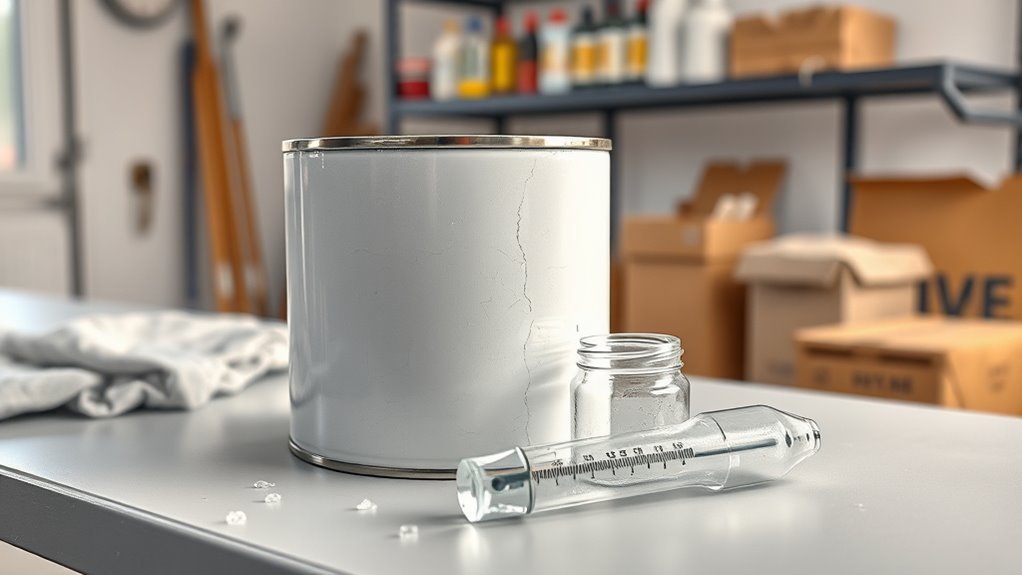
Check Can Integrity Be Restored
Before you toss the can, check whether the container itself survived the freeze: look for bulging lids, rusted seams, or cracks that could let air or moisture in, and feel the weight to see if most of the paint is still present rather than leaked or solidified around the edges.
Next, assess can integrity visually and by tapping the sides; a dented, split, or heavily corroded can means compromised paint quality and likely contamination.
If the lid still seals and the can feels full, you can attempt gentle thawing in a warm room, then stir and test a small sample before committing to use.
Assess Separation And Texture
Anyone can do three quick checks to judge whether frozen latex paint is still usable: look for obvious layer separation, feel the texture for grit or curdling, and test a small bit on a stir stick for smoothness.
First, open the can and note separation issues—clear liquid atop thicker pigment indicates serious freezing effects.
Next, scoop briefly to assess texture changes; slight thinning after stirring can be normal, but persistent clumps or sandy feel mean poor paint quality.
Finally, evaluate whether restoration methods like vigorous stirring or strainers restore a uniform consistency. If not, discard to avoid bad finishes.
Test Drying And Coverage
If the paint looked and felt recoverable after checking separation and texture, the next step is to test how it dries and covers.
Scoop a small amount and apply one thin coat to a primed scrap under the same drying conditions you’ll use on the job. Note tack time, film formation, and whether it levels or shows blemishes.
Let it cure fully and evaluate adhesion, color uniformity, and coverage—these are your test results.
If drying is slow, blotchy, or powdery, don’t use the batch; if it performs normally, you’re likely safe to proceed.
Simple Tests to Decide If Paint Is Salvageable
When you suspect frozen latex paint might still be usable, run a few quick tests to check its texture, scent, and performance instead of tossing the can.
First, inspect for separation, clumps, or watery layers—signs of severe freezing effects and compromised paint preservation. Stir gently; smooth consistency with no grit suggests potential use.
Smell it: a sour or foul odor means discard.
Brush a small sample on cardboard; check adhesion, leveling, and color after it dries. If it films uniformly and matches expectations, it’s likely salvageable.
If you see flaking, voids, or persistent graininess, don’t use it.
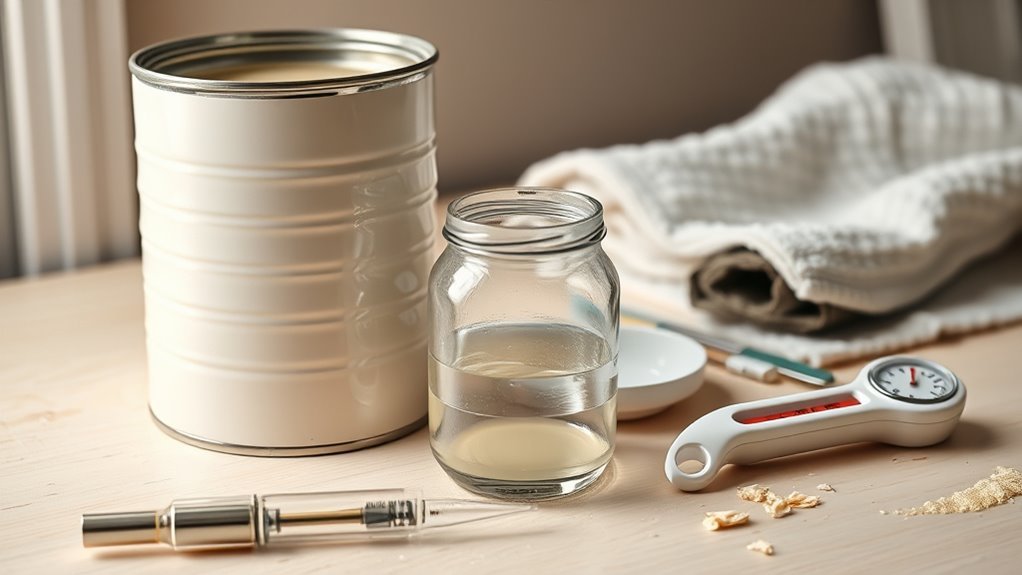
How to Remix and Strain Thawed Paint Properly
Start by gently remixing the thawed paint to restore uniform consistency: open the can, use a clean flat stir stick or a drill-mounted paint mixer, and stir slowly from the bottom up for several minutes until color and texture are even and any watery layer is fully incorporated.
Next, test viscosity; dip a stir stick and watch the drip—consistent ribboning shows proper paint consistency.
Dip a stir stick and watch the drip—smooth, ribboning flow indicates the paint has the right viscosity.
Use a fine nylon or metal mesh strainer into a clean bucket to catch lumps or dried bits.
Repeat mixing and straining if needed. These remix techniques help guarantee smooth application and prevent brush or roller clogging.
When Settling, Clumping, or Odor Means Toss It
If your thawed latex paint shows clear layers of separation or heavy settling that won’t mix back together, don’t try to salvage it.
Hard clumps or a gelatinous texture mean the binder’s been ruined and the paint won’t apply properly.
And if the can gives off a strong, sour, or otherwise off odor, it’s unsafe to use and should be tossed.
Visible Separation Or Settling
Seeing your latex paint separate, settle into a thick layer, or develop lumps is a clear sign it’s past saving. You’ll notice settling effects like watery top layers and dense pigment at the bottom; stirring often won’t reincorporate the components.
Separation causes include freeze-thaw damage breaking emulsion bonds and altered binder consistency. Smells may change and viscosity shifts, making coverage uneven and adhesion unreliable.
You can test a small amount, but if pigment won’t mix smoothly or liquid stays distinct, don’t risk a project. Dispose of compromised cans according to local guidelines and replace the paint for consistent results.
Hard Clumps Or Gelatinous
Hard clumps or a gelatinous texture in latex paint mean the binder and solvents have irreversibly broken down, and you shouldn’t try to salvage it.
You’ll see solid masses that don’t redisperse when stirred; those hard clumps indicate the film-forming polymers have coagulated. A gelatinous texture feels like congealed pudding and resists shearing, clogging brushes and sprayers.
Trying to thin or strain this paint won’t restore proper adhesion, color uniformity, or durability. For safety and finish quality, dispose of affected cans according to local hazardous-waste rules and replace the paint.
Don’t risk poor results with compromised product.
Strong Or Sour Odor
A strong, sour, or otherwise off smell from latex paint is a clear red flag you shouldn’t ignore.
If you detect a sour scent or chemical tang after thawing, don’t try to salvage it. That odor indicates bacterial growth or breakdown of binders; applying it risks offensive fumes and poor adhesion.
You might consider odor removal techniques for minor smells, but with freeze-damaged cans the safer choice is disposal.
Check labels for proper disposal, seal the can, and follow local hazardous-waste rules.
Replace the paint—fresh material guarantees color accuracy, performance, and a healthier indoor environment.
Test a Dried Film on Scrap Before Using
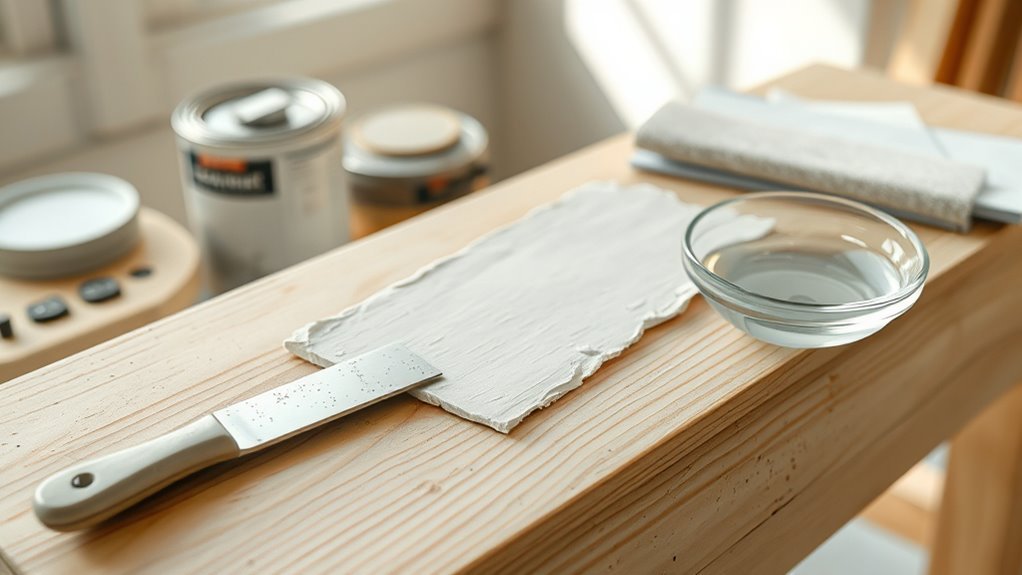
Before you coat your project, apply the reclaimed or suspect paint to a scrap piece and let it dry fully so you can inspect adhesion, flexibility, and appearance under real conditions.
You’ll use paint testing to confirm the finish holds up: check for cracking, flaking, or uneven sheen. Rub, bend, and tap the dried film to gauge flexibility and adhesion; note any powdery or sticky areas.
Record color shift and coverage so you know whether thinning or additional coats are needed. A quick scrap evaluation prevents wasted effort and reveals whether the paint’s usable after freezing or separation.
Signs of Can Damage: Bulging, Leaks, Expanded Lids
Check the can top for bulging or a swollen rim—it’s a clear sign pressure built up from freezing and thawing.
If the lid looks expanded or the seal seems raised, the can may no longer be airtight and could leak when opened.
Don’t ignore any deformation; handle affected cans carefully and consider transferring the paint to a new, undamaged container.
Bulging Can Tops
If you notice a paint can top swelling or the lid sitting higher than normal, don’t ignore it—bulging usually means pressure built from freezing, fermentation, or trapped gases, and the can may be compromised.
Check can tops for rounded edges or gaps; paint expansion inside raises the lid and can force seals to fail.
You’ll want to move bulging cans outdoors, away from heat, and open them cautiously with a flat tool to release gas slowly.
If the paint smells sour, shows separation you can’t remix, or leaks, discard it per local hazardous-waste rules—don’t reuse compromised paint.
Seal And Lid Expansion
Bulging lids are often the first visible sign that a can’s seal has been compromised, but you should also watch for more subtle lid deformation and gaps around the rim.
When paint freezes it expands, stressing lid integrity and reducing seal tightness; you’ll notice lids that no longer sit flush or that pop when pressed.
Check the seam for rust, dents, or small gaps that could let air in once thawed.
If you see drips, crusting, or a wavy lid, assume internal pressure changed.
Replace compromised cans or transfer paint to new containers to preserve the product.
What Latex Paint Is Made Of (Water, Binders, Pigments)
Think of latex paint as a simple blend of three key components: water, which carries the formulation and controls viscosity; binders (usually acrylic or vinyl acrylic polymers), which form the film that sticks to surfaces; and pigments, which provide color and opacity.
Think of latex paint as water, binders, and pigments—water for workability, binders for film and adhesion, pigments for color.
You rely on water to make the latex composition workable and easy to apply. Binders coalesce as the paint dries, creating adhesion and impacting paint durability.
Pigments and extenders determine hiding power and color stability. Additives tweak flow, mildew resistance, and freeze-thaw stability.
Knowing these parts helps you understand how freezing or mishandling can harm performance.
How Water in Latex Paint Freezes and Separates
When water in latex paint freezes, ice crystals form and push the paint’s solids—binders, pigments, and additives—into concentrated pockets.
So you’ll see separation and grainy textures rather than a uniform mix. You’ll notice layers and watery top films as the frozen water separates from heavier particles.
Upon thawing, sediment stays clumped because water expansion ruptured fragile emulsions. In practical terms, you can’t rely on simple stirring to reunite components: paint chemistry has been altered by phase change and mechanical stress.
To assess usability, look for irreversible clumping, odd odors, or persistent streaking during application.
How Binders and Polymers React to Freezing
Binders and polymer particles are what give latex paint its film-forming strength, and they react to freezing in ways that often can’t be fully reversed.
You’ll notice binder behavior shifts as ice disrupts polymer stability, altering paint chemistry at a molecular level.
Cold impact can cause polymer coalescence failure, producing texture changes and consistency issues that don’t simply remix away.
Those freeze effects increase the risk of adhesion problems and compromise film integrity when you apply the paint later.
If you suspect freezing, test a small sample—look for clumping, poor leveling, or weak film—and replace compromised cans rather than gamble on performance.
How Pigments and Fillers Behave After Freezing
Although pigments and fillers often look unchanged after a freeze, the freezing process can disrupt their dispersion and cause settling or flocculation that you’ll notice as streaks, graininess, or color inconsistency when you stir the paint.
You’ll see changes in pigment stability and altered filler behavior that affect coverage and texture. Check and remix thoroughly; some issues are reversible, others aren’t.
Consider these signs:
- Visible streaks or mottling indicating pigment reaggregation.
- Gritty or sandy texture from separated fillers.
- Uneven tinting or reduced hiding power due to compromised pigment stability.
How Freeze–Thaw Cycles Worsen Damage
If pigments and fillers have already started to separate, repeated freeze–thaw cycles will make those defects worse by stressing the paint’s emulsion and breaking down its protective structure.
You’ll see more clumping, altered sheen, and uneven color as ice crystals force particles apart and rupture polymer bonds. Each thaw allows partial recombination, but the next freeze undoes progress, accelerating freeze damage and reducing paint longevity.
Clumping, dull sheen, and uneven color appear as ice crystals rupture binders; repeated freezes undo recovery and shorten paint life.
Over multiple cycles, viscosity shifts and film-forming ability decline, so coatings dry brittle or fail to adhere.
To limit harm, store cans above freezing and use older paint quickly rather than risking cumulative deterioration.
When Freezing Causes Permanent Separation vs. Temporary
When you open a frozen can, you can usually tell quickly whether separation is temporary or permanent: temporary separation shows as settled pigments and watery liquid that remix with vigorous stirring, while permanent separation feels like gritty clumps, a curdled texture, or a layer that won’t re-emulsify no matter how long you mix.
You assess damage by observing odor, color uniformity, and texture. Consider these steps:
- Stir vigorously; test small area.
- Try temporary solutions: strain and add commercial re-emulsifier.
- Discard if gritty clumps, foul smell, or persistent layering remain.
These signs indicate irreversible separation effects.
How Freezing Changes Texture and Consistency
After you’ve determined whether separation is temporary or permanent, look closely at how freezing has altered the paint’s texture and consistency. You’ll notice texture alteration like graininess, clumping, or a curdled feel; consistency change appears as thickening or wateriness. Smell and stir to judge recovery potential. If re-emulsified smoothly, you can often salvage the batch; if grit or lumps remain, discard. Test a small patch before committing to a job. Below is a quick comparison to help you evaluate whether the paint’s tactile and flow properties are acceptable for use.
| Observation | Likely Issue |
|---|---|
| Grainy | Pigment clumping |
| Lumpy | Binder failure |
| Watery | Phase separation |
| Thick | Freeze-induced gelling |
How Freezing Affects Coverage and Opacity
Because freezing disrupts the paint’s emulsion, you’ll often find coverage and opacity suffer even after it seems stirred back to normal.
You notice thinner-looking coats and patchy spots because pigment and binder can separate or clump. Expect a measurable coverage impact: you’ll need more coats to hide the substrate. Opacity reduction shows as translucence where solid color belonged.
- Reduced hiding: pigments rearrange, so one coat won’t cover like before.
- Increased coats: plan for extra material and time.
- Inconsistent finish: some areas may remain translucent despite proper application.
Test a small area before proceeding.
How Freezing Impacts Adhesion and Film Formation
If your latex paint has frozen, the film it forms can lose integrity as binder particles rupture or separate during thawing.
That weakened film is more likely to crack, chalk, or flake over time. As a result, adhesion to surfaces can be compromised, so the paint may lift or peel instead of forming a durable coat.
Reduced Film Integrity
When latex paint freezes, the water in the emulsion forms ice crystals that disrupt the uniform film you expect after drying.
You’ll notice reduced film durability and compromised paint stability: the binder particles can aggregate, leaving weak spots and a patchy appearance.
Small flaws speed wear and reduce resistance to scuffs, moisture, and UV. You can evaluate damage by testing a small patch after full cure.
If film shows brittleness, chalking, or uneven sheen, it’s compromised.
- Particle aggregation — uneven film
- Microvoids — increased permeability
- Brittleness — reduced lifespan
Compromised Surface Adhesion
Although freezing primarily affects the paint’s internal structure, it also undermines how well the film bonds to the substrate. You’ll see this as poor adhesion and uneven film formation.
When latex freezes, polymer chains and emulsions can separate or become distorted, so the cured film won’t form a continuous, flexible layer. You’ll notice flaking, peeling, or patchy coverage because surface adhesion suffers; the paint may not wet or fuse with the substrate uniformly.
Even if appearance seems acceptable, compromised paint quality shortens lifespan and invites moisture and dirt. Always test and, if necessary, discard frozen containers to avoid adhesion failures.
How Freezing Alters Drying and Curing Times
Because freezing disrupts the water-based chemistry in latex paint, you’ll see both drying and curing slow dramatically once it thaws.
You’ll notice drying impacts immediately: paste-like consistency, uneven film formation, and tacky surfaces that take far longer to set.
Expect curing delays too: full hardness and resistance may not develop for days or weeks, raising risk of damage from handling or moisture.
To manage expectations and plan work, remember these points:
- Reduced evaporation rate prolongs surface drying.
- Coalescence of binders may be incomplete, extending tackiness.
- Chemical recovery time delays full cure and durability.
How Freezing Influences Gloss and Finish
If paint freezes and thaws, you’ll often see a duller, uneven finish because ice crystals and binder separation disrupt how the film forms and reflects light. You’ll notice a gloss impact immediately: highs lose shine, lows appear blotchy, and light scatters unpredictably. That reduces finish quality and makes touch-ups stand out. You can test small areas first; poor sheen recovery usually signals compromised binder. Below is a simple comparison to highlight common outcomes:
| Condition | Likely Result |
|---|---|
| Properly stored | Consistent gloss |
| Frozen/thawed once | Reduced gloss impact |
| Repeated freeze | Severely uneven finish |
| Returned to temperature | Possible partial recovery |
How Paint Sheens (Flat, Satin, Gloss) React to Freezing
Having seen how freezing scatters light and dulls a finish, let’s look at how different sheens respond: flat paints hide flaws but mask sheen loss less obviously, satins show moderate patchiness and gloss shifts, while gloss finishes reveal binder damage most clearly by producing streaks and bright/dull spots.
Freezing scatters light and dulls finishes; flat hides flaws, satin shows patchy gloss, gloss exposes binder streaks and bright/dull spots.
You’ll notice freezing effects differ by sheen and reveal reduced paint durability. Typical outcomes:
- Flat: hides texture changes but can flake or powder once thawed.
- Satin: shows uneven gloss; tougher than flat but can craze.
- Gloss: highlights binder separation; may need replacement for uniform finish.
How Specialty Latex Paints Handle Freezing
When you store specialty latex paints—like elastomeric coatings, anti-mold formulations, and high-build masonry paints—freezing affects each type differently because their unique additives and thicker binders respond to ice crystals and separation in specific ways.
You’ll find some specialty formulations tolerate brief cold snaps thanks to higher solids and tough polymers that maintain cohesion, offering moderate freeze resistance.
Others with delicate film-formers or microencapsulated agents can suffer irreversible separation, texture changes, or loss of performance.
Inspect, stir, and test a small sample before use; if film forming, adhesion, or odor seems off, discard rather than risk a failed job.
Additives and Pigments That Change Freeze Susceptibility
When you look at why some latex paints freeze more easily, pay attention to the binder and polymer chemistry because they control flexibility and freeze–thaw stability.
Additives like coalescents or antifreeze agents can raise cold tolerance, while pigments and heavy fillers can increase ice crystal damage by disrupting film formation.
You’ll want to compare formulations if you need paint to survive low temperatures.
Binder And Polymer Types
Because the binder is the paint’s structural backbone, its chemistry largely determines how a latex formulation reacts to freezing and thawing.
You’ll notice different binder types and polymer reactions control film formation, flexibility, and resistance to ice crystal damage. Choose binders suited to your climate to reduce failure.
- Acrylics — flexible, tolerate mild freezes; recover better after thaw.
- Styrene-acrylics — cheaper, more brittle; polymer reactions can cause flaking post-freeze.
- Vinyl-acrylics — moderate performance; additives often needed to improve freeze-thaw stability.
Understand binder selection to limit freeze-related degradation.
Pigment And Filler Effects
Although pigments and fillers mainly color and bulk up latex paint, they can markedly change how it handles freezing and thawing. You’ll find inorganic pigments often resist freeze damage better than organic dyes because pigment stability reduces color shift and aggregation.
Fine clay or calcium carbonate fillers can absorb water, expanding and breaking film integrity during ice formation; their filler performance worsens freeze susceptibility.
Conversely, functional additives or treated pigments improve dispersion and limit ice nucleation, helping the binder recover.
When evaluating a paint’s cold tolerance, check pigment stability data and filler performance notes—these determine whether a frozen batch can be salvaged.
Temperature Thresholds: What to Watch for by Formulation
If you store or use latex paint in cold conditions, pay close attention to the specific formulation: interior, exterior, high-solids, and specialty paints each have different freeze thresholds and vulnerabilities.
You’ll notice temperature effects vary because paint composition dictates how water and binders behave when chilled. Know your label: some exterior acrylics resist light freezes, while interior and high-water formulations coagulate sooner.
Temperature effects vary—paint chemistry controls how water and binders react; check labels, exterior acrylics tolerate light freezes, interiors coagulate sooner
Watch for pigment settling, binder separation, or gelled texture.
- Exterior acrylics — tolerate brief dips near 32°F but not prolonged freezes.
- Interior/water-heavy — vulnerable below ~40°F.
- Specialty/high-solids — check manufacturer limits.
How Long Latex Paint Can Safely Sit in the Cold
How long you can leave latex paint in the cold depends on the formulation and how far below its safe temperature it drops; acrylic-rich paints tolerate short, mild chills better than vinyl-based ones.
You should avoid prolonged exposure below the manufacturer’s minimum, since repeated or severe cold reduces paint stability and can cause irreversible coagulation.
For brief setbacks—hours to a few days—most modern latex fares okay if it didn’t freeze solid. Extended periods increase risk, especially with fluctuating temperatures.
When planning cold storage, keep cans sealed, upright, and insulated, and check viscosity and odor before use to confirm stability.
Cold Storage Before Opening vs. After Opening
When you store unopened cans in a cold garage or shed, they usually fare better than opened ones because their seals keep out moisture and air that speed degradation.
Once a can’s been opened, colder temperatures and repeated warming let condensation and contaminants in, raising the chance of skinning, separation, or freeze damage.
You should treat unopened and opened cans differently for cold storage and paint longevity.
- Unopened: keep upright, sealed, minimal temperature swings to preserve shelf life.
- Opened: transfer to smaller containers, reseal tightly, limit cold exposure.
- Monitor: check consistency before use; smell and texture reveal damage.
Short-Term Fixes When a Project Meets Frozen Paint
If your latex paint looks separated or chunky, first assess its consistency to see if it’s salvageable.
You can use quick thaw techniques like warming the unopened can in warm water or bringing it inside to gently return to room temperature.
Once fluid, strain the paint through a fine mesh to remove lumps before you start painting.
Assess Paint Consistency
Because paint that’s been exposed to freezing can separate, coagulate, or feel grainy, you should inspect its consistency before deciding to use it. Check for smoothness, lumps, or watery clarity; these clues reveal paint quality after freezing effects. Shake or stir gently, then evaluate.
- Scoop and rub a small amount between fingers to feel for grit or curdling.
- Brush a test stroke on cardboard to watch coverage and tackiness.
- Let a sample dry to assess adhesion, color uniformity, and finish.
If any test shows poor texture, uneven film, or long drying, don’t risk a full application.
Temporary Thaw Techniques
Although thawing frozen latex paint isn’t ideal, you can often recover small amounts quickly with a few careful steps; start by moving the can to a warm room and let it sit sealed until the temperature equalizes.
Then, gently stir to reincorporate separated components.
Next, check for smooth texture and uniform color; small clumps may dissolve with continued gentle stirring.
Use moderate heat sources like a warm water bath—avoid direct flame or high heat.
Test a small amount on scrap wood or cardboard.
If it levels and adheres, proceed; these thawing techniques aid short-term paint recovery without extensive processing.
Quick Straining Tips
When a project runs into partially frozen latex paint, quick straining can save both time and materials: you’ll want to work while the paint’s still workable, using a fine mesh or paint filter to catch flakes and clumps before they hit your brush or roller.
Use paint straining methods that match the paint’s condition and your timeline. Try these paint rescue techniques:
- Pour through a disposable mesh filter into a clean can, stirring gently to remove trapped bits.
- Double-strain using cheesecloth over a funnel for finer debris.
- Skim hardened skins first, then strain to prevent recontamination.
How to Safely Warm Frozen Paint Without Damage
If your latex paint freezes, don’t rush the thaw—slow, gentle warming preserves the binders and prevents separation that can ruin a batch. You’ll use staged thawing techniques: move cans to a cool room, then to warmer air, avoiding heat sources. Once liquid, stir slowly, strain, and test on cardboard. For stubborn separation, use a gentle mechanical stirrer; don’t overheat.
| Step | Action |
|---|---|
| 1 | Move to cool indoor space |
| 2 | Allow gradual warming (24–48 hrs) |
| 3 | Stir slowly, check consistency |
| 4 | Strain and test small patch |
These steps aid paint restoration without damage.
How to Transport Paint in Cold Weather Without Freezing
When you need to move paint in cold weather, pack the cans in insulating materials like foam or blankets to keep temperatures steady.
If you’re transporting for longer trips or extreme cold, use a heated vehicle or portable warming system to prevent freezing.
Check containers regularly and avoid leaving paint in unheated trucks or overnight.
Insulate Paint Containers
Because cold can creep into even well-sealed cans during transit, you’ll want to insulate paint containers to keep the contents above freezing and protect their consistency.
Use proven paint storage and insulation techniques to maintain temperature without contaminating the product. Wrap cans in foam sleeves or bubble wrap, seal in plastic tote bins, and add removable heat packs if needed.
Keep lids tight and store upright. Monitor with a simple thermometer. Transport in the warmest part of your vehicle and avoid overnight stops.
These steps reduce freeze risk and preserve finish quality until you’re ready to use the paint.
- Wrap cans securely
- Use tote bins
- Add heat packs
Use Heated Transport
Although you might pack cans snugly and use insulation, transporting paint in cold weather still calls for active temperature control—use a heated vehicle or portable heater to keep cans above freezing during transit. You should monitor temps with a thermometer and avoid overnight stops. Combine heated transport methods with paint insulation techniques: bubble wrap, foam, and thermal blankets reduce heater runtime and risk. Secure cans upright and minimize door openings. Keep trips short and plan routes to avoid delays. Check for local regulations on using portable heaters in vehicles and ventilate briefly after arrival to disperse fumes.
| Tip | Action |
|---|---|
| Heater type | Vehicle or portable |
| Insulation | Bubble wrap |
| Monitor | Thermometer |
| Positioning | Upright |
| Timing | Short trips |
Best Containers and Shelving for Winter Storage
If you want your latex paint to survive cold months intact, pick sturdy, airtight containers and strong, adjustable shelving that keep cans off the floor and protected from temperature swings.
Use insulated containers for short-term buffering and choose shelving that lets air circulate to aid temperature regulation.
Store full cans together, label lids, and keep incompatible chemicals separate.
Consider these practical choices:
- Heavy-duty plastic tubs with tight lids for grouped cans.
- Metal shelving with adjustable shelves and raised feet.
- Clear labeling bins and a small raised platform to avoid damp floors.
How to Insulate Cans in a Garage or Shed
When you’re insulating paint cans in a garage or shed, focus on reducing temperature swings and keeping cold air from contacting the lids and seams.
You’ll group cans off the concrete, elevate them on shelving or a pallet, and surround them with insulation materials like foam board, reflective wraps, or thick moving blankets.
Seal gaps to limit drafts and position cans away from doors or vents that change garage temperature rapidly.
Seal gaps to cut drafts, and keep cans away from doors or vents that cause rapid temperature swings.
For extra protection, create a simple insulated box with weatherstripping on the lid so cold air can’t pool around seams.
Check periodically for dampness or tears in the barrier.
How to Store Latex Paint to Prevent Freezing (Step-by-Step)
Now that you’ve insulated cans and cut drafts, take a few straightforward steps to store latex paint so it won’t freeze. You’ll prevent freezing effects and maintain quality by controlling temperature, limiting exposure, and organizing cans.
- Move cans off concrete onto shelves or pallets and keep them in an interior room where temperature stays above 40°F (4°C).
- Seal lids tightly, label with date and color, and group by use to minimize handling and temperature swings.
- Use small space heaters or insulated storage boxes only when needed, monitor temps, and avoid storing near doors or vents to reduce freeze risk.
Follow these steps for safe paint storage.
Professional Contractor Tips to Prevent Freeze Damage
When you’re protecting job-site paint, keep all latex cans stored indoors where temperatures stay above freezing.
Use reliable temperature monitors in storage areas and vehicles so you get alerts before conditions turn risky.
These simple steps cut the chance of freeze damage and keep your paint usable.
Store Paint Indoors
If you want to keep latex paint usable through cold snaps, store cans indoors where temperatures stay above freezing and humidity is controlled; garages, unheated sheds, and exterior basements often dip low enough to cause separation and coagulation.
You’ll protect gloss, color, and consistency by choosing a climate-controlled area for indoor storage. Seal lids tightly and keep cans off concrete to avoid cold transfer.
For paint protection and easy access, follow simple practices:
- Store on insulated shelving at eye level.
- Group by type and date; rotate oldest first.
- Keep lids clean, sealed, and labeled with purchase date.
Use Temperature Monitors
Anyone can avoid costly freeze damage by installing temperature monitors where you store paint; they alert you to drops before cans freeze and show trends so you can act fast.
You’ll pick a monitor with alerts, logging, and battery backup, then place sensors at shelf height and near doors. Set thresholds slightly above freezing and link alerts to your phone or a central system so you can move cans or heat the area before temperature hits danger.
Regularly check logs to refine setpoints and validate insulation. Good temperature monitoring turns paint storage from guesswork into a reliable, proactive protection strategy.
Expanded Cans and Safety Signals to Never Ignore
Because freezing causes paint to expand as ice crystals form and trapped gases try to escape, a swollen can is your first clear warning that something’s gone wrong.
You should treat bulging lids seriously because they signal compromised paint integrity and possible container rupture. Follow safety precautions immediately: move cans outdoors, avoid sparks, and wear gloves and eye protection.
Watch for these signs:
- Distorted lid fit or leaking seams.
- Sudden hissing when opening, indicating pressure release.
- Visible separation, curdling, or excessive swelling inside the can.
If you see any, don’t use the paint; dispose per local hazardous-waste rules.
Smell and Odor Changes That Indicate Spoilage
A swollen can and visible separation aren’t the only clues that latex paint has spoiled — your nose often gives the first unmistakable warning. You’ll notice a sour, musty, or chemical foul odor that differs from the usual mild latex smell.
Use odor detection as an early test: open lids briefly and sniff cautiously. Sharp, lingering smells are clear spoilage indicators; fresh paint has a clean, faint scent.
If the odor overwhelms the room or causes headaches, don’t assume it’s just strong new paint. Treat strong, unusual smells as signs the product’s paint freshness is compromised.
Environmental and Safety Precautions When Thawing Paint
When thawing frozen latex paint, work outdoors or in a well‑ventilated area to prevent fumes from building up and to limit spills that could harm soil or drains.
When thawing frozen latex paint, work outdoors or in a well‑ventilated area to avoid fumes and soil or drain contamination.
Keep pets and children away and wear gloves and eye protection to avoid skin or eye irritation from separated or spoiled paint.
You should follow safe thawing steps and minimize environmental impact by preventing runoff and containing messes. Consider:
- Place cans on trays and thaw at moderate room temperature, avoiding direct heat.
- Open lids slightly to vent; stir gently to assess consistency.
- Clean tools and spills promptly with minimal water, capturing residue.
How to Recycle or Dispose of Frozen or Ruined Paint
Before tossing frozen or ruined latex paint, check your local disposal rules because regulations and household hazardous waste programs vary by area.
If recycling is available, you’ll usually need to strain out solids, label the can, and guarantee it’s tightly sealed and uncontaminated.
When recycling isn’t an option, follow municipal guidelines for solidifying small amounts or taking larger quantities to a designated drop-off.
Check Local Disposal Rules
Wondering what to do with frozen or separated latex paint? Check local regulations first: rules vary and affect whether paint’s hazardous, recyclable, or trash.
Contact your municipality or waste authority for approved disposal methods and drop-off locations. Follow labeling, storage, and transport instructions to avoid fines.
- Ask: is curbside pickup allowed or do special events handle paint?
- Confirm: accepted container types, solidification requirements, fees.
- Locate: household hazardous waste centers or municipal recycling programs.
Stick to local regulations to choose safe, legal disposal methods and avoid contaminating recycling streams.
Prepare Paint For Recycling
Sort and stabilize the paint so recycling or disposal goes smoothly: separate usable from ruined cans, label any frozen or chemically separated containers, and remove lids to let partially dried paint harden.
Next, check local paint recycling programs and accepted drop-off sites; they’ll tell you if partially frozen paint qualifies for paint recycling or must be dried and trashed.
For unusable paint, speed drying with cat litter or paint hardener reduces volume and environmental impact before disposal. Keep lids off during drying in a ventilated area, then double-bag dried cans.
Document actions and receipts in case local authorities request proof.
Cost Comparison: Salvage vs. Replace
If you’re weighing whether to salvage frozen latex paint or just replace it, the key question is which option gives you the most value when you factor in time, materials, and risk.
You’ll compare salvage methods against replacement costs and decide based on effort and final performance.
Consider:
- Time and labor: stirring, straining, testing—your hours matter.
- Materials and tools: strainers, additives, test boards versus a new can.
- Risk of failure: poor adhesion, uneven finish, or wasted money if you must repaint.
Choose salvage when costs and risks are low; replace when quality or warranty matters.
How to Choose Replacement Latex Paint After Freeze Loss
Choosing the right replacement latex paint after a freeze means balancing color match, finish, and performance so your repaired or new surfaces look and hold up.
Start by deciding the exact sheen and base (interior vs. exterior, high-traffic vs. trim), then match the original color or get a fresh swatch.
Confirm the paint’s rust-free, low-VOC formulation if that matters, and pick a reputable brand with a warranty to minimize the chance you’ll need to redo the job.
Evaluate replacement options by testing small samples, checking drying time and coverage, and prioritizing paint quality over price for lasting results.
Common Misconceptions About Frozen Latex Paint
You might think freezing always ruins latex paint, but that’s not always true—some paints can recover if thawed and tested.
Don’t assume stirring will fix every problem; separation can mask coagulation or broken binders that won’t re-emulsify.
Before you toss or reuse, check consistency, smell, and a small test patch to confirm performance.
Freezing Always Ruins Paint
Although many people assume frozen latex paint is beyond salvage, that’s not always true. You shouldn’t automatically toss cans; outcomes vary by paint types and freezing effects.
Cold temperatures can separate pigments and water, but proper paint storage and temperature thresholds matter for paint preservation and shelf life. Consider these points before discarding:
- Inspect texture and smell — freezing damage often shows clumps or sour odor.
- Check paint quality after thawing at room temperature; minor separation can be reversible.
- Note original paint type and age; older cans nearer end of shelf life suffer more.
Use judgment, not panic.
Stirring Fixes Everything
When paint freezes, stirring alone often won’t fix the damage; ice crystals can rupture pigment and binder particles, creating clumps and a grainy texture that mere stirring can’t fully reincorporate.
You might try vigorous stirring techniques, but they won’t restore lost film-forming ability or remove microscopic aggregates. Test a small sample: if paint separates into water and solids or feels gritty after thorough mixing, it’s compromised.
You can strain to remove lumps and adjust paint consistency with manufacturer-recommended additives, yet results remain unpredictable.
For reliable finish and adhesion, replacing frozen latex paint is usually the safer, more professional choice.
Quick Checklist to Evaluate a Can After Suspected Freezing
If a can of latex paint may have frozen, act fast to judge its condition before you decide to keep or discard it.
You’ll want to check for freezing effects and consider paint preservation steps quickly.
Follow this short checklist to assess usability:
- Inspect: look for separation, clumps, or a grainy texture after gently opening the can.
- Smell & stir: note sour or off odors and attempt slow, thorough stirring to see if consistency returns.
- Test: apply a small sample to a disposable surface; check adhesion and drying time before committing to reuse.
FAQ: Top Reader Questions About Frozen Latex Paint?
You’re probably wondering whether the paint will freeze again if it already did and whether it’s safe to use after thawing.
Check for separation, clumps, and consistency before deciding. If it stirs back to a smooth, uniform texture and passes a small test patch, you can usually use it.
Will It Freeze Again?
Although frozen latex paint can thaw and look usable again, it may not return to its original quality, and you’ll want to check it carefully before using it.
You should assess freeze recovery signs and paint integrity: separation, graininess, or odor changes indicate lasting damage.
Consider the storage and number of freeze-thaw cycles; repeated freezing worsens breakdown of binders and pigments.
To decide whether it might freeze again, evaluate location and container insulation.
- Check storage temps and predict exposure risk.
- Note container seal and headspace that promote freezing.
- Monitor for future cold snaps and relocate indoors.
Can I Use It?
Many cans that froze can still be usable, but you’ll need to inspect and test the paint before committing to a project.
Check can integrity, smell for sour odors, and look for separation or chunky solids—signs of severe freezing effects. Stir thoroughly; if it regains smooth consistency, do a small adhesion and finish test on scrap wood or drywall.
Consider paint safety: if it smells off, shows mold, or won’t re-emulsify, discard it—don’t risk indoor air quality or coating failure.
When in doubt, replace the paint; a reliable result and safety are worth the cost.
Further Resources: Product Specs, Manufacturers, Standards
Reference specs, manufacturer guidance, and industry standards will help you turn general advice into safe, practical actions when latex paint freezes.
Check product specifications for storage temperature limits and shelf life; paint formulations differ, so don’t assume one rule fits all.
Review manufacturer guidelines for thawing procedures, testing, and warranty impacts.
Consult industry standards for testing methods and safety practices.
- Look up product specifications and technical data sheets.
- Follow manufacturer guidelines before using thawed paint.
- Compare relevant industry standards (ASTM, ISO) for testing and quality criteria.
Closing: What to Do Next If You Suspect Frozen Paint
If you suspect your latex paint froze, act promptly: check the container for bulging or separation, note the storage temperature and duration, and isolate the can from other supplies to prevent cross-contamination. Decide: salvage, test, or discard. Use proper paint storage going forward and document conditions. For salvage, thaw slowly using recommended thawing techniques (room temperature, then gentle stirring), then test adhesion and color on scrap. If doubtful, consult manufacturer or dispose per local rules. Quick checklist:
| Action | When | Outcome |
|---|---|---|
| Inspect | Immediately | Visual cues |
| Thaw | Gradual | Possible salvage |
| Test | After thaw | Performance check |
| Discard | If failed | Replace safely |
Frequently Asked Questions
Can Frozen Latex Paint Be Used on Exterior Masonry or Concrete?
You shouldn’t use frozen latex paint on exterior masonry or concrete. It’ll have compromised binder and adhesion, so you’ll need testing, remixing, proper application techniques, and consider repeated freeze–thaw cycles damage before risking long-term exterior durability.
Will Freezing Affect Paint Matched by a Color-Matching Machine?
Yes — but don’t panic like your paint’s staging a comeback: freezing can wreck color consistency and cause pigment separation, so you’ll want to check, strain, and possibly rematch to verify the machine’s calibration still works.
Are Water-Based Primers as Vulnerable to Freezing as Paints?
Yes — water-based primers can freeze and lose performance, but you’ll often get better water based benefits like quicker recovery and improved primer durability if stored above freezing; low temperatures still risk reduced adhesion and separation.
How Do Freeze-Damaged Paints Affect Warranty Claims?
Think of freeze-damaged paint as a betrayed pact; you’ll likely void warranty implications if cold-altered cans show crystallization, separation, or ruined performance, so don’t expect coverage when freeze damage caused the failure.
Can Frozen Paint Cause Long-Term Problems for Painted HVAC Ducts?
Yes — frozen paint can cause long-term problems for painted HVAC ducts: you’ll see compromised paint adhesion, flaking, and moisture trapped under coatings, which can degrade duct insulation and force premature repainting or duct repairs.
Conclusion
So your paint survived the arctic—or didn’t. If it froze, don’t march it triumphantly onto the wall; swollen cans, chunky gel, or sour smells are clues it’s time to retire it. If it thaws smooth and mixes back to normal, you’ve beaten nature and can use it; if not, accept defeat, recycle the mess, and buy fresh. Irony: the thing meant to freshen your rooms can’t even survive a chill.