What Paint to Use on Exterior Brick? Complete Guide
You should use a high-quality breathable acrylic-latex or masonry paint with a masonry primer so your brick can still dry out and the finish lasts. For moisture-prone areas pick elastomeric options; for general use choose acrylic-latex for color retention and easy upkeep. Clean and test the surface, fix any moisture or structural issues first, and apply two thin coats working top to bottom. Keep going to learn prep, testing, and maintenance steps that follow.
Quick Answer: Which Paint to Use on Exterior Brick?
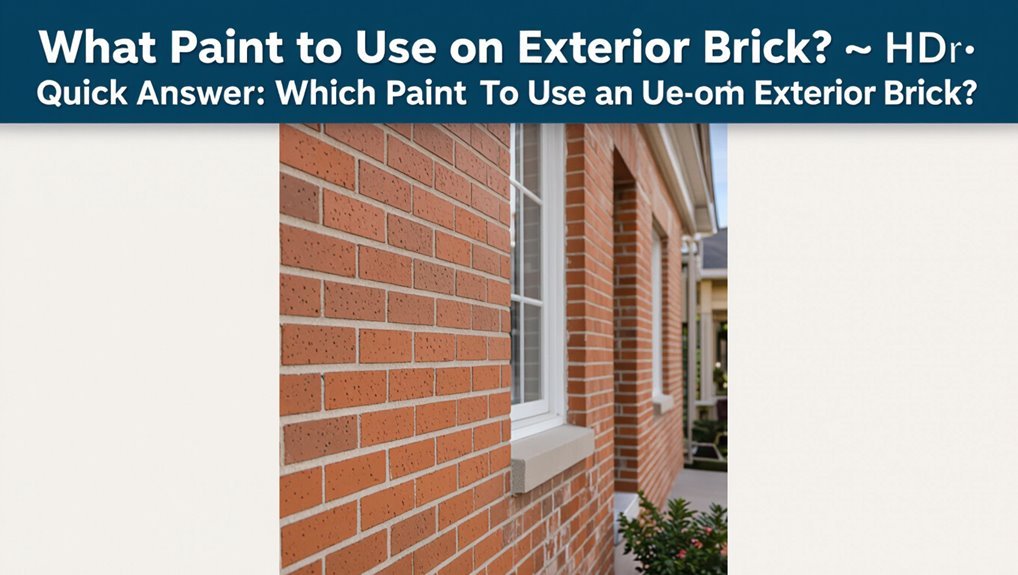
Looking for a quick answer? You should pick a high-quality exterior latex or acrylic paint formulated for masonry; it balances paint durability with breathability so moisture doesn’t get trapped.
Choose products labeled for brick or masonry and use a masonry primer where needed.
Select paints labeled for brick or masonry, and apply a dedicated masonry primer where recommended.
For color selection, test swatches on the brick and view them at different times of day; brick texture and mortar will affect appearance.
If you want longer-lasting protection, consider elastomeric coatings only for severely cracked or porous brick, since they alter breathability.
Follow manufacturer prep and application guidelines to maximize longevity and finish.
Should You Paint Your Exterior Brick?
Why paint your exterior brick? You might want improved brick aesthetics, color consistency, or protection from weather.
Painting can refresh curb appeal and unify mismatched masonry while affecting paint longevity depending on prep and product.
- Enhance curb appeal quickly—choose breathable masonry paint for durability.
- Protect against moisture and surface wear—proper sealing extends paint longevity.
- Achieve a specific style or modernize old brick—consider texture and finish.
You’ll need good prep, the right primer, and breathable coatings so the brick performs well and the finish lasts without trapping moisture.
When Not to Paint Brick: And Alternatives
If your brick has structural cracks, spalling, or chronic moisture issues, you shouldn’t paint it until those problems are fixed because paint can trap moisture and hide damage.
Likewise, if the brick has historic or original finishes that contribute to the building’s character, you should avoid painting to preserve its value and authenticity.
Instead, consider repairs, breathable sealers, or careful restoration that maintain the brick’s integrity without covering it.
Structural Or Moisture Issues
When your brick shows cracks, crumbling mortar, rising damp, or persistent efflorescence, don’t paint it—you’re just trapping moisture and hiding serious problems that need repair first.
You should assess moisture barriers and structural integrity before considering paint. Painting now forces salts and water into the wall, accelerating decay and masking leaks.
- Repair cracks and repoint mortar to restore structural integrity.
- Fix drainage, gutters, and add proper moisture barriers to stop rising damp.
- Replace damaged bricks and address sources of water infiltration before finishing.
Only after repairs and drying should you evaluate breathable coatings or limewash.
Historic Or Original Finish
Because historic brick often carries original craftsmanship and patina that define a building’s character, you shouldn’t paint it without careful consideration.
If you own a historic property, painting can erase evidence of age, mortar techniques, and material choices valued in historic preservation. You’ll also risk lowering resale value or violating local conservation rules.
Instead, assess condition: repoint, clean with gentle methods, and use breathable sealants that protect without concealing texture.
When visual change is needed, choose reversible, minimal interventions. Consult preservation professionals to retain original character while addressing deterioration or energy concerns.
Test Brick for Old Coatings and Moisture
Before you pick a paint, check the brick for any existing paint or sealers—scrape a small area or use a solvent to see if coating comes off.
You should also test for moisture by taping a 2-foot square of plastic to the wall for 24–48 hours and checking for condensation.
If old coatings or trapped moisture are present, address those issues before painting.
Check For Existing Paint
Curious whether your brick has been painted before or holds hidden moisture? Start with a thorough surface inspection: look for uniform sheen, brush marks, or peeling, which indicate previous paint and may need paint removal.
Perform a scrape test in an inconspicuous spot; loose flakes mean coating exists. Use a garden hose and watch for rapid darkening—don’t infer depth or saturation from this alone.
Check mortar joints and under sills where paint often clings. If you suspect stubborn coatings, sample small areas for lab analysis before committing to full removal.
Record findings to guide primer choice and prep.
Assess Brick Moisture
Now that you’ve checked for existing paint, it’s time to assess moisture and any old coatings that could affect adhesion.
Start with a moisture assessment using a reliable moisture meter; scan multiple bricks and mortar joints, especially near grade and rooflines.
Look for efflorescence, peeling, or soft spots that signal trapped moisture or compromised brick integrity.
Tape tests and solvent wipes reveal old sealers or coatings that block paint bonding.
If readings exceed manufacturer limits or bricks crumble, repair or allow drying before priming.
Address drainage, flashing, and vents to prevent recurrence and guarantee long-lasting paint adhesion.
Why Breathable Coatings Matter for Brick
Because brick naturally absorbs and releases moisture, you should use breathable coatings that let vapor pass through rather than trap it.
Use breathable coatings on brick so vapor can pass through instead of becoming trapped.
You’ll protect the masonry and avoid peeling, blistering, and salt stains by prioritizing breathability benefits and effective moisture management. Breathable paints let trapped water escape, reducing freeze-thaw damage and interior damp.
They also allow you to maintain original vapor transmission rates so masonry can dry toward either side.
- Prevents trapped moisture and related failures.
- Reduces efflorescence and salt migration.
- Extends coating and brick lifespan through better drying.
Breathable vs. Waterproof Coatings: Which to Choose?
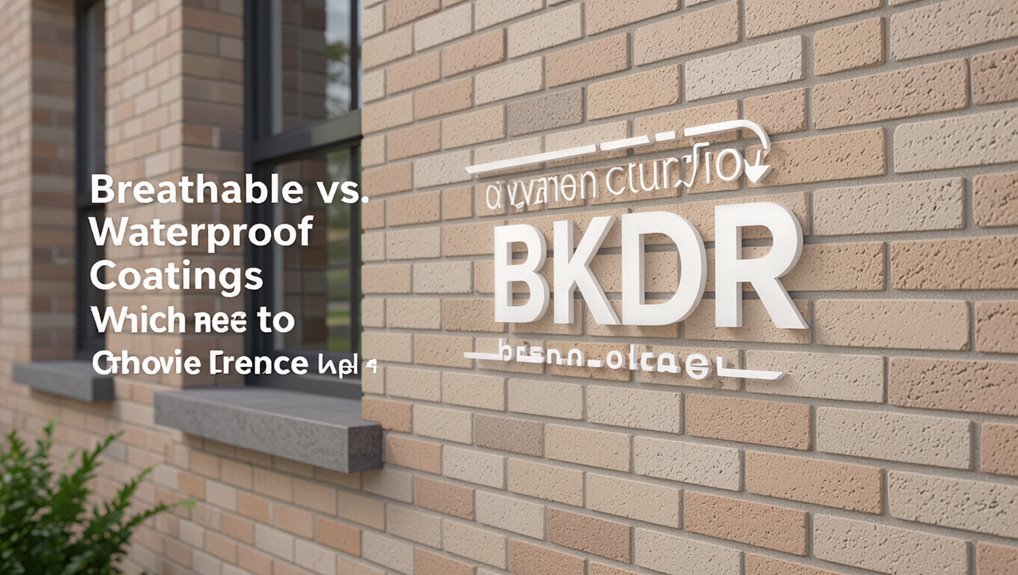
You’ll need to decide between breathable masonry paint that lets moisture escape and waterproof sealers that block water entry.
Breathable paints help prevent trapped moisture and efflorescence, while waterproof sealers offer stronger protection against rain and stains.
Consider your brick’s condition and local climate to choose the best balance of vapor permeability and water resistance.
Breathable Masonry Paint
1 key decision when painting exterior brick is whether to use a breathable masonry paint or a waterproof coating, since breathable paints let moisture escape from the wall while still protecting it from rain and UV.
You’ll choose breathable properties to prioritize moisture management, preventing trapped damp that can damage mortar and finishes.
Breathable masonry paint bonds well, resists peeling, and keeps vapor moving through the substrate.
Apply on clean, dry brick and follow manufacturer recommendations for coats and drying times.
Consider these benefits:
- Allows vapor diffusion, reducing blistering.
- Preserves historic masonry integrity.
- Lowers risk of trapped moisture buildup.
Waterproof Sealers
When deciding between breathable and fully waterproof sealers, weigh how your wall handles moisture and whether trapping vapor could cause damage.
You’ll choose breathable coatings if the brick and mortar release moisture; they let vapor escape while shedding rain. Go fully waterproof only on walls with good drainage and no history of rising damp, since impermeable layers can trap moisture and damage mortar.
Evaluate substrate condition, climate, and desired lifespan.
For either route, follow proper waterproofing techniques and guarantee thorough sealer application: clean, repair cracks, apply recommended coats, and test a small area before full coverage.
Acrylic-Latex vs. Masonry Paint: Pros and Cons
Because both acrylic-latex and masonry paints are common choices for exterior brick, it helps to know how they differ in adhesion, breathability, durability, and maintenance before you pick one.
You’ll find acrylic advantages and latex benefits in one category: good adhesion, color retention, and ease of cleaning.
Masonry paint, formulated for porous surfaces, offers stronger breathability and specialized mineral fillers that resist flaking on rough brick.
Choose based on your wall’s condition and climate.
Consider these quick trade-offs:
- Acrylic-latex: flexible, easy touch-ups, moderate breathability.
- Masonry: durable on rough mortar, higher vapor permeability.
- Maintenance: latex easier; masonry lasts longer.
When to Use Elastomeric Paint on Brick
Consider elastomeric paint if your brick has hairline cracks, frequent freeze–thaw exposure, or irregular mortar joints that let water in; it forms a flexible, waterproof membrane that bridges small gaps and keeps moisture out while still allowing limited vapor movement. You’ll choose it for protection, longevity, and elastomeric benefits when moisture is persistent. Follow proper application techniques: clean, repair, and apply generous coats for full bridging. Expect a slightly thicker, textured finish.
| Feeling | Result |
|---|---|
| Relief | Leaks stop |
| Pride | Fresh facade |
| Confidence | Lasting defense |
Choose the Right Primer for Exterior Brick
If your goal is a durable, attractive finish, start by picking a primer formulated for porous masonry—masonry or acrylic masonry primers penetrate brick and seal the surface so topcoats adhere evenly and resist peeling.
You’ll choose primer types based on brick porosity, previous coatings, and moisture exposure. Water-based acrylic primers suit most brick; oil-based or bonding primers handle chalky or sealed surfaces.
Follow proper application techniques: clean, repair mortar joints, and apply primer with a roller, brush, or airless sprayer for full coverage.
Remember to allow recommended dry time before painting.
- Match primer to substrate
- Prep thoroughly
- Use correct tools and drying times
Paint Sheen Choices for Brick and Why They Matter
You’ll want to weigh matte versus satin for durability because matte hides imperfections while satin resists scuffs and cleans easier.
Remember that higher gloss levels will accentuate the brick’s texture and joints, making them more noticeable.
Those choices affect both appearance and long-term maintenance, so pick the sheen that matches your look and upkeep plans.
Matte vs. Satin Durability
Two main sheens—matte and satin—affect how brick holds up and how easy it’s to maintain, so choosing the right one matters more than you might expect.
You’ll weigh matte durability against satin durability: matte hides imperfections and resists chalking, while satin sheds dirt and stands up to light scrubbing.
For exterior brick, consider exposure, maintenance willingness, and desired look.
- Low-traffic walls: choose matte for subtle, forgiving finish.
- High-traffic/exposed areas: pick satin for easier cleaning and moisture resistance.
- Compromise: use satin on trims, matte on large expanses for balance.
Gloss Effects On Texture
Because sheen changes how light plays across brick, the gloss level you pick will alter both texture and perceived depth, so choose deliberately. You’ll want lower gloss finishes on heavily textured surfaces to hide imperfections and reduce glare. Higher gloss finishes highlight mortar lines and surface irregularities, making texture pop and increasing washability. Consider climate, desired contrast, and maintenance when selecting sheen. Test small areas under different light before committing. Below is a quick comparison to guide your choice:
| Sheen | Effect |
|---|---|
| Flat | Minimizes texture |
| Eggshell | Softens texture |
| Satin | Balances sheen and depth |
| Semi-gloss | Accentuates texture |
Match Paint Color to Brick, Texture, and Style
When matching paint to your brick, start by evaluating the brick’s color, texture, and architectural style so your choices enhance—not clash with—the existing character.
You’ll want color coordination with mortar tones and surrounding trim, and maintain style consistency with period details.
Choose finishes that respect texture: matte smooths visual noise, satin highlights detail.
Test swatches on different exposures and view at various times of day.
Consider trim, doors, and landscaping as a palette.
Prioritize breathable masonry paints to avoid trapping moisture.
- Test swatches outdoors
- Match mortar and trim
- Keep finish compatible with texture
Prepare Unpainted Brick: Clean and Remove Efflorescence
Start by thoroughly cleaning unpainted brick so paint will adhere and your finish lasts; remove dirt, mildew, and loose particles with a stiff brush and a garden hose or pressure washer on a low setting. For efflorescence removal, dry the wall, scrub with a vinegar solution or commercial efflorescence cleaner, then rinse thoroughly. Test a small area first. Allow full drying—often several days—before priming. Proper brick cleaning prevents trapped salts from spoiling paint adhesion and appearance.
| Problem | Solution |
|---|---|
| Dirt | Brush + rinse |
| Mildew | Bleach solution |
| Salts | Efflorescence removal |
| Dust | Compressed air or brush |
Prepare Previously Painted Brick: Strip, Sand, and Test Adhesion
Strip loose paint, sand glossy spots, and test adhesion before you repaint—old coatings can hide problems that’ll cause new paint to fail.
Start with gentle strip techniques: use chemical strippers designed for masonry or a heat gun at low settings to avoid damaging brick.
Follow by sanding glossy areas and feathering edges so primer bonds evenly. Clean thoroughly to remove dust and residue.
Perform adhesion testing by taping and scoring small patches, then applying primer and paint to check for peeling after 24–48 hours.
Only proceed if adhesion testing shows solid bonding; otherwise strip more thoroughly.
Repair Mortar and Damaged Brick Before Painting
Assess and fix mortar joints and damaged bricks before you paint, because paint will only look and hold up as well as the underlying masonry. Inspect for crumbling mortar and cracked bricks, then choose appropriate mortar types and brick repair methods. Use matching color and compressive strength for repointing, and replace spalled bricks. Clean surfaces, let repairs cure, and test adhesion on a small area.
| Issue | Action | Time to Cure |
|---|---|---|
| Loose mortar | Rake and repoint | 24–72 hrs |
| Cracked brick | Replace unit | 48–72 hrs |
| Surface dust | Clean | 1–2 hrs |
| Minor chips | Patch | 24 hrs |
Painting Porous vs. Glazed Brick: Prep and Product Choices
You’ll start by testing how porous your brick is, since porosity dictates cleaning, priming, and how much paint it’ll absorb.
For highly porous brick you’ll need a masonry primer and possibly multiple coats, while glazed brick requires a bonding primer specifically formulated for slick surfaces.
Choose products designed for each type to guarantee adhesion and long-term durability.
Porosity Determines Prep
Because brick surfaces vary so much, porosity is the first thing you should consider before choosing paint and prep methods.
You’ll perform a porosity assessment by misting a small area: fast absorption means porous, beading means low porosity. Your surface treatment and product choices follow.
- For highly porous brick: clean, repair mortar, apply a penetrating masonry primer to reduce suction.
- For moderately porous brick: power-wash, etch if needed, use a masonry primer and breathable exterior paint.
- For low-porosity brick: focus on adhesion—use a high-bond primer designed for slick surfaces before topcoat.
Glazed Brick Coatings
When deciding between coatings for porous and glazed brick, remember that the surface’s texture drives both prep and product choice: porous brick soaks up primers and breathable paints, while glazed brick repels water and demands high‑bond primers or specialty adhesion primers before any topcoat.
You’ll clean glazed surfaces thoroughly, degloss with scuffing, and use a solvent‑based high‑bond primer for glazed brick applications. Test adhesion in an inconspicuous spot.
Choose alkyd or modified acrylic topcoats rated for slick substrates. For longevity, inspect and touch up seal failures regularly—good glazed brick maintenance prevents peeling and preserves appearance.
Best Paints and Primers for Cold Climates
If your region sees freezing temperatures or wide temperature swings, pick paints and primers formulated to cure and adhere in cold conditions.
You’ll prioritize cold climate considerations and paint durability to prevent peeling, flaking, and moisture damage on exterior brick. Choose acrylic latex paints with low-temperature cure labels and high-quality acrylic or epoxy primers rated for cold application.
Apply when temperatures meet product specs and bricks are dry.
- Use low-temp cure acrylic latex paint for flexibility and adhesion.
- Select primers labeled for frozen-season application to block efflorescence.
- Opt for high film-build systems to improve long-term paint durability.
Best Paints and Primers for Hot, Humid Climates
Hot, humid climates demand paints and primers that resist moisture, mildew, and blistering while still allowing brick to breathe.
You should pick high-quality acrylic latex paints paired with breathable masonry primers formulated for moisture resistance to prevent trapped water.
Look for mildew-resistant additives and elastomeric coatings for hairline crack bridging without sealing pores.
Seek mildew-resistant additives and elastomeric coatings to bridge hairline cracks while keeping masonry breathable.
Choose pigments and binders rated for UV stability to maintain color retention despite intense sun and humidity.
Apply primer to clean, dry brick and use proper ventilation during curing.
Regular inspection and prompt touch-ups will extend finish life and preserve both protection and appearance.
Eco-Friendly and Low-VOC Paint Options for Brick
If you want a greener finish on exterior brick, choose a low-VOC latex paint that cuts fumes without sacrificing durability.
You’ll also find natural mineral paints—like limewash and silicate-based options—that bond well to masonry and age gracefully.
Both choices reduce environmental impact and keep air quality better during application.
Low-VOC Latex Paint
Sustainability matters when you’re painting exterior brick, and low-VOC latex offers a practical, healthier alternative to traditional solvent-based coatings.
You’ll get eco friendly alternatives without sacrificing durability; modern latex formulations resist peeling, fading, and support paint longevity when applied to clean, primed masonry. They dry faster, reduce odors, and suit most climates.
- Choose a masonry-specific low-VOC latex for breathability.
- Prep thoroughly: clean, repair mortar, and use an appropriate primer.
- Apply two coats and inspect for coverage, paying attention to joints and textured surfaces.
You’ll protect your home and the environment with minimal trade-offs.
Natural Mineral Paints
Alongside low‑VOC latex, natural mineral paints give you an even more sustainable option for exterior brick by relying on inorganic binders like lime, silicate, or clay instead of synthetic resins.
You’ll appreciate mineral benefits such as breathability, mold resistance, and strong adhesion to porous masonry.
Application is straightforward: clean, repair, and pre‑moisten the brick, then apply thin, even coats.
These paints chemically bond to masonry, improving durability and exceptional color retention without off‑gassing.
They’re low‑maintenance, repairable, and compatible with historic substrates.
Choose mineral paints when you want an eco‑friendly, long‑lasting finish that respects brick’s natural moisture movement.
Estimate How Much Paint and Primer You’ll Need
Start by measuring the area you’ll paint—multiply the length and height of each wall, subtract windows and doors, and add up the totals—so you know the square footage to cover.
Use a paint calculator or paint estimator online to convert square footage to gallons, factoring coverage per gallon and surface texture. Brick and mortar absorb more, so increase estimates by 10–20%.
Remember primer needs its own calculation.
- Calculate total square feet precisely.
- Check coverage rates on product labels.
- Add 10–20% for texture and waste.
Round up to avoid shortages and label cans for touch-ups.
Tools and Equipment for Painting Exterior Brick
Before you start painting, gather the essential painting tools—brushes, rollers with nap suited for masonry, paint trays, and extension poles—so you won’t stop mid-job.
You’ll also need surface preparation equipment like a stiff-bristle brush, pressure washer or garden hose with spray nozzle, scraper, and wire brush to remove loose mortar and dirt.
Having the right tools on hand saves time and guarantees a smooth, long-lasting finish.
Essential Painting Tools
Tools matter: the right brushes, rollers, sprayer, ladders, and safety gear will make painting exterior brick faster and give you a durable, even finish.
You’ll want a selection of synthetic-bristle brushes for detail, a ¾–1″ nap roller for textured brick, and an airless sprayer for large areas.
Pick sturdy ladders and personal protective equipment.
Learn painting techniques like back-rolling after spraying to force paint into mortar joints.
Keep tools performing: clean brushes promptly, flush sprayers, and inspect ladders—tool maintenance prevents runs and safety issues.
Prioritize quality tools to save time and secure a long-lasting result.
- Brushes and rollers
- Sprayer and hose
- Ladders and PPE
Surface Preparation Equipment
Because paint only sticks to a clean, sound surface, you’ll need the right prep equipment to remove dirt, loose mortar, efflorescence, and old paint before you ever open a can. You’ll focus on surface cleaning and smart tool selection: pressure washer (low PSI), stiff nylon brushes, mortar rakes, and chemical strippers for stubborn areas. Wear PPE, test a small area, and work from top to bottom. Choose tools that match brick condition to avoid damage. Below is a quick gear guide.
| Tool | Purpose |
|---|---|
| Pressure washer | Removes grime |
| Nylon brush | Scrubs gently |
| Mortar rake | Removes loose mortar |
| Chemical stripper | Removes old paint |
Step-by-Step: Apply Primer to Exterior Brick
Start by inspecting and cleaning the brick so the primer can bond properly; you’ll want to remove dirt, loose mortar, and efflorescence with a stiff brush and mild detergent or a power washer on a low setting.
Start by inspecting and cleaning brick so primer can bond—remove dirt, loose mortar, and efflorescence first.
Choose primer types suited for masonry—water‑based for breathability or oil‑based for sealing old stains.
Patch mortar and let it cure.
Use a roller for broad areas and a brush for crevices; follow manufacturer drying times. Work in sections, maintain a wet edge, and check coverage.
Don’t skip a second coat if recommended.
- Choose correct primer types.
- Follow proper application techniques.
- Allow full cure before painting.
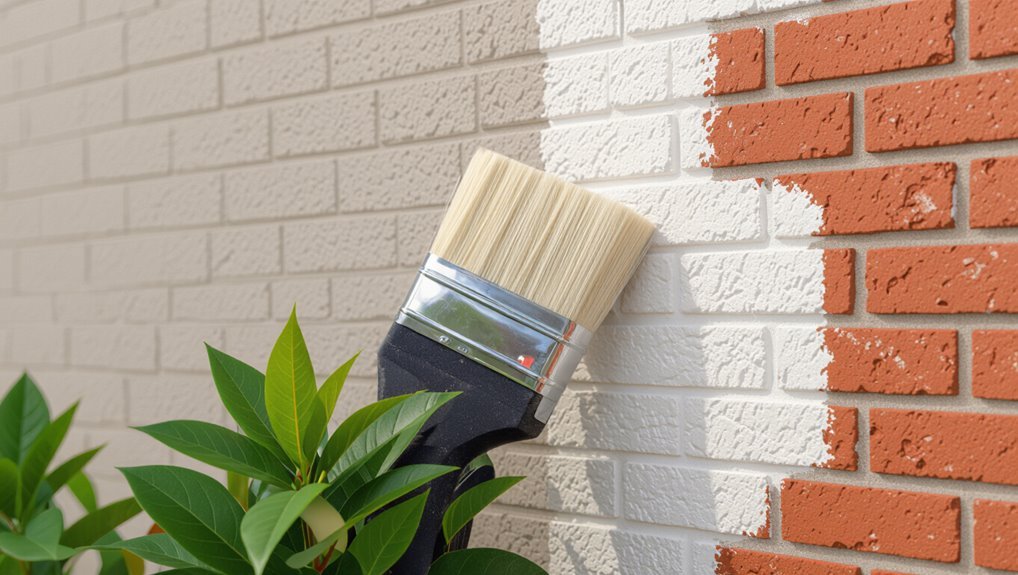
Step-by-Step: Apply Paint to Exterior Brick
With the primer fully cured, you’re ready to apply the paint to your exterior brick.
Begin by testing a small inconspicuous area to confirm adhesion and the chosen brick color under natural light.
Work in manageable sections from top to bottom, ensuring even coverage and maintaining a wet edge to avoid lap marks.
Apply two thin coats rather than one thick one; this enhances paint longevity and uniformity.
Allow proper drying time between coats per manufacturer guidelines.
Inspect mortar joints and touch up as needed.
Clean tools immediately and remove masking, enjoying the refreshed, durable finish.
Rolling, Brushing, or Spraying Brick: Pros and Cons
Choose the right application method and you’ll save time, get better coverage, and avoid common mistakes when painting exterior brick.
You’ll weigh rolling techniques for good coverage and application speed, brushing benefits for control around mortar and detailed spots, and spraying efficiency for large areas.
Spraying gives fastest application speed but can overspray; rolling balances finish uniformity and texture impact on rough brick; brushing offers control but is slower.
Pick based on surface texture, access, and desired finish uniformity.
Choose the method that matches your brick’s texture, access limitations, and how uniform you want the finish to be.
- Rolling: good midground for texture impact.
- Brushing: precision and brushing benefits.
- Spraying: top spraying efficiency.
How Many Coats of Paint Does Exterior Brick Need?
Most exterior brick jobs need two coats of paint: a quality primer followed by two finish coats is the safest route, though some situations let you get by with primer plus one topcoat.
You’ll choose based on paint types, brick textures, and exposure. Smooth, sealed brick may accept fewer coats; highly porous or rough textures soak up more and need extra.
Use masonry or exterior acrylic latex for durability, and pick thicker-body formulas for uneven surfaces.
Test a small area to gauge coverage and adjust coat count. Remember, additional thin coats beat one heavy coat for adhesion and longevity.
How Long to Wait Between Primer and Paint on Brick?
How long you wait between primer and paint on brick depends on drying time factors like humidity, brick porosity, and the primer type you used.
In warm, dry conditions you can often paint after 2–4 hours, but colder or humid weather may require 24 hours or more.
Always check the primer’s instructions and do a touch test to verify it’s fully dry before you apply paint.
Drying Time Factors
Because brick absorbs moisture unevenly, you’ll need to factor substrate conditions, primer type, and weather when timing the wait between primer and paint.
You should check drying conditions and monitor humidity levels; colder or damper conditions slow cure and require longer waits. Also consider primer porosity and manufacturer cure times, and inspect mortar joints for residual moisture.
- Measure surface and ambient moisture with a meter.
- Follow primer label for minimum recoat and full cure.
- Delay if dew, rain, or high humidity levels are expected within 24–48 hours.
Adjust timing rather than guessing to avoid adhesion failures.
Optimal Wait Periods
When you’re planning the repaint, let the primer reach its recommended dry and tack-free state before applying paint—typically that means waiting anywhere from 1 to 24 hours for fast-drying acrylic primers and up to 48–72 hours (or longer in cool, humid conditions) for oil-based or high-build masonry primers.
You should follow manufacturer instructions for ideal drying and factor in curing times before topcoating. For masonry, longer curing improves adhesion and reduces blistering.
If you’re unsure, tap a discreet area: no tackiness means you can proceed. Rushing risks peeling; waiting guarantees a durable, even finish on exterior brick.
Weather And Temperature
Although primer may feel dry to the touch, temperature and humidity can dramatically change how long you should wait before topcoating brick; cold or damp conditions slow curing and can require stretching your wait from the typical 1–24 hours up to 48–72 hours or more.
You should check product instructions, monitor weather impact, and avoid painting during temperature fluctuations. If you hurry, adhesion and finish suffer.
- Wait longer when humidity is high or temperatures are near freezing.
- Use a moisture meter to confirm dryness before painting.
- Plan for stable, moderate temperatures (50–85°F) to guarantee proper cure.
Avoid Peeling, Blistering, and Flaking on Painted Brick
If you want your painted brick to last, you’ll need to eliminate the common causes of peeling, blistering, and flaking before you ever touch a brush.
Inspect for loose mortar, dirt, and old failing coatings; proper surface preparation guarantees strong paint adhesion. Repair cracks and repoint mortar so moisture won’t undermine the film.
Clean with a masonry cleaner and rinse thoroughly; let brick dry fully. Choose breathable, exterior-grade masonry paint and apply at manufacturer-recommended thickness and conditions—don’t paint in direct sun or freezing temperatures.
Maintain gutters and downspouts to keep walls dry, and touch up damaged areas promptly to prevent spread.
Prevent and Treat Efflorescence After Painting
Because moisture drives efflorescence, stop water intrusion and salt migration before you paint and you’ll avoid most problems afterward.
Inspect mortar, flashings, and downspouts; fix leaks and improve drainage as part of efflorescence prevention. If salts appear after painting, don’t repaint over deposits.
- Remove salts with a dry brush, then wash with mild acidic solution (vinegar diluted) for stubborn deposits.
- Rinse thoroughly, let the brick fully dry, and test for recurring salts before repainting.
- Use breathable masonry primers and paints and address underlying moisture to complete efflorescence treatment and prevent recurrence.
Maintain Painted Brick to Maximize Lifespan
Keep an eye on painted brick year-round so small issues don’t become big repairs. You should inspect mortar joints, paint adhesion, and caulking every season, watching for cracks, peeling, or moisture stains.
For effective brick maintenance, wash gently with a mild detergent and soft brush to remove dirt and mildew; avoid pressure washing that can damage mortar. Address leaking gutters and poor drainage promptly to prevent water intrusion.
Apply breathable, high-quality exterior paint and maintain proper ventilation to reduce trapped moisture. These longevity tips help preserve appearance and structural integrity, reducing costly repairs and extending the painted brick’s lifespan.
Repaint or Touch Up Painted Brick Without Problems
When you’re ready to refresh painted brick, start by evaluating the surface so you can choose between spot repairs and a full repaint; this saves time and prevents mismatched patches.
When refreshing painted brick, assess the surface first to decide on spot repairs or a full repaint.
Clean, degloss, and repair mortar or flaking paint before proceeding. Decide on color selection now—match existing tones for touch-ups or pick a new hue for repainting.
Use proper primers and breathable exterior masonry paint. Follow careful application techniques: maintain consistent brush strokes, overlap slightly, and work in sections.
- Spot-clean and prime flaws.
- Sand and feather edges.
- Repaint full sections for uniformity.
Cost Comparison: DIY vs. Professional Painting for Brick
After you’ve assessed and prepped the brick for repainting, you’ll want to weigh whether to tackle the job yourself or hire a pro.
Use DIY tips to estimate material costs, equipment needs, and your skill level. DIY offers cost savings but increases time investment and risk of mistakes on complex surfaces.
Pros handle project complexity faster and deliver consistent quality differences you’ll notice. Factor long term value: a pro’s warranty and proper application can reduce future maintenance considerations.
Balance immediate savings against potential rework costs; pick the option that matches your budget, timeline, and confidence.
Frequently Asked Questions
Can I Paint Brick in Freezing or Rainy Conditions?
No — you shouldn’t paint brick in freezing or rainy conditions. You’ll risk poor paint adhesion and failure; wait for stable weather conditions, ensuring dry surfaces and temperatures within the paint manufacturer’s recommended range for reliable results.
How Long Does Painted Brick Increase My Home’s Resale Value?
Painted brick can boost resale value modestly, and you’ll often see quicker interest and potential higher offers if the finish modernizes curb appeal; the exact increase varies by market, quality of work, and color choice.
Will Painted Brick Affect My Homeowner’s Insurance or Warranty?
Yes—painted brick can affect insurance implications and warranty considerations; you’ll need to notify your insurer, check policy exclusions for moisture or alteration, and confirm any manufacturer or builder warranties aren’t voided by altering exterior finishes.
Can I Paint Brick Veneer or Manufactured Stone the Same Way?
Yes — you can paint both, but you’ll use different prep and products: for brick veneer techniques focus on breathable masonry primers and flexible acrylics, while for manufactured stone options use adhesion-promoting primers and paint rated for synthetic substrates.
How Do I Remove Paint From Brick Without Damaging It?
You can strip paint using gentle methods: chemical strippers, hot water pressure at low PSI, or hand-scraping with wire brushes. Combine paint removal techniques with thorough brick surface preparation to avoid damage and guarantee proper subsequent coating.
Conclusion
You’ve got the tools to decide whether to paint exterior brick — think of breathable masonry paint as a raincoat that lets your home breathe, not suffocate. If you test for moisture, remove old coatings, and treat efflorescence, your work will hold up. Maintain and touch up proactively, and weigh DIY savings against pro expertise. With the right choices, painted brick becomes a long-lasting, weatherwise armor that still shows off your home’s true character.