What Should I Do Before Painting a Wall? Prep Guide
Before painting a wall, clear the room and protect floors and furniture, then fix holes, cracks, and loose paint so the surface’s smooth. Clean grime and sand glossy spots for better adhesion, treat stains or mildew, and prime where needed—stain-blocking primer for nasty marks and drywall primer for skim-coated areas. Gather tools, tape, drop cloths, and PPE, plan your paint sequence, and inspect everything; follow the full prep checklist below to learn practical tips and timing.
Why Wall Prep Matters Before Painting
Preparation matters because it’s the difference between a paint job that looks professional and one that peels, chips, or shows every imperfection.
Preparation makes the difference between a flawless, long-lasting paint job and one that peels, chips, or reveals every flaw.
You’ll prevent small issues from becoming big problems by addressing wall damage early: fill holes, sand rough spots, and remove loose material.
Cleaning removes dust and grease that undermine paint adhesion, so wash and dry surfaces before priming.
Primer seals repairs and creates a uniform surface that helps paint stick evenly.
Skipping these steps risks wasted time and money when paint fails prematurely.
Do the prep right, and your finished wall will last and look polished.
Goal: What Good Wall Prep Looks Like
A well-prepped wall lets paint go on smoothly, hide repairs, and stay attractive for years—so you’ll see even color, no bubbling or flaking, and a surface that feels uniform to the touch.
Your goal is a clean, stable substrate: repaired dents and cracks, removed dust and grease, and consistent wall texture so light reads evenly. You want proper wall adhesion so paint bonds and resists peeling.
That means sanding glossy spots, feathering edges of patches, and addressing loose material. When you inspect the surface, picture the finished look—smooth, consistent, durable—and fix anything that would show through paint.
Quick Step‑By‑Step Prep Checklist
Start by clearing the work area so you’ve got room to move and nothing gets splattered.
Next, repair and patch any holes or cracks until the surface is smooth.
Finish by priming where needed and taping clean edges to guarantee crisp lines.
Clear The Work Area
Before you paint, clear the room so you’ve got an unobstructed workspace: move furniture to the center or out of the room, roll up rugs, unplug and remove lamps and decor, and set aside anything fragile or irreplaceable.
Next, clean surfaces and remove debris from floors and baseboards so dust won’t mix with paint.
Organize supplies and gather tools in one accessible spot—drop cloths, tape, brushes, rollers, trays, and a ladder.
Inspect walls and plan layout for primer and paint sequence, check lighting to guarantee even coverage, and assess damage to prioritize repairs before you start.
Repair And Patch
Patch holes, sand rough spots, and get your walls smooth so paint goes on evenly. Inspect for wall damage, then choose repair techniques that suit the size: small dents get spackle, larger gouges need joint compound and backing.
Use appropriate patch materials—mesh tape, putty, or drywall patches—apply in thin layers, letting each dry. Sand between coats for proper surface preparation.
For textured walls, blend and do texture matching before final sanding. Clean dust away, check for low spots, and apply finishing touches like feathering edges so your wall’s ready for the next step.
Prime And Tape Edges
Prime the repaired areas and tape the edges to create a clean, sealed base for your paint—this prevents bleed-through, evens out sheen, and gives you crisp lines where walls meet trim or ceilings.
Choose prime types based on surface: stain-blocking for repairs, bonding primer for glossy patches, or all-purpose for fresh drywall. Apply primer thinly and let it dry fully.
Use tape techniques that match the job: delicate tape for fresh paint, painter’s tape for standard edges, or low-tack for textured surfaces. Press tape down firmly, remove within 60 minutes of final coat tack for the sharpest lines.
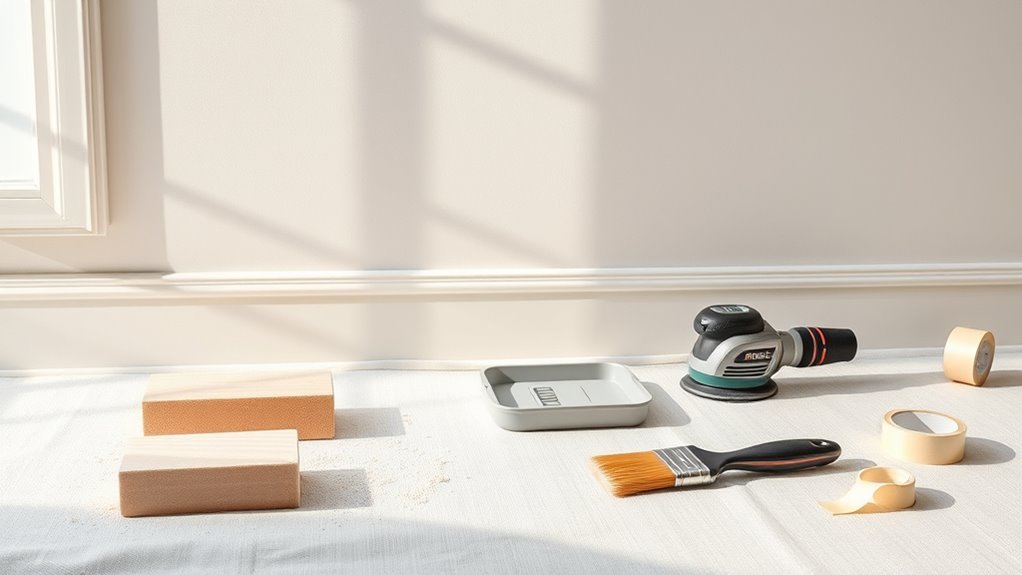
Tools and Materials to Gather First
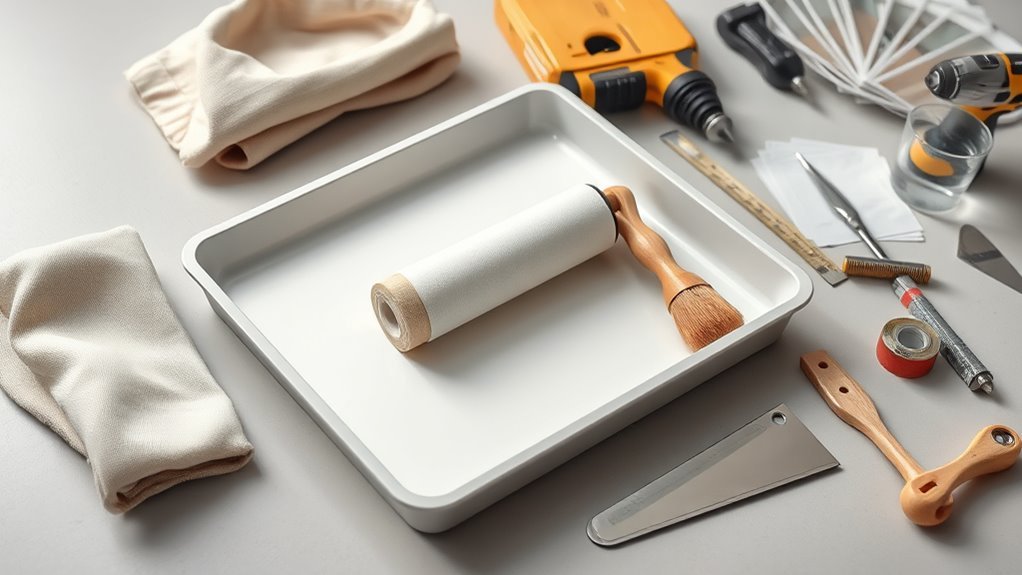
Start by gathering the essential tools and materials so you won’t have to stop mid-job: high-quality brushes and rollers, a tray and liner, painter’s tape, drop cloths, a putty knife and spackle for small repairs, sandpaper (medium and fine grit), a sturdy ladder, and the paint plus primer you’ve chosen.
Check roller nap against surface texture and pick brush shapes for trim. Select a paint finish that suits the room—flat hides flaws, eggshell or satin cleans easier, semi-gloss suits trim.
Have touch-up supplies, mixing sticks, a clean bucket for water or solvent, and rags for spills.
Personal Protective Equipment and Ventilation
Safety gear and good airflow keep you healthy while painting, so put on gloves, eye protection, and a mask rated for paint fumes or particulates before you open the cans.
Choose protective gear that fits: nitrile or neoprene gloves, sealed goggles, and an NIOSH-approved respirator or P100 for strong solvents. Wear old clothes or a disposable coverall and slip-resistant shoes.
Keep a first-aid kit and skin cleanser nearby. Follow safety precautions: avoid eating or drinking in the area, wash hands before breaks, and don’t mix chemicals without guidance.
Inspect gear for damage and replace filters or torn items promptly.
Create a Safe, Well‑Ventilated Workspace for Painting
You’ll want to set up cross-ventilation by opening windows and doors and using fans to push fumes outside.
Put on a respirator, gloves, and eye protection before you start, and keep spare PPE handy for helpers.
Check that ventilation is working throughout the job and pause if you start to feel dizzy or lightheaded.
Proper Ventilation Setup
Because paint fumes can build up quickly in enclosed rooms, set up ventilation before you open any cans. Open windows and exterior doors to create cross-ventilation, and position box fans to push stale air out and draw fresh air in.
Use ventilation equipment like exhaust fans or window fans for stronger airflow, and consider a portable air purifier to help maintain air quality during longer jobs.
Keep vents and HVAC intake closed if you’re trying to avoid spreading fumes through the system. Monitor how the room smells; if fumes linger, increase airflow or pause painting until conditions improve.
Personal Protective Equipment
When you’re prepping a well‑ventilated workspace, equip yourself with the right personal protective equipment to minimize exposure to fumes, dust, and splatter.
Wear safety goggles to protect eyes from drips and airborne particles. Use disposable or reusable gloves to keep solvents and paint off your skin. Put on respirator masks rated for paint fumes—choose cartridges for organic vapors when using solvent‑based products.
Wear long sleeves, pants, and shoe covers to avoid tracking paint. If sanding, add a dust mask or particulate filter and consider ear protection for power tools.
Replace or clean gear after each job.
Protect Floors: Drop Cloths and Plastic Sheeting
Start by covering the floor completely with drop cloths or plastic sheeting to catch drips, dust, and stray paint. Lay heavier canvas cloths over high-traffic areas and use taped plastic sheeting against baseboards and under trim for a snug seal.
Cover floors completely with drop cloths or taped plastic sheeting—canvas for traffic, plastic tight against baseboards to catch drips.
You’ll choose drop cloths types and plastic sheeting options based on durability and room use. Secure seams, tape edges to avoid trips, and overlap cloths to keep dust out. Keep a path clear for tools and drying ladders. Remove or replace soiled sections promptly.
- Canvas drop cloths for durability
- Disposable paper for quick jobs
- Plastic sheeting rolls
- Painter’s tape edges
- Weighted corners
Protect Furniture and Fixtures Effectively
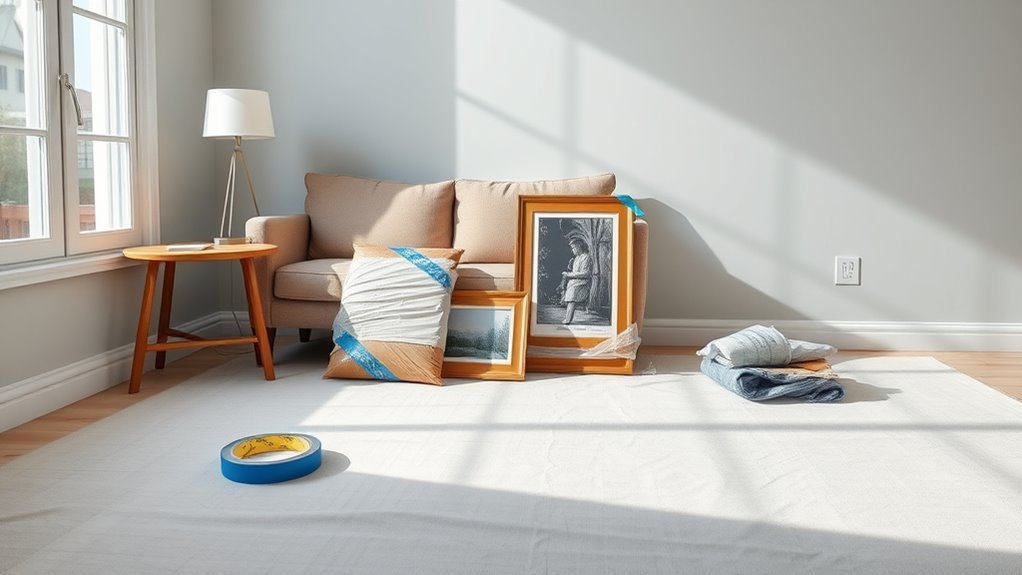
Once you’ve covered the floors, move on to shielding furniture and fixtures so paint splatters and dust don’t ruin them; cover couches and tables with breathable canvas or fitted plastic, remove cushions and lamp shades, and wrap light fixtures and hardware with painter’s plastic secured with low-tack tape.
Next, group small items and store them in boxes or on high shelves, and use furniture covers that fit snugly to prevent shifting.
For permanent fixtures, apply fixture protection like plastic bags and secure edges to avoid gaps.
Keep pathways clear so you won’t knock covers loose while you work.
Choose the Right Painter’s Tape and How to Use It
With furniture and fixtures protected, you’ll want the right painter’s tape to get clean paint lines and protect trim, glass, and hardware.
Choose tape based on surface, paint type, and desired edge crispness. Know tape types and follow proper tape application to avoid bleed and residue.
Prep surfaces by cleaning and drying; press tape edges firmly. Remove tape at a 45° angle while paint is tacky or fully dry depending on brand.
- Low-adhesion for delicate surfaces
- Medium for painted trim
- High for rough exterior
- Specialty for glass
- Test a small area first
Mask Trim, Outlets, and Fixtures Without Leaks
Cover trim, outlets, and fixtures carefully so paint goes only where you want it; use tape, plastic, or paper cut to fit snugly and press edges firmly to prevent seepage.
Start by cleaning surfaces and ensuring tape adhesion. Use painter’s tape for trim, thin plastic or paper for fixtures, and small folded tabs to mask outlet edges without removing covers.
Clean surfaces first, then use painter’s tape, thin plastic or paper, and folded tabs to seal outlets and trim.
Work from top down, smoothing tape with a fingertip or putty knife to seal seams—these masking techniques focus on leak prevention.
Check corners and gaps, add extra strips where needed, and remove tape while paint is tacky for clean lines.
Remove or Cover Hardware and Light Switches
Start by turning off power at the breaker and either remove screws to take off switch and outlet covers or mask them securely if you prefer not to detach plates. You’ll protect fixtures and make painting neater when you remove hardware or cover switches.
Use basic tools and painter’s tape, label plates for reinstallation, and keep small parts safe. Verify power is off before touching wiring.
- Unscrew covers and store screws in labeled baggies
- Use painter’s tape to cover switches and buttons
- Remove light fixtures only if confident
- Protect nearby hardware with plastic
- Inspect plates before reattaching
How to Set Up Ladders and Scaffolding Safely for Painting
Before you start painting high areas, make sure the ladder is on firm, level ground and angled correctly so it won’t slip.
If you’re using scaffolding, follow the manufacturer’s assembly steps, lock all braces and guardrails, and check that planks are secure.
Always keep your tools within reach on a stable platform and never overreach from a ladder or scaffold.
Safe Ladder Placement
One clear rule: place ladders and scaffolding on firm, level ground and secure them so they can’t slip or shift while you work.
You’ll prioritize ladder stability and ladder safety by checking feet, angle, and load capacity before climbing. Keep tools in a belt, not in your hands.
- Inspect rubber feet and locking mechanisms
- Set a 4:1 angle for extension ladders
- Tie off or brace the top when possible
- Keep a clean, dry base free of debris
- Don’t overreach; move the ladder instead
Follow these steps every time to reduce falls and work confidently.
Scaffold Assembly Basics
Ladders work well for small jobs, but when you need longer runs or a steadier platform, scaffolding gives you safer, more efficient access.
Choose scaffold types suited to your job—rolling, frame, or adjustable—matching height and load. Inspect components for damage, secure base plates, and level the frame before climbing.
Lock wheels and use guardrails, toe boards, and proper planking rated for weight. Tie scaffold to the structure when required and keep platforms clear of tools and paint cans.
Wear a harness if needed, non-slip shoes, and follow manufacturer instructions and local regulations for scaffold safety at every stage.
How to Plan Your Painting Timeline and Dry Times
Plan your schedule around three things: prep, paint application, and drying—each affects the next. You’ll make a realistic painting schedule by factoring room size, number of coats, and product drying times. Allow extra time for ventilation and temperature changes.
- Check manufacturer drying times on the can.
- Block off days for priming and patching.
- Schedule thin coats; they dry faster and level better.
- Plan touch-up time after full cure.
- Don’t rush between coats; tacky paint ruins finish.
Stick to this timeline, adjust for humidity, and you’ll avoid rework and achieve a professional result.
How to Estimate How Much Paint You Need
Start by measuring your wall’s height and width so you can calculate square footage.
Then check the paint’s coverage rate to figure how many gallons you’ll need per coat.
Finally, add a little extra for touchups and mistakes so you don’t run short.
Measure Wall Dimensions
Before you buy paint, measure each wall’s width and height so you can calculate square footage and estimate how many gallons you’ll need. Use a tape measure and note doors, windows, and any wall accessories so your wall measurements reflect actual paintable area. Measure twice to avoid mistakes.
- Mark each wall on a sketch
- Record width × height for every section
- Subtract openings (doors, windows)
- Include alcoves or built-ins separately
- Keep measurements handy when shopping
Accurate dimensions save trips and waste. With clear totals, you’ll choose the right amount of paint and avoid surprises.
Account For Coverage Rates
One gallon of paint typically covers about 350–400 square feet, but you should check the specific coverage on the can and adjust for surface texture, primer use, and number of coats.
Measure wall area, subtract windows and doors, then divide by the can’s stated coverage to get base gallons.
Factor in surface texture: rough or porous walls absorb more, smooth walls less.
Different paint types (latex, oil, high-build) have varying spread rates, so use manufacturer figures for accurate coverage calculations.
Round up to the nearest available can size to guarantee you won’t run short mid-project.
Add Extra For Touchups
Although your base calculation gives you the gallons needed for full coverage, you should add extra paint for touchups and future repairs to avoid color-mismatch headaches.
Plan to buy about 10–20% more for small fixes, settling time, and absorption differences.
Store leftover paint properly: seal the can, label color and date, and keep it cool and dark.
Learn simple touch up techniques like feathering, using the same roller nap, and testing on scrap.
Keep a small sample for mixing matches. Consider a quart reserve for each major color so repairs blend seamlessly.
- Buy 10–20% extra
- Seal and label cans
- Use same roller nap
- Test on scrap
- Reserve a quart
How to Choose the Right Paint (Type and Sheen) for Walls
Picking the right paint and sheen makes a bigger difference than most people expect, because it affects durability, coverage, and the final look of your room.
Choose latex for easy cleanup and good paint durability in most rooms; oil is tougher for high-moisture or trim.
Use latex for easy cleanup and solid durability in most rooms; reserve oil for trim or high‑moisture areas.
Match sheen to function: flat hides imperfections, eggshell balances durability and subtle sheen for living spaces, satin or semi-gloss works for kitchens and bathrooms where moisture and cleaning matter, and high-gloss suits trim.
Consider color psychology when picking hues—calming blues for bedrooms, energizing yellows for kitchens—and balance finish with maintenance needs.
Test Paint Color and Sheen on Your Wall
Start by applying small swatches of your chosen colors and sheens directly to the wall—at least three 4×4-inch patches for each option—so you can see how they look in the room’s light and next to existing finishes.
Observe at different times of day and with artificial light. Label each patch and note sheen. Use color swatches and paint samples to compare undertones and reflection. Avoid full rolls until satisfied.
- Check natural light morning and afternoon
- View with room lights on and off
- Inspect from different distances
- Compare against trim and furnishings
- Allow paint to dry fully before deciding
Mix and Thin Paint for Consistent Color
Before you start rolling, stir the paint thoroughly so the color and finish are uniform from top to bottom.
If the paint feels too thick for your brush or roller, thin it slightly following the manufacturer’s recommendation to maintain color integrity.
Keep stirring occasionally as you work to prevent settling and uneven patches.
Stir Paint Thoroughly
Stir the paint thoroughly so the pigment and binder are evenly distributed — this guarantees the color looks uniform from the first coat to the last. You’ll prevent streaks and mismatched batches by using proper mixing techniques and checking paint consistency before you load your roller.
Stir slowly, scrape the can sides, and lift settled pigment from the bottom.
- Use a clean paddle or stir stick
- Scrape edges and bottom well
- Stir until color and sheen match
- Check viscosity visually, not by guess
- Re-stir between coats if left sitting
Consistent stirring saves touch-ups and secures smooth coverage.
Adjust Paint Consistency
Thin and mix paint only when you need to match sheen and flow—too thick and it drags, too thin and it loses coverage. You’ll check paint viscosity by stirring and testing on a cardboard scrap. Use measured thinning techniques: add manufacturer-recommended thinner, a little at a time, and re-test. Keep records so batches match. Aim for uniform color and sheen before rolling.
| Action | Result |
|---|---|
| Stir thoroughly | Even pigment |
| Test sample | Check viscosity |
| Add thinner slowly | Controlled flow |
| Re-stir | Consistent sheen |
| Note ratio | Repeatable match |
When to Hire a Pro and Budget for Prep Services
How do you know when to call a pro? You should weigh cost considerations, complexity, and professional recommendations before deciding. Hire help if structural repairs, extensive patching, lead paint, or texture matching exceed your skills.
- Structural or water damage
- Lead or asbestos concerns
- Large-scale sanding or stripping
- Precise texture or color matching
- Limited time or physical ability
Request detailed quotes and itemized estimates so you can budget for labor, materials, permits, and waste disposal.
Compare at least three contractors, check references, and confirm insurance and warranties to avoid surprises and guarantee the prep meets painting standards.
How to Clean Walls Before Painting
Start by removing dust, grease, and grime so paint will stick and look even; grab a microfiber cloth or vacuum with a brush attachment for dry dusting.
Then spot-clean stains with a mild detergent or trisodium phosphate (TSP) solution as needed.
Next, rinse surfaces with clean water and a sponge to remove residue, working top to bottom.
For glossy or greasy areas, scuff-sand lightly after cleaning so primer bonds.
Patch holes, let repairs dry, then wipe away sanding dust.
Choose appropriate cleaning techniques and wall solutions for surface type—latex-safe cleaners for painted drywall, solvent-based for stubborn oil—then let walls fully dry.
Identify and Treat Mildew or Mold on Walls
Before you paint, inspect the walls closely for dark spots, musty odors, or fuzzy growth that indicate mold or mildew.
If you find any, clean the area with a mildew-killing solution and scrub until the stains are gone.
After cleaning, treat the surface with a mold inhibitor and let it dry fully before priming and painting.
Inspect For Mold
When you inspect walls for mold, look for discolored patches, musty smells, and areas that stay damp—these signs tell you where mildew or mold may be growing and whether you need to treat it before painting.
You’ll perform a quick moisture assessment and consider mold testing if hidden growth is suspected. Check entire rooms, corners, and behind furniture. Note ventilation and past leaks.
- Scan ceilings, baseboards, and window frames
- Sniff for persistent musty odors
- Use a moisture meter for hotspots
- Look for fuzzy, slimy, or powdery textures
- Record locations and severity for next steps
Clean And Treat
Scrub affected areas with a detergent solution and a stiff brush to remove visible mildew, then treat remaining spores with a diluted bleach solution (1 cup bleach to 1 gallon water) or a commercial mold remover; always ventilate the room, wear gloves and eye protection, and test a small inconspicuous patch first to confirm the treatment won’t damage the finish. You’ll rinse, dry thoroughly, and assess substrate integrity; replace damaged drywall if needed. Use proper cleaning supplies and choose compatible wall treatments before repainting. Quick reference:
| Task | Product | Safety |
|---|---|---|
| Remove mildew | Detergent, brush | Gloves, mask |
| Kill spores | Bleach mix or remover | Ventilation |
| Rinse | Water | Eye protection |
| Inspect | Drywall check | Replace if soft |
Find and Repair Holes, Cracks, and Dents
Start by scanning the wall closely for holes, cracks, and dents—run your hand over the surface and look from different angles to catch shallow imperfections.
Use simple tools for effective hole detection and dent repair so paint lays smoothly. Tackle structural cracks first and remove loose debris.
For small blemishes, roughen edges and make certain the area is clean and dry. Follow with appropriate filler later.
- Mark locations with pencil
- Clear dust with a brush
- Undercut loose edges gently
- Press filler to fill voids fully
- Sand flush once cured
Inspect again before priming.
Choose and Apply Spackle or Joint Compound (Step‑By‑Step)
Pick the right compound for the job—lightweight spackle for small holes and joint compound for larger gaps or plaster repairs.
You’ll load a putty knife and apply thin, even layers, letting each coat dry before adding the next.
Once filled, smooth and feather the edges so the patched area blends with the wall.
Choose The Right Compound
1 clear decision will save you time and frustration: choose spackle for small nail holes and dents, and joint compound for larger repairs, seams, or areas that need sanding and multiple coats.
You’ll match compound types to the job: spackle for quick fixes, lightweight compound for easy sanding, setting-type for deep fills, and all-purpose joint compound for smoothing seams.
Consider compound application needs, drying time, and sanding grit. Pick tools that suit the compound: a small knife for spackle, wider knives for joint compound. Don’t mix incompatible products.
- Size of damage
- Drying time required
- Sandability
- Tool compatibility
- Finish expectations
Apply And Smooth Spackle
Grab a putty knife and a clean rag, then mix your spackle to the consistency recommended on the package so it spreads smoothly without sagging.
Press spackle into holes and dents, overfilling slightly to allow for shrinkage. Use a broad knife to scrape across the surface at a shallow angle, removing excess and leaving a flush patch.
Let dry fully, then sand lightly with fine grit, cleaning dust with the rag.
For large gaps use joint compound in layers, letting each cure before the next.
Apply smoothing techniques like feathering edges and cross-sanding for an invisible repair prior to priming.
When and How to Sand Repaired Areas Smoothly
Before you paint, sand repaired spots until they’re flush with the surrounding wall so the finish looks seamless—start when the filler has fully cured (check the manufacturer’s drying time) and the surface feels hard to the touch.
Use proper sanding techniques to avoid gouges and speed smoothing repairs. Work with light pressure, circular motions, and progressively finer grit. Clean dust before priming.
- Choose 120–220 grit sandpaper
- Use a sanding block or sponge for even pressure
- Sand feathered edges into the surrounding paint
- Wear a mask and eye protection
- Wipe with a damp cloth and inspect for low spots
Check for and Fix Water Stains and Damage
Start by scanning ceilings and walls for discoloration, soft spots, or peeling paint—these are the telltale signs of water damage you’ll need to address before painting.
Do a quick damage assessment: tap for soggy areas, probe drywall gently, and trace stains to their source.
Fix leaks, dry the area thoroughly, and replace or patch ruined drywall or plaster.
For water stain removal, clean surfaces with a mild detergent or a bleach solution to kill mildew, then sand and smooth patches.
Let everything cure fully before priming and painting to prevent recurring stains or hidden decay.
When to Use a Stain‑Blocking Primer
If you’ve got oil or smoke stains, a stain‑blocking primer will stop bleed‑through before you paint.
It’s also what you reach for to seal watermarks and tannin from wood.
Use it to lock down marker and ink so they don’t reappear through your new finish.
When Oil Or Smoke Stains
When you see yellowing, greasy spots, or a lingering smoke odor on your wall, you’ll need a stain‑blocking primer before repainting; these stains can bleed through regular paint and ruin your finish.
You’ll treat the cause first: for oil stain removal use a degreaser or trisodium phosphate substitute, then rinse and dry.
For smoke damage treatment, clean soot with a dry sponge and a mild cleaner before priming.
Choose an oil‑based or shellac primer for stubborn stains. Apply evenly, let cure, then paint.
- Identify stain type
- Clean thoroughly
- Select the right primer
- Apply per instructions
- Inspect before painting
Covering Watermarks And Tannin
A few telltale rings or brownish streaks mean you’ll need a stain‑blocking primer before repainting: watermarks and tannin bleed can seep through regular paint and show up later.
First confirm water damage is fixed; don’t cover active leaks.
Do surface cleaning with mild detergent and a sponge to remove dirt and loose material, then allow full drying.
For tannin or deep water stains, apply a quality stain‑blocking primer following manufacturer instructions to guarantee paint adhesion and prevent bleed‑through.
After the primer dries, inspect for residual stains and touch up before finishing with your chosen topcoat for a uniform result.
Blocking Marker And Ink
Although pen and marker stains might look like surface dirt, they can bleed through fresh paint and ruin your finish, so you’ll want to treat them before repainting.
You should try marker removal first—clean gently with isopropyl alcohol or a commercial cleaner. If stains persist, use a stain‑blocking primer designed for ink stains and pigments.
Apply one coat, let it dry, then spot‑sand if needed before priming the whole wall.
- Test cleaner in an inconspicuous spot
- Wear gloves and ventilate the room
- Use a high‑adhesion blocking primer
- Follow manufacturer dry times
- Recoat only after primer cures
How to Pick Primer for Different Wall Types
Start by matching the primer to the wall’s material and condition, since the right base coat prevents adhesion problems and evens out absorption.
Assess stains, previous finishes, and moisture; oil-based or shellac primers block stains, while water-based and bonding primers suit many surfaces.
Consider primer types: stain-blocking, high-build, bonding, and mildew-resistant options.
Match to wall materials, porosity, and paint type—latex paint pairs with acrylic primers, oil paints with oil-based primers unless you use a universal bonding product.
Test a small area if unsure.
Choose quality primer to save coats and guarantee durable, uniform topcoat coverage.
How to Prime Drywall, Plaster, Masonry, and Wood
Now that you’ve matched primer types to wall materials and conditions, you’ll need to apply those choices correctly for drywall, plaster, masonry, and wood.
Start clean: dust, sand gloss, and repair holes. Use a roller for large areas and a brush for edges. Follow manufacturer dwell times.
- For drywall priming, seal joints and skim coats with a drywall-specific primer.
- On plaster, use an alkyd or bonding primer if porous or chalky.
- For masonry preparation, remove efflorescence, patch cracks, and use a masonry primer.
- For wood, sand and use a stain-blocking primer.
- Allow full cure before topcoating.
Prep Plaster Walls for Paint
Prep your plaster walls by cleaning, repairing, and sanding so the primer and paint will adhere evenly.
Inspect plaster types—traditional lime, gypsum, or modern veneer—so you choose compatible cleaners and fillers.
Identify the plaster type—lime, gypsum, or modern veneer—to select compatible cleaners and repair compounds.
Remove dust, grease, and loose paint with a mild detergent and soft brush; rinse and let dry.
Fill cracks and holes with a suitable plaster repair compound, then sand feathered edges for a smooth changeover.
Match or simplify wall texture where needed; preserve intentional texture but blend repairs to avoid visible seams.
Prime with a product rated for plaster to seal and guarantee even topcoat coverage.
Prep Concrete, Brick, and Masonry Walls for Paint
Start by inspecting the concrete, brick, or masonry for cracks, spalling, or loose mortar so you know what needs fixing.
Then clean and degrease the surface thoroughly to remove dirt, efflorescence, and oil that will prevent paint from adhering.
Finish by repairing damaged areas and applying a suitable masonry primer before you paint.
Inspect For Damage
Walk the wall and look closely for cracks, spalling, efflorescence, loose mortar, and any areas where paint or surface material is delaminating.
You’ll perform a damage assessment to note the wall condition, prioritize repairs, and decide if professional help’s needed. Check for structural vs. surface issues, moisture sources, and previous patch failures.
Mark problem spots and estimate materials.
- Hairline vs. structural cracks
- Crumbled or missing mortar joints
- Flaking or bubbling surfaces
- White salt stains (efflorescence)
- Areas of soft or powdery masonry
Document findings before repair so your paint will last.
Clean And Degrease
Begin by removing loose dirt, dust, and cobwebs with a stiff brush or broom, then wash the surface to lift grime, grease, and efflorescence so paint can adhere properly. Use appropriate cleaning solutions—mild detergent for general soil, trisodium phosphate for heavy buildup—and rinse thoroughly. Apply degreasing techniques to oil stains: scrub with a solvent-based cleaner or degreaser, scrub, then rinse. Allow masonry to dry completely before painting. Use a scrub brush or pressure washer on sturdy surfaces, keeping pressure moderate. Follow safety guidelines and test cleaners on a small area first.
| Surface | Cleaner | Dry time |
|---|---|---|
| Concrete | TSP | 24 hrs |
| Brick | Detergent | 48 hrs |
| Masonry | Degreaser | 24–48 hrs |
Repair And Prime
Patch and prime damaged concrete, brick, and masonry so your paint will stick and look professional.
Repair cracks, chips, and loose mortar; use appropriate patching compound or mortar mix. Sand or wire-brush to match wall texture and remove dust.
Apply a masonry primer to improve paint adhesion and seal porous surfaces. Let cures fully before painting.
- Remove loose material
- Fill cracks with mortar or patch
- Match surrounding texture
- Clean surface after repairs
- Use masonry primer for adhesion
Follow manufacturer cure times and weather recommendations so your finish lasts and looks uniform.
Prepare Painted Wood and Trim Surfaces for Repainting
Strip loose paint, sand glossy areas, and clean all trim so new paint will adhere properly.
You’ll inspect wood for rot, nail pops, or cracks, replacing or filling damaged sections. For effective wood surface preparation, remove hardware and mask adjacent surfaces, then degrease and degloss with appropriate cleaners.
Use wood filler, let it cure, and sand smooth. When repainting, apply a bonding primer suited for trim and compatible with your topcoat.
Adopt trim painting techniques like cutting in with a steady brush, keeping thin even coats, and sanding between coats for a durable, professional-looking finish.
Sand and Clean Glossy Surfaces for Adhesion
If you’re working on glossy areas, sand them lightly with fine-grit sandpaper to dull the sheen and give the paint something to grip.
Wipe away dust, then use a degreaser or TSP substitute to remove oils and residue.
Let the surface dry completely before priming or painting.
Sand Glossy Areas Lightly
Lightly sand any glossy spots to dull the sheen and give new paint something to grip; use 220–320 grit sandpaper and gentle, even strokes so you don’t gouge the surface.
You’ll improve adhesion by breaking the smooth surface with simple sanding techniques while preserving the substrate. Work small areas, keep the pressure light, and check frequently. After sanding, remove dust before painting.
- Test a hidden spot first
- Sand along the surface, not across edges
- Replace paper when it clogs
- Feather edges to blend shine
- Wear a dust mask and eye protection
These steps suit most glossy finishes for reliable results.
Degrease And Clean Surfaces
Start by removing grease, grime, and any remaining sanding dust so your new paint will stick properly.
Use targeted surface preparation techniques: wipe with a microfiber cloth, then apply a degreaser or trisodium phosphate (TSP) alternative. Work from top to bottom, rinsing thoroughly and drying between steps.
For glossy areas you’ve sanded, follow with a mild abrasive cleaner to lift residue without removing the tooth you created.
Test any cleaning solutions on a small patch first to avoid damage.
Once surfaces are clean and dry, inspect for missed spots before priming to guarantee consistent adhesion and a smooth finish.
How to Address Uneven Textures and Orange Peel
Uneven textures and orange peel can make even new paint look sloppy, so you’ll want to assess the surface first and choose the right repair method—sanding for minor bumps, skim-coating for widespread texture, or using a texture-matching product for localized patches.
Assess the surface, then sand, skim-coat, or use texture-matching products to fix uneven orange-peel finishes.
You’ll inspect lighting, feel the wall, and decide between texture repair or full surface smoothing. Prep steps matter.
- Sand high spots with fine sandpaper
- Apply joint compound for skim-coating
- Use a texture spray to match orange peel
- Feather edges and sand between coats
- Prime repaired areas before painting
Work patiently to blend repairs for a flawless finish.
Do I Need to Remove Wallpaper? How to Decide?
Do you need to remove the wallpaper before painting? You’ll decide by checking adhesion, texture, and pattern show-through. If paper peels, bubbles, or seams lift, remove it. If it’s firmly glued with heavy texture or you want a smooth finish, removal is best. For low-profile, intact paper, consider wallpaper alternatives like skim-coating or special primers.
| Condition | Action | Result |
|---|---|---|
| Loose or damaged | Remove | Smooth surface |
| Intact, thin | Prime or skim | Reduced prep |
| Textured or patterned | Remove | Even paint finish |
Weigh wall removal options vs. effort and final look.
How to Strip Wallpaper Without Damaging Drywall
Tackle wallpaper removal carefully to protect the drywall underneath: work in small sections, keep the surface damp when using steam or a stripping solution, and peel slowly at a low angle to avoid gouging the paper-backed gypsum.
You’ll use safe wallpaper removal techniques and tackle adhesive residue solutions without overworking the surface. Keep tools light: scorer, spray bottle, scraper with a flexible blade, and sponge.
If paper is stubborn, re-wet and wait.
- Test a small patch first
- Use a plastic scraper, not metal
- Apply stripping solution sparingly
- Blot, don’t rub residue
- Rinse surface with clean water
Repair Damaged Drywall Seams and Corners
Start by evaluating the seams and corners for loose tape, gaps, or crushed paper so you know exactly what to fix and which materials you’ll need.
Remove damaged tape and loose paper, cut back frayed edges, and clean dust.
Apply joint compound to gaps, press new paper or fiberglass tape into wet mud, and smooth for effective seam sealing.
For crushed or broken corner bead, replace or straighten it, then embed tape and feather compound outward in thin coats.
Sand lightly between coats, wipe dust, and inspect for continuity.
Proper drywall repair here prevents cracks and guarantees a durable, paint-ready surface.
Prep Skim‑Coated or Textured Walls for Paint
Assess the surface to determine whether you’ve got a true skim coat, thin texture, or heavier stipple, because each needs a different approach before painting.
Assess whether the wall is a skim coat, light texture, or heavy stipple—each requires a different prep before painting.
You’ll choose skim coat techniques for smooth walls or adjust sanding and priming for textured surfaces. Clean dust, repair gouges, and test adhesion with primer. For heavy texture, decide whether to paint as-is or level with joint compound.
- Remove loose debris and dust
- Sand glossy or rough high spots
- Spot-fill holes and feather edges
- Apply primer suited to texture
- Consider a light skim coat to level
Follow manufacturer directions and work methodically.
Plan Paint Application Order for a Room
Now that the wall surface is prepped and primed, plan the paint sequence so you work efficiently and avoid redoing areas.
First study the room layout and note doors, windows, and light sources.
Begin with ceiling edges, then cut in around trim and fixtures to keep wet lines consistent.
Paint walls from top to bottom, working one wall at a time toward the room’s focal point so overlaps stay wet and blendable.
Save trim and doors for last or after walls if you’ll use a different sheen.
Arrange tools, rollers, and extension poles to match your planned paint application and movement through the space.
Troubleshoot Common Prep Mistakes and Fixes
One common pitfall is skipping a thorough surface check—if you miss hairline cracks, loose paint, or grease spots, the new coat won’t adhere or will show defects later.
Skipping a careful surface check lets hairline cracks, loose paint, or grease ruin your new finish—inspect first.
You’ll want clear mistake identification and practical solution strategies to fix issues fast. Check these quick fixes:
- Sand glossy spots to promote adhesion.
- Clean grease with degreaser before priming.
- Fill hairline cracks with lightweight spackle, sand smooth.
- Scrape loose paint, prime bare areas to seal.
- Inspect for moisture; repair leaks before painting.
Follow each step, test adhesion, and repeat inspections to avoid rework and guarantee a lasting finish.
Save Time on Prep Without Sacrificing Quality
Catching and fixing surface problems fast sets you up to work smarter, not longer. Use efficient techniques: sand only high spots, spot-prime stains, and apply lightweight filler where cracks are obvious.
Gather tools in a caddy so you won’t hunt mid-task. Pick multi-purpose tapes and quick-dry compounds to speed steps without cutting quality. Limit masking to edges you’ll actually paint; protect floors with a single long runner instead of many small pieces.
Follow manufacturer dry times rather than guessing. These essential shortcuts trim wasted effort while keeping your wall prepped correctly, so painting goes smoother and finishes last.
Inspect Final Prep Before the First Coat and for Touch‑Ups
Before you lay down the first coat, take a deliberate final inspection of the surface and surrounding areas so you catch missed flaws and confirm everything’s ready. You’ll scan for dust, drips, nail heads, uneven caulk, and sanding marks. Fix problems now to avoid costly rework later.
Before the first coat, do a careful final inspection—catch dust, drips, nail heads, and sanding marks.
Use a bright light and move around the room to see from different angles. Apply primer to bare spots and use correct touch up techniques on patched areas so paint blends.
- Check edges and trim
- Look for loose debris
- Test repaired spots
- Confirm tape adhesion
- Verify drop cloth placement
Frequently Asked Questions
Can I Paint Over Nicotine‑Stained Walls Without Professional Cleaning?
Yes—you can, but you’ll need solid nicotine removal and wall cleaning first. You’ll degrease, rinse, sand glossy spots, and use a stain‑blocking primer; otherwise stains’ll bleed through and ruin your fresh paint job.
Will New Drywall Ever Need a Commercial Sealer Before Paint?
Yes — you’ll usually seal new drywall; drywall sealing through primer application’s essential to lock joint compound and paper, prevent flashing, and guarantee uniform sheen. Use a quality drywall primer or PVA primer before applying finish coats.
How Do I Prep Walls in Cold or Very Humid Weather?
You should wait for proper temperature considerations and monitor humidity effects; don’t paint below manufacturer’s temp range, use heaters or dehumidifiers to stabilize conditions, allow longer dry times, and choose slow-dry primers or paints designed for damp conditions.
Can I Use Leftover Paint From Years Ago Safely?
You can often use leftover paint years later if it looks, smells, and mixes well; check paint shelf life, stir and strain, and guarantee safe storage in sealed cans at stable temperatures to avoid spoilage or contamination.
How Long Should Painted Cabinets or Shelves Cure Before Reinstalling?
Careful curing creates confidence: you’ll wait 7–14 days for curing time after thorough cabinet preparation, though oils need longer. Don’t rush reinstalling; allow full hardening, ventilate well, and handle gently to prevent dings.
Conclusion
Proper prep boosts paint longevity—studies show poor surface prep causes up to 70% of paint failures—so don’t skip it. You’ve learned what good prep looks like, the checklist steps, necessary tools, safety tips, and common fixes. Plan your room’s painting order, save time with smart shortcuts, and inspect surfaces before the first coat and for touch-ups. Do these, and your paint will look professional and last much longer.