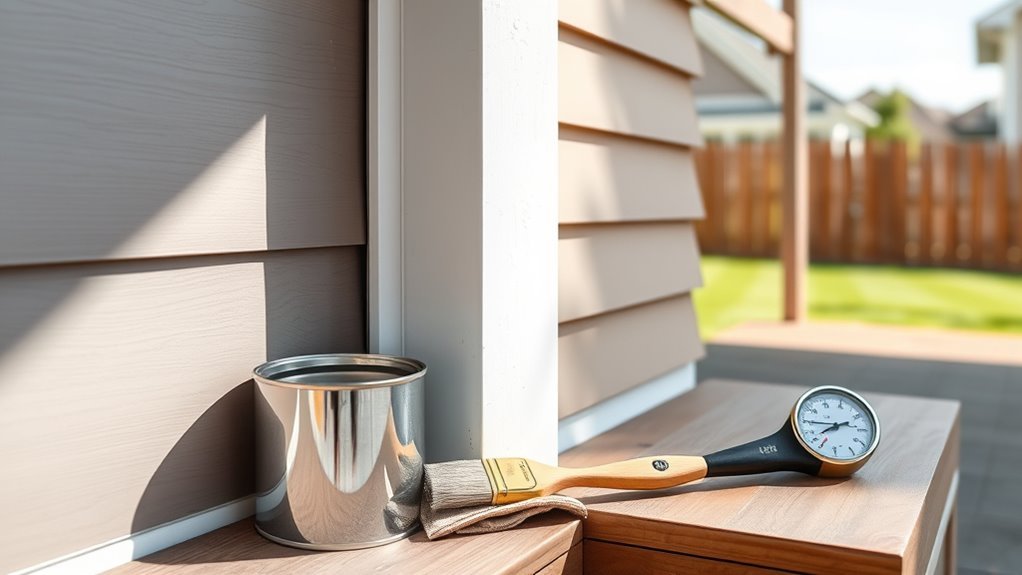
What Temperature Is Good for Exterior Painting?
You should plan exterior painting when temperatures are steady between about 50°F and 85°F (10°C–29°C), since that range helps paints form a proper film, dry evenly, and stick well. Check the paint can for its specific min/max temps and verify the surface temperature with an infrared thermometer. Watch dew point, humidity, wind, and overnight lows too, because they’ll affect curing and adhesion. Keep these basics in mind and you’ll find practical tips and precautions ahead.
Who This Guide Is For and What You’ll Learn
Wondering if this guide is for you? You’re likely a homeowner, DIYer, or contractor prepping for exterior work who needs clear temperature considerations and practical painting techniques.
Perfect for homeowners, DIYers, and contractors needing clear temperature-aware, practical exterior painting guidance and tips
You’ll learn when conditions help coatings cure, how humidity and sun affect application, and which tools and mixes suit marginal days.
You’ll get tips for surface prep, timing coats, and spotting weather risks so you won’t waste paint or time.
This guide won’t dump jargon; it gives actionable checkpoints and troubleshooting steps you can use on the job.
Quick Answer: Ideal Exterior Painting Temperature Range
Aim for daytime temperatures between 50°F and 85°F (10°C–29°C) for most exterior paints; that range lets the film form and solvents evaporate at a controlled rate so coatings cure properly without trapping moisture or drying too fast. You should avoid painting during rapid temperature fluctuations, and pick conditions that support consistent paint performance. Monitor dew point and overnight lows to prevent tacky finishes. Use the quick reference table below to guide choices.
| Condition | Temperature | Effect |
|---|---|---|
| Ideal | 50–85°F | Strong cure, good adhesion |
| Marginal | 40–50°F | Slower drying |
| Risky | <40°F | Poor film formation |
How Paint Labels State Temperature and Curing Limits
Paint labels tell you the minimum and maximum temperatures for application and often specify the temperature range for full curing, so you can plan when to coat and when to wait.
You’ll read paint label terminology that lists application temp, dew point limits, and recommended drying times. Follow curing process guidelines printed on the can to avoid tacky finishes or poor adhesion.
Check both air and substrate recommendations on the label. Use the info to schedule work and protect fresh coats from overnight cold or heat spikes.
- Note min/max application temperatures
- Observe specified curing times
- Respect dew point and humidity limits
How Air Temperature vs. Surface Temperature Matters
You should aim to paint when the air temperature is within the paint maker’s recommended range, usually between about 50°F and 85°F, so coatings cure properly.
Equally important is the surface temperature—if the wall is much hotter or colder than the air, the paint can dry too fast or not bond well.
Before you start, check both air and surface temps to guarantee ideal adhesion and curing.
Ideal Air Temperature
While air temperature sets the overall conditions for an exterior paint job, it’s the surface temperature that actually determines drying and adhesion, so you’ll want to monitor both. You’re aiming for ideal conditions: most paints perform best between about 50°F and 85°F.
Temperature effects include open time, flow, and curing speed, so don’t paint during rapid swings. Wind and sun change microclimates, so check forecast highs and lows.
- Paint in stable daytime temperatures, avoiding early-morning chill.
- Pause when heat exceeds product limits to prevent blistering.
- Use manufacturer guidelines to match ambient range for best results.
Importance Of Surface Temperature
Because the surface is what the coating actually touches, its temperature—not just the air—controls drying, adhesion, and overall performance, so you need to measure and manage it separately.
You’ll check surface temperature during surface preparation, since a cold substrate can slow film formation and prevent proper bonding.
Use infrared thermometers or surface probes for accurate temperature monitoring, and avoid painting when surfaces are below manufacturer limits or when rapid temperature swings occur.
Remember sun-heated surfaces may be much warmer than ambient air; cool them or wait for stable conditions.
Properly monitoring the substrate prevents adhesion failures and guarantees durable finishes.
Minimum Safe Air Temperature for Latex (Water‑Based) Paint
Check your paint can for the manufacturer’s minimum temperature — that’s the baseline you should follow for safe application.
You’ll also want to take into account how cold slows water-based paint curing, which can extend tack time and increase the risk of adhesion problems.
If nights will drop below the recommended minimum, postpone the job or use heaters and insulation to keep both air and surface warm.
Paint Manufacturer Minimums
When you’re planning to paint with latex (water‑based) products, manufacturers set a minimum air temperature—often 50°F (10°C) for many brands—to secure proper film formation and drying.
Going below that can cause poor adhesion, extended cure times, and a weak finish. You should always check the label because paint formulation, temperature effects, and warranty requirements vary.
Manufacturers base minimums on lab testing to verify pigment dispersion and binder coalescence. If conditions flirt with the limit, follow their guidance.
- Confirm the listed minimum and test spot.
- Note dew point and night lows.
- Store cans at recommended temperatures.
Cold Weather Curing
If temperatures fall below a paint’s recommended minimum, latex binders won’t coalesce properly and you’ll get a soft, tacky film that takes much longer to cure and resists abrasion and washability.
You should follow the manufacturer’s minimum—often 50°F (10°C) for many latex formulas—and avoid painting when nights drop below that.
Cold weather impacts drying rate and film formation; slowed evaporation increases solvent retention and risk of freeze damage.
To reduce curing challenges, choose cold-weather formulations, work mid-day when temperatures peak, apply thinner coats, and protect the surface with temporary enclosures or heaters that maintain safe, steady air temperature.
Minimum Safe Air Temperature for Oil and Alkyd Paints
Although oil- and alkyd-based paints cure more slowly than latex, you can safely apply them once the air temperature stays consistently above about 45°F (7°C); below that, drying slows dramatically and solvents may not evaporate properly, risking poor adhesion and wrinkling.
Apply oil or alkyd paints only when temperatures stay above about 45°F (7°C); cooler conditions risk poor drying and adhesion.
You should monitor overnight lows and surface temperature, since oil paint performance and alkyd paint applications depend on steady warmth for polymerization. Plan coats on days with a few hours above the minimum and avoid damp, foggy conditions that hold moisture.
- Check forecasted lows for at least 24 hours.
- Keep surfaces dry and clean.
- Allow extra dry time between coats.
Maximum Temperature Limits for Successful Exterior Painting
Because extreme heat can ruin paint films and make application difficult, you should avoid painting exteriors when air or surface temperatures climb too high.
Paint manufacturers often set maximum temperature limits to prevent blistering, sagging, and uneven sheen. You’ll notice maximum temperature effects like rapid skinning, poor adhesion, and solvent entrapment if you ignore guidelines.
Work early or late in the day, cool hot surfaces with water, or wait for milder conditions to reduce temperature related challenges.
For latex and oil-based products, follow label limits and consider shade, wind, and surface temperature—not just ambient readings—for reliable results.
Why Dew Point Matters and How to Calculate It
High temperatures aren’t the only risk to a fresh paint job—moisture can wreck it just as fast, and that’s where the dew point comes in.
You need to know dew point effects because paint applied when surface temperature is at or below the dew point will attract condensation, causing adhesion failure or milky finish.
Use simple calculation methods or apps to compare air temperature and relative humidity to estimate the dew point.
Check conditions before painting and avoid times when the surface may cool to that point.
- Know the dew point forecast
- Measure surface vs. air temp
- Use reliable calculation methods
How Humidity Changes Drying and Curing Times
When humidity’s high, your paint will stay tacky longer and may attract dirt or blister.
With very low humidity, paint can skin over too fast and trap solvents, causing cracking or poor adhesion.
Aim for a moderate humidity range—usually between 40% and 70%—to balance drying and proper curing.
High Humidity Effects
If you paint in muggy conditions, you’ll notice slower drying and longer curing because moisture in the air interferes with solvent evaporation and chemical cross-linking.
You should understand humidity effects so you can adjust timing, ventilation, and product choice. High humidity can cause tacky finishes, poor adhesion, and longer wait times; plan accordingly and prioritize moisture control.
- Delay recoats until tackiness disappears to avoid finish failures.
- Use fans or heaters where safe to boost evaporation and circulation.
- Choose paints rated for high-humidity application and follow manufacturer cure-time recommendations.
Low Humidity Risks
Because dry air speeds solvent evaporation, low humidity can make paints dry too fast, causing poor flow and weaker film formation.
You’ll notice brush marks, lap lines, and reduced adhesion when low humidity accelerates skinning before solvents escape. These humidity effects shorten open time, so you must work faster or use retarders formulated for low humidity conditions.
Fast surface cure can trap solvents, leading to blistering or incomplete hardness later.
Prep matters: sand and clean properly, and avoid thinning excessively.
Monitor conditions and adjust technique—small changes in timing, tools, and products prevent premature failures from low humidity.
Optimal Humidity Range
Although humidity doesn’t get as much attention as temperature, it plays a direct role in how paints dry and cure, and you should aim for a moderate range to get consistent results.
You’ll notice humidity effects on both drying speed and final film hardness: too high slows evaporation and can cause blistering, too low speeds skin formation and traps solvents. Aim for 40–60% relative humidity when possible.
Practice moisture control by scheduling work for drier parts of the day, using dehumidifiers in enclosed areas, and checking forecasts so coatings cure uniformly and bonds remain strong.
- Monitor humidity before painting
- Use simple moisture control tools
- Avoid extremes
How Wind and Direct Sun Affect Paint Behavior
When wind whips across a freshly painted surface or direct sun heats it, you’ll see drying times and finish quality change quickly; both factors pull solvents out faster and can cause blistering, lap marks, or uneven sheen.
You should plan work to minimize wind impact and intense sun exposure: paint early morning or late afternoon, shield walls with tarps, and work on the shaded side of the building.
Adjust technique by applying thinner coats, allowing longer flash times between strokes, and using paint formulated for faster skin formation.
Monitor surface temperature, not just air temperature, to avoid premature drying.
Day–Night Temperature Swings and Adhesion
If daytime heat expands substrates and night cooling makes them contract, those repeated swings can stress a fresh paint film and weaken adhesion, especially on porous or poorly prepared surfaces.
You’ll notice blistering, cracking, or flaking when temperature fluctuations force the coating to flex beyond its limits. To reduce adhesion challenges, pick products rated for wider thermal ranges and prepare surfaces thoroughly.
Time applications so curing avoids extreme swings, and monitor forecasts before you start.
- Choose flexible primers and elastomeric topcoats.
- Confirm surfaces are clean, dry, and properly profiled.
- Apply when stable temperatures persist for recommended cure time.
Best Times of Day to Paint in Spring and Fall
Because spring and fall bring fluctuating temperatures and variable moisture, plan your painting for the warmest, driest part of the day—usually late morning to midafternoon—so coatings can tack up and cure before evening chills or dew set in.
During spring painting, check surface temperature and forecasted lows; start after surfaces warm and stop with enough hours to cure before temperature drops.
For fall painting, aim for midday warmth while avoiding late-afternoon work that risks dew.
Work on shaded and sun-exposed areas at different times to keep drying consistent.
Monitor wind and surface temps so your finish bonds and levels properly.
When to Delay Painting Because of Rain or High Humidity
Although a light mist might seem harmless, you should postpone exterior painting whenever rain is forecast within the next 24 hours or humidity will stay above 85% during drying. Moisture prevents proper film formation and adhesion.
If rain or humidity above 85% is expected within 24 hours, postpone exterior painting to ensure proper adhesion.
You’ll face paint run-off, extended cure times, and weak bonds when you ignore rain delays and the humidity impact on solvents and coatings. Check short-term forecasts and consider local microclimates like shaded areas or morning fog.
Delay until surfaces are dry and humidity drops. Follow these quick checks:
- Inspect canopy and gutters for recent dampness
- Monitor relative humidity and overnight lows
- Reschedule if dew forms early
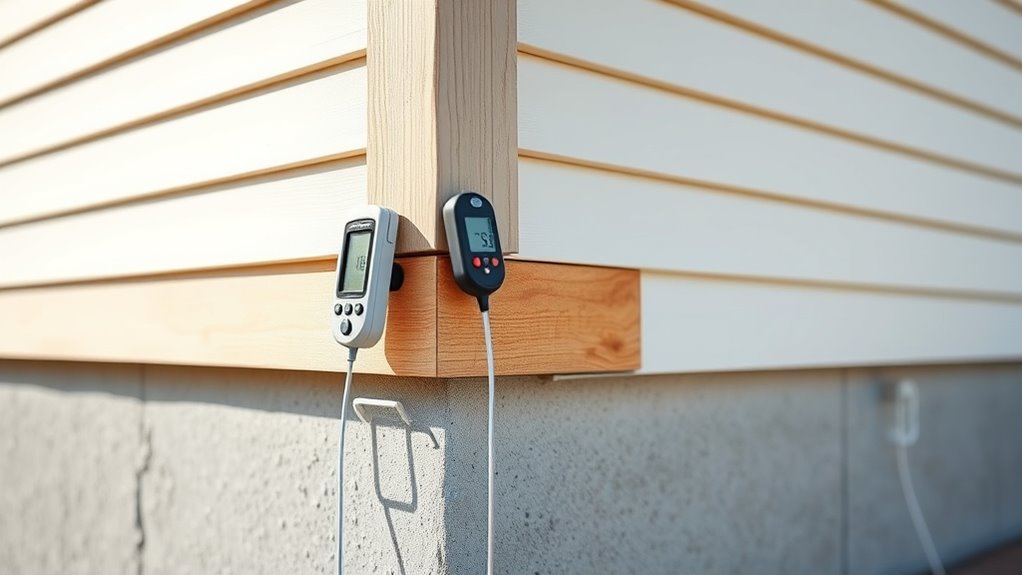
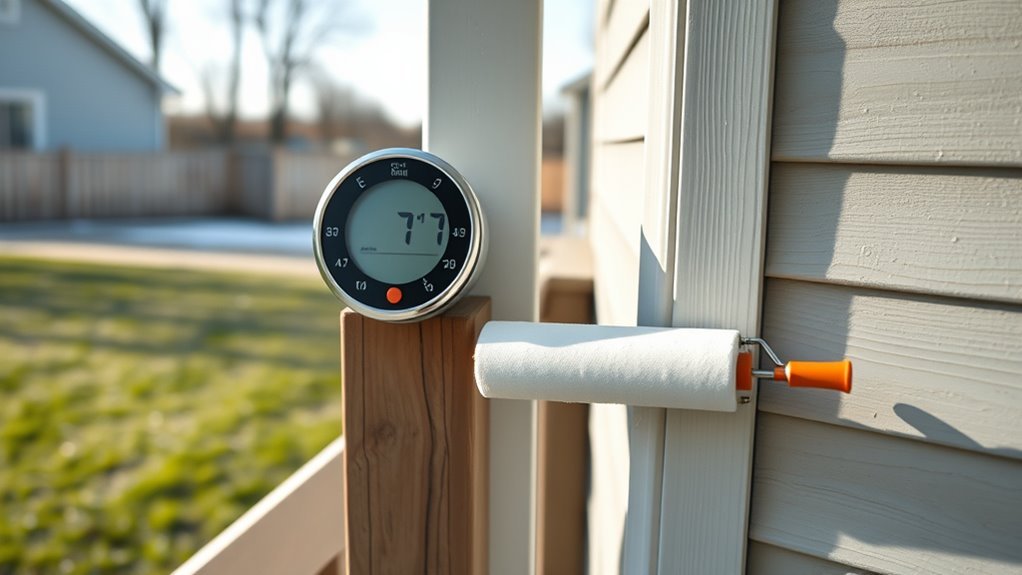
How to Check Surface Temperature With an Infrared Thermometer?
When you use an infrared thermometer, scan the same surface area from several angles to confirm consistent readings.
You’re aiming for surface uniformity so paint will dry evenly and adhere properly.
If temperatures vary, note the coolest spots and avoid painting until they fall within the recommended range.
Aim For Surface Uniformity
To get an even finish, you’ll want to confirm the whole surface is at a consistent temperature before you paint; an infrared (IR) thermometer makes that quick and precise.
You’ll scan walls and trim, noting hotspots or cold patches that affect surface preparation and paint selection. Aim for uniform readings across the area, and delay painting until variations fall within the manufacturer’s recommended range.
- Hold the IR gun perpendicular to the surface, keeping the same distance for each reading.
- Mark areas that deviate, then let them equalize in shade or sun.
- Recheck before applying primer or finish coats.
Measure From Multiple Angles
After you’ve equalized surface temperatures, measure from multiple angles with your infrared (IR) thermometer to catch reflective errors and hidden cold spots.
Point the device perpendicular for baseline readings, then shift to shallow and steep angles to reveal discrepancies caused by gloss, shadow, or sun reflection. Use consistent distance and emissivity settings, and document each reading.
Combine temperature measurement techniques—spot readings, area scans, and comparison checks—to confirm uniformity across siding, trim, and fixtures.
Pay attention to angle considerations when scanning metal or glass; adjust emissivity or use contact verification if IR results seem inconsistent.
Choosing Paints Rated for Lower Temperatures
Anyone can improve cold-weather results by choosing paints specifically formulated for lower temperatures. You’ll want paint selection strategies that prioritize low-temperature cure, adhesion, and flexibility while keeping cold weather considerations front and center.
Pick brands with clear temperature ratings and follow their recommended application windows.
- Choose acrylic latex blends rated for application down to 35°F (2°C) or lower.
- Prefer fast-curing formulas that still allow proper film formation in chilly conditions.
- Verify manufacturer guarantees and test a small patch for adhesion before committing.
These steps help you avoid poor cure, cracking, and premature failure in cool climates.
Additives and Accelerators for Cool‑Weather Painting
When temperatures drop, you can speed curing and improve film formation by using compatible additives and accelerators designed for cool‑weather painting.
Use cool‑weather additives and accelerators to speed curing and improve film formation when temperatures drop.
You’ll choose from additive types like antifreeze agents, flow enhancers, and polymer modifiers that maintain workability and adhesion as temps fall.
Read product labels to confirm compatibility with your paint system and VOC limits.
Accelerators shorten dry and recoat times, reducing exposure to dew or cold; their accelerator benefits include faster crosslinking and improved early hardness.
Use recommended dosages—overdosing can harm finish.
Test a small area first to verify appearance, adhesion, and pot life.
Tools and Techniques to Keep Surfaces Warm While Painting
1 practical approach is to preheat the work area and substrate so paint bonds and levels properly; you can do this with infrared heaters, portable forced‑air heaters (vented so fumes don’t concentrate), heat guns for spot warming, and electric heat blankets or mats for doors and smaller components.
You’ll also use surface insulation like removable foam wraps or insulated tarps to retain warmth. Choose safe heating methods, monitor temperatures with infrared thermometers, and keep ventilation controlled.
Combine tools and insulation to maintain consistent cure conditions.
- Use temporary enclosures with controlled heat
- Apply electric heat blankets to small parts
- Spot‑warm seams with heat guns
Avoiding Cold‑Weather Failures: Blistering, Peeling, Adhesion
When you paint in cold weather, proper paint film formation is your first line of defense against blistering and peeling.
Pay attention to surface temperature limits on the paint can and be sure the substrate stays within that range during drying.
If the surface is too cold you’ll lose adhesion and risk early failure.
Paint Film Formation
If temperatures drop too low during application or curing, the paint can’t form a continuous, well-adhered film and you’re likely to see blisters, poor adhesion, or premature peeling.
You need proper paint viscosity and adequate film flexibility to let coatings coalesce and bridge substrate irregularities. Cold slows solvent release and polymer fusion, so you should adjust technique, product choice, and timing to avoid defects.
Follow these practical checks:
- Confirm manufacturer cold‑temperature cure and thinning guidance.
- Apply thinner, warmer coats only when environmental conditions permit.
- Allow extended drying time before exposing the surface to moisture or stress.
Surface Temperature Limits
Because surface temperature governs how a coating cures and bonds, you should never paint below the substrate limits specified by the manufacturer. You’ll risk poor adhesion, blistering, and peeling if the surface’s too cold or too hot.
Check both surface temperature and ambient readings rather than air temperature alone; materials like metal, wood, and stucco hold heat differently. Avoid painting during temperature extremes or rapid swings—dew, frost, or baking sun all undermine film formation.
If conditions aren’t within recommended limits, delay work or use specialty products rated for lower or higher surface temperatures to guarantee a durable finish.
Painting in Hot, Dry Conditions: Prevent Fisheyes and Sagging
Although high heat speeds drying, it can cause fisheyes and sagging that ruin a smooth finish, so you’ll need to adjust technique and timing to compensate.
High heat speeds drying but risks fisheyes and sagging—adjust technique and timing for a smooth finish.
You’ll control fisheye prevention by cleaning surfaces and using compatible primers and additives, and you’ll avoid sagging issues by thinning coats and working in shorter sections.
Work early or late to dodge peak sun and use shading or misting to moderate temps. Keep tools cool and don’t overbrush.
Monitor film thickness and allow quick tack-free times before recoat.
- Clean, prime, and use fisheye prevention measures
- Thin coats; avoid heavy application
- Paint during cooler windows
Preparing Wood, Metal, Stucco, and Masonry for Temp‑Sensitive Painting
Before you paint, make sure each surface is thoroughly cleaned and completely dry so paint will adhere properly.
Pay attention to temperature-sensitive prep—wood needs proper moisture content, metal needs rust treatment and priming, and stucco or masonry should be free of efflorescence and repaired before coating.
If the substrate or ambient temps are out of range, postpone work or use products rated for those conditions to avoid adhesion and curing problems.
Surface Cleaning And Drying
Start by thoroughly cleaning and drying every surface—wood, metal, stucco, and masonry—so paint can adhere properly and cure within the temperature window.
For proper surface preparation, remove dirt, chalk, mildew, and loose paint using targeted cleaning techniques; rinse, then let surfaces dry fully before priming. You’ll prevent adhesion failures and temperature-related curing problems by eliminating contaminants and moisture.
- Use pressure washing or soft washing where appropriate, avoiding wood damage.
- Degrease metal and neutralize efflorescence on masonry for a sound substrate.
- Air-dry or use fans/heaters to achieve recommended moisture levels before painting.
Temperature-Sensitive Material Prep
When temperatures will swing near paint’s workable limits, prep each material with methods that compensate for cold or heat so coatings can bond and cure correctly.
You’ll treat wood by stabilizing moisture—dry, warm conditions in cold weather or shade in heat—to limit temperature impact on expansion.
For metal, remove rust, apply a compatible primer, and use heaters or coolers so material sensitivity to thermal contraction won’t break adhesion.
On stucco and masonry, mop, repair cracks, and avoid applying when surfaces are too hot or freezing; use misting or temporary covers to moderate surface temperature.
Check product guidelines before starting.
Drying and Recoat Times by Temperature and Humidity
Although paint labels give general drying and recoat times, temperature and humidity have the biggest practical impact, so you’ll need to adjust expectations based on conditions at the job.
Cold slows chemical reactions, so drying times stretch; high humidity traps moisture and worsens humidity effects, stalling cure. Work when nights won’t dip below the paint’s minimum. Watch dew points and sun exposure.
- At 50–70°F with low humidity, tack-free in hours and recoat within a day.
- At 40–50°F or high humidity, expect 24–72 hours before recoat.
- Below 40°F, defer painting; films won’t form properly.
How Primer Choice Changes When Temps Are Marginal
Those drying and recoat shifts mean your primer choice matters more as temperatures move toward the margin.
You’ll pick primers with different solids, binders, and flash points depending on the temperature impact you expect. Acrylic primers dry faster in cool, dry air, while oil-based or alkyd primers tolerate brief cold snaps and adhere better to chalky substrates.
Use bonding primers for marginal surfaces and latex for flexibility if temperatures fluctuate. Check manufacturer minimums—some primers need a longer cure before topcoating when it’s cold.
Match primer types to conditions so adhesion, film build, and recoat windows stay predictable.
Safety Tips for Heaters, Tents, and Generators During Painting
If you’re using heaters, tents, or generators to keep a jobsite workable in cool weather, prioritize ventilation, fire prevention, and proper placement to protect workers and the finish.
You’ll monitor heater safety by keeping clearances, using certified units, and avoiding open flames near coatings. Maintain tent ventilation to prevent solvent buildup and condensation that harms curing.
Plan generator placement downwind and away from entry points, and secure fuel storage in labeled, ventilated containers off the work surface.
Follow manufacturer instructions, keep fire extinguishers handy, and brief crews on emergency shutdowns to minimize risks and protect the job.
How Professionals Test Cured Paint for Hardness and Adhesion
Once the paint feels dry, you’ll want to check its cured hardness with a pencil hardness test to see how well it resists scratching.
You’ll also perform a crosshatch adhesion test to confirm the coating bonds to the substrate and won’t flake.
Finally, a solvent rub resistance check shows how the finish holds up to cleaning and weathering.
Pencil Hardness Testing
- Start with a known pressure and sequence of pencil grades.
- Note the hardest pencil that doesn’t mar the film.
- Record results and compare across temperatures for trends.
Crosshatch Adhesion Test
Professionals use the crosshatch adhesion test to quickly check how well cured paint bonds to a substrate and how resistant the coating is to peeling under stress.
You score a small grid through the coating, apply and remove standard tape, then inspect for flaking or removal. That result tells you the crosshatch adhesion rating and indicates likely paint durability in real conditions.
You’ll compare ratings to spec sheets to decide if recoating, surface prep, or a different system is needed. The test’s simplicity and repeatability make it a practical field check before warranty acceptance or exposing a surface to weather.
Solvent Rub Resistance
When you want to verify how well a cured exterior coating resists solvents and surface abrasion, the solvent rub resistance test gives a quick, objective measure of film hardness and adhesion.
You’ll rub a specified solvent and count double rubs until breakdown, noting how solvent types affect results. Temperature effects during cure change film toughness, so test samples cured under job conditions.
Record failures as staining, softening, or removal to decide if recoating or a different formulation is needed.
- Prepare cured panels and choose standard solvent
- Perform controlled double rubs and log the count
- Compare results considering temperature effects and specs
How to Plan a Painting Schedule Around Seasonal Temperature Windows
Because paints cure within a specific temperature and humidity range, you’ll get the best, longest-lasting finish by planning your exterior painting schedule around local seasonal windows. Use seasonal considerations and weather forecasting to pick blocks of consecutive days with mild temps and low humidity. Aim for spring or fall in temperate zones; delay if overnight lows or daytime highs stray from product specs. Track long-range forecasts and prepare materials to move quickly when a stable window opens.
| Season | Best Window |
|---|---|
| Spring | Mild, dry |
| Summer | Early, avoid humidity |
| Fall | Cool, stable |
| Winter | Generally avoid |
How Painting Outside Recommended Temps Affects Warranty and Costs
If you paint outside the manufacturer’s recommended temperature range, you can expect two immediate consequences: the paint may not cure properly, and the manufacturer can void your warranty.
You’ll face warranty implications and added labor to redo failed coatings. Cost considerations include wasted materials and potential reroofing or siding prep if peeling occurs. Plan to avoid these extra expenses.
- You may lose manufacturer coverage if specs aren’t met.
- Fixing failed cures raises labor and material bills quickly.
- Repainting in proper conditions prevents long-term maintenance costs.
Follow label temps to protect coverage and control expenses.
Quick Troubleshooting: Fixes for Temperature‑Related Paint Problems
Although cooler or hotter-than-recommended temperatures can wreck a job, you can often salvage or prevent temperature-related paint problems with a few targeted fixes.
If paint blisters from heat, remove loose areas, sand, let substrate cool, and repaint during cooler hours with a heat-tolerant formula.
For poor paint adhesion after cold curing, strip or sand failed spots, apply appropriate primer, and wait for a warmer forecast to repaint.
To limit issues from temperature fluctuations, schedule work during stable conditions, use low-VOC products that tolerate swings, and keep coatings within manufacturer-recommended temperature windows to guarantee lasting results.
Ready‑to‑Paint Checklist: Temperature, Moisture, and Surface Checks
Want a flawless exterior finish? Check conditions before you open the can: temperature effects influence drying, adhesion, and curing times, while moisture management prevents blistering and poor bonding. You’ll want surfaces clean, dry, and within the manufacturer’s temperature range.
Check conditions before painting—ensure proper temperatures, dry surfaces, and clean, primed areas to prevent adhesion and blistering.
- Verify air and surface temps with a thermometer; avoid frost or extreme heat.
- Test moisture with a meter or tape test; patch-dry areas needing attention.
- Inspect for loose paint, mildew, or contaminants; sand and prime bare spots.
Follow this checklist so your prep matches performance, minimizing callbacks and ensuring long-lasting results.
Final Recommendations and Quick Decision Flow for “Can I Paint Today?”
You’ve checked temperatures, moisture, and surface condition—now make a clear call: paint today only when air and surface temps fall within the product’s recommended range, humidity is low enough for drying, and all patched or primed areas are fully cured.
Use a quick decision flow: confirm temperature guidelines on the label, measure surface temp and ambient humidity, inspect for dew or recent rain, and verify adhesion test results.
If any check fails, postpone. When all painting conditions meet specs, proceed with small test area, then full application.
Document conditions and start early to maximize cure time before evening.
Frequently Asked Questions
Can Extreme Temperatures Affect VOC Emissions and Indoor/Outdoor Air Quality?
Yes — extreme temperatures change VOC emissions and hurt air quality. You’ll see temperature effects on paint performance, altering cure and off-gassing rates; follow VOC regulations to minimize emissions and protect indoor and outdoor air quality.
How Do Temperature Swings Impact Paint Color Fading Over Years?
You’ll absolutely see paint age faster with big temperature swings; they stress binders and pigments, harming color retention. To boost fading prevention, pick UV‑resistant formulations, apply proper primers, and maintain consistent temperatures when possible.
Will Nearby Landscaping or Mulch Heat Islands Change Paint Curing?
Yes — nearby landscape materials like dark mulch and paving create heat islands that raise surface temps, so you’ll see temperature effects on curing; plan painting during cooler periods and shade areas to guarantee even dry times and finish.
Do Temperature Limits Differ for Specialty Coatings (Fireproofing, Anti-Graffiti)?
Yes, they do: specialty coatings often need tighter temperature ranges, stricter humidity control, and specific surface temps; you’ll follow manufacturer specs, adapt application techniques, and adjust cure times to guarantee proper adhesion, performance, and safety.
How Does Temperature Influence Mildew and Mold Growth Under Paint?
Warmer, humid conditions speed mildew growth under paint, so you’ll control mildew prevention by painting when surfaces are dry and cooler; proper prep boosts paint adhesion, letting coatings bond and resist trapped moisture and mold.
Conclusion
You’re ready to decide: paint when both air and surface temps sit in the paint’s recommended range and humidity’s low—think of it like baking, not boiling. If it’s too cold, paint won’t flow or cure; too hot, it dries too fast and cracks. Follow label temps, check surface warmth with your hand or infrared gun, and postpone if dew or rain’s expected. Paint right now only when conditions cooperate—your walls will thank you.