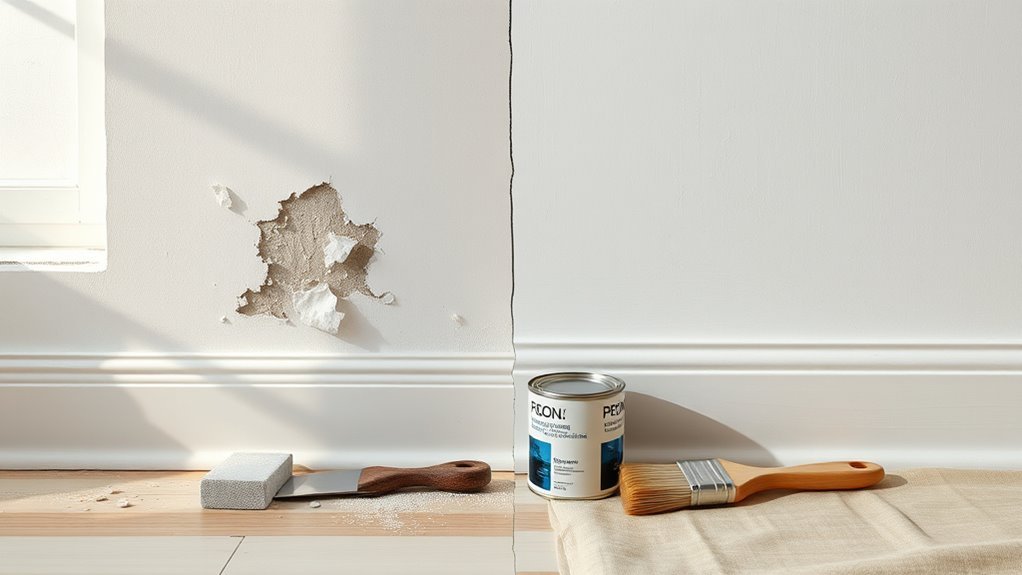
What to Do When Paint Comes Off Wall? Fix Guide
When paint comes off your wall, act fast: tap and scrape loose areas, check for moisture or mold, and decide if it’s a quick spot repair or a full redo. For small flakes, sand edges, prime with a compatible primer, then touch up with matching paint. For large or recurring peeling, remove all loose layers, fix the substrate and address leaks or humidity first. Follow proper prep and product choices and you’ll learn how to avoid repeats.
Peeling Paint: Quick Fix vs Full Repair
When paint peels, you’ve got to decide whether a quick patch will do or if the wall needs a full repair. You check the size and depth of the peel, tap nearby areas for loose paint, and assess moisture or damage without diving into causes.
For small, shallow flakes, you can use quick fixes: scrape, sand lightly, prime, and spot-paint for a neat result.
Larger areas with multiple layers lifting call for full repairs: remove loose material, repair substrate, apply appropriate primer, and repaint the whole section to guarantee adhesion and a uniform finish.
Why Paint Peels: Common Causes
Before you decide between a quick patch and a full overhaul, it helps to understand what makes paint peel in the first place.
You’ll see peeling when paint adhesion fails—often from moisture seeping through walls, high humidity, or leaks that lift paint away.
Poor surface preparation causes paint to lose grip: dirt, glossy old finishes, or flaky previous coatings prevent proper bonding.
Temperature extremes and applying paint too quickly can trap solvents, weakening the film.
Using incompatible paint types or skipping primer also undermines adhesion.
Recognizing these causes helps you choose the right repair approach and prevent repeat peeling.
How to Assess Peeling Paint Fast
How can you quickly gauge how serious peeling is and what repair you’ll need? Check the paint condition by tapping and scraping a small area: loose, bubbling, or wide flakes signal deeper issues.
Smell and look for dampness or mold near the peel; moisture often drives failures. Measure affected area size — isolated chips differ from large panels — and note substrate type (plaster, drywall, wood).
That lets you match repair techniques to severity: spot fill and sand for minor, strip and prime for extensive.
- You might feel frustrated seeing widespread damage.
- Small fixes can bring relief quickly.
- Major jobs demand patience.
Can You DIY This Repair or Call a Pro?
Look at how much paint has come off and whether the wall has underlying damage, because small chips are different from widespread peeling or rot.
Think about your skill level and the tools the job needs—sanding, patching, priming, and repainting all take time and technique.
If the scope or timing feels overwhelming, calling a pro can save you hassle and guarantee a long-lasting fix.
Assess The Damage
If the paint’s coming off in small patches, you can probably handle the touch-up yourself; but if large sections are peeling, bubbling, or the wall underneath looks damaged, you’ll want to contemplate a pro.
Assess the damage methodically: note paint types used, check for moisture, and inspect wall conditions like cracks, mold, or crumbly plaster. That helps decide scope and whether structural repairs are needed before repainting.
If you’re unsure, photos and measurements make consultations easier. Trust your instincts—don’t underestimate hidden issues.
- Frustration at ongoing peeling
- Relief when problems are superficial
- Anxiety if walls feel compromised
Skill And Time Needed
When deciding whether to tackle peeling paint yourself or call a pro, consider both the skills you’ll need and the hours the job will take. You’ll want basic sanding, patching, and painting skills plus patience for proper prep techniques. Do a damage assessment first: small flakes and isolated spots are DIY; widespread bubbling, moisture, or lead concerns need a pro. Estimate time: prep and drying dominate. Use the table to plan.
| Task | Skill Level | Time |
|---|---|---|
| Small spot repair | Beginner | 1–3 hrs |
| Patching holes | Intermediate | 2–4 hrs |
| Full repaint after prep | Advanced | 1–3 days |
| Lead/moisture issues | Professional | Varies |
Cost and Time Estimates for Common Repairs
You’ll want to know what small touch-ups cost versus larger fixes so you can plan your budget.
Patching and repair time varies by damage—minor spots can take an hour, larger patches a few hours to dry and sand.
If you need a full repaint, expect higher costs and a day or more per room depending on prep and drying.
Small Touch-Up Costs
A few common paint touch-ups—nail holes, scuffs, and small chips—typically take 10–45 minutes each and cost between $5 and $30 in materials if you handle them yourself; hiring a pro raises labor to about $50–$150 per hour, so expect a minimum trip charge or a small-call fee for quick fixes.
You can use simple touch up techniques and budget friendly options like sample pots, fine-grit sandpaper, and painter’s tape. Be realistic about matching sheen and color. If you do it yourself, plan for drying time and one or two light coats for seamless results.
- Relief when damage vanishes
- Pride in DIY success
- Savings that let you breathe easy
Patch And Repair Time
Estimate realistically: small repairs like filling nail holes, sanding scuffs, and touching up chips usually take 10–45 minutes each and cost $5–$30 in materials if you do them, while larger fixes—patching drywall, replacing trim, or correcting water damage—can run from 1–4 hours and $20–$150 in parts and supplies; hiring a pro adds labor at roughly $50–$150 per hour plus any minimum call-out fees.
| Repair | Typical Time |
|---|---|
| Nail holes/chips | 10–45 min |
| Scuffs/sanding | 15–40 min |
| Small drywall patch | 1–2 hrs |
| Water/trim repair | 2–4 hrs |
Use appropriate patch materials and proven repair techniques; factor drying time and possible multiple visits when budgeting.
Full Repaint Estimates
When you’re planning a full repaint, factor in both repair work and paint labor so you don’t get surprised by time or cost overruns.
You’ll estimate hours for surface preparation—sanding, patching, priming—and add painting time. Material costs vary with paint durability; higher-quality paints cost more but reduce future touchups.
Expect drywall patching to add a day, textured repairs several days, and a typical room repaint to take one to three days.
Get quotes for labor per hour or per square foot, and budget a contingency for hidden damage.
- Fear of messy delays
- Relief from durable results
- Pride in restored space
Tools & Materials for Peeling Paint Fixes
Before you start patching, gather the right tools and materials so the job goes smoothly.
You’ll need a putty knife, scraper, sanding block or orbital sander, durable gloves, safety goggles, and a dust mask for paint removal and surface preparation.
Get a high-quality patching compound, primer compatible with your wall type, and matching paint plus brushes or rollers.
Keep a bucket, sponge, and clean rags for cleanup.
For stubborn areas, include a chemical stripper or heat gun and a drop cloth (but don’t cover floors; that’s next).
Organize supplies on a tray so you work efficiently and safely.
Prepare the Area and Protect Floors
Start by clearing furniture and décor away from the wall so you have room to work.
Lay down drop cloths or plastic sheeting and tape edges to protect floors thoroughly.
Keep your sandpaper, putty knife, primer, and paint organized on a nearby table or tray so you can reach them without stepping on the protected area.
Clear The Work Area
Clear the room of furniture and valuables so you have space to work and nothing can get damaged.
You’ll set up a clean work area, lay out tools, and note safety precautions before you begin.
Remove rugs, delicate decor, and electronics; keep a clear path for moving ladders or paint supplies.
Sweep or vacuum to eliminate dust that’ll interfere with adhesion.
Keep windows open for ventilation and place a small table for brushes and cleaners so you won’t trip.
Stay mindful of pets and kids—lock them out while you prep.
- You’ll feel calm, ready, and confident.
- You’ll avoid stress and accidents.
- You’ll protect what matters.
Protect Floors Thoroughly
With the room emptied and tools staged, protect your floors thoroughly to prevent paint drips and dust from causing lasting damage. Lay heavy-duty floor coverings starting at one wall, overlap seams, and tape edges so dust and spills can’t seep underneath. Use adhesive protective sheets near trim and high-traffic zones to keep the work area clean. Move carefully to avoid shifting coverings; replace any section that’s torn. After sanding or scraping, vacuum over the coverings before removing them to catch residual dust. Inspect the floor once coverings are lifted, and spot-clean any remaining marks immediately.
| Area | Recommended covering |
|---|---|
| Main floor | Heavy-duty floor coverings |
| Trim/work edges | Protective sheets |
Organize Tools Nearby
Before you begin painting, set up a compact, reachable work station so you can grab brushes, rollers, scrapers, sandpaper, putty knives, and rags without stepping away from the wall.
Organize brushes by size and keep used ones in a sealed container to avoid drips. Gather dropcloths and tape them down, creating a clear perimeter so you won’t trip or track paint.
Place a trash bin and water jar within arm’s reach. Keep a flashlight or phone nearby for shadowed spots.
You’ll move faster, avoid mess, and feel calmer with everything in its place.
- Relief at order
- Confidence in control
- Calm focus
Fix Small Flakes and Chips in 3 Minutes
A quick touch-up can make small paint flakes and chips disappear in about three minutes: wipe the area clean, dab on a matching paint or stain with a fingertip or cotton swab, and smooth the edges so the repair blends with the surrounding finish.
For quick touch ups, choose a paint consistency that matches the wall—use a drop of water for latex or stir oil-based lightly. Apply thin layers; blot excess immediately.
Use effective techniques like feathering the edge and tapping, not brushing, to avoid brush marks. Let it dry briefly, then inspect in different light and repeat if needed.
Remove Loose Paint Safely and Efficiently
Start by securing the area and putting on safety gear—gloves, a dust mask or respirator rated for paint particles, and safety glasses—so you can remove loose paint without inhaling dust or getting debris in your eyes.
Inspect areas, score edges, and use a putty knife or scraper for safe scraping, working from intact paint toward damaged spots.
Try gentle paint removal techniques first to avoid gouging. Collect debris, vacuum with HEPA, and wipe with a damp cloth. Dispose of waste per local rules.
Restore primer and paint when surface is clean and dry.
- You’re protecting your home.
- You’re preserving value.
- You’re restoring calm.
When and How to Sand Before Repainting
You should sand whenever edges are rough, flaking remains, or the surface feels uneven to the touch.
Use the right grit—start with medium to remove loose paint and finish with fine for a smooth primer-ready surface—and sand with the grain or in light circular motions to avoid gouges.
Before repainting, wipe away dust, repair any small defects, and apply primer so new paint will adhere evenly.
When To Sand
When paint is flaking, glossy, or uneven, sand it before repainting to guarantee new paint adheres and looks smooth. If the surface is mostly intact with only minor scuffs, scuff-sanding or cleaning may be enough.
You’ll sand when peeling, bubbling, or visible brush marks threaten the finish. Recognizing sanding techniques and sanding benefits helps you decide: rough spots need leveling, glossy surfaces need dulling, and repairs require feathering edges.
Sanding also improves primer and paint adhesion, preventing future failures. Trust your sight and touch—if it doesn’t feel right, sand it.
- Frustration eased by control
- Pride in a smooth wall
- Relief from future peeling
Sanding Techniques
After you’ve decided sanding’s needed, pick techniques that match the damage and finish so the new coat will stick and look even.
For small chips or rough spots, hand-sand with fine (120–220) grit to feather edges and remove loose paint.
For larger areas, use a sanding block or random-orbit sander with medium grit, then finish with fine grit for smoothness.
Use sanding tools like detail sponges or sanding sticks for corners and trim.
Keep pressure even, sand with the grain when possible, and wipe dust frequently.
Stop once edges blend and surface feels uniformly smooth to the touch.
Preparing For Repaint
Before repainting, decide whether sanding is necessary by inspecting adhesion, gloss, and surface defects; if paint flakes, feels rough, or the finish is glossy, sand to promote proper bonding and an even look.
You’ll choose grit based on wall texture and remaining finish—coarse for peeling, fine for subtle scuffs. Clean dust, repair gouges, and feather edges so your new paint color lays smooth.
Sand in daylight, test with primer, and keep ventilation. Trust your eyes and touch: smoothness equals longevity.
- Relief when the wall finally looks right
- Pride in a flawless patch
- Calm knowing the job’s done correctly
Choose the Right Primer for Adhesion
If paint’s flaking or bare spots show through, pick a primer designed to bond to the exposed surface so your new coat will stick and last.
You’ll choose primer types based on substrate: oil-based or shellac for stained or glossy areas, latex for drywall, and bonding primers for tricky surfaces like glossy paint or previously coated plaster.
Read labels for adhesion benefits and stain-blocking claims.
Apply one even coat after cleaning and sanding; let it dry fully before painting.
Using the right primer reduces peeling, evens porosity, and guarantees fewer coats of finish paint are needed later.
Which Paint Type and Finish Prevent Peeling
You’ll want to pick a durable paint type, like a high-quality acrylic latex, that bonds well and resists wear.
Match the finish to the room—satin or semi-gloss for moisture-prone areas, eggshell for low-traffic rooms—to reduce peeling.
And don’t skip a quality primer, since it helps the paint adhere and prolongs the finish.
Choose Durable Paint Types
Pick a paint and finish that stand up to the room’s moisture, traffic, and surface conditions to reduce peeling.
You’ll want high-quality acrylic or elastomeric formulas for superior paint durability and reliable color retention. These resist cracking, flex with substrate movement, and shrug off humidity.
Match the formulation to the substrate—masonry, drywall, or previously coated surfaces—and use primers designed for adhesion. Test a small patch to confirm bonding and hue over time.
Proper selection cuts repainting frequency and frustration.
- You’ll sleep better knowing it lasts.
- You’ll feel proud of a stable finish.
- You’ll save time and money.
Opt For Appropriate Finish
When deciding on a paint finish, consider the room’s use and surface wear so the coating resists peeling and stays easy to clean. You’ll pick a finish based on traffic, moisture, and desired paint durability. High-traffic or wet areas benefit from satin or semi-gloss; flats hide imperfections but offer less durability. Your finish selection affects maintenance and longevity, so match sheen to function.
| Area | Recommended Finish | Why |
|---|---|---|
| Kitchen | Semi-gloss | Moisture resistance |
| Bathroom | Satin | Easy to clean |
| Living room | Eggshell | Moderate durability |
| Ceiling | Flat | Hides flaws |
Use Quality Primer
One essential step to prevent paint from peeling is applying a quality primer that’s matched to both the surface and the paint type you’ll use.
You’ll pick primer types for porous drywall, glossy surfaces, or stains, ensuring adhesion and uniform sheen. A proper primer seals, blocks stains, and creates a keyed surface so your topcoat bonds and lasts.
Consider oil-based or shellac for tough stains, latex for general use, and bonding primers for slick substrates.
Remember primer benefits: longer wear, fewer coats, and reduced peeling. Choose wisely and apply per instructions for a durable finish.
- Relief: you’ll stop recurring repairs.
- Confidence: the wall will look right.
- Pride: your work will last.
Repair Larger Peeling Patches: Step‑by‑Step
Start by removing loose paint and any failing primer so you’ll have a solid edge to work from; scrape and sand the area until only firmly adhered material remains.
Next, clean dust and grease with a damp cloth and allow drying.
Apply a patching compound to fill gaps and level the surface; let it cure, then sand smooth.
Prime the repaired section with a quality primer to guarantee adhesion.
Once dry, repaint using matching paint, applying thin, even coats.
Use appropriate peeling paint repair techniques and let each coat dry fully before additional coats to prevent future failures.
Feathering Edges and Blending Touch‑Ups
After you’ve sanded and primed the repaired spot, feather the paint edges so the new coats blend into the surrounding finish. Use light, overlapping strokes with a soft brush or small roller, pulling paint outward to avoid a hard line.
Match sheen and temperature, test blending colors on scrap cardboard, and thin your first coat if needed. Work quickly while paint is wet, then evaluate after it dries; add a second feathered pass only where visible.
Emotional payoff comes from a seamless repair that disappears into the wall.
- Relief when the patch vanishes
- Pride in a smooth finish
- Calm from restored harmony
Fix Peeling Paint on Drywall & Plaster
Peel away loose paint with a putty knife, then assess whether the problem’s surface is drywall or plaster so you can choose the right repair method.
If drywall shows paper tears or gouges, square the hole, apply joint compound, embed tape, sand smooth, and finish with primer for drywall repair.
For plaster, tap to find hollow spots, remove loose plaster, install backing if needed, and use a plaster patching compound in thin layers, allowing each to dry before sanding.
Prime repaired areas, feather edges into surrounding paint, and repaint. Use compatible primer and paint to prevent future peeling.
Fix Peeling Paint on Wood Trim & Baseboards
Scrape away loose paint from wood trim and baseboards with a putty knife or scraper, then inspect the surface for gouges, rot, or old glossy finishes that prevent new paint from sticking.
Sand smooth, fill gaps with wood filler, and prime bare wood to guarantee adhesion. Choose a durable trim paint and apply thin, even coats; sand between coats if needed.
Focus on wood trim maintenance to prevent future peeling, sealing joints and controlling humidity. Proper technique restores baseboard aesthetics and protects edges from scuffs.
Focus on trim upkeep—prevent peeling, seal joints, control humidity, and restore baseboard aesthetics while protecting edges from scuffs
- You’ll feel proud seeing crisp lines.
- You’ll relax in a cleaner room.
- You’ll protect your home’s charm.
Fix Peeling Paint Around Windows and Doors
Tackle peeling paint around windows and doors promptly to prevent moisture, drafts, and further damage to the surrounding trim and framing.
Start by removing loose paint with a scraper, then sand edges smooth to improve paint adhesion. Clean surfaces of dust and grease; prime bare wood or metal.
Repair minor trim damage with filler and replace severely rotten sections of window frames or door trims.
Apply exterior-grade primer and two finish coats, keeping strokes even. Finish with proper weatherproof sealing around joints and sills to block water and air.
Inspect annually and touch up chips to maintain protection and appearance.
How Moisture Causes Peeling : And Fixes
After you’ve repaired and resealed trim, look at why paint peeled in the first place: moisture. You’ll want to identify moisture sources—leaks, condensation, or rising damp—and dry the area fully.
Remove loose paint, sand, use a breathable primer, and choose paint suited for humid conditions. Then apply prevention methods: improve ventilation, fix plumbing, and add flashing where needed.
- You’ll feel relief once damp stains stop returning.
- You’ll gain confidence repairing the root cause, not just cosmetic damage.
- You’ll protect your home’s finish and avoid repeat work.
Deal With Mold or Mildew Under Paint
If you find mold or mildew lurking beneath flaking paint, don’t ignore it—address it before you repaint.
Wear gloves, goggles, and a mask. Scrape loose paint, then clean the area with a fungicidal solution or a diluted bleach mix; follow product instructions for effective mold treatment. Rinse and dry thoroughly.
Repair or replace any damp drywall or trim that caused growth. Prime with a mold-resistant primer, then repaint with a quality topcoat.
Replace any damp drywall or trim that fostered mold, then prime with a mold-resistant primer and repaint with a quality topcoat.
Finally, implement mildew prevention by fixing leaks, improving ventilation, and using dehumidifiers so the problem won’t return. Check periodically for recurrence.
Best Temperature and Humidity to Repaint
When you repaint, aim for moderate conditions: most latex paints cure best between about 50°F and 85°F (10°C–29°C) with relative humidity under 50–60%.
You’ll get smooth, durable results when you choose the ideal conditions: stable temperature, low humidity levels, and good ventilation.
Avoid painting during rapid temperature swings or high dew points that slow drying or trap moisture.
- You’ll feel relief watching even coats dry fast.
- You’ll gain confidence when brush marks vanish under proper curing.
- You’ll protect your work from tackiness and future peeling by controlling the environment.
Fixing Peeling Paint on Exterior Walls
Although exterior paint peels for several reasons—moisture, poor adhesion, or sun damage—you can stop the problem and restore your walls by removing loose paint, addressing the underlying cause, and repainting with proper prep.
Start by scraping and sanding to a feathered edge, then wash with a mild detergent or TSP substitute to remove dirt and mildew.
Scrape and sand to a feathered edge, then wash with mild detergent or TSP substitute to remove dirt and mildew.
Repair damaged siding or trim and let surfaces dry fully.
Use a compatible primer for bare spots and choose quality exterior paint.
Apply recommended painting techniques—thin, even coats and proper drying times.
This approach fits routine exterior maintenance and yields a durable, attractive finish.
Preventive Steps to Stop Paint Peeling Again
To stop paint from peeling again, you’ll need to tackle moisture, surface prep, and material compatibility before you ever open a can. You’ll do preventive maintenance by fixing leaks, sealing gaps, and choosing paint matched to the substrate.
Sand and prime glossy or damaged areas so coatings adhere. Guarantee proper ventilation during drying and long-term humidity control to prevent blistering. Use high-quality primers and paints rated for exterior or interior conditions.
Careful prep saves time and emotion later—pride in a job done right keeps you calm when storms or damp return.
- Relief: a stable wall you can trust
- Confidence: paint that stays put
- Peace: no recurring repair stress
Troubleshooting: What to Do If Paint Peels Again
If paint peels again, first check for moisture sources like leaks, condensation, or rising damp that can undermine new coatings.
Then reassess your surface prep—look for remaining loose paint, poor adhesion, or contaminants you might’ve missed.
Fix the underlying issue before repainting to prevent another failure.
Check Moisture Sources
When paint starts peeling again, check for moisture sources right away so you can stop the problem at its root.
Look for visible water leaks, warped trim, or damp spots and act fast. Examine vents, plumbing, and roofing paths.
Test hidden humidity with a moisture meter or by taping a small clear plastic bag to the wall for 24 hours.
Improve humidity control with dehumidifiers or better ventilation. Address any leak before repainting to avoid repeat peeling.
- That sinking feeling when you find a leak
- The frustration of recurring damage
- Relief after you stop the moisture
Reassess Surface Prep
Recheck the prep steps you took before repainting to find what was missed or done poorly. You’ll perform a focused surface evaluation: look for dust, oil, loose paint, or improper primer. Compare your prior prep techniques with recommended steps—sanding, cleaning, patching, and using the right primer for substrate. If peeling returns, strip to sound material and follow corrected prep techniques before repainting.
| Issue found | Corrective action |
|---|---|
| Loose paint | Scrape to sound edge |
| Contamination | Clean with degreaser |
| Poor adhesion | Sand and prime |
| Moisture stain | Fix source, dry, treat |
Frequently Asked Questions
Can Peeling Paint Affect Indoor Air Quality or Health?
Yes — peeling paint can worsen indoor pollutants and raise health risks; you’ll inhale dust, flakes, or old lead-based particles, which can irritate lungs, trigger allergies, or cause more serious chronic issues without prompt testing and remediation.
Will Scraping Old Lead-Based Paint Require Special Handling?
Will you need special handling? Yes — if paint might contain lead, you’ll follow lead safety rules: don’t dry-scrape, wear PPE, wet methods minimize dust, contain debris, and arrange proper disposal through hazardous-waste channels or certified contractors.
Can Wallpaper Underneath Cause Paint to Peel?
Yes—old or poorly adhered wallpaper can cause paint to peel. You’ll need to inspect wallpaper care, remove or properly seal it, and guarantee strong paint adhesion by cleaning, priming, and using compatible paints and adhesives for lasting results.
How Long Should New Paint Cure Before Cleaning or Rehanging Items?
Like watching sunrise on a wall, wait: you should let paint drying finish and observe curing times—typically 24–48 hours for light touch, seven days for full cure—before cleaning or rehanging items to avoid damage.
Does Paint Peeling Void My Home Insurance or Warranty?
Generally, paint peeling alone usually won’t void insurance coverage, but you’ll want to check your warranty details and your policy; if neglect or improper prep caused damage, insurers or warranties might limit or deny claims.
Conclusion
When paint peels, don’t let your walls look like a tired old map—take action. Start with a proper assessment, choose the right fix for the damage, and prep the surface like you mean it: clean, dry, sand, and prime. For big jobs or structural issues, call a pro. Repaint in stable temperature and humidity, and seal out moisture to keep things smooth. With care and the right steps, your walls will wear a fresh coat of confidence.