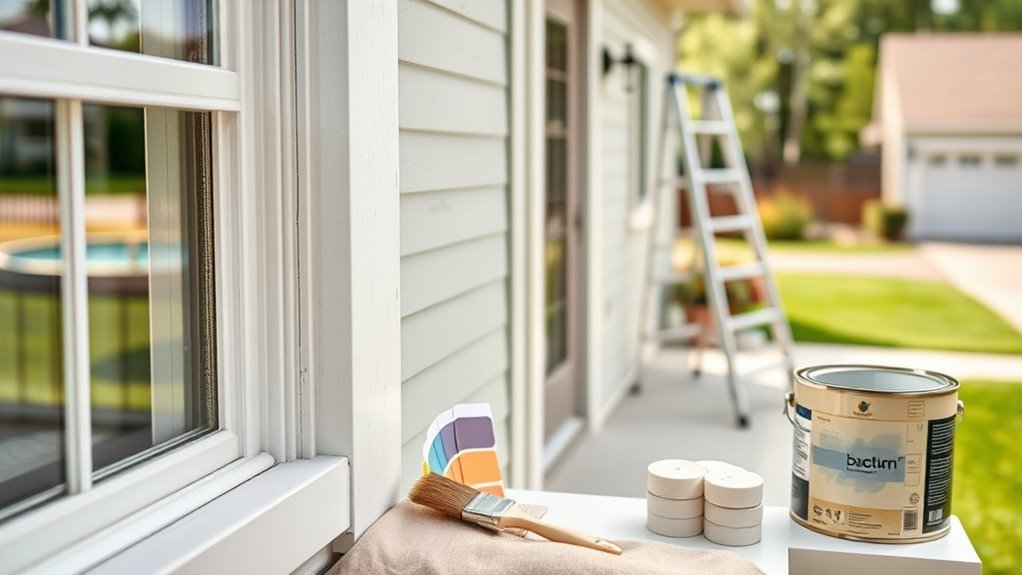
What Type of Paint for Exterior Trim? Best Guide
You’ll want a durable, flexible exterior latex or hybrid‑alkyd paint in a satin or semi‑gloss sheen so your trim sheds water, resists cracking, and’s easy to clean. Use a high‑quality exterior primer matched to the substrate—oil‑based for bare wood or metal, latex for previously painted surfaces, and specialty primers for PVC or composites. Pick low‑VOC formulas if you’re sensitive, and avoid flat finishes. Keep coats thin and dry between applications, and keep going for tips on prep, climate, and troubleshooting.
Who This Guide Is For and What You’ll Learn
This guide is for homeowners, DIYers, and small contractors who want durable, attractive exterior trim without guesswork.
You’ll learn how to assess substrate, pick the right finish, and prep surfaces for consistent paint application.
I’ll walk you through tools, drying times, and techniques that prevent drips and uneven coverage.
You’ll also get practical tips for trim maintenance—seasonal inspection, touch-up strategies, and when to repaint—to extend life and save money.
This section sets expectations so you can approach projects confidently, avoid common mistakes, and achieve a professional-looking result without wasting time or materials.
Quick Answer: Which Paint to Buy for Exterior Trim
Wondering what paint to grab for exterior trim? Choose a high-quality acrylic latex or an exterior alkyd enamel depending on your preference: acrylic latex offers durability, flexibility, and easier cleanup; alkyd enamel gives a hard, smooth surface and is great for detailed moldings.
Pick a satin or semi-gloss trim finishes to highlight profiles and resist dirt—semi-gloss stands up best to weather and cleaning.
Match primer to substrate: use a bonded primer for PVC or glossy surfaces.
Buy paints labeled for exterior trim and from reputable brands to guarantee color retention and long-term protection.
Why Trim Needs Different Paint Than Siding
Because trim sits at edges, joints, and around openings, it faces different stresses than siding and needs paint formulated for those conditions. You’ll want tougher, flexible coatings that handle movement, abrasion, and more frequent touch-ups. Trim maintenance focuses on preventing cracks and sealing seams; choose paint finishes that resist dirt and allow easy cleaning. Siding paint prioritizes coverage and weather resistance over flexibility. Use high-quality acrylic or elastomeric blends on trim, and pick a sheen that hides imperfections while shedding grime. Compare properties below to decide what’s best for each surface.
| Feature | Trim vs Siding |
|---|---|
| Flexibility | Trim needs more |
| Abrasion | Trim endures more |
| Cleaning | Trim needs easier cleaning |
| Finish choice | Sheen matters for trim |
How Climate Changes Your Exterior‑Trim Paint Choice
When your region swings between freezing winters and hot summers, pick trim paints that stay flexible and resist cracking rather than ones that only block moisture; extreme temperature shifts and UV exposure demand formulations—like high‑flex acrylics or elastomeric blends—that accommodate movement, resist chalking, and maintain adhesion over time.
You’ll consider climate impact: coastal salt spray needs superior corrosion and mildew resistance, while arid zones require UV-stable, low‑chalk finishes.
Look for explicit weather resistance ratings, freeze/thaw testing, and UV inhibitors. Choose finishes engineered for your local patterns, and apply proper priming and caulking so the paint performs as specified.
Which Substrates Matter: Wood, MDF, PVC, Metal, Composite
Any trim material you choose — wood, MDF, PVC, metal, or composite — demands a paint system matched to its properties and failure modes.
So you’ll need to evaluate adhesion, moisture sensitivity, expansion rates, and surface porosity before picking a primer and topcoat.
For Wood selection, prioritize rot-resistant species and proper sealing.
MDF concerns center on edge swelling, so use a stable, exterior-grade sealant and primer.
PVC advantages include low maintenance and minimal priming, but match flexible coatings to expansion.
Metal durability needs rust inhibitors and suitable primers.
Composite options vary—follow manufacturer guidance.
Consider Environmental impact, Maintenance tips, and Color choices for longevity.
Acrylic‑Latex Exterior‑Trim Paint: Benefits and Uses
After sizing up your substrate choices and failure modes, you’ll find acrylic‑latex paints are the workhorse for most exterior trim jobs. You’ll get acrylic benefits like UV and moisture resistance, flexible film, and color retention. For quick projects and multiple substrates, latex uses shine: fast drying, easy cleanup, and lower VOCs. Apply to primed wood, PVC, and composite; sand and clean for best adhesion. Keep strokes consistent and avoid painting in extreme heat or cold.
| Feature | Benefit | Best For |
|---|---|---|
| Flexibility | Resists cracking | Wood trim |
| Cleanup | Soap and water | PVC/composite |
Oil‑Based Exterior Trim Paint: When to Choose It
When you’re deciding on oil-based exterior trim paint, consider where it performs best outdoors—high-traffic areas, metal trim, and surfaces that need a hard, durable finish.
Make sure you prep properly and check compatibility with existing finishes and caulks to avoid adhesion or yellowing issues.
Weigh the pros and cons: excellent durability and leveling versus longer dry times, stronger fumes, and tougher cleanup.
Best Uses Outdoors
Durability matters most for exterior trim, and oil‑based paints still win in specific outdoor situations you’ll encounter.
You’ll choose oil when outdoor durability and weather resistance are priorities: high‑traffic door frames, porch railings, window sills exposed to driving rain, and trim facing prevailing winds.
Use it on aged hardwoods or areas prone to scuffs where flexible acrylic might fail. It’s ideal for ornate millwork that needs a hard, long‑lasting finish and for locations where moisture and temperature swings are severe.
You’ll accept longer dry times and stronger fumes in exchange for a tougher, more protective coating.
Prep And Compatibility
Having chosen oil for its toughness, you’ll need to prepare surfaces and check compatibility to get that performance.
You should strip loose paint, remove dirt, mildew, and chalking, then sand glossy areas to promote adhesion. Fill gaps and prime bare wood or metal with a compatible oil‑based or bonding primer.
Test a small area if an existing coating is latex: incompatible layers can peel. Consider temperature and humidity limits listed by the manufacturer.
Use appropriate cleaners and allow full drying before painting. Proper surface preparation and confirming paint compatibility will extend finish life and reduce recoating issues.
Pros And Cons
Although oil‑based trim paint takes longer to dry and needs stronger solvents, it still shines where toughness and a hard, scuff‑resistant finish matter most.
You’ll get durable paint finishes that resist abrasion and yellowing less when pigmented properly. Choose oil if trim sees heavy wear, frequent touching, or tool contact.
Downsides: slower paint application, long drying times, stronger odor, and tougher cleanup with mineral spirits.
You must verify compatibility with primers and existing coatings to avoid adhesion issues.
For quick projects or eco‑friendly choices, water‑based alternatives win, but oil remains best for extreme durability.
Alkyd Enamel vs Waterborne Enamel: Pros and Cons
When choosing between alkyd and waterborne enamel for exterior trim, you’ll want to weigh durability and longevity against ease of application and cleanup.
Alkyds usually offer tougher, longer-lasting finishes, while waterborne enamels are easier to apply and clean with soap and water.
Consider the tradeoffs for your climate and how much time you want to spend on prep and maintenance.
Durability And Longevity
Because trim faces constant sun, moisture, and temperature swings, choosing between alkyd (traditional oil-based) and waterborne enamels comes down to how long you need the finish to last and how much maintenance you’re willing to do.
You’ll favor alkyd if you want tougher wear, better initial weather resistance, and slower chipping; it often sands and repairs well.
Waterborne enamel resists yellowing and offers superior color retention over time with easier fading patterns.
Consider these trade-offs before deciding:
- Alkyd: durable, harder film, more VOCs
- Waterborne: UV-stable, better color retention
- Maintenance: frequency depends on exposure and prep
Application And Cleanup
If you want easier brushing, faster dry times, and simpler cleanup, waterborne enamels usually win out; they thin with water, clean up with soap and water, and let you recoat sooner.
You’ll find waterborne suits delicate paint techniques like feathering and thin coats, while modern alkyds excel at leveling for a silky finish.
Alkyd enamel needs mineral spirits for cleanup methods and longer drying, so plan ventilation and tack-free times.
Choose alkyds if you need extended open time for blends; pick waterborne for quicker turnaround.
Test both on a scrap to match sheen, adhesion, and your workflow.
Specialty High‑Build Paints and Sealers for Uneven Trim
Though uneven trim can make a job look sloppy, specialty high-build paints and sealers let you fill minor gaps, smooth out imperfections, and create a uniform surface in far fewer coats than standard paint.
You’ll appreciate specialty finishes that bridge small cracks and mask uneven surfaces before the final coat. Choose products labeled high-build or epoxy-modified for durability, and apply with a brush or short-nap roller for control.
Prep by cleaning and lightly sanding only rough spots.
Consider these benefits:
- Faster leveling and fewer coats
- Improved moisture resistance and adhesion
- Easier touch-ups and longer-lasting trim appearance
Exterior Primer Types and When to Use Each
Before you pick a topcoat, you’ll want to match the primer to the job: oil-based primers for bare wood or metal, latex/acrylic primers for milder weather resistance and easier cleanup, and specialty bonding primers when surfaces are glossy or hard to stick to.
Each type handles adhesion, moisture, and stain-blocking differently, so choosing the right one prevents peeling and tannin bleed-through.
I’ll explain when to use each so your trim holds up and looks sharp.
Oil-Based Primers
- Best for bare or oil-coated substrates
- Excels at blocking stains and tannin bleed
- Provides a tough, long-lasting base
Latex/Acrylic Primers
Latex and acrylic primers are water-based choices you’ll reach for when you want fast drying, easy cleanup, and good adhesion on previously painted or porous surfaces.
You’ll choose latex primer benefits when you need mildew resistance, flexibility for wood movement, and simple soap-and-water cleanup.
Use acrylic primer applications for exterior trim exposed to sunlight and moisture because acrylic bonds well to masonry, stucco, and composite materials and resists chalking.
Both prime for topcoat adhesion and even coverage; sand lightly between coats and apply in mild weather.
Don’t rely on them for bare metal or heavy stain blocking—those need specialty primers.
Specialty Bonding Primers
If you’ve used latex or acrylic primers on typical siding and trim, you’ll find occasions when adhesion problems or unusual substrates call for something stronger—this is where specialty bonding primers come in.
You’ll reach for them when surfaces are slick, glossy, or poorly bonded. They create a tenacious base so paint doesn’t peel.
- Use on vinyl, PVC, slick metals
- Use over glossy factory finishes or previously painted surfaces
- Use when contamination prevents normal primer application
Apply per manufacturer directions: clean, sand lightly, then perform the specified primer application and dry times.
You’ll get longer-lasting trim paint and fewer callbacks.
Bonding Primers for Slick or Previously Painted Trim
When you’re dealing with slick surfaces or trim that’s already been painted, bonding primers create a reliable bridge between the old finish and your new paint.
You’ll choose primers formulated for adhesion—usually solvent‑based or acrylic adhesion promoters—and follow bonding techniques that include light scuffing and degreasing.
Proper surface preparation matters: clean, remove loose paint, sand glossy areas, and let everything dry.
Apply primer evenly, avoid pooling, and follow manufacturer flash times before topcoating.
These primers reduce peeling and improve longevity on vinyl, PVC, glazed wood, and previously painted trim, letting your finish coat adhere and perform as expected.
Rust‑Inhibiting Primers for Metal Trim
Metal trim exposed to moisture and salt needs protection, so you’ll want a rust‑inhibiting primer that bonds to bare metal and staves off corrosion.
You’ll prep surfaces by cleaning, sanding, and removing mill scale so the primer can deliver long-term rust prevention and reliable metal care. Choose primers labeled for exterior use and compatible with your topcoat.
- Use zinc-rich or epoxy primers for severe exposure.
- Select fast-dry, rust-inhibiting primers for quick recoats.
- Consider self-etching primers for smooth, galvanized surfaces.
Apply per manufacturer instructions, inspect regularly, and touch up chips promptly to maintain protection.
Stain‑Blocking Primers for Tannin Bleed on Wood
Because tannins in woods like cedar, redwood, and some tropical species can leach through paint and stain your finish, you’ll want a good stain‑blocking primer that seals those natural oils and prevents discoloration.
You should choose a primer formulated for tannin bleed resistance, often shellac‑based or high‑quality oil‑based formulas, for stubborn woods.
Consider primer selection based on adhesion, drying time, and compatibility with your topcoat (water or oil).
Apply per manufacturer instructions, spot‑prime knots and end grains, and allow full cure before topcoating.
Proper primer choice prevents tannin bleed and extends the life and appearance of exterior trim.
Which Sheen for Trim: Flat, Satin, Semi‑Gloss, or Gloss
Wondering which sheen will best show off your exterior trim? You’ll pick based on durability, visibility of imperfections, and style.
Do a sheen comparison tied to trim materials — wood tolerates higher gloss, while textured composites hide flaws with satin. Consider maintenance: higher sheen cleans easier; lower sheen hides surface blemishes.
- Flat: minimizes flaws, low reflectivity, best for rough trim materials.
- Satin: balanced durability and subtle sheen, good for most wood and fiberboard.
- Semi-gloss/Gloss: high durability and washability, highlights details but shows imperfections.
Color Tips to Highlight Architectural Details
Now that you’ve picked a sheen that balances durability and flaw-hiding, think about color choices that will actually call attention to your architectural details.
Use color combinations that create clear architectural contrast: a lighter trim against a darker siding makes moldings and cornices pop, while a darker trim frames windows and doors.
Choose contrasting colors—light trim with darker siding to make moldings pop, or dark trim to frame windows and doors.
Limit your palette to two or three hues to keep lines crisp. Test samples at different times of day and view from street level.
Consider complementary or analogous schemes depending on style—bold contrasts suit modern homes, subtle shifts favor traditional ones—always prioritize proportion and balance.
How Sheen Affects Durability and Cleaning
When you pick a sheen for exterior trim, remember it does more than alter the look—sheen level directly impacts how well the paint resists weather, dirt, and routine cleaning.
You’ll choose based on exposure and desired maintenance: higher glosses shed moisture and grime but show flaws; lower sheens hide imperfections yet attract dirt.
Consider these practical trade-offs and match cleaning methods to finish.
- High gloss: easiest to wipe, ideal for exposed trim.
- Satin: balances durability and appearance; forgiving.
- Low sheen/flat: needs gentle cleaning to avoid wear.
Think of sheen levels as a maintenance decision, not just aesthetics.
Adhesion: Prep, Temperature Range, and Moisture Limits
Adhesion depends on three things you can control: surface prep, temperature during application, and moisture levels in the material and air.
Use adhesion techniques like scuff sanding, degreasing, and compatible primers to create a stable bond; don’t paint over chalky or loose coatings.
Apply paint within manufacturer temperature and dew point ranges to avoid poor film formation.
Keep wood and ambient moisture low—use moisture barriers where recommended and wait for trim to dry after rain or washing.
Test small areas if conditions are marginal.
Proper control of these factors prevents peeling and extends trim life.
Prep Checklist for Bare Wood Trim
Before you paint bare wood trim, inspect the surface for cracks, loose fibers, or old finish that needs sanding or stripping.
Check moisture content with a meter and probe any soft spots—rot must be removed and replaced or treated.
Only proceed once the wood is dry, sound, and properly repaired.
Wood Surface Inspection
Although the trim may look sound at a glance, you should inspect every board closely for rot, loose sections, raised grain, old failed coatings, and nail pops before you start sanding or priming.
Check for wood decay signs: soft spots, dark staining, or crumbly fibers. Do a moisture inspection with a meter or probe areas near joints and sills.
Clean, mark, and plan repairs; don’t cover problems.
- Probe suspect areas gently with a screwdriver.
- Note gaps, nail pops, and peeling layers.
- Sweep away dirt and old caulk to expose defects.
Address only surface prep here; full repairs come next.
Moisture And Rot Repair
Now that you’ve identified soft spots, gaps, and areas with raised grain, focus on stopping moisture and repairing rot before painting. You’ll remove damaged wood, dry the area, and use a wood hardener and epoxy filler for structural repairs. Install flashing and seal joints to create effective moisture barriers. Prime repaired spots with a compatible exterior primer for rot prevention. Follow with topcoat once cured.
| Task | Action |
|---|---|
| Remove rot | Cut to sound wood |
| Dry | Use fans/sun |
| Harden | Apply wood hardener |
| Fill | Epoxy or filler |
| Seal | Flashing, caulk, prime |
Prep Checklist for Painted or Previously Finished Trim
Start by clearing the work area and inspecting the trim for old paint, loose caulk, cracks, and mildew so you know exactly what needs attention.
You’ll prioritize paint removal where coatings fail, clean surfaces, and plan surface preparation steps before priming. Gather tools, test adhesion, and mask nearby areas.
Follow this quick checklist:
- Remove loose paint and flaky areas; wash mildew with a mild bleach solution.
- Sand glossy spots lightly and wipe dust; check caulk lines and remove failed caulk.
- Clean dirt, allow full drying, and verify weather permits painting within the recommended temperature and humidity range.
Repair Tips: Fill Gaps, Sand, and Replace Damaged Trim
Inspect each trim piece closely for rot, gaps, and surface irregularities so you can decide whether to fill, sand, or replace it. Small cracks and nail holes are usually fixed with paintable exterior caulk or wood filler, while soft, crumbling sections should be cut out and replaced to confirm a durable finish.
After replacement or repair, perform gap filling where joints meet and where trim meets siding to prevent moisture. Use a quality scraper, then trim sanding with a medium, then fine grit to blend repairs and create adhesion.
Clean dust, inspect seams, and verify surfaces are dry before proceeding to paint.
Proper Priming Sequence for Each Substrate
Start by brushing a dedicated wood primer on bare or repaired trim so you get a stable first coat that seals and evens out the surface.
For metal, you’ll need to clean, remove rust, and apply a corrosion-inhibiting primer before any topcoat.
Follow each substrate’s prep and primer sequence to guarantee adhesion and long-lasting protection.
Wood Primer First Coat
When you’re prepping wood trim, apply a quality wood primer as the first coat to seal the surface, block tannin bleed, and promote paint adhesion.
You’ll clean, sand, and remove dust so the wood surface is receptive. Choose an oil- or latex-based primer suited to exterior use and compatibility with your topcoat to guarantee long-lasting paint application.
Prime end grains and joints thoroughly; thin spots will show later. Allow proper drying and lightly sand between coats for a smooth finish.
- Clean, sand, dust-free surface
- Compatible exterior primer type
- Thorough coverage on edges and joints
Metal Surface Prep
Prepare metal trim by removing rust, grease, and loose coating before you prime; this guarantees the primer bonds and prevents peeling.
For metal cleaning, scrub with a degreaser, rinse, and dry thoroughly. Sand areas with surface rust to bright metal, then treat with a rust converter on pitted spots.
For bare steel, use a rust-inhibiting metal primer; for aluminum, pick an etching primer or one labeled for non-ferrous metals.
Make sure all primer coats dry per manufacturer directions before topcoating. Mask adjacent surfaces, work in dry conditions, and follow safety guidelines to make sure long-lasting adhesion and corrosion protection.
Application Methods: Brush, Roller, and Sprayer
Choosing the right application method—brush, roller, or sprayer—depends on your trim’s profile, desired finish, and how much prep you’re willing to do.
You’ll weigh brush techniques for control, roller advantages for speed on flat areas, and sprayer efficiency for fast, even coverage.
Consider the application comparison: edges need precision, large runs need consistency, and weather affects drying.
- Brush techniques: detail work and tight corners.
- Roller advantages: smooth, quick coverage on broad faces.
- Sprayer efficiency: best for complex profiles but needs masking and practice.
Match method to trim shape, access, and finish goals.
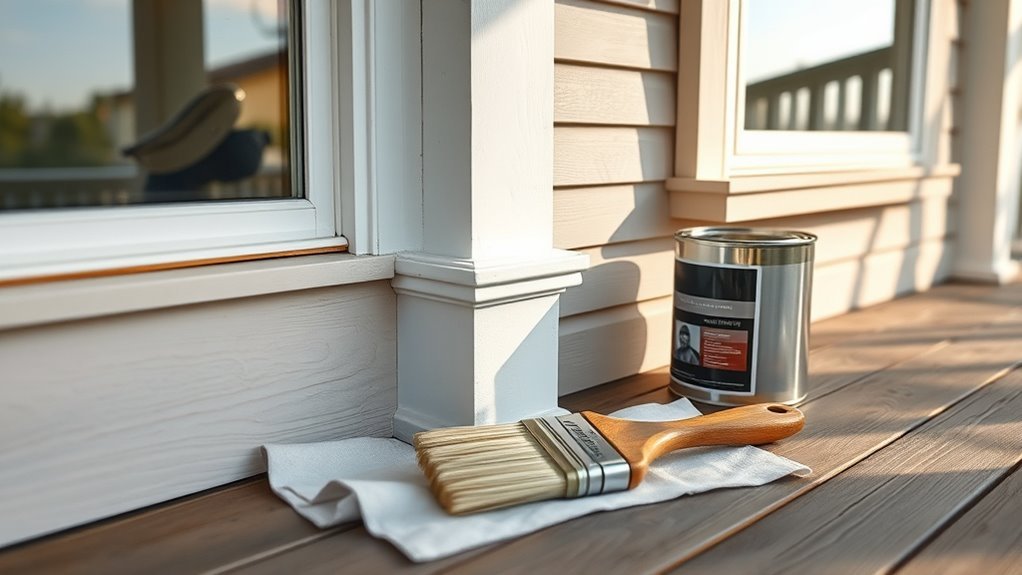
Best Brushes and Tools for a Smooth Trim Finish
The right brushes and tools make the difference between a pro-looking trim job and a frustrating one, so pick quality items that match your paint and trim profile. You’ll want angled sash brushes for corners, natural-bristle for oil or alkyd, and synthetic for latex—these brush types cover most jobs. Use a good edger, small foam rollers for flats, and a sharp putty knife. Practice tool maintenance: clean brushes immediately, reshape bristles, and store hung.
| Tool | Best Use | Tip |
|---|---|---|
| Angled brush | Corners | 2–2.5″ |
| Synthetic brush | Latex | Clean with water |
| Natural brush | Oil | Use solvent |
| Foam roller | Flats | Light pressure |
Drying, Recoat Times, and Curing
- Temperature and humidity affect film set and overall curing.
- Apply thin coats to speed drying and guarantee adhesion.
- Allow full cure before heavy use or exposure.
Maintenance and Touch‑Up Strategies
When you spot chips, cracks, or peeling on exterior trim, act quickly to clean, sand, and prime the area before touching up so small problems don’t become costly repairs.
Inspect trim seasonally, remove dirt and mildew, and sand feathered edges for a smooth base. Use high-quality exterior primer and matching topcoat; get accurate color matching by bringing a sample or using a spectrometer at the store.
Apply thin coats with a small brush, blending into surrounding paint with gentle strokes. Keep spare cans labeled for future touch-up techniques and note batch numbers to guarantee consistent results.
Common Mistakes That Ruin Exterior Trim Paint Jobs
If you skip proper surface prep or rush drying times, even high-quality paint won’t hold up long on exterior trim. You’ll see peeling, blistering, and uneven sheen if you ignore moisture, fail to sand, or paint in direct sun.
Use solid trim maintenance tips and proper paint application techniques to avoid shortcuts.
- Painting over dirty or chalky surfaces without cleaning.
- Skipping primer on bare wood or patched areas.
- Applying thick coats or re-coating before previous layers cure.
Spot these mistakes early, correct them, and follow recommended drying windows so your trim stays protected and looks sharp.
Budget‑Friendly Paints That Still Perform
You can get durable results without breaking the bank by choosing a quality acrylic-latex or an affordable oil-based alternative made for exterior trim.
Focus on proper prep—cleaning, sanding, and priming—to make budget paints adhere and last.
With the right application and dry times, a cheaper product can still give you professional-looking durability.
Durable Acrylic Latex
- Easy application: brushes or sprayers work well
- Low VOC and fast drying: good for quick projects
- Maintenance: simple touch-ups extend life
Choose reputable brands and follow proper prep for best results.
Affordable Oil Alternatives
While true oil-based paints still have advantages for trim, plenty of budget-friendly alternatives now give you similar durability and finish without the heavy solvents or high cost.
You can choose waterborne alkyds and high-quality acrylics that mimic oil’s leveling and hardness while offering easier cleanup.
Look for brands advertising tough exterior film, UV resistance, and mildew protection.
Prioritize eco-friendly options if ventilation or disposal is a concern; many low-VOC formulas perform well.
Compare coverage and warranty to find cost-effective solutions that meet your climate and exposure.
These choices help you get oil-like results on a tighter budget.
Prep And Application Tips
Start by cleaning and repairing trim so paint sticks and lasts: scrub dirt and mildew, scrape loose or flaking paint, sand glossy spots, and fill cracks or nail holes with an exterior-grade filler.
You’ll save money choosing budget-friendly coats if you nail surface preparation and follow smart application techniques. Prime bare wood and patched areas, use high-quality brushes or a small roller, and work in mild, dry weather. Keep edges sharp and avoid overworking wet paint.
Tips:
- Cut in edges first, then roll for uniform coverage.
- Apply thin, even coats; wait recommended dry time.
- Inspect and touch up within 24–48 hours.
When Should You Hire a Pro vs. DIY?
Decide based on scope, skill, and risk: if your trim project is small, straightforward, and you’re comfortable with prepping, caulking, and using a brush or sprayer, you can DIY; hire a pro when the job involves extensive surface repair, hard-to-reach areas, lead paint concerns, or tight timelines that demand consistent, high-quality results.
Assess DIY Considerations: time, tools, ladder safety, and patience for proper prep and multiple coats.
Get Professional Expertise for complex substrate repair, matching historical profiles, strict warranty needs, or large multi-story jobs.
Obtain quotes, check references, and weigh cost versus long-term durability before deciding.
Top Brand Recommendations by Paint Type and Use Case
Looking for reliable exterior trim paint? You want clear brand comparisons and guidance on paint finishes for specific tasks.
Choose by substrate, exposure, and desired sheen. Consider these top picks for common use cases:
- Sherwin-Williams (duration + smooth acrylic latex) — great for high-exposure wood trim; durable paint finishes and color retention.
- Benjamin Moore (premium acrylic) — ideal for historic homes and crisp detail work; offers satin and semi-gloss options.
- Behr (cost-effective enamel) — good for budget projects and metal or vinyl; tough, easy-clean semi-gloss.
Match product specs to your project needs to get long-lasting results.
How to Read Paint Labels and Technical Data Sheets
One clear way to avoid costly mistakes is to learn how to read paint labels and technical data sheets (TDS): they tell you what the product is made of, where it performs best, and how to apply it.
You’ll look for sheen, film thickness, coverage, dry time, and recommended substrates in a paint label breakdown.
On the TDS, focus on adhesion, VOC, temperature limits, and compatible primers.
Use technical data interpretation to match product limits to your climate and trim material.
Note cure versus dry times, warranty conditions, and recommended prep.
That helps you choose confidently and avoid rework.
VOC, Safety, and Eco Tips for Exterior Paint
Because exterior paints release fumes that can affect your health and the environment, you should pay attention to VOC levels, safe handling, and disposal practices before you start.
Check VOC regulations in your area, choose eco-friendly options like low-VOC or water-based formulations, and follow safety precautions: ventilate, wear gloves and respirators, and store cans tightly.
Use painting techniques that minimize overspray and waste, like tipping and brush cutting-in. Dispose of leftover paint at approved facilities.
Quick checklist:
- Pick certified low-VOC or zero-VOC brands
- Use PPE and proper ventilation
- Recycle or take unused paint to hazardous-waste centers
Estimating How Much Paint and Primer You’ll Need
After you’ve chosen low‑VOC products and set up safety measures, you’ll want to figure out how much paint and primer the job actually needs so you don’t waste materials or make extra trips.
Measure linear feet of trim and average height, then calculate square footage. Subtract areas like windows and doors for accuracy.
Check product coverage on labels—most list square feet per gallon—and account for two coats plus primer if bare wood is involved.
Factor in waste for sanding, overlap, and touchups. Recording paint quantity upfront prevents shortages and helps you stick to budget while estimating needs precisely.
Best Months and Weather Windows to Paint Trim
You’ll get the best results when temperatures stay between about 50–85°F, so plan projects for milder months.
Check humidity and dew point—high moisture or painting near dew can ruin adhesion and drying.
Aim for several consecutive dry days in spring or fall to give paint time to cure.
Ideal Temperature Range
When planning exterior trim painting, aim for dry days with temperatures between about 50°F and 85°F so the paint can cure properly without blistering or freezing.
You’ll want consistent temperatures during application and curing; understand temperature effects on drying times and film formation. Choose seasons that offer those ideal conditions and check short-term forecasts to avoid sudden drops or heat spikes.
- Paint when daily highs and lows stay within range.
- Avoid early morning frost or late-afternoon heat bursts.
- Use heat-friendly or cool-weather formulations if you can’t wait.
This helps you get durable, attractive trim with fewer callbacks.
Humidity And Dew Point
Because moisture in the air controls how paint dries, check both humidity and the dew point before you start trim work. You’ll avoid tacky finishes and poor adhesion by aiming for relative humidity below about 85% and avoiding rapid swings.
Understand humidity effects: high moisture slows curing and can cause blooming or blistering; very low humidity can make paint skin too fast and trap solvents.
For dew point considerations, don’t paint when surface temperature is within a few degrees of the dew point—condensation ruins finish.
Watch forecasts for stable, dry windows and plan short sections so conditions stay consistent.
Seasonal Timing Tips
If you plan trim work around the calendar and forecast, aim for the late spring through early fall window in most climates—these months typically offer moderate temperatures, lower humidity, and fewer freeze–thaw cycles that can compromise adhesion and curing.
You’ll want to track seasonal trends and local weather considerations so paint can dry properly and last longer. Pick days with steady daytime temps between about 50–85°F and low dew point. Avoid painting just before rain or overnight drops. Plan prep and coats within a clear dry stretch.
- Morning starts after dew lifts
- Midweek forecasts with stable temps
- Avoid high-humidity afternoons
Troubleshooting: Peeling, Blistering, and Adhesion Failures
Although it’s frustrating, you can usually diagnose and fix peeling, blistering, and adhesion problems by systematically checking surface prep, moisture, and product compatibility. Inspect for peeling paint, blistering issues, and adhesion problems; scrape, sand, and clean to ensure proper surface preparation. Test for moisture with a meter, fix leaks, and allow drying. Match primer and paint type to substrate; strip incompatible coatings. Recoat only when adhesion is secure.
| Symptom | Likely Cause | Quick Fix |
|---|---|---|
| Peeling | Poor prep | Scrape, sand, prime |
| Blisters | Moisture | Dry, seal leaks |
| Poor adhesion | Wrong product | Use compatible primer |
| Flaking | Old layers | Strip, recoat |
Frequently Asked Questions
Can I Paint Exterior Trim Myself if I’M Allergic to Paint Fumes?
Yes — you can, but prioritize painting safety: choose fume free alternatives like water-based or low‑VOC paints, use ventilation, wear proper respirators and gloves, and consider hiring help for extensive jobs to avoid exposure.
How Long Should I Wait Before Installing New Trim After Painting?
Wait until paint feels dry, not heroic — you’re not saving the world by rushing. You should allow trim installation timing of at least 24–48 hours, considering paint drying duration, humidity and manufacturer’s recommendations for best results.
Will Painted Trim Affect My Home’s Resale Appraisal?
Yes — painted trim can influence resale value and buyer perception; if it’s neat, color-appropriate, and durable, you’ll boost appeal, but sloppy or trendy finishes could lower offers, so prioritize clean, neutral, well-executed work.
Can I Use Leftover Interior Paint for Exterior Trim Touch‑Ups?
You shouldn’t—interior paint lacks exterior durability, so it won’t withstand weather or UV. You can use leftovers for temporary, sheltered touch‑ups, but you’ll want proper exterior trim paint for lasting protection and a uniform finish.
How Do I Dispose of or Recycle Leftover Exterior Paint and Contaminated Rags?
Think of a pirate burying treasure: you’ll treat paint disposal like sealing a chest—dry leftover paint, take it to a hazardous waste drop, and bag contaminated rags for proper rag recycling or local disposal to avoid fires.
Conclusion
You’ve learned how trim needs tougher, glossier paint than siding, and how substrate and climate change your choice. Pick an exterior acrylic latex or a marine-grade alkyd for trouble spots, prime appropriately, and time jobs for dry, mild weather. One striking stat: properly priming and using the right topcoat reduces repaint frequency from about every 5–7 years to 10–15 years—so the right choices can roughly double trim lifespan and save time and money.