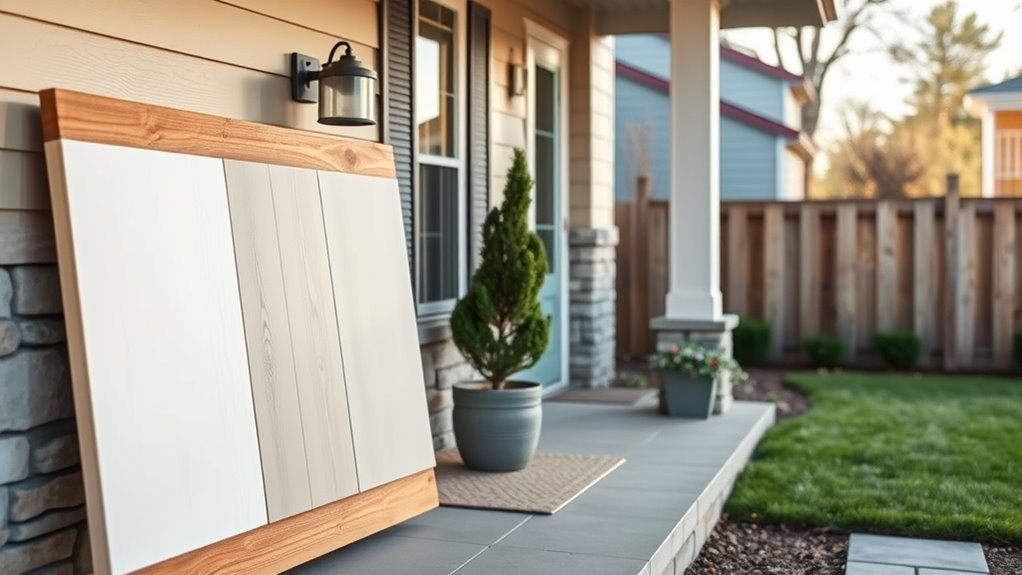
What Type of Paint Is Best for Exterior?
You should pick a high-quality exterior acrylic latex for most surfaces because it balances durability, weather resistance, and easy maintenance. Use semi-gloss on trim and fascia for washability, and choose oil-based or waterborne enamels for metal and older doors to guarantee adhesion. Match formulations to your climate—UV resistance for sun, flexible blends for freeze-thaw or humid areas—and consider low‑VOC options for less odor. Keep going to see specific choices for common home scenarios.
Quick Answer: Best Exterior Paint by Common Scenarios
When you’re choosing exterior paint, think about the specific job rather than just the brand—house siding, trim, doors and metal each need different formulations to perform well.
For wood siding, pick high-quality acrylic latex for flexibility and mildew resistance.
For wood siding, choose a high-quality acrylic latex—flexible, durable, and mildew-resistant for lasting protection.
Trim and fascia often do best with a semi-gloss for durability and washability.
Use oil-based or hybrid enamels on metal and older doors for adhesion; modern waterborne enamels work too.
Consider exterior paint trends like flatter, muted palettes and durable sheens.
Also look for eco-friendly options with low-VOC formulas to reduce odors and environmental impact while keeping performance strong.
How This Guide Helps You Choose Exterior Paint
Because choosing the right exterior paint can feel overwhelming, this guide breaks down what matters most—surface type, climate, finish, and environmental factors—so you can match product features to your specific job and budget.
You’ll get clear comparisons of paint types and finish options, practical paint application steps, and guidance on surface compatibility without digging through jargon.
It highlights weather impacts and maintenance tips, offers cost analysis and brand comparisons, and walks you through color selection.
- Match surface compatibility.
- Weigh weather impacts.
- Compare cost analysis and brands.
- Follow paint application and maintenance tips.
How to Factor Climate Into Paint Selection
Think about your local climate before you pick a paint type so it matches humidity, sun exposure, and temperature ranges.
Choose flexible, breathable formulations in humid or freeze-thaw zones, and pick UV-resistant, fade-proof options in hot, sunny areas.
Also consider how seasonal extremes — like rapid temperature swings or long wet seasons — will affect adhesion and durability.
Match Paint To Climate
If you live in a humid, hot, cold, or coastal area, pick exterior paint that’s formulated to handle those specific conditions — not just the color you like.
You’ll want paint formulations with mildew resistance, UV blockers, flexible binders, and salt tolerance for climate compatibility. Match these features to local conditions so coatings last longer and need fewer repairs.
- Humid: mildew-resistant, breathable primers.
- Hot/sunny: high UV protection, fade-resistant pigments.
- Cold: flexible binders, low-temperature cure formulas.
- Coastal: corrosion inhibitors, salt-spray tested finishes.
Ask local pros and check product specs before buying.
Consider Seasonal Extremes
Local weather patterns can change dramatically over a single year, so factor seasonal extremes into your paint choice rather than just peak conditions. You should assess seasonal conditions—humidity, freeze/thaw cycles, and intense sun—for lasting paint performance. Consider temperature fluctuations during curing; some formulations handle rapid shifts better. Think about climate impact on adhesion, cracking, and colorfastness. Choose flexible, breathable coats for cold/wet zones and UV-resistant, hard films for hot, dry areas. Use primers matched to substrates, and schedule applications when forecasted swings are minimal.
| Condition | Recommended focus |
|---|---|
| Freeze/thaw | Flexibility |
| High UV | Fade resistance |
| Humidity | Breathability |
| Wide temp swings | Fast cure, elasticity |
Decision Criteria: Substrate, Budget, Finish, Durability
Choosing the right exterior paint starts with four practical criteria—substrate, budget, finish, and durability—because each affects how well the paint performs and how long it lasts.
You should match paint brands and application techniques to the surface: wood, masonry, metal, or fiber cement each need specific primers and prep.
Consider lifecycle cost over initial price. Pick a finish that hides imperfections or sheds dirt.
Prioritize coatings formulated for UV and moisture resistance if you want longevity.
Use this checklist to decide:
- Substrate compatibility
- Budget and lifecycle cost
- Finish and appearance
- Expected durability
Latex Paint: Best Uses and Limits
You’ll find latex paint offers strong durability and flexibility, so it moves with siding and trim without cracking.
It’s generally good at resisting moisture and mildew, but high-humidity areas may still need mildew-resistant formulations and proper ventilation.
Expect thorough surface prep—cleaning, scraping, and priming are key for adhesion and long-term performance.
Durability And Flexibility
Because latex paints form flexible films, they handle the small movements and temperature shifts common on exterior surfaces better than rigid coatings.
However, that flexibility has limits—excessive substrate movement, constant abrasion, or prolonged moisture exposure can still cause cracking, peeling, or blistering.
You’ll want to weigh paint longevity and choose flexible coatings suited to the substrate and climate.
Consider these practical tips:
- Prep surfaces thoroughly to facilitate adhesion.
- Use high-quality exterior latex where movement is moderate.
- Avoid latex on highly flexible or constantly rubbing surfaces.
- Recoat when you see early signs of stress to maintain protection and appearance.
Moisture And Mildew Resistance
When exterior surfaces face frequent dampness or humid climates, latex paints offer good mildew resistance but aren’t foolproof, so you should pair them with proper prep and the right additives.
You’ll choose mildew-resistant latex formulations and use biocide additives when needed to enhance mildew prevention.
Latex paints breathe better than oil, reducing trapped moisture, yet they won’t replace proper moisture barriers in walls or foundations.
For areas exposed to constant wetness—eaves, decks, trim—pick high-quality exterior latex with fungicides and maintain coatings; recoat when gloss or adhesion fails.
That balance gives you effective mildew control without sacrificing finish flexibility.
Surface Preparation Needs
Keeping mildew at bay starts with prep, and latex paint will only perform as well as the surface beneath it. You’ll need disciplined surface cleaning and thoughtful surface priming to guarantee adhesion and longevity.
- Remove dirt, mildew, and loose paint with detergent, bleach solutions, or a pressure washer.
- Repair cracks, rot, and caulking failures before painting so moisture won’t reappear.
- Sand glossy areas and feather edges for uniform adhesion.
- Apply a compatible primer to bare wood, metal, or patched areas to seal and promote even topcoat coverage.
Do these steps and latex will last longer, resist mildew, and look better.
100% Acrylic Paint: When to Pick It
Curious which acrylic blend matches your project? You’ll pick % acrylic when you want breathable, flexible coating with strong acrylic advantages for siding, trim, or stucco. Use these application tips: clean, dry surface; prime where needed; apply between 50–85°F; thin only per label. Expect fast drying and good color retention without oil cleanup.
| Surface | Best Use | Note |
|---|---|---|
| Wood | Siding/trim | Sand, prime knotty areas |
| Stucco | Walls | High adhesion, breathable |
| Brick | Accent | Good for color depth |
| Trim | Detail | Low cracking risk |
Follow manufacturer specs for longevity.
Oil‑Based Paint: When It Still Makes Sense
Although oil-based paints have fallen out of favor for many homeowners, you should still consider them for specific jobs where toughness, leveling, and stain-blocking matter most.
Although less popular today, oil-based paints still shine for tough, smooth, stain-blocking jobs.
You’ll pick oil when durability and smooth finishes outweigh clean-up hassle. Know the oil advantages: superior abrasion resistance, excellent flow for trim, and strong stain/toxin sealing.
Also weigh oil disadvantages: longer dry times, stronger fumes, and harder cleanup.
- Use on high-traffic trim and doors.
- Choose for wood with tannin bleed.
- Avoid where fast recoats are needed.
- Prep and ventilate thoroughly for safe application.
Elastomeric Coatings: When to Use Them
If you’re facing cracked stucco or heavily weathered masonry, elastomeric coatings are worth considering because they bridge hairline cracks and provide a waterproof barrier.
You’ll need to clean, repair, and prime the surface thoroughly so the thick, flexible coating can adhere properly.
Expect long-lasting protection and exceptional flexibility that accommodates movement without splitting.
When To Choose
Wondering when elastomeric coatings are the right choice for your exterior project? You should pick them when you need durable waterproofing, surface crack bridging, long-lasting color retention, and flexible protection on masonry or stucco.
Consider these scenarios:
- High moisture exposure or frequent rain demands superior waterproofing.
- Visible hairline cracks need a coating that bridges and flexes.
- You want fewer repaints and strong color retention among paint finishes.
- Large surfaces or textured walls where roller or spray application techniques save time.
Choose elastomeric when durability and elasticity matter more than traditional exterior paints.
Surface Preparation Needs
Because elastomeric coatings form a thick, flexible membrane, you’ll need to prepare surfaces more thoroughly than for standard exterior paints.
Inspect for loose material, chalking, and active leaks; repair cracks and replace rotten substrate first.
Use pressure washing and appropriate cleaners for effective surface cleaning, removing mildew, dirt, and efflorescence.
Allow full drying before proceeding.
Prime porous or patched areas with a compatible primer to promote paint adhesion, especially over masonry or repaired stucco.
Mask trim and joints, and follow manufacturer instructions for recommended primers and tack-free times so the elastomeric will perform as designed.
Longevity And Flexibility
When you need a protective finish that stretches with your building and lasts for years, elastomeric coatings are the smart choice; their thick, flexible membranes bridge hairline cracks, resist weathering, and often outlast standard exterior paints on porous substrates like stucco or masonry.
You’ll weigh surface compatibility, finish selection, and color retention against environmental impact and maintenance strategies. Apply with proper application techniques, watching seasonal trends for temperature and humidity limits.
Consider paint innovations that improve breathability. Use the right primer and repair routine to maximize life.
- Check substrate porosity
- Follow temp/humidity windows
- Use compatible primer
- Plan routine inspections
Exterior Paint for Humid and Coastal Environments
If you’re painting in humid or coastal areas, pick products that resist moisture, salt, and mildew so your finish lasts longer and needs fewer repairs.
You’ll consider humidity effects and coastal conditions that accelerate deterioration; choose high-quality acrylic or marine-grade paints formulated for salt exposure and changing weather patterns.
Proper surface treatments — like anti-mildew primers, corrosion-resistant fasteners, and breathable sealers — improve paint adhesion and paint longevity.
Account for environmental factors such as persistent damp, wind-driven spray, and tidal salt.
Prep thoroughly, follow manufacturer recommendations, and schedule more frequent inspections to catch issues early and maintain protection.
Exterior Paint for Hot, Sun‑Exposed Climates
Hot, sun‑baked climates demand paints that block UV, reflect heat, and resist chalking so your exterior stays durable and colorfast.
You want coatings formulated for long-term sun protection and strong UV resistance, preferably acrylic or elastomeric finishes with pigments that minimize fading.
Prioritize heat reflection and breathable films to avoid blistering.
- Choose high-quality acrylics with built-in UV stabilizers.
- Consider light color selection to lower surface temperatures.
- Use reflective or cool‑roof additives for added heat reflection.
- Prep and prime thoroughly; proper adhesion keeps coatings effective longer.
Exterior Paint for Cold and Freeze‑Thaw Regions
Because cold regions put coatings through repeated freezing, thawing, and wide temperature swings, you’ll want exterior paints that stay flexible, resist cracking and peeling, and shed moisture quickly. You should choose elastomeric or high‑flex acrylics designed for cold weather and freeze thaw cycles to maintain paint adhesion and handle thermal expansion. Look for formulations with good insulation properties, moisture control, and UV protection to preserve color retention. Check substrate compatibility and follow seasonal application windows for proper curing. Compare options below to paint a clear picture.
| Feature | Benefit |
|---|---|
| Flexibility | Prevents cracking |
| Moisture control | Reduces freeze‑thaw damage |
| Insulation/UV | Improves retention |
Exterior Paint for Wood Surfaces
1 key concern when painting exterior wood is managing moisture: pick paints that seal, flex with seasonal movement, and let trapped damp escape.
You’ll want proper wood treatment before painting to prevent rot and improve paint adhesion. Choose high-quality acrylic or elastomeric exterior paint for durability and flexibility.
- Clean and dry the surface thoroughly.
- Apply a compatible primer after treatment.
- Use caulk on gaps; allow full cure.
- Maintain by inspecting and touching up every few years.
Follow these steps, and you’ll keep siding, trim, and wooden details protected without trapping moisture.
Exterior Paint for Brick and Masonry
Masonry demands paints that bond to porous surfaces and breathe, so pick breathable masonry or elastomeric paints that resist moisture, efflorescence, and freeze-thaw damage while letting trapped vapor escape.
You should assess brick texture and masonry absorption before choosing primer and paint; rough, highly absorbent surfaces need a masonry primer or diluted first coat to guarantee even coverage.
Use high-quality mineral or acrylic-latex masonry paints formulated for exterior use, and avoid interior formulations.
Choose high-quality mineral or acrylic-latex masonry paints rated for exterior use; avoid interior formulations for durability.
Apply with brushes or rollers designed for textured surfaces, and plan maintenance—cleaning and occasional touch-ups will extend service life and preserve appearance.
Exterior Paint for Stucco
Brick and stucco share some needs—breathability and moisture resistance—but stucco’s textured, often uneven surface and cementitious nature call for a different approach.
You’ll want breathable, acrylic-latex masonry paint that flexes with substrate movement and repels water while letting vapor escape. Match product choice to stucco textures and patch rough spots before priming.
Consider paint finishes that hide imperfections without trapping moisture.
- Use high-quality acrylic-latex masonry paint
- Choose a low- to mid-sheen paint finish for durability
- Always prime patched or bare areas with a masonry primer
- Apply two coats for uniform coverage and protection
Exterior Paint for Vinyl and Aluminum Siding
When you’re painting vinyl or aluminum siding, start by thoroughly cleaning and repairing the surface so paint will adhere properly.
Pick a paint formulated for nonporous siding—usually a high-quality acrylic latex for vinyl and a rust-resistant exterior acrylic for aluminum.
Apply with the right tools, follow manufacturer drying times, and plan routine maintenance to keep color and protection lasting.
Preparing Siding Surface
Before you paint vinyl or aluminum siding, clean and inspect the surface so the finish will adhere and last. You’ll evaluate siding materials, remove loose paint, and decide if paint stripping is needed.
Focus on surface cleaning and drying to guarantee paint adhesion. Seal gaps and joints for weather sealing before coating. Consider primer application where recommended and choose eco-friendly options if desired. Follow maintenance tips to prolong results.
- Scrub with mild detergent and rinse thoroughly.
- Sand chalky areas lightly.
- Caulk seams and replace damaged panels.
- Use primer on bare or repaired spots.
Choosing Compatible Paint
Now that your siding is clean, dry, and any repairs or priming are in place, pick a paint formulated to bond with vinyl or aluminum so your work holds up.
Choose acrylic latex for vinyl; it flexes with temperature changes and resists peeling. For aluminum, select coatings with corrosion inhibitors and strong adhesion.
Match sheen to hide imperfections—eggshell or satin for durability without glossy glare.
Consider color psychology: lighter hues reduce heat absorption on vinyl, while neutrals enhance curb appeal.
Factor environmental impact by selecting low-VOC, water-based formulations to minimize fumes and ecological harm without sacrificing performance.
Application And Maintenance
Start by laying out a clear plan for painting and maintaining your vinyl or aluminum siding so each step—prep, application, and upkeep—flows efficiently and lasts.
You’ll choose proper cleaners, patch damage, and pick compatible paint. Use recommended application techniques: low-pressure sprayer or quality brush/roller, thin even coats, and avoid painting in direct sun or extreme temps.
For long-term care follow simple maintenance tips: gentle washing and prompt touch-ups.
- Clean thoroughly before painting.
- Prime where needed.
- Apply thin, even coats.
- Wash annually and repair chips promptly.
Exterior Paint for Fiber Cement
Fiber cement siding takes paint differently than wood or vinyl, so you’ll want a coating that grips porous surfaces, resists moisture, and tolerates temperature swings.
For fiber cement, check paint compatibility and prioritize primer importance to guarantee adhesion. Use proper application techniques—brush, roller, or sprayer—with attention to texture considerations on grooves and lap joints.
Choose color selection mindful of environmental factors like sun and humidity to preserve surface durability. Finish options affect sheen and weathering; low to medium sheens are common.
Follow maintenance tips: inspect annually, touch up caulked seams, and clean gently to prolong the finish.
Durability: Latex vs Acrylic vs Oil vs Elastomeric
When you choose between latex, acrylic, oil, and elastomeric, think first about how long the finish will withstand sun, rain, and temperature swings.
You’ll also want to evaluate flexibility to prevent cracking and how often you’ll need to touch up or repaint.
These factors determine the real-world durability and maintenance burden of each option.
Longevity And Weather Resistance
Although paint choice won’t eliminate maintenance, picking the right formula determines how long your exterior will resist sun, rain, freeze–thaw cycles, and dirt.
You’ll weigh paint types and weather factors, using durability comparisons and performance ratings to decide. Consider color selection, application methods, and surface treatments for maximum life. Factor environmental impact and cost analysis when choosing.
- Latex: easy cleanup, moderate longevity, good for mild climates.
- Acrylic: strong weather resistance, excellent adhesion, top performer.
- Oil: durable sheen, less UV stability, higher maintenance.
- Elastomeric: exceptional sealing, best for extreme exposure; follow maintenance tips.
Flexibility And Crack Prevention
Because exterior surfaces expand and contract with temperature and moisture, paint flexibility becomes a key factor in preventing cracks and peeling—you want a finish that stretches without breaking its bond. You’ll prefer elastomeric for maximum flexibility benefits and crack resistance on masonry; high-quality acrylics give good elasticity for siding; latex offers ease and moderate flexibility. Oil is rigid and more prone to hairline cracks over time. Choose based on substrate movement and exposure.
| Paint Type | Flexibility |
|---|---|
| Elastomeric | Excellent |
| Acrylic | Good |
| Oil/Latex | Moderate/Low |
Maintenance And Recoat Frequency
Surface movement affects how often you’ll need to repaint, but maintenance and recoat frequency depends more on paint durability, exposure, and substrate.
You should perform regular surface assessment and follow maintenance tips to maximize paint longevity. Use appropriate cleaning techniques before recoating and consider environmental impact and seasonal considerations when scheduling work.
- Inspect yearly for wear and cracking; note substrate-specific issues.
- Latex and acrylic: typical recoat intervals 5–10 years with good prep.
- Oil: shorter UV-related fade, often 4–7 years; elastomeric: extends life up to 15.
- Choose paint technology suited to climate; plan maintenance accordingly.
How Finish Affects Exterior Performance and Appearance
When you pick a paint finish for exterior walls, you’re choosing more than just sheen—you’re deciding how well the coating will shed water, hide imperfections, resist dirt, and stand up to UV and abrasion.
You should weigh finish types and performance factors against appearance impact; sheen selection influences how much texture shows and how light reflects.
Consider durability differences, weather resilience, and maintenance needs for your climate. Match substrate compatibility and use proper preparation techniques and application methods to maximize longevity and minimize color fading.
Also factor in seasonal considerations—temperature and humidity affect curing and final performance.
Choosing Sheen: Flat, Satin, Semi‑Gloss, Gloss
When you pick a sheen for your exterior, think about how it balances durability and weather resistance with appearance.
Flat finishes hide surface imperfections but don’t clean as easily, while satin and semi‑gloss stand up better to moisture and wipe down with less effort.
Gloss offers the toughest protection and easiest cleaning but will show flaws, so choose based on the surface condition and maintenance you want.
Durability And Weather Resistance
Although sheen might seem like a purely aesthetic choice, it directly affects how well your exterior paint resists weather, dirt, and wear.
Flat finishes hide imperfections but shed water and grime less effectively, while satin, semi‑gloss, and gloss offer increasing durability and washability for high‑traffic or exposed areas.
You’ll choose finish types based on weather conditions, substrate compatibility, and surface types to maximize paint lifespan.
Consider application techniques and maintenance strategies, plus color selection that resists fading.
Read product reviews. Compare options:
- Flat — low sheen, lower durability
- Satin — balanced protection
- Semi‑gloss — tougher, washable
- Gloss — highest resistance
Hiding Surface Imperfections
You’ll often balance durability and appearance, but sheen also controls how well paint hides bumps, cracks, and brush marks.
You’ll choose flat or matte sheens when you need maximum imperfection coverage; they scatter light, masking surface flaws and aiding texture improvement without highlighting repairs.
Satin offers a middle ground—slightly reflective yet forgiving—so small blemishes remain less noticeable while adding subtle depth.
Semi-gloss and gloss boost durability and highlight architectural details, but they’ll emphasize uneven patches.
Before painting, assess surfaces: if imperfections are likely, favor lower sheens or smooth and prime to optimize coverage and finish consistency.
Ease Of Cleaning
Choose a sheen based on how often you’ll need to clean the surface and how tough the messes will be. You want a finish that fits traffic and exposure: flat hides flaws but resists scrubbing poorly; satin balances durability and appearance; semi‑gloss and gloss stand up to frequent washing.
- Flat — low sheen, delicate; use gentle cleaning methods.
- Satin — good compromise; follow mild soap and soft brush routines.
- Semi‑gloss — tougher; OK for power rinses and firmer scrubbing.
- Gloss — most durable; best for heavy‑duty cleaning.
Use maintenance tips like spot‑testing cleaners and regular rinses.
Color Tips for Longevity and Fade Resistance
When you pick exterior colors, favor mid-tone shades and colors closer to true neutrals, because they resist visible fading better than vivid brights or very dark hues.
Choose palettes that suit your region’s sunlight and landscaping; subtle warm or cool neutrals hide dirt and weathering.
For reliable color selection, test samples on different walls and observe them at multiple times of day.
Lighter mid-tones reflect heat, aiding paint longevity, while balanced pigments improve fade resistance without sacrificing style.
Maintain color durability with proper priming and regular gentle cleaning to prevent surface breakdown and premature fading.
How Pigments and Formula Improve UV Resistance
Because pigments absorb and reflect different wavelengths, they play a direct role in blocking UV-driven breakdown. Modern formulas pair those pigments with stabilizers to slow fading.
You’ll want to understand pigment types and formula variations so you can choose coatings that improve UV stability and paint longevity. Consider:
- Titanium dioxide and inorganic pigments for superior color retention.
- Organic pigments with UV absorbers for vivid hues and weather resistance.
- Resin choices—acrylic vs. elastomeric—affect protective coatings performance.
- Low-VOC blends balance durability with environmental impact.
Match pigment chemistry and additives to your climate for best results.
Primer Types and When to Always Use One
Although primers work behind the scenes, they’re essential for adhesion, stain blocking, and creating a uniform surface that helps your topcoat perform and last.
You’ll choose primer types based on surface condition and problem: stain-blocking for tannins, bonding primers for glossy or slick substrates, and high-build primers to level imperfections.
Primer benefits include improved coverage, longer topcoat life, and resistance to peeling.
Always use a primer when switching between sheens, covering bare or repaired areas, or sealing stains.
Proper primer application—clean, dry surface, correct spread rate, and adequate drying—ensures the topcoat adheres and the finish endures.
Best Primers for Wood, Masonry, Metal, Vinyl
When you pick a primer, match the type to the surface—oil-based or shellac for raw wood, Masonry-specific breathable primers for stucco or concrete, rust-inhibiting primers for metal, and vinyl-safe acrylic primers for PVC.
Pay attention to application method and drying time, since spray, brush, or roller and fast- or slow-drying formulas affect coverage and scheduling.
Choosing the right combo upfront makes your topcoat look better and last longer.
Primer Types by Surface
If you’re prepping different exterior materials, choosing the right primer for each surface is essential to getting durable, even paint that resists peeling and weathering.
Match primer types to surface compatibility: oil-based for raw wood, masonry primers for stucco and brick, metal primers with rust inhibitors, and vinyl-specific adhesion primers.
Consider application techniques, drying times, environmental factors, product recommendations, maintenance tips, and primer benefits when selecting.
- Wood: stain-blocking, sealer primers.
- Masonry: breathable, high-alkali primers.
- Metal: anti-corrosion, etch primers.
- Vinyl: adhesion-promoting, flexible primers.
Application And Drying
Because proper application and drying determine how well primers protect and bond, you should follow surface-specific techniques and environmental guidelines to get durable results.
For wood, sand, clean, and use brush or roller for even coverage; oil-based or stain-blocking primers need longer drying times.
For masonry, apply masonry primer with a roller or sprayer, working in sections; allow full cure to prevent efflorescence.
For metal, remove rust, use a rust-inhibiting primer, and apply thin coats to avoid runs; note shorter drying times between coats.
For vinyl, choose a flexible acrylic primer, use light coats, and respect manufacturer drying times for best adhesion.
Surface Prep Steps That Extend Paint Life
Start by removing loose paint, dirt, and mildew so the new coating can bond properly; you’ll save time and money down the road by addressing adhesion issues now.
Focus on surface cleanliness and paint adhesion: wash with a mild detergent, rinse thoroughly, and let dry.
Sand glossy spots and feather edges to create a uniform profile. Use a compatible primer on bare or patched areas.
- Scrub surfaces and rinse completely.
- Sand to remove gloss and rough edges.
- Vacuum or tack to remove dust.
- Apply primer where needed for consistent adhesion.
Repairing and Sealing Cracks Before Painting
Once the surface is clean and primed, you’ll want to fix cracks and gaps so the paint lays down smoothly and lasts longer.
Inspect for hairline cracks, wider gaps, and loose material. Remove debris, widen tiny fissures slightly to accept filler, and use appropriate surface repair products—masonry filler for stucco, flexible caulk for trim, or exterior-grade spackling for wood.
Inspect cracks, remove debris, widen tiny fissures, and choose the right filler—masonry for stucco, caulk for trim, spackle for wood
For larger voids, apply patching compound in layers, sanding between cures. Follow manufacturer directions for drying times, then prime repaired spots.
Proper crack sealing prevents moisture intrusion and paint failure, ensuring an even, durable finish you can trust.
Test for Moisture and Fix Water Problems First
Before you apply any paint, check for moisture and resolve water issues so your new finish won’t fail prematurely. You’ll need to identify sources of water damage and stop them before painting.
Use moisture testing tools to confirm dry surfaces; even minor dampness ruins adhesion. Follow these steps:
- Inspect gutters, downspouts, and flashing for leaks.
- Repair roof, siding, or foundation issues causing seepage.
- Dry walls fully with dehumidifiers or ventilation after repairs.
- Retest with a moisture meter and only paint when readings are within acceptable range.
Doing this prevents peeling, mold, and costly repainting.
Application Methods: Brush, Roller, Sprayer
Next you’ll learn practical brush technique tips to cut lines and work paint into trim without leaving streaks.
You’ll get roller guidance for even coverage and the right nap choice for siding textures.
Finally, I’ll cover sprayer setup advice so you can adjust pressure, choose nozzles, and mask properly for a clean finish.
Brush Technique Tips
While rollers and sprayers can cover large areas fast, mastering brush techniques gives you control for edges, trim, and textured surfaces—so you’ll get cleaner lines and less touch-up.
You should choose brushes by material and size; understanding brush types, technique mastery, and proper loading cuts drips and visible strokes.
Keep a wet edge, use long, smooth strokes, and feather ends for even coverage.
Clean and reshape synthetic bristles after water- or latex-based paints; use natural bristles for oil-based jobs.
- Load brush correctly
- Maintain wet edge
- Feather stroke ends
- Clean and store brushes properly
Roller Use Guidance
1 good roller can cut your painting time in half if you use it right. You’ll choose the proper nap for siding or smooth trim, load the roller evenly, and roll in overlapping W or M patterns to maintain wet edges.
Work in manageable sections, back-rolling to level the finish and avoid drips. Use extension poles for height and keep a tray grid to control excess.
For trim adjacent to rolled areas, cut in with a brush first so roller techniques blend seamlessly.
Proper roller techniques improve coverage and speed, ensuring consistent paint application without rework.
Sprayer Setup Advice
After you’ve got a smooth, well-blended finish with your roller and brush for trim, set up a sprayer to speed large-area coverage and get an even factory-like coat.
You’ll prep, test, and tune for consistent results, balancing flow and pressure. Keep sprayer maintenance in mind to avoid clogs and downtime. Prioritize sprayer efficiency to save paint and time.
- Thin paint per manufacturer, strain to remove particles.
- Adjust nozzle and pressure for droplet size and even laydown.
- Mask and overlap passes, keeping a steady distance.
- Flush and clean thoroughly after use to preserve performance.
Coverage Rates and How to Calculate Paint Needed
Because coverage determines how much paint you’ll actually need, it’s one of the first specs to check before you buy.
Check the can for square feet per gallon; that’s your base for coverage calculations. Measure wall height and width, subtract windows and doors, then multiply to get total square footage.
Divide that by the can’s coverage to get gallons needed per coat. Account for surface texture—rough surfaces soak more—by increasing estimates 10–20%.
Round up to avoid shortages and factor primer separately if needed. Keep a little extra for touch-ups; proper paint estimates save time and money.
Dry Time and Recoat Windows to Expect
When you pick a paint, check the can for both “dry to the touch” and “recoat” times—these tell you when you can handle surfaces and when it’s safe to apply another coat without ruining the finish.
You’ll use dry time expectations and recoat guidelines to plan work and avoid tacky results. Consider temperature, humidity, and film thickness; colder or wetter conditions lengthen times.
Follow the label, but wait longer if unsure.
- Note “dry to touch” on the can.
- Record manufacturer recoat guidelines.
- Allow extra time in cool/humid weather.
- Sand lightly only after full recoat window.
Maintenance Schedule by Paint Type
Knowing dry and recoat times helps you plan the job, but upkeep schedules vary by paint type and will determine how often you’ll repaint or touch up. You should set seasonal inspections to catch peeling, and follow surface care routines to extend paint lifespan. Consider weather impact—sun, moisture, and freeze-thaw shorten intervals. Latex often needs touch-ups every 5–10 years; oil-based can last longer in some spots but needs more care. Vinyl-friendly coatings resist fading. Plan repaint intervals based on exposure, perform regular cleaning, and address small failures promptly to minimize larger repairs and maintain curb appeal.
| Paint Type | Typical Repaint Intervals | Key Maintenance |
|---|---|---|
| Latex | 5–10 years | Seasonal inspections, wash |
| Oil-based | 7–12 years | Surface care, spot repairs |
| Acrylic | 8–15 years | Weather impact monitoring, clean |
Upfront Cost vs Lifetime Cost Comparison
Although upfront price tags catch your eye, the lifetime cost of exterior paint matters more for your budget and maintenance planning. You should weigh upfront costs against expected durability, touch-ups, and cleaning needs.
Consider lifetime cost, not just sticker price—factor durability, touch-ups, and cleaning into your paint choice.
Higher-quality paints can cost more now but reduce repaint frequency, saving time and labor.
- Compare upfront costs per gallon and coverage.
- Estimate repaint intervals to project lifetime costs.
- Factor in prep, labor, and surface-specific needs.
- Include cleaning and minor repair frequency in calculations.
Make choices based on total spending over years, not just initial price, to minimize surprises.
Understanding Paint Warranties and Coverage
When you’re choosing exterior paint, check the warranty length so you know how long the manufacturer promises performance.
You’ll also want to read the fine print to understand coverage limitations like fading, peeling, or labor exclusions.
Knowing both the term and the limits helps you weigh risk against cost.
Warranty Length Explained
A paint warranty’s stated length—often 5, 10, or 15 years—tells you how long the manufacturer promises coverage for specific defects, but you should read the fine print to see what those years actually protect.
You’ll want to compare warranty coverage and warranty specifics so you know what’s included, how claims are handled, and whether labor or replacement is offered.
Consider these practical points:
- Start date and prorated vs. full coverage.
- What defects trigger a claim (film failure, peeling).
- Required maintenance or application conditions.
- Transferability and claim process timeframe.
Use this to weigh long-term value, not just years.
Coverage Limitations Clarified
You’ve looked at warranty length, but the years alone won’t tell the whole story—coverage limitations define what the manufacturer will actually pay for.
You’ll need to read exclusions closely: surface types, preparation standards, and environmental factors often create coverage challenges that void claims.
Keep records of purchase, surface prep, and application techniques to support any warranty dispute. Manufacturers can deny coverage for peeling caused by poor prep, incompatible primers, or DIY shortcuts.
Understand prorated payouts, required maintenance, and approved installers or methods.
Environmental and VOC Concerns for Exterior Paint
Because paints off-gas chemicals as they cure, choosing low-VOC or zero-VOC exterior options matters for both your health and the environment.
You should weigh eco friendly options and green certifications to confirm claims and reduce environmental impact.
Understand VOC regulations in your area so you comply and limit pollution.
Consider sustainable practices like proper disposal, recycling leftover paint, and minimizing overspray to cut waste and exposure.
Note health impacts for sensitive occupants and time projects when fewer people are present.
- Verify labels and certifications.
- Check local VOC regulations.
- Reduce waste with accurate estimates.
- Protect vulnerable residents.
Low‑VOC Exterior Paint: What to Expect
If you’ve decided to prioritize lower emissions, know that low‑VOC exterior paints perform differently from traditional formulations. You’ll get low VOC benefits like reduced odors and improved health considerations during application.
Expect varied drying times and slightly different application techniques—thin, even coats and proper ventilation help. Check surface compatibility; some substrates need primers for adhesion.
Allow for different drying times and use thin, even coats; ensure ventilation and primer where substrates require adhesion.
Paint longevity can match conventional paints if you prep well. Consider color selection and finish types carefully; pigments and sheens may vary.
Weigh cost comparison against long‑term environmental impact and personal exposure to make a practical, informed choice.
Eco‑Friendly Brands and Certifications to Consider
When choosing eco-friendly exterior paint, look for brands that back their claims with third-party certifications and transparent ingredient lists so you can trust both performance and safety.
You’ll want labels noting eco-friendly certifications and responsible sourcing, plus claims about sustainable materials and low-impact practices.
Prioritize non-toxic finishes and natural pigments to protect family and landscape. Consider biodegradable options for cleanup and disposal.
Think green painting as both product choice and contractor practice. Check certification details, ingredient transparency, and company sourcing policies before buying to guarantee durability, environmental responsibility, and healthier outdoor spaces.
- LEED/BREEAM/GreenGuard
- Cradle to Cradle
- EPA Safer Choice
- Local ecolabels
Common Painting Mistakes That Shorten Paint Life
Although it’s tempting to rush through prep and application, cutting corners on cleaning, priming, or surface repairs is the quickest way to shorten your exterior paint’s lifespan.
You’ll face common pitfalls like painting over dirt, skipping primer, using wrong caulk, or applying paint in extreme temperatures. Those choices reduce adhesion, allow moisture intrusion, and invite early fading.
Use proper cleaning, patch and sand damaged areas, choose compatible primer and paint, and follow manufacturer dry-time and temperature guidelines.
Clean, repair, then prime — use compatible paints and follow dry-time and temperature guidelines for lasting exterior finishes.
That disciplined approach improves paint longevity, saves money, and keeps your exterior looking good longer.
Troubleshooting Peeling, Blistering, Chalking
When you see peeling, blistering, or chalking, start by checking surface prep—proper cleaning, sanding, and priming makes a huge difference.
You’ll also want to identify moisture sources like leaks, poor ventilation, or trapped damp that can undermine any paint job.
Finally, choose durable, weather-resistant finishes and high-quality primers to prevent problems from coming back.
Surface Preparation Tips
Because exterior coatings fail for predictable reasons, you can fix most peeling, blistering, and chalking by addressing moisture, adhesion, and surface contamination before you paint.
Start with thorough surface cleaning and surface inspection to note surface types, surface texture, and surface weathering. Match primers and paints for surface compatibility.
- Remove loose paint, chalk, and contaminants.
- Sand or grind to create a stable profile for adhesion.
- Complete surface repairs—fill cracks, replace damaged material.
- Apply appropriate surface priming for the substrate, sealing porous or weathered areas before topcoat application.
Identifying Moisture Sources
If you’re troubleshooting peeling, blistering, or chalking, start by locating where moisture’s entering or accumulating—roof and flashing leaks, failing caulk, plumbing issues, poor drainage, and trapped vapor behind siding are common culprits.
Walk the perimeter after rain, feel for dampness, and inspect attic and crawl spaces for signs of water damage. Use moisture detection tools—pin or non‑invasive meters—to map wet areas.
Check vents, gutters, and grade for runoff problems. Trace staining, softening, or mold back to its source before repainting.
Fix the root cause; treating symptoms without resolving moisture will let deterioration recur.
Choosing Durable Finishes
Once you’ve repaired leaks and removed trapped moisture, pick finishes that resist the stresses that caused the damage in the first place.
You’ll want coatings proven by durability tests and clear finish comparisons before buying. Consider surface prep, substrate type, and climate; choose elastomeric or high-quality acrylics for flexibility and UV resistance.
Follow manufacturer application guidelines to avoid premature failure.
- Test small areas to compare adhesion and appearance.
- Check product datasheets for durability tests results.
- Match finish sheen to exposure—satin hides flaws better than flat.
- Recoat windows and trim more often to prevent chalking.
Refreshing Paint Without a Full Repaint
While you don’t always need a full repaint to make your home’s exterior look sharp, targeted touch-ups and proper prep can dramatically extend the life and appearance of existing paint.
You can freshen trim, shutters, and doors without tackling all siding; sand flaking spots, prime bare areas, and match sheen for consistency.
Use accent changes guided by color psychology to boost curb appeal—bold door hues or soft neutrals shift perception.
Let color psychology guide accents—bold door hues or soft neutrals subtly transform curb appeal and perception.
Follow current paint trends sparingly to avoid dated choices.
Clean surfaces, replace caulk, and use high-quality exterior touch-up paint so results last and look cohesive.
When to Repaint vs Repair the Substrate
Touch-ups can buy you time, but at some point you’ll need to decide whether to repaint the surface or fix the underlying material first.
You should perform a substrate evaluation: probe for soft spots, check adhesion, and note moisture or rot. If substrate fails, repair before repainting; if sound, use targeted repainting techniques.
- Flaking paint but firm substrate — sand and repaint.
- Soft, rotten areas — replace substrate first.
- Blistering from moisture — fix source, then repaint.
- Hairline cracks — fill, prime, then repaint.
Make choices based on longevity, not just aesthetics.
DIY or Hire a Pro: Decision Checklist
Want to tackle the job yourself or bring in a pro? Weigh DIY Considerations against Professional Expertise: assess Skill Level, Time Commitment, Safety Precautions, and Project Scope. Do a Cost Analysis including Long term Maintenance and Quality Expectations. Factor Personal Preference and readiness.
| Factor | DIY | Pro |
|---|---|---|
| Skill Level | low→high | expert |
| Time Commitment | likely higher | faster |
| Cost Analysis | lower upfront | higher upfront |
| Safety Precautions | you handle | contractor handles |
| Quality Expectations | variable | consistent |
Use this checklist to decide quickly and confidently whether to DIY or hire professional help.
Questions to Ask Contractors About Exterior Paint
How do you know you’re getting a fair, professional job? Ask focused questions so you can compare bids and avoid surprises.
Verify contractor experience, licensing, and insurance. Confirm surface prep, warranty, timeline, and cleanup. Ask which paint brands they recommend and why.
- What’s your contractor experience and can you show references?
- Which paint brands do you use, and are they warranted?
- How will surfaces be prepped, repaired, and primed?
- What’s the estimated start, completion, and written warranty?
Get answers in writing, compare specifics, and choose the contractor who’s clear, accountable, and confident.
How to Test a Paint on Your Home First
After you’ve compared bids and confirmed materials, test the paint on your home before committing to a full job.
Pick test samples and paint swatches, apply them in small, visible areas, and assess color matching at different times of day.
Check surface compatibility and perform adhesion testing on original and repaired spots.
Note application techniques and try brush, roller, and spray if relevant.
Observe finish options—sheen can change perception.
Run moisture checks first and monitor for blistering.
Consider weather conditions and other environmental factors during the trial period so you’ll know the real-world performance before painting everywhere.
Four Case Studies: Best Choices for Typical Homes
Pick four representative home types—historic craftsman, modern stucco, suburban vinyl, and rural wood clapboard—and we’ll match each to the paint systems and finishes that work best for their materials, climates, and budgets.
Pick four home types—historic craftsman, modern stucco, suburban vinyl, rural clapboard—and match them to ideal paint systems and finishes.
You’ll get a concise case study analysis of typical homes so you can pick what’s durable, breathable, or low-maintenance.
- Historic craftsman: breathable oil-modified or high-quality acrylic for trim, satin finish for authenticity.
- Modern stucco: elastomeric acrylic with flat/low-sheen to hide texture, flexible for cracks.
- Suburban vinyl: 100% acrylic with fade-resistant pigments, low-luster.
- Rural wood clapboard: exterior latex with mildew inhibitors, semi-gloss for trim and protection.
Product Recommendations by Use Case and Budget
Those case studies show how material, climate, and style shape your choices, and now we’ll match real products to specific needs and budgets.
You’ll find eco-friendly options like low-VOC acrylics for sensitive areas and durable elastomeric for stucco. Use product comparisons to weigh cost versus longevity, considering surface types and finish selection—satin for trim, flat for aged siding.
Follow primer importance for adhesion and choose application techniques that suit DIY or pros. Remember paint trends and color psychology when picking hues.
Finally, keep maintenance tips and environmental impact in mind to maximize lifespan and reduce waste.
Best Months and Seasonal Timing to Paint Exteriors
If you want durable, attractive results, time your exterior painting for mild, dry weather—generally late spring through early fall in most climates—when temperatures and humidity stay within the paint manufacturer’s recommended range so coatings can properly cure and adhere.
You should watch seasonal trends and pick ideal conditions for prep, application, and curing. Consider these timing tips:
- Aim for consecutive dry days to allow full curing.
- Avoid extreme heat or cold; follow label temperature ranges.
- Paint in morning or late afternoon to prevent rapid drying.
- Schedule after landscaping or construction to avoid contamination.
Plan around weather forecasts for best outcomes.
Quick Decision Flowchart to Pick the Right Exterior Paint
Want a fast, reliable way to choose exterior paint? Start by identifying surface type: wood, stucco, brick, or metal.
Pick acrylic latex for most surfaces; use oil-based for metal repair.
Next, assess climate—humid, coastal, or sunny—and choose mildew-resistant formulas.
Decide durability needs: high-traffic or trim gets semi-gloss; siding often uses satin or low-luster for concealment.
Consult color trends but prioritize neighborhood harmony and resale value.
Test swatches on three walls, view at different times.
Confirm finish sheen and compatibility with primer.
Follow a simple yes/no flow: surface → climate → durability → color → test → paint.
Frequently Asked Questions
Can Exterior Paint Colors Affect Indoor Temperatures Significantly?
Yes — lighter exterior colors can cut heat gain and improve energy efficiency, while darker hues absorb warmth; you’ll also influence occupants’ moods via color psychology, so choose shades balancing thermal performance and psychological comfort.
Can Paint Be Applied Over Solar-Reflective Coatings?
About 70% of heat gain can cut with reflective coatings, so yes—you can paint over them if you test first. You’ll preserve solar reflective benefits but must address paint adhesion concerns with proper primers and surface prep.
How Long After Painting Can Landscaping Chemicals Be Used Near Walls?
You should wait until the paint curing time is fully reached—usually 7–30 days—before applying landscaping chemical types like herbicides, fertilizers, or pesticides; doing so prevents staining, adhesion loss, or surface damage to freshly cured paint.
Will Exterior Paint Interfere With Future Lead-Paint Testing?
Yes — if you paint over original lead, you can mask it and complicate detection; you’ll need compliant lead paint regulations adherence and appropriate testing methods like XRF or lab analysis to verify presence despite new coatings.
Can You Paint Over Insect- or Mold‑Killed Wood Without Treatment?
You shouldn’t—like wallpapering over rot, painting insect- or mold-killed wood without wood treatment risks poor paint adhesion; you’ll need to clean, dry, treat and potentially replace damaged sections before priming and painting for durable results.
Conclusion
You’ll want paint that performs precisely for place and price—pick products proven for your climate and surface. Prioritize protection, peel prevention, and proper prep to prolong paint lives. Choose coatings compatible with your substrate, balance budget with durability, and schedule work in suitable seasons. Remember: smart selection saves scratches, stains, and stress. Stay steady, select sensibly, and secure stunning, long‑lasting surfaces that satisfy you season after season.