Where to Use Latex Paint? Best Surfaces
You should pick latex paint for most interior jobs—walls, ceilings, primed wood trim, and painted masonry—because it dries fast, cleans up with soap and water, and has lower odor and VOCs. It bonds well to drywall, plaster, and primed cabinets, and mildew-resistant latex works for bathrooms and kitchens. Avoid oil-primed, heavily stained, or high-heat surfaces unless properly prepared and primed. Keep going to find prep tips, primer choices, and finish recommendations.
Quick Guide: When to Choose Latex Paint
Wondering whether latex paint is right for your project? You’ll appreciate latex paint benefits like quick drying, easy cleanup with soap and water, low odor, and flexible adhesion on drywall, primed wood, and plaster.
You’ll also weigh latex paint drawbacks: less durability on high-traffic floors, potential poor adhesion on glossy surfaces, and sensitivity to freezing during storage.
Choose latex for interior walls, ceilings, and trim that won’t face heavy wear. Prep matters: clean, sand, and prime where needed.
Best for interior walls, ceilings, and light-use trim — but prep well: clean, sand, and prime first.
If you need extreme hardness or exterior longevity, consider alternatives or specialty formulations instead.
Where Latex Paint Works Best
When you need a quick, low-odor option for most interior surfaces, latex paint’s your best bet: it dries fast, cleans up with soap and water, and flexes with walls and trim so it resists cracking on drywall, primed wood, plaster, and ceilings.
You’ll find latex paint applications ideal for living rooms, bedrooms, hallways, and kitchens (away from heavy grease). It’s great on painted masonry, trim, and primed cabinets indoors.
In moist but ventilated bathrooms or laundry rooms choose mold-resistant formulations. For exterior use pick high-quality exterior latex in ideal environments with mild temperature swings and good surface prep.
Why Choose Latex Over Oil-Based Paint
Because latex dries quickly, cleans up with water, and gives you durable, flexible coverage, it’s often the smarter choice over oil-based paint for most home projects.
You’ll appreciate latex paint benefits like faster recoats, less yellowing, and easier maintenance. You won’t need harsh solvents, so cleanup is safer and less costly.
Latex also reduces volatile organic compounds compared with many oil formulas, improving indoor air quality.
Consider the environmental impact: lower solvent emissions and easier disposal make latex preferable for eco-conscious jobs.
For trim, cabinets, or exterior siding, latex gives practical, efficient results without sacrificing durability.
Latex for Drywall and Plaster (Living Rooms, Bedrooms)
Before you paint drywall or plaster in living rooms and bedrooms, make certain you clean, patch, and sand surfaces so the latex will adhere smoothly.
Pick a high-quality primer—stain-blocking for patched areas or a bonding primer for slick plaster—to guarantee even coverage.
For finish, use eggshell or satin in living spaces for durability with a soft look, and flat for low-traffic bedrooms where you want to hide imperfections.
Surface Preparation Steps
Start by clearing the room and protecting everything you won’t paint: remove outlet covers, move furniture or cover it with drop cloths, and tape plastic over trim and floors.
You’ll prep drywall and plaster with surface cleaning and repair techniques so paint adheres and looks smooth. Follow these focused steps:
- Vacuum and wipe walls with a mild detergent solution; rinse and let dry.
- Scrape loose paint, sand rough spots, and dust away residue.
- Fill holes and cracks with spackling; sand flush after it dries.
- Inspect for stains or mold; treat affected areas before painting.
Best Primer Choices
When you’re working on drywall or plaster in living rooms and bedrooms, a water-based latex primer gives the best balance of adhesion, quick drying, and low odor for indoor use. You’ll pick between stain-blocking, high-build, and bonding primer types depending on surface condition. For new drywall, use a drywall-specific primer; for patched plaster, choose a bonding primer. Proper primer application—thin, even coats with a roller and brush for corners—ensures uniform absorption and reduces topcoat issues. Visualize choices:
| Situation | Recommended Primer |
|---|---|
| New drywall | Latex drywall primer |
| Patched plaster | Bonding/high-build primer |
| Stained areas | Stain-blocking primer |
Paint Finish Recommendations
If you want a soft, durable look in living rooms and bedrooms, choose a latex finish that balances appearance and practicality.
You’ll want a finish that highlights drywall or plaster without drawing attention to imperfections. For most rooms, eggshell or satin offers the best paint durability and a subtle finish sheen that cleans well.
Flat works if walls are smooth and you prefer minimal sheen, but expect lower resistance to scrubbing. Avoid high-gloss except for trim.
Consider family traffic, light levels, and cleaning needs when deciding.
- Eggshell — balanced durability and low sheen
- Satin — easier cleaning, slight sheen
- Flat — hides flaws, less durable
- Semi-gloss — trim and high-use areas
Latex Finishes for Ceilings and High-Traffic Walls
Ceilings and high-traffic walls need durable latex finishes that resist scuffs, hide imperfections, and clean up easily; choose a flat or matte sheen for ceilings to minimize glare and a satin or eggshell for busy walls to balance durability with appearance.
You’ll match finish to surface: smooth ceiling textures take flat sheens to mask flaws, while popcorn or knockdown may need thicker application.
For hallways, kitchens, and playrooms prioritize wall durability—use washable formulas and higher sheen where wiping is frequent.
Apply two coats, allow proper drying, and spot-prime stains. That combo keeps surfaces looking fresh and simplifies maintenance.
Wood Trim and Baseboards: Prep and Adhesion Tips
Before you paint trim and baseboards, clean and repair any dents, gouges, or grease so the surface is smooth.
Pick a high-quality primer designed for wood to guarantee the latex topcoat adheres and resists tannin bleed-through.
Use thin, even brush strokes, allow proper drying between coats, and sand lightly for a factory-smooth finish.
Surface Cleaning And Repair
Start by stripping dirt, grease, and old flaky paint from wood trim and baseboards so new latex adheres properly; use a mild degreaser or trisodium phosphate for stubborn grime, a scraper or putty knife for loose paint, and a fine-grit sanding block to dull glossy finishes and feather edges.
Match cleaning techniques to surface types: bare wood, painted, or veneer. Patch gouges with wood filler, let it cure, then sand smooth.
Vacuum and tack cloth dust before painting. Seal gaps with paintable caulk to prevent moisture intrusion.
- Clean
- Sand
- Fill
- Dust and caulk
Primer Selection For Adhesion
Choosing the right primer makes all the difference when you want latex paint to stick and look smooth on wood trim and baseboards. You’ll pick primer types based on wood condition, stain-blocking needs, and sheen. Sand, clean, and degrease; those adhesion factors determine whether oil-based, shellac, or acrylic primers suit the job. Apply thin coats and allow proper cure before topcoat. Use the table below to visualize options quickly:
| Condition | Primer Type | Benefit |
|---|---|---|
| Raw wood | Acrylic | Good bonding |
| Stained | Shellac | Blocks bleed |
| Previously painted | Oil-based | Promotes adhesion |
Painting Technique And Drying
Now that you’ve selected a primer that matches the wood’s condition, focus on brush and drying technique to get a smooth, durable finish on trim and baseboards.
Use quality angled brushes, load sparingly, and cut into corners with steady strokes. Thin coats reduce drips and improve adhesion.
Respect manufacturer drying times between coats to avoid tackiness and sanding problems.
- Sand lightly between coats for better bonding.
- Maintain consistent brush direction to hide strokes.
- Control humidity and temperature to meet drying times.
- Remove dust and tape edges before final coat for crisp lines.
Kitchen Cabinets and Built-Ins: Best Latex Finishes and Application
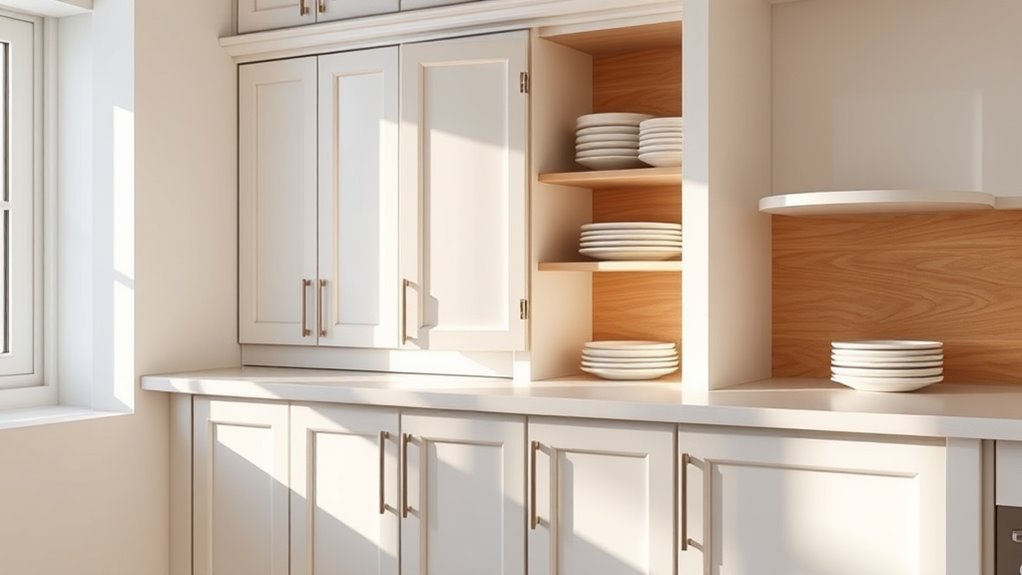
Refresh your kitchen cabinets and built-ins with durable latex finishes that balance toughness and appearance—semi-gloss or satin latex enamels are ideal because they resist moisture, scrub cleaning, and yellowing while giving a smooth, wipeable surface that holds up to daily use.
Choose a cabinet color that complements countertops and lighting, testing samples under real light.
Sand lightly, prime with a stain-blocking primer, and use a high-quality brush or foam roller for even coverage.
Apply two thin coats, sanding between coats for adhesion and finish durability.
Let proper cure time before reinstalling hardware and daily use.
Doors and Interior Woodwork: Finishes for Durability
When you want finishes that stand up to frequent handling and resist scuffs, semi-gloss or satin latex enamels are your best bets for doors and interior trim because they combine durability with easy cleaning.
You’ll prep by sanding and cleaning, then use a quality primer on bare or repaired wood. Focus on finishing techniques that build thin, even coats and allow proper drying to avoid drips.
- Sand and dust between coats for smooth results.
- Apply thin, even layers to prevent runs.
- Use a high-quality brush or foam roller for trim.
- Consider durability considerations like household traffic and finish hardness.
Painting Metal: Primers and Latex That Stick
If you’re painting metal, start with the right primer and surface prep so latex will actually stick and last.
Clean the metal surfaces thoroughly—remove rust, grease, and loose flakes—then sand lightly to create a keyed profile. Choose a rust-inhibiting or bonding primer formulated for metal; it promotes paint adhesion and prevents failure.
Thoroughly clean and sand metal, then apply a rust‑inhibiting or bonding primer to ensure lasting paint adhesion.
Apply primer per manufacturer instructions, let it cure, then use a high-quality latex topcoat designed for exterior or interior metal use. Thin coats improve flow and durability.
Maintain firm drying times and avoid painting in extreme humidity or temperatures to guarantee a long-lasting finish.
Masonry and Brick: Breathable Latex Options
When you’re painting masonry or brick, pick a breathable masonry latex that lets moisture escape and prevents peeling.
Prepare the surface by cleaning, repairing cracks, and removing loose mortar so the paint can bond properly.
You’ll also want to test a small area to verify proper adhesion and color.
Breathable Masonry Paint
Breathable masonry latex lets moisture escape from brick and stucco while keeping rain and dirt out, so you’ll avoid trapped damp that causes peeling and efflorescence.
You’ll choose breathable masonry paint for its breathable properties and reliable moisture control, protecting masonry without sealing pores. Apply it where vapor must move—exterior walls, chimneys, and render.
- Weather-resistant finish that still vents vapor
- Reduces salt bloom and paint blistering
- Works on old lime-based mortars and new cement mixes
- Low-VOC options for safer outdoor use
Check manufacturer permeability ratings to match your structure’s needs.
Brick Surface Preparation
Before you coat brick with breathable masonry latex, prepare the surface so the paint can adhere and the wall can still vent moisture.
Inspect for loose mortar, efflorescence, and peeling. Use a stiff brush or power washer on low to reveal true brick texture, then let dry fully.
Rake and repoint damaged joints, and apply a breathable masonry primer where needed.
Test a small area to confirm adhesion and vapor permeability.
Choose a latex formulated for masonry to preserve moisture resistance while allowing vapor transfer.
Work in mild, dry conditions and follow manufacturer cure times for durable results.
Concrete and Garage Walls: Where Standard Latex Falls Short
Concrete and garage walls put a lot of stress on standard latex paint, and you’ll quickly notice its limits: ordinary latex doesn’t handle moisture, efflorescence, oil stains, or heavy abrasion the way masonry-specific products do.
When you face rough concrete textures and persistent garage moisture, pick coatings designed for masonry or epoxy systems. Prep matters: clean oil, etch smooth slabs, and repair cracks before coating.
Choose breathable masonry primers where salts may bleed through.
- Moisture resistance: masonry primers or epoxies
- Salt/efflorescence control: breathable systems
- Stain blocking: oil-specific primers
- Abrasion: epoxy or elastomeric coatings
Exterior Siding and Trim: Acrylic-Latex for Weather Resistance
When you want long-lasting protection for siding and trim, acrylic-latex delivers weather resistance, flexible adhesion, and UV stability that stand up to sun, rain, and temperature swings.
You’ll choose acrylic-latex for exterior durability on wood, fiber cement, and engineered siding because it expands and contracts without cracking. It bonds to primed surfaces and resists chalking, fading, and moisture intrusion, cutting maintenance needs.
For trim, pick a trim-specific acrylic-latex with higher sheen for easier cleaning and improved mildew resistance.
Apply in suitable temperatures, follow manufacturer’s prep guidance, and touch up high-exposure areas to preserve color and protection.
Stucco and Textured Exteriors: Adhesion and Flexibility Tips
When you’re painting stucco or other textured exteriors, start with thorough cleaning and patching so the surface is sound and free of loose material.
Use a high-build acrylic-latex primer to improve adhesion on rough textures.
Choose flexible, elastomeric or high-stretch latex finishes to bridge hairline cracks and resist movement.
Surface Preparation Essentials
1 key step before painting stucco or any heavily textured exterior is ensuring the surface will accept and flex with the latex paint; you’ll prepare correctly.
Inspect surface types for loose material, efflorescence, or previous coatings. Use preparation tools like stiff brushes, pressure washers, and grinders to remove debris and open pores.
Prime porous or patched areas with a masonry primer. Repair gaps and retexture as needed, then clean with masonry cleaner and rinse thoroughly. Allow full drying before coating.
Follow this checklist:
- Inspect and document damage
- Clean and rinse
- Repair and retexture
- Prime porous areas
Flexibility And Crack Resistance
Because stucco and heavily textured exteriors expand, contract, and move with temperature and moisture changes, you’ll want a latex system that stays flexible and bonds well to prevent cracking and peeling.
You should choose high-quality acrylic latex primers and topcoats formulated for textured surfaces; they offer flexibility benefits that accommodate movement without losing adhesion.
Clean and repair hairline fissures, then use flexible patching compounds before painting.
Apply thinner, multiple coats rather than one heavy coat to enhance crack resistance and even coverage.
Regular maintenance inspections let you spot and touch up vulnerable areas, extending the life of the finish.
Bathrooms and Kitchens: Mildew-Resistant Latex Coatings
If you’re painting bathrooms or kitchens, choose mildew-resistant latex coatings to protect high-humidity areas from mold and staining.
You’ll get durable, washable finishes that stand up to steam and splashes. Focus on proper surface prep and remember mildew prevention is ongoing; clean regularly and fix leaks.
Guarantee good bathroom ventilation to reduce dampness and prolong the coating’s life.
Ensure strong bathroom ventilation to cut dampness and extend the life of your mildew-resistant paint.
- Use mildew-resistant latex for ceilings and walls.
- Prime porous surfaces to improve adhesion.
- Select semi-gloss or satin for easy cleaning.
- Recoat when wear appears to maintain protection.
When Not to Use Latex: Oil-Primed Surfaces, Stains, and Limits
When surfaces have been primed with traditional oil-based products or show heavy staining, latex paint can fail to adhere or hide problems, so don’t assume it’s always the right choice.
You’ll run into issues on oil based paints or surfaces with tannin bleed, grease, or water damage where latex won’t bond or provide adequate stain blocking. In those cases, consider alternatives or proper primers that are compatible with oil primers and designed for stain blocking.
Also avoid latex on certain high-heat or solvent-exposed areas where durability and chemical resistance matter.
Know the limits before painting to prevent peeling and discoloration.
Prep Checklist by Material: Primer, Sanding, Cleaning
Now that you know where latex can fail, get surfaces ready so the paint can perform. You’ll protect finish and maximize latex paint benefits by matching prep to material. Clean, scuff or sand, and prime where needed so surface compatibility is ideal.
Prep surfaces to protect the finish and let latex paint perform — clean, scuff or sand, and prime appropriately.
Follow this checklist:
- Wood: wash, sand to 120–150 grit, fill defects, prime with stain-blocking primer.
- Drywall: dust, patch, sand smooth, use drywall primer for uniform absorption.
- Metal: remove rust, degrease, sand to feather edges, use metal primer.
- Previously painted surfaces: clean, sand glossy spots, spot-prime bare areas before coating.
Choosing the Right Latex Finish and Cleanup Tips
Because finish choice affects durability and appearance, pick the latex sheen and cleanup routine that match the room and your workflow.
You’ll choose between latex finish types—flat for ceilings, eggshell or satin for living areas, semi-gloss for trim and kitchens, gloss for high-wear surfaces.
Consider light, traffic, and cleanup needs when selecting sheen.
For cleanup methods, wipe spills promptly with soap and water; use a soft brush for textured areas.
Rinse rollers and brushes thoroughly, spin or blot to dry, and store tools in a sealed bag for short breaks.
Proper finish and cleanup extend paint life and look.
Frequently Asked Questions
Can Latex Paint Be Used Over Wallpaper Without Removal?
You can sometimes paint over wallpaper, but you’ll risk poor wallpaper adhesion and bubbling unless it’s firmly attached and smooth; use a primer and choose a compatible paint finish, knowing removals often yield better, long-term results.
How Long Does Latex Paint Take to Fully Cure?
Latex paint usually takes about two weeks to fully cure; you’ll notice initial drying within hours, but the curing process—distinct from drying time—can span 14–30 days depending on humidity, temperature, and coat thickness.
Can Latex Paint Be Tinted for Exterior Durability?
Yes — you can tint latex paint for exterior durability; you’ll use tinting techniques with UV-stable pigments and flexible binders, test samples, and apply proper primers and coatings to guarantee long-lasting exterior applications and color retention.
Is Low-Voc Latex Safe for Nurseries and Schools?
Like a soft blanket, yes — you’ll find low-voc benefits make low-VOC latex safer for nurseries and schools; it reduces odors and airborne chemicals, improving nursery safety, though proper ventilation and certified products still matter.
Can Latex Coatings Be Applied in Freezing Temperatures?
No, you shouldn’t apply latex coatings in freezing temperatures; you’ll face application challenges and poor adhesion because of temperature limitations, so wait for above-freezing, manufacturer-recommended conditions to guarantee proper curing and longevity.
Conclusion
Think of latex paint as your home’s wardrobe—versatile, breathable, and ready for most occasions. You’ll reach for it on drywall, plaster, ceilings, high-traffic walls, and mildew-prone bathroom or kitchen surfaces, where it cleans up easily and dries fast. Avoid it over raw oil-based finishes, heavy stains, or where extreme heat demands enamel. With proper prep—cleaning, priming, sanding—you’ll get a long-lasting look that feels fresh as a spring breeze.