Why Does Paint Dry Patchy? Causes and Fix
You’re seeing patchy paint because the film isn’t forming evenly: uneven surface absorption, poor prep, wrong or old primer, or rapid/irregular drying (from drafts, cold walls, humidity or direct sun) keeps the binder and pigment from coalescing. Clean, sand, prime appropriately, mix and thin per instructions, control temperature and airflow, and avoid overworking wet edges to fix it. Keep going and you’ll get the causes, fixes and prevention steps in detail.
Quick Fixes You Can Try Today for Patchy Paint
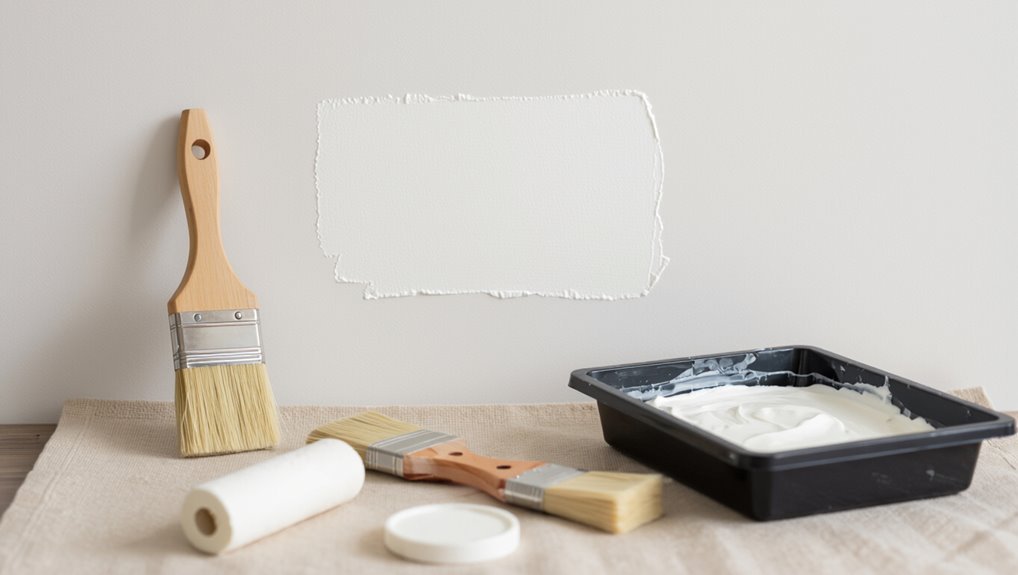
If your paint’s gone patchy, you don’t have to redo the whole wall—start with a few quick fixes you can try today.
Inspect for color variation and texture differences, then sand lightly on uneven spots. Match paint types and finish options before feathering touch-ups using proper application tools: brushes for trim, rollers for flats.
Use thin layering techniques to blend edges, allowing recommended drying times between coats. Consider surface types and environmental factors like humidity that affect cure.
For ongoing results, follow maintenance tips: clean gently, repair chips promptly, and store leftover paint for future matching.
How Paint Dries (Film Formation Primer)
When you paint, the solvent first evaporates and leaves the binder and pigment behind.
The binder particles then coalesce into a continuous film that locks the pigment in place.
How well the pigment and binder interact determines whether the finish goes on smooth or ends up patchy.
Solvent Evaporation Process
Because solvents carry dissolved binders and pigments across the surface, your paint only forms a continuous film as those solvents evaporate and leave the solids behind. You’ll notice solvent types and evaporation rates control how evenly the film forms; fast rates can strand pigment, slow rates can cause sagging. Manage temperature, airflow, and solvent blends to balance drying.
| Factor | Effect |
|---|---|
| Solvent polarity | Affects solubility of binders |
| Volatility | Determines evaporation rates |
| Temperature | Speeds or slows solvent loss |
| Humidity | Slows evaporation, risks blushing |
| Airflow | Promotes uniform drying |
Binder Coalescence Mechanics
Although solvents leave the pigments and binders behind, it’s the binder particles themselves that must soften and fuse to form a continuous, durable film.
You need to understand binder types and coalescence factors: glass alteration temperature, coalescent aid presence, and polymer interactions determine film formation quality.
Adjust coating properties and viscosity effects to match application methods; spray, brush, or roller change particle packing and drying times.
Pay attention to environmental influences—temperature and humidity alter softening and adhesion science.
Control these variables and choose compatible binders to guarantee uniform coalescence, good adhesion, and consistent, non-patchy coverage.
Pigment And Binder Interaction
If you want a smooth, uniform film, the way pigments and binders interact during drying is essential. You need good pigment dispersion so particles stay evenly distributed and don’t disrupt the forming film.
As solvent evaporates, binder particles must flow and coalesce around pigment surfaces; poor binder stability or weak wetting leaves gaps, mottling, or pinholes.
You can control this by adjusting surfactants, rheology modifiers, and solvent balance to improve pigment–binder contact and prevent flocculation.
Test small batches under real drying conditions so you catch incompatibilities early and maintain consistent appearance across the coated surface.
Most Common Causes of Patchy Drying at a Glance
You’ll usually see patchy drying when three things go wrong: uneven surface absorption, paint that wasn’t mixed properly, or adverse environmental conditions.
Check how porous the substrate is, whether you stirred or shaken the paint thoroughly, and if temperature or humidity were out of range.
Addressing those factors first will resolve most patchiness.
Uneven Surface Absorption
When paint soaks into some spots faster than others, you’ll get blotchy, patchy drying that ruins the finish; uneven surface absorption is the most common culprit.
You’ll notice uneven texture where some areas drink paint faster because of varied absorption rates. Proper surface preparation evens porosity: clean, sand, and remove dust so sealer and primer adhere uniformly.
Choose primer selection aimed at leveling absorption for porous or glossy substrates. Adjust spray technique or brush pressure to avoid overworking thin spots.
Maintain application consistency—wet edges, correct overlap, steady passes—to prevent new patches as paint dries.
Improper Paint Mixing
Because paint components can separate or settle, improper mixing is one of the quickest ways to get patchy drying. You’ll see streaks or thin spots when pigment distribution is uneven, binder ratios are off, or paint consistency isn’t right. Use proper mixing techniques and check viscosity before applying. Match application methods to the job and consider surface textures that reveal flaws. Monitor drying times during work to catch issues early. Avoid blaming tools; review your prep and mix. Quick reference:
| Problem | Cause | Fix |
|---|---|---|
| Streaks | Poor pigment distribution | Stir thoroughly |
| Runs | Too thin | Adjust consistency |
| Blotches | Binder ratios off | Rebalance/replace |
Environmental Conditions
Although paint chemistry matters, environmental conditions often decide whether a finish dries evenly or looks patchy, and you should control them before you start.
You’ll watch temperature fluctuation closely; swings change drying patterns and can mar paint formulation performance. Manage humidity control and avoid painting when moisture’s high.
Consider airflow impact—too much creates skinning, too little extends tackiness. Match application timing to surface texture; rough or porous areas need longer cure.
Seek environmental consistency during coat application to prevent lap marks. Account for weather influence and seasonal changes so your work dries uniformly and lasts.
How To Tell Patchy Drying From Staining or Bleed‑Through
Want to know whether you’re dealing with patchy drying or a stain/bleed-through issue? You’ll use patchy diagnosis and paint identification together: inspect sheen differences, feel for tackiness, and note time since application.
Look for staining signs like discoloration that penetrates the film versus irregular sheen from incomplete drying. Consider bleed through factors—watermarks, tannin migration, or solvent spots—visible before or after topcoats.
Do a surface evaluation: test a small swatch with denatured alcohol or water to see if color lifts.
Compare drying techniques and finish assessment records from your application review to confirm cause and choose the right fix.
How Surface Contamination Causes Uneven Sheen
Once you’ve ruled out staining or bleed-through, check for surface contamination—dirt, oil, silicone, or wax can prevent paint from wetting out evenly and leave patches of low sheen.
You should assess surface cleanliness and identify contamination sources before painting. Use surface testing (tape, solvent wipe) to reveal residues and choose cleaning techniques and preparation steps accordingly.
Match primer choice and coating compatibility to the cleaned substrate to minimize sheen variation. Contamination effects often show as dull spots or poor adhesion.
Replace or clean application tools to avoid reintroducing contaminants and re-test surfaces before topcoating.
How Poor Surface Preparation Leads to Patchiness
If you skip or rush preparation, you’ll almost always see patchy results because paint can’t form a uniform film on an uneven or improperly prepped substrate.
You must control surface texture through proper substrate preparation—cleaning, sanding, and filling—so paint adhesion is consistent.
Choose product selection and primer quality that match paint compatibility; wrong combos break adhesion and hurt finish uniformity.
Select compatible paints and primers—mismatched products compromise adhesion and ruin finish uniformity.
Maintain mixing consistency and use the right application technique to avoid streaks or thin spots.
Consider environmental impact like humidity and temperature during prep and application, since they change curing and adhesion, causing visible patchiness if ignored.
Why Old or Incompatible Primers Cause Drying Problems
If the primer beneath your topcoat has started to break down, it can release oils and particles that stop paint from drying evenly.
You’ll also run into trouble when the primer’s binder chemistry doesn’t match the paint, which prevents proper film formation.
Finally, a weakened or incompatible primer can’t provide a good adhesion layer, so the finish cures patchily or flakes off.
Old Primer Breakdown
Old or incompatible primers can chemically break down or fail to bond, and when that happens your topcoat won’t dry evenly.
You’ll notice tacky spots, discoloration, or flaking where old primer compatibility was poor. Weathering, UV exposure, or age can weaken the primer film so solvents from new paint re-swell it, causing primer adhesion issues.
Before repainting, test small areas: sand to see if the primer powders, scrape for lifting, and wipe with solvent to check dissolution.
If breakdown appears, remove or fully strip the old primer and apply a compatible, high-quality primer to guarantee even drying.
Incompatible Binder Chemistry
Because primers and topcoats rely on different binder chemistries to form a unified film, incompatible binders can prevent the new paint from coalescing and curing properly.
You’ll notice patchy drying when binder compatibility is poor: resins resist mixing, surface interactions are uneven, and coating performance drops.
Check paint formulation labels and prioritize product selection that matches resin properties and formulation stability.
Adjust application methods to manufacturer guidance, and perform a small adhesion challenges test before full work.
A simple quality assessment—crosshatch or test panel—lets you confirm compatibility and avoid costly rework from hidden chemistry conflicts.
Poor Adhesion Layer
When incompatible binders interfere with film formation, the primer beneath a fresh coat can also undermine drying by not gripping the new paint.
You’ll see adhesion failure when old or wrong primers resist new coatings; poor surface preparation and inadequate surface treatment make it worse.
Check primer selection and product compatibility before you start, and match primer chemistry to paint quality.
Your application technique and drying conditions matter—heavy films, low temperatures, or humidity amplify problems.
Consider environmental factors and follow quality control steps: strip or sand old layers, clean thoroughly, and test a small area so final adhesion and drying work as planned.
How Improper Sanding Creates Visible Patches
If you skip proper sanding or rush through it, you’ll leave uneven abrasion and residual gloss that shows up as blotchy, uneven patches after paint dries.
You need consistent sanding techniques and the right sanding tools to control surface textures and avoid disrupting paint layers. Missed spots create surface irregularities that break paint adhesion, so follow a sanding progression to blend edges, finish smoothing, and texture matching.
Preparation methods matter: start coarse, move finer, and inspect under light. Don’t shortcut or you’ll see every mistake.
Start coarse, progress finer, and inspect under light—no shortcuts if you want a flawless finish.
- Frustration at visible flaws
- Regret for rushed work
- Urgency to fix
- Desire for flawless finish
- Pride in proper technique
How Substrate Porosity Affects Paint Absorption
Although you mightn’t see it at first glance, the substrate’s porosity controls how paint soaks in and levels out, and that absorption directly influences color uniformity and sheen.
You’ll notice substrate types vary—plaster, drywall, wood—each with different absorption rates affecting paint compatibility and finish quality.
Adjust primer selection and surface treatment to even porosity before you paint. Control moisture levels and choose application techniques that match texture differences to avoid blotchy spots.
Monitor coating thickness; porous areas need more build. Match products and methods to the substrate so your paint lays down uniformly and the final finish looks consistent.
How To Test Substrate Porosity
You can check porosity quickly with a simple water drop test: place a few drops on the surface and watch how they behave.
Time how long the drops take to absorb to get an absorption timing check.
Repeat the test on a known non-porous control area to compare results and decide if sealing is needed.
Water Drop Test
Want to know quickly whether a surface will soak up your paint? Place a few drops of water and watch: rapid water absorption signals high porosity, slow bead retention means low porosity.
That tells you about paint consistency needs, likely drying times, and whether primer types or coating thickness must change. Note surface texture, environmental factors, and drying conditions as you test. Use results to adjust application methods and choose appropriate paint quality. Don’t rely on temperature alone.
- Frustration when water vanishes
- Relief when beads sit tight
- Urgency to prep before painting
- Confidence choosing primer
- Satisfaction with even finish
Absorption Timing Check
After the quick water-drop check, run an absorption timing test to measure how fast a substrate soaks up moisture and what that means for paint bonding. You’ll need a stopwatch, a syringe or pipette, and a small masked area.
Deliver a measured droplet, start timing, and note when the liquid disappears. Fast absorption (seconds) signals high porosity; slow absorption (minutes) signals low porosity. Record several spots to spot variability.
Use results to adjust primer choice, thinning, and wait times so paint layering stays even. Document times for future reference and to prevent patchy drying from uneven substrate uptake.
Compare With Control
When you compare a suspect area with a control patch, you get a clear baseline for how porous the substrate really is.
You’ll test paint types and primer types side by side, note surface texture differences, and see how substrate condition affects drying time and color consistency.
Use the same application tools, mixing techniques, and paint quality for both spots. Record environmental factors like humidity and temperature.
The contrast tells you whether absorbency causes patchiness or if technique is to blame.
Then choose appropriate prep, sealer, or a different paint system to fix the issue.
- Anxiety about wasted paint
- Relief from clear results
- Confidence to proceed
- Frustration turned actionable
- Satisfaction with a plan
Why Inconsistent Paint Mixing Makes Patches
Because paint components separate over time, failing to mix thoroughly leaves you with uneven pigment and binder distribution that shows up as patches on the wall.
You’ll notice inconsistent texture and color variation when blending methods are rushed or inappropriate for the paint types you’re using. Check mixing techniques and match paint viscosity to your application tools; rollers, brushes, and sprayers all respond differently.
Environmental factors like temperature and humidity affect surface tension and drying times, so mix carefully just before use. Stir slowly to avoid air bubbles, use proper paddles or mixers, and remix periodically during long jobs to maintain consistency.
How Wrong Thinning Changes Drying Behavior
If you thin paint with the wrong solvent ratio, it won’t evaporate evenly and patches will appear.
Adding too much thinner thins the binder and weakens film formation, so some areas dry glossy while others stay dull or tacky.
Check and follow the manufacturer’s thinning guidelines to avoid those drying inconsistencies.
Improper Solvent Ratio
Although thinning seems like a small step, using the wrong solvent ratio can dramatically change how your paint dries. You’ll notice uneven sheen, blistering, or slow curing when solvent effects and mixing ratios aren’t respected.
Match solvent type to paint chemistry, adjust for environmental factors and surface conditions, and tweak application methods to preserve paint quality and predictable drying times.
- Frustration when a perfect mix ruins the finish
- Anxiety over visible laps and streaks
- Regret after rushing thinning
- Relief when balance restores smooth cure
- Confidence from mastering solvent, ratio, and technique
Excessive Thinning Effects
When you over-thin paint, you change its drying chemistry and invite a host of problems: weakened film formation, longer tack time, increased susceptibility to runs and sagging, and a paler, patchy appearance as solvents evaporate unevenly.
You’ll notice thinning effects immediately: reduced opacity, spotting where solvent pools, and inconsistent sheen. Lower paint viscosity lets pigment and binder settle unevenly, so some areas dry thin while others hold more solids.
To avoid this, follow manufacturer thinning guidelines, test spray or brush techniques on a scrap, and let thinner flash off properly between coats. Restore proper paint viscosity before full application.
How Expired or Poor‑Quality Paint Causes Patchiness
Because paint manufacturers formulate pigments, binders, and solvents to work together, expired or low‑grade products often fail to spread and level evenly, leaving visible streaks and thin spots.
You’ll notice expired paint effects like separation, graininess, and poor adhesion. Quality paint differences matter: cheap or old cans resist sheens, causing color consistency challenges.
Check paint storage practices and primer selection guidance before you start. Address paint compatibility issues and drying conditions impact by choosing matched products.
Follow surface preparation tips and consider application technique adjustments as part of patchiness prevention strategies.
- Frustration at ruined walls
- Regret over rushed buys
- Relief after testing cans
- Confidence with proper prep
- Pride in lasting results
How Uneven Application Technique Leaves Streaks : And How To Stop It
Master your technique to stop streaks before they start: uneven pressure, overworking a wet edge, or loading your brush or roller inconsistently all show up as visible lines and thin spots once the paint dries.
You’ll avoid uneven strokes by maintaining steady application speed and consistent paint thickness. Use proper brush selection for edges and a matched roller technique for fields so coverage consistency improves despite varied surface texture.
Respect drying time before adding coats; follow a deliberate layering method to blend overlaps. Work wet‑into‑wet, keep tools loaded uniformly, and check finish uniformity as you go to prevent streaks.
How Roller Nap and Brush Choice Change the Finish
After you’ve settled on consistent strokes and wet‑into‑wet layering, pick the right roller nap and brush to match the surface and paint sheen — they determine how smoothly paint lays down and how textured the dried film looks.
You’ll feel the difference: a short nap gives a sleek finish texture on smooth drywall, while a longer nap grabs thick paint for rough masonry.
Your brush selection affects edges and blending; consider material compatibility and paint viscosity when choosing.
Match application technique to surface interaction and drying characteristics to reduce patchiness and create the look you want.
- Relief at a flawless wall
- Pride in clean edges
- Confidence in choices
- Calm from consistent texture
- Satisfaction with durable results
Why Overbrushing or Overworking Paint Creates Marks
When you keep brushing a panel after the paint has started to set, you lift partially cured pigment and binders and create streaks, lap marks, and uneven sheen; the solvent in the film evaporates and the surface skins over, so extra passes disturb the developing film instead of smoothing it. You’ll see overbrushing effects if you force flow after skinning; it breaks uniformity and highlights poor paint consistency. Stop working edges once they tack. Use lighter strokes, proper nap or brush, and maintain wet edges to avoid reworking. Practice timing and thin coats for even drying.
| Cause | Result |
|---|---|
| Overworking | Streaks |
| Skinned surface | Uneven sheen |
| Thick coat | Slow cure |
| Poor mix | Patchy color |
How Inadequate Overlap or Cut‑In Causes Lines
If you don’t overlap each stroke enough or cut in with a consistent wet edge, you’ll leave visible lines where two passes meet. You want Cut in techniques and Overlap strategies that keep Edge blending tight so Brush strokes and Roller application merge.
Work quickly to maintain a wet edge, use steady Paint layering and moderate pressure, and aim for Seamless changes for Coverage consistency. Practice timing between passes, match paint load, and avoid stopping mid-panel.
These habits prevent lap marks and uneven sheen, helping the finish look professional and intentional rather than streaked, patchy, or amateurish.
- Frustration at visible seams
- Pride in smooth walls
- Anxiety over mistakes
- Relief when fixed
- Satisfaction with consistency
How Temperature and Humidity Affect Drying Rate
You’ll notice temperature directly speeds or slows evaporation—warm air makes solvents leave faster, cold air holds them longer.
Humidity controls how well the paint’s binders cure, so high moisture can stall drying and leave tacky spots.
Keep both factors in check to prevent uneven finish and blotchy areas.
Temperature’s Effect On Evaporation
Because air holds and moves moisture differently at different temperatures, drying times shift noticeably as conditions change. You’ll notice temperature fluctuation effects alter how quickly solvents leave paint; warmer air speeds evaporation while cold slows it.
You can’t ignore evaporation rate dynamics when scheduling coats — uneven warmth makes some areas set before others, causing patchiness. Adjust temperatures to keep them steady and within the paint’s recommended range. Move heaters or ventilate gently to avoid drafts that cool surfaces.
Monitor and wait between coats so film forms uniformly.
- Frustration when a perfect finish blisters
- Anxiety watching wet streaks
- Relief with steady warmth
- Satisfaction after uniform drying
- Regret from rushing the job
Humidity’s Role In Curing
Temperature sets the pace for evaporation, but humidity controls how quickly that moisture actually leaves the paint film.
You’ll notice humidity effects immediately: high humidity slows curing, causing tacky, patchy surfaces; low humidity speeds evaporation but can lead to surface skinning and poor adhesion.
Check humidity measurement before painting—use a reliable hygrometer—and aim for manufacturer-recommended ranges.
For humidity control, ventilate, use dehumidifiers, or schedule work for drier days.
Remember humidity impact varies with temperature and paint type, so adjust technique: thin coats, longer flash times, and proper tooling help prevent uneven drying and guarantee a consistent finish.
Why Cold Walls or Drafts Cause Patchy Gloss
If your walls are cold or there’s a draft, the paint film can dry unevenly and leave shiny patches where it cures faster. You’ll notice gloss variation because surface temperature and air circulation change drying patterns: cold surfaces slow curing while warmer streaks cure sooner.
Draft effects move moisture influence away, altering paint adhesion and creating mottled sheen. Poor wall insulation magnifies temperature impact, so a room can show patchy gloss even with careful brushing.
Drafty air shifts moisture and adhesion, causing mottled sheen; thin insulation makes patches of gloss even after careful brushing.
You can’t ignore how subtle drafts and thermal differences shift results.
- Frustration with uneven shine
- Worry about ruined finish
- Urgency to fix drafts
- Regret over timing
- Relief when corrected
How Direct Sunlight Creates Flash Drying
When sunlight hits a freshly painted wall, it can cause the surface to dry so fast that the top skin sets before solvents and water can escape, producing a patchy, glossy look called flash drying.
You’ll notice sunlight effects alter drying speed through thermal dynamics and heat absorption, shifting paint chemistry behavior at the surface. UV exposure accelerates film formation while surface reflection creates hot spots that trap solvents beneath a hardened skin.
That reduces moisture retention and interrupts normal drying cycles, so you get uneven sheen.
To prevent flash drying, plan coatings away from direct sun and consider temperature-appropriate products.
How High Humidity Leads to Blushing and Sheen Loss
Because moisture slows solvent evaporation, high humidity lets water vapor condense into freshly applied paint, causing a milky haze called blushing and dulling the desired sheen.
You’ll notice reduced clarity and an uneven finish because humidity effects interrupt proper paint curing, trapping tiny droplets that scatter light.
You can’t force drying quickly; the film’s chemistry changes and the gloss flattens.
To recover, wait for drier conditions or use controlled heat and dehumidification, avoiding solvents that worsen blushing.
Recover by waiting for drier air or applying gentle heat and dehumidification; never use solvents that worsen blushing.
Preventing the problem is easier than fixing it—control room humidity, timing, and ventilation before you start.
- Frustration at ruined work
- Anxiety over wasted time
- Relief when corrected
- Regret for rushed painting
- Satisfaction with a smooth finish
Why Paint Compatibility Issues Create Uneven Film
If you slap new paint over an old, incompatible coating you’ll often get patchy drying and poor film formation.
Check whether the existing paint is oil- or water-based before you start, because mismatched systems won’t bond properly.
Using the right primer can restore adhesion and give you an even finish.
Old Paint/New Paint
Although old paint might look fine, it often reacts differently to fresh coatings and that mismatch creates uneven film build. You’ll notice poor paint adhesion, odd color compatibility, and broken finish uniformity when old paint’s surface texture and existing paint layers conflict with your new coat.
Pay attention to drying times and coat thickness—differences amplify patchiness. Choose primer types when needed to bridge disparities, and match application tools to the job.
Also consider environmental factors that stress both layers. If you prep thoughtfully, you’ll reduce visible flaws and get a smoother, more consistent result.
- Frustration at blotches
- Fear of wasted effort
- Relief with a fix
- Pride in smooth results
- Confidence in lasting finish
Primer And Adhesion
Old and new paint layers can meet badly, so you’ll often need a primer to get them to behave. You’ll choose primer types based on surface compatibility and desired primer effectiveness; oil-based, acrylic, or stain-blocking primers each suit different substrates.
Proper primer application and surface sealing control layer thickness and improve adhesion. Use adhesion techniques like sanding, cleaning, and bonding agents where needed. Perform adhesion testing on a small area to confirm compatibility before full coverage.
Watch drying times between coats to prevent poor bonding. Thoughtful prep, correct products, and measured layer thickness prevent patchy finishes and peeling.
How Solvent‑Based vs. Water‑Based Differences Matter
When you’re choosing between solvent‑based and water‑based paints, the solvents’ evaporation behavior and binder chemistry determine how evenly the film forms as it dries.
You’ll notice solvent properties and binder types affect drying times and finish types; paint chemistry interacts with absorption rates and surface compatibility.
Match application techniques to environmental factors, or you’ll get patchy areas. Maintain quality control by testing small sections and adjusting thinning or technique.
- You feel relief when a smooth coat appears.
- You tense up seeing blotches emerge.
- You celebrate even gloss across a wall.
- You dread redoing an entire surface.
- You trust proven methods.
When to Use a Stain‑Blocking or High‑Build Primer
If you’re painting over stains, tannin bleed, smoke damage, or patched drywall, reach for a stain‑blocking primer to seal the problem and prevent show‑through.
For uneven or porous surfaces where thin paint soaks in and looks patchy, use a high‑build primer to level and fill so the topcoat applies uniformly.
Choosing the right primer for the surface is one of the fastest ways to stop patchy finish problems before they start.
When To Choose Primer
Because stains, tannins, and uneven surfaces can show through even the cleanest topcoat, you’ll want to choose a primer that specifically addresses those problems before you paint.
You decide based on substrate, primer types and surface compatibility, considering application techniques and drying times. Check adhesion properties and finish types to match paint formulations. Factor environmental factors like humidity and temperature.
Use stain‑blocking primer for discoloration, high‑build primer to level, or specialty primers for tricky substrates.
- Relief when stains vanish
- Confidence in even coverage
- Satisfaction with smooth results
- Calm knowing adhesion is secure
- Pride in a lasting finish
Primer For Problem Surfaces
Although a topcoat can hide minor flaws, you’ll need a stain‑blocking primer for discoloration and a high‑build primer to level uneven or pitted surfaces before you paint.
If stains bleed (water, smoke, tannin), choose a solvent or shellac‑based stain‑blocking primer to seal and prevent bleed‑through.
For textured or damaged drywall, pick a high‑build latex or acrylic primer/skim to fill and smooth before topcoating.
Follow Problem Surface Solutions: clean, sand, and dry surfaces first.
Primer Selection Tips: match primer chemistry to substrate and stain type, test a small area, and allow full cure before applying finish coats.
When Priming Prevents Patchy Drying
When you seal a bare or repaired surface with the right primer, you create a uniform base that helps paint lay down evenly and avoid the blotchy, uneven sheen that causes patchy drying.
You’ll notice improved paint adhesion and consistent primer drying when you match primer types to surface compatibility. Use proper priming techniques and application methods to control coating thickness and respect surface texture.
The undercoat importance can’t be overstated: it evens porosity and masks repairs so topcoats behave predictably.
- Relief that uneven spots disappear
- Confidence in long-lasting finish
- Pride in smooth, professional results
- Satisfaction from fewer touch-ups
- Calm knowing you did it right
Step‑By‑Step Prep to Prevent Patchy Drying
Start by clearing the workspace and inspecting the surface for dirt, loose paint, or imperfections that could cause the finish to dry unevenly.
You’ll follow a clear surface preparation sequence: clean, sand, and fill defects, then choose primer types matched to substrate.
With Paint selection, confirm product compatibility between primer and topcoat.
Match your primer and topcoat—verify product compatibility to ensure even adhesion and a uniform finish.
Control the environment—temperature, humidity, and ventilation—to manage drying times.
Pick proper roller types and practice brush techniques for even laydown.
Use recommended mixing methods to homogenize paint before use.
Finally, adopt consistent application techniques and allow full cure between coats to prevent patchy drying.
Mixing and Thinning Best Practices to Avoid Uneven Drying
When you mix paint, stick to the manufacturer’s paint-to-thinner ratio to keep drying consistent.
You’ll also want to stir thoroughly from the bottom up so pigments and solvents are evenly distributed.
Skipping proper thinning or rushing the stir can cause patchy drying and color variation.
Proper Paint-to-Thinner Ratio
1 clear rule governs smooth, even drying: stick to the manufacturer’s recommended paint-to-thinner ratio and adjust only in small increments.
You’ll control paint viscosity and paint consistency to keep paint uniformity across varied surface textures. Choose compatible thinning agents, consider application techniques, and respect recommended drying time—small changes in mixing ratios change finish quickly.
Don’t guess; test a small patch before full application.
- Frustration when drips spoil a weekend project
- Relief seeing seamless, uniform color
- Anxiety over a blotchy wall under light
- Pride in a flawless, professional finish
- Calm knowing you followed proper ratios
Thorough Stirring Technique
Following the manufacturer’s mix ratio is only part of the job; you also need to stir thoroughly so pigments, binders, and any thinner blend evenly.
You should use proper stirring techniques: scrape the can sides and bottom, lift and fold, then spin the stick to homogenize. Keep a steady, firm motion for several minutes until the paint consistency is uniform and no streaks remain.
If thinning, add small amounts incrementally and restir between additions. Poor stirring leaves pockets of solvent or pigment that dry differently.
Take time—consistent mixing prevents patchy finish and saves touch-ups later.
Application Tips for Smooth, Consistent Coverage
If you want smooth, consistent coverage, start by using the right tools and loading your brush or roller evenly so paint goes on in a single, continuous pass.
You’ll focus on application techniques and paint consistency, matching brush selection and roller types to surface types. Mind environmental control and drying times so layers settle predictably. Use layering methods and recommended product recommendations for compatibility.
Adjust application angles to reach edges without overworking wet paint. Keep hands steady, work wet edges, and pause to inspect sheen for missed spots.
Angle your brush to reach edges, keep hands steady, blend wet edges, and pause to inspect for missed sheen.
- You’ll feel relief when streaks vanish.
- Pride in flawless walls.
- Confidence in choices.
- Calm in the process.
- Joy at the reveal.
Rolling and Brushing Techniques to Avoid Patches
Now that you’ve got the right tools and know how to load them, focus on how you move them: rolling and brushing techniques make or break even coverage.
You’ll choose roller types and brush sizes for surface texture, match primer selection to substrate, and use paint extension sparingly to control paint thickness.
Maintain consistent brushing angles, overlap roller passes, and adjust application speed to avoid lap marks.
Keep technique consistency: pressure, stroke length, and direction matter.
Blend edges while wet, feather shifts, and back-roll or tip off as needed.
Practicing these steps reduces patches and yields a uniform finish.
Spraying Tips to Prevent Dry Spray and Mottling
When you switch from brush and roller to a sprayer, controlling atomization and overlap becomes critical to avoid dry spray and mottling. Set the fluid flow and air pressure for a smooth, wet spray pattern. Keep the nozzle moving at a steady speed and distance, and maintain consistent overlap so each pass lays down an even film.
Switching to a sprayer demands controlled atomization, steady motion, and consistent overlap for a smooth, even finish.
Tune your spray technique: match paint viscosity to pressure settings, pick the right nozzle choice, practice distance control, and follow gun maintenance to prevent spitting. Small environmental adjustments affect finish, so aim for coverage consistency.
Breathe pride, calm, relief, confidence, and satisfaction:
- Pride
- Calm
- Relief
- Confidence
- Satisfaction
How To Control the Environment During Painting
You’ll get more consistent results when you control temperature and humidity, because both affect drying rate and film formation.
Keep airflow steady and ventilate to remove solvent but avoid strong drafts that cause uneven drying.
Time your surface prep so it’s clean and at the right temperature and moisture level before you start.
Temperature And Humidity
Although paint can look fine as you apply it, temperature and humidity control will make the difference between a smooth finish and a blotchy one. You’ll watch temperature fluctuations and humidity levels change drying times; match paint types to conditions.
In summer painting, high humidity slows cure and traps moisture; in winter challenges, cold stalls film formation. Use moisture control and pre-warming or conditioned spaces, and choose surface treatments and primers suited to the environment.
Plan around forecasts, and don’t force drying with extremes.
- Frustration when runs reappear
- Relief seeing even sheen
- Anxiety about missed spots
- Pride in a flawless wall
- Regret avoided by patience
Airflow And Ventilation
Because air movement controls how solvents leave the paint film, managing airflow and ventilation is one of the easiest ways to prevent patchiness.
You should set up ventilation systems to create consistent airflow patterns, balancing intake and exhaust so no areas dry faster. Use fans, dehumidifiers, and temperature regulation to support drying techniques that suit paint properties and application methods.
Monitor moisture management to avoid damp pockets and reduce environmental impact by choosing efficient equipment.
Organize your workspace to minimize obstructions and cross-currents.
With deliberate airflow control you’ll get uniform drying and fewer visible flaws.
Surface Preparation Timing
When you time your surface prep to match temperature, humidity, and the paint’s open time, you cut down on problems like patchy dries and uneven sheen.
You’ll plan substrate preparation and surface treatment so paint selection and paint compatibility align with drying conditions and curing duration.
Control environmental impact by choosing preparation methods that suit finishing techniques and avoid rushed application timing.
Monitor humidity, temperature, and airflow; pause if conditions shift.
Trust proper timing to unify sheen and adhesion.
- Relief: knowing you prevented flaws
- Pride: your surface looks flawless
- Confidence: finish will last
- Calm: no surprise blotches
- Satisfaction: job done right
When and How To Sand Between Coats
If your finish feels rough or shows brush marks after the first coat, you’ll want to sand before applying the next one. You should follow proper sanding preparation: clean, dry surfaces and choose sanding tools and grit for the job. Use light pressure, check sanding marks, and aim for smooth connections between coats. Consider sanding frequency — usually between each coat until desired sanding finishes appear. Practice sanding techniques and observe sanding benefits: better adhesion and even gloss. Always use sanding safety like masks and goggles when abrading paint.
| Tool | Purpose |
|---|---|
| 120–220 grit | Smooth flaws |
| Foam pad | Delicate finishes |
| Vacuum/cloth | Clean dust |
How To Spot‑Repair and Feather Out Patchy Areas
Although small patchy spots can look discouraging, you can usually fix them without redoing the whole surface by spot‑repairing and feathering the surrounding paint.
Assess the spot, sand lightly, clean, then apply thin coats that blend into edges using proper feathering techniques. Match sheen and do color matching under the same light. Work quickly while paint is tacky, wipe rag‑soft edges, and let each thin layer dry fully.
Sand, clean, then feather thin coats, matching sheen and color in the same light for seamless touch-ups.
- Relief when a stubborn spot disappears
- Pride in a seamless touch‑up
- Calm knowing you saved time
- Satisfaction from smooth transitions
- Confidence to tackle more repairs
When To Strip and Start Over Versus Touch‑Up
Because you’ve already tried spot repairs, you’ll need to decide whether to strip and start over or keep touching up based on the extent of damage, adhesion, and finish uniformity.
If large areas show poor adhesion, multiple layers, or mismatched sheen, choose full paint removal and restart. Use appropriate paint removal techniques and follow thorough surface preparation methods: clean, sand, fill, and prime.
If defects are isolated and surrounding paint adheres well, touch‑ups or localized sanding and priming will suffice.
Prioritize long‑term durability over quick fixes—stripping costs time but prevents recurring patchiness and reduces future rework.
Troubleshooting Checklist for Stubborn Patchiness
Start with a quick scan: note where the patchiness appears, how large each area is, whether the texture or sheen differs, and whether the paint is flaking or just uneven.
Then run this focused checklist: verify surface cleanliness, test paint absorption with a damp cloth, check surface texture for sanding needs, confirm primer types used, and evaluate paint quality and finish consistency.
Assess application tools and technique, measure drying speed and drying conditions, and account for environmental factors like humidity and temperature.
If issues persist, isolate one variable at a time and recoat small test patches before committing.
Quick‑Use Products: Deglossers, Sprays, and Touch‑Up Kits
When you need fast fixes for patchy paint, quick‑use products—deglossers, aerosol sprays, and touch‑up kits—get you back to a uniform finish without a full repaint.
You’ll use deglossing techniques to remove sheen and help new paint bond; wipe thoroughly, let dry, then test a small area.
For larger spots, choose matching aerosol spray and practice consistent spray application: keep a steady distance, use light overlapping passes, and blend edges while wet.
Touch‑up kits work best for tiny nicks—thin coats, feather edges, and cure fully between layers.
Clean tools and patience prevent repeat patchiness.
When To Call a Pro: Signs You Need Expert Help
If quick fixes haven’t smoothed out the patchiness or the problem keeps coming back, it’s time to contemplate a pro. You’ll want a professional evaluation to get expert recommendations and clear consultation benefits.
A thorough project assessment highlights hiring considerations, cost analysis, and time implications. Expect quality assurance through skills assessment and proven experience factors.
Call a pro when DIY causes repeat failures, the surface needs structural repair, or you lack tools and time. A specialist prevents waste and delivers lasting results.
When DIY keeps failing or the surface needs structural repair, call a pro to save time, tools, and money.
- Frustration at failed touch-ups
- Anxiety about hidden damage
- Relief from expert guidance
- Confidence in durable finish
- Regret avoided by early action
Cost and Time Estimates for Common Fixes
Although small touch-ups can look quick on the surface, budget and schedule estimates vary a lot depending on the cause and scope—expect a half-day and under $50 for a basic spot repair, a day or two and $150–$500 for correcting prep-related patchiness, and several days plus $500+ if you need sanding, priming, or drywall repair. You’ll perform surface evaluation, choose material selection, and weigh Cost analysis vs. Labor costs. Use Common tools and DIY techniques to reduce Budget considerations. Plan Time investment and Project timelines, apply Efficiency strategies, and know when pros cut time.
| Fix | Time | Typical Cost |
|---|---|---|
| Spot repair | 0.5 day | <$50 |
| Prep redo | 1–2 days | $150–$500 |
| Full repair | several days | $500+ |
Preventive Habits for Long‑Term Even Finishes
Because consistent prep and habit make the difference, you should establish a few simple routines—cleaning surfaces, watching humidity, using quality primers, and keeping tools in good condition—to prevent patchy drying over time.
You’ll adopt preventive techniques that protect finish consistency: wipe dust before painting, store paints properly, check weather and humidity, sand and prime as needed, and replace worn rollers and brushes.
Over months, these habits cut touch-ups and frustration. They’ll help you deliver even, lasting results without scrambling. Small routines save time, money, and pride.
Over time these habits reduce touch-ups and stress, delivering even, lasting results that save time, money, and pride.
- Relief when a wall looks flawless
- Confidence in every coat
- Satisfaction of durable results
- Calm knowing you’re prepared
- Pride in workmanship
Quick Reference: Common Causes Matched to Fixes
Now that you’ve built those preventive habits, it helps to have a quick reference that links common causes of patchy drying to specific fixes you can apply on the spot.
If uneven paint texture appears, sand lightly and adjust application consistency or layering methods.
Poor drying from environmental factors? Improve ventilation and tweak drying techniques.
Low paint quality or wrong color selection needs replacement or primer.
Problematic surface materials require proper cleaning and compatible primers.
Missed finishing touches signal rushed work—slow down.
Check equipment maintenance to avoid streaks.
Match fixes to causes quickly to restore even coverage and durable results.
Further Reading and Manufacturer Resources
Resources can speed your learning and help you avoid repeat mistakes: check manufacturer data sheets for dry times, recommended primers, and surface prep; read industry guides from trade associations for techniques and troubleshooting; and consult product-specific FAQs and how-to videos for real-world tips.
You’ll want to follow manufacturer guidelines and paint specifications, compare product comparisons, and refine preparation methods. Learn application techniques that match surface compatibility, finish types, and drying times while considering environmental factors.
Keep maintenance tips handy to protect results. Use reliable sources to choose the right materials and avoid costly rework.
Keep maintenance tips close and rely on trusted sources to select materials—avoid costly rework and protect your finish.
- Relief: clear guidance calms stress
- Confidence: right specs boost certainty
- Frustration: avoid repeated failures
- Pride: quality finish rewards effort
- Safety: informed choices protect you
Frequently Asked Questions
Can Paint Additives (Like Mildewcides) Cause Patchy Drying?
Yes, they can. You’ll see patchy drying if additives alter paint consistency or drying time; poor surface preparation, wrong primer use, incorrect roller type, bad application technique, high humidity levels or temperature effects can worsen it.
Does Paint Color or Pigment Type Affect Drying Uniformity?
Yes — color consistency and pigment quality affect drying uniformity; you’ll see uneven sheen or absorption if pigments vary, low-quality pigments settle, or mixes differ, so use consistent, high-quality pigments and thorough mixing for uniform results.
Can Underlying Wallpaper Adhesives Cause Uneven Paint Sheen?
Yes — adhesive residue can behave like hidden storms, scattering your sheen unevenly. You’ll need thorough surface preparation to remove glue, prime properly, and then repaint so the finish lays down smooth and consistent.
Will Applying a Topcoat (Varnish) Hide Existing Patchiness?
No, a topcoat application won’t hide existing patchiness; varnish effects can sometimes make sheen differences more obvious. You’ll need to fix surface issues, sand, prime, and repaint for an even finish before varnishing.
Can Uneven Lighting Make Paint Look Patchy When It Isn’t?
Right off the bat, don’t judge a book by its cover: yes, uneven lighting conditions can make paint look patchy, exaggerating surface texture, paint application flaws, color variation, drying time differences and other environmental factors you’ve overlooked.
Conclusion
Patchy paint’s fixable — think of it like tuning a guitar: small adjustments get everything in harmony. Start by cleaning and inspecting the surface, sand glossy spots, prime porous or stained areas, and use compatible paints and proper thinning. Match drying conditions (temperature, humidity, airflow) and apply consistent technique (load, stroke, wet edge). If problems persist, strip and redo the coat. With these steps you’ll restore a smooth, even finish that lasts.