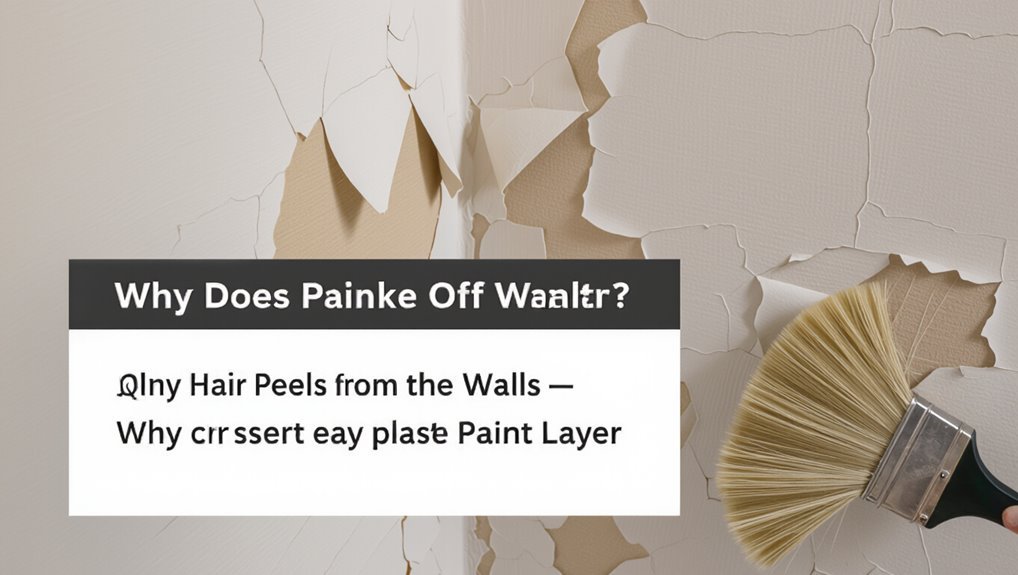
Why Does Paint Flake Off Walls? Causes & Fix
You’re seeing paint flake off because the finish lost adhesion—often from moisture (leaks, damp walls, or condensation), poor surface prep (dirt, mill glaze, or residual moisture), incompatible coatings, or house movement and temperature swings. Check for soft plaster, staining, or hollow spots and test layers by scratching. Fix the source, repair and prime properly, then repaint with compatible products and ventilation. Keep going and you’ll find clear steps for diagnosis, repair, and prevention.
Quick Answer: Why Paint Peels From Walls
If your paint’s flaking, it’s usually because the surface beneath couldn’t hold it—moisture, dirt, poor adhesion, or incompatible layers break the bond between paint and wall.
You’ll most often see peeling where paint adhesion failed: dampness pushes the film away, grime prevents bonding, or a new paint won’t marry an old layer due to surface compatibility issues.
You can stop further damage by identifying and fixing the underlying cause—drying out wet areas, cleaning and deglossing, or removing incompatible coatings—then priming and repainting with compatible products so your finish lasts.
How to Tell If It’s Paint or Plaster (Diagnosis)
Wondering whether the flaky material is paint or plaster? Start with paint identification: scratch a small area—paint peels in thin, flexible sheets and often shows underlying primer or color layers.
Wondering if that flaky material is paint? Scratch a small area—paint peels in thin, flexible sheets revealing layers beneath.
Rub gently; paint feels smooth and may chip cleanly. Check thickness: paint films are usually thinner than plaster.
For plaster characteristics, look for brittle, powdery fragments, granular texture, and irregular edges that crumble to dust.
Tap the wall; hollow sounds or hard, dense spots suggest plaster over lath or drywall.
Use a magnifier to inspect edges: paint layers sit atop surfaces, plaster composes the substrate.
Common Cause: Moisture and Water Damage
When moisture gets into a wall—whether from a leaky pipe, roof drip, or high humidity—it breaks the bond between paint and substrate and makes the finish lift and flake. You’ll spot peeling, staining, or soft plaster where water damage occurred. Use moisture detection tools and visual checks to find wet spots, then fix the source before repairing paint. Drying, treating mold, and using proper primers prevent recurrence. Quick action saves you time and cost.
| Sign | Cause | Action |
|---|---|---|
| Peeling | Leak | Repair pipe |
| Stain | Roof drip | Patch roof |
| Soft drywall | Rising damp | Dry and treat |
Common Cause: Condensation and Poor Ventilation
You’ll often spot paint peeling where condensation collects, like along window sills and cold bridge wall spots.
If your bathroom lacks adequate ventilation, steam can saturate paint and cause it to flake.
Check these areas first to see if poor airflow or temperature differentials are the real problem.
Moisture Buildup Near Windows
If cold glass meets warm indoor air, moisture will condense on window frames and nearby walls, and that dampness can soften paint and make it peel over time.
You’ll notice bubbling or flaking where condensation regularly forms. Improve moisture control by using dehumidifiers, keeping indoor temperatures steady, and wiping visible dampness promptly.
Check window sealing for gaps that let cold air meet warm interiors; reseal or add weatherstripping where needed. Ascertain curtains don’t block airflow, and consider trickle vents or periodic window airing to reduce buildup.
Addressing these spots prevents recurrent paint failure and protects trim and drywall from long-term damage.
Inadequate Bathroom Ventilation
Areas around windows often show what poor air circulation can do, and bathrooms are another common hotspot for the same problem.
When you shower, trapped steam raises bathroom humidity, causing condensation on walls and ceilings. That repeated moisture softens paint, breaks adhesion, and eventually leads to flaking.
You can prevent damage by adopting ventilation solutions: install or upgrade an exhaust fan, run it during and after showers, and keep doors or windows ajar to boost airflow.
Also use moisture-resistant paint and fix leaks promptly. Monitor humidity with a hygrometer so you act before paint starts to fail.
Cold Bridge Wall Spots
When cold structural elements meet warm interior air, condensation can form on those “cold bridges” and weaken paint until it flakes; you’ll often spot these damp patches where wall studs, window frames, or balconies penetrate the building envelope. You’ll notice thermal bridging lowers local wall temperatures, causing moisture to condense and compromise coatings. Address insulation issues and improve ventilation to raise wall temperatures and prevent repeat flaking. Also check paint compatibility with humid areas; some finishes resist moisture better. Quick fixes: seal gaps, add insulation, or use breathable, moisture-tolerant paint to break the condensation–flaking cycle.
| Problem | Cause | Solution |
|---|---|---|
| Damp spot | Thermal bridging | Add insulation |
| Recurrence | Insulation issues | Improve ventilation |
| Flaking paint | Low wall temperatures | Use compatible paint |
| Mold risk | Condensation | Seal and dry surfaces |
Common Cause: Applying Paint Over Glossy or Incompatible Coatings
Though glossy and other nonporous coatings look durable, they can prevent new paint from bonding properly to the wall. When you paint over glossy coatings or other incompatible surfaces, the new layer may only cling superficially and later flake off.
You should identify the existing finish—high-gloss, enamel, varnish, or certain oil-based paints—and avoid assuming adhesion. Light sanding or using a suitable deglosser improves mechanical grip; primers formulated for slick or hard-to-bond substrates create a chemical bridge.
Match primer type to the old coating, and test a small area before repainting the entire wall to prevent failures.
Common Cause: Poor Surface Preparation
If you skip cleaning, sanding, and repairing the wall before painting, the new coat won’t adhere properly and will start to flake.
You need proper surface cleaning to remove dust, grease, and loose material. Sand rough spots and fill cracks so paint bonds evenly.
Don’t assume paint will stick to every surface without prep. Use primer application on bare plaster, patched areas, or stained spots to create a uniform base and improve adhesion.
Follow these steps to avoid peeling:
- Clean thoroughly (degrease, rinse, dry).
- Sand and repair imperfections.
- Apply appropriate primer evenly before painting.
Common Cause: Low‑Quality or Aged Paint Failure
Even with proper prep and priming, your paint can still fail if it’s old or cheap; inferior formulas and degraded coatings lose adhesion and flexibility, causing cracking and flaking.
You’ll notice thin, powdery film or large sections peeling where paint quality was poor or the paint lifespan exceeded recommendations.
Low-cost paints often lack binders and elasticity, so they can’t endure humidity, cleaning, or temperature swings.
To fix it, strip loose areas, sand to a sound substrate, and use a high-quality primer and durable topcoat matched to the room.
Tracking purchase dates helps avoid using paint past its lifespan.
Common Cause: Structural Movement and Cracking
When your home shifts—from settling foundations, seasonal joist movement, or temperature-driven expansion and contraction—the paint on walls and ceilings can crack and flake where the substrate flexes.
You should monitor signs of movement because compromised structural integrity makes paint failure likely. Do a quick crack assessment: note width, length, and whether cracks widen over time.
Monitor movement closely—document crack width, length, and any widening, since structural issues often precede paint failure.
Repair loose plaster or drywall tape, reinforce framing if needed, and use flexible fillers and primers before repainting. Prevent recurrence by addressing moisture and load issues influencing movement.
Prioritize structural fixes over cosmetic touch-ups to guarantee lasting paint adhesion.
- Measure cracks
- Stabilize structure
- Use flexible repairs
Where Exterior Paint Fails and Why
Moving from interior movement issues to the outside, exterior paint faces a different set of stressors that make failure more likely.
You’ll notice environmental factors like UV, moisture, and freeze-thaw cycles accelerate wear; weather impact and seasonal changes force expansion and contraction.
Poor surface conditions — dirt, mill glaze, or residual moisture — undermine adhesion.
Skip proper prep techniques or use incompatible primers and coatings, and material compatibility problems appear.
Incorrect application methods, thin films, or wrong drying windows reduce paint longevity.
Even intact structural integrity won’t save you if substrates move or shed moisture; address substrate, prep, and methods to prevent failure.
Where Interior Paint Fails and Why
Although interior walls don’t face UV and freeze-thaw cycles, they still fail for predictable reasons tied to moisture, surface prep, and building movement.
Interior walls avoid UV and freeze-thaw yet still fail for predictable reasons: moisture, poor prep, and building movement.
You’ll notice peeling where paint adhesion was compromised by damp, incompatible primers, or dirty substrates. Indoor environmental factors like humidity swings and poor moisture management shorten paint lifespan.
Incorrect application techniques—too thick coats, wrong drying time, or incompatible product layering—also cause failures. Movement at joints and settling creates stress that paint can’t bridge if elasticity is wrong.
- Moisture and humidity
- Surface compatibility and prep
- Application techniques and building movement
Inspect and Diagnose the Root Cause Step‑by‑Step
You’ve seen where and why paint fails—now inspect methodically to find the specific cause.
Walk the room, note flaking patterns, and check moisture with a meter or by touch; rising damp, leaks, or condensation show where to focus.
Probe adhesion by gently scraping edges to see if paint peels from old layers, bare plaster, or glossy finishes.
Inspect substrate integrity—cracks, efflorescence, or loose plaster indicate deeper repair needs.
Record findings and match them to appropriate Surface Treatments and Preventive Measures: sealing, priming, or improving ventilation.
That diagnostic list guides targeted repairs and prevents repeat flaking.
Tools & Materials for Repairing Flaking Paint (Interior & Exterior)
You’ll want a compact kit of basic repair tools—scrapers, sandpaper, putty knives, a wire brush, and a reliable caulk gun—to remove loose paint and prep surfaces.
Pick appropriate paint and surface materials next: primer suited to the substrate, quality interior or exterior paint, patching compound, and rust- or mildew-resistant products as needed.
With the right tools and materials, you’ll make repairs that last.
Basic Repair Tools
A few basic tools will make fixing flaking paint faster and give you a professional result: gather essential tools and learn basic repair techniques before you start.
You’ll want durable, multipurpose items that suit interior and exterior work.
- Sandpaper (various grits), putty knife, and scraper — for removing loose paint and feathering edges.
- Patch compound, filler knife, and drying adhesive — to repair substrate gaps and guarantee adhesion.
- Primer, brushes/rollers, and drop cloths — to seal repaired areas and apply finish cleanly.
Use these tools correctly and you’ll streamline repairs and improve long-term durability.
Paint & Surface Materials
Now that you’ve lined up the right tools, pick the paint and surface materials that match the job—interior and exterior surfaces demand different formulations and preparatory products.
You’ll choose paint types based on location: acrylic latex for exteriors, washable acrylic or low-VOC for interiors. Match primers to substrate—stain-blocking, bonding, or masonry primers as needed.
Consider surface textures: smooth drywall needs light sanding and primer; rough stucco or wood needs fill and flexible exterior paint. Use caulk, patching compound, and rust-inhibitor where required.
Store materials properly and follow manufacturer instructions to prevent future flaking.
How to Remove Flaking Paint Safely and Effectively
Before you start scraping, protect the area and yourself: wear a dust mask or respirator, safety goggles, and gloves. Lay down drop cloths, and ventilate the room to reduce dust and fumes.
Use proper paint removal methods: loosen flaking paint with a putty knife or scraper, apply a chemical stripper if needed, and collect debris carefully.
Follow safety precautions for lead: test older paint, wet surfaces to limit dust, and bag waste. Finish by wiping with a damp cloth.
- Scrape loose paint gently.
- Use chemical strippers cautiously.
- Contain and dispose of debris safely.
Prepare and Sand Surfaces to Prevent Peeling
Prep and sand the surface thoroughly to give new paint something solid to grip to.
You should begin with surface cleaning to remove dust, grease, and loose particles—use a mild detergent, rinse, and let dry.
Inspect for old, flaky paint and use proper sanding techniques: start with medium-grit to level edges, finish with fine-grit for a smooth profile.
Wear a mask and work in good ventilation.
Wipe away sanding dust with a tack cloth before priming.
Proper prep prevents adhesion failures and reduces future peeling, so take time now for a durable, long-lasting finish.
How to Repair Damaged Plaster, Drywall, and Surfaces
Start by evaluating the extent of the damage so you know whether you’re dealing with small cracks, holes, or crumbling plaster.
Clean and prep the area by removing loose material and dust to guarantee patches will bond.
Then apply the appropriate patching compound and sand smooth before priming and repainting.
Assess Surface Damage
To assess surface damage, inspect the whole area for cracks, holes, bubbling, and loose or powdery plaster or drywall—these signs tell you what repair method and materials you’ll need.
For effective surface assessment and damage identification, note size, depth, and whether moisture or mold is present. Photograph areas for reference and mark boundaries of flaking paint.
- Small hairline cracks — monitor and later fill.
- Holes or large cracks — need patching and reinforcement.
- Soft, powdery, or wet areas — address moisture source before repair.
Use your notes to choose the correct repair path without skipping steps.
Prep And Patch
Gather the right tools and materials before you touch the wall so repairs go quickly and the new paint will bond properly. Do a surface inspection and moisture assessment, then follow a prep checklist: surface cleaning, sanding, and priming to improve paint adhesion. Use proper tool selection and proven repair methods for plaster or drywall. Apply patch techniques—fill, feather, and sand—then match texture before paint layering. Work methodically and let layers dry fully for durable results.
| Task | Material | Tip |
|---|---|---|
| Clean | Cleaner/cloth | Remove dust |
| Patch | Joint compound | Feather edges |
| Finish | Primer/paint | Match texture |
Fixing Underlying Moisture Problems Before Repainting
Before you repaint, you’ve got to identify and stop the moisture source so new paint won’t peel again. You’ll use moisture detection tools and simple inspections—look for stains, soft drywall, or musty smells.
Before repainting, find and stop the moisture source—inspect for stains, soft drywall, or musty odors first.
Once identified, prioritize repair techniques that eliminate water intrusion rather than just covering damage.
- Fix leaks: repair roof, flashing, or plumbing immediately to stop ongoing moisture.
- Improve ventilation: add vents, fans, or dehumidifiers to lower indoor humidity.
- Replace damaged materials: remove and replace moldy or crumbling drywall and insulation before repainting.
Addressing moisture first guarantees your repainting lasts.
Choosing the Right Primer for a Flaking‑Paint Repair
1 good primer can make or break a flaking‑paint repair, so choose one that matches the surface and the problem—stain‑blocking primers for water or smoke damage, rust‑inhibiting for metal, and high‑adhesion or bonding primers for glossy or chalky surfaces.
You’ll evaluate substrate porosity, previous coating, and expected exposure, then pick among oil‑based, latex, shellac, or specialty primers.
Follow proper application techniques: clean and sand, remove dust, apply thin even coats, and respect dry times. Use a brush for edges and a roller for flats, and avoid over‑thinning.
Correct primer types and methods guarantee lasting adhesion.
Picking Paint That Resists Future Peeling
After you’ve chosen and applied the right primer, pick a paint system that complements it and resists the causes of peeling—moisture, poor adhesion, and substrate movement.
You’ll want coatings engineered for adhesion and flexibility; modern paint technology offers acrylic blends and elastomeric options that tolerate movement and block moisture.
Look for low-VOC, mold-resistant formulas when humidity’s an issue. Prioritize brands with guarantees and test samples on problem areas to confirm bonding.
- Choose acrylic or elastomeric for flexibility and adhesion.
- Select mildew-resistant, moisture-blocking finishes.
- Verify compatibility with your primer and substrate.
Correct Painting Techniques and Application Tips
When you’re ready to paint, work methodically and use the right tools so each coat bonds and lays down smoothly; you’ll control humidity, sand lightly, clean the wall, and follow recommended dry times. Use correct paint application: load brushes and rollers evenly, maintain a wet edge, and apply thin, uniform coats. Don’t skip surface priming—primer seals porous areas and improves adhesion. Address edges and trim first, then fill large areas. Check for runs and back-brush as needed. Below is a quick guide:
| Task | Tip |
|---|---|
| Sanding | Use fine grit |
| Priming | Seal stains |
| Rolling | Even pressure |
Estimated Cost & Timeline by Repair Type (DIY vs Pro)
Although small touch-ups can be quick and cheap, larger flaking repairs vary a lot in time and price depending on cause and method: expect DIY fixes (simple sanding, priming, repainting) to cost $10–$75 in materials and take a few hours to a day, while professional repairs for underlying issues like moisture damage or plaster replacement can run $200–$1,200+ and take one to several days or longer if drying or structural work is needed.
You should weigh DIY Repair Costs against Professional Repair Estimates, using Material Pricing Insights and Labor Cost Analysis to judge Repair Complexity Levels and Timeframe Comparisons.
- Simple DIY: $10–$75, hours–day.
- Moderate: $75–$400, 1–3 days.
- Complex/pro: $400–$1,200+, days–weeks.
When to Call a Pro: Signs You Need a Contractor
If you notice cracks in the wall, bulging plaster, or crumbling drywall, call a contractor—those are signs of visible structural damage that need a professional assessment.
If paint keeps flaking because of recurring damp spots, mold, or a musty smell, persistent moisture problems often indicate leaks or poor ventilation that pros should fix.
Don’t wait until the damage worsens; getting an expert in early can prevent bigger repairs.
Visible Structural Damage
Because serious paint failure can signal deeper issues, you should look for visible structural damage before deciding on a DIY fix.
You’ll want a structural assessment if you spot bowed studs, large cracks, or crumbling plaster that threaten wall integrity. These issues shorten paint lifespan and undermine paint adhesion, so call a pro rather than patching cosmetic flakes.
- Large cracked surfaces or gaps needing specialized repair methods.
- Shifting walls, sagging trim, or compromised wall integrity.
- Evidence of past repairs, uneven paint, or failing joints suggesting broader problems.
A contractor will combine moisture assessment with structural fixes for lasting damage prevention.
Persistent Moisture Problems
When moisture keeps returning despite basic fixes, you’ll need a contractor who can pinpoint hidden leaks and correct underlying causes rather than just repainting. You should call a pro if you see recurring flaking, mold, or damp smells. A contractor assesses water drainage, exterior sealing, and wall insulation, installs moisture barriers, and advises ventilation solutions and humidity control. They’ll recommend paint additives only after fixing sources. Look for documented mold prevention plans and permits for structural work. Table shows common actions and goals.
| Issue | Action | Goal |
|---|---|---|
| Exterior leaks | Exterior sealing | Stop water entry |
| Poor airflow | Ventilation solutions | Reduce humidity |
| Cold walls | Wall insulation | Prevent condensation |
Simple Prevention Tips to Keep Paint From Peeling Again
Prevent paint from peeling again by addressing the causes before you coat: clean and dry surfaces, fix moisture problems, sand glossy areas, and use the right primer and paint for the substrate.
You’ll extend finish life with simple preventive maintenance and surface protection routines. Keep humidity controlled, repair leaks promptly, and guarantee good ventilation while drying.
Follow manufacturer instructions for primers and paints matched to drywall, wood, or metal.
Prep thoroughly to avoid adhesion failure and schedule periodic inspections to catch issues early.
- Inspect and fix moisture sources.
- Clean, sand, and prime properly.
- Use quality paint and ventilate.
Common Mistakes to Avoid When Repairing Peeling Paint
When you repair peeling paint, don’t skip proper surface prep—loose flakes and dirt will make new paint fail fast.
Make sure you’re using the right paint for the surface and conditions, or adhesion and durability will suffer.
Also track down and fix any moisture sources before repainting, since damp walls will just cause more peeling.
Skipping Proper Surface Preparation
Surface prep sets the stage for any lasting paint job, and skipping it’s the most common reason repairs fail. You’ll waste time if you don’t remove loose flakes, dust, and contaminants.
Use proper surface cleaning techniques and consider simple adhesion testing so you know the substrate will hold new paint. Sand, scrape, and degrease where needed; patch and prime bare spots. If you rush this step, the new layer will lift again.
- Clean thoroughly with recommended solutions.
- Sand and smooth edges before priming.
- Perform adhesion testing on a small area first.
Using Wrong Paint Type
Even after you’ve cleaned, sanded, and primed, choosing the wrong paint can undo all that work. You’ll want paint formulated for the surface: interior vs. exterior, wood, drywall, or metal each need different binders for adhesion and paint durability.
Mixing oil-based over latex, or vice versa, harms paint compatibility and leads to cracking or peeling. Match finish and substrate, follow manufacturer recommendations, and use a quality primer that’s compatible with your topcoat.
When you pick the correct type, you’ll extend the life of repairs and avoid redoing flaky patches sooner than necessary.
Neglecting Moisture Sources
If you ignore moisture sources, your repair will fail no matter how well you prep and paint.
You must track leaks, condensation, and rising damp so moisture doesn’t undermine paint adhesion. Fix plumbing, improve ventilation, and seal exterior gaps before repainting. Otherwise new paint will blister and flake.
- Inspect for leaks: check pipes, roofs, and window seals.
- Control humidity: install vents or dehumidifiers in bathrooms and basements.
- Treat rising damp: repair foundation drainage and use appropriate barriers.
Handle the root moisture sources first, and your paint adhesion improvements will last rather than peeling away.
How to Use This Guide: Quick Steps to Fix Peeling Paint
Before you start, gather the basic tools and materials—scraper, sandpaper, primer, paint, drop cloths, and safety gear—so you won’t stop mid-job.
Work room by room: remove loose paint, sand edges smooth, clean dust, and wipe with a damp cloth. Match paint types and use appropriate primer for adhesion.
Follow repair techniques: patch holes, feather edges, and allow proper drying between coats. Apply thin, even layers and inspect for missed spots.
Clean up carefully and ventilate until fully cured. Keep notes on causes and fixes for future prevention and quicker repairs next time.
Frequently Asked Questions
Can Paint Flakes Pose a Health Risk to Pets or Children?
Yes — you should worry: paint flakes can cause paint toxicity if ingested, especially with old lead paint. You’ll prevent exposure by supervising kids/pets, cleaning flakes promptly, and using flaking prevention measures like sealing and repainting.
Can Wallpaper Removal Cause Paint to Flake Unexpectedly?
Yes — you’ll cause paint to flake if wallpaper types and removal techniques aren’t matched: heavy paste or vinyl can pull poorly bonded paint, while gentle steaming or scoring with proper prep helps protect underlying paint from unexpected peeling.
Will Paint Flaking Lead to Mold Growth if Left Untreated?
Absolutely — if you ignore flaking paint, it can invite mold growth like an open door; you’ll need mold prevention and moisture control, or spores’ll thrive in damp, peeling areas and worsen structural and health problems.
How Long After Repairs Should I Wait Before Hanging Pictures?
Wait about 24–72 hours after repairs before picture hanging; repair timing depends on compound and paint drying. If you used quick-dry products you can hang sooner, but heavier patching and primer usually need full curing for secure hanging.
Can Humidity Sensors Prevent Future Interior Paint Peeling?
Yes — if you’re lucky, a sensor will catch spikes before damage. You’ll use humidity control data to adjust ventilation and drying, which helps preserve paint adhesion and prevent future peeling.
Conclusion
Peeling paint can feel like a small mess or a big warning light — don’t ignore it. You can often fix the problem by diagnosing moisture, sanding glossy finishes, and priming before repainting, but call a pro if mold, widespread damage, or structural issues show up. Take simple prevention steps and avoid common repair mistakes to keep walls looking sharp. Like a stitch in time, a little care now saves a lot of work later.