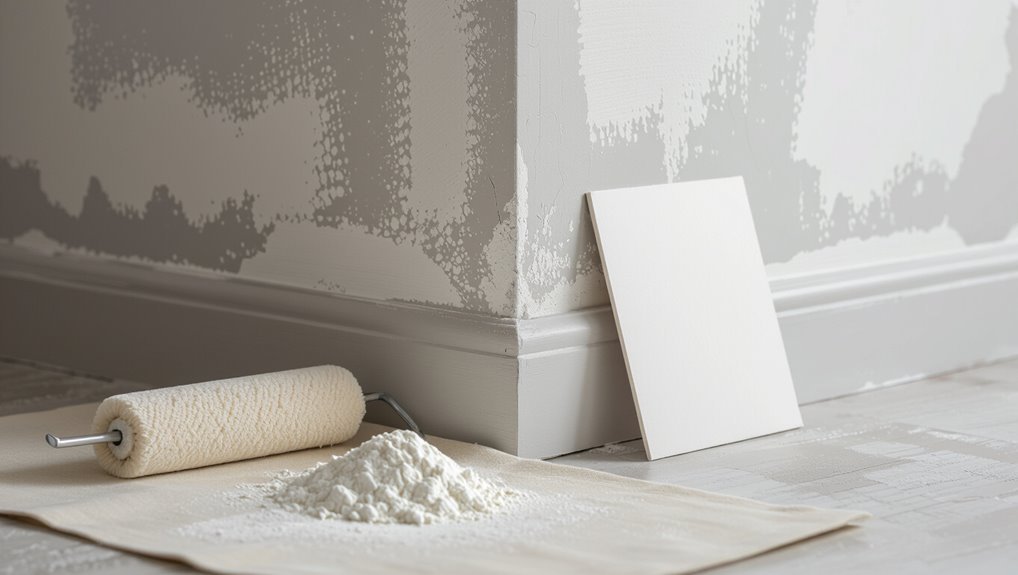
Why Is the Paint on My Walls Powdery? Causes and Solutions
If the paint on your walls feels powdery, it usually means the binder has broken down from sun, moisture, or chemical attack and the pigment’s rubbing off. You can check by wiping with a damp cloth, doing a tape or scrape test, and looking for leaks, salts, or failed primer. Clean, prime with a high-adhesion primer, then repaint; use breathable coatings on masonry and control humidity. Keep inspecting surfaces to catch issues early and learn practical fixes ahead.
Why Paint Becomes Chalky : Quick Answer
Anything left on your walls that rubs off as a fine powder means the paint has chalked—its binder broke down and the pigment grit is loose.
You’re seeing paint texture change from smooth to dusty as UV, weather, or poor formulation cause surface deterioration.
That powder signals lost adhesion and protection; you’ll need to address the weakened coating rather than repaint over the dust.
Quick Triage: What to Try First
First check for white, powdery salt stains on masonry—efflorescence needs fixing at the source before repainting.
Then do a simple adhesion test by pressing and rubbing a piece of clear tape or using a putty knife to see if the paint flakes off.
Those quick checks tell you whether you’ve got moisture salt issues or failing paint so you can plan the proper repair.
Check For Efflorescence
Wondering whether those powdery spots are efflorescence? Check for efflorescence identification by wiping a damp cloth: if white salt appears, you’ve got wall moisture migrating through masonry. Address moisture sources before repainting.
| Sign | Test | Action |
|---|---|---|
| White powder | Damp cloth wipe | Investigate leaks |
| Location | Near base/surface | Improve drainage |
| Repeat | Reappears after cleaning | Consult waterproofing |
Test Paint Adhesion
Before you repaint, do a quick adhesion check so you don’t waste time covering up failing paint.
Press a strip of painter’s tape firmly, then pull it off fast. If loose powder or paint comes away, paint adhesion has failed.
Scrape and sand to solid substrate, clean thoroughly, and focus on proper surface preparation before priming and repainting for a lasting finish.
Common Weathering & UV Damage That Causes Chalking
When sunlight and moisture repeatedly hit exterior paint, the binder that holds pigment particles breaks down and releases a fine, powdery residue called chalking.
You’ll notice faded color, surface powder, and loss of gloss from weathering effects and prolonged UV exposure.
You can remove chalking, prep the surface, and choose UV-resistant coatings to restore protection and prevent rapid recurrence.
How Moisture and Humidity Lead to Chalking Indoors and Out
If humidity stays high or water keeps finding its way into paint layers, the binders that hold pigment particles will soften and break down, releasing the fine, powdery residue you see as chalking.
You can limit this by managing moisture control and monitoring humidity levels indoors and out.
- Ventilate bathrooms and kitchens
- Repair leaks promptly
- Use dehumidifiers where needed
- Choose breathable paints
- Guarantee exterior drainage
How Alkaline Masonry and Stucco Promote Chalking
When you paint over alkaline masonry or stucco, the high pH can attack the paint’s binder and weaken its film.
As that binder breaks down, pigment and binder particles release as a powdery residue.
You’ll also see surface salts migrate through the coating, accelerating chalking and staining.
High pH Effects
Because masonry and stucco naturally leach alkaline salts, they raise the surface pH of adjacent paint and speed binder breakdown, producing that powdery chalk you see.
You’ll notice how high pH effects force pigment and binder to degrade; alkaline paint streaks and dust form.
Consider these steps:
- Test surface pH
- Neutralize before painting
- Use masonry-rated primers
- Select alkali-resistant coatings
- Regularly inspect for efflorescence
Paint Binder Breakdown
Although alkaline salts don’t attack pigment directly, they break down the paint’s binder—the polymer “glue” that holds pigment particles to each other and to the wall—so you end up with fine, powdery chalk.
You’ll see reduced paint longevity when binder types like acrylic or vinyl degrade on masonry or stucco.
Choose alkali-resistant binders and proper primers to slow binder breakdown and prevent chalking.
Surface Salt Migration
If your masonry or stucco contains soluble alkaline salts, they’ll migrate to the surface with moisture and leave behind a powdery residue as the water evaporates.
You can prevent and treat this by controlling moisture, using proper surface treatment, and installing moisture barriers when needed.
- Identify efflorescence early
- Dry and clean affected areas
- Apply breathable primers
- Use sacrificial washes
- Add moisture barriers
Signs Chalking Is Due to Poor Adhesion
When chalking comes from poor adhesion, you’ll notice the powder lifts off in thin layers or patches rather than rubbing away evenly, and paint flakes or peels near edges, trim, and high-friction spots.
You’ll also see uneven color, bare substrate showing through, and rapid deterioration after cleaning.
These chalking causes point to adhesion issues requiring surface prep, primer, or repainting with compatible products.
Do a Simple Tape Test to Check Adhesion
To quickly check whether chalking is caused by poor adhesion, try a simple tape test: press a strip of strong adhesive tape firmly onto a small area of paint, smooth it down, then pull it off sharply and inspect the tape for lifted paint and the surface for bare spots.
- Use heavy-duty tape
- Test several spots
- Note tape adhesion level
- Look for adhesion failure
- Record results for repair planning
Do a Solvent Rub to Confirm Chalking vs. Other Deposits
Although a tape test shows loose paint, you should do a solvent rub to tell chalking from dirt, mildew, or other surface deposits; dampen a clean white cloth with mineral spirits or denatured alcohol, rub a small inconspicuous area firmly, and check whether pigment wipes off onto the cloth.
| Step | Result |
|---|---|
| Solvent types | Mineral spirits/denatured alcohol |
| Rub action | Firm circular motion |
| Chalking indicators | Powder transfers to cloth |
| Next | Note area, plan cleaning or repainting |
How to Tell Chalk From Mold or Dirt
You can usually spot the difference by looking at texture: chalking is powdery and evenly worn, while mold or dirt often looks patchy, fuzzy, or stained.
Try a simple spot test—wipe the area with a damp cloth and then with a mild bleach solution if needed; chalk will smear and come off easily, while mold may resist and dye the cloth.
If you’re unsure after these checks, treat the area as contamination and clean or test further before repainting.
Visual Texture Differences
Sometimes what looks like mold is just chalky paint residue, and knowing the visual cues will save you time and worry.
You’ll judge by visual texture and overall surface appearance: look for powdery, uniform film versus fuzzy, irregular growth.
Check color consistency, edge definition, transfer when rubbed, and whether it follows moisture patterns.
- powdery
- fuzzy
- uniform
- irregular
- transferable
Simple Spot Tests
If visual checks leave you unsure, do a couple of quick spot tests to tell chalky paint from mold or dirt.
Rub a damp white cloth over a small area: chalk will leave residue, mold may smear darkly and have texture, dirt wipes away easily.
For a more precise chalk assessment, scrape gently with a fingernail; chalk smudges, mold resists and may smell musty.
How Paint Chemistry Affects Chalking: Resins Explained
Because the binder in paint determines how tightly pigment particles stay bound, the resin chemistry plays the biggest role in whether a surface will chalk.
You’ll notice different resin types and binder formulations resist weathering differently. Consider these factors:
- polymer flexibility affects abrasion resistance
- crosslinking degree changes durability
- UV stability limits breakdown
- additive compatibility matters
- pigment dispersion influences surface loss
Oil vs. Latex: How Finishes Age Differently
While both oil-based and latex paints aim to protect and beautify surfaces, they age in distinct ways because of their different binders and solvent systems. You’ll notice oil paint aging shows yellowing and hard film cracking; latex paint aging tends toward chalking and pigment loss. Compare traits below:
| Finish | Typical aging signs |
|---|---|
| Oil | Yellowing, embrittlement |
| Latex | Chalking, fading |
| Both | Dirt pickup, loss of sheen |
Pigment and Filler Ratios: Why Some Paints Chalk More
When you look at a paint label, the balance between pigments and fillers tells you a lot about how it’ll hold up: higher pigment concentration gives better color and binding, while heavier use of inexpensive fillers like calcium carbonate increases the tendency to chalk as the binder weathers and releases pigment particles to the surface.
- Check pigment ratios for durability
- Note common filler types listed
- Higher pigments mean less chalk
- Fillers reduce cost, increase dusting
- Choose paints with stronger binder and richer pigment ratios
Low‑Quality Paint and Formulation Problems That Cause Dusting
Low-quality paints break down faster and leave you with a dusty, chalky finish because manufacturers cut corners in the formulation.
You’ll notice formulation issues when poor binder types and cheap pigments accelerate aging effects. Pay attention to paint quality and surface preparation to reduce chalking causes.
Chemical interactions and moisture impact also speed dusting, so choose better products and control humidity to limit degradation.
How Incompatible Paint Layers Create Powdery Finishes
If you’ve painted latex over old oil-based paint without proper prep, you’ll often get a powdery finish as the two systems won’t bond.
The chemical mismatch can cause the new coat to flake, chalk, or break down prematurely.
You’ll need to identify the layers and use the right primer or removal method to fix it.
Old Oil Under New Latex
Although oil-based paints once dominated interior walls, they don’t play well with modern latex coatings. That mismatch often leaves new paint with a powdery, failing surface.
You’ll spot adhesion loss when oil bonding is poor and paint compatibility is ignored. Address it by identifying the old layer, prepping properly, and choosing the right primer.
- Inspect surface
- Sand glossy oil
- Degrease thoroughly
- Use bonding primer
- Repaint with latex
Chemical Reaction Between Coats
When you layer incompatible paints, their binders and solvents can react at the interface and break down the film, producing a powdery, chalk-like residue that flakes away instead of forming a continuous coating.
You should check chemical compatibility before paint layering; if coatings clash, they’ll prevent proper adhesion and cure.
Strip or prime to restore a stable surface and avoid recurring powdery failures.
How Old Lead or Legacy Finishes Affect Chalking and Safety
Curious about why that chalky residue feels more concerning on older walls? You’ll want to treat it seriously: lead paint in legacy finishes can amplify chalking effects and pose safety risks, especially where flakes or dust form.
Curious about chalky residue on old walls? Treat it seriously—lead paint can worsen chalking and create hazardous dust.
- Test for lead paint
- Avoid sanding dry surfaces
- Contain dust when cleaning
- Use proper PPE
- Consult abatement pros
How Improper Surface Prep (Dirt, Oils, Wax) Causes Chalking
If you skip proper cleaning before painting, dirt, oils, and wax on the surface will prevent paint from bonding and lead to that powdery, chalk-like breakdown over time.
You’ll notice chalking where surface contaminants block adhesion. Use appropriate cleaning methods—degreasers, trisodium phosphate, or solvent wipes—then rinse and dry.
Proper prep removes residues so paint adheres and chalking is minimized.
Oversanding, Overflashing, and Surface Damage That Produces Powder
If you sand too aggressively you can strip paint binders and leave a weak, powdery surface.
Repeated flashing from metal edges or high-traffic rubbing will wear the coating down and create fine dust.
Even light surface abrasion over time can break the paint into powder that won’t adhere properly.
Excessive Sanding Damage
When you sand a painted surface too aggressively or with the wrong grit, you can strip away the binder that holds pigment and create a fine, powdery residue.
Oversanding, overflashing, and other surface damage all weaken the paint film and leave behind dust that won’t rebind to the wall.
- Check sanding techniques and grit choice
- Avoid excessive pressure or speed
- Clean dust thoroughly after surface preparation
- Spot-sand instead of broad sanding
- Reprime areas with exposed binder
Flashing-Induced Paint Wear
Oversanding and sloppy prep don’t just strip binder—they can cause flashing, where edges and low spots dry differently and create weak, powdery areas that shed under touch.
You’ll notice uneven sheen and dusty streaks near trim or corners.
For lasting flashing repairs, gently remove loose powder, feather edges, and spot-prime before repainting.
Regular paint maintenance prevents recurrence and preserves finish.
Surface Abrasion Problems
Because aggressive sanding, overflashing, and other surface damage remove the paint’s binder and roughen the film, you’ll end up with dusty, powdery areas that keep shedding under touch.
- Check prior surface treatment for improper sanding grit.
- Note abrasion effects from tools or heavy traffic.
- Avoid overflashing that strips primer and paint.
- Rehabilitate by cleaning, sealing, and recoating.
- Use gentler prep and correct primers to restore durability.
Why Too‑Thin Paint Films Fail and Chalk
If you apply paint too thinly, it won’t form a continuous, protective film and will dry into a weak, powdery layer that rubs off easily. You need correct paint application and adequate film thickness to resist chalking and abrasion. Check coverage, apply proper coats, and sand lightly before recoating.
| Cause | Effect | Fix |
|---|---|---|
| Thin coat | Chalks | Add coat |
| Low solids | Weak film | Use higher solids |
| Poor spread | Uneven | Improve technique |
How Temperature Extremes During Application Affect Finish
When you apply paint in temperatures that are too hot or too cold, the drying chemistry gets disrupted and the finish can become powdery, cracked, or uneven.
- You’ll notice temperature sensitivity in drying rate.
- Fast skinning traps solvents, causing chalk.
- Cold slows film formation, weakening binders.
- Poor application timing ruins cohesion.
- Avoid extremes to guarantee proper cure and durable finish.
Paint Storage, Age, and Chalking Risks
Temperature and application technique aren’t the only things that make paint go powdery — improper storage and old paint do it too. You’ll notice chalking from paint age effects and poor humidity control. Follow paint storage tips: keep cans sealed, store upright, avoid freezing. If paint’s past its life, replace it—chalking signals loss of binders and failing protection.
| Emotion | Evidence |
|---|---|
| Concern | Flaking |
| Relief | Fresh coat |
How to Inspect Paint Layers With a Moisture Meter
Because underlying moisture problems can wreck a fresh finish, you’ll want to check paint layers with a moisture meter before prepping or repainting.
Use a careful paint inspection to spot damp substrates and trapped moisture. Follow these quick steps:
- Calibrate the moisture meter.
- Test multiple spots and layers.
- Compare readings to acceptable limits.
- Note high-moisture areas.
- Delay painting until dry.
How Contamination Shows Up as Chalking : What to Look For
If dirt, oils, or mill glaze are left on a surface before painting, they’ll often show up later as a fine, powdery chalk that rubs off under your hand.
You’ll notice it most clearly on horizontal surfaces and around drip lines where contaminants collect.
During surface evaluation, look for localized chalky finishes, uneven gloss, tackiness, and residue when you wipe; these signs point to contamination rather than age.
How to Decide: Clean and Repaint or Remove Existing Paint
Check the paint’s adhesion by scraping or using tape to see if it flakes off easily.
If you spot deep blistering, cracks, or substrate damage, you’ll likely need to remove the coating rather than just clean it.
Also weigh your long-term goals—a quick repaint can mask issues short-term, but removal and proper prep give a more durable result.
Assess Paint Adhesion
When you rub a wall and the paint powders or flakes off, you need to quickly assess whether the coating is failing at the surface or has lost adhesion to the substrate; that determines whether you can clean and repaint or must remove and redo the finish.
Check adhesion with simple tests and consider paint quality and application techniques before deciding.
- scrape small area
- tape pull test
- solvent swab
- inspect edges
- note substrate type
Evaluate Surface Damage
You’ve already determined whether the paint is powdering at the surface or losing adhesion to the substrate; now decide whether to clean and repaint or remove the existing coat entirely.
For a quick surface evaluation, check for flaking, blistering, or soft spots. Use a scratch test and probe suspicious areas.
Your damage assessment should guide:
- minor chalking → clean and repaint;
- significant failure → strip and refinish.
Consider Long-Term Goals
Because your choice now affects future maintenance, think beyond a quick fix and weigh how long you want the job to last, how durable you need the finish to be, and how much time or money you’ll invest.
- Assess substrate stability for long term maintenance
- Estimate lifespan of repaint vs. removal
- Factor labor, materials, and costs
- Consider aesthetics and durability needs
- Use future planning to choose the best approach
How to Safely Clean Chalky Exterior Surfaces
Start by evaluating the extent of chalking so you can choose the right cleaning method and protect surrounding plants and surfaces.
For chalky surfaces, test a small area.
Use soft brushes, low-pressure washing, and mild detergent or trisodium phosphate solution as needed.
Rinse thoroughly, avoid harsh scrubbing that damages substrate, and let the wall dry fully before any repairs or repainting.
Prepare a Chalky Wall Properly for Repainting
After you’ve cleaned and rinsed away loose chalk, get the wall ready for repainting by correcting surface problems and creating a sound profile for new paint to adhere to.
Use simple preparation techniques and thorough wall cleaning before you proceed.
- Scrape flaking paint
- Sand rough areas
- Fill cracks and holes
- Degrease spots
- Re-rinse and let dry
Choose the Right Primer for Chalky Surfaces
Before you prime, test how chalky the surface is by rubbing a wet finger over a small area—if pigment comes off, you’ve got chalking to address.
For light chalk, a high-adhesion latex primer might work, but for heavy chalking you’ll want a specialty bonding primer formulated to stick to powdery surfaces.
Choose a primer rated for chalky or previously painted surfaces to guarantee your new paint adheres and lasts.
Assess Surface Chalkiness
If your paint rubs off on your hand or a cloth, you’ve got a chalky surface that needs special attention before priming.
Do a surface inspection to confirm chalky texture, then clean, test adhesion, and note problem areas. Use these steps to decide treatment before choosing a primer:
- Wear gloves and wipe test
- Scrub loose powder
- Rinse and dry
- Sand glossy spots
- Record affected areas
Select Bonding Primer
When a wall feels chalky, choose a high-quality bonding primer designed to lock down powdery residues and create a stable surface for topcoats.
You’ll want primers with proven bonding agents and clear instructions on surface compatibility. Test a small area, follow drying times, and sand lightly if needed.
Proper primer selection prevents re-chalking and guarantees your finish adheres evenly and lasts longer.
Pick Paints Formulated to Resist Chalking
Because chalking comes from pigment and binder breaking down, you’ll want paints that’re specifically formulated to resist that powdery breakdown.
Choose high-quality options to boost paint durability and ease maintenance; proper surface preparation still matters.
Look for:
- UV-resistant binders
- High-pigment load
- Flexible film-formers
- Manufacturer chalk-resistance ratings
- Good warranty and technical data sheets
Ensure Compatibility Between Existing and New Paint
Before you repaint, check whether the existing finish is water- or oil-based so you pick a compatible new paint.
Match the sheen level to avoid adhesion and appearance problems.
Do a small adhesion test patch to confirm the two paints bond well.
Check Paint Base Type
If you mix an oil-based primer with a latex topcoat, you’ll probably get poor adhesion, blistering, or a chalky finish—so always confirm whether the existing paint is oil or water-based before you start.
Check paint types and base materials to avoid reaction. Use simple tests or labels, then choose compatible products.
- Identify oil vs. latex
- Read product labels
- Use solvent test
- Match primer
- Spot test first
Match Sheen Levels
Once you’ve confirmed the paint base and picked a compatible primer, pay close attention to sheen—the level of gloss affects how the paint wears and how imperfections show.
Match existing sheen variations when repainting; mixing gloss, semi-gloss, satin, or flat can highlight powdery areas.
Choose the same paint types and sheen to guarantee uniform wear and appearance, minimizing noticeable texture differences.
Test Adhesion Compatibility
Because old and new paints can cling differently, you’ll want to test adhesion before rolling on fresh coats to avoid flaking or a continued powdery finish.
- Perform a small patch for adhesion testing.
- Clean and sand the test area.
- Apply the new paint and let it cure.
- Peel a tape strip to check bonding.
- Confirm paint compatibility or use a primer.
Application Tips to Prevent Future Powdering
Start by preparing the surface thoroughly: clean away dust, grease, and loose chalky paint with a detergent solution and a stiff brush, then rinse and let it dry completely.
Use proper application techniques—prime if needed, apply thin, even coats, and follow drying times.
Use correct application: prime when necessary, lay down thin, even coats, and respect recommended drying times.
Choose quality paint selection suited to substrate and exposure.
Maintain consistent temperature and humidity while painting to prevent powdering later.
How to Seal Alkaline Masonry Before Painting
If your walls are masonry or have a history of efflorescence, you’ll want to neutralize and seal the alkaline surface before painting to prevent poor adhesion and paint breakdown.
Use masonry preparation techniques and choose products emphasizing alkaline primer benefits.
- Test and clean the surface
- Rinse soluble salts
- Apply pH neutralizer
- Prime with alkaline-blocking primer
- Use compatible topcoat
Control Indoor Humidity and Ventilation to Stop Indoor Chalking
When indoor humidity stays high, paint binders can soften and release pigment as a powdery residue.
So control of moisture and fresh air is essential to stop indoor chalking.
You should use humidity control like dehumidifiers and exhaust fans, monitor with hygrometers, and adopt ventilation strategies such as opening windows, using timed fans during baths and cooking, and ensuring HVAC systems circulate air properly.
Fixes for Recurring Chalk Within 1–3 Years
If chalking returns within a few years, you’ll need to recoat the surface using a quality primer designed for chalky substrates to lock down loose material.
You should also find and fix any moisture issues—like leaks, poor ventilation, or rising damp—that keep the paint from adhering. Tackling both the primer and the moisture source stops the problem from coming back.
Recoat With Proper Primer
Because chalking often means the old paint’s binder has broken down, you should strip loose powder and recoat with a primer formulated for chalky surfaces to guarantee adhesion and long-term durability.
Use correct primer types and thorough surface preparation before recoating. Follow these steps:
- Remove powder with a stiff brush
- Clean with mild detergent
- Sand glossy areas
- Apply bonding primer
- Repaint with quality topcoat
Address Moisture Sources
Although chalking can follow normal wear, recurring powdery paint within a few years usually signals ongoing moisture problems you need to fix; locate and stop water sources—leaky roofs, poor flashing, clogged gutters, rising damp, or high indoor humidity—before you prime and repaint so the new finish will last.
Then address moisture sources: repair leaks, improve drainage, seal masonry, and install proper humidity control to prevent recurrence.
Estimate Repair Cost vs. Full Repaint
When deciding whether to repair powdery paint or redo the whole room, weigh the scope of damage against the time and money you’ll spend.
Small, localized chalking can often be fixed with cleaning, primer, and spot painting, while widespread deterioration usually justifies a full repaint.
- Get a repair estimate for spot fixes
- Compare repaint cost per room
- Include labor and materials
- Factor prep time
- Consider long-term durability
How to Hire a Contractor for Chalk Remediation
How do you find a contractor who actually knows how to handle chalking and won’t just slap on a coat of paint? Check contractor qualifications, ask for references, and get a clear project timeline before hiring. Use the table to compare bids:
| License | Experience | Timeline |
|---|---|---|
| Verified | 5+ years | 2 weeks |
| References | Chalking work | Written plan |
Maintain Painted Surfaces to Prevent Future Chalking
If you want painted surfaces to stay smooth and chalk-free, set up a simple maintenance routine you’ll actually follow: inspect yearly for chalking or wear, wash exterior walls gently after storms, and touch up compromised spots with compatible primer and paint.
- Check sealants and caulking
- Clear gutters and trim vegetation
- Repaint high‑traffic areas on schedule
- Use preventive maintenance logs
- Apply surface protection where exposed
Choose Cleaning Products That Won’t Damage Paint
Before you clean chalky paint, test any product on a hidden scrap or inconspicuous spot to make sure it won’t strip or discolor the finish.
Choose pH-neutral cleaners so you don’t break down the binder in the paint.
And skip steel wool or harsh scrubbers—use soft cloths or nonabrasive pads to avoid rubbing the surface thin.
Test Products On Scrap
When you’re choosing a cleaner, test it on a hidden scrap of the same painted surface first so you can see how it reacts without risking visible damage.
You’ll test surface reactions, evaluate products, and note color change, sheen loss, or residue. Use a small cotton swab, wait, and compare before treating the whole wall.
- Pick an inconspicuous scrap
- Apply minimal product
- Wait recommended time
- Blot, don’t rub
- Record results
Use pH-Neutral Cleaners
After you’ve tried cleaners on a scrap and seen how the paint reacts, pick a pH-neutral cleaner for the full job to avoid stripping binder or altering pigments. pH-neutral formulas (usually around pH 6–8) clean dirt and grime without the alkaline bite of many household detergents that can soften or powder paint films. Use proper pH balance for safe surface cleaning.
| Type | pH | Use |
|---|---|---|
| Mild soap | 7 | Light dust |
| Vinegar mix | 3 | Avoid |
| Commercial neutral | 7 | General |
| Specialty rinse | 6–8 | Final pass |
Avoid Abrasive Tools
If you want the paint to stay intact, don’t reach for scouring pads or coarse brushes—those abrasive tools can scrape away the binder and leave a dull, powdery finish.
You should avoid abrasive tools and choose gentle methods when cleaning.
Try soft cloths, microfiber, sponge, mild cleaner, and light pressure to preserve paint without causing more powdering.
- Soft cloths
- Microfiber
- Sponge
- Mild cleaner
- Light pressure
When Chalking Signals Structural Moisture Damage
Although chalking often comes from normal paint aging, it can also point to serious moisture problems inside your walls.
When you see heavy, persistent powdering—especially near joints, windows, or the base of exterior walls—treat it as a potential sign of structural moisture damage and investigate further.
Check moisture indicators like damp spots, efflorescence, or musty odors, and schedule a structural assessment to locate leaks and rot.
Monitor Paint Condition Over Time and When to Act
Heavy, localized chalking can signal moisture damage, but even mild powdering deserves attention because paint condition changes gradually—so you should monitor it over time to know when to act.
Even mild chalking can herald moisture issues—monitor surfaces over time so you know when repairs are needed.
- Note monitoring frequency: monthly after repairs, quarterly otherwise.
- Use assessment techniques: touch, visual records, moisture meter.
- Record changes and compare photos.
- Prioritize areas near leaks.
- Repaint or repair when powdering worsens or moisture persists.
Frequently Asked Questions
Could Chalking Be Harmful to Indoor Air Quality or Health?
Yes — you can inhale chalking particles, which may irritate lungs or trigger allergies; addressing chalking causes and practicing chalking prevention (cleaning, sealing, using low-VOC paints) will reduce indoor air quality and health risks.
Can Chalky Paint Affect the Resale Value of My Home?
Yes — chalking impacts resale considerations because buyers notice powdery, neglected finishes; you’ll lower perceived maintenance and curb appeal, which can reduce offers. Repainting or cleaning prevents devaluation and supports stronger sale negotiations.
Will Chalking Occur on Painted Furniture or Cabinetry?
Yes, chalking can occur on painted furniture or cabinetry. You’ll prevent it by using proper furniture paint types, sealing with durable topcoats, cleaning surfaces before painting, and following chalking prevention methods like primers and UV-resistant finishes.
Is Powdery Paint Covered by Homeowners Insurance?
Generally, no — insurance coverage usually won’t pay for powdery paint caused by wear or poor paint maintenance. You’ll need to show sudden, covered damage (like a storm) for a claim; otherwise you’ll handle repairs yourself.
Can Specialty Finishes (Metallic, Chalkboard) Chalk Differently?
Yes — specialty finishes like metallic or chalkboard can chalk differently; you’ll notice varying powderiness based on formulation, application, and paint durability, so you’ll need specific care and sealing to reduce chalking and preserve finish.
Conclusion
Now you know chalky paint usually means weathering, UV, moisture, or alkaline surfaces are breaking the binder down — but don’t panic. Start with a gentle wash and a quick adhesion test to see if it’s surface chalking or something worse. If cleaning reveals delicate paint or persistent powder, investigate moisture or substrate issues before repainting. Take note, because ignoring it can hide serious damage — and waiting to act could make the next fix far harder.