Can You Mix Latex and Enamel Paint? Compatibility Guide
You can sometimes mix latex and enamel for small touch-ups, but you’ll need careful testing and strict limits to avoid adhesion, sheen, and durability problems. Start with tiny batches, favor water-based enamel or add only 5–15% of the other type, and always test on panels for drying, gloss, and adhesion. Use a bonding primer when switching bases, sand glossy areas, and keep detailed labels. Continue for full guidance on techniques, primers, and troubleshooting.
What Search Intent Does This Guide Satisfy?
What’re you really looking for when you search “mixing latex and enamel paint”?
You’re after clear guidance that matches your intent—safety, technique, and outcomes—so you can decide quickly.
This guide’s structured content improves search engine optimization while focusing on user experience: concise headings, practical steps, and warnings that help you find trustworthy, actionable answers without wading through irrelevant theory.
Quick Answer: Can You Mix Latex and Enamel Paint?
You can mix latex and enamel, but compatibility basics matter: water-based latex won’t blend well with oil-based enamel without a proper intermediate.
You can use specific mixing methods like using a compatible primer or a commercial bonding agent to get them to adhere.
When in doubt, choose recommended alternatives—stick to all-latex or all-enamel systems or use conversion coatings for a safer result.
Compatibility Basics
Although latex and enamel both sit in the paint family, they use different binders and solvents, so you can’t just mix them and expect reliable results.
You’ll notice latex properties include water-based flexibility and faster drying, while enamel characteristics emphasize solvent-based hardness and durability.
Mixing risks separation, poor adhesion, uneven sheen, and curing problems, so test compatibility before combining any coatings.
Mixing Methods
Decide first whether mixing is worth the risk: you can sometimes blend a small amount of latex and water‑based enamel (or use bonding primers) to achieve a specific finish, but solvent‑based enamel and latex don’t reliably combine and usually cause separation, poor adhesion, or uneven curing. Use careful mixing techniques and test small batches to evaluate paint properties before full application.
| Method | Result |
|---|---|
| Latex + water enamel | Possible with testing |
| Latex + solvent enamel | Unreliable |
| Bonding primer | Improves adhesion |
| Small-batch testing | Essential |
Recommended Alternatives
If you’re after the look or durability of enamel but want to avoid the risks of mixing paints, pick a purpose-made product or system instead: use a true water‑based enamel, a high‑quality latex with an enamel‑like finish, or apply a bonding primer plus enamel topcoat.
- Water-based enamel — durable, eco friendly options.
- Enamel-like latex — easy cleanup.
- Bonding primer + enamel — best adhesion.
- Match paint types for warranties.
Quick Dos and Don’ts for Mixing Paints
When you mix paints, start by using primers that are compatible with both latex and enamel to guarantee adhesion.
Always test a small patch first so you can confirm finish, drying time, and adhesion before committing.
Don’t mix latex and enamel directly—use intercoat primers or separate coatings instead.
Use Compatible Primers
Because primers form the bond between your surface and topcoat, you should always choose one that’s compatible with both latex and enamel paints; using the wrong primer can cause poor adhesion, blistering, or uneven sheen.
- Pick primer types labeled “universal” or compatible with both.
- Match primer chemistry to topcoat.
- Prioritize surface preparation: clean, sand, degloss.
- Use oil-based primer for problematic substrates.
Test Small Patch
After choosing the right primer, always try a small test patch before committing to mixing latex and enamel—it’s the quickest way to spot adhesion, sheen, or compatibility problems.
You should use simple test patch techniques: apply in a hidden corner, let cure fully, check for lifting, color shift, or texture changes.
Small area testing saves time and prevents costly fixes.
Avoid Direct Mixing
If you’re tempted to pour latex and enamel together to save time, don’t—directly mixing them usually causes adhesion failures, uneven sheen, or prolonged drying.
You should avoid blending incompatible paint types because differing paint properties create adhesion challenges and finish defects.
Quick dos and don’ts:
- Don’t mix cans directly.
- Test compatibility first.
- Use a proper primer.
- Keep separate application tools.
When Mixing Is a Reasonable Option
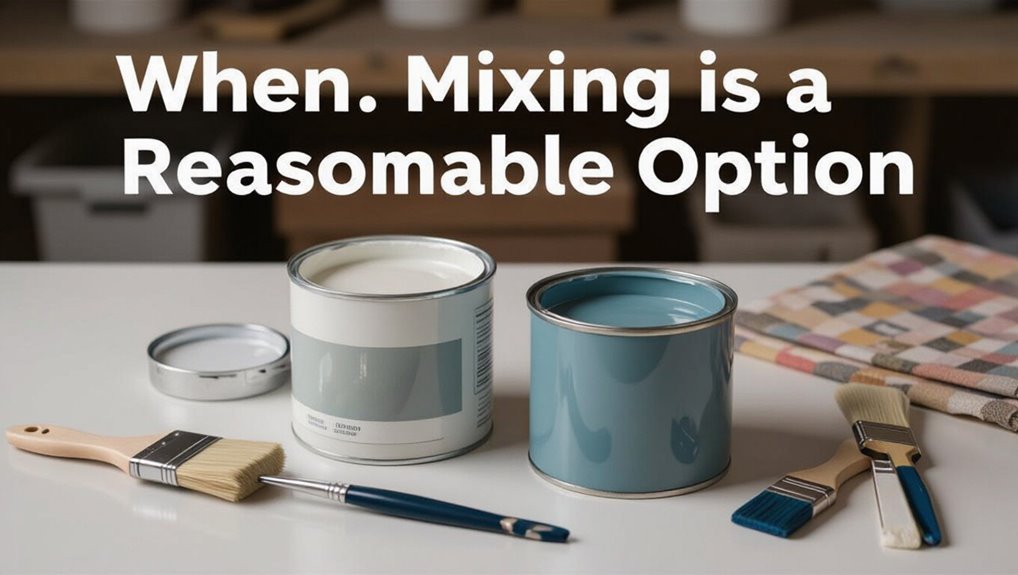
When you need durable exterior trim or furniture and want faster drying with easier cleanup, mixing a small amount of enamel into latex can be a reasonable option.
You’ll test small batches to confirm adhesion and sheen.
Know when to mix: use compatible alkyd-modified enamels and high-quality latex, thin sparingly, and sand between coats to guarantee paint compatibility and durable, even results.
When You Should Never Mix Latex and Enamel
Why risk a ruined finish? You shouldn’t mix when surfaces need durability or chemical resistance—latex paint hazards and enamel paint limitations can conflict, causing peeling, tackiness, or poor adhesion.
- High-moisture areas
- Exterior trim requiring hard enamel
- Industrial or chemical-exposed surfaces
- Previously enamel-coated furniture
Stick to compatible systems to avoid costly repairs.
How Latex Paint Is Formulated
Latex paint combines water, polymer binders (usually acrylic or vinyl-acetate copolymers), pigments, fillers, additives, and propylene glycol or other coalescing agents to form a stable, brushable emulsion; the binders create the film that holds pigment and adheres to the surface as the water evaporates.
You’ll notice latex paint properties like flexibility, quick drying, and low VOCs, making it suited for many latex paint applications indoors and outdoors.
How Enamel Paint Is Formulated
Now you’ll look at what makes enamel paint tick, starting with the solvents and resins that control flow, gloss, and adhesion.
You’ll also cover the pigments and fillers that give enamel its color, opacity, and body.
Finally, you’ll examine the drying and curing mechanisms that determine how fast and how hard the finish becomes.
Solvent And Resin Types
Because the solvent and resin define how enamel behaves, you should understand both components before mixing paints.
You’ll learn solvent types and resin differences so you can match drying time, adhesion, and flexibility. Check labels and test small areas.
Consider:
- Fast-evap solvent (alkyd)
- Slow-evap solvent (urethane)
- Natural resin (alkyd)
- Synthetic resin (acrylic/urethane)
Pigments And Fillers
With solvent and resin chosen, you’ll next look at the pigments and fillers that give enamel its color, hiding power, and body.
You’ll assess pigment interaction with the resin for tint strength and durability, and choose fillers for consistency and cost.
Filler performance affects sag resistance, sheen, and grind; balance guarantees uniform color, ideal application, and longevity without compromising adhesion.
Drying And Curing Mechanisms
If you want enamel to harden correctly, you need to understand how drying and curing differ: drying removes solvent so the film sets, while curing builds chemical crosslinks that give the enamel its final toughness, chemical resistance, and adhesion.
- Solvent evaporation controls initial drying times.
- Catalysts accelerate curing processes.
- Temperature and humidity affect both stages.
- Proper cure yields maximum hardness and adhesion.
Key Chemical Differences: Solvents, Binders, Pigments
When you compare latex and enamel paints chemically, three components stand out: solvents, binders, and pigments.
You’ll notice solvent interactions differ—water for latex, organic solvents for enamel—affecting mix behavior.
Binder properties also contrast: latex uses acrylic emulsions, enamel relies on alkyd or epoxy resins, which change film flexibility and adhesion.
Pigments mainly provide color and opacity, with similar roles.
Why Solvent Compatibility Determines Mixability
When you mix paints, the solvent base matters because water-based latex and solvent-based enamel behave differently at a molecular level.
You’ll notice differing evaporation rates can leave streaks, skinning, or improper film formation if they’re not compatible.
And if the solvents react, you’ll risk coagulation, poor adhesion, or chemical separation that ruins the finish.
Solvent Base Differences
Because paints carry their binders and pigments in different solvent systems, solvent compatibility is the first thing you need to check before attempting to mix latex and enamel.
You’ll compare solvent types to predict interactions and how paint characteristics change. Consider:
- Water-based latex vs. oil-based enamel
- Solvent polarity differences
- Emulsion stability
- Film formation compatibility
Solvent Evaporation Rates
If you mix paints with different solvent evaporation rates, you’ll change drying time, film formation, and the final finish because faster solvents leave too quickly while slower solvents linger and can trap or soften the film. You should match solvent types to control evaporation effects and avoid uneven cure.
| Fast solvents | Slow solvents |
|---|---|
| Quick dry | Extended cure |
| Surface skin | Internal soft |
| Matte risk | Gloss shift |
Chemical Interaction Risks
Although solvents often look interchangeable, their chemistry can clash and ruin a mixed paint, so you need to evaluate compatibility before combining latex and enamel.
You’ll face chemical reactions that weaken film formation and harm paint adhesion. Consider these risks:
- Solvent polarity mismatch causes separation.
- Co-solvent incompatibility leads to blushing.
- Crosslinker inhibition reduces durability.
- Surface tension shifts impair leveling.
How Binders (Acrylic vs Alkyd) Change Adhesion and Finish
When you compare acrylic and alkyd binders, you’ll notice they change how paint grips surfaces and how the final film looks and wears. You should consider binder types, adhesion differences, finish characteristics, paint longevity, application techniques, and surface preparation before mixing.
| Property | Impact |
|---|---|
| Binder types | Grip/elasticity |
| Adhesion differences | Surface bond |
| Finish characteristics | Sheen/durability |
| Paint longevity | Wear resistance |
How Pigments and Fillers Behave When Mixed
When you mix pigments and fillers, particle size affects how smooth the blend lays down and how opaque it is.
Check filler chemistry for compatibility with your binder, because some can cause flocculation or poor adhesion.
Expect shifts in color strength — diluted pigments or oversized filler loads will weaken tinting power.
Pigment Particle Size
Because pigment and filler particle size determines how they’ll pack, scatter light, and interact with different binders, you need to understand it before mixing latex and enamel.
You’ll affect pigment dispersion and particle interaction, altering gloss, opacity, and stability.
Consider:
- Fine particles increase hiding.
- Coarse particles reduce gloss.
- Broad distributions improve packing.
- Agglomerates harm dispersion and must be broken.
Filler Chemical Compatibility
Particle size sets the stage, but chemical compatibility dictates whether pigments and fillers will coexist or react negatively in your mixed latex–enamel system. You’ll test filler types for insolubility, pH sensitivity, and unwanted chemical reactions that cause flocculation or curing issues. Use small trials and the table below to compare behaviors.
| Filler | Solubility | Reaction risk |
|---|---|---|
| Calcium carbonate | Low | Moderate |
| Kaolin | Low | Low |
| Silica | Very low | Very low |
| Talc | Low | Moderate |
Color Strength Changes
Although pigments usually set the base hue, adding fillers or blending latex with enamel often alters color strength by diluting tinting power and changing light scattering; you’ll see darker, duller, or more muted results depending on pigment concentration, filler refractive index, and particle size distribution.
- Reduced color vibrancy from dilution.
- Mottling from uneven particle sizes.
- Faster perceived fading affecting paint longevity.
- Test mixes to calibrate pigment load.
Which Products Call Themselves “Enamel” (And Why It’s Confusing)
When you walk down the paint aisle, the word “enamel” appears on cans that are water-based, oil-based, and even some specialty formulations, which is why the label can be misleading.
You’ll face enamel definitions that vary by brand. Knowing product types helps explain mixing challenges and prevents consumer confusion.
Check solvent base, finish, and manufacturer notes before blending.
Signs Two Cans Are Likely Incompatible
If the two cans have different solvent bases—water vs. oil—you’re likely looking at incompatibility, since the solvents won’t properly dissolve each other and can cause separation, poor adhesion, or curdling.
Watch incompatibility indicators and paint characteristics like texture, odor, and label chemistry before mixing.
- Clumping or separation
- Strong solvent smell mismatch
- Sticky or gummy finish
- Label shows different binder types
Tools and Safety Gear You Need Before Testing Mixes
You’ve spotted signs of incompatibility and now it’s time to test small samples safely—so gather the right tools and safety gear before you mix anything.
Put on gloves, safety goggles, and a respirator if ventilation’s poor.
Use disposable cups, wooden stir sticks, and a small scale or measuring spoons as mixing tools.
Keep rags, labels, and a sealed waste container nearby.
How to Perform a Small Compatibility Test
Before you mix anything, set up a clean, well-lit workspace and lay out labeled disposable cups, stir sticks, measuring tools, and a small sample of both paints plus the thinner or additive you plan to use.
You’ll perform quick testing techniques to spot compatibility indicators:
- Mix small ratios.
- Observe separation.
- Note odor or skins.
- Record drying behavior.
How to Make a Test Panel for Color, Sheen, and Adhesion
Now that you’ve checked small mixes for basic compatibility, it’s time to make a test panel to verify color match, sheen, and adhesion under real conditions. Gather test panel materials, tape, sandpaper, and both paints. Do color sampling across finishes, label sections, and cure fully before adhesion checks.
| Area | Finish | Result |
|---|---|---|
| A | Matte | – |
| B | Satin | – |
| C | Gloss | – |
How to Evaluate Dry Time and Odor After Mixing
When you mix latex and enamel, track dry time by noting when the surface is tack-free, recoat-ready, and fully cured, and compare those stages to the original products’ specs; keep a stopwatch or log, room temp, humidity, and film thickness recorded so you can correlate conditions to results.
- Note drying factors: temp, humidity, film thickness.
- Record tack-free and recoat times.
- Smell periodically for odor control and ventilation needs.
- Compare to manufacturer specs and adjust conditions.
How to Check for Blooming, Cracking, or Separation
After the mix has cured, inspect the surface for a cloudy, powdery sheen that indicates blooming.
Check closely for hairline or larger cracks in the paint film that show it’s not bonding properly.
Run your fingernail gently across the finish to feel for any layer separation lines where coats might be peeling apart.
Visible Surface Blooming
If you suspect mixing latex and enamel has caused visible problems, start by inspecting the painted surface under good light and at an angle—this makes subtle blooming, hairline cracks, or areas of separation easier to spot.
Check for visible surface issues and changes in paint appearance, then follow these steps:
- Run your hand gently for texture.
- Look for whitish haze.
- Note glossy/matte shifts.
- Test adhesion with tape.
Paint Film Cracking
Damage to the paint film shows itself in a few clear ways, and you’ll want to identify whether you’re seeing blooming, cracking, or separation before deciding how to fix it.
Check for hairline cracks, flaking, or powdery bloom by running a fingernail gently.
Poor surface preparation reduces paint durability, so test adhesion, sand loose areas, and spot-prime before repainting to restore proper bonding.
Layer Separation Lines
When you inspect a painted surface for layer separation, look for distinct lines, edges, or feathered gaps where one coat has pulled away from the one beneath it.
You’ll check for bloom, cracking, or delamination that signals poor layer adhesion or paint compatibility.
- Visible edge lines
- Flaky patches
- Blistering or bloom
- Test peel zones
When to Thin Mixed Paint: And What to Use
Because mixed latex and enamel can change viscosity as solvents evaporate or pigments settle, you’ll want to thin only when flow, leveling, or sprayability suffer.
Use minimal thinning techniques: add small amounts of water for latex-rich mixes, or the manufacturer’s solvent for enamel-dominant blends.
Test on a sample, stir thoroughly, and retest. Stop when desired paint viscosity and coverage are restored.
How Much Latex Can You Safely Add When Mixing With Enamel?
If you’re blending latex into enamel, keep additions conservative: start with no more than 10–15% latex by volume and evaluate performance before adding more.
Test adhesion, drying, sheen, and durability on a small panel. Track latex proportions and adjust enamel ratios only if tests pass.
- Adhesion
- Dry time
- Sheen
- Durability
How Much Oil/Enamel Can You Safely Add to Latex?
You can usually add only a small amount of oil/enamel to latex—start at about 5–10% by volume—and evaluate the mixture before increasing the ratio.
You should test adhesion, drying and sheen on scrap. Keep latex paint ratios conservative; small increments reduce problems from enamel paint limitations like extended drying, yellowing, or poor film formation.
Stop if separation or tackiness appears.
Will a Paint Conditioner or Universal Reducer Help?
Wondering whether a paint conditioner or universal reducer will rescue a latex/enamel mix? You can try paint additives to improve flow, but universal reducers rarely fix fundamental incompatibility.
Use careful mixing techniques, small test batches, and short cures. Risks remain: adhesion, drying, and finish differences.
- Test small batch
- Add conditioner sparingly
- Stir thoroughly
- Observe for 24–48 hours
Primer Rules When You Plan to Mix Paints
Having tested small batches and seen how additives affect blend behavior, you’ll want to think about primer before committing to a full mix.
Choose primer types that bond both chemistries—adhesion-promoting and stain-blocking options work best.
Test primer application on scrap to confirm adhesion, cure times, and sanding compatibility.
Proper primer selection and technique prevent delamination and guarantee a uniform final finish.
Best Primers for Latex-Over-Enamel and Enamel-Over-Latex
Some primers are formulated to bridge the chemistry gap between latex and enamel, so pick one that explicitly lists adhesion to both water- and solvent-based paints; this guarantees you get a reliable bond whether you’re painting latex over enamel or enamel over latex.
- Shellac-based primer — excellent enamel adhesion.
- High-adhesion bonding primer — strong latex compatibility.
- Oil-based universal primer — versatile adhesion.
- Acrylic adhesion promoter — balanced performance.
Surface Prep Steps to Prevent Peeling With Mixed Paints
Picking the right primer is only part of the job; thorough surface prep prevents the mixed-paint layers from peeling down the road.
You should clean grease and dirt, repair chips, and remove loose paint. Use recommended surface preparation cleaners and a tack cloth.
Apply adhesion techniques like bonding primers and proper drying times so latex and enamel layers bond reliably without future separation.
Sanding and Deglossing Tips Before Applying Mixed Paint
Before you apply any mixed paint, sand glossy surfaces and degloss them so new layers can bite; roughen smooth enamel with fine-grit sandpaper (220–320) or use a liquid deglosser on tight spots.
Then wipe away dust with a tack cloth. Use proper sanding techniques and deglossing methods to guarantee adhesion.
Wipe dust with a tack cloth and use correct sanding and deglosser techniques to ensure proper paint adhesion.
- Sand along grain, light pressure.
- Vacuum and tack.
- Feather edges after sanding.
- Test adhesion before full coat.
Application Tips for Brushes, Rollers, and Sprayers With Mixed Paint
When you’re ready to apply mixed latex-and-enamel paint, choose tools that match the job—synthetic-bristle brushes for trim, short-nap rollers for smooth walls, and a fine-tip HVLP or airless sprayer for cabinets and furniture—and adjust technique and thinning to maintain a smooth, even finish.
Use proper brush techniques to avoid streaks, match roller applications to surface texture, tweak sprayer settings, and anticipate application challenges to protect paint finishes.
Dry Time Management and Recoating Schedule for Mixed Paint
Although mixed latex-and-enamel paint often dries faster on the surface, you’ll need to treat it like a hybrid: plan for a slightly longer tack time and verify through touch and visual checks before recoating.
Use proper drying techniques and adhere to safe recoating intervals. Follow this quick checklist:
- Wait initial tack-test (finger press).
- Confirm surface is matte, not sticky.
- Allow extra cure overnight.
- Sand light before next coat.
How Mixed Paint Affects Sheen and Color Consistency
When you mix latex and enamel, expect risks of uneven sheen because the finishes cure differently.
You’ll also notice color shifts from binder and pigment interactions that can make matched colors look off.
To keep a uniform finish, test small batches, stir thoroughly, and apply consistent technique across the surface.
Sheen Variation Risks
Because latex and enamel have different binders and surface tension, mixing them can leave you with uneven sheen and subtle color shifts that become obvious once the paint dries.
You’ll notice sheen variations and altered finish effects that betray inconsistent mixing.
- Patchy gloss
- Satin spots
- Matte bleed
- Light reflection inconsistency
Color Shift Causes
If you mix latex and enamel, you’ll often see subtle color shifts and sheen changes as the different binders interact and dry at different rates.
You’ll notice undertones that emerge or dulling where glossy enamel meets flatter latex. Understanding color theory helps predict shifts, and careful mixing techniques reduce surprises.
Test small blends and document ratios to track resultant hue and sheen.
Finish Uniformity Tips
Mixing latex and enamel can give you unpredictable sheen and color consistency, so plan for steps that control drying, surface prep, and application technique.
You’ll want to test small areas, match sheen, and adjust methods to maintain finish consistency.
- Feather edges with thin coats.
- Sand between layers.
- Use consistent application techniques.
- Test samples under real light.
Matching Color and Sheen When Using Leftover Cans
When you’re working from leftover latex and enamel cans, the key is testing and adjusting rather than guessing—start by applying small swatches of each paint next to one another on the actual surface and view them in the room’s light at different times of day. Focus on color harmony and sheen matching; blend small amounts, note dry differences, and keep records.
| Action | Result |
|---|---|
| Swatch | Compare hue |
| Thin blend | Adjust sheen |
| Record | Repeat tests |
Durability Expectations for Mixed Paint Finishes
When you mix latex and enamel, expect the adhesion to change over time and watch for areas that might lift or peel.
You’ll also notice differences in surface hardness—some spots may resist scuffs while others stay softer.
That mix affects wear and maintenance, so plan for more frequent touch-ups and gentle cleaning.
Adhesion Over Time
Because different binders dry and cure at different rates, you should expect some variation in how well a mixed latex-enamel finish holds up over months and years.
You’ll notice adhesion longevity depends on prep and paint layering choices. Monitor and maintain to extend life.
- Test small area first
- Sand and prime properly
- Apply thin, even coats
- Inspect and touch up annually
Surface Hardness Differences
If you mix latex and enamel, expect a surface that won’t match the uniform hardness of a single-formulation finish; latex adds flexibility while enamel contributes toughness, so the resulting film will vary across the surface and with coat thickness.
You’ll notice uneven surface durability and inconsistent paint performance: some areas resist impacts better, others flex, so plan coats and tests accordingly to predict real-world results.
Wear And Maintenance
Although the blended finish can look fine at first, you should expect uneven long-term wear because latex and enamel age differently. The latex component will stay more flexible while the enamel portions tend to harden and craze. As a result, scuffs, chips, and abrasion will appear inconsistently across the surface.
- Note durability concerns: expect patchy fading.
- Clean gently to avoid cracks.
- Touch up with matching blend only.
- Schedule periodic inspections and maintenance tips.
Common Problems After Mixing: And How to Fix Them
When you mix latex and enamel paints, you might run into issues like poor adhesion, uneven sheen, or clumping—here’s how to spot each problem and fix it quickly.
Check paint adhesion by scratching a discreet area; sand and prime if it fails.
Adjust mixing techniques: thin gradually, stir thoroughly, strain to remove lumps.
Recoat after proper drying and cure times.
When to Scrap Mixed Paint and Start Fresh
You’ve tried sanding, thinning, straining, and letting coats fully cure, but sometimes mixed latex and enamel just won’t behave; know when it’s time to scrap it and start fresh.
- Separation or gummy texture despite agitation.
- Persistent adhesion or peeling on test panels.
- Off smell or mold developing.
- Color shift or curing failures that wreck project planning.
Use proper paint disposal methods.
Typical Use Cases Where Mixing Is Acceptable (Trim, Furniture, Etc.)
You can safely mix latex and enamel for small, durable jobs like trim and molding where adhesion and a hard finish matter.
It also works for furniture refinishing when you want a tough, washable surface without stripping everything back.
For cabinets and shelving, mixed formulas can give the durability of enamel with easier application of latex, but test a small area first.
Trim And Molding
- Use proper trim techniques: sand and prime.
- Match sheen levels.
- Test on molding materials.
- Lightly scuff between coats.
Furniture Refinishing
Refresh furniture by thoughtfully combining latex and enamel when the situation calls for it: latex for flexible, breathable body coats and enamel for durable, glossy accents or hardware.
You’ll protect surfaces and preserve furniture design integrity by using latex on large planes and enamel on trim, edges, or legs.
Plan paint application sequence, degloss and prime between coats, and test adhesion on an inconspicuous area first.
Cabinets And Shelving
After handling large furniture surfaces with latex and reserving enamel for trim, think about cabinets and shelving as the next practical place to mix the two: use latex for the box interiors and backs where flexibility and breathability matter, and reserve enamel for doors, drawer fronts, and exposed shelves that need tougher, glossier finishes.
- Choose cabinet finishes per use.
- Match sheen between parts.
- Prep shelving materials carefully.
- Test adhesion on scraps.
When to Call a Pro
If you’re unsure about the compatibility of two paints, or the surface has serious adhesion, rust, or solvent-sensitivity issues, call a pro—mixing latex and enamel can hide problems that worsen over time.
A professional can assess the substrate, recommend primers or adhesion-promoting systems, and verify the finish lasts.
Seek professional advice and trusted painting services to guarantee durable, correct application.
How Mixing Affects VOCs and Ventilation Needs
Calling a pro is wise when compatibility or substrate problems might hide bigger issues, but you should also consider what happens in the air when you mix latex and enamel: solvents and co-solvents in oil-based enamels raise volatile organic compound (VOC) levels compared with typical waterborne latex.
So combining them — or applying an oil-based topcoat over a latex base without proper cure — can increase fumes and change how long you need ventilation.
- Increase ventilation for higher VOC levels.
- Use fans to improve air circulation.
- Allow full cure before topcoating.
- Wear appropriate respirators when needed.
Cost vs. Performance: Is Mixing Worth It?
You’ll need to weigh upfront savings against how long the finish actually lasts.
Mixing latex and enamel can cut initial costs but may raise long-term maintenance expenses if durability is compromised.
Consider how often you’ll need touch-ups or recoats before deciding if the trade-off is worth it.
Cost Versus Durability
When weighing cost against durability, consider how much life you want out of the finish and where you’ll use it: latex is cheaper and easy to touch up, while enamel costs more but resists wear and holds up in high-traffic or moisture-prone areas.
Do a cost analysis and durability comparison to decide.
- Budget impact
- Wear tolerance
- Touch-up ease
- Application effort
Long-Term Maintenance Costs
Although mixing latex and enamel can lower upfront costs by letting you use latex where durability isn’t critical, it can raise long-term maintenance expenses if their different wear rates and adhesion lead to more frequent repairs. You should weigh lower initial cost against reduced long term durability and increased maintenance frequency to decide if mixing is worth it.
| Factor | Impact |
|---|---|
| Cost | Lower upfront |
| Durability | Variable |
| Repairs | More frequent |
| Aesthetics | Potential mismatch |
| Lifespan | Possibly reduced |
How Manufacturers Recommend Handling Cross‑System Paints
If you’re mixing latex and enamel products, follow the manufacturers’ instructions closely—cross‑system blending usually isn’t supported and can void warranties, affect drying and adhesion, or cause coating failure.
They advise against ad hoc cross system applications and recommend testing or approved products to protect paint adhesion.
Steps to follow:
- Read label warnings.
- Contact tech support.
- Test small area.
- Use specified primers or systems.
Alternatives to Mixing: Conversion Primers & Cross‑Compatibility Products
If you don’t want to mix latex and enamel, consider using a conversion primer to create a reliable bond between the two systems.
You can also choose cross‑compatible products designed to work together without compatibility issues.
Both options save time, reduce risk, and keep your finish consistent.
Use Conversion Primers
One reliable alternative to mixing latex and enamel is to use a conversion primer designed to bridge the chemical differences between the two. This allows you to topcoat with confidence without blending incompatible paints.
Use conversion techniques and pick primer types that match substrate and topcoat. Consider these quick tips:
- Prep surface thoroughly
- Choose compatible conversion primer
- Follow manufacturer’s cure times
- Test small area first
Cross‑Compatible Product Options
When you need to avoid mixing latex and enamel, choose products made to be cross‑compatible so you can apply a topcoat without battling adhesion or curing problems.
Look for cross compatible brands and hybrid formulations labeled for both water‑ and solvent‑based systems.
Use conversion primers or one‑coat hybrids to bridge substrates, follow manufacturer instructions, and test small areas to confirm adhesion and finish before full application.
How to Store Leftover Mixed Paint Safely
Because mixed latex and enamel have different shelf lives and separation tendencies, you’ll want to store leftovers so they stay usable and safe.
Use clean, airtight containers and follow paint canister safety guidelines. Keep mixes cool and stable; monitor storage temperature. Dispose if smell or texture changes.
- Seal tightly
- Label date and contents
- Store upright
- Check monthly
Labeling and Documenting Test Mixes for Future Projects
If you want to recreate a successful test mix later, label each sample clearly and consistently: include the exact paint brands, color codes or names, ratios by volume, additives used, date mixed, and the surface and conditions you tested on. Use concise mixing ratios and documentation methods.
| Sample | Ratio | Notes |
|---|---|---|
| A | 70:30 | Semi-gloss over primer |
| B | 50:50 | Added 5% bonding agent |
Checklist: Safely Mix and Apply Latex + Enamel
Before you start full-scale application, take a moment to label and review your test mixes so you know exactly what you’re working with and can replicate results later.
Before starting, clearly label and review test mixes so you can identify and replicate results confidently.
Follow this checklist to safely mix and apply latex + enamel, focusing on application techniques and color blending:
- Wear PPE and ventilate work area.
- Stir and strain mixtures thoroughly.
- Test adhesion on a small patch.
- Apply thin, even coats and cure fully.
Resources and References for Deeper Technical Guidance
When you want to go beyond basic tips, consult authoritative resources—manufacturer technical data sheets, ASTM and ISO standards for coatings, and peer-reviewed articles—so you can verify compatibility, cure times, and long-term performance of latex/enamel blends.
Use those sources to understand paint chemistry, recommended mixing techniques, solvent interactions, and testing protocols. They’ll help you choose compatible products, avoid failures, and document safe procedures.
Frequently Asked Questions
Can Mixed Latex-Enamel Paint Be Used on Exterior Metal Without Rust Treatment?
No, you shouldn’t—mixed latex-enamel on unprepared exterior metal won’t provide reliable rust prevention or surface adhesion; you’ll need proper rust treatment, primer, and compatible coating to prevent corrosion and guarantee the paint bonds and lasts.
Will Mixed Paints Affect Fire-Resistance or Heat Tolerance of Surfaces?
Mixed paints can reduce fire resistance and heat tolerance; you shouldn’t assume safety. If you mix latex and enamel, you’ll likely alter thermal properties and should test or use certified high-temperature, fire-rated coatings for reliable protection.
Can I Mix Latex and Enamel in Spray Gun Reservoirs Mid-Job?
No — you shouldn’t mix latex and enamel in a spray gun reservoir mid-job; imagine clogged, uneven spray patterns from separation. You’ll harm spray gun maintenance, risk poor paint adhesion, and create cleanup and finish problems.
Do Mixed Paint Films Complicate Future Color-Matching at Hardware Stores?
Yes — you’ll face color matching challenges because mixed finishes and paint formulation issues alter tint, sheen, and opacity; stores may struggle to match a nonstandard blend, so keep samples and exact product info handy.
Will Mixing Affect Compatibility With Antibacterial or Moisture-Resistant Additives?
Yes — mixing can reduce additive effectiveness and paint adhesion because solvent, binder, and pH differences alter dispersion and cure. You’ll risk compromised antimicrobial or moisture resistance unless manufacturers confirm compatibility or you use formulated, tested mixes.
Conclusion
You can handle mixing latex and enamel, but do it like a cautious alchemist: test, thin, and cure before trusting the result. Don’t rush chemistry—if adhesion, flexibility, or finish matters, choose compatible products instead of improvising. When you must blend, label clearly, store air-tight, and document proportions. Think of each trial as a ledger in your workshop’s grimoire—small experiments keep big projects from turning into costly mistakes.