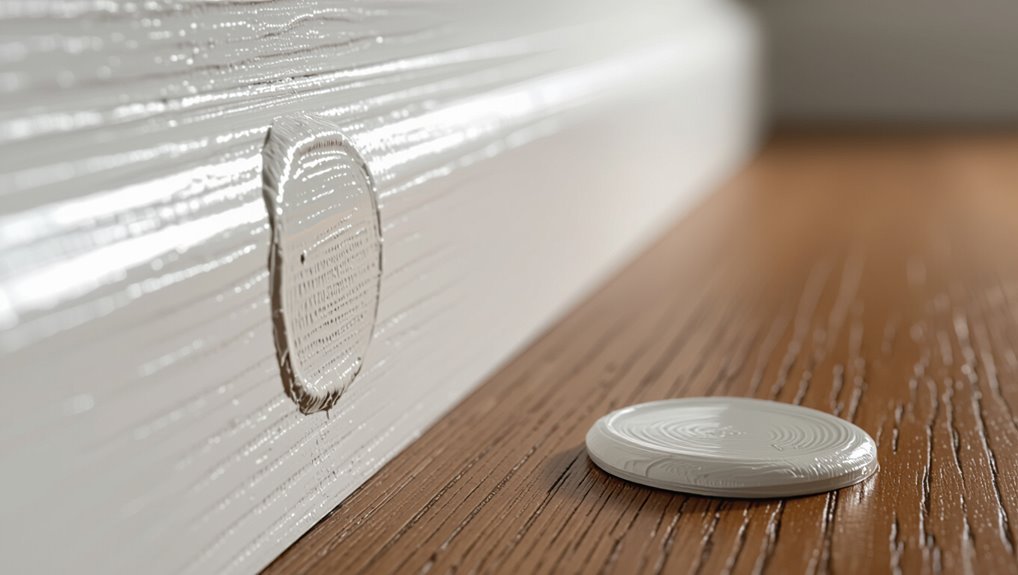
How Do You Remove Dried Latex Paint? Easy Methods
You can remove dried latex paint with common items and a bit of elbow grease: for small spots dab rubbing alcohol or warm soapy water to soften, then rub with a cloth or plastic scraper; for tougher areas try vinegar steam, a commercial latex softener, or a gel stripper on vertical surfaces, testing first on an inconspicuous spot. Wear gloves and ventilate the area, and for large or risky jobs consider a pro—keep going to see specific tips for different surfaces.
Fast Way to Remove Small Dried Latex Paint Spots
Grab a damp cloth and some rubbing alcohol—small dried latex spots are usually easier to lift than you think.
Dab gently, let alcohol soften the spot, then rub in circular motions until paint loosens. Rinse with water and repeat if needed.
For stubborn remnants, use a plastic scraper. This spot cleaning approach speeds paint removal without harming most finished surfaces.
Choose the Right Removal Method (Surface & Paint Age)
Because the right technique depends on both the surface and how long the paint’s been dry, start by identifying the material (wood, fabric, metal, drywall, glass) and estimating the paint’s age—fresh, partially cured, or fully hardened.
Then match removal tools and cleaners to surface compatibility and paint condition. Choose gentler methods for delicate materials and tougher approaches for hardened paint on durable surfaces.
Can You Soften Dried Latex Paint? Quick Options
Once you’ve matched the surface and paint age to a removal strategy, you can focus on softening options that make paint easier to lift.
Once surface and paint age are matched to a strategy, focus on softening methods to loosen paint for easier lifting.
You’ll use simple softening techniques and household solutions to loosen dried latex before scraping.
Try:
- Warm soapy water soak
- Vinegar steam or wipe
- Rubbing alcohol swab
- Commercial latex softener follow label
These speed removal.
Wear the Right Safety Gear
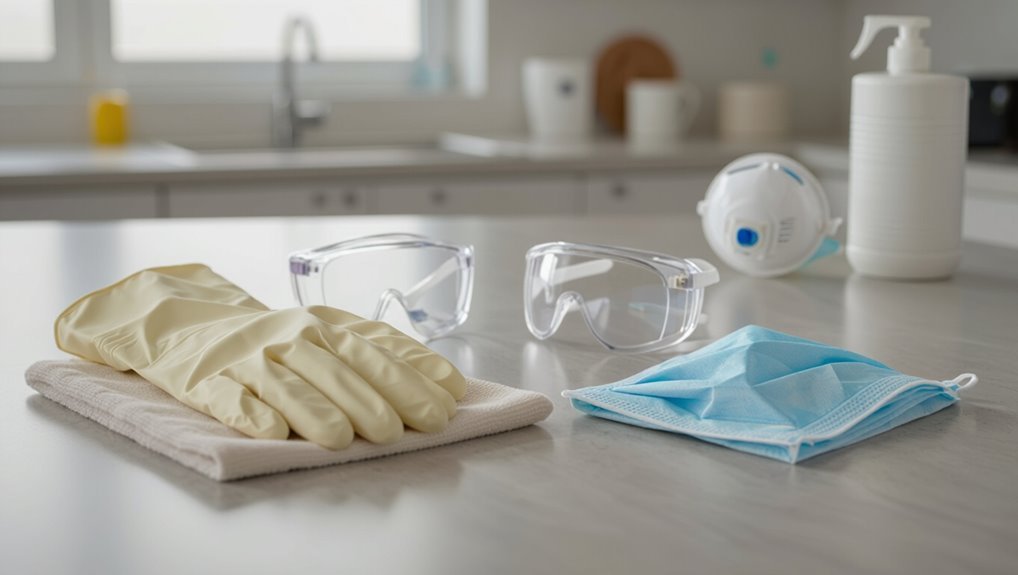
Before you start scraping or softening dried latex paint, put on proper safety gear to protect your skin, eyes, and lungs.
Wear safety goggles to prevent splashes, and choose protective gloves resistant to solvents and abrasions.
If you’re sanding or using strong removers, add a respirator and long sleeves.
Keep a first-aid kit nearby and work in a well-ventilated area to reduce risks.
Test Paint Type & Surface Compatibility
Before you start scraping or applying removers, identify whether the paint is latex, oil-based, or acrylic so you pick the right method.
Check what the surface is—wood, metal, drywall, or fabric—because some cleaners will damage certain materials.
Then test your chosen remover or technique on a small, inconspicuous area to confirm it works without harming the surface.
Identify Paint Type
How can you tell what kind of paint you’re dealing with? Identify paint type by testing simple paint characteristics and comparing latex types.
Try these quick checks:
- Rub a damp cloth to see if pigment lifts
- Smell: water-based vs oil hints
- Scratch test for flexibility
- Use a small solvent spot (water first)
These steps help match removal methods without harming the surface.
Check Surface Material
Now that you know what kind of paint you’re dealing with, check the surface material so you pick a removal method that won’t cause damage.
Assess wood, metal, plastic, masonry, and fabric for surface variations and consider previous coatings.
Think about paint interactions with solvents, abrasives, heat, and sealants.
Choose gentle approaches for porous or delicate substrates and stronger options for durable, nonreactive surfaces.
Test Small Area
Want to be sure your removal method won’t harm the surface or spread the stain? You should always try a small test area first to confirm paint compatibility and results.
Follow these quick checks:
- Clean a hidden spot and note finish
- Apply remover briefly, blot gently
- Wait per product directions
- Inspect for discoloration or damage
When to Skip Chemical Strippers
If your dried latex paint sits on delicate wood, indoor surfaces, or items you’ll be refinishing, skip chemical strippers and try gentler methods first.
You should choose chemical alternatives and eco friendly solutions like warm soapy water, rubbing alcohol, or a citrus-based remover.
Test a hidden spot, work slowly to avoid damage, and reserve strippers for durable, exterior materials only.
Scraping & Sanding Tools You’ll Need
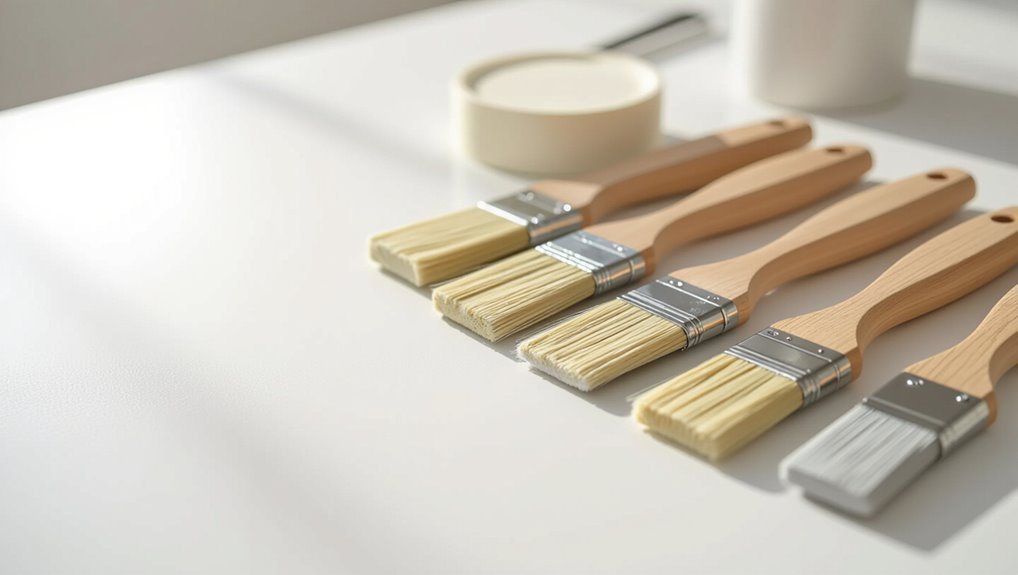
When gentler cleaners don’t lift the paint, you’ll need the right scraping and sanding tools to remove stubborn latex without harming the surface.
Choose proper scraper types and learn sanding techniques to protect finish and speed work.
Pick the right scrapers and sanding methods to preserve finishes and make paint removal faster and safer.
- Metal and plastic scrapers
- Putty knives for edges
- Hand sanding blocks
- Random-orbit sander with fine grit
Use Warm Water & Soap for Freshly Dried Spots
Dampen a clean cloth with warm, soapy water and rub the freshly dried latex spot in gentle circular motions; the heat softens the paint and the soap breaks its surface tension, making removal easier without scraping.
Work promptly while the fresh paint is still tacky, swap to clean cleaning supplies as needed, blot excess residue, then rinse and dry the area to prevent streaks.
How Isopropyl Alcohol Lifts Latex Paint
Reach for isopropyl alcohol to break down latex paint’s binders and soften the film so you can lift it away without harsh scraping.
You’ll dab, wait, and gently wipe. For safe paint lifting, follow these steps:
- Test on a hidden area first
- Apply with a cloth or cotton pad
- Let sit 30–60 seconds
- Wipe gently, repeat as needed
Soften Dried Paint With White Vinegar
You can soften dried latex by gently heating the area to loosen the paint before treatment.
Then soak a cloth or sponge in warm white vinegar and press it onto the softened paint for several minutes to help break it down.
After the soak, scrape or wipe the paint away with a plastic scraper or cloth.
Heat The Paint Gently
If the latex has hardened but not fully cured, gently heating it with white vinegar can soften the film so it peels or wipes away more easily.
You’ll use low heat and vinegar to aid paint softening without damaging surfaces.
Tips:
- Test in an inconspicuous spot
- Warm vinegar, don’t boil
- Use a soft cloth to rub
- Work slowly with controlled heat application
Vinegar Soak Method
One simple way to soften dried latex paint is to soak a cloth or sponge in warm white vinegar and press it against the paint until the film loosens.
You’ll let it sit several minutes, then rub gently to lift softened flakes.
Vinegar benefits include mild acidity that breaks binding agents, offering a safe alternative to harsher paint solvents for small spots and trim.
Loosen Stubborn Paint With Baking Soda Paste
Make a thick paste by mixing baking soda with just enough hot water to reach a peanut-butter consistency.
Then apply it directly to the dried latex paint and let it sit for 10–15 minutes.
You’ll scrape gently with a plastic scraper, rinse, and repeat if needed.
- Let paste soften paint
- Scrape in short strokes
- Rinse residue off
- Dry the surface
Using Commercial Latex Paint Removers Safely
Choose a remover rated for latex paint and follow the label instructions closely to avoid damage to the surface or harm to yourself.
Wear gloves, goggles, and a respirator for safe handling. Test on an inconspicuous area first.
Apply product sparingly with recommended application techniques, wait the specified time, then scrape gently.
Dispose of residues per label directions and ventilate the area thoroughly.
Citristrip & Low‑VOC Strippers: How to Use Them
Pick a low‑VOC stripper that’s rated for latex and matches the surface you’re working on, and read the label for recommended dwell times.
Apply the product evenly, let it sit the specified time to soften the paint, then scrape or wipe away gently.
Work in a well‑ventilated area, wear gloves and eye protection, and follow disposal instructions.
Choosing The Right Stripper
When you’re deciding on a stripper for dried latex paint, weigh effectiveness, surface safety, and ventilation needs—Citristrip and other low‑VOC formulas remove layers without the harsh fumes of traditional strippers, but they work differently and suit different jobs.
Choose based on substrate, finish, and cleanup.
Consider these paint stripper types and eco friendly options:
- Citrus-based for gentle removal
- Gel for vertical surfaces
- Solvent for heavy buildup
- Biobased for low odor
Application And Dwell Time
After you’ve selected a low‑VOC stripper like Citristrip, set up for application by working in a well‑ventilated area, protecting nearby surfaces, and testing a small inconspicuous spot.
Apply stripper with recommended application techniques—brush, roller, or disposable plastic spreader—in an even coat.
Follow manufacturer guidance for dwell time, checking periodically and scraping gently when finish softens to avoid damaging the substrate.
Safety And Ventilation
Good ventilation and basic PPE are essential whenever you use Citristrip or other low‑VOC strippers, because even milder solvents can emit fumes and irritate skin or eyes; open windows, run a fan to move air out, wear chemical‑resistant gloves and eye protection, and have a respirator rated for organic vapors on hand if ventilation is limited.
- ventilation importance: position fans outwards
- safety precautions: gloves
- safety precautions: eye protection
- keep pets and kids away
When Mineral Spirits or Paint Thinner Help
If you’re dealing with oil-based or alkyd latex paint that’s stubbornly dried on a brush, metal, or wood, mineral spirits or paint thinner can dissolve and lift the residue without excessive scrubbing.
Apply a small amount to a rag or container, soak bristles or wipe the surface, then agitate gently.
Rinse with solvent, wash with soap and water, and ventilate the area.
Remove Dried Latex Paint From Painted Walls
Before you start, check the wall’s finish—flat, satin, and gloss react differently to cleaners and scrapers.
You’ll want to try the gentlest methods first, like warm soapy water and a soft cloth, before moving to a plastic scraper or magic eraser.
Test any technique in an inconspicuous spot so you don’t damage the underlying paint.
Assess Paint Finish
Start by checking the wall’s paint finish — flat, eggshell, satin, semi-gloss, or gloss — because each finish reacts differently to cleaning and scraping; flatter finishes are more porous and prone to damage, while glossier finishes resist abrasion and liquids better.
You’ll want to use paint finish types knowledge when evaluating surfaces. Consider:
- Flat: avoid aggressive methods
- Eggshell: test small area
- Satin: moderately durable
- Gloss: most forgiving
Gentle Removal Techniques
Now that you’ve assessed the finish and know how delicate the surface is, you can begin gentle removal methods that protect the underlying paint.
Start with mild soap and water, using soft cloths to blot and lift flakes.
For stubborn spots, apply gentle solvents sparingly on a cloth, test first, then rub lightly.
Rinse, pat dry, and touch up if needed.
Get Dried Paint Off Trim & Baseboards
Trim and baseboards often catch the brunt of sloppy painting, but you can remove dried latex paint without damaging the profile or finish.
Trim and baseboards often bear sloppy paint—dried latex can be removed carefully without harming profiles or finish.
Use gentle trim techniques and targeted baseboard solutions:
- Score paint edge, lift with plastic scraper
- Soften with warm soapy water, blot
- Use rubbing alcohol for small spots
- Sand lightly and touch up with matching paint
Remove Dried Paint From Wood Furniture Carefully
Work carefully to lift dried latex from wood furniture without stripping the finish or gouging the grain. Use gentle scraping, a soft cloth, mild solvent on a hidden spot, then buff. Test first, work along grain, and stop if finish dulls.
| Tool | Action | Tip |
|---|---|---|
| Plastic scraper | Lift paint | Angle shallow |
| Cotton cloth | Dab solvent | Test first |
| Toothpick | Remove edges | Work gently |
Remove Dried Latex Paint From Raw Wood Without Over‑Sanding
Start by testing a small, hidden spot so you can see how the wood reacts before treating the whole area.
Use gentle solvents like mineral spirits or citrus-based removers applied sparingly with a soft cloth or cotton swab to lift the paint without sanding away the grain.
If the solvent softens the paint, work slowly and wipe frequently to avoid overworking the wood.
Test Area First
Before you tackle the whole surface, test a small, inconspicuous patch to see how the paint and wood react—this prevents over‑sanding and hidden damage.
You’ll confirm test surfaces and paint compatibility, assess adhesion, and note grain changes.
Try these steps:
- Clean area
- Lightly sand corner
- Apply small remover or scrape
- Inspect for discoloration and softness
Use Gentle Solvents
If you want to remove dried latex paint from raw wood without over‑sanding, reach for gentle solvents first—these dissolve the paint so you can lift it with minimal abrasion.
Choose a citrus-based remover or isopropyl alcohol, apply sparingly, wait, then blot and scrape gently with a plastic card.
Test small areas, ventilate, wear gloves, and repeat until paint removal is complete.
Remove Dried Paint From Metal & Appliances
Metal and appliances often get splattered with latex paint, but you can remove dried spots without harming finishes by choosing the right solvent and technique for the surface.
For metal cleaning and appliance maintenance, test solvents on hidden areas first.
Then try:
- Warm soapy water and plastic scraper
- Rubbing alcohol for small spots
- Mineral spirits for stubborn paint
- Light sanding with fine grit
Clean Paint Off Glass & Windows Without Scratching
Once you’ve handled metal and appliances, glass and windows need a gentler touch to avoid scratches while still removing dried latex paint.
Use a razor blade at a 20° angle on wet glass, working slowly. For smaller spots, soften paint with warm, soapy water or rubbing alcohol, then scrape gently.
Finish with glass cleaning solution and a microfiber cloth for streak-free results.
Get Dried Latex Paint Out of Clothing & Fabric
Treat dried latex paint on clothing and fabric quickly to avoid permanent stains; the sooner you act, the better your chances of restoring the item.
Act quickly to treat dried latex paint on fabric—the sooner you act, the better the chance of saving it
Check garment labels for fabric care, scrape excess, then test cleaners on hidden seams. For different paint types, adjust solvents.
- Gently scrape with a dull knife
- Pre-treat with dish soap
- Use rubbing alcohol on small spots
- Wash promptly on safe cycle
Remove Paint Spots From Carpet & Upholstery
If cleaning clothes didn’t fully remove splatters, you’ll want to address carpet and upholstery next—these porous surfaces hold paint differently and need a gentler, targeted approach. Blot excess, soften with warm soapy water, then lift with a soft brush. For stubborn spots, use rubbing alcohol sparingly. Maintain carpet cleaning and upholstery care to avoid damage.
| Step | Action |
|---|---|
| 1 | Blot |
| 2 | Soften |
| 3 | Lift |
| 4 | Treat |
| 5 | Protect |
Restore Paintbrushes Hardened With Latex Paint
If your brushes have hardened with latex paint, you can soften the bristles to make them usable again.
Start by loosening dried paint with warm soapy water or a brush conditioner, then work through the bristles to remove residue.
With patience and the right cleaners, you’ll restore the brush’s shape and performance.
Soften Hardened Bristles
Often the quickest way to revive a brush with dried latex is to dissolve and loosen the paint in the bristles before you try reshaping them. You’ll extend brush maintenance and aid paint preservation by softening bristles gently.
Try these steps:
- Soak tips in warm, soapy water briefly
- Massage bristles to break paint flakes
- Rinse and repeat if needed
- Comb bristles with a fine-tooth brush
Remove Paint Residue
Work the softened bristles with targeted agitation to lift out stubborn paint residue without shredding the brush. Use gentle combing, solvent dips, and warm soapy rinses as latex paint removal techniques; repeat until bristles move freely. For paint residue cleanup, rinse thoroughly and reshape the brush to dry.
| Step | Action | Time |
|---|---|---|
| 1 | Comb | 2–5 min |
| 2 | Soak | 10–30 min |
| 3 | Comb | 3–6 min |
| 4 | Rinse | 1–2 min |
| 5 | Dry | 12–24 hr |
Clean Rollers & Foam Tools With Dried Paint
When rollers and foam brushes harden with latex, you can still restore them if you act patiently and use the right tools; beginning with gentle mechanical removal and progressing to chemical softening usually gives the best results.
If rollers and foam brushes harden with latex, you can restore them by patiently removing flakes, scrubbing, and softening chemically.
Use proper cleaning supplies for safe paint removal.
Steps:
- Peel off flakes
- Scrub with brush
- Soak in remover
- Rinse and dry thoroughly
Use Heat Guns to Soften Paint: Tips & Risks
If you need to soften dried latex quickly, a heat gun can be effective—but you’ll want to use it cautiously.
Hold the gun several inches away, use low to medium heat settings, and move continuously to avoid scorching.
Wear gloves, eye protection, and a respirator for paint safety.
Test a small area first, scrape softened paint gently, and ventilate the workspace.
Chemical Stripper vs Mechanical Removal: When to Use Each
You’ll find chemical strippers work well on delicate profiles and narrow crevices where scraping would damage the substrate, and they often require less elbow grease.
Mechanical removal — sanding, scraping, or using a heat gun — is faster on flat, durable surfaces and avoids harsh chemicals.
Choose based on the surface: test a small area to see which method removes the paint without harming the material.
Chemical Stripper Advantages
Choose a chemical stripper when dried latex paint is bonded into crevices, layered thickly, or adhered to delicate substrates that sanding would damage.
You’ll get targeted removal with less surface harm. Consider chemical stripper types and eco friendly options to match material and safety needs.
- Precise paint loosening
- Minimal substrate abrasion
- Works in tight areas
- Selectable toxicity levels
Mechanical Removal Benefits
Compare mechanical removal when dried latex paint needs faster, more controlled stripping without chemicals. You’ll prefer mechanical tools for speed, edge control, and reduced fumes, and you’ll still prioritize surface protection with masking and pads. Use sanding, scraping, or power tools judiciously to avoid damage; they’re ideal when chemical use is unsuitable or messy.
| Advantage | Note |
|---|---|
| Speed | Fast removal |
| Control | Precise edges |
| No fumes | Safer indoors |
| Prep needed | Protect surface |
Choosing Based On Surface
1 clear rule helps: match the removal method to the surface type and condition before you start.
You’ll pick chemical stripper for delicate or ornate pieces where surface compatibility matters, and mechanical removal for sturdy surfaces or thick paint finish.
Consider safety, time, and cleanup when deciding.
- Delicate wood
- Metal with rust
- Painted drywall
- Concrete floors
Sand Away Dried Paint Without Leaving Marks
Start by evaluating the surface and the paint thickness so you can pick the right grit and sanding technique; sanding too aggressively will leave scratches, while too fine a grit will take forever.
Use progressive sanding techniques—start coarser, finish finer—keep motion even, and let surface preparation guide grit choice.
Clean dust frequently, inspect for feathered edges, and stop once paint blends smoothly.
Prevent Surface Damage During Paint Removal
Before you start, cover nearby surfaces and floors with drop cloths or plastic to prevent accidental damage.
When using solvents or scrapers, test your method on a hidden spot to make sure it won’t harm the finish.
If the test shows any discoloration or etching, stop and try a gentler approach.
Protect Surrounding Areas
Protecting nearby surfaces keeps the cleanup focused and prevents swapping one problem for another, so lay down drop cloths or plastic sheeting and tape edges securely before you begin.
Use drop cloths, painter’s tape, and masking materials to create protective barriers and surface shielding for full area coverage.
- Cover floors and furniture
- Tape baseboards and trim
- Shield hardware and fixtures
- Block vents and openings
Test On Hidden Spot
Now that surrounding areas are shielded, test your removal method on an inconspicuous spot to avoid surface damage.
Choose a hidden location—like inside a cabinet or under trim—and apply your solvent or scraper briefly.
Check for discoloration, finish softening, or residue to confirm paint compatibility.
If the sample passes, proceed cautiously; if not, try a gentler method or different product.
Reprep & Refinish a Surface After Paint Removal
Assess the stripped surface carefully to decide what repairs and prep it needs before refinishing.
You’ll prep surfaces, use sanding techniques, and match texture while choosing refinishing techniques for paint adhesion and surface durability.
Then seal, test paint compatibility, and apply finish touches.
Then seal the surface, test paint compatibility, and apply final finish touches for lasting results.
- Fill cracks, smooth edges
- Match texture, feather repairs
- Seal and prime for adhesion
- Apply compatible topcoat
Eco Disposal of Paint Scraps & Rags
Store paint scraps and used rags in clearly labeled, sealed containers to keep fumes contained and prevent accidental fires.
Check local recycling programs for latex paint drop-off or reuse options, and never pour paint down drains.
Compost only uncontaminated, natural-fiber rags if permitted by your local guidelines—otherwise treat them as hazardous waste.
Safe Paint Waste Storage
When you finish a painting job, keep leftover latex, chips, and used rags separate and contained so they won’t leak, ignite, or contaminate soil and water.
You should follow local paint storage and waste disposal rules:
- Seal cans tightly
- Double-bag used rags in labeled containers
- Store in a cool, ventilated area off the ground
- Take hazardous loads to collection sites
Recycling And Composting Options
You can often keep paint waste out of landfills by recycling usable leftovers and composting safe, water-based scraps like small amounts of fully dried latex and paper cleanup materials.
Knowing what’s acceptable and how to prepare items will make drop-off or home composting straightforward. Check local paint disposal programs, strain and seal small dried chips, and only compost uncontaminated paper rags as part of eco friendly practices.
Remove Paint Drips From Concrete & Driveways
Although concrete soaks up paint more than other surfaces, you can often lift drips without damaging the slab by choosing the right approach for the paint’s age and the driveway’s finish.
For concrete cleaning and driveway restoration try:
- Scrape loose paint with a stiff brush or scraper.
- Apply mild detergent and scrub.
- Use a poultice for stubborn spots.
- Rinse and repeat until clean.
Remove Dried Latex Paint From Plastic Safely
Plastic is less porous than wood or concrete, so dried latex paint usually sits on the surface and can be removed without damaging the item if you act carefully. Test a small area for plastic compatibility, then soften with warm soapy water or rubbing alcohol depending on latex paint types. Scrape gently with a plastic scraper; rinse and repeat as needed.
| Tool | Solvent | Tip |
|---|---|---|
| Plastic scraper | Warm soapy water | Test first |
| Soft cloth | Rubbing alcohol | Gentle rub |
| Toothpick | Vinegar | Precision |
| Brush | Commercial remover | Follow label |
| Gloves | Water rinse | Protect hands |
Tackle Large Areas vs Small Touchups Efficiently
When you’ve cleared small patches of dried latex from plastic, it’s time to decide whether to attack an entire surface or focus on spot repairs.
After removing small dried latex patches from plastic, decide whether to tackle the whole surface or just spot repairs.
Large areas call for different tools, time, and strategy than small touchups. You’ll choose touchup techniques or large area strategies based on scope, finish, and patience:
- Use scraper and solvent for spots
- Roll or strip for big surfaces
- Blend edges carefully
- Protect surrounding areas
How Long Common Methods Take (Minutes–Hours)
You’ll find that method choice largely determines time: small spot cleaning with a scraper and solvent often takes 10–30 minutes per spot, while rolling and sanding entire walls can run several hours to a full day depending on surface area and drying times.
Use time estimates to plan work sessions; combine faster methods for effectiveness on small stains and longer approaches for full-surface removal.
Troubleshooting: What to Do If Paint Won’t Budge
If a spot or section refuses to come off after the usual scraping, solvent, or sanding—despite the time estimates above—don’t assume it’s permanent.
Try targeted steps addressing paint adhesion issues and adjust paint removal techniques as needed:
Try focused fixes for stubborn paint: reheat, stronger solvent, finer sanding, or use primer/prep.
- Reheat with a heat gun, then scrape gently.
- Switch to a stronger solvent rated for latex.
- Sand progressively finer grits.
- Test adhesive primer or mild abrasion prep.
When to Call a Professional Paint Remover
Although many dried-latex problems you can handle yourself, call a professional if the paint covers lead-containing surfaces, spans large areas, resists all safe removal methods, or risks damaging structural materials—especially on historic trim, exterior siding, or complex architectural features. You’ll want professional services for safe, effective paint removal and to protect finishes and health.
| Situation | Risk | Action |
|---|---|---|
| Lead paint | High | Hire pros |
| Large area | Moderate | Hire pros |
| Stubborn coats | Moderate | Hire pros |
| Delicate trim | High | Hire pros |
Cost Comparison: DIY Options vs Professional Services
When weighing DIY removal against hiring pros, focus on total cost—not just upfront price—because tools, materials, disposal, and your time all add up, and mistakes can raise expenses quickly.
You’ll compare DIY Strategies with Professional Pricing; factor time, risk, and results.
Consider:
- Tool and product costs
- Time investment
- Potential repair or waste fees
- Guaranteed cleanup and labor costs
Frequently Asked Questions
Can Dried Latex Paint Be Removed From Electronics or Circuit Boards Safely?
Yes — you can remove dried latex paint from electronics, but you’ll need careful paint removal techniques and safe solvents; you’ll power down, gently test solvent on a hidden spot, use minimal solvent, and avoid soaking sensitive components.
Will Removing Paint Void My Home’s Warranty or Violate Rental Agreements?
Yes — removing paint can affect warranty implications and violate rental policies; you should check your homeowner warranty terms and your lease, get landlord or manufacturer approval, and document permissions before altering finishes to avoid disputes.
Are There Health Risks From Fumes When Removing Paint Outdoors?
Sure — you’re totally safe outdoors, right? Not really: you’ll still face fume exposure if solvents are strong; you should use outdoor ventilation best practices, wear protection, and limit time near fumes to reduce health risks.
Can Dried Latex Paint Be Recycled or Reprocessed for Crafts?
Yes — you can recycle dried latex paint partially: you’ll grind or soften chunks, mix with binders or sealants, and repurpose pigments for craft projects. You’ll check local paint recycling programs for safe disposal or reuse options.
How Do Humidity and Temperature Affect Paint Removal Effectiveness?
Don’t worry — humidity levels and temperature fluctuations change drying and softening times, so you’ll need to adjust methods. Higher humidity slows drying; heat speeds it but can harden paint. Work when conditions are stable for best results.
Conclusion
You’ve got this — think of the paint as a stubborn splinter you’ll coax out, not rip. Try the gentlest tools first: warm soapy water, rubbing alcohol, a plastic scraper, or a heat gun on low, matching method to surface and paint age. Protect your hands and lungs, test a hidden spot, and expect minutes to hours. If it won’t budge or the surface’s at risk, call a pro to finish the job cleanly.