How Long Does Masonry Paint Take to Dry? Dry Time Guide
You can expect masonry paint to be touch-dry in about 1–4 hours and fully cured in roughly 24–72 hours, though that shifts with paint type, coat thickness, temperature, humidity and substrate porosity. Light coats in warm, dry conditions dry fastest, while cold, damp weather or thick layers slow things dramatically. Breathable silicone paints may feel slower at the surface but manage moisture better. Keep manufacturer times in mind, and if you keep going you’ll find tips for faster, safer results.
Masonry Paint Drying Time: Quick Ranges

Masonry paint typically dries to the touch in 1–4 hours and cures fully in 24–72 hours, depending on the formula, coat thickness, temperature, and humidity, so plan projects with those ranges in mind.
You’ll judge masonry paint application speed by coat thickness and ambient drying conditions. Light coats in warm, low-humidity air dry fastest; cool, humid conditions slow progress and extend recoat intervals.
Which Paint Type Dries Fastest: Acrylic vs Masonry vs Lime?
While acrylics usually dry fastest—often touch-dry within an hour—you’ll find masonry (mineral) paints and lime paints take longer because of their formulations and moisture-curing behavior.
Masonry paints commonly reach touch-dry in 1–4 hours and cure in 24–72 hours, whereas lime paints can remain tacky for several hours to a day as they carbonate and fully harden over days.
You’ll appreciate acrylic advantages for speed, while lime disadvantages include slow setting and sensitivity to humidity.
Do Breathable (Silicone) Masonry Paints Dry Differently?
How do breathable (silicone) masonry paints dry compared with other types?
You’ll find they often cure slightly slower at surface level but manage moisture vapor better, so trapped damp won’t prolong failures.
Those breathable benefits let walls dry from the inside out while film formation remains steady.
Expect similar touch-dry times but improved long-term performance due to silicone longevity and reduced blistering.
How Substrate Porosity Changes Masonry Paint Drying
Porosity controls how much paint the substrate soaks up, and that absorption directly speeds or slows drying.
If you’re working on very porous masonry, you’ll often need a primer or surface sealer to reduce suction and promote an even cure.
Proper preparation—cleaning, pointing, and fixing loose material—also evens out porosity and gives the paint a predictable drying time.
Porosity Impact On Absorption
Because masonry surfaces soak up paint differently depending on their pore structure, you’ll see drying times vary a lot from one substrate to another.
You’ll notice porosity effects directly: high-porosity blocks speed initial absorption rates, thinning the film and accelerating surface touch-dry time but prolonging full cure.
Low-porosity surfaces slow absorption, keeping solvents trapped longer and delaying safe recoating and full hardness.
Surface Preparation Effects
The way you prepare a masonry surface directly changes its pore structure and consequently how paint dries.
By cleaning, sanding, or applying a primer you alter surface texture and control moisture levels so paint soaks evenly.
Rough, unsealed substrates absorb faster and can shorten open time; sealed or primed areas promote film formation and consistent drying, reducing blistering and uneven finish.
Preparing New Plaster or Render Before Painting
When you’re working with fresh plaster or render, let it fully cure and dry to the touch before you do anything else; that prevents adhesion problems and blistering later on.
For plaster preparation and render treatment, check moisture with a meter, apply a suitable primer or mist coat, and remove dust.
Only paint once readings are consistently low and the surface is stable.
How Temperature Affects Masonry Paint Drying
Temperature has a big effect on how quickly masonry paint sets, so you’ll see faster drying in warm conditions and much slower results when it’s cold.
Remember that humidity combines with temperature to slow evaporation, so a warm, damp day can still keep paint tacky.
If you’re painting in cold weather, take precautions like warming the surface, using slow-dry formulations, and allowing extra curing time.
Temperature And Drying Speed
Although it might seem subtle, how warm or cold it is will directly change how quickly masonry paint sets and cures, so you’ll want to plan application around predictable conditions.
You’ll notice temperature effects on tack time and full cure; adjust drying techniques accordingly.
- Work during stable daytime warmth
- Avoid freezing or extreme heat
- Use gentle heating or shading to moderate conditions
Humidity’s Combined Impact
If humidity rises while the air stays warm, you’ll see paint feel tackier longer and take much more time to fully cure. This is because moisture in the air slows solvent evaporation and can alter film formation.
You’ll face humidity effects that create drying challenges; monitor moisture levels and consider environmental factors and weather conditions to protect paint performance. Schedule work when conditions favor faster curing.
Cold Weather Precautions
When cold settles in, paint dries much slower and can fail to form a proper film. So, you’ll need to take precautions like warming the substrate, using quick-dry formulations, and timing work for the warmest part of the day to guarantee proper adhesion and curing.
- Check surface preparation and frost precautions before coating.
- Control humidity levels and manage temperature fluctuations with heaters.
- Use fast drying techniques to shorten curing times and protect paint adhesion.
How Humidity and Dew Point Slow or Speed Drying
Because moisture in the air controls how quickly solvent and water evaporate from masonry paint, you’ll see drying speed change dramatically with humidity and dew point.
You’ll notice humidity effects reduce evaporation rate, slowing cure times when dew point is high. Aim for low-to-moderate drying conditions; avoid painting when dew point approaches surface temperature, or condensation will halt drying and ruin finish.
How Wind and Ventilation Affect Masonry Paint Drying
Humidity and dew point set the stage for paint drying, but air movement determines how fast that moisture actually leaves the surface.
Humidity and dew point influence drying, but airflow — not just moisture — controls how quickly paint loses water.
You’ll notice wind effects speed surface drying but can cause unevenness if gusty; controlled ventilation impact promotes even evaporation.
Manage airflow to avoid dust and skinning.
- Use steady cross-ventilation
- Shield from strong gusts
- Increase circulation after painting
Touch-Dry vs Fully Cured: What’s the Difference?
When a masonry paint feels dry to the touch, it means the surface film has set and you can lightly handle the area without smudging.
Fully cured, however, is when the paint has completed its chemical hardening process through the full depth and reached its maximum durability.
You’ll need to wait the manufacturer’s recommended curing time before subjecting the surface to heavy use or cleaning.
Touch-Dry Explained
Although touch-dry paint feels dry to the fingertips after a short time, it’s not yet fully cured and won’t handle heavy use or cleaning.
You should treat touch-dry as a temporary state while the coating continues to harden and develop full durability.
You’ll learn touch dry terminology and factors influencing touch dry so you know when to wait.
- Light contact safe
- Avoid washing
- Protect from abrasion
Fully Cured Meaning
Touch-dry tells you the paint won’t smear if you gently touch it, but fully cured means the coating has chemically hardened and reached its designed strength and resistance.
You should wait the full curing period to enjoy fully cured benefits like durability, stain and weather resistance, and paint adhesion.
Check the manufacturer’s fully cured timeline and avoid stress, cleaning, or heavy use until that time.
How to Test If Masonry Paint Is Ready for a Second Coat
Curious how to tell if the masonry paint’s ready for a second coat? Check paint readiness signs: surface feels dry, no tackiness, and uniform color.
Use simple second coat testing to avoid seals or lifts.
- Light fingertip touch on hidden spot
- Fingernail scratch test
- Wait 10–15 minutes after touch to confirm non-tackiness
Recoat Timing: Single vs Multiple Coats
When you’re planning recoats, note that a single coat often dries to touch faster than it cures fully.
So check the manufacturer’s stated drying time before proceeding. If you need multiple coats, allow the recommended interval between layers to prevent trapping moisture or causing poor adhesion.
Remember temperature, humidity, and substrate porosity will affect both single-coat drying and the safe interval for additional coats.
Single Coat Drying Time
One coat of masonry paint typically feels dry to the touch within 1–4 hours, but you shouldn’t assume it’s ready for heavy use or a second coat that soon.
You should monitor drying factors and use single coat techniques to guarantee an even finish. Consider:
- Check tackiness before light traffic
- Allow longer in cool or humid conditions
- Use recommended manufacturer wait times
Multiple Coats Interval
Because drying time varies with temperature, humidity, and coat thickness, you’ll need to space recoat intervals according to conditions and the manufacturer’s instructions; typically wait 4–24 hours between coats for masonry paint, allowing longer in cool or damp weather and shorter in warm, dry conditions.
| Condition | Interval | Tip |
|---|---|---|
| Warm/dry | 4–8 hrs | Use quick drying techniques |
| Cool/damp | 12–24 hrs | Verify ideal conditions |
Plan recoat intervals for multiple applications, monitor drying factors and paint layers to maintain drying consistency amid environmental influences.
Factors Affecting Recoat
Although environmental conditions are often the headline factor, recoat timing also depends on the number of coats you’re applying, the paint’s formulation, and how thick each layer is.
You should judge readiness by touch, sheen, and recommended wait times.
Consider:
- Single vs multiple coats affects dry-through and required wait.
- Solvent or waterborne formula changes cure pace.
- Greater paint thickness needs longer recoat timing.
How Coat Thickness and Application Method Change Drying
When you lay on a thicker coat or use a high-pressure sprayer, the paint’s surface may skin over quickly while the interior stays wet, which lengthens total cure time and raises the risk of runs or blistering.
You should adjust coat thickness and choose an application method—brush, roller, or low-pressure spray—to promote even drying, reduce sagging, and guarantee consistent adhesion.
How Long Before You Can Hang Fixtures or Décor on Painted Walls
After paint feels dry to the touch, wait before hanging anything heavy—most latex paints reach handling dryness in 1–2 hours but need 24–48 hours for light fixtures and picture frames, and up to 7–30 days for very heavy or load-bearing mounts as the film fully cures.
You should:
- Use anchors rated for the load when hanging fixtures.
- Test small wall décor first.
- Avoid stress on fresh paint until fully cured.
How Long Before New Plaster or Render Can Be Painted
Wondering how long you should wait before painting new plaster or render?
You’ll usually wait at least 2–6 weeks depending on thickness, drying conditions and plaster preparation.
Confirm the surface’s moisture content is low, cure fully after render application, and ventilate the area.
Ensure the surface is fully cured and dry, check moisture levels, and keep the area well ventilated.
Test with a moisture meter or tap: a hollow sound and stable readings mean it’s ready for primer and paint.
How Primer Choice Changes Drying and Recoat Times
Choosing the right primer can greatly shorten or lengthen both drying and recoat times, because different formulations absorb into or seal the substrate in different ways.
You should match primer types to surface porosity, control drying conditions, and adjust paint thickness and application techniques to meet manufacturer times.
- Use solvent or water-based primers appropriately
- Thin coats speed drying
- Spray vs brush affects recoat intervals
Do Colour and Pigment Change Dry Time or Appearance?
While pigment type and color shade don’t usually change a paint’s chemical cure time, they can affect how a surface looks as it dries and how quickly it reaches a touch- or recoat-ready feel.
You’ll notice color impact: dark tones absorb heat and may seem to dry faster on warm days, while high-pigment whites can show brush marks.
Pigment effects influence sheen and uniformity.
Additives and Accelerators: Speed vs Risks
You can use faster-curing additives to shorten drying time, but they can change how the paint bonds and ages.
Watch for health and safety warnings—some accelerators release strong fumes or require protective gear.
Balance the immediate speed gains against possible long-term integrity issues before you add anything.
Faster Curing Additives
If you’re pressed for time, faster-curing additives can shave hours off masonry paint dry times by accelerating solvent evaporation or speeding polymer crosslinking.
However, they also bring trade-offs you need to weigh. You can use paint additives as faster curing methods to meet deadlines, yet they may alter finish, working time, and compatibility.
- Reduced open time
- Altered sheen
- Substrate sensitivity
Health And Safety
Faster-curing additives can meet tight schedules, but they often introduce health and safety trade-offs you should know before use. You must balance speed with health risks: follow safety precautions, wear protective gear and respiratory protection, enforce ventilation requirements, and control chemical exposure. Organize the workspace, note surface hazards, and post emergency procedures.
| Hazard | Control | Action |
|---|---|---|
| Paint toxicity | Ventilation | Evacuate |
| Skin contact | Gloves | Wash |
| Fumes | Mask | Monitor |
Long-Term Paint Integrity
Although accelerators and additives can shave curing time, they can also compromise long-term paint integrity in ways you should understand before using them.
You’ll get faster touch-dry results, but additives can reduce long term durability and shorten overall paint lifespan, causing premature cracking, adhesion loss, or color fade.
Consider trade-offs carefully and test on samples.
- Reduced flexibility
- Weakened adhesion
- Accelerated UV fading
How Cold Weather Painting Affects Adhesion and Cure
When temperatures drop, paint chemistry and surface conditions change in ways that can weaken adhesion and slow curing, so you need to plan differently for cold-weather jobs. Cold weather brings adhesion challenges and curing delays; frost effects and temperature extremes harm paint performance. You should warm surfaces, use cold-formulated masonry paint, and allow extra cure time.
| Issue | Action |
|---|---|
| Adhesion challenges | Warm substrate |
| Curing delays | Extra dry time |
| Frost effects | Avoid painting |
| Low temps | Use cold-formula |
| Moisture | Control humidity |
How Hot, Sunny Conditions Create Surface-Skinning Problems
When you paint in hot, sunny conditions the surface can dry so fast it skins over before the underlying paint has released its solvents.
That skin traps solvent pockets underneath, which can later bubble, blister, or cause a tacky finish.
To avoid this, plan work for cooler parts of the day or use slower-drying formulations.
Rapid Surface Skinning
If your masonry paint dries too quickly in hot, sunny weather, the surface can form a hard skin while the underlying layer stays wet, causing blisters, poor adhesion, and an uneven finish.
You’ll notice rapid surface skinning; understanding surface skinning causes helps you act fast.
Consider these skinning prevention methods:
- Work in cooler hours
- Thin paint slightly
- Use slower‑evaporation additives
Trapped Solvent Pockets
Because hot, sunny conditions speed the paint’s surface drying, solvents beneath that skin can get trapped and form pockets that expand or emit gases as they try to escape.
You’ll see blisters or weak spots where solvent evaporation lagged, and those pockets undermine paint adhesion.
To prevent them, avoid painting in peak heat, work in shaded periods, and allow slower, even drying for durable results.
When to Seal or Apply Masonry Treatments After Painting
Although paint needs to cure fully before you seal or apply treatments, you can usually start light sealing once the surface has dried to the touch and the manufacturer’s minimum cure time has passed.
Once paint is dry to the touch and minimum cure time met, gentle sealing can begin—avoid trapping moisture.
You should consider sealing options and treatment timing carefully to avoid trapping moisture. Follow product instructions, test in a small area, and verify conditions are dry.
- Test patch
- Product compatibility
- Dry weather conditions
How to Avoid Blistering, Flaking, and Poor Adhesion
To prevent blistering, flaking, and poor adhesion, you’ll start with proper surface preparation—cleaning, repairing cracks, and removing loose material so the paint can bond.
You’ll also use correct application techniques: the right primer, appropriate spread rates, and suitable weather conditions.
Follow those basics and your finish will last instead of failing prematurely.
Surface Preparation Essentials
Good surface prep is the single biggest thing you can do to prevent blistering, flaking, and poor adhesion—clean, dry, and sound masonry lets paint bond properly and last longer.
Use surface preparation techniques and essential tools to remove dirt, efflorescence, and loose mortar before painting.
- Pressure wash and let fully dry
- Scrape, wire-brush, and tack-clean
- Repair cracks and repoint joints
Proper Application Techniques
Start by applying paint only when the masonry is completely dry and the temperature and humidity are within the manufacturer’s recommended range, since moisture and extreme conditions are the main causes of blistering, flaking, and poor adhesion.
Use proper application techniques: prime porous areas, maintain correct paint consistency, spread thin even coats, allow full cure between layers, and avoid painting in direct sun or wind.
How to Speed Drying Safely Without Harming the Finish
If you want your masonry paint to dry faster without compromising the finish, focus on controlled airflow, moderate heat, and proper humidity management—each adjusted gently to avoid cracking, blistering, or uneven sheen.
You’ll use safe heat sources and mild drying agents, practice precise airflow management, and respect paint layering to prevent defects.
- Use gentle fans
- Low, indirect warmth
- Humidity control and timing
How to Slow Drying When Paint Skins Too Fast
If your masonry paint is skinning over too quickly, reduce airflow near the surface by closing vents or moving fans away so the top layer stays tacky longer.
You can also increase humidity around the painted area with a humidifier or by misting water nearby to slow solvent evaporation.
These simple steps help prevent premature skinning and improve film formation.
Reduce Airflow Near Surface
When paint skins too fast, cutting down airflow near the surface helps retain moisture and slow drying; you can do this by creating a gentle barrier—like a temporary wind break, a folded drop cloth, or closing nearby vents—so the surface stays damp longer without trapping fumes.
You should reduce airflow strategically to enhance drying consistency and prevent surface film while protecting ventilation.
- Position a wind break
- Drape a folded drop cloth
- Close nearby vents carefully
Increase Humidity Around Paint
1 simple way to slow paint from skinning over too quickly is to raise the humidity around your work area, because higher moisture in the air keeps solvent evaporation down and lets coatings level out longer.
You can use a humidifier or misting to adjust humidity effects and moisture management, improving paint performance.
Monitor drying conditions, consider weather considerations, and control environmental factors to avoid defects.
Drying After Rain or High Humidity: Emergency Steps
Although sudden rain or oppressive humidity can stall a masonry paint job, you can take quick, effective steps to salvage the surface and prevent staining or adhesion problems.
Address rain effects and humidity challenges immediately with these emergency solutions and targeted drying strategies:
Address rain and humidity fast with emergency fixes and focused drying to protect paint and ensure proper curing.
- Blot pools, avoid rubbing to limit contamination.
- Use fans and dehumidifiers to accelerate drying.
- Inspect for bloom or tackiness; recoat only when dry.
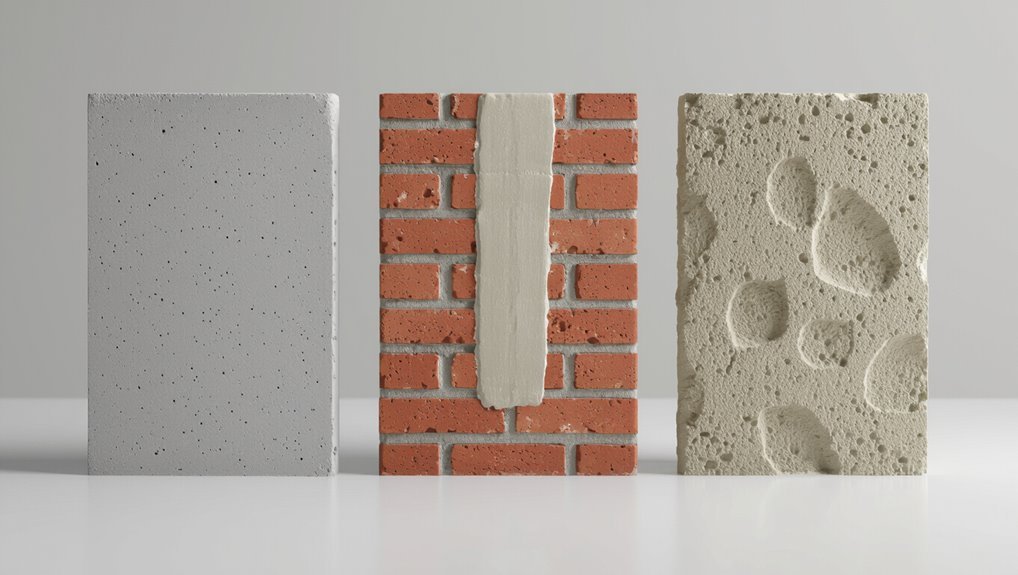
Drying Differences on Brick, Concrete, and Render
Know that brick, concrete, and render each shed moisture at different rates, so your drying timeline will change with the substrate.
Brick often dries faster on the surface but can retain damp deeper in the pores, while dense concrete and absorbent render can both slow overall drying depending on mix and finish.
Consider those material traits when planning recoat times and final inspections.
Brick Drying Timeline
How long will paint take to dry on brick versus concrete or render? You’ll find brick drying timelines vary because brick moisture and drying conditions affect absorption; expect longer curing on older, porous brick.
Follow these tips:
- Check brick moisture before painting to avoid trapped damp.
- Paint in warm, ventilated drying conditions for faster cure.
- Allow extra time for shaded or cold areas.
Concrete And Render Differences
Surface type matters: concrete and render absorb and release moisture differently than brick, so you’ll see faster initial drying on dense concrete but longer full curing on porous render. You should adapt concrete surface preparation and appreciate masonry paint benefits for durability and breathability.
| Surface | Drying note |
|---|---|
| Concrete | Quick tack, slower cure |
| Render | Slower overall curing |
| Brick | Moderate drying |
How Substrate Moisture and Salt Contamination Delay Cure
If the masonry is damp or holds soluble salts, the paint won’t cure on schedule and you’ll see problems like extended tackiness, blistering, or adhesion failure.
You’ll notice moisture impact slows solvent evaporation and film formation, while salt intrusion draws moisture back to the surface, renewing dampness and causing paint lift.
- Delayed drying
- Surface efflorescence
- Reduced adhesion
How to Prepare a Newly Plastered Wall to Optimize Drying
Before you paint, make certain the plaster’s fully cured and dry—tackiness or a cold, damp feel means it’s not ready—and remove any loose dust or laitance with a soft brush or vacuum.
Then control ventilation and temperature to create ideal drying conditions, use breathable primers suited to new plaster, fill cracks with compatible filler, and follow wall preparation techniques that prevent trapped moisture and guarantee even paint adhesion.
How Professionals Test Paint Dryness On-Site
Once your prep work confirms the plaster’s dry and primed, you’ll want to verify the paint itself is setting correctly on-site.
You’ll use simple on site techniques and quick paint testing to confirm tack, adhesion, and curing without delaying work.
Typical checks include:
- Fingertip tack test for surface dryness
- Adhesion tape pull for bonding
- Smell and sheen inspection for curing progress
Reading Manufacturer Datasheets: Drying and Recoat Times
When you consult a manufacturer’s datasheet, focus first on the stated dry times and recoat intervals, because those numbers set the schedule for safe sanding, second coats, and final curing.
They reflect test conditions (temperature, humidity, film thickness) that you should match on-site or adjust for.
Use manufacturer specifications to plan work, noting recommended drying conditions, substrate prep, and any temperature or humidity limits.
Interpreting “Touch Dry,” “Recoat,” and “Full Cure” Labels
The labels “touch dry,” “recoat,” and “full cure” tell you different milestones in a coating’s development, so read them as distinct instructions:
You’ll use touch dry to know when surfaces feel dry, recoat timing for additional coats, and full cure for maximum paint adhesion and durability.
Consider humidity effects, temperature influence, substrate preparation, application methods, drying accelerators, and color impact.
- touch dry vs full cure
- recoat timing guidance
- factors: humidity effects, temperature influence
Specialty Masonry Paints (Silicone, Breathable): Typical Times
Silicone and breathable masonry paints dry and cure on different schedules than conventional acrylics, so you should plan your work around their typical timelines. You’ll notice silicone properties give water repellence and breathable benefits allow vapor escape. Watch drying conditions, use proper application techniques, check surface compatibility, and expect improved paint longevity when cured.
| Type | Touch dry | Full cure |
|---|---|---|
| Silicone | 1–4 hrs | 7–14 days |
| Breathable | 2–6 hrs | 5–10 days |
Warranty Tips: How Drying Affects Guarantees for Masonry Paint
Because drying and curing determine how paint performs over time, you should follow the manufacturer’s drying guidelines precisely to keep your warranty valid.
You’ll protect warranty coverage and avoid negative guarantee implications by documenting conditions and timelines.
Take these steps:
- Record application date, temperature, and humidity.
- Follow recommended recoat and cure times.
- Keep receipts and product batch numbers for claims.
Troubleshooting Slow-Drying Jobs: Causes and Corrective Steps
If your masonry paint’s taking unusually long to dry, check a few common causes first: assess environmental factors like humidity and temperature, inspect substrate conditions for moisture retention, and review paint formulation and paint application thickness.
Corrective steps include improving ventilation, using drying techniques (fans, dehumidifiers), spot-drying damp areas, and making timing adjustments between coats to prevent slow drying and adhesion issues.
Scheduling Work and Maintenance Around Realistic Drying Windows
Want to avoid rework and delays? Plan tasks using realistic scheduling: account for temperature, humidity, and manufacturer times so surfaces cure before traffic.
Coordinate maintenance planning with contractors and occupants to avoid premature contact. Use buffers for unexpected slow drying.
- Confirm cure windows daily
- Stagger trades by surface readiness
- Communicate changes to all stakeholders
Frequently Asked Questions
Can Masonry Paint Be Used Over Oil-Based Emulsion Without Full Sanding?
You can, but you’ll face adhesion concerns unless you do proper surface preparation; you’ll need thorough cleaning, deglossing or light sanding, and a suitable primer to guarantee masonry paint bonds well over oil-based emulsion.
Will Nearby Vegetation or Soil Stains Affect Long-Term Paint Durability?
Yes — vegetation impact and soil stains can reduce longevity; you’ll need stain prevention measures like clearance, barriers, and sealed masonry coatings to keep roots, moisture, and organic staining from degrading paint and causing peeling or discoloration over time.
Are There Eco-Friendly Masonry Paints With Comparable Drying Times?
Yes — you can choose eco friendly options that match conventional drying technology; imagine dew lifting as paint firms quickly, and you’ll find low-VOC, water-based formulations that dry comparably fast while cutting emissions and odors.
How Do Paint Sprayers Versus Roller Systems Affect Texture and Coverage?
Sprayers give you faster, even coats with sprayer advantages for fine texture control and fewer brush marks, while roller limitations include visible stipple and slower coverage; you’ll need touch-ups after rollers to match sprayer smoothness.
Is Touch-Up Colour Matching Reliable Years After Initial Application?
You can usually match touch-ups, but you’ll face color consistency and fading issues over years; sunlight, dirt, and original fading change tones, so you’ll often need blending, feathering, or repainting sections for an invisible repair.
Conclusion
You’ve got the timing down: masonry paint usually skins in a few hours and fully cures in days to weeks, so plan coats and maintenance around manufacturer times. Let new plaster or render dry thoroughly—no rush—before you paint, and pick acrylics for faster drying or breathable/silicone options for damp walls. If drying lags, check humidity, substrate and coat thickness, then correct. Now go forth like a Victorian telegram—measure, prep, paint, and protect.