How to Remove Dry Latex Paint Without Damaging Surfaces
You can remove dry latex paint without harming surfaces by starting gentle: soak a cloth in warm soapy water and blot to soften, then lift flakes with a plastic scraper. Try rubbing alcohol or white vinegar for stubborn spots, testing a hidden area first. Use a heat gun or hair dryer on low for thick patches, and protect finishes with mild solvents and slow, careful scraping. Keep safety gear on, and keep going to learn detailed surface-by-surface tips.
How To Tell Latex Vs Oil Paint (Simple Tests)
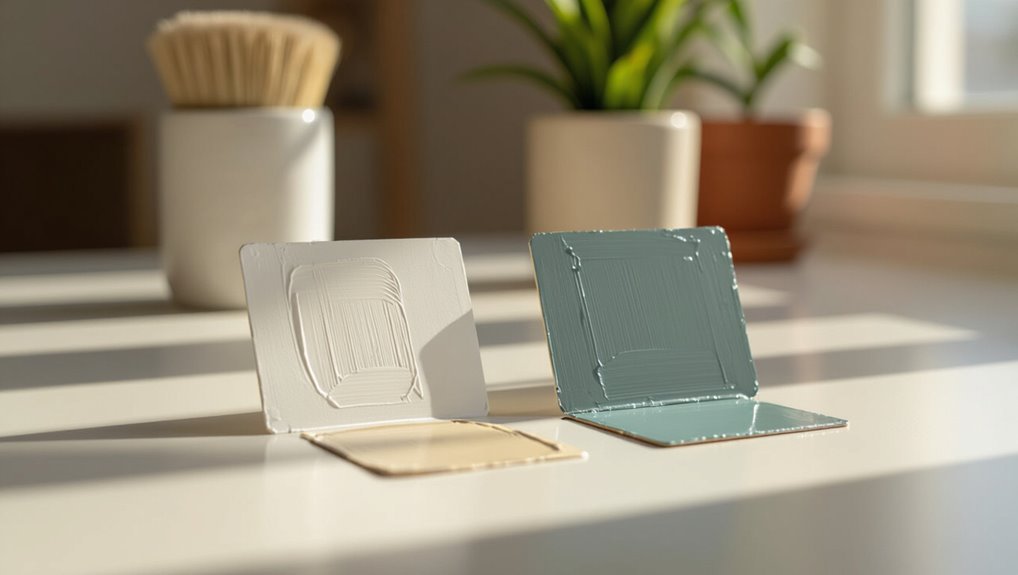
How can you quickly tell whether a dried paint is latex or oil? Rub a hidden spot with rubbing alcohol: latex paint characteristics include softening or lifting, while oil paint resists.
Smell and sheen help too—oil paint properties often feel harder and glossier and emit a stronger solvent odor.
A careful scratch test shows latex more flexible, oil more brittle.
Quick Step‑By‑Step: Remove Dried Latex Fast
Grab a putty knife and some rubbing alcohol — you can remove dried latex paint quickly by softening the film, scraping gently, and cleaning the residue.
Dampen a cloth with alcohol, loosen edges, and lift flakes with the putty knife. Repeat until gone, wipe with soapy water, then dry.
These removal techniques work on glass, metal, and sealed wood without harsh chemicals.
Quick Safety Steps Before You Start Removal
Before you start, make sure you’ve ventilated the area, put on chemical-resistant gloves, and protected nearby surfaces — these quick steps cut your risk of irritation, skin contact, and accidental damage while you remove the dried latex paint.
Check labels for hazards, keep kids and pets away, use eye protection, and lay drop cloths for surface protection.
Follow safety precautions and work deliberately.
Tools And Household Supplies You’ll Need
Before you start scraping, gather the right protective gear—gloves, goggles, and a mask—to keep yourself safe.
You’ll also want basic household cleaners like soap, rags, and rubbing alcohol for softening and cleanup.
For tough spots, have specialized tools ready such as putty knives, paint scrapers, and a heat gun or citrus-based remover.
Necessary Protective Gear
Since you’ll be working with flakes, dust, and chemicals, wear basic protective gear to keep yourself safe and comfortable: a dust mask or respirator, safety goggles, nitrile gloves, and old clothes or a disposable coverall.
Use:
- protective gloves for solvent contact
- safety goggles to shield eyes
- respirator mask for fumes
- work apron to protect clothing and keep tools handy
Household Cleaning Supplies
When you start removing dry latex paint, have a few basic household cleaners and tools within arm’s reach so the job goes faster and cleaner:
you’ll want mild dish soap, white vinegar, rubbing alcohol, baking soda paste, microfiber cloths, plastic scrapers, and a spray bottle.
Consider cleaning alternatives and eco friendly solutions like vinegar or baking soda before stronger chemicals.
Wear gloves; ventilate the area.
Specialized Removal Tools
If you’re tackling dried latex paint, you’ll want a few specialized tools beyond basic cleaners to make removal quicker and safer.
You’ll need protective gear and tools that minimize surface damage.
Useful items include:
- specialized scrapers for edges and trim
- plastic razor blades for delicate finishes
- heat guns for stubborn spots (use low setting)
- nylon scrub pads and gentle solvents
How To Test A Small Area Without Damaging The Surface
Before you start, pick a hidden spot—behind a trim or inside a closet—so any test won’t be obvious.
Gently rub a small area with your chosen remover or a damp cloth to see if the paint softens or lifts.
If the surface shows no damage and the paint responds, you can proceed with confidence.
Choose Hidden Spot
Wondering where to test the paint remover? Pick a hidden location as your test area to avoid visible damage.
Try these spots:
- Behind furniture or appliances
- Inside a cabinet or closet corner
- Under trim or molding
- Beneath a removable fixture
You’ll see how the remover reacts without risking the main surface; proceed only if the hidden area stays intact.
Perform Adhesion Check
Now that you’ve confirmed the remover won’t harm a hidden spot, check how well the paint sticks to the surface so you know the best removal method.
Gently score a tiny area, press tape, then peel—these simple surface tests reveal adhesion types: loose, semi-adherent, or fully bonded.
Record results and choose mechanical, chemical, or gentle scraping accordingly to avoid damage.
Softening Dried Latex With Warm Soapy Water (How Long & Tips)
Softening dried latex with warm, soapy water is often the simplest first step: mix a few drops of dish soap into a bowl of warm (not hot) water, soak a clean cloth or sponge, and press it against the paint for 5–15 minutes to rehydrate and loosen the film.
Use soapy water preparation and maintain warm water temperature.
Tips:
- Test in an inconspicuous spot
- Gently blot, don’t scrub
- Repeat if needed
- Dry and assess removal
Using Rubbing Alcohol To Loosen Latex Paint
If warm, soapy water doesn’t revive the dried latex, rubbing alcohol is a practical next step for loosening the paint film.
Dampen a cloth with rubbing alcohol, blot and let it sit briefly to promote paint softening, then gently rub to lift flakes.
Test an inconspicuous area first to avoid finish damage, and ventilate the room while you work.
Applying White Vinegar For Gentle Paint Removal
Because white vinegar’s mild acidity breaks down latex binders without harsh chemicals, you can use it as a gentle way to soften dried paint on many surfaces.
Because white vinegar’s mild acidity gently softens dried latex paint, it’s a safe, non-toxic way to loosen and remove residue.
Use vinegar benefits with a gentle application:
- Warm vinegar soak for 10–15 minutes
- Scrape gently with a plastic tool
- Blot residue with a damp cloth
- Rinse and dry to prevent etching
When To Use Commercial Latex Paint Removers
Warm vinegar works well on small, recent spots, but there are times when you’ll need a stronger approach. Use commercial alternatives when paint is thick, stubborn, or on porous surfaces; check product effectiveness and test a hidden area. Compare features:
| Situation | Action | Result |
|---|---|---|
| Thick build-up | Use remover | Softens paint |
| Old stains | Apply poultice | Lifts residue |
| Porous surface | Test first | Prevents damage |
How To Choose A Solvent Safe For Finished Wood
First identify the type of finish on your wood—varnish, shellac, or lacquer react differently to solvents.
Test any solvent on an inconspicuous spot to check for discoloration or finish softening.
When possible, choose a mild, water-based remover to minimize damage.
Assess Wood Finish Type
When you’re about to remove dried latex paint from wood, identify the finish first so you pick a solvent that won’t damage it.
Know common wood finish types and assess finish compatibility before proceeding. Check surface gloss, age, and feel to infer type.
- Shellac: sensitive to alcohol
- Varnish: tougher, needs stronger solvents
- Lacquer: dissolves easily
- Polyurethane: most durable
Test Solvent Compatibility
Curious which solvent will be safe on your finish? You’ll run compatibility tests: try small areas with different solvent types and cleaning agents, note surface reactions, residue effects, and drying times.
Match paint properties and material interactions before wider use. Vary application methods and observe.
Always follow safety precautions and stop if finish softens, discolors, or bubbles.
Prefer Mild, Water-Based
After you’ve tested solvents on inconspicuous spots and confirmed the finish holds up, choose the gentlest effective cleaner next: mild, water-based solutions will usually preserve varnish, lacquer, and shellac better than harsh chemicals.
Use mild solvents and water based options first; they reduce risk and spot damage.
Consider:
- Warm soapy water
- Vinegar diluted
- Commercial water-based remover
Rinse and dry thoroughly.
Removing Dried Latex From Painted Walls Without Harming Paint
Start by evaluating the spot—rub a hidden area gently with a damp cloth to confirm the wall paint is fully cured and not water-sensitive.
Use mild soap, water, and a soft sponge first; test paint compatibility and alternate removal techniques like a plastic scraper or rubbing alcohol on a cloth.
Work gently, rinsing and drying; stop if paint softens, then try a gentler method.
Stripping Latex Paint From Unpainted Wood Carefully
Strip paint carefully to protect the wood: begin by evaluating the surface to determine paint thickness and whether the wood is raw, stained, or sealed.
Then choose a removal method—chemical stripper, heat, or mechanical—that suits the substrate and your skill level.
Choose a removal method—chemical, heat, or mechanical—matched to the substrate and your experience level.
- Assess wood types and paint thickness for proper removal techniques
- Prioritize surface protection and wood care during stripping
- Consider paint solvents, drying times, and environmental impact
- Plan project planning, disposal, and repainting to preserve paint adhesion
Cleaning Latex Drips Off Finished Furniture
Before you touch the drip, check how thick the dried latex is so you know whether it can be lifted or needs softening.
Pick a solvent that’s safe for the finish—water, mild soap, or a commercial latex remover—and test it in an inconspicuous spot.
Use gentle tools and slow, light motions to lift the paint without scratching or stripping the furniture.
Assess Paint Thickness
When you inspect the dried latex drip, check how much paint built up by looking at its height, edges, and how it catches light. Thin films that sit flush with the finish will scrape or dissolve more easily, while raised, scalloped drips have more bulk and may need careful softening or gentle sanding first.
Use these checks to assess paint residue and consider latex paint types.
- Height above surface
- Edge sharpness
- Surface sheen change
- Flexibility under fingernail
Choose Safe Solvent
Pick a solvent that’ll dissolve the latex without damaging the finish underneath: test products on an inconspicuous spot first, and favor mild options like warm soapy water, isopropyl alcohol (70%), or a citrus-based cleaner before trying stronger solvents.
Choose safe options based on your finish—varnish, lacquer, or painted surfaces—and learn which solvent types are compatible to avoid stripping or clouding the repair area.
Gentle Removal Techniques
If latex drips have dried on your finished furniture, start with the least aggressive methods and work up only as needed—you’ll protect the underlying finish while removing the paint.
Try these steps:
- Use warm water and mild soap to soften edges.
- Gently blot, don’t rub.
- Perform gentle scraping with a plastic putty knife.
- For stubborn spots, use a safe solvent sparingly and test first.
Removing Dried Latex From Metal Surfaces
Because metal doesn’t absorb paint the way wood or drywall does, dried latex often sits on the surface and can be scraped or softened without damaging the substrate. You’ll use metal surface techniques: test adhesion, scrape gently, then apply mild solvent if needed. Do a paint adhesion evaluation before proceeding.
| Tool | Purpose |
|---|---|
| Plastic scraper | Lift paint |
| Solvent | Soften residue |
Treating Latex Paint On Glass And Mirrors
Start by evaluating how much paint is on the glass or mirror and whether it’s flaking or firmly bonded, since that determines whether you’ll scrape, soften, or use a solvent.
Assess how much paint is on the glass and whether it’s flaking or firmly bonded before choosing removal methods.
For glass care and mirror maintenance try:
- Gently lift flakes with a plastic scraper.
- Soften with warm soapy water.
- Use rubbing alcohol for stubborn spots.
- Clean residue with a lint-free cloth and glass cleaner.
Get Dried Latex Out Of Carpets
After handling paint on smooth surfaces like glass, you’ll need a different tactic for carpets since fibers trap pigment and binder.
Assess carpet types and paint types, note drying times and paint thickness, then use vacuum techniques first.
Test cleaning methods on a hidden area, apply targeted stain removal, protect surrounding surface protection, follow fabric care guidance, and finish with careful residue cleaning to avoid damage.
Removing Latex From Upholstery And Fabrics
Start by checking the fabric label and testing a hidden spot so you know what treatments are safe.
If the paint is still wet, blot and gently scrape excess before using a mild soap solution; for dried paint you’ll need different solvents and more careful scraping.
Follow fabric-specific steps to avoid damage while removing the stain.
Assess Fabric Type
Before you try any cleaning method, identify the fabric type so you know what it can tolerate; delicate fibers like silk or rayon need very different treatment than sturdy canvas or polyester.
Check labels for fabric care and consider paint compatibility before testing.
Then choose a gentle method and spot-test first.
- natural vs synthetic
- washable vs dry-clean
- weave tightness
- colorfastness
Remove Fresh Paint
If the latex paint is still wet, act quickly to blot and lift it—don’t rub, which will push pigment deeper into the fibers.
Use clean paper towels to absorb excess, then dampen a cloth with mild soap and water to dab the spot.
For stubborn fresh paint, try a small amount of rubbing alcohol; test hidden area first.
Repeat blotting until paint removal is complete.
Treat Dried Stains
Once latex paint has fully dried on upholstery or fabric, you’ll need to soften and lift it rather than scrub blindly—otherwise you risk damaging fibers or spreading pigment.
- Test an inconspicuous area first for colorfastness.
- Use a gentle paint softening solvent (isopropyl or dish soap mix).
- Gently blot loosened paint; don’t rub.
- Rinse and launder per fabric instructions for final stain removal.
Salvage Clothes Stained With Dried Latex
Though dried latex feels permanent, you can often rescue stained clothes with the right steps and products.
Start by scraping excess, then pretreat using a fabric care–safe stain treatment or mild solvent on a hidden seam.
Scrape off excess, then pretreat with a fabric-safe stain remover or test a mild solvent on a hidden seam.
Gently work from edges inward, launder per label instructions, and repeat treatment if needed.
Air-dry to confirm removal before using heat.
Removing Latex Paint From Tile And Grout
Start by checking the type and condition of your tile and grout so you don’t use a cleaner that will etch or discolor the surface.
Use gentle, safe methods first — like warm soapy water, a plastic scraper, and a soft brush — and only step up to stronger cleaners or a grout-safe remover if those don’t work.
Test any product in an inconspicuous spot before treating the whole area.
Assess Tile And Grout
Before you try any cleaners or scrapers, take a close look at the tile and grout to determine their material, finish, and how much paint is stuck to them.
Check tile integrity and grout condition, noting cracks or porous grout. Consider these factors before proceeding:
- glaze type (matte vs. glossy)
- grout age and porosity
- paint thickness
- nearby sealed surfaces
Safe Paint Removal Methods
Work carefully and choose the gentlest method that’ll remove the paint without damaging the tile or grout.
Test a small area, then use a plastic scraper, warm soapy water, and a nylon brush.
Try natural alternatives like vinegar or baking soda paste before solvents.
Rinse well and dry.
For stubborn spots, consider eco friendly techniques such as citrus-based removers applied briefly, then neutralized.
Working With Masonry: Brick, Concrete, And Stucco
When you tackle dried latex on masonry—brick, concrete, or stucco, because the surface texture and porosity affect adhesion and removal methods.
Use masonry techniques focused on Surface considerations, Texture preservation, Paint adhesion, Removal strategies, and Damage assessment.
Apply gentle scraping, low-pressure washing, poultices, and stiff brushes.
Check for mortar or stucco damage and stop if surface crumbles.
How To Remove Latex From Vinyl And PVC
Start by evaluating the vinyl or PVC surface—its finish, age, and how firmly the latex is bonded—so you can choose the least aggressive method that won’t gouge or discolor the material.
For latex paint removal, soften spots with warm soapy water or rubbing alcohol, gently scrape with a plastic tool, then clean and rinse.
Prioritize vinyl surface protection and test any solvent in an inconspicuous area.
Safe Techniques For Glassware And Ceramics
Glass and ceramic pieces need gentle, nonabrasive methods because hard scrubbing or harsh solvents can scratch glazes, etch glass, or remove decorative finishes.
Handle glass and ceramics gently—avoid harsh scrubbing or solvents to protect glazes, finishes, and delicate surfaces.
You should use mild soap, warm water, and soft cloths for glass cleaning and ceramic care.
Try these steps:
- Soak loosened paint in warm, soapy water
- Use a soft microfiber cloth
- Dab with isopropyl alcohol for spots
- Rinse and dry gently
Using A Plastic Scraper Or Credit Card Without Scratching
Pick a plastic scraper or an old credit card with a slightly rounded, stiff edge so it lifts paint without gouging.
Always protect the surface first with a soft cloth or painter’s tape around the spot to catch slips.
Hold the tool at a low angle and use light, steady pressure to coax the paint away.
Choose the Right Edge
When you need to lift dried latex without damaging the surface, choose a thin plastic scraper or a stiff credit card—both give a firm edge that flexes enough to get under paint without scratching.
Focus on edge selection and compare edge types so you pick the safest tool for the job.
- thin plastic scraper
- stiff credit card
- rounded blade
- flexible tip
Protect Surface First
Before you scrape, protect the finish by slipping a thin barrier—like painter’s tape or a folded layer of soft cloth—along the paint edge so the plastic scraper or credit card can’t dig into the surface.
For surface preparation, use clean protective coverings to shield surrounding areas and stabilize the workpiece. That prevents scratches and lets you focus on careful paint removal without risking damage.
Gentle Angle And Pressure
Start with the scraper or credit card almost flat—about a 10–20° angle—so you lift the paint without digging into the surface, and apply steady, gentle pressure that lets the blade slide under the edge rather than gouge it.
Use gentle techniques and controlled pressure application:
- Test on an inconspicuous spot
- Keep the angle shallow
- Use steady, even strokes
- Swap tools if resistance increases
When And How To Use A Razor Blade Safely
If you need to scrape dried latex paint from glass or a smooth surface, use a razor blade carefully and deliberately so you don’t gouge the substrate or cut yourself. Practice razor blade safety: score gently at a 30–45° angle, push away from your body, and use effective blade techniques like short, controlled strokes. Wear gloves and keep blade fresh.
| Surface | Tip |
|---|---|
| Glass | 30–45° |
| Tile | Short strokes |
Power Washing Dried Latex: When It Helps And When It Hurts
After scraping or shaving paint from smooth surfaces, you might be tempted to reach for a power washer to finish the job, but know when it helps and when it can cause damage.
After scraping smooth surfaces, a power washer can help—but use it carefully to avoid damaging trim or soft materials.
You’ll weigh power washing benefits against power washing drawbacks and choose pressure, nozzle, and distance carefully.
- Removes loose paint fast
- Cleans textured areas
- Can gouge soft substrates
- Forces water under trim
Heat Guns And Hair Dryers: Softening Dried Latex
Warm the paint gently: heat guns and even a hair dryer can soften dried latex enough to peel or scrape it away with less effort.
You should test low heat settings first, keep the tool moving to avoid scorching, and use a putty knife or plastic scraper as paint softens.
Combine with proper drying techniques—cooling between passes—to prevent surface damage and blistering.
Using Steam To Loosen Paint On Delicate Surfaces
If you’re working on delicate surfaces, a steam cleaner can soften dried latex without harsh chemicals.
Use low-pressure steam, keep the nozzle several inches away, and test a hidden spot first to avoid warping or finish damage.
Always wear gloves, avoid prolonged exposure, and unplug the unit before refilling or moving it.
Steam Cleaner Safety Tips
When you use a steam cleaner to loosen dry latex paint on delicate surfaces, take precautions so you don’t damage the substrate:
- Check steam cleaner types for appropriate pressure and attachments.
- Test a hidden area before full treatment.
- Wear gloves and eye protection to prevent burns.
- Follow steam cleaner maintenance and use manufacturer safety guidelines to avoid leaks or overheating.
Gentle Steam Techniques
Use low-pressure steam and the smallest nozzle you have so you can control the heat and moisture precisely; you’ll prevent warping and finish damage.
Focus brief steam application, keep the nozzle moving, and test an inconspicuous spot first.
Use gentle scraping or soft cloths as paint softens.
Maintain strict moisture control to avoid swelling, and dry surfaces promptly after treatment.
How To Remove Paint From Tight Corners And Crevices
Tackle tight corners and crevices by working small and steady: grab a thin, stiff tool—like a putty knife, plastic scraper, or a stiff-bristled toothbrush—and loosen the paint edges.
Then soften stubborn bits with a damp sponge or a cotton swab soaked in warm water (for water-based paint) or the appropriate solvent for dried latex; scrape gently and wipe frequently to avoid spreading residue.
- Use precision tools and paint scrapers
- Protect surfaces with tape and drop cloths
- Rinse cleaning brushes and swabs often
- Apply corner techniques and effective solvents for detail work
Removing Latex From Textured Surfaces Without Flattening Texture
When you tackle latex on textured surfaces, pick a gentle solvent that softens paint without eating the texture.
Use texture-preserving techniques like spot-treating with a soft brush or cotton swab and working from the edges inward.
Test a small area first so you can adjust method and avoid flattening the finish.
Gentle Solvent Selection
Although you want something strong enough to soften dried latex, pick solvents that won’t dissolve or flatten the underlying texture; start with mild options like isopropyl alcohol or a citrus-based remover and only move up to stronger solvents if those fail.
Use gentle solvent options and eco friendly removers. Test discreet spots, then consider:
- Isopropyl alcohol
- Citrus-based remover
- Mild acetone blend
- Water-based gel solvent
Texture-Preserving Techniques
If you want to remove dried latex from a textured surface without flattening the pattern, work slowly and aim to lift paint rather than scrape it aggressively; use soft tools (nylon brushes, rubber spatulas), test mild solvent mixtures, and apply poultices to dissolve paint.
Protect edges and surrounding areas for surface protection, feather treatments to preserve texture preservation, and rinse gently to avoid gouging or flattening the finish.
Fixing Residue And Ghosting After Paint Removal
Some lingering residue or faint “ghosts” of old latex paint are common after removal, but you can usually eliminate them with a few targeted steps.
Some faint ghosts of old latex paint often remain after removal, but targeted cleaning usually removes them.
For residue removal and ghosting solutions, try these quick actions:
- Gently scrub with a mild detergent solution.
- Use a magic eraser lightly.
- Apply rubbing alcohol on stubborn spots.
- Rinse and dry thoroughly before refinishing.
Repairing Finish Or Paint Damage After Removal
Once you’ve cleared residue and ghosting, inspect the surface for scratches, gouges, or areas where the substrate or primer got exposed—these defects need repair before you repaint or refinish.
Fill holes with appropriate filler, sand smooth, and prime bare spots.
For paint touch ups, match sheen and color, feather edges, and apply thin coats.
Finish restoration may require clear coats or protective sealers.
How To Restore Fabric Texture After Cleaning Paint
Once the paint’s gone, gently fluff the fibers with your fingers or a soft brush to lift the nap and restore softness.
If the fabric still feels stiff, reapply a diluted fabric conditioner and rinse lightly to relax the fibers.
Finish by steaming or ironing on a low setting (with a cloth barrier) to smooth and set the texture.
Gently Fluff Fibers
After the paint’s gone and the fabric’s dry, gently fluff the fibers to restore the original texture—use your fingers, a soft-bristled brush, or a low-heat setting on a hair dryer held several inches away to lift and separate fibers without damaging the weave.
Maintain fiber care and paint preservation focus:
- Finger tease stubborn tufts
- Brush with light strokes
- Heat briefly from distance
- Finish by smoothing seams
Reapply Fabric Conditioner
Recondition the fabric by applying a diluted fabric conditioner to restore softness and reduce stiffness from cleaning; mix one part conditioner with three parts water.
Lightly mist or dab it onto the affected area, and gently work it into the fibers with your fingers or a soft cloth.
You’ll notice fabric conditioner benefits quickly; use precise fabric softener application, blot excess, and air dry flat to preserve texture.
Steam Or Iron Lightly
If the fabric still feels a bit limp or the fibers look uneven after using fabric conditioner, steam or light ironing will help revive the texture and smooth any remaining creases.
Use gentle steam techniques and check fabric safety first.
Tips:
- Test a hidden seam
- Use low heat settings
- Keep iron moving
- Hold steamer a few inches away
Disposal And Cleanup Of Paint Waste And Rags
1 simple rule will keep you safe: treat used paint, solvents, and rags as hazardous until you’ve rendered them nonflammable and nonreactive.
Follow hazardous waste guidelines, learn paint disposal methods, and use paint recycling options where available.
For eco friendly cleanup, absorb residues with kitty litter, dry rags fully, and follow safe rag disposal and local waste management tips to prevent fires and contamination.
Avoid These Solvents For Specific Surfaces
Be careful which solvents you use on different materials to avoid damage.
Don’t use acetone on plastics — it can melt or cloud them.
Avoid ammonia on finished wood and skip aggressive solvents on fabrics, which can stain or weaken fibers.
Avoid Acetone On Plastics
Plastics and acetone don’t mix well—acetone can quickly soften, crack, or dissolve many common plastics like polystyrene, acrylic, and some PVCs.
So you shouldn’t use it to remove dried latex paint from plastic surfaces. Use safer solvent alternatives and follow plastic safety tips:
- Test a hidden spot first
- Try warm soapy water
- Use isopropyl alcohol sparingly
- Use a plastic-safe scraper
No Ammonia On Wood
While ammonia can strip residue quickly, don’t use it on wood—you’ll risk lifting finishes, discoloring stains, and drying or warping the grain.
Instead, test gentle cleaning techniques like mild soap, water, or dedicated wood-safe removers on an inconspicuous spot.
Protect surfaces with proper wood protection afterward, work slowly with a plastic scraper, and always follow manufacturer guidance to avoid permanent damage.
Skip Solvents On Fabrics
If you’re dealing with dried latex paint on clothing or upholstery, skip solvent-based removers—many will dissolve dyes, weaken fibers, or leave oily stains that’re harder to remove than the paint itself.
Use gentler methods focused on fabric care and paint stains:
- Test cleaners on an inconspicuous spot first
- Gently scrape or brush excess paint
- Use mild detergent and warm water
- Try rubbing alcohol sparingly
How To Protect Surrounding Areas While You Work
Start by laying out protective barriers so paint chips and dust stay contained and your tools don’t damage nearby surfaces.
Use surface barriers and protective coverings—drop cloths, plastic sheeting, and painter’s tape—for area shielding.
Use drop cloths, plastic sheeting, and painter’s tape to shield surfaces and contain mess before painting.
Keep workspace organization tight: group tools, limit foot traffic, and follow painting precautions.
Plan cleanup: collect debris in bins, vacuum residue, and dispose of materials safely to finish efficiently.
Preventing Accidental Drips In Future Projects
Because drips not only ruin finishes but also add extra cleanup time, you’ll want to adopt a few simple habits before you paint:
- Stir thoroughly and strain to use proper drip prevention techniques.
- Load the brush lightly; follow concise paint application tips.
- Work in thin coats and watch edges.
- Keep a damp rag handy to catch runs immediately and wipe them away.
What To Do If Paint Has Cured For Months Or Years
When paint’s been cured for months or years, you’ll need to treat it like a cured film rather than fresh paint: assess adhesion and surface damage.
Expect long term effects like deeper bonding and brittle edges.
Expect deeper bonding and brittle edges over time—treat cured paint as a hardened film, not fresh coating.
Use stronger paint removal techniques—softening with controlled heat, gentle chemical strippers suited to the surface, and careful scraping.
Test a small area first and work slowly to avoid further harm.
When To Call A Professional Restorer
If the paint’s been cured for months or years and your tests show deep bonding, brittle edges, or damage you can’t safely fix, it’s time to contemplate a professional restorer.
You should seek a professional evaluation for complex surfaces. They’ll advise advanced restoration techniques and handle risks like structural harm, delicate finishes, hazardous materials, or historical value.
- structural concerns
- fragile finishes
- hazardous residues
- historic surfaces
Cost Comparison: DIY Vs Professional Removal
Compare costs side-by-side before you start:
DIY removal usually saves on labor but adds sunk expenses for tools, materials, disposal, and your time, while hiring a pro raises upfront fees but covers expertise, specialized equipment, and liability.
Weigh cost factors like Equipment needs, Time efficiency, Skill levels, Risk assessment, Surface types, DIY advantages, Professional expertise, Budget considerations, and Long term solutions.
Eco‑Friendly And Non‑Toxic Removal Options
If you want safer options, try household solutions like vinegar and warm water to soften small spots.
For tougher areas, a baking soda paste can gently lift dried latex without harsh chemicals.
You can also use citrus-based solvents for stubborn residue while keeping fumes and toxicity low.
Vinegar And Warm Water
One simple, non-toxic way to soften and lift dried latex paint is to apply a mixture of equal parts white vinegar and warm water; the mild acetic acid breaks down the paint film without harsh chemicals.
Use vinegar benefits and warm water techniques to:
- Saturate the spot and wait 10–15 minutes
- Gently scrub with a soft cloth
- Rinse and repeat if needed
- Dry thoroughly
Baking Soda Paste
Try a simple baking soda paste for an eco-friendly way to loosen dried latex paint: mix about 3 parts baking soda with 1 part water to form a thick spreadable paste.
Apply, let sit 10–20 minutes, then gently scrub with a soft brush or cloth. Rinse and repeat until paint removal is complete.
Safe for many surfaces; test a hidden spot first.
Citrus-Based Solvents
Baking soda works well for light spots, but for thicker or stubborn latex paint you can reach for citrus-based solvents.
You’ll prefer citrus extraction methods as eco friendly options that soften paint without harsh fumes.
Try these steps:
- Test on hidden area first
- Apply solvent, wait several minutes
- Gently scrape with plastic tool
- Clean residue with mild soap
Common Mistakes That Cause Permanent Damage
When you rush or use the wrong tools, you can turn a fixable paint mess into permanent damage—scraped drywall, ruined wood grain, or stained fabrics that never come clean. You’ll face common misconceptions; follow clear prevention strategies: test small areas, use soft scrapers, avoid harsh abrasives, blot spills, and stop before sanding through finishes.
| Mistake | Cause | Quick Fix |
|---|---|---|
| Scraping | Wrong tool | Use plastic |
| Sanding | Overzealous | Lower grit |
| Solvent burn | Too strong | Dilute/retest |
| Staining | Rubbing | Blot only |
| Heat | High temp | Cool first |
How Long Each Removal Method Typically Takes
One to several minutes is enough to lift a fresh drip with a damp cloth, but fully removing dry latex paint usually takes longer and depends on the method you choose and the surface involved.
- Scraping: quick for thick spots; time estimates vary by adhesion.
- Heat gun: moderate time; good method efficiency on trim.
- Solvent soak: longer; best for porous surfaces.
- Sanding: slowest but predictable time and efficiency.
Checklist: Step‑By‑Step For Most Surface Types
Now that you know how removal methods differ in time and effectiveness, you can follow a compact step-by-step checklist that works for most surfaces.
First, identify surface compatibility and paint types. Gather tools, protect surroundings, and test a small hidden area.
Apply remover or heat gently, scrape with a plastic tool, clean residue, rinse, and dry.
Repeat as needed, proceeding cautiously.
How To Test For Solvent Compatibility Quickly
Before you apply any solvent, check compatibility on a hidden spot to avoid damage.
Always test a solvent first on an inconspicuous spot to avoid unexpected damage.
You’ll do quick testing to identify safe solvent types and reactions. Use small, timed trials and note effects.
Follow these steps:
- Clean area gently first
- Apply tiny solvent amount
- Wait 1–2 minutes and blot
- Inspect for color, finish, or swelling changes
Tools And Products Pros Use For Stubborn Latex
After you confirm a solvent won’t harm the surface, you’ll want the right kit for tougher dried latex.
Gather a plastic scraper, nylon brush, microfiber cloths, and disposable gloves. Use commercial latex removers, rubbing alcohol, or mineral spirits per instructions.
Pros combine gentle agitation, timed dwell, and heat or steam for stubborn stains, applying professional techniques to minimize surface damage and repeat treatments as needed.
How To Document Damage For Insurance Or Contractor Claims
1 clear, time-stamped record can make or break an insurance or contractor claim, so photograph the damage from multiple angles, note locations and measurements, and save copies of any related receipts or communications.
Use these documentation tips:
- Photo evidence: close-ups and context shots for damage assessment
- Detailed descriptions: materials, cause, and timeline
- Contractor communication: save emails and estimates
- Claim process: log calls and outcomes
Seasonal Tips: Removing Paint In Hot Or Cold Weather
When you’re removing dry latex paint in extreme temperatures, adjust your approach so solvents and tools perform reliably—cold makes paint brittle and slow to react, while heat can soften it and speed up evaporation, which affects dwell time and cleanup.
In hot weather tips, work early or shaded, use slower‑evaporating removers and protect finishes.
For cold weather strategies, warm surfaces gently and allow extra reaction time.
One‑Minute Emergency Fixes For Fresh‑Looking Results
If you need a quick touch-up that makes painted surfaces look fresh in under a minute, keep a damp cloth, a small spatula or putty knife, and a dampened melamine sponge (like a Magic Eraser) within reach so you can lift smudges, scrape flakes, and smooth tiny drips before they set.
Use these emergency techniques for fast, safe quick solutions:
- Blot smudges gently
- Scrape raised bits
- Lightly sand glossy spots
- Feather edges with sponge
Frequently Asked Questions
Can Dried Latex Paint Be Safely Removed From Electronics or Appliance Controls?
You shouldn’t; dried latex paint risks damaging electronics and controls. For safe paint removal techniques, power off, use gentle mechanical scraping, isopropyl swabs, or plastic picks, and prioritize electronic device safety by avoiding solvents and moisture.
Will Paint Remover Odors Aggravate Pets or Indoor Air Quality?
Yes — you’ll dread the fumes like a melodramatic villain; paint remover odors can worsen indoor ventilation concerns and harm pet safety, so you’ll ventilate thoroughly, isolate animals, and use low‑odor products or respirators.
Can Sun Exposure or UV Cause Hidden Damage When Stripping Exterior Paint?
Yes — long term exposure to UV effects can weaken surface integrity and reduce paint adhesion; you’ll see chalking, cracking, and substrate degradation, so inspect thoroughly and address compromised areas before or during stripping to avoid hidden damage.
How to Handle Latex Paint on Historical or Antique Finishes Without Restoration?
You should consult historical preservation guidelines and a conservator before touching antique finishes; gently test solvents, use minimal intervention, document condition, and prioritize antique care to avoid irreversible damage while preserving original patina and materials.
Are There Warranties or Product Guarantees Voided by DIY Paint Removal?
Yes — you can void warranty implications and product guarantees if you DIY remove paint improperly; you should check manufacturer terms, document conditions, use approved methods, and consult professionals to avoid unintentionally cancelling coverage.
Conclusion
So you’ve learned to tell paint types, tested, prepped, and used the right tools — and now you’ll avoid ruining the very thing you wanted fixed. Ironically, removing dried latex takes more patience than throwing a fresh coat on, but that’s the point: careful work protects surfaces and saves money. Keep those records, follow safety steps, and when you’re tempted to rush, remember damage happens fast while nice finishes take time.