Can I Use Wax Over Latex Paint? What You Need to Know
Yes — you can wax over latex paint if the paint’s fully cured (usually 2–4 weeks), clean, and lightly scuffed so the wax can bite. Pick a compatible wax—polymer or oil‑based paste for durability, water‑based for low odor—and apply thin coats, buffing between them. Avoid waxing glossy, greasy, or chalky surfaces without extra prep, and expect more upkeep than with polyurethane. Follow proper prep and testing, and you’ll get good results; keep going to learn tips and troubleshooting.
Quick Answer: When Wax Works Over Latex Paint
Wondering if you can wax over latex paint? You can, when the paint is fully cured, clean, and has a compatible surface finish like satin or eggshell.
Light scuffing boosts wax adhesion; avoid glossy, greasy, or chalky surfaces.
Test a small area first to guarantee proper bonding and desired sheen.
Proper prep lets wax protect and enhance the painted surface.
When Wax Is a Bad Idea on Latex Paint
If your latex paint is glossy, chalky, or poorly cured, wax may not stick and will peel off quickly.
You shouldn’t wax surfaces that trap moisture—like exterior walls or damp basements—because wax can seal in water and cause bubbling or mildew.
Also skip wax on high-traffic areas since it wears away fast and won’t protect the paint long-term.
Poor Surface Adhesion
When the latex paint film isn’t well-bonded to the substrate, waxing only makes the adhesion problem worse because the wax sits on a surface that’s already prone to peeling or flaking. You should skip wax, focus on surface preparation and proven adhesion techniques, strip loose paint, sand to sound edges, and use a primer before waxing.
| Step | Action | Tip |
|---|---|---|
| 1 | Strip | Remove loose paint |
| 2 | Sand | Feather edges |
| 3 | Prime | Improve bonding |
Trapped Moisture Issues
Even after you’ve fixed adhesion problems, waxing over latex paint that’s holding moisture can cause worse damage: wax seals the surface and traps dampness beneath, promoting blistering, peeling, and mold growth.
You should test for moisture retention before waxing; if the substrate’s damp, don’t wax.
Trapped moisture accelerates paint peeling and structural decay, so dry and ventilate thoroughly first.
High-Traffic Wear
Anyone who expects a floor, table, or stair tread to take constant foot traffic should avoid wax over latex paint: waxes offer only a thin, soft protective layer that scuffs, wears away, and shows footprints quickly under heavy use.
You’ll need coatings with higher wear resistance and proven surface durability—polyurethane or hard-wax oils provide lasting protection where wax would fail, saving repainting and constant maintenance.
Why Choose Wax: Benefits and Limits for Latex Paint
Although latex paint gives you durable, easy-to-clean walls, adding a paste or liquid wax can improve appearance and surface protection in specific situations. You’ll gain mild water resistance, softer sheen control, and touch-up ease, but expect limited durability and recoat needs. Consider wax properties and application techniques before use.
| Benefit | Limit | Tip |
|---|---|---|
| Sheen control | Low durability | Test first |
| Water resistance | Recoat often | Use sparingly |
Which Wax Types Work Best Over Latex Paint
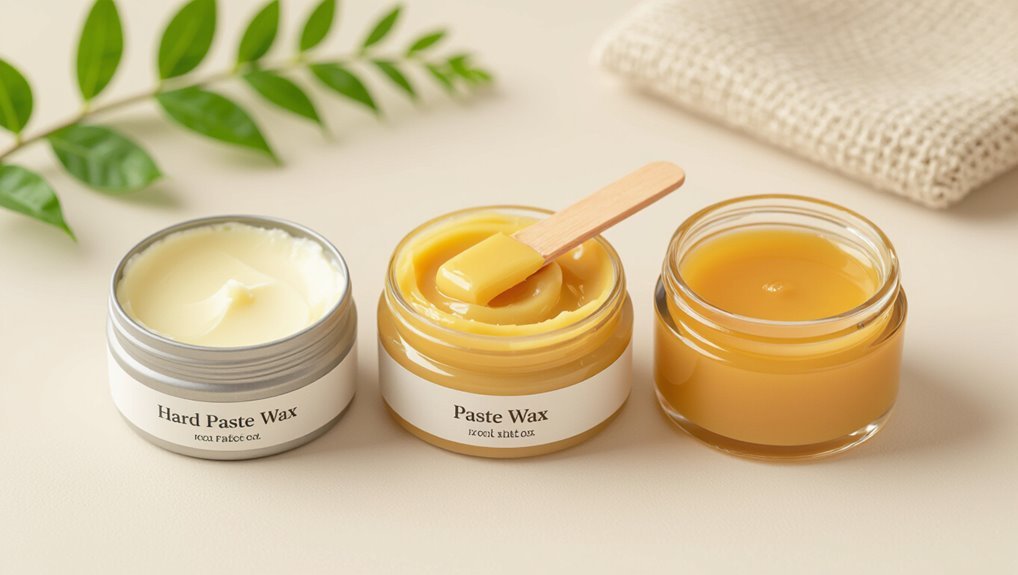
You’ll usually choose between paste waxes and newer polymer waxes when finishing latex paint.
Paste wax gives a warm, traditional glow and is easy to buff, while polymer waxes offer tougher, longer-lasting protection and better water resistance.
Think about the look you want and how much durability you need before picking one.
Paste Wax Options
When you want durable, low-sheen protection for latex-painted surfaces, paste waxes are a solid choice because they create a hard, buffable layer that resists scuffs and moisture.
You’ll weigh natural waxes versus synthetic waxes in a comparative analysis, considering wax formulations, wax durability, application techniques, finishing options, and eco friendly choices to pick the right paste for your project.
Polymer Wax Choices
1 clear advantage of polymer waxes over traditional paste options is their blend of synthetic resins and waxes that bond better to latex paint, giving you tougher, longer-lasting protection with less frequent reapplication.
You’ll appreciate polymer wax benefits and polymer wax applications for painted furniture and trim.
- Durable finish
- Water resistance
- Easy buffing
- Non-yellowing
- Low maintenance
Oil‑Based Paste Wax vs. Water‑Based Furniture Wax
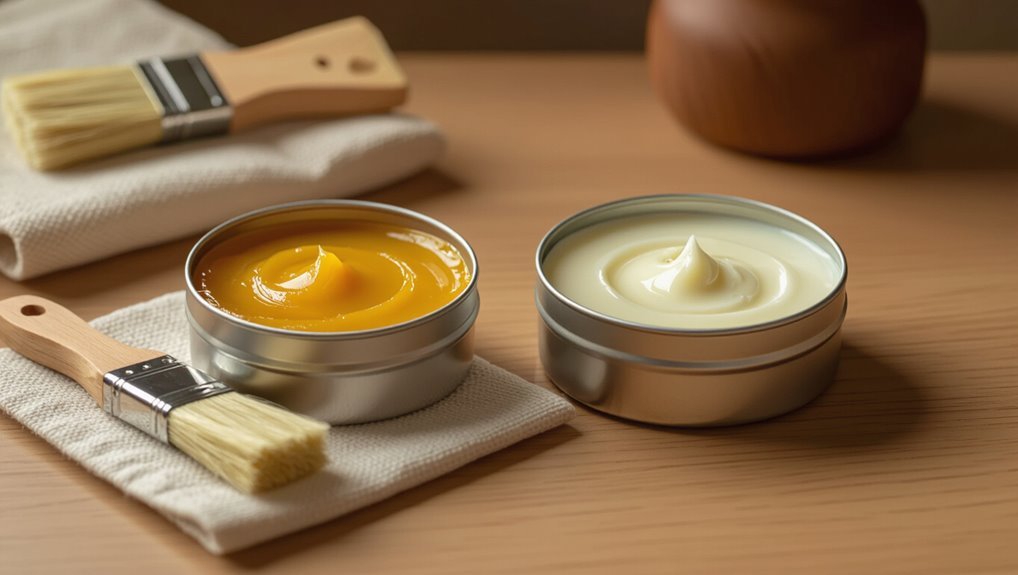
Although both oil‑based paste wax and water‑based furniture wax protect and finish painted surfaces, they work differently and give distinct looks and maintenance needs.
You’ll notice oil based advantages: deep sheen, durable surface, easier spot‑repair.
Water based drawbacks include thinner feel, less ambering, and sometimes shorter wear.
Choose paste wax for vintage warmth and water‑based for low‑odor, quick‑dry convenience on modern pieces.
How Latex Paint Sheen Affects Wax Adhesion
Sheen affects how wax sticks because flat, eggshell, satin, semi‑gloss, and gloss paints all vary in surface porosity.
You’ll find flatter sheens are more porous and accept wax more readily, while higher sheens are smoother and can repel or show adhesion problems.
That means you should match your wax type and prep to the paint sheen to avoid compatibility issues.
Sheen Levels Explained
Paint finish matters because the level of sheen directly changes how well wax will stick and how the final look turns out.
You’ll notice sheen variations and differing gloss levels affect adhesion, buffing, and durability. Consider:
- Flat: low reflectivity, better bite
- Eggshell: subtle sheen, moderate hold
- Satin: smoother, trickier adhesion
- Semi-gloss: slick, needs prep
- Gloss: least porous, best priming required
Surface Porosity Differences
One key thing to understand is that latex paint’s porosity changes with sheen, and that directly affects how well wax will adhere and how durable the finish becomes.
You’ll notice flatter sheens have greater surface absorption, letting wax penetrate more and bond via paint interaction.
Higher sheens repel penetration, so wax sits more on top, requiring different prep to achieve lasting adhesion.
Wax Compatibility Issues
Because latex finish affects how wax bonds, you’ll need to match your prep and product to the paint sheen.
You’ll check sheen, scuff-sand glossy surfaces, and choose compatible wax for adhesion and wax longevity.
Adjust application techniques for semi-gloss or satin to avoid streaks and peeling.
- assess surface sheen
- sand glossy areas
- use adhesion-friendly wax
- test a small patch
- follow recommended application techniques
Will Wax Change Latex Paint Color or Sheen?
Curious whether wax will alter the color or sheen of your latex paint? You might see slight color shift or sheen alteration depending on wax type and finish. Clear paste adds depth; tinted wax changes hue. Test first.
| Wax Type | Effect on Color | Effect on Sheen |
|---|---|---|
| Clear paste | Minimal | Slight satin |
| Tinted | Noticeable | Varies by pigment |
How to Prep Latex Paint for Waxing
Before waxing, you’ll want to clean and degrease the painted surface so the wax sticks evenly.
Next, scuff the paint with a fine-grit sandpaper or abrasive pad to create a key for the wax.
Wipe away dust with a tack cloth before applying any product.
Surface Cleaning And Degreasing
When you’re prepping latex paint for wax, start by cleaning and degreasing the surface thoroughly so the wax can bond properly; any dust, oils, or residue will create adhesion problems and uneven sheen.
Use surface preparation tips and gentle cleaning solutions, work methodically, and let the surface dry fully before waxing.
- Use mild detergent
- Rinse thoroughly
- Degrease stubborn spots
- Avoid residues
- Dry completely
Scuffing And Light Sanding
After cleaning and letting the paint dry, you’ll need to scuff and lightly sand the surface so the wax will grip instead of bead up.
Use scuffing techniques like a Scotch-Brite pad or 220-320 grit sandpaper, working gently and evenly.
Wipe dust with a tack cloth, inspect for glossy spots, and repeat light sanding where needed to guarantee consistent adhesion before waxing.
Sanding Tips for Furniture Painted With Latex
If your latex-painted piece feels rough or the new finish isn’t sticking, sand lightly to key the surface and remove imperfections; you’ll want to use a fine-grit paper (220–320) and gentle pressure so you don’t eat through the paint.
Sand to improve paint compatibility and preserve furniture durability.
Sand first to help new paint adhere and keep your furniture durable and long-lasting.
- Sand with the grain
- Use a sanding block
- Avoid heavy pressure
- Clean dust between passes
- Test in an inconspicuous spot
Cleaning Before Waxing Walls or Furniture
Prepare the surface by thoroughly cleaning it so wax bonds evenly and lasts longer. You’ll remove dust, grease, and residues with mild detergent and warm water, rinse, and let dry.
For stubborn grime use a gentle degreaser or TSP substitute following package directions.
Good surface preparation and proper cleaning techniques guarantee wax adheres smoothly, prevents streaks, and improves final durability.
Should You Use a Deglosser on Latex Paint?
Wondering whether a deglosser is necessary on latex paint? You can use one when sheen is high or surface feels slick; it boosts deglosser effectiveness and improves latex paint compatibility before waxing.
Test a small area first. Consider safety and ventilation.
- assess sheen level
- perform a spot test
- follow product instructions
- wear gloves and mask
- wipe residue thoroughly
Step‑By‑Step: Applying Wax to Cured Latex Paint
Start by making sure the latex paint has fully cured—usually 2–4 weeks for standard interior paints—so the wax will bond and not trap solvents. You’ll clean, scuff lightly, test compatibility, then apply thin coats using recommended wax application techniques for latex paint compatibility. Buff between coats and inspect finish.
| Step | Action | Tip |
|---|---|---|
| 1 | Clean | Use mild detergent |
| 2 | Scuff | Fine sandpaper |
| 3 | Buff | Soft cloth |
How Much Wax Should You Apply Per Coat?
When you apply wax, think thin—usually a paper‑thin, even layer per coat is enough to build protection without creating a sticky, cloudy finish.
You’ll control wax application amount by using light pressure and small pads; aim for minimal wax layer thickness that still buffs smooth.
Use light pressure and small pads—apply a minimal, paper‑thin wax layer that still buffs out smooth.
- Use a soft cloth
- Work in sections
- Apply sparingly
- Buff thoroughly
- Reassess coverage
How Long to Wait Between Wax Coats and Cure Time
Although wax feels dry to the touch within a few minutes, you should wait at least 30–60 minutes between thin coats to let solvents flash off and the layer firm up enough to accept buffing and another thin application.
For proper wax application timing, plan multiple light passes, allow 24–48 hours for initial cure before heavy use, and use consistent wax layering techniques to build protection.
Best Tools and Brushes for Applying Wax
When you’re waxing latex paint, picking the right brushes makes a big difference—natural bristle brushes work well with soft paste waxes, while synthetic brushes suit water-based formulas.
You’ll also want a few essential tools on hand: lint-free cotton rags, foam applicator pads, and a soft-bristled buffing brush or lambswool pad for finishing.
Use the applicator for even coverage and the buffing tool to build sheen without overworking the surface.
Best Brush Types
Brush choice matters: pick tools that lay wax smoothly and let you control sheen without leaving streaks.
You’ll want brush types that suit water- or solvent-based wax and match application techniques for edges and flat surfaces.
- Natural bristle angled brush
- Synthetic flat brush
- Soft goat-hair brush
- Foam brush for touch-ups
- Small artist’s brush for details
Essential Application Tools
You’ve picked the right brushes; now gather the other tools that’ll make waxing latex paint fast and even.
Grab lint-free cotton rags, a foam brush for tight spots, a soft-bristle tack cloth, and a microfiber applicator pad.
Keep a plastic scraper, small mixing stick, and mild solvent handy.
These items support wax application techniques and reinforce surface preparation tips for smooth results.
Buffing Techniques for an Even Finish
If you want a smooth, consistent sheen after waxing over latex paint, buffing is what makes the finish uniform and brings out the depth of color.
You’ll use proper buffing techniques, gentle pressure, and circular motions, achieving shine without removing wax.
- Use a soft cloth
- Work small sections
- Apply even pressure
- Buff in circles
- Finish with light strokes
How Many Wax Coats Do You Need?
After you’ve achieved an even sheen by buffing, decide how many wax coats to apply based on the level of protection and sheen you want. You’ll usually apply 1–3 thin coats, waiting full cure between layers. Follow wax application tips and monitor wax coat thickness for uniform coverage.
| Coats | Result |
|---|---|
| 1 | Light sheen |
| 3 | Maximum protection |
Do You Need a Topcoat Over Waxed Latex?
Because wax sits on the surface and provides only surface-level protection, you’ll usually want a topcoat over waxed latex when you need long-term durability, moisture resistance, or a harder finish.
You’ll assess topcoat necessity based on use and desired wax durability. Consider:
- High-traffic areas
- Moisture exposure
- Cleaning frequency
- Desired sheen
- Longevity expectations
How to Remove Wax From Latex Paint Safely
First, you’ll want to identify the type of wax on the surface so you know whether it’s paste, liquid, or polymer.
Test a small, inconspicuous area to see how the paint reacts before applying any cleaner. If the paint holds up, gently remove the wax with a soft cloth and a mild solvent like mineral spirits or a wax-specific remover.
Assess The Wax Type
When you’re tackling wax on latex paint, the first thing you should do is identify what kind of wax you’re dealing with — car paste wax, furniture paste, liquid wax, or a polymer sealant all behave differently and need different removal methods.
Assess wax durability and consider wax application before choosing solvents or abrasives.
- Car paste: harder, high durability
- Furniture paste: softer, oily
- Liquid wax: thin, easier
- Polymer sealant: durable, bonded
- Unknown: start mild
Test A Small Area
Want to avoid damaging your paint? Test a small area first: perform wax testing on an inconspicuous spot after proper surface preparation.
Apply and remove a tiny bit of wax using your chosen method, wait for it to cure, then inspect for discoloration, softening, or peeling.
If the paint holds, proceed cautiously; if not, stop and reconsider your finish.
Clean Gently With Solvent
If your spot test showed the paint held up, you can remove excess wax with a mild solvent without risking the finish.
Choose solvent selection carefully, prioritize gentle cleaning, and work small areas. Use soft cloths, minimal pressure, and quick blotting.
Rinse with water and mild soap, then dry. Stop if paint softens.
- Test first
- Pick mild solvent
- Blot don’t rub
- Rinse promptly
- Inspect finish
Fixing Streaks, Cloudy Wax, or Tacky Finishes
Although wax can revive latex-painted surfaces, streaks, cloudiness, or tackiness usually signal application or curing problems that you can correct.
For streak removal, buff lightly with a soft cloth and a little mineral spirits if needed.
Improve wax application by applying thin, even coats, allowing full cure between layers, and re-buffing to restore sheen and reduce tackiness.
Wax vs. Polyurethane Over Latex: Which to Pick?
When choosing between wax and polyurethane over latex, you’ll weigh durability and protection against the look you want.
Wax gives a soft, low-sheen finish but needs more frequent reapplication and offers less scratch resistance.
Polyurethane creates a tougher, longer-lasting barrier and can be glossy or satin depending on the product.
Durability And Protection
Because you’re choosing a topcoat to protect latex paint, think about how each option handles wear and moisture: You’ll weigh durability factors and protection methods—wax gives surface resistance, polyurethane adds tougher abrasion and moisture barriers.
Consider:
- Wear resistance differences
- Scratch vulnerability
- Water and stain protection
- Maintenance frequency
- Repairability and recoating compatibility
Appearance And Finish
If you want a quick, subtle sheen that softens colors and hides minor imperfections, wax gives a low-luster, natural look; polyurethane, by contrast, offers a clearer, more uniform finish with options from satin to high-gloss that intensify color and reflectivity.
You’ll choose wax for muted, tactile charm and easier touch-ups, or polyurethane for varied gloss levels and superior finish durability.
Wax on Kitchen Cabinets and High‑Traffic Pieces?
Curious whether wax belongs on your kitchen cabinets or other high‑traffic pieces? You can use paste wax to boost cabinet durability and add low‑sheen protection, but it’s best on pieces with moderate use.
For heavy wear, consider stronger finishes.
- seals small imperfections
- adds subtle sheen
- easy spot maintenance
- needs periodic reapplication
- not as durable as polyurethane
Should You Wax Latex‑Painted Walls?
When you’re thinking about waxing latex‑painted walls, remember that paste wax is designed for furniture and low‑traffic surfaces—not large vertical areas—so it can change sheen, trap dirt, and be hard to maintain evenly on walls.
You’ll usually skip wax application on walls; it rarely improves wall longevity and makes cleaning, touchups, and repainting more difficult, especially in textured or high‑traffic rooms.
Safe Waxes for Kids’ Furniture and Toys
When you’re waxing kids’ furniture or toys, pick non-toxic options like beeswax or carnauba that are food-safe and low-VOC.
Check for certifications such as GREENGUARD, EcoLogo, or ASTM toy-safety standards on the label to confirm safety.
If a product lacks clear labeling, don’t use it on items children will handle or mouth.
Non-Toxic Wax Options
If you’re finishing kids’ furniture or toys, pick waxes labeled food-safe, low-VOC, or certified non-toxic to avoid harsh solvents and additives.
Choose natural alternatives and eco friendly options like beeswax blends or plant-based waxes for a safer finish. Apply thin coats, buff gently, and reapply as needed.
- Beeswax
- Carnauba-beeswax blend
- Soy-based wax
- Candelilla
- Food-grade mineral oil
Certification And Labels
How can you quickly tell a wax is safe for kids’ furniture and toys?
Check certification requirements like ASTM F963, EN 71, or Greenguard; they show tested safety.
Read label guidelines for ingredients, VOC levels, and age recommendations.
Look for “non-toxic,” “food-safe,” or “child-safe” claims backed by a certification number.
When in doubt, contact the manufacturer for test documentation.
How Waxing Affects Future Repainting
Because wax sits on top of latex paint rather than bonding with it, you’ll need to take extra steps before repainting to guarantee new paint adheres properly.
Wax creates future repainting challenges and affects long term maintenance, so prep matters.
- Clean thoroughly
- Degloss or sand
- Use a bonding primer
- Test adhesion
- Plan for extra labor and cost
How to Test a Wax on a Latex Surface First
Before you commit wax to an entire painted surface, try it on a small, inconspicuous test patch so you can evaluate adhesion, finish, and removal.
Use several wax testing methods: apply paste, liquid, and a diluted sample. Note drying time, sheen, and ease of buffing.
Check surface compatibility by testing on both cured and lightly sanded areas, then document results before proceeding.
Cost and Time: Waxing vs. Other Finishes
When you compare waxing to other finishes, you’ll find it usually costs less upfront and takes less time to apply for small projects.
Though it may need more frequent maintenance, consider both materials and labor when estimating total cost over time.
- cost comparison: wax vs polyurethane
- time efficiency for prep and application
- small-project savings
- maintenance frequency affects lifetime cost
- labor vs DIY choices
VOCs and Safety When Waxing Latex Paint
Cost and time aren’t the only things to weigh—you’ll also want to contemplate VOCs and safety if you’re waxing latex paint.
Check product VOC regulations for limits, choose low-VOC or water-based waxes, and work in a ventilated area.
Wear gloves and a mask, keep kids and pets away, and follow safety precautions on the label to minimize fumes, skin contact, and fire risk.
What to Look for on Labels and Brand Picks
If you want reliable results, read labels carefully and prioritize products that state compatibility with latex paint and low-VOC or water-based formulations.
You’ll use label importance to verify ingredients, drying time, and surface prep.
For brand recommendations, pick reputable names and test in a hidden spot.
- compatibility claims
- ingredient list
- recommended surfaces
- VOC level
- application instructions
What to Do If Wax Won’t Stick to Latex Paint
Even with the right product and careful label checks, wax can still refuse to bond to latex paint; you’ll need to troubleshoot methodically.
First, clean and degloss the surface, then sand lightly to improve mechanical tooth.
Start by cleaning and deglossing the surface, then lightly sand for better mechanical tooth.
Test a small patch to confirm latex paint compatibility.
If problems persist, strip and recoat with a compatible primer or choose a different wax formulated for water-based paints.
Maintenance: Caring for Waxed Latex Surfaces
Keep your waxed latex surfaces looking their best by cleaning gently and reapplying thin coats of wax as needed; regular care prevents buildup and protects the finish.
You’ll preserve wax durability and maintain latex compatibility with simple routines.
- Dust with a soft cloth
- Use mild soap and water
- Avoid abrasive pads
- Reapply paste wax sparingly
- Buff gently after drying
When to Hire a Pro for Waxing Over Latex
After you’ve established a simple maintenance routine for waxed latex, you’ll sometimes face situations where a professional should handle the job.
Hire a pro when surfaces are heavily damaged, large or intricate, or when you need tailored professional recommendations.
They’ll assess adhesion, finish compatibility, and use advanced waxing techniques for even coverage and durability, saving time and preventing costly mistakes.
Quick Checklist: Steps to Wax Latex Paint Successfully
- Follow this quick checklist to wax latex paint successfully, focusing on wax application techniques and latex paint compatibility.
- Clean surface thoroughly and let it dry.
- Lightly scuff to improve adhesion.
- Test wax compatibility on a hidden spot.
- Apply thin, even coats with a soft cloth.
- Buff to desired sheen after proper curing.
Frequently Asked Questions
Can Wax Trap Odors or Stains in Latex‑Painted Furniture?
Yes — wax can trap odors and help with stain prevention on latex‑painted furniture, but it can also seal in existing smells or stains if surface wasn’t fully cleaned first, so you should clean and dry thoroughly beforehand.
Will Wax Attract Dust More Than Other Finishes?
You might fear wax will trap dust, but it won’t considerably increase dust accumulation; you’ll see slightly more cling on softer waxes. Choose harder waxes for better wax durability, and you’ll clean surfaces easily.
Can Waxed Latex Survive Outdoor Exposure or Humidity Fluctuations?
No — waxed latex won’t reliably survive outdoor conditions or big humidity fluctuations; you’ll get limited wax durability, chalking, and wash-off. For exterior use, choose exterior-rated sealers or clear coats designed for moisture and UV exposure.
Will Wax Affect Latex Paint’s Fire Retardant or Safety Ratings?
No, applying wax typically won’t change latex paint’s fire safety ratings, but it can slightly reduce paint durability by trapping moisture or affecting finish adhesion; you should test and consult manufacturer specs for certified flame-retardant coatings.
Can Wax Cause Discoloration Under UV Light Over Time?
Yes — wax discoloration can occur with prolonged UV exposure; you’ll notice yellowing or darkening as binders and additives break down, so test in sunlight and use UV-stable waxes or topcoats to minimize fading over time.
Conclusion
You’ve prepped, tested, and chosen the right wax — now comes the reveal. Slowly run your hand across the painted surface: does it glide over a silky, protected sheen or snag on tacky spots? That small moment tells you everything. If it’s smooth, enjoy the depth and easy upkeep. If not, don’t panic — sand, re-prime, or switch wax types and try again; the finish you want is still waiting.