How to Paint the Exterior of an RV: Complete Beginner Guide
You can repaint your RV by following a clear prep-and-paint workflow: identify coach material, remove decals, clean and sand, fix rust or delamination, and mask trim. Choose a compatible primer and paint (enamel, acrylic, or urethane), apply evenly with brushes, rollers, or a sprayer, and control temperature and humidity while allowing proper cure time. Expect days to weeks and variable costs; do touch-ups promptly and wax regularly, and keep going for step-by-step tips and troubleshooting.
Quick Start: Your RV Paint Workflow
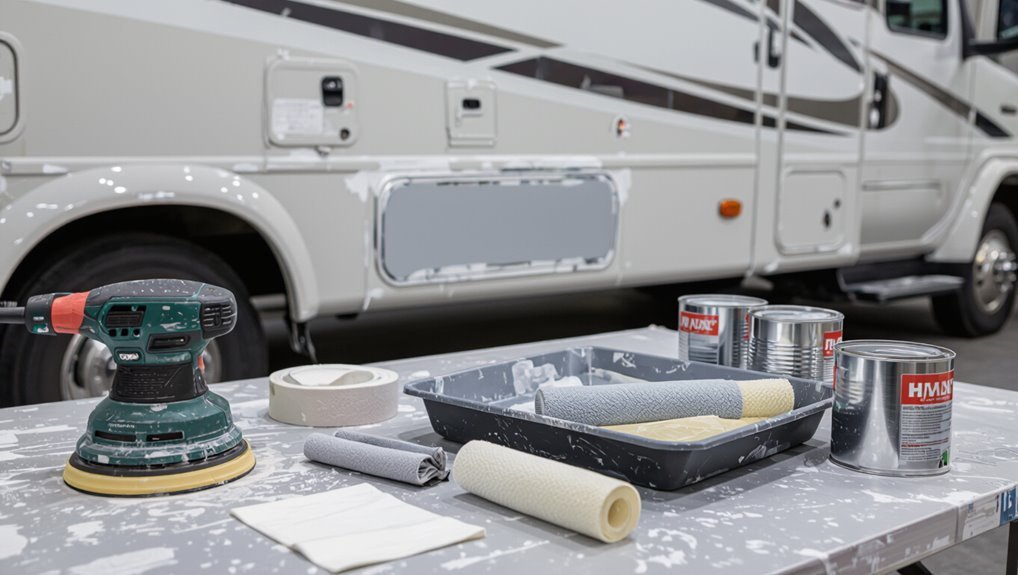
Start by setting up a clear, step-by-step workflow so you won’t get bogged down mid-job: gather materials, prep the surfaces, mask edges, choose your application method, and schedule time for drying and touch-ups.
You’ll handle paint preparation efficiently, inspect for rust and dents, sand and clean thoroughly, then decide on color selection and test swatches.
Proceed methodically to avoid rework.
What to Expect: Time, Cost, Difficulty
Painting an RV takes more than a weekend—plan for several days to a few weeks depending on prep and curing times.
You’ll spend anywhere from a few hundred to several thousand dollars based on paint type, tools, and whether you hire help.
The job’s difficulty ranges from straightforward for small touch-ups to challenging for full resprays, so match your timeline and budget to the scope you’re ready to tackle.
Time Commitment Estimate
Expect painting an RV to take anywhere from a long weekend for a small, simple refresh to several weeks for a full strip-and-repaint on a large motorhome.
You’ll be sanding, masking, priming, painting, and curing between coats, so plan both hands-on hours and waiting time for materials to dry.
Use strict time management and project scheduling, break tasks into daily goals, and pad timelines for weather and unforeseen delays.
Cost And Difficulty
Costs and difficulty can vary widely: you might spend a few hundred dollars on supplies for a basic DIY refresh or several thousand if you hire pros or need extensive bodywork and specialty coatings.
The skill level ranges from straightforward (touch-ups and simple spray jobs) to advanced (complete strip, rust repair, and multi-stage finishes) depending on the scope.
- Do a cost comparison before buying
- Assess your difficulty rating honestly
- Budget for unexpected repairs
- Consider pro quotes for complex jobs
- Factor time versus money tradeoffs
Signs You Need to Repaint Your RV
If your RV’s paint is faded or peeling, it’s a clear sign you’re losing protection and curb appeal.
Spotting rust or corrosion means metal is exposed and you’ll want to address it before it spreads.
Frequent water stains are a warning that seals or roof coatings may have failed and repainting plus repairs could be needed.
Faded Or Peeling Paint
When your RV’s paint looks dull, chalky, or is flaking off in spots, it’s a clear sign you should consider repainting.
You’ll want fading solutions and peeling prevention in your plan: clean, sand, prime, and choose UV-resistant topcoats to restore protection and appearance.
- Assess affected areas
- Test adhesion
- Strip loose paint
- Smooth and prime surfaces
- Apply UV topcoat
Rust And Corrosion Spots
After handling faded and peeling areas, check for rust and corrosion—these spots signal metal failure beneath the paint and mean you should act before damage spreads.
You’ll sand to bare metal, apply a rust converter, and follow with primer and paint. Prompt corrosion treatment plus regular rust prevention coatings extend life.
Deal with spots now to avoid costly repairs and structural loss later.
Frequent Water Stains
- Locate leaks quickly
- Probe for rot
- Clean and dry surfaces
- Apply preventive measures
- Use compatible paint
Decide: Match Color or Change It
Wondering whether to match your RV’s original color or pick something new? You’ll weigh color preferences against resale value, maintenance, and your desired aesthetic impact.
Matching keeps continuity and may be easier for touch-ups; changing lets you express personality but can complicate future repairs and reduce appeal to buyers.
Choose based on long-term priorities and how you use the RV.
RV Paint Types: Enamel, Acrylic, Urethane
Now you’ll compare the main RV paint types so you can pick what’s right for your build.
Enamel is affordable and easy to apply but can chip and yellow over time.
Acrylic gives good finish and ease of use, while urethane offers the best durability and resistance for long-term protection.
Enamel Pros And Cons
Enamel paints have long been a go-to for RV owners because they dry hard and resist chipping, but they come with trade-offs you should weigh before picking one.
You’ll need thorough surface preparation for durable enamel finishes.
Consider:
- Durable, glossy look
- Longer cure time
- Limited flexibility
- Easier touch-ups
- Sensitive to poor prep
Acrylic Benefits Overview
If you liked enamel’s toughness but worry about its stiffness and prep demands, acrylic offers a more forgiving alternative that still protects your RV.
You’ll enjoy acrylic advantages like flexibility, faster drying, and easier cleanup. It sands and bonds well, reducing cracking.
Use proper application tips: clean thoroughly, apply thin even coats, maintain consistent temperature, and let adequate flash time between layers for a durable finish.
Urethane Durability Comparison
Urethane stands out for durability, and you’ll notice its advantages when comparing it to enamel and acrylic: it resists chipping, UV degradation, and chemical exposure far better, while retaining some flexibility to handle RV movement.
Consider urethane longevity factors and follow urethane application tips for best results:
- Superior UV and chemical resistance
- Less chipping over time
- Flexible under stress
- Longer maintenance intervals
- Requires proper prep and technique
Tools & Materials You’ll Need
Before you begin, gather the right tools and materials so the job goes smoothly and you avoid unnecessary trips to the store. Choose paint types suited for RV exteriors and plan surface preparation steps. You’ll need brushes, rollers, primer, topcoat, masking tape, sandpaper, and cleaners.
| Tool | Purpose | Qty |
|---|---|---|
| Primer | Adhesion | 1 |
| Topcoat | Protection | 2 |
| Sandpaper | Prep | Various |
| Tape | Masking | 3 |
Safety Gear & Ventilation Essentials
While you work on the RV, wear proper protective gear and keep fresh air flowing to protect your lungs, eyes, and skin.
Follow a safety checklist and choose ventilation options that suit your setup so you stay safe.
- Respirator (P100 or N95 for paints)
- Safety goggles
- Nitrile gloves
- Disposable coveralls
- Portable fan or exhaust setup
Estimate Budget & Prepare Workspace
Before you start painting, figure out a realistic budget for paint, primer, masking supplies, and any specialty tools you’ll need.
Lay out your workspace so tools are organized, the RV has room to move, and trip hazards or loose chemicals are removed for safety.
With costs and a safe, efficient layout planned, you’ll avoid surprises and work faster.
Budgeting Materials And Tools
Start by calculating a realistic budget that covers paint, primer, brushes/rollers, masking supplies, protective gear, and a contingency for mistakes or extra coats.
Then list tools you can rent (spray gun, sander) versus those worth buying. Choose cost effective options and prioritize essential tools to avoid surprises.
- Paint and primer totals
- Rent: spray gun, sander
- Buy: quality brushes
- Masking supplies
- Protective gear and extras
Workspace Safety And Layout
Set aside a clear, level area you can control—ideally a covered garage or well-ventilated outdoor space with room to move around the RV and store materials safely. Inspect for workspace hazards, mark zones, and plan layout organization for tools, paints, and ventilation. Use barriers and PPE.
| Zone | Item | Purpose |
|---|---|---|
| A | Paints | Storage |
| B | Tools | Access |
| C | Vent | Safety |
Evaluate RV Surface: Aluminum, Fiberglass, Gelcoat
Different RV exteriors need different prep and paint systems, so first identify whether your coach is aluminum, fiberglass, or gelcoat — each requires distinct cleaners, primers, and techniques.
You’ll tailor surface preparation and guarantee paint adhesion accordingly.
Consider these checks:
- Cleanability and contaminant removal
- Primer compatibility
- Sanding/grit needs
- Flexible vs rigid coatings
- UV and solvent resistance
Find Structural Issues: Dents, Soft Spots, Delamination
Inspect the coach thoroughly for dents, soft spots, and delamination before you touch any paint—these structural issues will affect adhesion and may hide corrosion or water damage.
Walk every panel, press suspect areas, and look behind trim and seals for separation. Document locations and severity to prioritize work.
Understanding structural integrity helps you choose appropriate repair methods later without overlooking hidden failures.
Fix Structural Problems Before Painting
Before you paint, you’ll want to inspect the frame and joints for cracks, rust, or loose fasteners.
Repair any rot or delamination and replace compromised panels so the surface is stable.
Finally, seal leaks and seams to stop moisture from returning and ruining your new finish.
Inspect Frame And Joints
Start by walking the entire frame and joints, looking for cracks, corrosion, loose fasteners, and any signs of previous repairs that might fail under a fresh coat of paint.
You’ll assess frame stability and joint integrity, mark issues, and plan fixes before painting.
- Check for rust and pitting
- Tug fasteners for looseness
- Inspect welds and seams
- Note paint-blistered areas
- Photograph problem spots
Repair Rot And Delamination
After you’ve marked and photographed frame and joint problems, address soft spots and peeling layers in the skin and substructure that paint won’t hide.
Use rot detection probes and moisture meters to find compromised areas. Cut out rotten wood or delaminated panels, dry and treat surrounding material, then perform delamination repair with proper adhesives, clamps, and reinforcement.
Only paint when structure is sound.
Seal Leaks And Seams
Seal every joint, seam, and penetration you’ve inspected so moisture can’t return to the structure; leaks are the most common cause of hidden damage and will ruin a new paint job fast.
You’ll perform leak detection, clean surfaces, and apply proper seam sealing before priming. Follow these steps:
- Inspect roof, windows, and vents
- Remove old sealant
- Clean and dry areas
- Apply compatible sealant
- Recheck for leaks
Remove Oxidation, Chalking, and Paint Failures
When your RV’s finish looks dull, chalky, or has peeling spots, you’ll need to remove oxidation and any failing paint before applying new coatings; doing this correctly guarantees the new paint will adhere and last.
Use mechanical abrasion, sanding to feather edges, and chemical strippers where needed. Address oxidation removal, chalking issues, and paint failures thoroughly, then wipe residue away and inspect for bare metal or primer needs.
Clean & Degrease the RV Exterior Properly
Before you apply any new coatings, thoroughly clean and degrease the RV’s exterior so paint can bond to a contaminant-free surface.
Use proper cleaning techniques and degreasing solutions, rinse well, and work in sections. Remove wax, oil, and road grime before priming.
- Pre-rinse with low-pressure water
- Use marine-safe degreaser
- Scrub with soft brush
- Rinse until clear
- Let surface dry completely
Sanding Strategy: Grit Progression & Techniques
Although sanding might feel tedious, it’s the step that determines how well new paint will adhere and how smooth your finish will look; you’ll use sanding techniques and grit selection to remove flaws, feather edges, and prep surfaces. Be systematic: start coarse, move finer, finish uniformly.
| Emotion | Action | Result |
|---|---|---|
| Frustration | Start 80–120 grit | Progress |
| Relief | Move 220–320 grit | Smooth |
| Pride | Finish 400–600 grit | Ready |
Choose the Right Primer for RV Surfaces
Primer choice sets the foundation for a durable, professional RV paint job, so pick one matched to your substrate and topcoat.
You’ll consider primer types, adhesion, corrosion resistance, and compatibility during surface preparation. Choose primers for aluminum, fiberglass, or painted metal, and match solvent/epoxy or polyurethane systems to the finish.
- Adhesion to substrate
- Corrosion inhibition
- Flexibility for panels
- Compatibility with topcoat
- Drying and recoat times
Apply Primer Evenly & Sand Between Coats
Start with a clean, dry surface and apply the primer in consistent, overlapping strokes so each pass lays down a uniform film; keep the spray gun or brush moving at a steady speed and maintain the correct distance to avoid sags or thin spots. Let cure, sand light between coats using proper sanding techniques for adhesion; choose primer types suited to substrate.
| Step | Action |
|---|---|
| 1 | Apply primer |
| 2 | Cure |
| 3 | Sand |
| 4 | Repeat |
Masking Windows, Trim, Seals, and Graphics
Before you lay down any topcoat, mask off windows, trim, seals, and existing graphics precisely so paint only goes where you want it — use high-quality automotive masking tape for edges, low-tack paper or film for large areas, and plastic sheeting or magnetic covers for curved surfaces.
Mask windows, trim, seals, and graphics precisely using quality automotive tape, low-tack paper, and sheeting for clean topcoats
Use proper masking techniques and check sealant options to protect bonded joints.
- Tape edges snugly
- Cover large panels
- Protect vents
- Remove old decals
- Test adhesion
Brushes, Rollers, and Spray Equipment for RVs
You’ll want to match your equipment to the job: HVLP or airless sprayers speed up large panels, while a quality angled brush and a dense-nap roller handle trim and touch-ups.
Pick brushes with flagged or tapered synthetic bristles for acrylics and a solvent-resistant roller cover sized to the panel profile.
I’ll cover sprayer selection, nozzle sizes, brush types, and roller tips so you can get a smooth, even finish.
Choosing The Right Sprayer
When you’re tackling an RV’s large, curved surfaces, choosing the right sprayer will save time and deliver the smooth, even finish brushes or rollers can’t match; yet there are still situations where a brush or roller is the better tool.
Pick based on sprayer types, application methods, paint viscosity, portability, and cleanup needs.
- HVLP for control
- Airless for speed
- Portable for tight spots
- Battery for small jobs
- Consider nozzle sizes
Brushes And Roller Tips
One good brush or roller can save you time and fix detail work a sprayer can’t reach, so choose tools that match your paint type and the RV’s contours.
For brush selection, pick high-quality synthetic or natural bristles for enamels or latex.
Match roller types to surface: foam for smooth panels, low-nap for lightly textured areas, high-nap for deep texture.
Clean and store tools properly.
Spray Basics: Pressure, Tip Size, Overlap
Because spray painting an RV depends on controlling atomization and coverage, getting pressure, tip size, and overlap right is essential.
You’ll tune pressure settings and tip size to match paint viscosity, and use a consistent spray technique with correct overlap to avoid runs or thin spots.
- Match tip size to material
- Set PSI for atomization
- Hold consistent distance
- Overlap 50%
- Adjust for weather
How to Spray Large RV Panels Smoothly
Start by planning each panel as a single pass area so you can keep a wet edge and avoid lap marks; set consistent spray techniques, maintain proper distance and gun speed, and overlap strokes about 50%.
Do thorough panel preparation—clean, sand, and mask seams.
Use steady, even passes, keep the nozzle parallel, and blend edges into adjoining panels to achieve a smooth, uniform finish.
Coats & Drying Times
Decide how many coats your RV needs based on color change and paint type, usually two to three thin layers for even coverage.
Wait the manufacturer’s recommended drying time between coats and check tackiness before recoat.
Remember temperature and humidity affect cure times, so paint on warm, dry days or adjust your schedule accordingly.
Number Of Coats
Most RV paint jobs need two to three coats for full coverage and durability; you’ll apply a primer (if required), one or two finish coats, and sometimes a clear topcoat for extra protection.
You’ll judge paint layering and coat thickness to avoid runs. Aim for even, thin passes and inspect coverage between coats.
- Start with primer if needed
- Use thin, even passes
- Check for runs
- Feather edges
- Apply topcoat if desired
Drying Time Between
Because temperature, humidity, and paint type all affect how long you should wait, check the manufacturer’s recommended recoat time and then confirm visually before applying the next coat. Use proper drying techniques, gently touch test edges, and note temperature impact on skin-dry versus cure. Patience prevents runs and adhesion failures.
| Feeling | Action |
|---|---|
| Relief | Wait |
| Pride | Inspect |
| Calm | Touch |
| Confidence | Recoat |
| Joy | Finish |
Weather And Temperature
When you plan coats and drying times, remember that temperature and weather control both how fast paint skins over and how well it cures.
So check the manufacturer’s recoat window and adjust timing for current conditions.
- Work within the recommended temperature range.
- Avoid high humidity weather conditions.
- Allow extra cure time in cool temps.
- Speed up drying with airflow.
- Don’t apply if rain’s forecasted.
Handling Seams, Rivets, and Graphics
If you want a smooth, durable finish, tackle seams, rivets, and old graphics before you spray or roll—these areas create the most trouble for paint adhesion and visible imperfections.
Remove decals, clean adhesive, and sand edges for proper graphic application. Inspect rivets, tighten or replace as needed, then apply seam sealing where panels meet.
Prime repaired spots, then feather edges for uniform coverage.
Blend New Paint Into Old for a Seamless Look
After you’ve smoothed seams, addressed rivets, and removed old graphics, you’ll want the new paint to blend invisibly with the existing finish.
Use precise color matching and gentle blending techniques so changes vanish. Prep, feather edges, thin coats, and test panels carefully.
- Clean and scuff
- Match paint chips
- Feather with sandpaper
- Spray light passes
- Inspect in daylight
Clearcoat Options for RV Exteriors
Anyone tackling RV paint should pick a clearcoat that balances durability, UV protection, and ease of application for your skill level.
Professional polyurethane and two-part acrylic urethane give the best long-term protection, while single-stage clears or aerosol options can work for small repairs or DIYers.
Choose clearcoat types based on finish, flexibility, and weather resistance, and follow proper application techniques for adhesion and longevity.
Avoid Orange Peel, Runs, and Fisheyes
When you want a smooth, professional finish on your RV, control your spray technique and prep to prevent orange peel, runs, and fisheyes.
Use correct pressure, nozzle size, and overlap; clean oil/contaminants; and test panels.
Focus on paint application techniques and surface preparation tips to avoid defects.
- Adjust spray pattern
- Thin per label
- Maintain distance
- Clean and degrease
- Dry between coats
Troubleshoot Adhesion Problems & Cracking
Adhesion problems and cracking usually signal issues with surface prep, incompatible products, or environmental stress—so start by inspecting the substrate for peeling, chalking, rust, or old coatings that won’t bond.
Fix by cleaning, sanding to bare sound material, and using appropriate primer. Test compatibility before full coats.
For adhesion issues and cracking solutions, address moisture, temperature, and flexible topcoats to prevent recurrence.
Curing Time, Reassembly, and When to Drive
After the final coat goes on, give the paint proper time to cure—don’t rush reassembly or driving just because it looks dry to the touch.
After the final coat, let the paint fully cure—resist reassembly or driving until it’s truly set.
You’ll follow the curing process, use reassembly tips, and confirm driving readiness to protect paint durability.
- Wait recommended hours/temperature
- Inspect for tackiness
- Reinstall trim gently
- Torque hardware evenly
- Test short local drive
Maintain Your New RV Paint Job
1 simple routine will keep your new RV paint looking sharp for years: inspect, clean, and protect it regularly.
Check for chips, fading, or loose trim every month. Wash with mild soap, wax twice yearly, and park shaded when possible.
Learn basic touch up techniques for small chips and keep a matched paint can on hand.
Consistent paint care prevents costly repairs.
When to Hire a Pro: Jobs to Outsource
When a job goes beyond routine washing, waxing, or small touch-ups, you should hire a pro to avoid costly mistakes and get a durable, factory-quality finish.
For anything beyond simple washing, waxing, or minor touch-ups, call a pro for a durable, factory-quality finish.
You’ll save time and money by outsourcing tasks to professional painters for complex work.
Consider hiring pros for:
- Structural repairs
- Paint stripping
- Color matching
- Overspray prevention
- Clearcoat application
Frequently Asked Questions
Will Painting My RV Affect Its Resale Value or Warranty?
Yes — painting can affect resale considerations and warranty implications. You’ll potentially increase appeal if done professionally, but DIY or improper coatings can lower value and risk voiding manufacturer or dealer warranties, so check terms first.
Can I Legally Change My Rv’s Exterior Color Registration?
An old adage says, “measure twice, cut once.” Yes—you can legally change your RV’s exterior color; follow your state’s color change and registration process, submit required forms, proof, and pay any fees to update title and registration.
How Do Temperature and Humidity During Storage Affect Long-Term Paint Durability?
Temperature and humidity during storage directly affect long-term paint durability: you’ll see reduced paint adhesion and faster degradation if extremes or cycles occur, so control moisture, keep stable temperatures, and ventilate to prevent condensation and mold.
Are There Eco-Friendly or Low-Voc Paint Alternatives for RVS?
Think of a green shield: you can choose eco friendly options like waterborne acrylics and latex, which give low voc benefits, protect finishes, reduce fumes, and let you maintain your RV’s look while caring for air and health.
Can I Safely Paint Roof-Mounted Solar Panels or Antennas in Place?
You shouldn’t paint roof-mounted solar panels or antennas in place; you’ll risk damaging electronics and voiding warranties. Use solar panel protection and follow antenna maintenance: mask panels, remove antennas when possible, and consult manufacturers first.
Conclusion
You’ve got the basics to tackle an RV exterior paint job, from prep through curing — and you’ll save money if you do it right. Remember, about 40% of DIYers underestimate prep time, which causes most paint failures, so don’t rush sanding and masking. Take your time choosing paint type and adhesion methods, follow curing times before reassembly, and call a pro for structural repairs. With patience, your RV will look great and last longer.