
How to Fix a Wall Where the Paint Peeled: Repair and Repaint Guide
First, find and fix the cause—moisture, leaks, or poor adhesion—before you repair. Wear eye and dust protection, scrape loose paint to firm edges, then sand and clean the surface. Patch gouges or plaster with compound, feather edges smooth, and let it dry. Prime porous or repaired spots, match sheen, and apply thin paint coats with proper drying time. Blend outward for an invisible repair, and keep going to learn full prep and prevention tips.
Identify Why Paint Peeled (Moisture, Adhesion, Age)
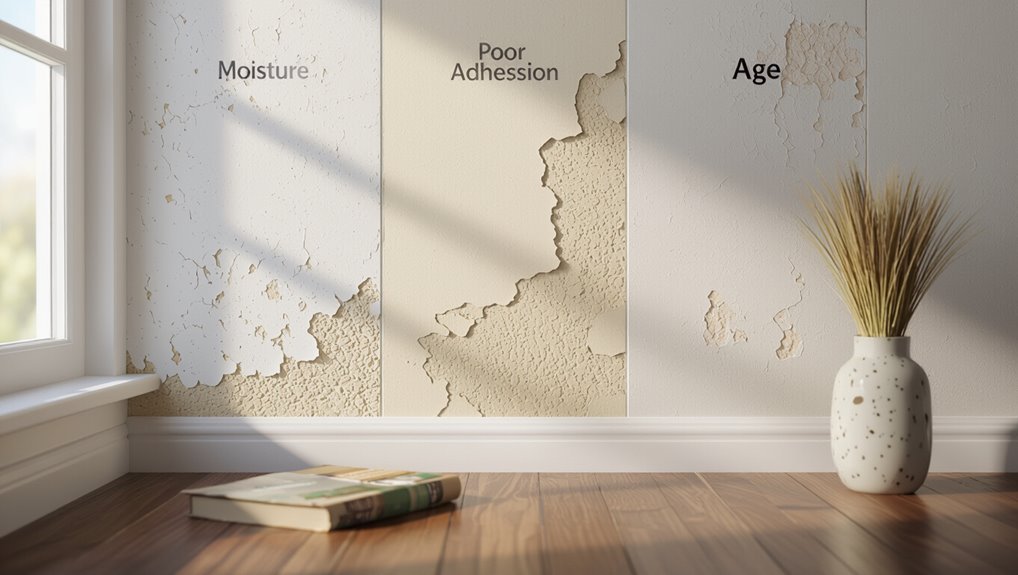
Before you start scraping or repainting, figure out why the paint peeled so you can fix the root cause.
You’ll inspect paint adhesion by probing flakes, check moisture sources like leaks or humidity, consider age factors that brittle coatings, and note wall materials—plaster, drywall, or concrete—to choose fixes.
Address the underlying cause before repairing and repainting to prevent recurrence.
Safety Gear and Tools You Need
You’ll need basic protective gear and a handful of simple tools to work safely and efficiently: safety glasses, a dust mask or respirator (N95 or better for sanding), gloves, and knee pads if you’ll crouch a lot; plus a sturdy ladder, a putty knife or scraper, sanding block or sandpaper (80–120 grit), patching compound, a paintbrush and roller, drop cloths, and a bucket for cleanup.
Follow safety precautions and gather essential tools before starting; inspect equipment, keep ventilation, and use respirators during dusty steps.
Test for Moisture and Hidden Leaks
Before you start repairs, check for surface dampness by feeling the wall and looking for discoloration or bubbling paint.
If the wall’s dry but you still see damage, inspect nearby plumbing fixtures and behind cabinets for leaks.
Don’t forget to check the roof and attic for signs of water entry that could be seeping down the wall.
Check For Surface Dampness
If paint’s peeling, check for surface dampness right away so you don’t waste time repairing a symptom of a deeper leak.
Do a quick dampness assessment: look for discoloration, feel for cool spots, and sniff for musty odors. Note moisture indicators and mark affected areas.
Then dry the surface and monitor; don’t repaint until it’s fully resolved.
- Inspect visually
- Touch test
- Odor check
Inspect Plumbing And Roof
Surface dampness often signals a hidden source, so trace that moisture back to plumbing and roofing next. Check for plumbing leaks under sinks, behind toilets, and along supply lines; lift baseboards. Climb for a roof inspection or hire a pro; look for damaged shingles, flashing, and vents. Act quickly to stop ongoing moisture and prevent recurring paint failure.
| Area | What to look for | Action |
|---|---|---|
| Bathroom | Stains, soft wall | Tighten/replace pipe |
| Kitchen | Drips, odors | Repair fittings |
| Attic/roof | Missing shingles | Patch or call roofer |
Inspect the Wall: Where to Look and What to Record
When you start inspecting the wall, work systematically from top to bottom and left to right so you don’t miss any trouble spots; note loose or bubbling paint, hairline cracks, peeling edges, stains, and any soft or crumbling areas.
Check wall texture and note paint types used. Record locations, severity, and likely causes.
- Locations
- Severity
- Causes
Remove Loose, Flaking Paint the Right Way
Now that you’ve mapped out where paint is failing and why, it’s time to remove the loose and flaking areas so repairs will hold.
Use scraping, a putty knife, or a wire brush to lift failing paint, working toward firm edges. Collect debris, vacuum, and dispose safely.
These paint removal techniques protect underlying drywall; follow surface preparation tips to guarantee new coatings adhere properly.
Sand, Clean, and Degloss: Surface Prep Steps
Start by sanding the peeled edges smooth so the patch won’t show once it’s painted.
Then wipe away all dust with a damp cloth or vacuum to guarantee good adhesion.
Finish by deglossing shiny areas with the appropriate solvent so your new paint bonds properly.
Sand Smooth Edges
Grab a fine- to medium-grit sandpaper and carefully sand the peeled area’s edges until they’re feathered smooth with the surrounding paint; this removes loose paint and creates a gentle change so new primer and paint will adhere evenly.
- Use light, controlled sanding strokes—apply consistent sanding techniques.
- Check for even edge finishes; blend shifts.
- Inspect for remaining loose flakes and smooth high spots before priming.
Remove Dust Thoroughly
With the edges sanded smooth, clear away every bit of dust so your primer and paint can bond properly. Use dust removal techniques like vacuuming, tack cloths, and damp wiping. Apply effective cleaning methods without soaking the wall.
| Vacuum | Tack cloth | Damp wipe |
|---|---|---|
| HEPA | Lint-free | Microfiber |
| Crevice | Gentle | Light rub |
Degloss With Solvent
After sanding and cleaning, degloss the area with a solvent to remove remaining sheen and contaminants so primer and paint will adhere evenly.
Choose solvent types (denatured alcohol, mineral spirits, or trisodium phosphate) based on finish. Use safe deglossing techniques and ventilate. Follow with tack cloth before priming.
- Test solvent on small spot
- Wipe with consistent strokes
- Rinse or neutralize if needed
Patch Drywall and Plaster Damage Correctly
Start by evaluating the damage so you know whether you’re dealing with a hairline crack, a gouge, or crumbling plaster—each needs a different fix.
For drywall patching, cut clean edges, apply mesh or a taped patch, and use joint compound in thin layers.
For plaster repair, remove loose material, use a bonding agent, and feather on plaster or patching compound until smooth.
Remove Stains, Mold, and Efflorescence (Masonry Notes)
Tackle stains, mold, and efflorescence on masonry by identifying the cause and matching the cleaner to the problem: use a mildew-specific cleaner or diluted bleach for biological growth, a trisodium phosphate (TSP) solution or masonry cleaner for stubborn dirt and stains, and a mild acid rinse (like diluted muriatic acid applied carefully) to remove salt deposits—always test a small area first, wear proper PPE, and guarantee good ventilation.
- Scrub for mold removal with appropriate cleaner.
- Rinse and repeat TSP for deep stains.
- Apply efflorescence treatment cautiously; neutralize and rinse.
Choose Primer and Paint for Better Adhesion
Pick a primer and paint system that’s formulated for the surface and the problem you fixed—masonry, drywall, or previously painted plaster all need different chemistry to stick and breathe.
Check primer adhesive properties and choose one that bonds to your substrate. Match paint compatibility to the primer (water- or oil-based).
Follow manufacturer instructions for drying and recoating times to guarantee durable adhesion and prevent future peeling.
Repaint for a Smooth Finish (Timing & Technique)
Wait the primer and base coats the recommended time so each layer cures fully before you paint again.
Use long, even brush or roller strokes and keep a wet edge to avoid lap marks.
If you follow drying times and steady technique, you’ll get a smooth, professional-looking finish.
Ideal Drying Times
Because paint needs time to form a proper film, you should let each coat dry thoroughly before recoating to avoid lifting, sanding issues, or visible brush marks.
Consider drying conditions and ideal humidity to schedule your work. Follow these simple timing guidelines:
- Wait 2–4 hours for latex in warm, low-humidity conditions.
- Allow 24 hours for oil-based paints.
- Extend drying times in cool or humid environments.
Painting Technique Tips
With the surface dry, you’re ready to focus on technique so the new coat lays down smoothly and bonds well. Use proper brush techniques, even strokes, and thin coats; wait recommended drying times between layers. Match primer to color selection and finish.
| Tool | Stroke | Dry time |
|---|---|---|
| Brush | Long | 1–2h |
| Roller | Cross | 2–4h |
| Spray | Thin | 30–60m |
| Tip | Blend | 24h |
Blend and Feather Repairs so They Disappear
After you’ve filled and sanded the damaged area, blend and feather the repair into the surrounding paint so it disappears from view; you’ll do this by gradually thinning the edge with fine sanding and by building up very thin coats of primer and paint that overlap the original finish.
Use blending techniques and feathering edges to match sheen and texture:
- Sand progressively finer.
- Apply thin primer coats.
- Feather paint outward.
Prevent Future Peeling: Ventilation, Insulation, Maintenance
If you want your repaired wall to stay fixed, control the conditions that caused the peeling in the first place: improve ventilation to reduce moisture buildup, add or upgrade insulation to prevent temperature-driven condensation, and keep up with simple maintenance like fixing leaks and cleaning gutters.
Use ventilation tips like exhaust fans and air circulation paths, adopt insulation strategies, and set maintenance schedules to inspect and prevent recurrence.
Troubleshoot Common Problems After Repainting
When your newly painted wall shows issues like bubbling, cracking, or uneven sheen, don’t panic—you can usually diagnose the cause quickly and fix it before it worsens.
- Inspect peeling patterns to spot moisture or adhesion failure; sand and prime accordingly.
- Match paint types; latex over oil needs proper prep or adhesion primer.
- Control humidity, dry thoroughly, and recoat with recommended drying times to prevent recurrence.
Frequently Asked Questions
Can I Repaint Over Oil-Based Paint With Latex Without Stripping First?
Yes, you can repaint latex over oil-based paint if you prepare properly: sand and clean, then apply a bonding primer for oil based compatibility so latex adhesion stays strong and the finish lasts.
Will Peeling Paint Affect My Home’s Resale Value?
Yes — a buyer’s first look shapes resale perception, and peeling walls scream neglect, lower paint quality, reduce offers, and slow sales; fix, repaint, and reassure to protect value, confidence, and closing speed.
Are There Eco-Friendly Primers and Paints That Prevent Peeling?
Yes — you can choose eco friendly options like low‑VOC primers and paints made from sustainable materials such as plant-based binders and recycled fillers; they reduce peeling risk, improve durability, and lower indoor toxins for healthier homes.
Can Wallpaper Be Applied Over a Previously Peeled and Repaired Wall?
Yes, you can apply wallpaper over a previously peeled and repaired wall if you guarantee thorough wall preparation, sanding, priming, and smoothing; doing so promotes strong wallpaper adhesion and prevents future bubbles, lifting, or visible repairs.
How Long Should I Wait Before Rehanging Heavy Items on Repaired Areas?
Wait at least 48–72 hours for paint and filler to cure; full drying time for heavier items may be 7 days. Check weight limits for anchors and hangers, and don’t exceed them when rehanging.
Conclusion
Peeling paint’s annoying but fixable if you know why it happened and take the right steps. About 60% of homeowners report paint failures caused by moisture, so start by testing for leaks and drying the substrate before you sand and prime. Use proper safety gear, remove loose paint, and feather repairs so new coats blend. With good ventilation, correct primers, and timely maintenance, you’ll stop future peeling and keep walls looking smooth for years.
