How to Paint a Stucco Ceiling: Diy Step-By-Step Instructions
You can repaint a stucco ceiling yourself by prepping, repairing, priming, and using the right tools. Clear and protect the room, patch cracks and flaking, clean and let it dry, then use a masonry primer. Roll with a textured nap or use a sprayer for even coverage, cut in edges with an angled brush, and let coats dry fully before touch-ups. Follow proper safety and ventilation, and keep going to learn timing, common fixes, and pro tips.
Quick Checklist: Paint a Stucco Ceiling in 5 Steps
1. You’ll gather tools, evaluate stucco ceiling benefits, and choose primer.
Prep surfaces, patch cracks, and mask trim.
Apply primer, then use color selection tips to pick a durable, light-reflective paint.
Roll textured areas carefully, then cut edges with a brush.
Allow proper drying time, inspect, and touch up for an even, lasting finish.
When to Repaint a Stucco Ceiling (Signs to Watch For)
Watch for visible damage or stains—these are clear signs your stucco ceiling needs attention.
If the texture starts flaking or losing its original pattern, that deterioration means paint and protective layers are failing.
You’ll want to repaint before problems worsen and lead to bigger repairs.
Visible Damage Or Stains
If you notice cracks, peeling, or brownish stains spreading across your stucco ceiling, it’s a clear signal that repainting—or at least a deeper inspection—is needed.
Check for visible mold around stains and areas of color fading.
Spot discoloration or soggy patches may indicate leaks.
Address underlying moisture or mold before painting to guarantee a lasting, safe finish and prevent recurring damage.
Texture Degradation Or Flaking
Beyond stains and leaks, you’ll also want to inspect the surface itself for texture degradation or flaking, which signals the stucco’s bond to the substrate is failing.
If you see loose particles or sheets peeling, don’t paint over them. Remove loose material, perform texture repair, and address underlying moisture.
Proper preparation and flaking prevention restore adhesion and guarantee a lasting finish.
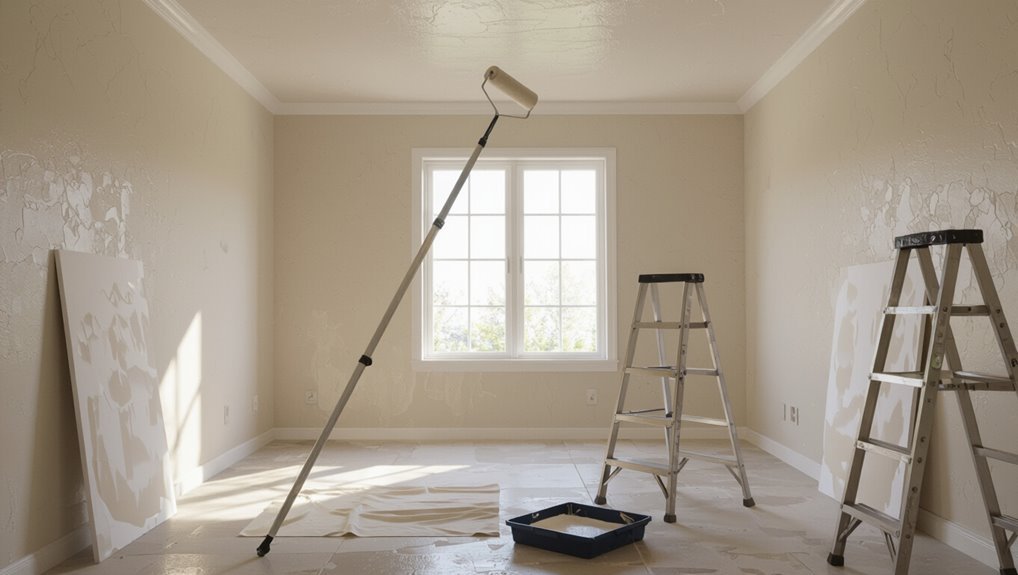
Gather Tools and Supplies for a Stucco Ceiling Job
Before you start, gather the right tools and equipment—extension poles, textured rollers or sprayers, ladders, drop cloths, and safety gear—to make the job safe and efficient.
Pick the proper paint and consumables: a quality masonry or textured-ceiling paint, primer if needed, painter’s tape, brushes, and enough caulk and patching compound for repairs.
Having everything on hand saves trips and helps you maintain a consistent finish.
Tools And Equipment Needed
Tools matter: you’ll need the right brushes, rollers, ladders, and protective gear to paint a stucco ceiling safely and effectively.
Gather a sturdy extension pole, textured rollers, angled brushes for crevices, drop cloths, painter’s tape, respirator, goggles, and gloves.
Bring a stable ladder or scaffolding, putty knife and sanding block for repairs, plus a paint tray and stirring stick for different paint types.
Paints And Consumables
For a stucco ceiling, pick paints and consumables that match the texture, surface prep, and ventilation conditions you’ll be working with; you’ll typically want a high-quality acrylic or elastomeric exterior/interior latex for durability and breathability, plus a primer rated for masonry or plaster to seal porous areas. Choose stucco paint types after surface preparation: rollers, brushes, drop cloths, tape, patching compound.
| Mood | Tool | Result |
|---|---|---|
| Calm | Roller | Smooth |
| Confident | Primer | Sealed |
| Proud | Paint | Durable |
| Relieved | Tape | Clean |
| Joyful | Cloth | Protected |
Safety When Working Overhead and Protecting the Room
When you’re working overhead, take steps to protect yourself and the room so a small mistake doesn’t become a big cleanup or injury.
Use proper ladder safety: place on level ground, lock spreaders, and have a helper steady it.
Cover furniture and floors with drop cloths, mask trim and light fixtures, and wear eye protection and a respirator for dust, debris, and paint splatter.
Inspect and Repair Cracks, Flaking, and Water Damage
Start by closely inspecting the entire ceiling for hairline cracks, flaking stucco, and any stains or soft spots that signal water damage. You’ll want to mark problem areas so you can address them systematically.
Do a thorough crack assessment and moisture evaluation. Remove loose stucco, scrape gently, apply patching compound, and let it cure.
Recheck for firmness before priming and painting.
Clean and Prep a Textured Stucco Ceiling for Paint
Now that you’ve repaired cracks and removed loose material, clean and prep the textured stucco so paint will adhere evenly.
You’ll use gentle cleaning techniques—vacuum, soft-bristle brush, and mild detergent rinse—then let it fully dry.
Focus on surface preparation to remove dust, mold, and grease so primer bonds properly.
- Relief at a refreshed ceiling
- Confidence in a solid base
- Pride in careful prep
- Anticipation for a smooth finish
Choosing and Applying Primer for Stucco Ceilings
Because stucco’s texture soaks up paint unevenly, you’ll want a high-quality primer that seals and evens the surface before topcoat application.
Because stucco soaks up paint unevenly, use a quality primer to seal and level the surface before painting.
Choose between acrylic, bonding, or stain-blocking primer types based on porosity and stains.
Test a small area, then use proper application techniques—thin coats, even coverage, and brush into crevices.
Allow full drying and sand high spots before painting.
Painting Methods for Stucco Ceilings: Roller, Brush, Sprayer
Now that your primer’s set, you’ll choose the best application method for stucco’s texture.
Use a nap roller and specific coverage techniques to work paint into crevices, a brush for cutting in and detail work, and a sprayer with the right tip and pressure for even coats.
I’ll walk you through roller patterns, brush tips, and sprayer setup so you can pick the most efficient approach.
Roller Coverage Techniques
Start by choosing the right roller and technique for your stucco ceiling—texture and height will dictate whether you use a nap roller, extension pole, or a different method entirely.
You’ll follow consistent roller patterns, adjust for texture considerations, and overlap passes to avoid streaks.
Focus on rhythm and pressure to control coverage and minimize touch-ups.
- Confident
- Calm
- Empowered
- Satisfied
Brush Tip Applications
Once you’ve mastered roller rhythm, bring a brush into play for edges, corners, and stubborn texture where the nap won’t reach—brushes let you work tight to trim lines and push paint into crevices.
Use angled sash brushes and firm bristles for control, employ short, stippling strokes, and follow textured contours.
These brush techniques and application tips help you blend seams and avoid drips while preserving texture.
Sprayer Setup Tips
Set up your sprayer carefully to get even coverage on stucco ceilings without overspray or clogging—choose a high-volume, low-pressure (HVLP) or airless unit rated for textured surfaces, fit it with a coarse-tip nozzle (typically .015–.021 inch for airless; 1.8–2.5mm for HVLP), and thin the paint only as the manufacturer’s guidelines allow so it flows into crevices without running.
You’ll feel confident seeing full coverage.
You’ll dread blotches less.
You’ll enjoy faster progress.
You’ll love the clean finish.
Adjust sprayer types, pressure, and spray patterns for texture and avoid clogging by straining paint and testing on scrap drywall.
Prevent Drips and Get Even Coverage on Rough Texture
A good roller technique and the right tools will keep drips off your face and deliver even coverage across the stucco’s peaks and valleys. Use slow, overlapping strokes, a thick-nap roller, and light pressure for drip prevention and proven texture techniques. Work small sections, back-roll to level, and check for runs.
| Tool | Purpose | Tip |
|---|---|---|
| Roller | Coverage | Overlap |
| Brush | Cut-in | Light |
| Pole | Reach | Steady |
Drying, Touch-Ups, and When to Apply a Second Coat
Let the paint dry to the touch before you inspect it—typically 1–2 hours for latex in warm, dry conditions—and plan to wait longer in high humidity or cooler temps.
Check for thin spots, then use gentle touch up techniques with light stippling.
Follow recommended drying times before recoat—usually 4–6 hours.
You’ll feel relief seeing even coverage:
- Pride
- Calm
- Confidence
- Satisfaction
Common Problems After Painting and How to Fix Them
When you spot issues like lap marks, peeling, or texture changes after painting, tackle them quickly to prevent bigger repairs. You can sand peeling, re-prime glossy spots, and mist heavy texture to blend. For a streaky finish or uneven texture, feather edges and re-roll with consistent pressure. Monitor drying and ventilate to avoid faults.
| Problem | Cause | Fix |
|---|---|---|
| Peeling | Poor adhesion | Sand, prime, repaint |
| Lap marks | Overlap too wet | Re-roll |
| Streaky finish | Roller issues | Replace roller |
| Uneven texture | Inconsistent pressure | Reapply evenly |
Frequently Asked Questions
Can I Paint Stucco Ceilings in High-Humidity Climates?
Yes, you can paint stucco ceilings in high-humidity climates, but you’ll need proper stucco preparation and moisture control; humidity effects demand thorough drying, anti-mold primer, and ventilation so paint adheres and resists peeling or mildew.
Will a Textured Ceiling Hide Smoke or Cooking Stains?
Yes — a textured ceiling hides smoke or cooking stains by scattering light like a cloudy sky, so you’ll notice less discoloration. Textured ceiling benefits include camouflage; combine with sealers for true smoke stain prevention.
Is Special Paint Needed for Popcorn vs. Stucco Texture?
Yes — you’ll need special paint and prep for popcorn texture because it’s fragile and uneven; stucco accepts standard ceiling paint after cleaning. You’ll want a thicker, high-hiding formula and gentle application for popcorn.
Can I Paint Over Mold Without Professional Remediation?
You can, but only for small, surface issues you’ll tackle yourself; you’ll clean gently, use a mold-killing solution, repaint, and then focus on mold prevention and ceiling maintenance to keep the problem from quietly returning.
How Long Should I Wait to Reinstall Light Fixtures?
Wait at least 24–48 hours before reinstalling light fixtures to guarantee proper drying time; you’ll prioritize light fixture safety, confirm surfaces are fully dry and any mold treatments have settled, and test electrical connections before restoring power.
Conclusion
By following these steps, you’ll transform your stucco ceiling with confidence and care. Think of the process like tuning an old guitar: a little prep, the right tools, and steady technique bring harmony back to the room. Inspect and repair first, protect the space, choose your application method, and work methodically to avoid drips. Let paint dry fully before touching up, and you’ll enjoy a refreshed ceiling that lasts.