How to Paint Over Stain Wood – Prep, Primer & Finishing Techniques
You can paint over stained wood if you prep and test carefully. Start by testing sealing and adhesion with water drops and tape pulls, then clean, degrease and sand to dull glossy finishes. Spot-repair dents or gouges and use a shellac or oil-based primer for stain blocking before topcoating with acrylic, alkyd or hybrid paint. Work in controlled temperature and humidity, apply thin even coats, and allow full cure; keep going and you’ll find detailed tips for each step.
Can You Paint Over Stained Wood? Quick Answer
Wondering if you can paint over stained wood? Yes — with proper surface preparation you’ll get lasting results.
Choose compatible paint types (latex or oil-based) and use a bonding primer to block tannins and promote adhesion.
Sand glossy finishes, clean thoroughly, and fill gaps before priming.
Follow product instructions, and you’ll transform stained wood without stripping or replacing it.
When to Paint Vs Refinish Or Replace Stained Wood
When deciding whether to paint, refinish, or replace stained wood, weigh the piece’s condition, your desired look, and your budget; if surface damage is minor and you want a new color, painting is efficient.
Choose wood restoration when grain or value matters. Replace only if structural failure or cost of repair exceeds replacement.
Consider paint alternatives like stains or veneers for compromise.
How To Tell If Stained Wood Is Sealed Or Porous
You can quickly tell if stained wood is sealed or porous with two simple checks.
Place a few drops of water on the surface — if it beads, the wood’s sealed; if it soaks in, it’s porous.
Also scratch a hidden spot or rub a damp cloth to see if stain color lifts or absorbs, which confirms porosity.
Water Drop Test
Curious whether your stained wood is ready for paint or still needs sanding and sealing?
Place a few drops of water on the surface and watch for beading or soaking. If drops bead, the finish likely resists moisture exposure and limits water damage; if they absorb quickly, the wood is porous and needs sealing.
Repeat across the piece to confirm consistency.
Stain Absorption Check
If the water drop test left you unsure, a quick stain absorption check will confirm whether the wood’s finish is sealed or still porous. Dab a tiny alcohol or mineral spirits drop; sealed finishes bead, porous soak. Note stain types and wood compatibility before testing. Use this quick reference:
| Test | Result | Action |
|---|---|---|
| Bead | Sealed | Prime |
| Soak | Porous | Sand |
| Partial | Mixed | Spot-sand |
Test Adhesion: Quick Surface Tests To Try First
Before you paint, you’ll want to run a couple quick adhesion checks to see how the stain and finish will hold up.
Try a pressure-wash spot test on an inconspicuous area to see if the finish softens or rinses away.
Then use an adhesion tape pull (apply strong tape, press firmly, then rip it off) to check if the surface flakes or peels.
If either test shows the finish failing, you’ll need to strip, sand, or prime before painting.
Pressure Wash Spot Test
When you think the wood’s ready, do a pressure-wash spot test to check how well the stain and any loose finish will come off; it’s a quick, low-risk way to gauge adhesion before you commit to full-scale stripping or painting.
You’ll learn if pressure washing and light agitation remove contaminants or reveal stubborn areas.
- Choose inconspicuous spot.
- Start low PSI.
- Dry and inspect.
- Note next steps.
Adhesion Tape Pull
Although it looks simple, the adhesion tape pull gives you a fast, reliable read on how well the existing finish is sticking to the wood. You’ll press strong tape, pull sharply, and judge adhesion test results. Use careful tape techniques to avoid damage and decide whether sanding or primer’s needed.
| Feel | Result | Action |
|---|---|---|
| Confident | Good | Paint |
| Uneasy | Partial | Sand |
| Worried | Bad | Strip |
Prep Your Workspace And Protect Surrounding Areas
Start by clearing a workspace wide enough to move the piece freely and cover nearby floors, walls, and furniture with drop cloths or plastic sheeting so dust and paint can’t spread.
Keep workspace organization tight and prioritize surface protection.
Follow these steps:
- Remove clutter and allow movement.
- Tape edges and seams.
- Elevate the piece on blocks.
- Set up ventilation and lighting.
How To Clean Stained Wood Before Painting
Before you sand or prime, clean the stained wood thoroughly to remove grease, wax, and dirt that’ll prevent paint from adhering; use a degreasing cleaner or a wood-specific trisodium phosphate (TSP) substitute, working with a soft cloth or sponge and rinsing with clean water so the surface dries completely.
After drying, test for lingering residue, apply mild cleaners as needed, and follow stain removal techniques for proper wood surface preparation.
Remove Grease, Wax, And Polish Effectively
Before you paint, you’ll need to remove any grease and old polish so the primer and paint will stick.
Use a degreasing solution (like trisodium phosphate or a mild citrus cleaner) to cut oil, then rinse and dry the wood.
For wax buildup, strip it with a solvent-based wax remover or gently scrape and clean until the surface feels dry and matte.
Degreasing Solutions
1 essential step in painting over stained wood is thoroughly degreasing the surface to remove oils, wax, and polish that repel paint.
You’ll use degreasing methods and effective cleaners to prep properly. Follow these focused steps:
- Test cleaner in an inconspicuous spot.
- Use TSP or citrus-based degreaser.
- Rinse with clean water.
- Dry and scuff before priming.
Removing Old Wax
If previous cleaners haven’t removed residue, you’ll need to strip old wax and polish so paint can adhere properly; use a targeted wax remover or a solvent-based cleaner.
Scrub with a soft cloth or nonabrasive pad, then wipe away loosened buildup and rinse.
Test wax removal methods in an inconspicuous spot, choose effective solvents safe for your finish, and let wood dry fully before priming.
When To Strip Finish And When To Skip Stripping
Decide whether to strip the existing finish based on what’s on the wood and the look you want: glossy varnish, thick polyurethane, or damaged stained layers usually need stripping so new stain and finish will penetrate and adhere, while lightly worn or thin oil-based finishes can often be scuffed and recoated without full removal.
- Evaluate finish type for stripping techniques and paint adhesion.
- Test a small area.
- Consider time vs. outcome.
- Strip if flaking or incompatible.
Sand Stained Wood For Better Paint Adhesion
Before you sand, check the finish for peeling, gloss level, and any damage so you know how aggressive to be.
Start with a medium grit and work to a finer grit to scuff the surface without removing all the stain.
Wipe the dust away and degrease the wood so paint will stick.
Assess Finish Condition
Once you look closely at the stained wood, you’ll be able to judge whether sanding is necessary by checking for gloss, surface buildup, and damage. Smooth, low-gloss finishes often need only light scuffing, while high-gloss or heavily varnished surfaces require more aggressive sanding to give paint something to bite into.
- Identify stain types and coating layers.
- Note finish longevity and wear.
- Spot flaking, bubbles, or scratches.
- Test adhesion with a fingernail or tape.
Choose Grit Progression
After you’ve judged the finish and noted any gloss or damage, pick a sanding progression that matches what you found: start with a coarser grit to remove glossy varnish or surface buildup, then step down to finer grits to smooth scratches and prepare the wood for primer.
Use common grit types (80–120 then 180–220), follow proper sanding techniques, and test an inconspicuous area.
Clean And Degrease
1 simple cleanup step can make the difference between paint that sticks and paint that peels: thoroughly clean and degrease the stained wood.
You’ll use proper cleaning tools and degreasing methods to remove oils, wax, and dust before sanding.
Follow these steps:
- Wipe with a degreaser solution.
- Scrub stubborn spots.
- Rinse and dry fully.
- Vacuum and tack cloth.
Which Sanding Grits Work For Different Woods
Different woods take abrasives differently, so match grit to species and project goals: start with a coarser grit to remove finish or deep stain on hardwoods like oak or maple, but use finer starting grits on softwoods like pine to avoid gouging the grain.
For sanding techniques, begin 80–120 grit on hardwoods, 120–180 on softwoods, then finish with 150–220 grit for painting.
Treat Deep Stains And Prevent Tannin Bleed-Through
Deep, set-in stains and tannin bleed can ruin a painted finish if you don’t neutralize them first, so tackle them before priming.
You should use targeted stain treatment—bleach or oxalic acid for dark spots—and seal with a tannin prevention solution.
Prep by cleaning, drying, and testing a small area, then apply sealant evenly.
- Identify
- Treat
- Rinse
- Seal
Best Stain-Blocking Primers For Stained Wood
When you’re covering stained wood, choosing the right primer makes the job easier and more durable.
You’ll often pick between oil-based primers for strong stain resistance and shellac-based primers for the toughest tannin and odor blocking.
Apply them per label—clean and sand first, use thin even coats, and tack up any bleed-through before topcoating.
Oil-Based Primer Options
If you’re tackling stained wood, oil-based primers give you the strongest stain-blocking protection before topcoat, sealing tannins and color bleed that water-based primers can miss.
You’ll appreciate oil based advantages and straightforward application techniques:
- Clean and sand thoroughly.
- Use quality oil primer for tannin-heavy woods.
- Apply thin, even coats; allow full cure.
- Lightly sand between coats.
Shellac-Based Primer Benefits
A shellac-based primer gives you the fastest, most reliable stain-blocking protection for stained wood, sealing tannins, knots, and water stains that can bleed through other primers.
You’ll appreciate shellac properties like rapid drying, strong adhesion, and odor control.
Its primer advantages include superior sealing, compatibility with various topcoats, and minimal sanding between coats, making painting over stained wood simpler and more dependable.
Stain-Blocking Application Tips
Pick a high-quality stain-blocking primer that matches your project and apply it methodically for reliable results.
You’ll consider stain types, primer selection, surface prep, and adhesion testing before painting.
Watch drying times, use proper application techniques, and check color matching for topcoat success.
Balance finish durability with environmental considerations and follow product recommendations.
- Prep
- Test
- Apply
- Cure
Oil Vs Water Primer: Which To Choose
Wondering whether to use an oil- or water-based primer?
You’ll weigh oil primer advantages like superior stain blocking and finish durability against water primer drawbacks such as weaker sealing on bare stain.
Consider surface compatibility, drying times, odor considerations, cleanup differences, and environmental impact.
Choose oil for tough stains and longevity, water for lower odor and easier cleanup when surface prep is solid.
Use Shellac-Based Primer For Stubborn Stains
When ordinary oil or water primers won’t block stubborn tannin stains, reach for a shellac-based primer because it seals and locks in discoloration fast.
You’ll get Shellac benefits for tough Stain types; watch Primer consistency and use proper Application techniques to avoid bleed-through.
- Seal tannins
- Thin for flow
- Spot-test first
- Use quick recoat window
Primer Coats: How Many And How Much Coverage
Although one coat of primer can hide minor stains and even out color, you’ll usually need two thin coats for reliable stain blocking and uniform coverage.
For primer selection consider primer types and primer comparison for oil, shellac, or latex.
Use proper primer application and primer techniques, watch primer drying between coats, and understand primer benefits and primer finishes to guarantee consistent adhesion and final look.
Smooth And Feather Primer Between Coats
After each primer coat, you’ll sand lightly to knock down any raised grain or brush marks so the next layer sits smooth.
Use a feathering technique at edges and junctions to blend new primer into the old without hard ridges.
That extra sanding and feathering gives you a seamless base for paint.
Sand Between Coats
Smooth the surface between coats by lightly sanding to knock down dust nibs, brush marks, and raised grain so each new layer bonds evenly.
Use proper sanding techniques and grit selection; wipe dust before recoating.
Follow this checklist:
- Sand with 220–320 grit between primers.
- Lightly sand topcoat with 320–400 grit.
- Sand in direction of grain.
- Clean thoroughly before next coat.
Use Feathering Technique
Now that you’ve knocked down imperfections with light sanding, use the feathering technique to blend primer seams and thin edges so the next coat lays flat and invisible.
Lightly drag a lightly loaded brush or foam pad from wet to dry areas, feathering technique focused on blending edges.
Work quickly, overlapping strokes, checking for ridges, then let primer cure before final sanding and repainting.
Repair Dents, Gouges, And Fill Holes In Stained Wood
Start by evaluating the damage so you know whether you’re dealing with a shallow dent, a deeper gouge, or a void that needs filling; each requires a different approach and materials.
For dent repair use steam or wood filler; for gouges and hole filling, rout, glue splinters, or pack with epoxy/wood filler. Sand smooth and feather edges before priming.
- Assess
- Clean
- Fill
- Sand
Spot-Prime Repairs To Stop Stain Bleed
Because repaired areas can still bleed tannins or old stain through paint, you’ll want to spot-prime each repair before priming the whole piece.
Use a shellac or oil-based spot primer, applying thin coats to seams and fills. This targeted approach is one of the most reliable stain prevention techniques.
Let spots cure fully, then follow your overall priming methods for even coverage.
Paint Choices That Work With Primed Stained Wood
After your spot primers have cured, pick paints that’ll bond to the primer and resist any remaining stain bleed.
Choose water-based or oil-based acrylics depending on primer compatibility. Consider current color trends but prioritize durability and easy touch-ups.
- Acrylic latex — versatile, low odor
- Alkyd — tough, stain-resistant
- Hybrid enamel — balance of durability and flow
- Stain-blocking topcoat options
Picking Sheen: Cabinets, Furniture, And Trim
When you pick a sheen, think about use and visibility: cabinets need durability, furniture benefits from softer sheens, and trim often calls for a paint that highlights detail.
You’ll usually choose semi-gloss or gloss for cabinets, satin or eggshell for most furniture, and semi-gloss for trim to make cleaning and touch-ups easier.
Match sheen to function and appearance to get results that last and look right.
Sheen For Cabinets
Choosing the right sheen for your cabinets matters more than you might think, since it affects durability, appearance, and how easy surfaces are to clean.
You’ll pick sheen types based on use, style, and desired finish durability. Consider these practical options:
- Flat — hides imperfections.
- Satin — balanced sheen, easy clean.
- Semi-gloss — durable, reflects light.
- Gloss — highest durability, shows flaws.
Furniture Sheen Choices
Although it might seem minor, the sheen you pick for furniture and trim changes both how pieces look and how well they hold up, so think about use, style, and cleaning needs before you start.
Choose higher sheen for high-traffic pieces to boost sheen durability and easier sheen maintenance; pick lower sheen to hide imperfections and create softer, more refined surfaces for occasional-use furniture.
Trim Sheen Guidelines
Now that you’ve weighed furniture sheen options, focus on trim and cabinetry where sheen plays a bigger role in durability and appearance.
Choose semi-gloss for high-traffic trim, satin for subtle cabinets, and flat for low-use areas.
Consider trim color options to complement walls and follow trim maintenance tips for longevity.
- Durability
- Cleanability
- Reflection
- Matching
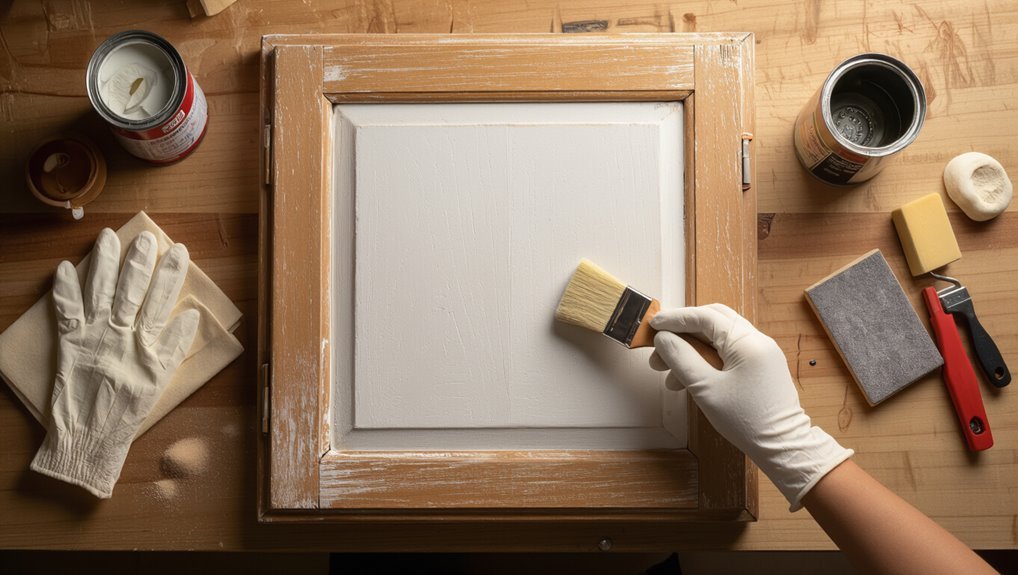
Apply Paint: Brush, Roller, Or Sprayer Techniques
Decide which tool suits your project—brush, roller, or sprayer—based on the surface, paint type, and desired finish.
You’ll use brush techniques for edges and detail, roller methods for flats, and sprayer tips for fast, even coats.
Consider paint application, technique comparison, finish options, coverage considerations, texture effects, drying times, and tool selection to match speed, control, and final look.
Avoid Brush Marks, Roller Texture, And Drips
To avoid brush marks, roller texture, and drips you’ll need a smooth, well-prepared surface and the right application technique.
Sand and clean the wood, then use thin, even coats with a high-quality brush, foam roller, or sprayer.
Work systematically and keep a wet edge to minimize overlaps and runs.
Smooth Surface Prep
Start by sanding the stained wood smooth and wipe away all dust so your primer and paint lay down evenly; any remaining roughness or debris will show as brush marks, roller texture, or drips once you start coating.
Use proper sanding techniques for surface smoothing and tack cloths to remove grit.
Then:
- Sand progressively finer grits
- Clean with tack cloth
- Fill gaps, sand again
- Inspect under light
Optimal Application Technique
Although careful prep matters, your technique as you apply primer and paint makes the biggest difference in eliminating brush marks, roller texture, and drips; use light, even strokes with the ideal brush technique—load sparingly, feather edges, and keep a wet edge.
For roller application methods, choose a low-nap cover, roll slowly in overlapping passes, and tip off to smooth texture and prevent drips.
Drying And Recoat Times For Common Products
Drying and recoat times vary widely by product and conditions, so you’ll want to plan each step instead of guessing.
Dry and recoat times differ greatly—plan each step, don’t guess.
You’ll check labels for drying times and recoat intervals, match product compatibility with paint types, and adjust for environmental factors and application techniques after good surface preparation to guarantee finish durability.
- Oil-based primers
- Water-based paints
- Alkyd enamels
- Specialty sealers
Sanding Between Paint Coats For A Glassy Finish
Once your coats have dried to their recommended recoat window, sanding between layers gives you the control to remove dust nibs, brush marks, and orange peel so each subsequent coat lays down smoother and reflects light like glass. You’ll use fine sanding techniques, clean thoroughly, and repeat to build ultra-smooth, glossy finishes.
| Step | Grit |
|---|---|
| Prep | 220 |
| Smooth | 320 |
| Polish | 400 |
| Final | 600 |
Topcoats And Seals To Protect Painted Wood
When you’ve built a smooth base, choosing the right topcoat and sealant is what actually protects the paint from wear, moisture, and UV damage; pick a product that matches the paint type and the piece’s use.
A proper topcoat seals your work—choose one that suits the paint and the piece’s expected wear.
- Waterborne polyurethane for light-duty topcoat options.
- Oil-based poly for high-traffic durability.
- Spar urethane for outdoor UV resistance.
- Wax or shellac as quick sealant types for furniture.
Fix Common Finish Problems: Peeling, Flashing, Orange Peel
Even with the right topcoat, you’re likely to run into finish problems like peeling, flashing, or orange peel — and each has a specific cause and repair.
Sand and strip peeling paint, address moisture problems in substrate, and improve surface adhesion with proper primer.
Correct a flashing finish by feathering coats; reduce orange peel and texture issues by adjusting spray technique and ensuring paint compatibility for better finish durability.
Test Adhesion Before Committing To A Full Job
Before you commit to a full repaint, do a simple adhesion test on a small, inconspicuous area to confirm the stain and substrate will bond with your primer and paint.
Before repainting, test adhesion on a small, hidden area to confirm primer and paint will bond.
You’ll verify adhesion testing results and refine surface preparation steps before scaling up.
Follow these checks:
- Clean area
- Sand lightly
- Apply primer/paint
- Tape pull test
Paint Cabinets Without Removing Doors
Anyone can refresh kitchen cabinets without removing the doors, and doing so saves time and keeps alignment intact—just plan a methodical workflow: clean and degrease, label hinges and hardware, prop doors open or support them with painter’s pyramids, and work in sections so you can sand, prime, and paint each surface without trapping paint in the hinge area.
| Surface preparation | Paint types | Application tools |
|---|---|---|
| Sand, degrease | Acrylic | Brush |
| Primer needed | Oil-based | Roller |
| Paint layering | Enamel | Sprayer |
| Finish durability | VOC options | Fine sandpaper |
Choose cabinet color by cabinet styles and aesthetic trends; match finish durability to use.
Speed-Paint Trim And Baseboards Without Sacrificing Quality
Cut trim and baseboards down to size quickly by organizing a simple, repeatable process: clean and lightly sand the surfaces, fill gaps and nail holes, then mask the wall with low-tack painter’s tape and a thin coat of primer where needed.
Use these speedy techniques and quality shortcuts to save time without cutting corners:
- Tool staging
- One-coat practice
- Wet-edge brushing
- Quick touch-ups
Painting In Humid Or Cold Conditions: Dos And Don’Ts
After you’ve staged tools and mastered quick, clean brushwork on trim, you’ll face a different challenge when humidity or cold moves in: temperature and moisture change how paint behaves, from drying time to adhesion.
You should monitor humidity effects and temperature considerations, control moisture, adjust drying times, and choose paint compatibility suited to conditions.
Don’t paint during extreme weather impacts or on damp surfaces.
Budget-Friendly Primers, Paints, And Tool Choices
One smart way to save on a paint-over-stain job is to focus on high-impact, low-cost choices: a quality bonding primer, mid-grade latex or acrylic paint, and a few reliable tools (brush, roller, and scraper) will get you professional results without breaking the bank.
Target high-impact, low-cost choices—bonding primer, mid-grade latex/acrylic, and a few reliable tools for pro results.
- Choose cost effective primers that stick well.
- Use affordable paints with good coverage.
- Pick economical tools for durability.
- Seek budget friendly options and low cost materials as budget friendly solutions.
Pro-Level Tips For A Durable, Long-Lasting Finish
1 key to a truly lasting finish is in the prep—you’ll clean, de-gloss, and prime thoroughly so the paint bonds instead of peeling, and you’ll use thin, even coats and proper dry times to build durable layers rather than slathering on one heavy coat.
Sand between coats, choose compatible topcoats, control humidity and temperature, and address durability factors like adhesion and abrasion to maximize paint longevity.
Final Checklist: Confirm Your Stained-Wood Paint Job Is Ready
Before you call the job done, run through a quick checklist to confirm adhesion, smoothness, and durability so the finish holds up over time.
Do a final inspection focused on adhesion, full cure, and paint durability. Check edges, test a hidden spot for scuff resistance, and verify even sheen.
- Adhesion
- Smoothness
- Cure time
- Scuff resistance
Frequently Asked Questions
Can I Paint Over Stained Wood That Has Water Damage or Mold?
You can, but don’t paint until you address water damage solutions and mold remediation first; you’ll need to dry, clean, and repair the wood, remove mold with proper methods, then prime and paint with moisture-resistant products.
Will Painting Stained Wood Affect Indoor Air Quality or VOC Levels?
Yes — painting stained wood can raise VOC emissions and indoor pollutants if you pick high-VOC products; you should prioritize low-VOC paint selection, ventilate well, and consider health considerations for sensitive occupants to minimize risks.
Can I Use Chalk Paint Over Stained Wood Without Priming?
Quick as a flash, you can sometimes use chalk paint over stained wood without priming, but chalk paint adhesion varies; do stained wood preparation—clean, sand, and degloss—so the finish sticks and won’t peel down the road.
How Do I Match New Paint to Existing Stained-Wood Trim Color?
You’ll color match by bringing a sample to a paint store or using swatches at home, checking stain undertones, testing small painted patches, adjusting hue or gloss, and standing back under different light before committing.
Is Painted Stained Wood Reversible for Future Refinishing?
Yes — painted stained wood can be reversible, but it depends: you can choose repainting options or perform stain removal later, and you’ll need proper stripping, sanding, and refinishing to restore the original stained look.
Conclusion
You can paint over stained wood—as long as you prep, test, prime, and finish it right. Sometimes you’ll decide to paint because the stain clashes; other times, painting is the coincidence that saves a scratched piece from the landfill. If you’ve checked porosity, tried adhesion tests, protected surrounding areas, and worked in proper conditions with suitable primer and paint, your project will outlast the impulse. Now step back, admire the transformation, and let the finish earn its keep.