How to Use White Paint on Walls for Best Results
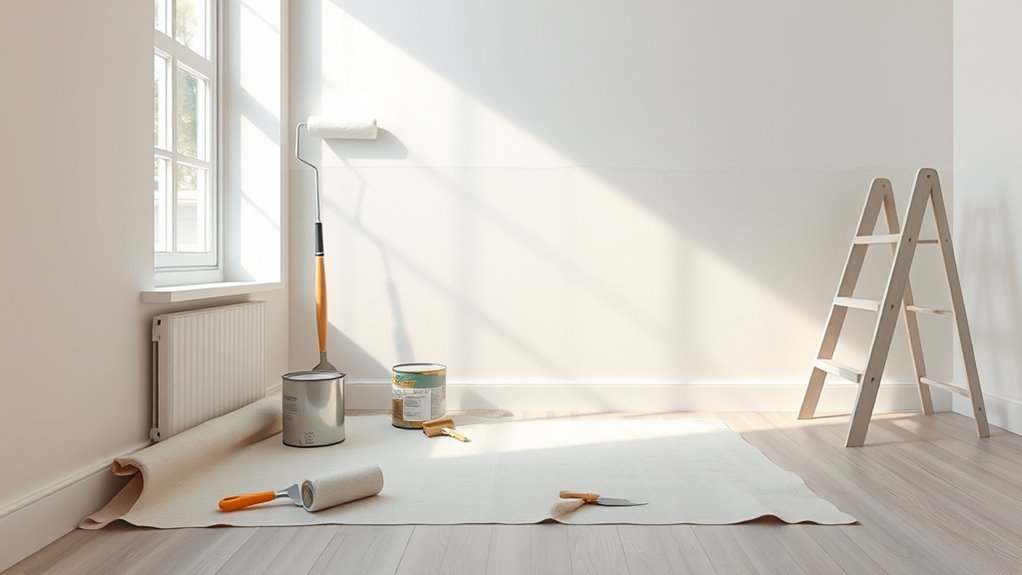
Start by testing several white swatches in different light and next to your fabrics so you’ll pick the right undertone. Prep the room: clear space, patch, sand, and prime for even adhesion. Use a good roller for broad areas and an angled brush for trim, applying two thin coats and waiting recommended dry times. Remove tape carefully before full cure, ventilate while it dries, and inspect for touchups—keep going and you’ll pick up helpful tips for each step.
Quick Step‑By‑Step: Paint a Room White
Before you open a can, clear the room and protect floors and furniture with drop cloths and tape—this keeps cleanup quick and your new white finish pristine.
Patch holes, sand, and wipe dust; primer comes next to guarantee adhesion and even coverage.
Use a quality roller for broad strokes and an angled brush for trim.
Apply two thin coats, letting the recommended drying time between them to maximize paint durability.
Remove tape before full cure to avoid peeling.
Consider color psychology: white boosts light and calm, so orient lighting and furnishings to support the mood you want to create.
Choose the Right White Shade
Now that the room is prepped and you’ve applied your coats, choose a white that fits the space rather than assuming all whites are the same. You’ll consider color psychology and subtle undertones to set mood, reference historical shades for character, and test samples in morning and evening light.
Hold large swatches on walls, observe adjacent fabrics and finishes, and note glare. Trust how a shade makes you feel more than labels. Imagine daily moments and pick the one that feels right.
- Calm and restful
- Bright and energizing
- Warm and inviting
- Clean and crisp
- Timeless and comforting
Warm White vs Cool White: When to Use Each
When you want a snug, inviting feel, choose a warm white with yellow or pink undertones to make living rooms and bedrooms feel cozier.
If you need a bright, modern look that reads crisp and clean, go with a cool white that has blue or gray undertones for kitchens, bathrooms, or contemporary spaces.
Think about the mood you want and how natural and artificial light will interact with the undertone.
Warm White For Cozy Spaces
If you want a room that feels intimate and inviting, choose warm whites—hues with subtle yellow, beige, or peach undertones that soften light and cozy up surfaces. You’ll create a soothing backdrop that flatters wood tones and fabrics, and you can use decor accents to add personality without overwhelming the calm.
Think about color contrasts for depth: muted navy, terracotta, or olive pop beautifully against warm white. Layer textures—plush rugs, woven throws, matte ceramics—to amplify comfort.
Balance natural and artificial light to keep the mood consistent.
- Soft glow of evening lamps
- Tactile textiles
- Natural wood grain
- Gentle art pieces
- Subdued patterns
Cool White For Crisp Light
Although cool whites carry blue, green, or gray undertones, they’ll make a room feel bright, airy, and sharply defined—ideal for modern kitchens, home offices, and spaces where you want colors to read true.
You’ll use cool white to enhance daylight, sharpen architectural details, and provide a neutral backdrop that keeps artwork and textiles honest.
Don’t buy into White paint myths that claim all whites are cold; undertones and finish change mood.
Color psychology shows cool whites boost focus and clarity, so choose them where you need crisp light and visual accuracy, balancing with warm accents for comfort.
How Undertones Change White Paint
Pay attention to undertones because they can make a “white” read warm or cool on your walls. Warm undertones lean yellow or beige and cozy up a room, while cool undertones pull blue or gray and feel crisper.
Also remember that natural and artificial lighting will shift those undertones, so test paint in the space at different times of day.
Warm Versus Cool Undertones
When you look closely at a white paint chip, you’ll notice subtle hints of color beneath the surface; those hints — the undertones — determine whether a white reads warm or cool in your room. You’ll choose warm creams or cool bluish whites based on mood, color psychology, and how furnishings interact.
Warm whites feel cozy and inviting; cool whites feel crisp and modern. Consider paint durability for high-traffic areas when selecting finish and formula. Test swatches on walls.
- Imagine mornings bathed in soft warmth
- Picture crisp, energizing afternoons
- Feel calm serenity at night
- Sense cozy intimacy
- Embrace clean sophistication
Effects Of Lighting
Because light shifts throughout the day, the undertones in your white paint will change too, so a shade that looks crisp in morning sun might read warmer by evening. You’ll notice cool morning light emphasizes blue or gray undertones, while golden afternoon sun brings out cream or beige.
Test samples at different times and under artificial lighting you’ll use most. Consider color psychology: cooler whites feel calm and clean, warmer whites feel cozy and inviting.
Look at historical uses of white in architecture and interiors to understand context. Adjust trim, fabrics, and finish to balance shifting undertones for consistent results.
How Natural and Artificial Light Affect White Paint
How does the light hitting a white wall change the way you perceive its color and texture? You’ll notice natural light warms or cools whites across the day, revealing undertones and affecting color psychology—sunlight feels uplifting, north light reads cooler.
Artificial light shifts whites too: warm bulbs cozy up a room, cool LEDs feel clinical. Consider glare, shadows, and finish; sheen affects paint durability by showing wear differently under varied lighting. Position fixtures and choose bulb temperature to match the mood you want.
- You’ll feel calm in soft morning light.
- You’ll feel energized under bright daylight.
- You’ll feel cozy with warm bulbs.
- You’ll feel alert with cool LEDs.
- You’ll notice texture and age more in harsh light.
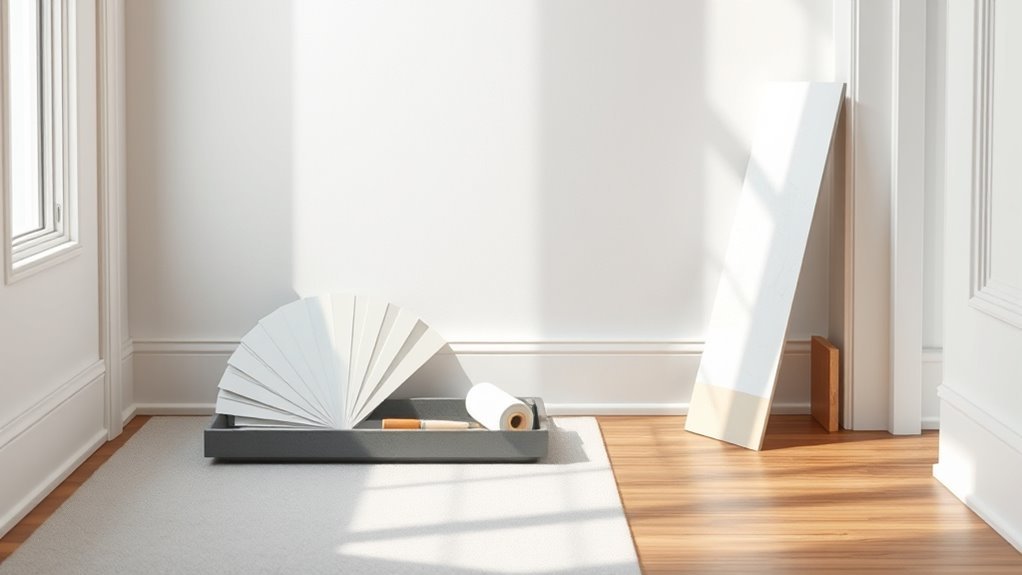
Test Swatches: Try Samples on Multiple Walls
Light changes mean a swatch that looks perfect on one wall can read very different elsewhere, so put samples on multiple walls before you commit.
Light shifts can transform a swatch—test samples on several walls before committing.
Apply several white tones in large patches near corners, windows, and in shaded areas so you see shifts through the day.
Note how undertones affect mood; use color psychology to judge warmth or coolness relative to furnishings.
Photograph swatches at different times for comparison.
Leave samples up for several days, then decide.
Keep leftover sample pots sealed and labeled for future touch-ups, and follow proper paint storage to preserve consistency.
Best White Paints for Bathrooms and Kitchens
When you’re choosing white paint for bathrooms and kitchens, prioritize durability and cleanability alongside the right undertone — these rooms demand finishes that resist moisture, stains, and frequent scrubbing. You’ll want semi-gloss or satin for easy wiping, and look for labels touting paint durability and mildew resistance.
Consider color psychology: warm whites feel cozy, cool whites feel crisp. Test samples under your lighting.
- You’ll love how a crisp white brightens the space.
- You’ll feel calm with a soft warm white.
- You’ll appreciate low-maintenance finishes.
- You’ll enjoy a fresh, hygienic look.
- You’ll gain confidence in long-lasting results.
Picking White Paint for Small Rooms
When choosing white for a small room, pick an undertone that complements your furniture and lighting so the space feels cohesive.
Use whites that amplify natural light—warmer whites for north-facing rooms, cooler ones for sunnier spots—to make the room feel larger.
Also choose a sheen that balances reflectivity and imperfection: eggshell or satin usually works best.
Choose The Right Undertone
Because small rooms magnify every color decision, choosing the right undertone in white paint matters more than you might think. You’ll want to deliberate on color psychology and historical uses to set mood: warm creams feel cozy, cool whites feel crisp, and slight greiges read modern.
Test swatches on different walls and observe at several times. Pick undertones that complement furnishings and the room’s purpose. Avoid stark whites if you want softness; skip yellowed whites if you crave clarity. Trust your instincts after testing.
- Cozy reassurance
- Fresh clarity
- Timeless calm
- Modern neutrality
- Subtle warmth
Maximize Natural Light
If you want a small room to feel larger and brighter, choose whites that reflect light rather than absorb it—opt for higher light-reflective (LRV) values and cooler or neutral undertones to bounce daylight around the space.
Position mirrors and glossy accents to multiply sunlight, and keep window treatments minimal so you don’t block beams.
Use consistent white on walls and ceilings to erase visual edges, then add furniture contrast with darker or textured pieces to define zones without shrinking the room.
Consider color psychology: crisp whites feel calm and spacious, while slight warmth can prevent sterility in compact areas.
Select Appropriate Sheen
Although sheen might seem like a small detail, it has a big impact on how white paint reads in a compact room, so choose carefully. You’ll want a finish that balances light reflection and imperfection-hiding:
flat conceals surface flaws and creates a cozy matte feel, while eggshell or satin adds subtle warmth without glare.
Consider sheen consistency across walls and trim to keep the room cohesive, and pick a level that supports sheen durability if you expect cleaning.
Test samples under your lighting before committing.
- Calm
- Bright
- Clean
- Cozy
- Durable
Selecting White Paint for High‑Traffic Areas
Where will the scuffs, fingerprints, and daily traffic hit your walls most? Choose a durable white with higher sheen in those spots—satin or semi-gloss resists marks and cleans easily.
Pick a white that balances brightness without feeling sterile; color psychology matters because warmer or cooler undertones change mood and perceived cleanliness. Test swatches under real light and traffic patterns.
Use high-quality, washable formulas labeled scrubbable or stain-resistant. Keep extra paint for touch-ups; proper paint storage prevents separation and guarantees color match later.
Plan maintenance intervals so high-traffic whites stay fresh and consistent over time.
Matching Trim and Ceiling Whites to Wall White
How do you choose whites for trim and ceilings that complement—not clash with—your wall color? You consider undertones, gloss, and room mood. Use cooler whites for airy ceilings and warmer trims to cozy corners. Think about color psychology and historical uses—traditional homes often used warm trims against muted walls. Modern spaces favor crisp contrasts. Test samples in different light before committing.
- Imagine calm mornings under a soft, cool ceiling white.
- Picture inviting evenings with warm trim accents.
- Feel the room expand with high-contrast white.
- Sense tradition with subtly yellowed trim.
- Enjoy modern crispness throughout.
Choosing Primer When Painting White Walls
Now that you’ve settled on wall, trim, and ceiling whites, pick a primer that helps those colors sit right and last. You’ll choose based on surface, coverage needs, and desired sheen. Consider how color psychology affects perceived warmth or coolness; primer can prevent undertones from showing. Also check paint storage age—old cans may need replacing. Use a quality primer to block stains, improve adhesion, and reduce coat count.
| Surface | Primer type |
|---|---|
| Drywall | All-purpose |
| Stain-prone | Shellac-based |
When to Use a Tinted Primer Under White
If your white paint looks thin, streaky, or shifts toward an unwanted undertone, use a tinted primer to improve coverage and color accuracy. You’ll tint primer toward the final white’s base to neutralize yellow, pink, or blue bias, helping the topcoat read true and reducing coats.
Tinted priming also seals porous surfaces and hides previous colors, saving time and waste—avoid excessive paint disposal by getting coverage right first. Consider color psychology when choosing warmth or coolness to support the room’s mood.
Tinted primer seals porous surfaces and hides old colors—save time, reduce waste, and set the room’s mood.
Trust tinted primer for reliable, predictable results.
- Relief: the room finally feels balanced
- Confidence: your white reads as planned
- Calm: undertones vanish
- Pride: fewer recoats needed
- Satisfaction: less paint disposal
How to Identify and Fix Stains Before Painting White
Before you slap fresh white on the wall, inspect for common stains—water rings, smoke, grease, mold, and marker—that will show up starkly against a light topcoat. You’ll test suspect areas with a damp cloth and mild detergent; persistent marks need TSP or solvent per label.
Kill mold with a bleach solution, rinse, and let dry. Apply a stain-blocking primer on tannins or smoke before painting.
Consider how pristine white affects color psychology and how historical trends favored clean, bright interiors after remediation.
Label steps, ventilate, and wear protection so your white finish stays flawless and durable.
Repairing Drywall and Filling Holes for a Smooth Finish
When you’re prepping walls for white paint, repairing drywall and filling holes is essential to achieve a smooth, professional-looking finish. You’ll patch holes, apply joint compound, and feather edges so light reflects evenly — important for how white reads and ties into color psychology.
Choose eco friendly paints and low-VOC primers afterward to keep the room feeling fresh and healthy. Work methodically: clean, fill, dry, and prime. Take time now so the final white feels crisp and calming.
- Relief at a flawless wall
- Pride in careful prep
- Calm from clean white surfaces
- Confidence in lasting results
- Joy in a healthier home
Sanding Tips to Avoid Bumps Under White Paint
Since tiny ridges and grit show up clearly under white paint, sand methodically with progressively finer grits to get a smooth, even surface.
Start with 120–150 grit to level repairs, follow with 220 grit for feathering, then finish with 320–400 grit where you need ultra-smooth results.
Sand lightly between coats to prevent texture issues and wipe surfaces with a tack cloth.
Check in different light angles to spot bumps.
Replace sandpaper when it loads, and store leftover abrasives and brushes properly—proper paint storage prevents contaminated tools that can reintroduce grit.
Work patiently; rushing creates flaws you’ll see under white paint.
Cleaning Greasy or Dusty Surfaces Before Painting
Before you paint white walls, you’ll want to remove any grease with a degreasing cleaner so the paint will stick evenly.
Wipe down surfaces with a damp microfiber cloth or tack cloth to get rid of dust and loose debris.
If grease or dust isn’t fully removed, the finish can look blotchy or fail to adhere.
Remove Grease Thoroughly
Even if the wall just looks dusty, you’ll need to remove grease thoroughly so paint will stick and finish evenly. Start by wiping with a degreaser, rinsing, and letting surfaces dry. Greasy patches will repel primer and ruin sheen.
Use a sponge, not a dry cloth, and change water often. Keep cleaning brushes spotless so you don’t reintroduce oils, and store rags away from paint storage to avoid contamination.
Test a small area before priming.
- Relief when stains vanish
- Pride in a flawless surface
- Confidence in even coverage
- Calm knowing you prepped well
- Joy at a crisp final coat
Dust And Debris Removal
Once grease is gone, sweep your focus to dust and debris so paint will adhere and look smooth. You’ll vacuum corners, wipe baseboards, and use a damp microfiber to trap fine dust.
Sand glossy spots, then tack cloth to remove particles before priming. Don’t forget ceiling crown and window sills; trapped grit shows on white finishes.
If walls smelled or felt oily, clean again and let fully dry. Proper prep makes DIY decor projects look professional and lets color psychology of clean white read bright and calm.
Take your time now to avoid touch-ups later.
When to Remove Old Wallpaper Before Painting
Wondering whether to strip that old wallpaper before you paint? You should remove loose, peeling, or textured paper—wallpaper removal is essential when it hinders adhesion or shows through white paint.
For smooth, long-lasting results, focus on surface preparation: clean, repair seams, and sand any residues. If paper is glued down perfectly and sealed, you might prime instead, but inspect carefully.
- Frustration at peeling edges
- Relief after a clean wall
- Pride in doing prep right
- Anxiety about visible seams
- Satisfaction with flawless white
Decide based on adhesion, texture, and the condition beneath.
Tape and Protect Trim for Crisp White Edges
Before you paint, tape the trim with painter’s tape and press the edges firmly so paint won’t seep under.
Paint up to the tape line and let the white coat dry to the touch.
Pull the tape back slowly and at a 45° angle to leave a clean, crisp edge.
Prep Trim Edges Carefully
If you want crisp, professional-looking white edges, take time to tape and protect the trim precisely. You’ll focus on trim precision and edge masking: clean surfaces, choose low-tack painter’s tape, and press edges firmly so paint won’t bleed.
Mask around hardware and corners, protect floors with drop cloths, and cover nearby fixtures. Work calmly, align tape with your sightline, and paint with steady strokes to feel confident about the result.
- You’ll appreciate flawless lines.
- You’ll avoid frustrating touch-ups.
- You’ll feel proud of the finish.
- You’ll save time later.
- You’ll enjoy the fresh, clean look.
Remove Tape Cleanly
When the paint’s dry to the touch but not fully cured, peel the tape back slowly at a 45-degree angle to get a clean line without tearing paint or pulling trim finish. You’ll keep steady pressure and move slowly, watching for any adhesive residue.
If tape lifts paint, stop and score the edge with a razor to separate film from paint. After removal, inspect edges; use a small brush for touch-ups.
Finish with gentle surface cleaning—wipe trim with a damp cloth to remove dust and bits of tape. Proper tape removal and surface cleaning preserve crisp white edges and trim finish.
Brushes and Rollers: What to Buy for White Paint
Although choosing the right brushes and rollers might seem small, they determine how smoothly white paint spreads and how visible brush strokes will be. You’ll want a high-quality angled brush for trim, a synthetic brush for water-based whites, and a sturdy roller frame that won’t wobble.
Right brushes and rollers make white paint glide smoothly—angled trim brushes, synthetic for water-based, and steady rollers for flawless results
Think about color mixing, cleanup, and proper paint storage to keep tools ready and whites consistent. Choose sizes that fit the job so you work faster and neater.
- Pride when edges are razor-sharp
- Calm knowing no streaks remain
- Joy at quick, even coverage
- Relief from easy cleanup
- Confidence in a flawless finish
Best Roller Nap for Smooth White Coverage
You’ll want to pick a roller nap length based on how smooth or textured your wall is, since shorter naps give a finer finish and longer naps hold more paint for rough surfaces.
Match the roller material and nap to the surface—smooth walls do best with 1/4″–3/8″ naps, while lightly textured or orange-peel finishes need 1/2″–3/4″.
Choosing the right combo makes white coverage look even and minimizes touch-ups.
Choose Nap Length Carefully
Wondering which roller nap will give your white paint the smoothest, most even finish? You’ll pick nap length based on surface texture and paint consistency; thinner paint soaks less into short naps, thicker paint needs a slightly longer nap to hold and release evenly.
Test roller samples on a scrap board, watch for streaks or excess texture, and adjust nap length until coverage looks uniform. You’ll save time and avoid rework by matching nap to your conditions.
- Relief when coverage is flawless
- Confidence in professional-looking walls
- Satisfaction from smooth strokes
- Pride in a clean, bright finish
- Joy at minimal touch-ups
Match Roller To Surface
How do you pick the right roller nap for smooth white coverage? Match roller nap to surface texture: use a 1/4″ or 3/16″ nap for ultra-smooth drywall and plaster to avoid stipple.
3/8″ is suitable for lightly textured walls.
1/2″–3/4″ nap is ideal for rough or popcorn surfaces to guarantee even laydown.
Choose synthetic nap for latex whites to reduce lint.
Consider how white influences perception—color psychology shows pure whites read cooler or sterile on slick finishes, while warmer whites soften with slight texture.
Note historical trends: older homes often need thicker naps to mask imperfections without losing crispness.
Brush Techniques for Cutting In Cleanly
Before you load the brush, steady your hand and plan a short, consistent stroke pattern so your cut-in lines stay straight and even. Keep the brush angle at about 45°, use light pressure, and feather the edge to blend with the wall’s paint texture. Work in small sections, maintaining wet edges to avoid lap marks.
Think about color psychology—clean, sharp edges make white feel crisp and spacious. Practice wrist motion on scrap before working near trim. Slow, deliberate strokes beat speed for control.
- Pride in a perfect edge
- Calm from neat lines
- Confidence in your skill
- Joy at crisp progressions
- Satisfaction with a polished room
How to Load a Roller to Prevent Splatter
When loading your roller, pour paint into the tray well and roll slowly to pick up an even coat across the nap.
Don’t overfill the roller—excess paint causes splatter and drips.
Aim for a damp, not dripping, roller before you start each pass.
Proper Roller Loading
Although it looks simple, loading a roller the right way is the biggest factor in preventing splatter and getting even coverage. You’ll dip the roller into paint tray well, roll it over the ramp until it’s evenly saturated, then roll off excess. This controls drips, helps color blending across the wall, and supports subtle texture enhancement without blotches.
Keep a steady, deliberate rhythm and check edges for loose fibers or pools. Clean, confident loading saves touch-ups.
- You’ll feel pride when strokes align
- You’ll hate splatter less
- You’ll notice smoother transitions
- You’ll enjoy a calmer process
- You’ll love the finished wall
Avoid Overfilling Roller
You’ve already got the rhythm of loading and rolling, so next focus on how much paint you actually put on the roller — overfilling is what causes most splatter and drip marks. Keep a light coat on the paint roller, dip only a third of the nap, and roll off excess on the tray’s slope. If you spot roller overfill, blot and re-roll on the tray. Work in short strokes, check edges, and reload less often to maintain control. Quick fixes: wipe drips immediately and press gently near ceilings to avoid runs.
| Symptom | Cause | Fix |
|---|---|---|
| Drips | Roller overfill | Roll off excess |
| Splatter | Heavy load | Dip less |
| Runs | Too much pressure | Light strokes |
| Uneven | Inconsistent load | Even rolling |
Paint Application Order for Flawless White Walls
Because prep and sequence make the difference, start by priming, then cut in edges, roll large areas, and finish with touch-ups so your white walls look even and bright. You’ll follow a logical rhythm: prime, tape, cut in, roll, inspect.
Use historical techniques and note cultural influences that shaped careful layering and stroke direction; they remind you patience matters. Work from top to bottom, left to right if right-handed, and keep a wet edge. Finish with small corrective strokes, blending rather than overworking. This order prevents streaks, sags, and uneven sheen.
- Pride in a crisp wall
- Calm through order
- Joy in bright results
- Confidence in technique
- Relief at clean lines
When You Really Need Two Coats of White
If your walls started out a dark color, have patched or textured areas, or you’re switching between very different whites, plan on two coats to get full, consistent coverage.
You’ll need a first coat to seal stains and smooth texture, then a second to equalize sheen and opacity. Two coats also reinforce the color psychology impact—true white reads clean and bright only when coverage is uniform.
Choose eco friendly options with higher pigment load and good hide to reduce coats.
Inspect under natural light between coats and touch up thin spots; you’ll get a durable, even finish without wasted effort.
Tips for Avoiding Lap Marks With White Paint
To avoid lap marks with white paint, keep a wet edge and work in manageable sections so each stroke overlaps while the paint is still wet.
Stick to the same paint mix—shake or stir frequently and mix cans together if you opened more than one—to keep sheen and color consistent.
If you keep those habits, your finish will look smooth and uniform.
Maintain Wet Edge
While you’re painting, keep a wet edge so each stroke blends seamlessly into the next; this prevents the dull, chalky lap marks that show up easily with white paint. Work in manageable sections, keeping roller and brush loaded so the white texture stays uniform. Pause to reload before the edge dries, and avoid working toward direct sunlight or heat that accelerates drying.
Proper paint storage between breaks keeps viscosity consistent. If you must stop, feather out the edge and restart within the wet zone.
Emotional cues:
- You’re creating calm, flawless walls.
- Take pride in smooth coverage.
- Feel relief as seams vanish.
- Enjoy the crisp, clean finish.
- Appreciate your careful rhythm.
Use Consistent Paint Mix
Keeping a wet edge helps, but you also need a consistent paint mix so every stroke lays down the same sheen and pigment. Stir thoroughly, strain if needed, and keep a dedicated mixing bucket so touch-ups match. If you thin, use the same ratio every time. Consistency preserves color psychology—uniform white reads calm, bright, or cozy rather than patchy. Test a small area, let it dry, then evaluate lighting and furniture coordination before continuing. Track batch numbers and mix amounts. A single mis-mix ruins harmony; avoid that by standardizing your process.
| Item | Action |
|---|---|
| Stirring | Every coat |
| Thinning | Measured ratio |
| Bucket | Dedicated |
| Testing | Dry-check |
| Labeling | Batch info |
Feathering and Back‑Rolling Seams
When you join freshly painted areas, feathering and back‑rolling prevent visible seams by blending paint thickness and texture so the wall reads uniformly. Use the Feathering technique at edges: lighten pressure on the brush or roller to taper paint and soften the line. Then apply the Back rolling method perpendicular to strokes to even nap and sheen.
Work quickly while paint is wet, match roller nap, and keep a wet edge. Check under varied light and touch up with short feather strokes.
Work swiftly while paint is wet, match roller nap, keep a wet edge, and touch up with short feather strokes.
- relief when seams vanish
- pride in a smooth finish
- calm from uniform color
- confidence in craftsmanship
- satisfaction in subtle perfection
Using Sprayers for Large White Projects
If you’re covering large surfaces, a paint sprayer will save time and give a smooth, uniform coat that rollers can’t match. You’ll work faster, maintain consistent coverage, and highlight white paint durability when you apply even layers.
Prep thoroughly: mask trim, protect floors, and ventilate. Practice on scrap to set spray pattern and distance, reducing runs and overspray.
Choose quality white paint suited to your surface and current white paint trends for desired sheen and reflectivity.
Move steadily, overlap passes by 30–50%, and allow proper drying between coats.
Clean the sprayer immediately to preserve equipment and achieve professional results.
Thinning White Paint for Spray Applications
Although thinning isn’t always necessary, you’ll often need to dilute white paint for a sprayer to achieve proper atomization and avoid clogging or spattering. You measure manufacturer recommendations, add small increments of reducer or water, and test spray onto cardboard. Keep notes on ratios, since color mixing adjustments or additives change viscosity.
Don’t over-thin — that reduces coverage. Strain the mixture to catch particles and work in a ventilated area. After spraying, follow paint storage guidelines to preserve leftover thinned paint or revert to original consistency with careful remixing.
- Relief: smooth strokes replace frustration
- Pride: even coverage delights
- Calm: fewer drips ease stress
- Confidence: repeatable ratios empower
- Satisfaction: crisp white walls reward
Drying Times and Recoat Windows for White Paint
Because drying and recoat windows vary with paint type, humidity, and temperature, you should plan your schedule around the manufacturer’s stated tack, dry-to-touch, and recoat times.
Plan your painting schedule around the manufacturer’s tack, dry-to-touch, and recoat times for best results.
Check the can for recommended wait intervals between coats—latex often allows faster recoats than oil-based formulas.
Respect minimum recoat times to avoid lifting previous layers; waiting too long can also hinder adhesion, so follow suggested maximum windows when provided.
Track the drying process visually and by touch, then apply subsequent coats evenly.
Proper timing improves paint durability and finish uniformity, reducing brush marks and premature wear for a lasting white wall.
How Humidity and Temperature Affect Finish
You’ll get the best results when you paint within the ideal temperature range—usually between 50°F and 85°F—so the finish cures evenly.
Keep room humidity moderate (40–60%) to prevent blushing, extended drying, or cracking.
Use heaters, fans, or a dehumidifier to control conditions before and during painting.
Ideal Temperature Range
Wondering what temperature and humidity you should paint in? You want smooth, even white without blistering or slow curing. Aim for 50–77°F (10–25°C) and moderate humidity so paint levels coat and dry predictably.
Remember how color psychology and historical trends pushed painters to choose temperate conditions for consistent results.
- Imagine calm results when conditions cooperate.
- Feel confident knowing temperature protects finish.
- Recall pride in a flawless, even wall.
- Worry less about streaks or tacky spots.
- Enjoy the satisfaction of a professional-looking white surface.
Adjust timing, not technique, when weather drifts.
Controlling Room Humidity
Temperature sets the stage, but humidity decides how paint behaves as it dries. You should aim for 40–60% relative humidity; higher levels slow drying and cause blotches, lower levels speed drying and can lead to visible brush marks.
Use a dehumidifier or run HVAC to stabilize conditions. Keep windows closed during painting, but open them briefly afterward to exchange air if humidity stays high.
Watch indoor plants—they raise humidity nearby, so move them out of the room until paint cures.
Confirm ventilation systems are clean and functioning to remove moisture and fumes, promoting an even, durable white finish.
Preventing Streaks and Roller Marks on White Walls
Even with the best white paint, streaks and roller marks can show if you rush or use the wrong technique, so take your time and follow a few key steps to get an even finish. You’ll prep by cleaning and smoothing textured surfaces, choosing the right nap, and using consistent pressure. Work wet edges, overlap strokes, and keep a full roller to avoid dragging.
Even the best white needs care—prep surfaces, pick the right nap, keep a full roller for smooth, streak-free results
Allow proper drying between coats; thin spots tempt streaks. Remember how Color psychology makes flawless white feel calm and bright, so neat application supports the room’s mood.
- Relief at a perfect wall
- Pride in clean lines
- Calm from uniform brightness
- Confidence in your skill
- Joy in a finished space
Achieving Uniform White Coverage Over Dark Colors
When you’re covering dark walls with white, plan for extra steps so the final coat looks even and opaque. Start by cleaning and patching, then sand any sheen so primer bonds.
Apply a high-hide primer designed for deep colors; let it fully dry before painting. Use quality white paint with strong pigment load and good paint durability to avoid thin spots.
Roll in consistent overlapping strokes, and maintain a wet edge. Consider how color psychology shifts space perception—white over dark brightens and feels larger.
Inspect under different light, and add a second coat only if coverage isn’t flawless.
Handling Glossy or Semi‑Gloss White Surfaces
If you’re working with glossy or semi‑gloss white surfaces, prep matters more than it does for flat finishes. You’ll need to degloss, clean, and sand lightly so new white paint adheres; primers for glossy substrates help prevent peeling. Use thin, even coats and a high‑quality brush or roller to avoid lap marks.
Remember how White paint decor evolved from simple utility to stylish minimalism—your finish shows that history in every sheen. Handle edges carefully and allow full cure between coats.
- pride in a flawless shine
- relief after stubborn gloss yields
- confidence in clean lines
- joy at true color
- calm from durable finish
How to Paint Textured Walls White Smoothly
Because textured walls hide brush marks but demand more paint and careful technique, you’ll prep differently than for smooth surfaces. Start by cleaning and repairing grooves, then use a thick-nap roller (3/4″–1″) to push paint into crevices.
Apply a high-quality primer tinted toward your white to reduce coats. Roll in a “W” pattern, back-rolling to even coverage without overworking.
For edges and corners, use a stubby brush and stipple lightly to match texture. Add white accents sparingly to highlight architectural features.
Let each coat dry fully before evaluating coverage and applying additional coats as needed.
Tips for Painting Ceilings Bright White
When painting your ceiling bright white, pick a sheen that hides imperfections—flat or matte if you want to mask texture, eggshell if you need a little washability.
Set up proper lighting while you work so you can spot missed areas and get even coverage.
Good sheen choice plus targeted lighting will make the ceiling look crisp without extra coats.
Choose The Right Sheen
Picking the right sheen makes a bigger difference than most people expect, since ceiling finishes affect light reflection, hide imperfections, and influence how often you’ll need to repaint. You’ll usually prefer flat or matte for ceilings to minimize glare and mask texture, while satin can work in high-traffic spaces.
Consider color psychology: brighter sheens read cooler, boosting alertness; softer sheens feel calmer. Match sheen to room function and ceiling condition, and check leftover cans in paint storage before buying new. Choose a sheen that balances aesthetics and maintenance so you love the look longer.
- Relief: imperfections disappear.
- Calm: soft ambience.
- Pride: crisp finish.
- Ease: simpler cleaning.
- Confidence: lasting choice.
Use Proper Lighting Techniques
If you want a bright, even ceiling, set up layered lighting before you paint so you can see true color and surface flaws as you work. Position a mix of overhead, portable flood, and angled task lights to eliminate shadows and reveal uneven texture.
You’ll spot missed spots, drips, and thin coverage faster, letting you correct before the paint cures. Proper lighting also helps you judge how white interacts with room tones — useful for color psychology and achieving the mood you want.
Finally, even application under good light contributes to paint longevity by preventing unnecessary rework and premature wear.
How to Paint Trim and Baseboards White Like a Pro
Because trim and baseboards frame every room, painting them white cleanly makes the whole space look finished and brighter. So start by removing dust, filling holes, and sanding for a smooth surface before you lay down primer and paint. Use quality primer and brushes, apply thin even coats, and sand lightly between coats for White paint durability.
Keep White paint ventilation in mind—open windows or use a fan. Work top to bottom, cutting in carefully, and wipe drips immediately. Embrace pride in small details.
- Delight at crisp, clean edges
- Calm from orderly progress
- Confidence in neat finishes
- Joy in refreshed rooms
- Satisfaction in lasting results
Creating Crisp Lines Between White Walls and Accents
After you’ve finished the trim, focus on the junctions where white walls meet colored accents — clean lines there make the whole room read as intentional. Use high-quality painter’s tape, press edges firmly, and seal the tape with a thin swipe of the base white to prevent bleed.
Paint the accent color carefully, remove tape while paint’s tacky, and touch small gaps with a fine brush.
Consider color psychology when selecting contrasts: cool accents calm, warm ones energize. Reference historical trends for inspiration—like crisp colonial borders or midcentury blocks—to guide edge placement and proportion.
Maintaining and Cleaning White Painted Walls
When you keep up with a simple routine, your white walls stay bright and blemish-free. You’ll dust weekly, spot-clean gently, and inspect for wear so the room’s Color psychology stays calm and inviting. Use mild cleaner, soft cloths, and avoid abrasive tools.
Keep a simple routine—dust weekly, spot-clean gently, and inspect wear to keep white walls bright and calm.
Store leftover cans upright, sealed, and labeled; good paint storage preserves sheen for touch-ups. Rotate sunlight exposure with curtains to prevent uneven fading. Small, regular efforts prevent big jobs later and keep whites feeling fresh.
- Pride in a pristine room
- Calm from balanced tones
- Confidence in quick fixes
- Relief from low maintenance
- Joy in lasting brightness
Removing Scuffs and Stains From White Paint
When scuffs and stains show up on your white walls, start with gentle cleaning methods like a soft cloth, mild soap, or a magic eraser to avoid damaging the paint.
For tougher marks, use stain-specific treatments—gum, crayon, grease, and ink each respond to different cleaners and techniques.
Test any cleaner in an inconspicuous spot first so you won’t be surprised by discoloration.
Gentle Cleaning Methods
Though white walls show dirt more than other colors, you don’t need harsh chemicals to restore them — gentle cleaning usually does the trick. You can lift scuffs with a soft sponge, mild soap, or a magic eraser used sparingly; test first.
Use gentle cleaning habits weekly and choose eco-friendly products to protect finish and air quality. Work top to bottom, rinse with clean water, and dry immediately to prevent streaks.
Be patient with stubborn marks and repeat gently rather than scrubbing hard.
- Relief when stains vanish
- Pride in cared-for walls
- Calm from non-toxic choices
- Confidence in subtle results
- Satisfaction in small wins
Stain-Specific Treatments
You’ve already got the basics down with gentle weekly cleaning; now let’s focus on targeted fixes for common marks. For scuffs, start with a soft eraser or diluted dish soap; for grease, use a degreasing cleaner. Test solutions in an inconspicuous spot. After removing residues, assess paint loss: do color matching if touch-ups are needed. For stubborn stains, lightly sand, prime, then repaint. Keep tools clean and blot, don’t rub. Follow this quick reference for common marks:
| Mark Type | Quick Fix | Touch-up Needed? |
|---|---|---|
| Scuff | Eraser/soap | Sometimes |
| Grease | Degreaser | Often |
| Marker | Alcohol | Often |
| Water | Soap/sand | Sometimes |
Stain removal decisions save you time and finish.
Dealing With Yellowing or Discoloration of White Paint
If your white walls start to yellow or show uneven discoloration, don’t panic — you can usually restore a crisp look without repainting the whole room. First, identify cause: nicotine, cooking grease, sunlight, or moisture.
Clean gently with mild detergent or TSP substitute, rinse, dry. Use a stain-blocking primer on stubborn patches, then touch up with matching white.
Consider swapping vintage accents to see how color psychology alters perceived warmth; sometimes rearranging changes your sense of yellowing.
- Relief when spots vanish
- Pride in small repairs
- Calm from restored brightness
- Confidence in targeted fixes
- Joy in refreshed space
Fixing Bubbling, Peeling, or Flaking White Paint
If you spot bubbling, peeling, or flaking, first figure out the underlying cause—moisture, poor adhesion, or old paint.
Once you know what’s wrong, you’ll need to remove loose paint, dry and repair the surface, and sand or prime as appropriate.
Proper prep guarantees your next coat of white will bond and look smooth.
Identify Underlying Cause
Because bubbling, peeling, or flaking usually signals a problem beneath the surface, you should identify the root cause before repainting. You’ll check moisture, adhesion, and substrate issues so your white finish—and its color psychology and historical uses—doesn’t betray you later.
Look, don’t guess: test for leaks, condensation, or salt efflorescence; confirm previous paint compatibility; inspect for mold; probe for structural movement; note environmental triggers.
- Frustration at recurring bubbles
- Relief when a leak’s found
- Anxiety over hidden mold
- Pride after solving adhesion issues
- Satisfaction in a lasting, pristine white finish
Proper Surface Preparation
Once you’ve found the cause of bubbling, peeling, or flaking, get the surface ready for a durable white finish by removing loose paint, cleaning contaminants, and repairing the substrate. Scrape or wire-brush to sound edges, sand feathered areas, and vacuum dust.
Use a mild detergent or TSP substitute to lift grease, then rinse and dry. Repair holes and soft plaster with appropriate filler, prime stained or porous spots with stain-blocking primer, and replace moldy drywall.
Match primers and topcoats to your chosen white—consider how color psychology and historical trends affect perceived warmth or coolness—then paint.
What Causes Flashing and How to Stop It
Why does flashing show up on freshly painted white walls, and how can you stop it? Flashing causes often stem from uneven porosity, spotty paint adhesion, or painting over glossy or damp areas.
You can prevent it by preparing surfaces, using consistent primer, and applying uniform coats.
- You’ll feel frustrated when streaks ruin a fresh room.
- You’ll be relieved once consistent priming solves the issue.
- You’ll gain confidence with smooth, even coverage.
- You’ll avoid heartbreak by testing a small patch first.
- You’ll appreciate the final crisp, uniform white after proper prep.
When to Repaint vs Touch Up White Walls
Start by evaluating the overall condition of the wall—large stains, widespread scuffs, or peeling usually mean a repaint is due.
Check the paint film integrity; if the finish is chalky, cracking, or failing to adhere, touching up won’t hold.
Finally, consider coverage and color match, since small chips can be touched up but faded or mismatched areas often need a full coat.
Assess Overall Wall Condition
Although white paint hides a lot, you’ll still need to inspect your walls closely to decide whether a touch-up will do or a full repaint is required. Check stains, scuffs, and chips; note softened areas near sinks or windows. Feel the wall texture for hidden damage, and compare faded sections to areas where you kept paint storage—older cans can shift shade.
Decide if spot repairs will blend or if widespread discoloration demands a fresh coat. Consider emotional impact: you want confidence, pride, calm, relief, and renewal.
Evaluate Paint Film Integrity
When you run your hand over the wall and step back to scan it, pay attention to the paint film—it’s the best indicator whether you should touch up or repaint.
Feel for peeling, chalking, or soft spots; intact film means spot repairs will hold, damaged film signals a full repaint.
Inspect paint texture for orange peel, gloss loss, or uneven sheen that touch-ups won’t blend.
Look for dirt embedment and minor scratches you can spot-prime and feather out.
If patches create noticeable color contrast or texture mismatch, plan a repaint.
Document affected areas before starting repairs.
Consider Coverage And Color Match
How well will a touch-up blend with the existing coat? You’ll examine coverage, sheen, and whether subtle yellowing or dirty spots distort color psychology that affects mood. If paint durability has declined, patching won’t hold or match.
Touch up small, hidden areas; repaint when large sections differ or finish won’t take evenly. Consider lighting—natural or warm bulbs reveal mismatches.
- Frustration when a spot stands out
- Relief after a seamless repair
- Pride in a uniform wall
- Anxiety if touch-up fails
- Calm from consistent color psychology and finish
Decide based on scope, not shortcuts.
Cost‑Saving Tips for Painting a Room White
To save money painting a room white, plan ahead and focus on smart choices that cut costs without skimping on quality. You’ll pick supplies wisely, buy value paint after checking White color psychology and White paint history for nuance, and prep surfaces to avoid wasted coats. Rent tools for short jobs, reuse drop cloths, and shop sales. Ask friends to help for faster work.
| Mood | Cost | Result |
|---|---|---|
| Calm | Low | Brightness |
| Fresh | Medium | Clean lines |
| Timeless | Low | Cohesion |
Follow these steps and you’ll save time and cash.
Eco‑Friendly and Low‑VOC White Paint Options
Looking for a healthier way to paint your walls white? Choose eco friendly options that cut odors and improve indoor air. You’ll want paints labeled low‑VOC or zero‑VOC for rapid VOC reduction, and certifications like Green Seal.
Looking for healthier white paint? Choose eco-friendly, low‑VOC or zero‑VOC options with Green Seal to cut odors and improve indoor air.
Pick durable finishes to avoid frequent repaints, and test sample swatches in small areas before committing.
- Breath easier with milder smells
- Feel proud choosing sustainable products
- Protect kids and pets from fumes
- Love the fresh, clean look without guilt
- Relax knowing you reduced harmful emissions
Compare labels, ask suppliers, and prioritize air quality when selecting white paint.
Using White Paint to Change Room Perception
When you paint walls white, you can make a small room feel airy and a large room feel more cohesive by controlling light, contrast, and finish.
Use warm or cool whites to influence mood—color psychology shows warmer whites feel cozy while cooler ones feel crisp.
Reflective sheens amplify daylight, making low ceilings seem higher; matte reduces bounce for intimate spaces.
Layering trim and ceilings in slightly different whites adds depth without clutter.
Consider the historical significance of white in architecture to guide choices: some periods favored stark white for minimalism, others used off-whites for warmth.
Test samples at different times of day.
Styling Tips That Complement White Walls
Because white walls create a neutral backdrop, you can anchor a room with a few deliberate color, texture, and scale choices that make the space feel intentional rather than empty.
White walls offer a calm canvas—anchor the room with thoughtful color, texture, and scale for intentional warmth.
Use color psychology to pick accents that set mood—calming blues, energizing yellows, or grounding greens.
Balance with furniture coordination: match finishes, proportions, and rhythm so pieces feel cohesive.
Layer textiles and art to add warmth without clutter.
Keep sightlines open and introduce one statement piece to focus the eye.
- A soothing throw that invites touch
- A bold lamp that sparks joy
- A textured rug for comfort
- A plant that breathes life
- A framed photo that tells a story
Safety: Extension Poles, Ladders, and High Walls
Need to reach high without risking a fall? Use extension poles first — they keep you grounded while covering ceilings and tall walls.
Pair poles with appropriate safety equipment: non-slip shoes, gloves, and eye protection.
If a ladder’s necessary, inspect it before use, set it on firm level ground, and follow ladder safety: maintain three points of contact, don’t overreach, and keep tools secured.
Have a helper steady the base and hand you supplies.
For textured or uneven surfaces, use a tall pole with the right roller cover.
Stop and reassess if wind, fatigue, or instability appears.
When to Hire a Pro for White Walls
If climbing and equipment checks feel overwhelming or the job keeps stretching past your comfort level, call in a pro. You’ll save time and avoid costly mistakes when ceilings, tricky trims, or faux finishes tied to White paint trends demand expertise. Hire help if walls have extensive damage, you want historic accuracy with historical white paints, or color matching is critical.
Pros bring tools, prep skills, and insurance so you won’t worry about accidents. Trust them when deadlines or resale value matter.
- Relief when stress fades
- Pride in flawless results
- Confidence in accurate color
- Safety for risky spots
- Value for your investment
Final Checklist Before You Start Painting White
Before you touch a brush, run through a quick checklist so nothing derails the job. Confirm lighting, test swatches, and consider color psychology for mood. Clear furniture, protect floors, and mask trim. Check primer, stir paint, and verify tools are clean. Note paint storage conditions and open cans last. Plan breaks and ventilation. Use a timer for coats and inspect for blemishes between layers.
| Task | Tool | Result |
|---|---|---|
| Swatch test | Sample pot | True color |
| Prep | Tape, drop cloths | Clean edges |
| Prime | Roller | Even base |
| Store | Sealed cans | Later touch-ups |
Frequently Asked Questions
Can I Tint White Paint Slightly to Match Fabric or Furniture?
Yes—you can tint white paint slightly to match fabric or furniture. You’ll use color matching techniques at a paint store, request subtle paint tinting, test small samples, and adjust until the hue complements your room.
Will White Paint Hide Nail Pops or Hairline Cracks?
No, white paint won’t reliably hide nail pops or hairline cracks; you’ll need proper nail pop repair and hairline crack concealment first, then prime and repaint, otherwise imperfections will bleed through or reappear over time.
How Do I Prevent Mold in White-Painted Bathrooms Long-Term?
You’ll prevent mold in white-painted bathrooms by improving ventilation, using mold-resistant primer and paint, fixing leaks, controlling humidity with vents or dehumidifiers, cleaning regularly, and scheduling long term maintenance inspections to catch issues early and limit growth.
Can I Paint White Over Wallpaper Adhesive Residue Without Primer?
You shouldn’t paint white over wallpaper adhesive residue without primer; you’ll risk adhesion problems. Proper wallpaper removal and thorough surface preparation are required, or use a stain-blocking primer to seal residue before painting.
Will White Paint Increase Home Resale Value Significantly?
Yes — white paint can boost resale appeal, but it won’t always add significant value; you’ll maximize impact by Choosing paint finishes wisely and prioritizing White paint maintenance, neutral tones, good prep, and cohesive staging.
Conclusion
White walls transform spaces—used well, they make rooms feel brighter and bigger. Did you know 87% of designers recommend white or off‑white for resale appeal? So pick the right shade, test undertones in different light, and prep surfaces carefully. Use quality primer, proper tools, and take safety precautions on ladders. If the job’s large or uneven, consider a pro. With planning and these tips, your white walls will look crisp and timeless.